") So, first things first, you are either really into the idea of a furry pink office chair or really not into the idea – and that’s OK! It’s definitely a statement chair for sure, but that’s exactly what I was going for.
So, first things first, you are either really into the idea of a furry pink office chair or really not into the idea – and that’s OK! It’s definitely a statement chair for sure, but that’s exactly what I was going for.
Our little 60s ranch house is really cozy, but the bedrooms are pretty boring (low ceilings and small high windows), so they need a lot of help when it comes to infusing them with personality.
I love how our bedroom turned out, so now I can move on to turning my office/craft room into something a little more fun. A fun office chair seemed like a good place to start!
") I saw this grey office chair at Target and thought it was a little more unique of a shape than your standard office chair (and a pretty good price too!). The perfect base for a makeover chair!
I saw this grey office chair at Target and thought it was a little more unique of a shape than your standard office chair (and a pretty good price too!). The perfect base for a makeover chair!
") Before putting on the base and wheels, I spray painted the silver legs and the top of the wheels gold (use a primer on the metal first).
Before putting on the base and wheels, I spray painted the silver legs and the top of the wheels gold (use a primer on the metal first).
I left the shaft that goes into the base of the chair alone though. It’s kind of greasy on purpose so the chair can go up and down. Not the most ideal paint surface…
") I bought two yards of this beautiful blush faux fur to recover the chair with and draped it over the chair (fur side down) with the excess fabric hanging over the front side. Once I did that, I basically made two big gatherings of fabric on the back (spaced equally apart) until the fabric fit snugly.
I bought two yards of this beautiful blush faux fur to recover the chair with and draped it over the chair (fur side down) with the excess fabric hanging over the front side. Once I did that, I basically made two big gatherings of fabric on the back (spaced equally apart) until the fabric fit snugly.
I then pinned the gatherings in place. Then I smoothed the fabric down the front side of the back of the chair and pinned the excess bit of fabric above the arms of the chair as well.
Make sure you think about which direction your fur is going when you are doing this so it’s not “upside down” when you flip it all over!
")
") Once I knew what fabric was “extra fabric”, I sewed down those pinned lines and then tried the shell back on the chair to see if any parts needed to be taken in a little more for a snug fit.
Once I knew what fabric was “extra fabric”, I sewed down those pinned lines and then tried the shell back on the chair to see if any parts needed to be taken in a little more for a snug fit.
") Once the fit was right, I cut off the extra sections, leaving about a 1/2″ seam allowance.
Once the fit was right, I cut off the extra sections, leaving about a 1/2″ seam allowance.
") I then followed the line of the bottom of the back of the chair with my scissors, making sure the fabric was about 1″ longer than where the bottom of the back meets the seat.
I then followed the line of the bottom of the back of the chair with my scissors, making sure the fabric was about 1″ longer than where the bottom of the back meets the seat.
I then cut another piece of fabric that followed the line of the seat of the chair, pinned them together, and repeated the process of sewing, trying it on, adjusting if needed, and cutting any extra fabric (again, check the direction of your fur before you cut!).
") I pinched, sewed, and cut any extra fabric on the front of the chair as well so I ended up with a pretty tight fit when it was all said and done. Flip your shell right side out, and you are ready to attach it to your chair!
I pinched, sewed, and cut any extra fabric on the front of the chair as well so I ended up with a pretty tight fit when it was all said and done. Flip your shell right side out, and you are ready to attach it to your chair!
") I made sure to leave an extra 5″ or so of fabric hanging off the bottom of the shell so I could fold it under and staple gun it to the bottom of the chair all the way around.
I made sure to leave an extra 5″ or so of fabric hanging off the bottom of the shell so I could fold it under and staple gun it to the bottom of the chair all the way around.
") Then, if I had any areas of the fur shell that weren’t sitting smoothly against the chair or looked puffy, I used a curved upholstery needle and thread to tack the fabric onto the chair material so it would stay in place (it’s way easier to sew onto a flat surface with one of these guys).
Then, if I had any areas of the fur shell that weren’t sitting smoothly against the chair or looked puffy, I used a curved upholstery needle and thread to tack the fabric onto the chair material so it would stay in place (it’s way easier to sew onto a flat surface with one of these guys).
Once the material was tacked, all I had to do was clean up the fur, and I was done!
")
") I’m not going to lie, this is probably one of the messiest projects I’ve done in a while – there was faux fur flying everywhere!! Definitely best done in a small contained room so you don’t have as much clean up to do at the end.
I’m not going to lie, this is probably one of the messiest projects I’ve done in a while – there was faux fur flying everywhere!! Definitely best done in a small contained room so you don’t have as much clean up to do at the end.
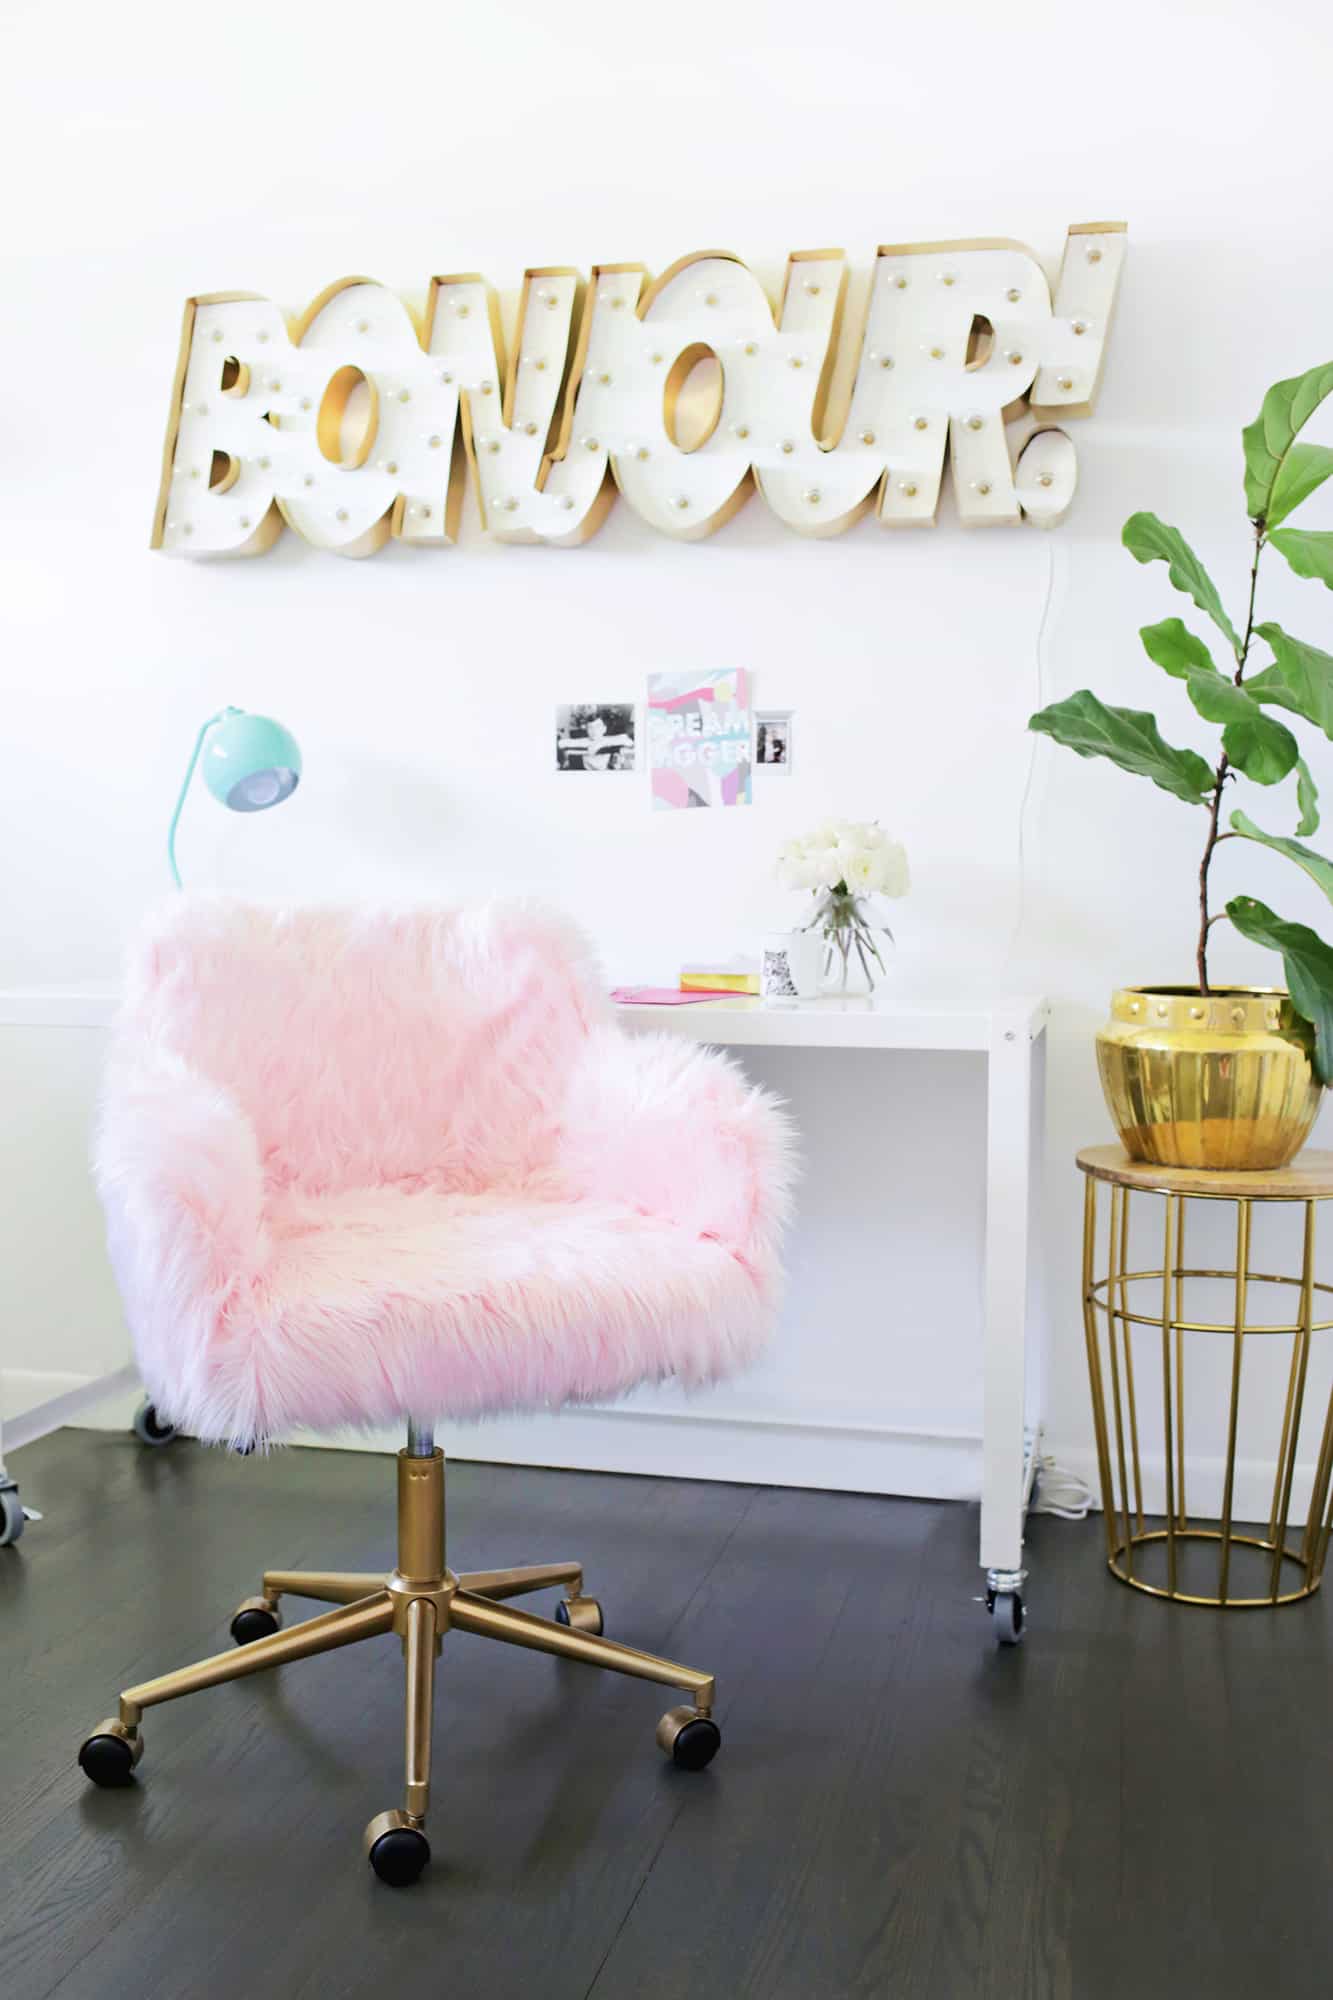
Regardless, I think the result is a really fun version of what can usually be a pretty boring category of chairs. I think it looks so cute under the gold BONJOUR sign and helps to give the room a little boost. Now I just have to get to work on the rest of the room, but I think this is a good start! xo. Laura
Can you make another pink chair like the one here for sale? I would like to buy one. It is really pretty.
Soooooooo cute! I think I’ll try it with purple or lavender faux fur to cover up my boring blue desk chair and spray paint the legs silver glittery or gold.?
love love.
what primer did you use?
Que linda!
Vou tentar fazer!
Beijos,
Isa | http://isabellalessa.com
I’ve been looking for a new office chair that won’t break the bank but they are all so boring! Definitely going to jazz up our studio with some custom upholstery!
www.lionandwolf.co
My daughter would love that chair!
haha!
Laura
http://laurelandfern.com/
Love this! I’ve never recovered a chair before, but your steps make it look easier than I thought it would be! Thanks for the tutorial! Such a fun project!
Laura
http://laurelandfern.com/
I am so incredibly in love with this I don’t think a chair could ever be more me. I’m curious about the upkeep though, faux fur can get a bit flat and yuck after a while, how can you prevent that?
love this idea, the chair looks fab
Mel x
mediamarmalade.com
Any spray primer for metal will work!
Laura 🙂
This is very cute, but I would love it as a throw so you had the option not to sit on it at all times/seasons. Maybe because we just had a heat wave but this seems so potentially sweaty. Sticky legs and faux fur make me think of my legs dipped in cotton candy. In the winter it sounds absolutely divine, though.
You are really creative, very thoughtful, do very well
http://www.chichandbagnews.com
This is sooo cool! It looks so cozy and fluffy, amazing!
https://www.makeandmess.com/
This is amazing and really perfect! I’ve been planning to upcycle my old desk chair and this is just the DIY I need. Great job guys!
http://annescribblesanddoodles.blogspot.com
oh, this is a great makeover! Totally love it! (and the Bonjour sign!) Great work Laura! thank you for sharing!xx
I am in LOVE with this chair! great tutorial!
I love this project. Totally pinning it! http://www.hannamarielei.com
This chair is fantastic! What primer did you use?
Love this!! So much better looking than any office chair I’ve ever seen!