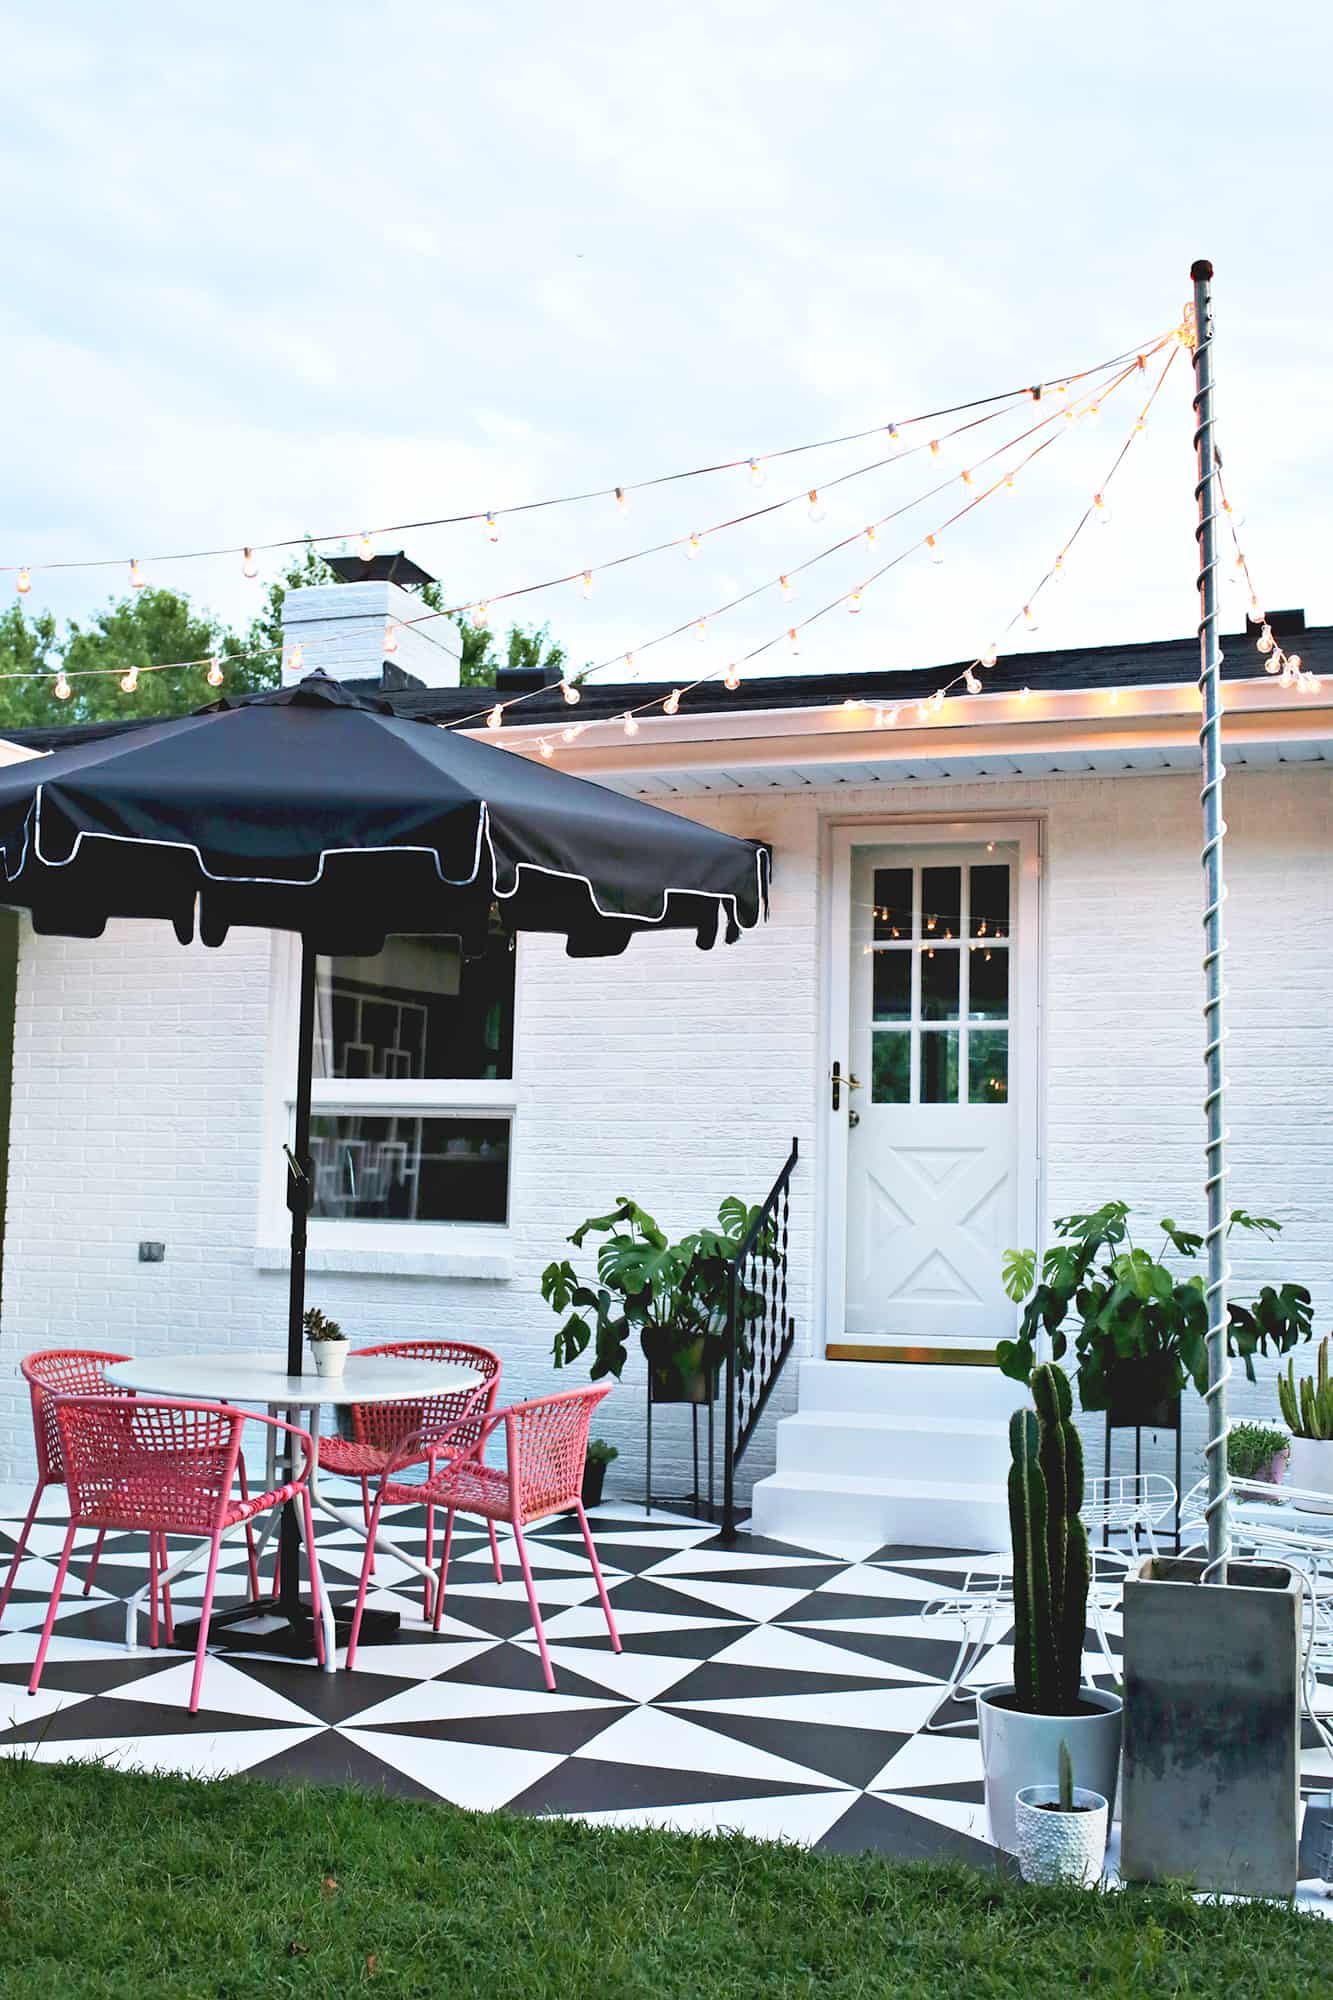
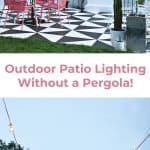
 Click through for tutorial.") One thing that can really make or break an outdoor space is lighting. Lighting is what really sets the mood as a hot summer night starts to wind down and a cool breeze (hopefully) begins to blow. Our last house had a pergola already built on the property, so it was easy enough to string some globe patio lights around the edge of it and call it a day. But at our Nashville house, well, there is no pergola to speak of. So what’s a mood-lighting-lover to do? Figure out another way of course!
One thing that can really make or break an outdoor space is lighting. Lighting is what really sets the mood as a hot summer night starts to wind down and a cool breeze (hopefully) begins to blow. Our last house had a pergola already built on the property, so it was easy enough to string some globe patio lights around the edge of it and call it a day. But at our Nashville house, well, there is no pergola to speak of. So what’s a mood-lighting-lover to do? Figure out another way of course!
Since we are just starting to work on the outside of our house, I don’t know what kind of deck or pergola we might want to build in the future. So I wanted a solution that would stay as long as I wanted it, but wouldn’t have to be permanent in case our plans changed. I started investigating online and saw that there were a few variations of outdoor lighting that one could rig up using a long pole mounted inside of planters, and I decided that would be the perfect solution for the space. And since you don’t have to install anything permanent for this set up, it’s totally something you could do if you were renting a house as well. Let’s get started!
 Click through for tutorial") Supplies:
Supplies:
-10’ metal pole or pipe (about 1”-1.5” thick)
-3 J-bolts long enough to go through your pipe and 2 corresponding nuts for each bolt
-metal drill bit the size of your J-bolt
-outdoor globe patio string lights
-Christmas light gutter clips
–tall planter
-ladder
-rebar (optional)
-50lb bag of quick dry cement (I used 2)
-dirt and decorative rocks (optional)
First I determined how high I wanted the lights to be off of the pipe, and since 10’ seemed like a good height, I left the pipe the length it came in (you can have them cut it shorter at the store if you need to). Mark your hole locations with a marker and use a metal drill bit to drill three holes (all the way through) spaced about 2” apart at the top of the pole. Put your J-bolt through each hole with a nut on each side of the pipe to keep the bolt in place.
 Click through for tutorial.") Place your pole in the middle of your planter and pour the cement into the planter one bag at a time. Use a hose to add water to the planter. Then use a scrap piece of wood or a strong stick to stir the water with. You can follow the amount directions on the package or basically just get the cement to where it’s thoroughly wet but not soupy, and it should turn out just fine. It’s best to have a helper on these steps so you can have one person to stir and mix and one to hold the pole straight as the cement sets. Add another bag of cement as needed. You want to make sure that your pole and planter aren’t going anywhere, so make sure to also take into account how skinny or wide your planter is and how tall it is when deciding how much to fill it (I filled mine about 18” deep with cement). Since the pole isn’t that thick, wind just goes around it, and it feels very sturdy in the base.
Place your pole in the middle of your planter and pour the cement into the planter one bag at a time. Use a hose to add water to the planter. Then use a scrap piece of wood or a strong stick to stir the water with. You can follow the amount directions on the package or basically just get the cement to where it’s thoroughly wet but not soupy, and it should turn out just fine. It’s best to have a helper on these steps so you can have one person to stir and mix and one to hold the pole straight as the cement sets. Add another bag of cement as needed. You want to make sure that your pole and planter aren’t going anywhere, so make sure to also take into account how skinny or wide your planter is and how tall it is when deciding how much to fill it (I filled mine about 18” deep with cement). Since the pole isn’t that thick, wind just goes around it, and it feels very sturdy in the base.
 Click through for tutorial.") Use a level to make sure your pole is standing up straight in the container and allow the cement to dry (make sure your hooks at the top are facing the direction you want as well). You can either fill the planter to the top with cement or leave some room to fill with dirt and a few small plants or some decorative rocks instead.
Use a level to make sure your pole is standing up straight in the container and allow the cement to dry (make sure your hooks at the top are facing the direction you want as well). You can either fill the planter to the top with cement or leave some room to fill with dirt and a few small plants or some decorative rocks instead.
 Click through for tutorial.")
 Click through for tutorial.") Measure the distance from your pole placement to the gutter line at each area you want to attach lights and sketch out a rough estimate of your light strand path. Knowing the distance will let you know what length of light strand you need and allow you to make placement adjustments before you start. Believe me, it’s way easier to do it on paper than when you’re on the ladder! I haven’t found any light strands that will let you go longer than 100 feet without blowing fuses (I learned that the hard way after stringing up too many strands and having to redo the whole thing!), so adjust your design as needed or add in another extension cord to plug in two lights. Anyway, once your plan is mapped out, use a ladder and the gutter light clips to string your lights from the gutters to one of the pole hooks and back again until you have your lights set up!
Measure the distance from your pole placement to the gutter line at each area you want to attach lights and sketch out a rough estimate of your light strand path. Knowing the distance will let you know what length of light strand you need and allow you to make placement adjustments before you start. Believe me, it’s way easier to do it on paper than when you’re on the ladder! I haven’t found any light strands that will let you go longer than 100 feet without blowing fuses (I learned that the hard way after stringing up too many strands and having to redo the whole thing!), so adjust your design as needed or add in another extension cord to plug in two lights. Anyway, once your plan is mapped out, use a ladder and the gutter light clips to string your lights from the gutters to one of the pole hooks and back again until you have your lights set up!
 Click through for tutorial.")
 Click through for tutorial.") You can have an outdoor extension cord plug into your lights at the top of the pole to give you a few more hanging lights, or you can wrap them around and down the pole if you have lights to spare. We have an outdoor electrical box in that corner of the porch from where an old lamppost used to be, but you can also just run your extension cord to your closest outdoor plug instead and watch your porch glow!
You can have an outdoor extension cord plug into your lights at the top of the pole to give you a few more hanging lights, or you can wrap them around and down the pole if you have lights to spare. We have an outdoor electrical box in that corner of the porch from where an old lamppost used to be, but you can also just run your extension cord to your closest outdoor plug instead and watch your porch glow!
Important note!! Make sure to hang the lights without the bulbs first, and then add the bulbs once the lights are secure. This will save you cleaning up lots of broken glass if you accidentally drop light strands onto cement. Twice. Just believe me OK…
 Click through for tutorial.")
 Click through for tutorial.")
 Click through for tutorial.")
 Click through for tutorial.")
 Click through for tutorial.") Isn’t it so cozy looking?! As soon as we put the lights up, I knew that’s what this space had been missing all along. I love being able to sit back here now and just take in the hot summer nights and listen to all the crickets and cicadas in the woods behind our house. If you are looking for a short or long-term lighting solution in your backyard, I hope this option works for you as well! xo. Laura
Isn’t it so cozy looking?! As soon as we put the lights up, I knew that’s what this space had been missing all along. I love being able to sit back here now and just take in the hot summer nights and listen to all the crickets and cicadas in the woods behind our house. If you are looking for a short or long-term lighting solution in your backyard, I hope this option works for you as well! xo. Laura
Credits // Author and Photography: Laura Gummerman. Project Assistant: Collin DuPree
I just came across this on Pinterest, love your patio. Can you tell me where y purchased the white screen? It’s lovely. Thanks!
Hi! This is so lovely but we live in Florida where we have rain daily in the summer. I worry about the water pooling in the planter… do you have any suggestions?
We love this and are going to try it for our backyard! I have a question though, how tall is your planter? Just wondering how heavy it needs to be to keep from toppling over. Thanks!
This is beautiful! I love how cozy it makes your space.
this looks fantastic! im just wondering about the power source, did you have a pre-existing electrical outlet outside?
Your blog is packed full of great ideas and with the nights getting shorter I’m looking for ideas for patio lighting. This was just what I was looking for. I’m looking forward to building this.
What a great idea! We have a similar patio that we built with pavers off of the actual patio and something like this would work perfect for it!
=) Bridget | http://nuttyhiker.com
It’s really amazing idea. I like it. Best utilization of outdoor space.
This is a great post. Also that umbrella and flooring are amazing!!
This is so cool! http://www.hannamarielei.com
Hmm, I hadn’t thought about it yet! I’m sure I could but if I get lazy I bet they will be ok. I left them up all year round in MO too 🙂
Laura
Aw, thanks Jess! Glad you like my style!
Laura 🙂
Yes, I did look at those options but like Jen said they only have these tiny tiny fairy lights that couldn’t be used for this purpose. And there are some solar lights but the were really short and wouldn’t have worked well for this set up either. The good news is that they are only plugged in when in use so they amount of time they are on is pretty limited. Hope they come up with better options for that soon though!
Laura
Oh, thank you!!
Laura 🙂
We do have LED string lights available in the US, but they are mostly very small “fairy lights” style, however these can be found with solar power for an energy conscious home owner. This larger “cafe style” light string style is generally in incandescent bulbs, with very few LED options that come in hard acrylic bulbs (not glass). The current craze for vintage light bulb styles has meant that many exteriors and interiors are not using LED fixtures, and have switched back to incandescent, which is a choice of the homeowner.
I loved the P&B floor! And those lights… <3
It is amazing…. So beautiful…. I want the same…..
Wow, that looks so amazing (and romantic)! The idea with the pole is brilliant, maybe I’ll try something similar with my balcony!
https://www.makeandmess.com/
I mean??! So clever!!
Hi Laura! I love this so much – I just bought a house this summer and have been looking for a way to string up lights for a similar concrete patio situation! Do you anticipate having to take the lights down for the winter? I’m not sure what winters in Nashville are like, but Pittsburgh can get pretty rough (as I’m sure you know!) Do string lights like these fare well in the winter?
Sarah
www.thesurznickcommonroom.com