 When I was planning my kitchen renovation, I didn’t want to miss my chance to add some dream elements to our new space. For me, kitchen dreaming is more about providing function, not just beauty, but sometimes those two qualities can collide. One of my dream elements was pretty simple— a utensil rail. A few of the kitchens I saved on my Pinterest kitchen inspiration board have rails or hooks for convenient utensil storage, and I loved the quirky look and functionality the display seemed to add to each space.
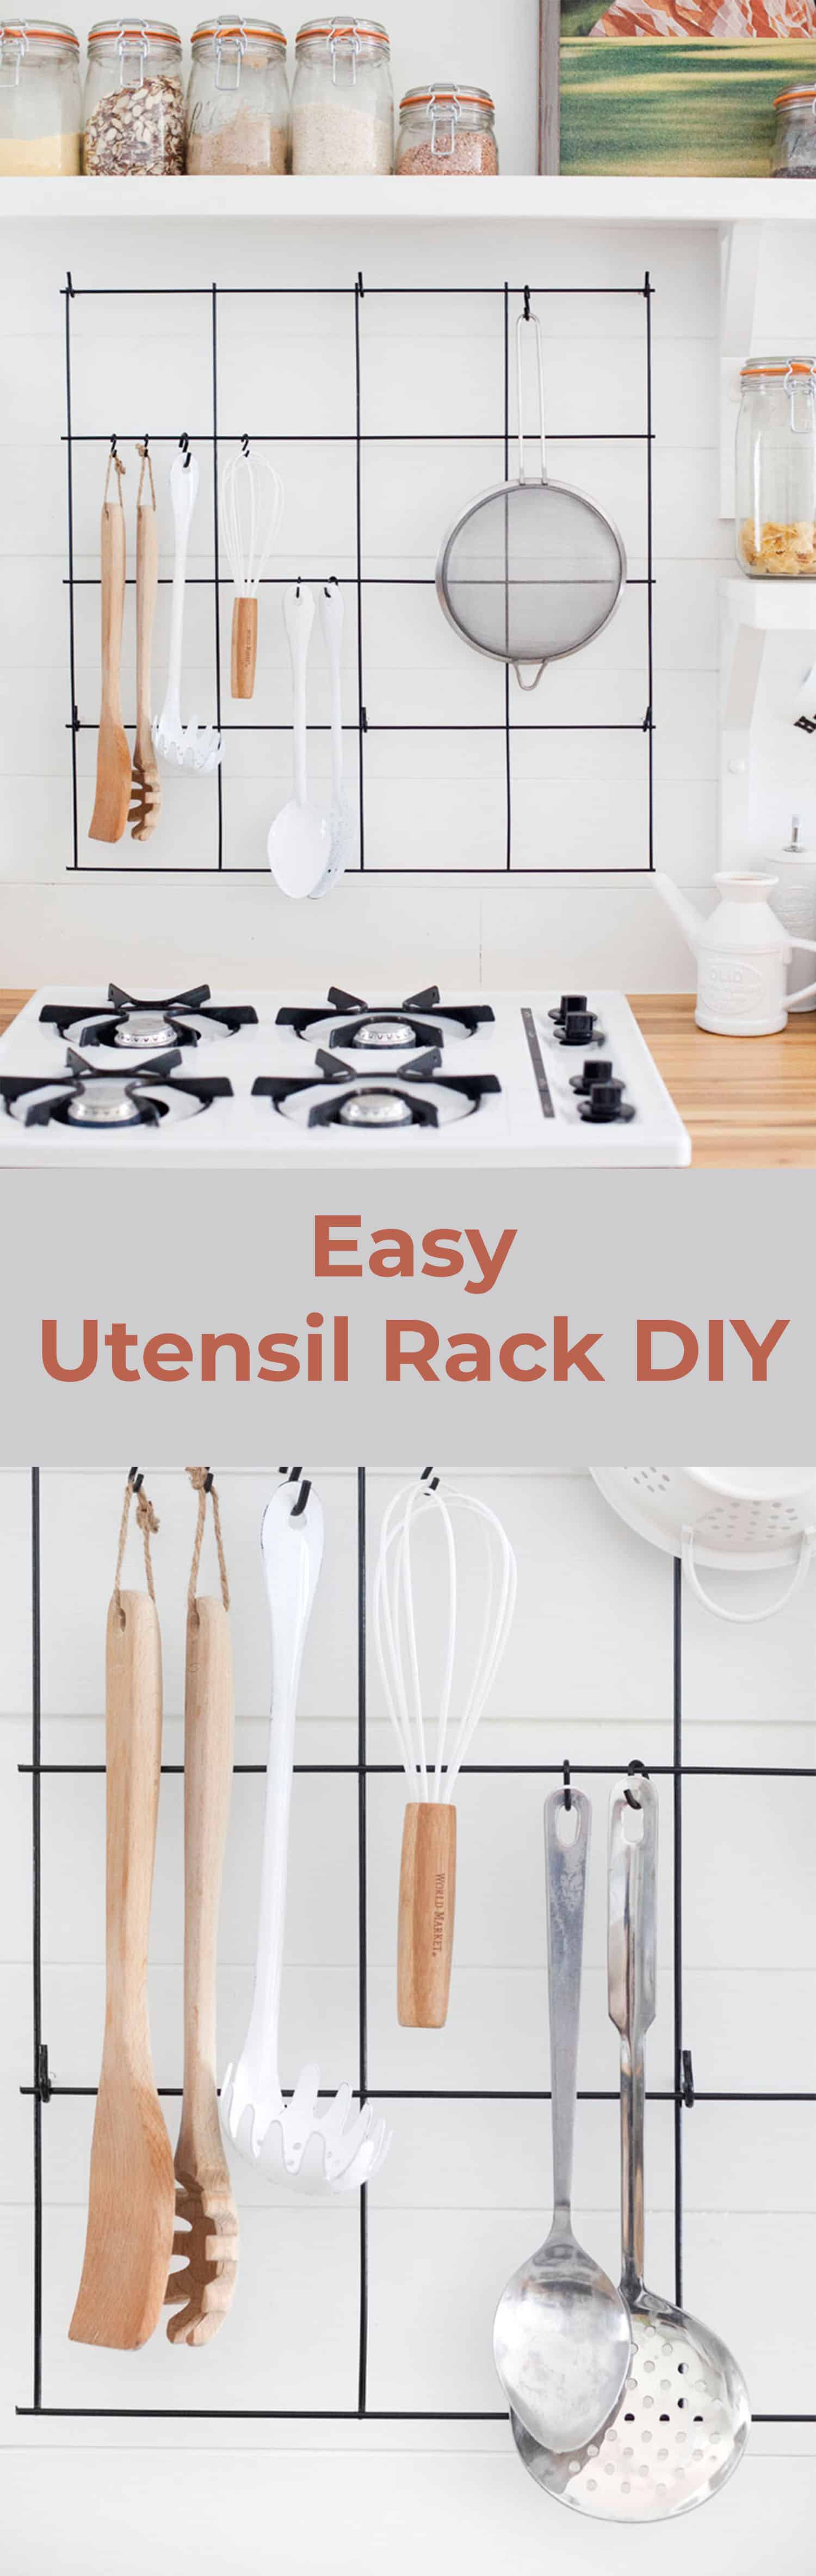
 When I first considered how to implement visible utensil storage in my own kitchen, I thought I would mount a rail on the wall below the upper shelf and use S-hooks to hang regularly used utensils. But I had such a large, open space on the backsplash that was begging to be filled, so I decided to fashion a wire rack instead— one that could hold skillets and strainers as well as utensils. I love the industrial/country quality it adds to the space, and also the versatility of the rack. I can hang as many or as few things on it depending on how clean or cluttered I want this wall to be.
Check out how simple and inexpensive it is to make your own wall-mounted wire utensil rack!
 Materials:
-wire mesh rebar— $7 (found in concrete section of hardware stores)
-ceiling hooks— $8 for a 10 pack
-variety of S-hooks— $5-$10
-bare metal primer (rust preventing)— $4
-appliance epoxy— $4
-rust removing cleaner (I used CLR)- $5
Total Cost at Most: $38
My Cost* (not including CLR): $28
*I had plenty of primer, paint, and mesh left over from other projects.
Tools:
-industrial wire cutters or metal grinder (like I used)
-gloves (chemical safe + fabric protective gloves) (not shown)
-safety glasses
-cleaning brush or metal scratchy pad
-tape measure
-power drill (not shown)
-pencil (not shown)
 Step One: Measure the space where you want to hang the wire rack. Then decide how big you want the wire mesh to be and cut it to size. You will have to round down to the nearest square. Each square measures 6″. I cut mine to 24″ x 24″.
Step Two: Cut the wire mesh to size. If you are using a grinder instead of industrial wire cutters, you should probably wear long sleeves and protective fabric gloves because sparks will fly. Lesson learned on that one. Definitely wear safety glasses, as you always should when doing any kind of cutting or grinding.
 Step Three: Clean the rust off the raw steel with your preferred cleaner. I found CLR worked nicely with some elbow grease and a metal scratchy pad. Rinse and completely dry the steel when finished.
 Step Four: Prime the wire mesh and metal hooks with bare metal primer. I used rust-preventing primer because the wire mesh is made of raw steel, which rusts easily. The S-hooks and ceiling hooks are already coated, so you don’t necessarily need rust-preventing primer on those, but I used it anyway.
After priming, paint with epoxy paint in the color of your choice.
 Step Five: Hold the dried wire screen up to the wall where you will be hanging it. If you don’t have horizontal lines to use as a guide, as I did (thanks to my paneling), you may need someone to hold up a level to make sure it is straight. Mark the corners where your support hooks will go. I used 6 support hooks for a 4 x 4 grid (24″ x 24″).
 Step Six: Drill pilot holes for the ceiling hooks. If you are not drilling into studs or wood (as I was), you will need to use drywall anchors to keep the hooks from pulling out of the drywall. They can be painted to match your wall color.
Step Seven: Screw in the hooks. Then hang the rack! You may be able to see here, but I only painted the ends of my hooks to match the wire rack. The neck of the hooks I painted white to match the wall. This is just a matter of personal preference.
 I used various sizes of S-hooks to hang my utensils. I also plan on hanging skillets here, maybe, but I’m pretty sure the steel mesh wouldn’t hold up to something really heavy, such as cast iron. You can hang somewhat heavier items at the joints of the wire mesh where it’s least likely to bend. As far as the load capacity goes, that depends on the drywall anchors you use and the strength of the wire mesh, which can only be determined by testing it. If the wire bends against the weight of a skillet, I’d suggest storing it somewhere else.

 I still store the bulk of my utensils in a drawer so they don’t get dusty or create too much clutter. But I sure am loving having my regularly used spoons and strainers hanging out within arm’s reach. How about you? Are you someone who likes to hide your utensils or put them out in caddies or on rails? –Mandi
Credits // Author and Photography: Mandi Johnson. Photos edited with Stella of the Signature Collection.
Grate Idea! I had some of those wire squares leftover from a modular shelving snap-together set. I had wanted to use like this in my last apartment, but I never got around to it. When my son helped me move, he questioned me as to why I had them and we decided to get rid of them. Lol, I wondered if those would have worked well too? A little thought occurred to me; wouldn’t it be possible to minimize the rattling of the wire when retrieving stuff off the rack by attaching washers or rubber o-rings on the ceiling hooks on either side of the wire? Or use a piece of a pool noodle painted to match that creates a bumper of some sort?
Thanks for the inspiration and I’ll be reading more of your posts in the future.
Hi! Where are the white shelves in this photo from??
love this idea my stove is next a cover up painted brick trying to figure out to hang on brick wall may have to use super glue to make it permanent
I’m thinking the S hooks would fall down behind the stove more often than not.
I just love these cabinets! I’m trying to track this kitchen down, but it looks like from your website like yours is different. Can you give us some more info? Are the cabinets black?
I absolutely love this project idea. We have a television series that aires during our morning show at our station about DIY projects. I’d love to feature your idea and credit you on the show, as well as on our blog if that’s okay?
This looks so cool, but I would be worried about them getting dirty from oil splatters and such. Have you found that they get dirty from whatever food you’re cooking?
xo Kimi
This is so fun. I actually have two smaller sized cooling racks that I mistakenly put in the dishwasher and are starting to show signs of rust. Thinking I need to get new ones and then maybe I can clean up and paint the old ones, hang on the wall and use hooks to hang things from them. So glad I saw this today for some inspiration!
This DIY looks great! Nice, clean, modern. It did remind me of another DIY post from 2 years ago on Little Green Notebook. The author ended up getting tetanus from a scratch she received when working with that rusty wire fencing. To fellow accident prone DIYers working with rusty things: be sure to be up to date on your shots! 🙂
Im sooo trying this!
I;ve been looking for a way to revamp my kitchen for soo long
Jules.- www.thekiwidiaries.com
This turned out great! I love the function of it + the awesome pattern it adds to the wall.
xoxo
Taylor
This is an awesome idea! So creative, I love you guys!! I actually featured you guys on my blog, too. You made the cut for my top 5 favorite blogs, obviously.
If you are interested, you can see it here: bit.ly/1nImRtq
Keep the good stuff coming, ladies! xx Bianca
Love this idea! Nice in the style of your kitchen en soooo functional!
Wow I love it so, so much!!
http://www.beingerin.com
This is genius!
Yeah, you wouldn’t want prolonged exposure from a hot pan to a plastic utensil. Good thinking! I guess I didn’t think about that, because the ones I hung are metal. But I suppose wood is a concern as well. They are far enough away, though, that I don’t think it will be any problem at all. 🙂 -Mandi
What a cool look – wish I had the space to hang this, very neat!
I’m loving this so much! I want it in my house right now!
My apartment doesn’t have the wall space for this right now, but I could definitely see myself doing something like this in the future. 🙂
I was asking the latter! 🙂 That definitely makes sense. My concern would be the heat from the stove / a pot on one of the back burners melting the plastic. But I suppose I could just take them off the rack if I was going to use the back burners!