 In the wintertime, I like to cuddle up with a basket of yarn and settle in for a Netflix marathon. The yarn isn’t just there as a cuddle buddy, though. No, no! The yarn gets put to work. Normally I like to crochet the yarn into a blanket or maybe a hat for a friend, but lately I’ve been all about the embroidery. I might not have the patience of a colonial woman when it comes to practicing my stitching with an embroidery hoop and fine linen, but the use of a handy dandy plastic canvas and yarn made this embroidery project pretty easy.
 I love the warmth of the yarn as wall art combined with the fresh appeal of a modern design. You can create your own embroidery design or stick to basic geometrics when it comes to embroidering your own plastic canvas. Check out my tips before you get started on making your own!
 Supplies:
-plastic canvas (aim for the smallest opening that will work for your embroidery needle and yarn— mine was labeled “10 mesh” and can be purchased in a pack here.)
–#18 embroidery needle
–yarn in various colors
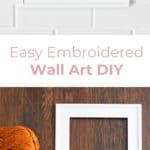
-empty frame
-scissors (not shown)
 Step One: Using yarn, block out a space of your canvas according to the opening of your frame. You want the space you’re working in to fill the frame perfectly without the frame covering up any embroidery, because in the end, you can’t trim away the embroidery if you’ve made the piece too big.
Step Two: Create the main design of your piece, tying off the ends of each color of yarn on the back of the canvas. After I created the design shown above, I filled in the areas with neutral yarn to create a background (as shown below).
Tip: Be careful not to string the yarn across too great of an area, or the design will become difficult to control. If you pull too tightly, it will bend the canvas, and even a small amount of bending will not be corrected by the stability of the frame when mounting the embroidery piece.
 Step Three: Trim away the excess canvas so it will fit inside your frame. Be sure to remove the blocking yarn from step one. Pop this puppy into a frame, and the project is complete!
Problems to Avoid: I made two big mistakes when working on my embroidery. I began with a 7 count mesh and the holes were too big, making the plastic canvas visible behind my design. I had to rip it out and begin again with a finer 10 count mesh.
Also, I pulled too tightly when making my long strands of black diagonal lines because I wanted to make sure they stayed in place. I ended up having to rip them out at the end because the warped canvas wouldn’t straighten out inside the frame. I strung them again, and even though it seemed too loose at first, by the time I got the white diagonals in beside the black, and the whole thing was inside the frame, I could use my fingers to straighten out the lines and put them perfectly in place.
 There you have it— Embroidery art made easy! Change up the style and you can add the perfect little touch of textile art to any wall in your home. –Mandi
Credits // Author and Photography: Mandi Johnson. Photos edited with Stella from the Signature Collection.
I knew to search with you guys to find an updated idea for using plastic canvas. SO CUTE!
This is great! I’m always looking for inexpensive art ideas for my home. This may be my weekend project.
i love this!
xx nikki
www.dream-in-neon.com
Looks so cool! I recently picked up needlepoint myself! Has anyone seen some more modern patterns online? I’m having trouble finding something more contemporary. Maybe an ABM post about designing your own? (hint hint)
Great post, I love the idea of making your own art!
Really beautuful! I love embroidery and chilling out stitching away freestyle. This is going on my todo list! 🙂
www.crafternooncabaretclub.com
Such a beautiful idea! I love the colors !
What a neat idea! Now to just find the time and a mix of patterns that I love!
Such a fun way to use up your yarn stash! I loved those plastic sheets growing up, and this is such a great way to play with pretty yarns without picking up a big project.
That’s a great project for a whool addict like me !!
Oh my this looks amazing 🙂
Cheryl
http://daisycandle.com
Oooh I love this, this is beautiful!
Thanks for sharing 🙂
Liefs,
Yara
This is great! this is the most creatively inspiring post I’ve seen in a while. Looking forward to giving it a go.
xo, toolie
Very pretty and creative, love how it turned out!
http://www.mintnotion.com
Mandi, as always, I love your stuff! I swear we’re taste twins. I’m definitely going to try this. I’ve been getting into yarn arts lately, so I have a bunch of yarn hanging around. This also looks like a very quick project. I need a few of those in my life.
http://aweekfromthursday.com
what! this is probably one of my favorite DIY’s from you guys ever! thanks for sharing, as always!
Very nice. thank you.
Wooow, I just love this idea. I think I’ll try to make one very soon. Looove it 🙂
xOrsi
http://szkorso.blogspot.ro/
I love the way it looks!
xx, Renaud | renaudew.blogspot.com
Looks fancy)!