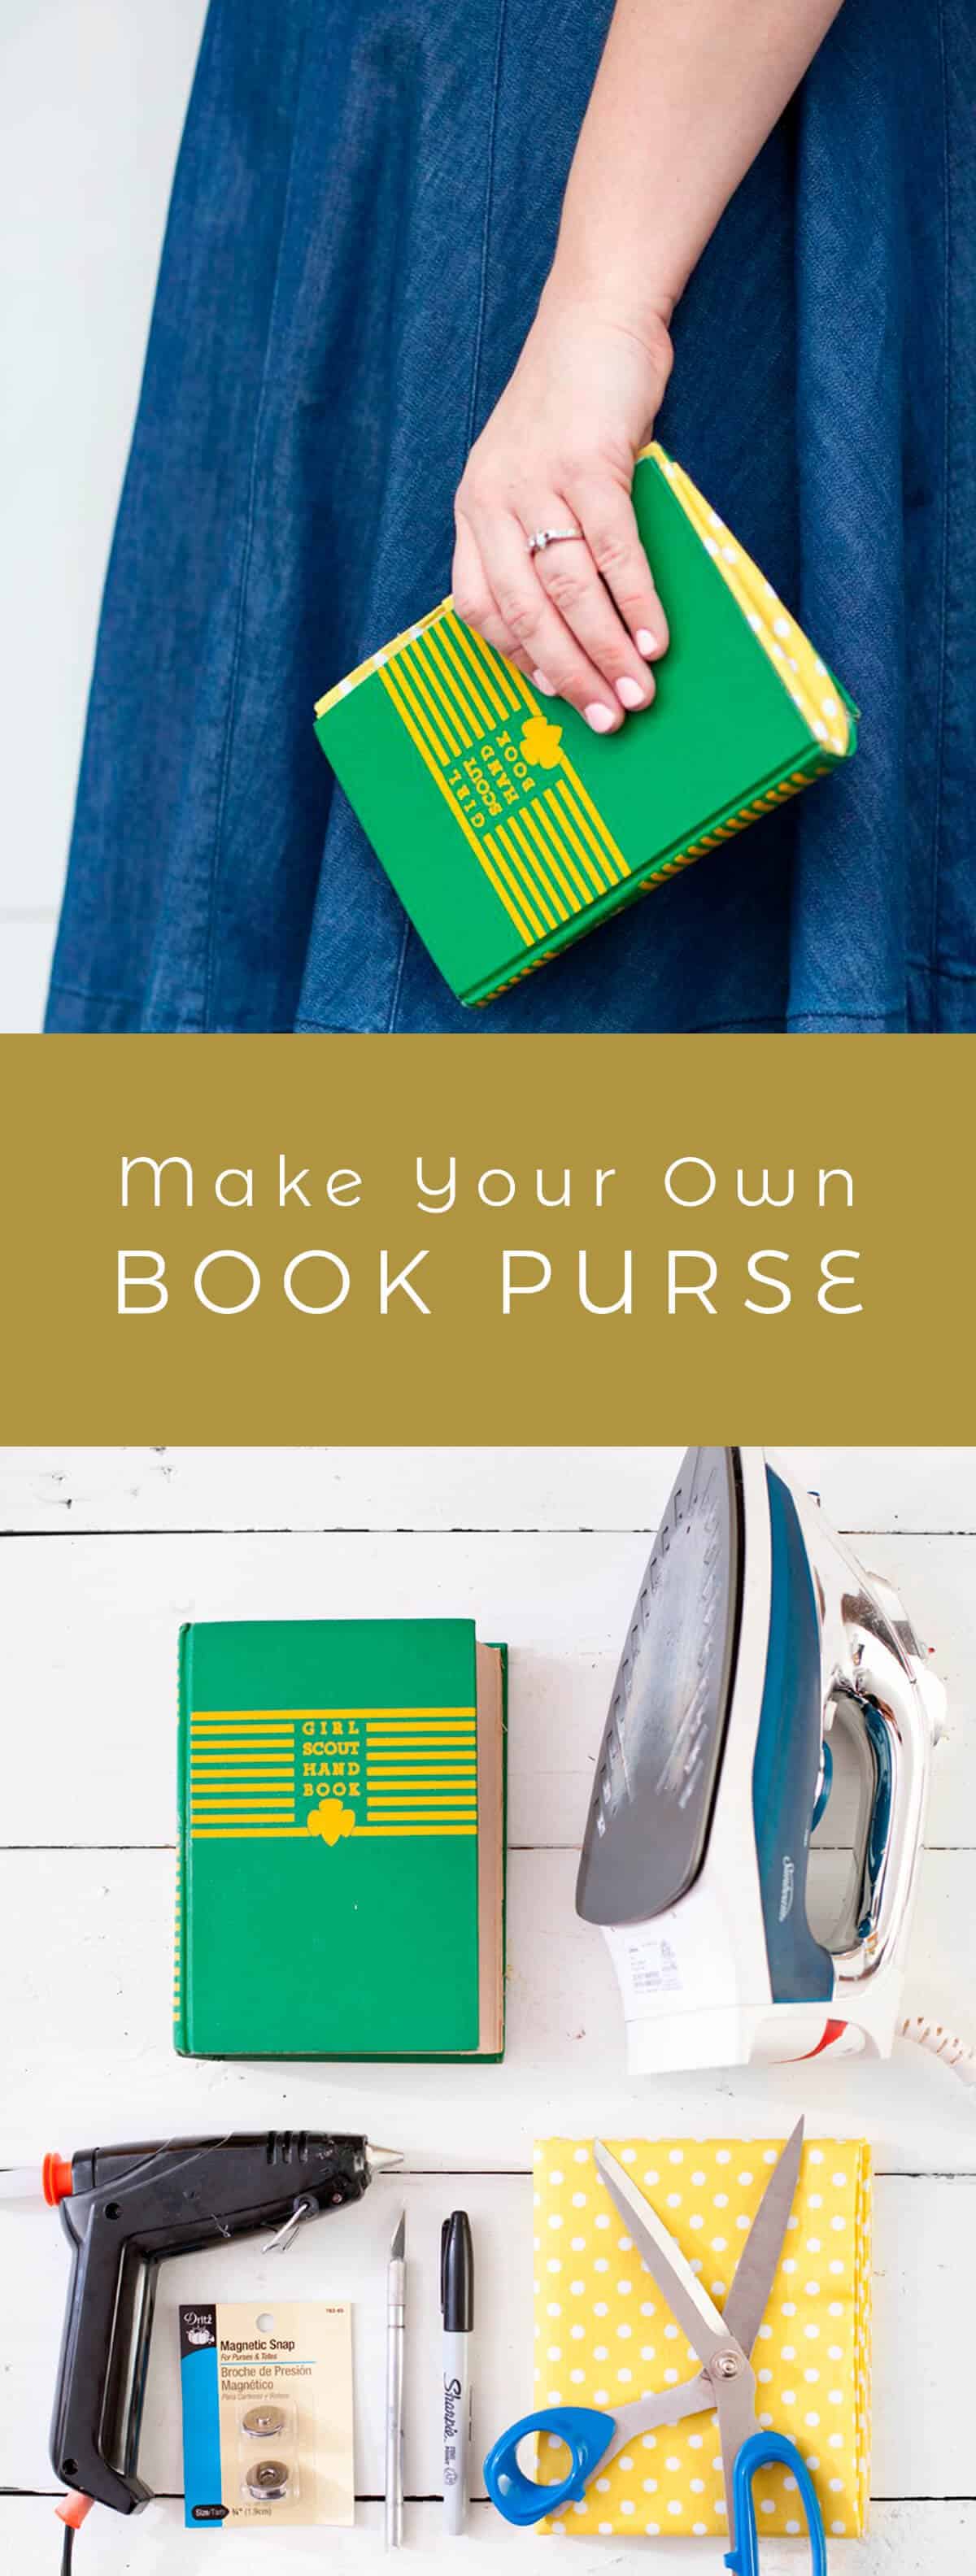
 The best accessories are functional, cute, and great conversation starters. This book clutch is the perfect little thing to carry to a party for stashing your necessities while meeting new friends and finding kindred spirits.
This project is fairly simple, though it does involve minimal sewing. If you have beginner to moderate sewing skills, you could whip up this fun little clutch in just a couple hours!
 Supplies:
-hard cover book at least 1″ thick
-magnetic snap kit
-lining fabric that coordinates or compliments with book colors
-heavy weight interfacing
Tools:
-X-Acto blade
-fabric scissors
-marker
-hot glue gun
-iron
-sewing machine
 Step One: Use an X-Acto blade to remove the cover from the binding and pages. Clean up the cover as much as possible.
Step Two: Cut out a piece of your lining fabric to the size of your book’s cover, plus a .75″ border.
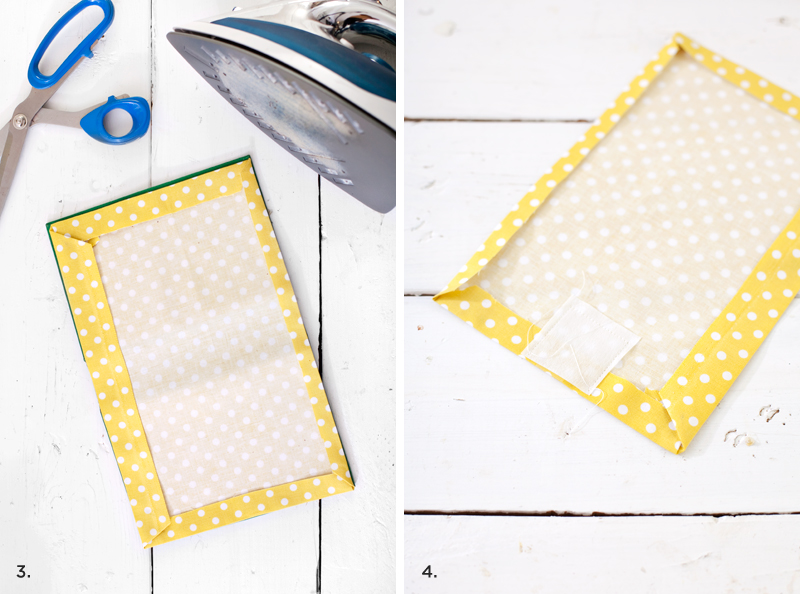 Step Three: Use an iron to fold down the edges of the fabric lining, making sure the final shape is just a bit smaller than the cover of your book.
Step Four: Cut a small piece of interfacing and stitch it to the end of your fabric where the snap will go.
 Step Five: Lay your snap back onto the area where your interfacing is, a bit more than .5″ from the edge of your rectangle. Use an X-Acto blade to cut through the slits of the snap back.
Step Six: Put the arms of your snap front through the slits of the snap back as shown above. Bend down the arms to secure it. The snap should be on the right side of the fabric.
 Step Seven: Stitch around the edge of your rectangular lining, just about .25″ from the edge.
Step Eight: Begin making your snap flap. Use the snap back as a template. You want to make a shape generally like the one shown above. Make sure there is at least .75″ around the edge of the snap back. Cut out two pieces of patterned fabric and one piece of interfacing to this shape.
 Step Ten: Stitch the interfacing to the wrong side of one of the patterned pieces you cut out the previous step. Use a wide stitch about .25″ from the edge. Then lay the snap back on it and use an X-Acto blade to cut through the slits of the snap back.
Step Eleven: Put the arms of the snap front through the snap back, making sure the snap front is on the right side of the fabric and the snap back is on the interfacing side.
 Step Twelve: Layer the flap pieces so that the right sides of the fabric are facing each other. Then stitch the pieces together as close to the snap as you can get. Leave the bottom edge unsewn. Flip the flap pieces right-side-out and iron around the edges.
 Step Thirteen: Create the side panels of the purse by tracing the edge of the slightly opened book cover as shown above. Make sure You fold the fabric at the opening of the purse so that you will have two layers of fabric.
Step Fourteen: Cut out the pieces of fabric and stitch around the edges of the folded fabric pieces, .5″ from the edge.
 Step Fifteen: Attach the side panels of the purse by using hot glue. Begin with the binding edge of the cover as shown above, then do the front and back of the book. Make sure you don’t put the line of hot glue too close to the edge of the book, or you will have glue seep into sight as you push the fabric into the hot glue. You can always add more glue later if you need to.
 Step Sixteen: Use hot glue to attach the snap flap as shown above.
Step Seventeen: Attach the lining to the inside of the purse. Use hot glue and work on only little bits at a time, or the glue will dry and harden before you can get to it. Work slowly to make sure the fabric is lined up with the book cover.

 There it is! It might seem like a lot of steps, but it only took me a couple of hours to transform this old book into a purse, and that even includes stopping to take pictures along the way. If you prefer, you could add straps or handles to the purse when you attach the snap. The magnetic snap works like a charm, and I love the simplicity of a clutch design. So fun! –Mandi
Credits // Author and Photography: Mandi Johnson. Photos edited with Stella from the Signature Collection.
Very cute, but how am I going to cut up a book?! lol I’ll just have to grab them as my husband throws them out.
Soooo cute! I’m a bookaholic as well as an art journaler and love to find cool book pages to use in my journals. This takes it to a new level! Thx$1M! ~Hobby
Awesome!! I bought this very pretty calender last year and I thought it was too pretty to throw away. Now I know what I’m going to do with it!!
what a great post! genius!
http://momochiclook.blogspot.com
i adore this idea! so fun!
What a sweet idea! I have a ton of antique hardback books but couldn’t bring myself to rip the pages out. I bought a 25Ppaperback kids book to butcher for a craft product and just couldn’t rip out the main pages- I just ripped out the reviews and sample chapter of the next book at the back!x
I’ve been working on something very similar to this recently. I love your take on it!
That’s so cool! Need to try this out soon!
Love this! Can’t wait to start. Adorable !
Obsessed! I think I’d like to add a piece of cloth along the top and use a zipper instead of magnetic snap for extra security. I’ve been lusting over the Charlotte Olympia book clutch, but the $$$ has deterred me from actually purchasing one for myself. This DIY is just what I need! AND I can choose whatever book cover I wish!! -Audrey | Brunch at Audrey’s
OK ~ I MUST just stop and make one too! Thank you for such detailed instructions so the rest of us can sail through the process – well, sort of. 🙂
What a clever idea! I’m going to look for an especially good book to do this with. It would make a great gift!
Wow! This is super cute!
Love this!! Really like that it looks so professional and could be done with stuff you can find around the house!!
Katie
http://www.zzandh.com/
Absolutely love this idea!<3 it’s perfect with a doll like outfit or even a everyday kind of look (and college;) )
<3 Love, Thays <3
www.sillycrazylove.com
Such a cute idea!x
What an absolutely fantastic idea!!!! LOVE this!
Oh my goodness, this is the cutest and most creative thing ever! I must make.
This is an amazing idea. I just have to find a book I can part with to do it.
www.akacompletemess.com
This is such a fun idea! It looks so cute! Can’t wait to try making one.