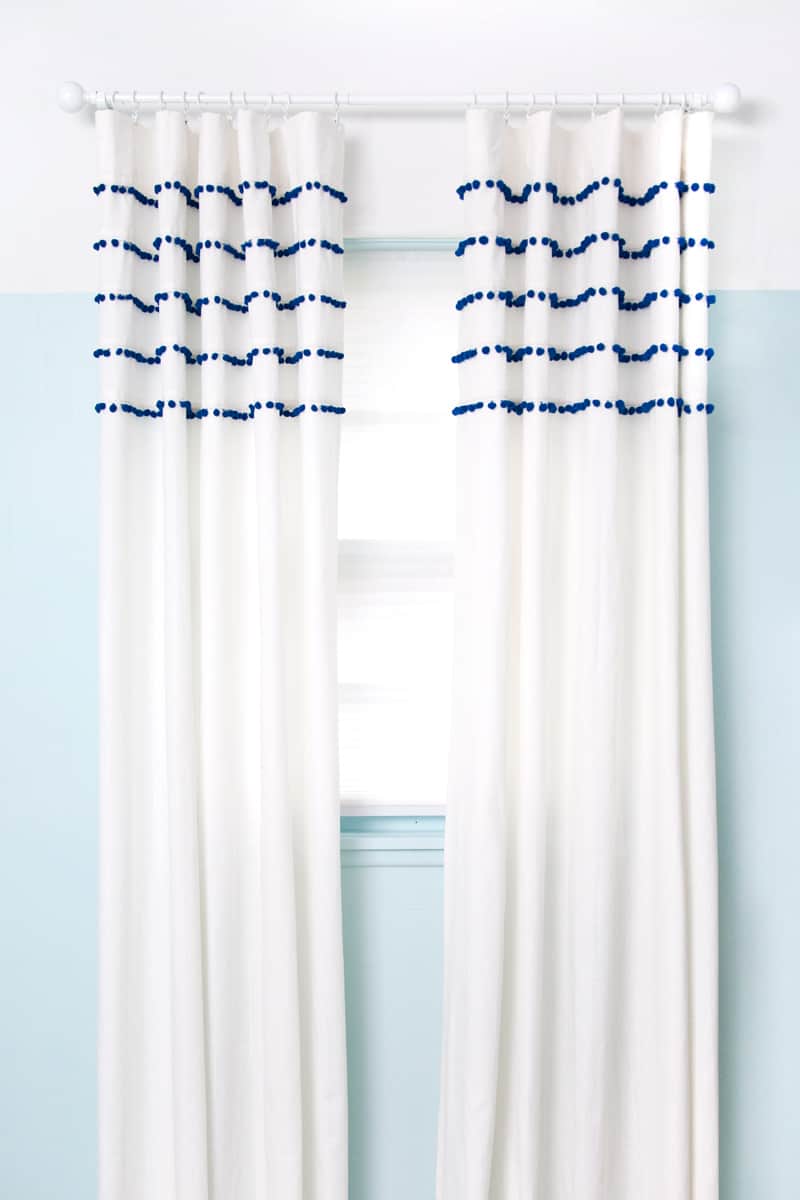
 Curtains are a great finishing touch for any room, but I often have a difficult time settling on the perfect pair for the windows in our home. I’m in the midst of decorating my daughter, Lucy’s “big girl room,” and wanted something fun and fresh for her windows, but nothing too bold or overwhelming. I had been eyeing pom pom trimmed curtains, but thought I’d try my own spin on the project with stripes of pom poms across the top of a pair of plain white curtain panels. When using existing curtains, it’s a really simple project that adds a subtle yet special touch to a window.
 Supplies:
-pair of long curtains (mine are from Ikea, also available on Amazon)
-thread to match curtains
-pom pom trim
-fabric scissors
-straight pins
-tape measure
-iron and ironing board
-sewing machine
Cost of materials: $63
The key to this project being a money-saver was finding inexpensive pom pom yardage and a cheap pair of long curtains (that would be shortened during the pleating process). After thoroughly searching the entire world wide web and local stores, I found a really economical pom pom supplier on Etsy. I only needed 16 yards, but because the trim is sold in 5 yard increments, I purchased 20 yards for $22 plus $16 for shipping. I found long linen-like white curtains at Ikea for $25 (on Amazon here), which put the total for these two pom pom curtain panels at $63. Not too shabby, eh?
 Note: It’s important to use curtains that are a few inches longer than your desired finish length. The extra amount you need will depend on the number of stripes you make as well as the size of your pleats.
 Step One: I made a 3/4″ pleat right below the top hem of my curtain panel, then ironed it flat.
Step Two: Pin the pom pom trim into the pleat so that only the balls and not the banding is showing below the pleat.
 Step Three: Stitch near the bottom of the pleat, making sure your line of stitching is right where the banding of your pom pom trim is underneath the pleat.
You can use a wider stitch for this—it’ll go faster. There won’t be strain on the pleats, so you don’t have to worry as much about strength.
 Step Four: Measure out a row three inches from the bottom of your previous pleat. I marked my row along the width of the curtain with straight pins.
Step Five: Iron another 3/4″ pleat along the row you just marked with straight pins. You can see above that I kept the pleat 3/4″ lower than the line of pins. You can do yours however you please, just make sure each pleat is parallel to the one above it.
Repeat Steps 2-5. After ironing the pleat, pin and stitch the pom pom trim inside of it the same way you did with the first row. Repeat this as many times as you want. I personally found 5 pleats on each panel to be just the right amount without going overboard.
 Step Six: When it comes time to work on your second panel, Be sure to line up the panels beside each other before ironing your pleats to make sure your rows are matching up perfectly.
Step Seven: After all of the pleats and pom poms are sewn in place, flip the curtain over and stitch along the loose top of the pleat on the reverse side of the curtain.
After the curtains are finished, hang them to see what the length is like. If you need to take some length off the bottom, and you’ve used the same simple-hemmed Ikea curtains as I did, all you need to do is pin them to the length you want, iron the hem flat, and stitch it in place.
 Originally I had intended to make these curtains striped all the way to the bottom, but after thinking it through, I thought that would be a bit much. I just wanted a subtle touch of whimsy—nothing too crazy here! I think if you selected a lighter and more subtle color for the pom pom stripes on your white curtains, it could be a fun look to go all the way to the bottom. You’ll just have to buy curtains long enough to take up the length that much for pleating, and be prepared for lots of ironing! In the end, you may also decide that simpler is better.

 I love how the curtains turned out—a little bit Moroccan meets 1970s vintage, though still modern enough for my taste. This would be a fun look for simple cafe curtains in a kitchen too. Do you think you’ll give it a try? –Mandi
We are decorating our new home. I can readily see this in an extra bedroom with one strip each of red, yellow, and blue pompous! Thank you so much for the super cute idea!!!
I have a question…. is it necessary to do the pleats? what if the pom pom string is white? could i just sew them right on without the pleats or it will not look as nice?
This is a bit cute, a multicoloured combo of pom poms would look brill.
https://cornerstore.net.au/corner-story/
I love those curtains
dont forget visit my blog
http://thepocketstyle.blogspot.com/
the color is great, makes even the mood for the summer. and it reminde me of greece and so on vacation.
best! patricia from http://blog.fancythoughts.de
These are gorgeous! I love pom pom trim like this – I’ve been wanting to make throw pillows with this around the edges for a while now. In my opinion anything involving pom poms is better!
The White Corner Creative
These turned out so cute! I can see them in a little girls room so easily! Love them!
These are positively delightful!
I literally just folded and ironed them first. You kind of have to fold and iron as you go along, rather than folding a whole pleat, then ironing it. It’s done together, if that makes sense. Then I pinned them into place after tucking the pom poms inside, and that’s what I ran the pleats through the sewing machine. The combo of ironing and pinning will keep them in place until you’ve stitched it. Hope that helps! -Mandi
I thought about using a zipper foot, but I actually didn’t want to get so close to the edge of the pleat, because the thick part of the trim (not sure what it’s called) was actually up higher in the pleat, so I wanted to make sure each stitch secured that part of the trim moreso than closing the bottom of the pleat. Hope that makes sense! 🙂 -Mandi
Thanks for the warning! It might be a good idea to color set the pom pom in the wash before attaching it. You can get bottles of Rit color setting that you’re supposed to use when dying fabric, and I’d imagine that would help. Since I didn’t do that, I’ll have to wash mine in cold water and use a color-catching sheet. Thankfully they won’t be around dripping water in Lucy’s room. 🙂 -Mandi
I didn’t sew it twice, but on my first row I used a zig-zag stitch, so that might be what you’re seeing, unless you’re seeing stitching from the top hem. I decided the zig zag wasn’t necessary, so I used a straight stitch for the other rows. Hope that helps! -Mandi
Those curtains looks way too cute…so adorable BubblyBeauty135
Thank you for sharing a place to find reasonably priced pom pom trim!! Every time I have used this trim it has cost me an arm and a leg. I love these curtains and am definitely going to make some for my daughter’s nursery.
Wow, these are amazing! Great job!
These are so damn cute!
I am moving next week so i will bear this in mind 😉
Clare | www.clare-without-an-i.com
this is so perfect!! and so simple!
xx nikki
www.dream-in-neon.com
I’m going to do mine with jumbo rick rack. Thanks for the idea!
This might be my favorite take on the pom pom trend yet!
Paige
http://thehappyflammily.com
www.makeyourbestself.com