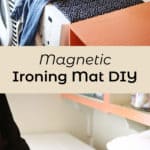
") I don’t think I’m alone in saying that ironing is not one of my favorite tasks. I try to use a steamer on everything I can or just spritz things with water to ease wrinkles, but sometimes you just can’t get around bringing out the ole iron for a job. I think part of not wanting to iron is the fact that a full size ironing board usually takes up all of the space in a laundry room (if you even have a separate room for laundry).
I don’t think I’m alone in saying that ironing is not one of my favorite tasks. I try to use a steamer on everything I can or just spritz things with water to ease wrinkles, but sometimes you just can’t get around bringing out the ole iron for a job. I think part of not wanting to iron is the fact that a full size ironing board usually takes up all of the space in a laundry room (if you even have a separate room for laundry).
So you have to cart everything a few rooms away to really have enough space to do the job. If you’ve had that problem, you may have your eye on one of those fold up ironing mats that you put on top of your washer/dryer so you can iron smaller items without having to get out the ironing board.
The mats usually have magnets on them and some sort of non-slip bottom layer so it will stay put while you iron, and you can fold it up for easy storage when you’re done. What’s not to love! And being able to make it yourself so you can customize size and color? Double win! This seemed like the perfect project for our ongoing JOANN collaboration since I was able to find all the needed supplies in their online store.
") Supplies:
Supplies:
-1.5 yards of 100% cotton fabric for top layer (I used this pattern)
-1.5 yards of 100% cotton fabric for bottom layer (I used this solid in black)
-1.5 yards of Insul-Bright
–fabric scissors
-8 magnets (.75 in diameter)
–puff paint
–straight pins
First you’ll want to cut a rectangle of fabric that is 39″ x 18″ from your top fabric, bottom fabric and your Insul-Bright (so you’ll have three rectangles of matching size from each).
NOTE: These dimensions will make a finished mat that is 38″ x 17″. If you need a mat that is longer or shorter to fit your washer, just adjust the measurements accordingly.
") Cut two rectangles out of your bottom fabric that are 4.5″ x 18″. Space out four magnets on the lower half of each rectangle and fold the top half down on top of them. Use straight pins around the magnets to keep them in place, and then hand sew closely around the magnet to secure it.
Cut two rectangles out of your bottom fabric that are 4.5″ x 18″. Space out four magnets on the lower half of each rectangle and fold the top half down on top of them. Use straight pins around the magnets to keep them in place, and then hand sew closely around the magnet to secure it.
") Place one of the fabric magnet strips on the wrong side of your bottom layer of fabric about 3″ from the end. Pin in place. Repeat the process with your second magnet strip on the opposite end. Sew your strips around the outside edges with a sewing machine to secure.
Place one of the fabric magnet strips on the wrong side of your bottom layer of fabric about 3″ from the end. Pin in place. Repeat the process with your second magnet strip on the opposite end. Sew your strips around the outside edges with a sewing machine to secure.
") Now you’ll want to layer your three rectangles in a specific order so that when you turn your fabric right side out after sewing, it will be in the correct order. First place your Insul-Bright lining down first (doesn’t matter which side faces up). Then place your bottom layer of fabric on top with the wrong side of the fabric (the side with the magnets) touching the Insul-Bright. Finally, lay down your top layer of fabric with the right side of the fabric facing down. Pin layers together all around the edges.
Now you’ll want to layer your three rectangles in a specific order so that when you turn your fabric right side out after sewing, it will be in the correct order. First place your Insul-Bright lining down first (doesn’t matter which side faces up). Then place your bottom layer of fabric on top with the wrong side of the fabric (the side with the magnets) touching the Insul-Bright. Finally, lay down your top layer of fabric with the right side of the fabric facing down. Pin layers together all around the edges.
") Sew around the edge with a 1/2″ seam allowance, but make sure to leave a 4″ gap so you can pull your fabric right-side out through that hole later. I would also sew with the Insul-Bright facing up rather than down so it doesn’t get caught in your sewing machine feed.
Sew around the edge with a 1/2″ seam allowance, but make sure to leave a 4″ gap so you can pull your fabric right-side out through that hole later. I would also sew with the Insul-Bright facing up rather than down so it doesn’t get caught in your sewing machine feed.
") Use scissors to snip off the corners of your rectangle.
Use scissors to snip off the corners of your rectangle.
") Using the gap you left when sewing the edges, separate the top layer of fabric from the bottom and Insul-Bright layer. Then reach in to grab the fabric and pull it through until the mat is right side out.
Using the gap you left when sewing the edges, separate the top layer of fabric from the bottom and Insul-Bright layer. Then reach in to grab the fabric and pull it through until the mat is right side out.
") Press all your seams with an iron and use a blind stitch to close the gap by hand. For a non-stick surface, you can also add little dots of puff paint all over the back of your mat before use, and if you want to get really fancy, top stitch a few seams across the top of your mat for a quilted look. Now your mat is done and ready for use!
Press all your seams with an iron and use a blind stitch to close the gap by hand. For a non-stick surface, you can also add little dots of puff paint all over the back of your mat before use, and if you want to get really fancy, top stitch a few seams across the top of your mat for a quilted look. Now your mat is done and ready for use!
")
") We tested the mat in Elsie’s laundry room and it works perfectly! Takes up way less space for a small job, and you just roll or fold it up when you’re done–perfect for small laundry spaces or apartments. I’m up for anything that can make household chores a little bit easier, so I’m pretty happy with how this turned out. Think you’ll give it a try for your laundry area? xo. Laura
We tested the mat in Elsie’s laundry room and it works perfectly! Takes up way less space for a small job, and you just roll or fold it up when you’re done–perfect for small laundry spaces or apartments. I’m up for anything that can make household chores a little bit easier, so I’m pretty happy with how this turned out. Think you’ll give it a try for your laundry area? xo. Laura

Got ya one better. No insulbrite where I live. Used half of one of the fold up insulated windshield protectors , stitched a cover, turned it, and hit another snag. No puff paint either. Just stitched some used garden hose washers to the back. Works. Not so pretty, but had all I needed to make it with no expense, and no four hour round trip, to get supplies
Jimmie
I like this idea, right now I use a folded single bed sheet on my dryer for small jobs.
What could I use instead of buying unsul Brit?
If u know how to maneuver garments around the board, yes! I DESPERATELY need a lesson on that…i know there are a lot of things I’m doing wrong or putting way too much effort in cuz i dont know the proper way
Wow, this idea is really smart for when you don’t have much space in your flat! I love it!
www.happiness-treasures.blogspot.com
I’m moving to a new house tomorrow, and this is going to be one of my first projects! : )
Vert cute and simple tutorial! Perfect for those limited on space in their laundry room or apartment! 🙂
Adorable! And perfect for small college dorm rooms.
Love your blog, I would love it if you could take the time to look at mine its www.lauraamyj.blogspot.co.uk xx
I made something similar for my sewing room to place on top of a large metal rolling cabinet. I left my cutting mat under the ironing cover and it got steamy and warped the mat. Just an FYI for people. It’s still very very useful, just now I use a towel under the ironing cover and remove the mat.
Brilliant, absolutely brilliant.
but if I have one of these, I’ll have no excuse for not getting my ironing done! I’ve got a Craft Gossip post scheduled for tomorrow morning that links to your tutorial: http://sewing.craftgossip.com/?p=83075 –Anne
This is an amazing idea! It would be perfect for apartment living with limited space, too! 🙂
This is such a great idea! And looks pretty easy!
Laura
http://laurahager.blogspot.com/
So smart! And such a cute alternative to an ironing board (especially for smaller spaces 🙂 )
xx, mel
http://melinspired.com
This is such an amazing idea!
Warm Regards,
Alexandra
www.littlewildheart.com
This is an awesome idea! I’m about to get married and need things like this for our apartment!!
http://www.theinbetween.org/
Well, to make my 39″ x 18″ squares I needed over a yard, so I just said a yard and a half. If you had a wide bolt of fabric that could fit it in under a yard, then you wouldn’t need as much 🙂
Laura
It’s a great idea. I wonder why the materials list requires 1.5 yards of each fabric when the project only requires a half yard of each?
Fabulous idea. Thanks for the inspiration 🙂