") Sometimes I really don’t mind spending hours on a Christmas DIY. I mean, it’s my favorite time of the year and I love to decorate for it, so a few extra hours of making time is no big deal. However, if every decoration you do is a giant project, well, it will be Valentine’s Day before the projects are even done! I saw a picture of some Christmas lights with a gold cord and thought, “Yes! A fast and easy project. Totally doing that one!” Also, it’s kind of amazing how much better the Christmas lights look with a painted cord—why have I never thought of that before?? Mind blown.
Sometimes I really don’t mind spending hours on a Christmas DIY. I mean, it’s my favorite time of the year and I love to decorate for it, so a few extra hours of making time is no big deal. However, if every decoration you do is a giant project, well, it will be Valentine’s Day before the projects are even done! I saw a picture of some Christmas lights with a gold cord and thought, “Yes! A fast and easy project. Totally doing that one!” Also, it’s kind of amazing how much better the Christmas lights look with a painted cord—why have I never thought of that before?? Mind blown.
") I just removed the bulbs from the cord and stuck pieces of aluminum foil down into the sockets and painter’s tape on the plug connections to protect those areas from paint while I was painting. Of course, your lights should be unplugged the whole time you do this, so wait until the end to plug them back in!
I just removed the bulbs from the cord and stuck pieces of aluminum foil down into the sockets and painter’s tape on the plug connections to protect those areas from paint while I was painting. Of course, your lights should be unplugged the whole time you do this, so wait until the end to plug them back in!
") Once the sockets were plugged up, I laid out the lights on some cardboard and sprayed them in an even coat on both sides with adequate dry time in between.
Once the sockets were plugged up, I laid out the lights on some cardboard and sprayed them in an even coat on both sides with adequate dry time in between.
") I find that spray paint takes a little longer to dry on rubbery plastic than other surfaces, so make sure it’s fully dry and no longer tacky before pulling out the foil and putting the bulbs back in.
I find that spray paint takes a little longer to dry on rubbery plastic than other surfaces, so make sure it’s fully dry and no longer tacky before pulling out the foil and putting the bulbs back in.
")
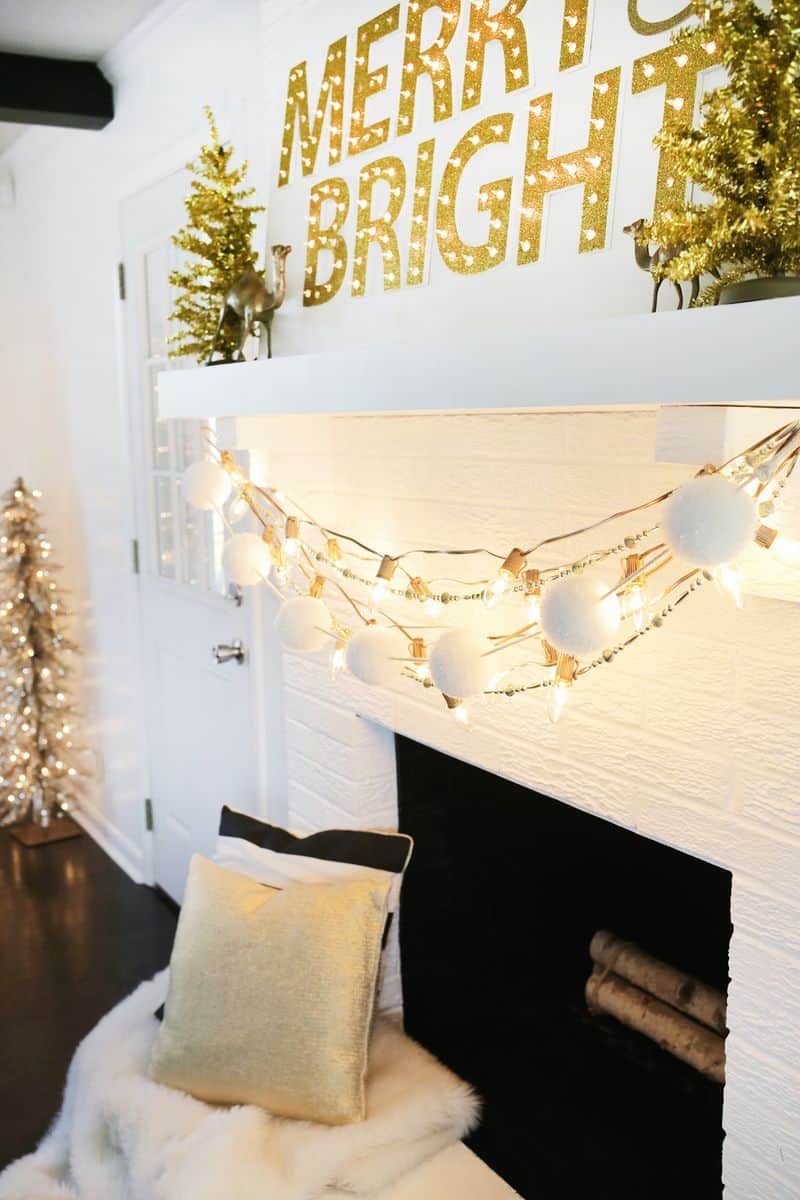
") You can hang the cords as a garland (alone or with some other garlands), decorate a mantel, place them in a glass jar—whatever you like! The gold color really looks pretty with the warm glow of the light and makes the light string look extra special. And with all that leftover time you have from such a quick DIY, you can make an extra batch of Christmas cookies, right?? xo. Laura
You can hang the cords as a garland (alone or with some other garlands), decorate a mantel, place them in a glass jar—whatever you like! The gold color really looks pretty with the warm glow of the light and makes the light string look extra special. And with all that leftover time you have from such a quick DIY, you can make an extra batch of Christmas cookies, right?? xo. Laura
Credits // Author and Photography: Laura Gummerman. Photos edited with A Beautiful Mess actions.

what a difference that gold makes!! Love how you paired them with the large spheres and small beaded garland, too. Like a fancy necklace for yo
I sometime to lazy to make a DIY product, but this kind of things is so enticing i wanna try to
Thanks For you Articel
find it very creative
Thanks for making this site, and I’ll be visiting again. Do you do newsletters by email? Thank you, muchas gracias
We do! You can sign up here: http://eepurl.com/bMfc8r
Thank you, i have subscribe to your newsletter. Hope for more another good post!
this article very interesting for me. please share this information to many people. I hope you will always give your best article articles
superb! vien danke!
I am happy with your article in this section, very full of insiprasi and help me in the work I am doing right now. This information you share will be useful to many people. I hope you will always give your best article articles up and so on. Thank you very much… Lakitoto
Thank a lot.
The articles you create are always interesting to watch and read is very useful. Always passion and success continues.
by: situs resmi 4d
i think this is a good idea becasue DIY in holiday is more fun and spent more time at home
please visti togel online
Merry Christmas all & Happy new yearr
please visit togel online
This is very educating post, thanks for sharing with us.
Thank you for sharing such a informative post with us, it will beneficial for everyone, It is one of the best sites that I have visited. I am looking forward to read more blogs post from here
thank you for the article
Yes, the article I was looking for. Your article gives me another approach on the subject. I hope to read more articles from you.
situs togel online terbaik dan terpecaya,
mari bergabung bersama kami…
togelpelangi i
togel sgp
very like this 🙂
Go bro!!
despacito :p 🙂
Great
I did it! As soon as I saw this, I knew I needed to try it ASAP. It’s after Christmas now but today was ASAP, and it turned out beautifully. I just knew the gold string would look so pretty compared to the green one. Thank you! 🙂
This is so awesome!! Perfect idea!
http://simonaroxanahuidiu.blogspot.ro