 Sometimes the closest I get to some spa time is the 5-10 minutes I slip away to take a shower while the kids are napping. It’s sacred time, people! 😉 Lately I’ve been trying to think of ways to make shower time a “treat yo self” experience. Yummy smelling shampoos, fancy masks… but recently I’ve been loving these little DIY shower melts.
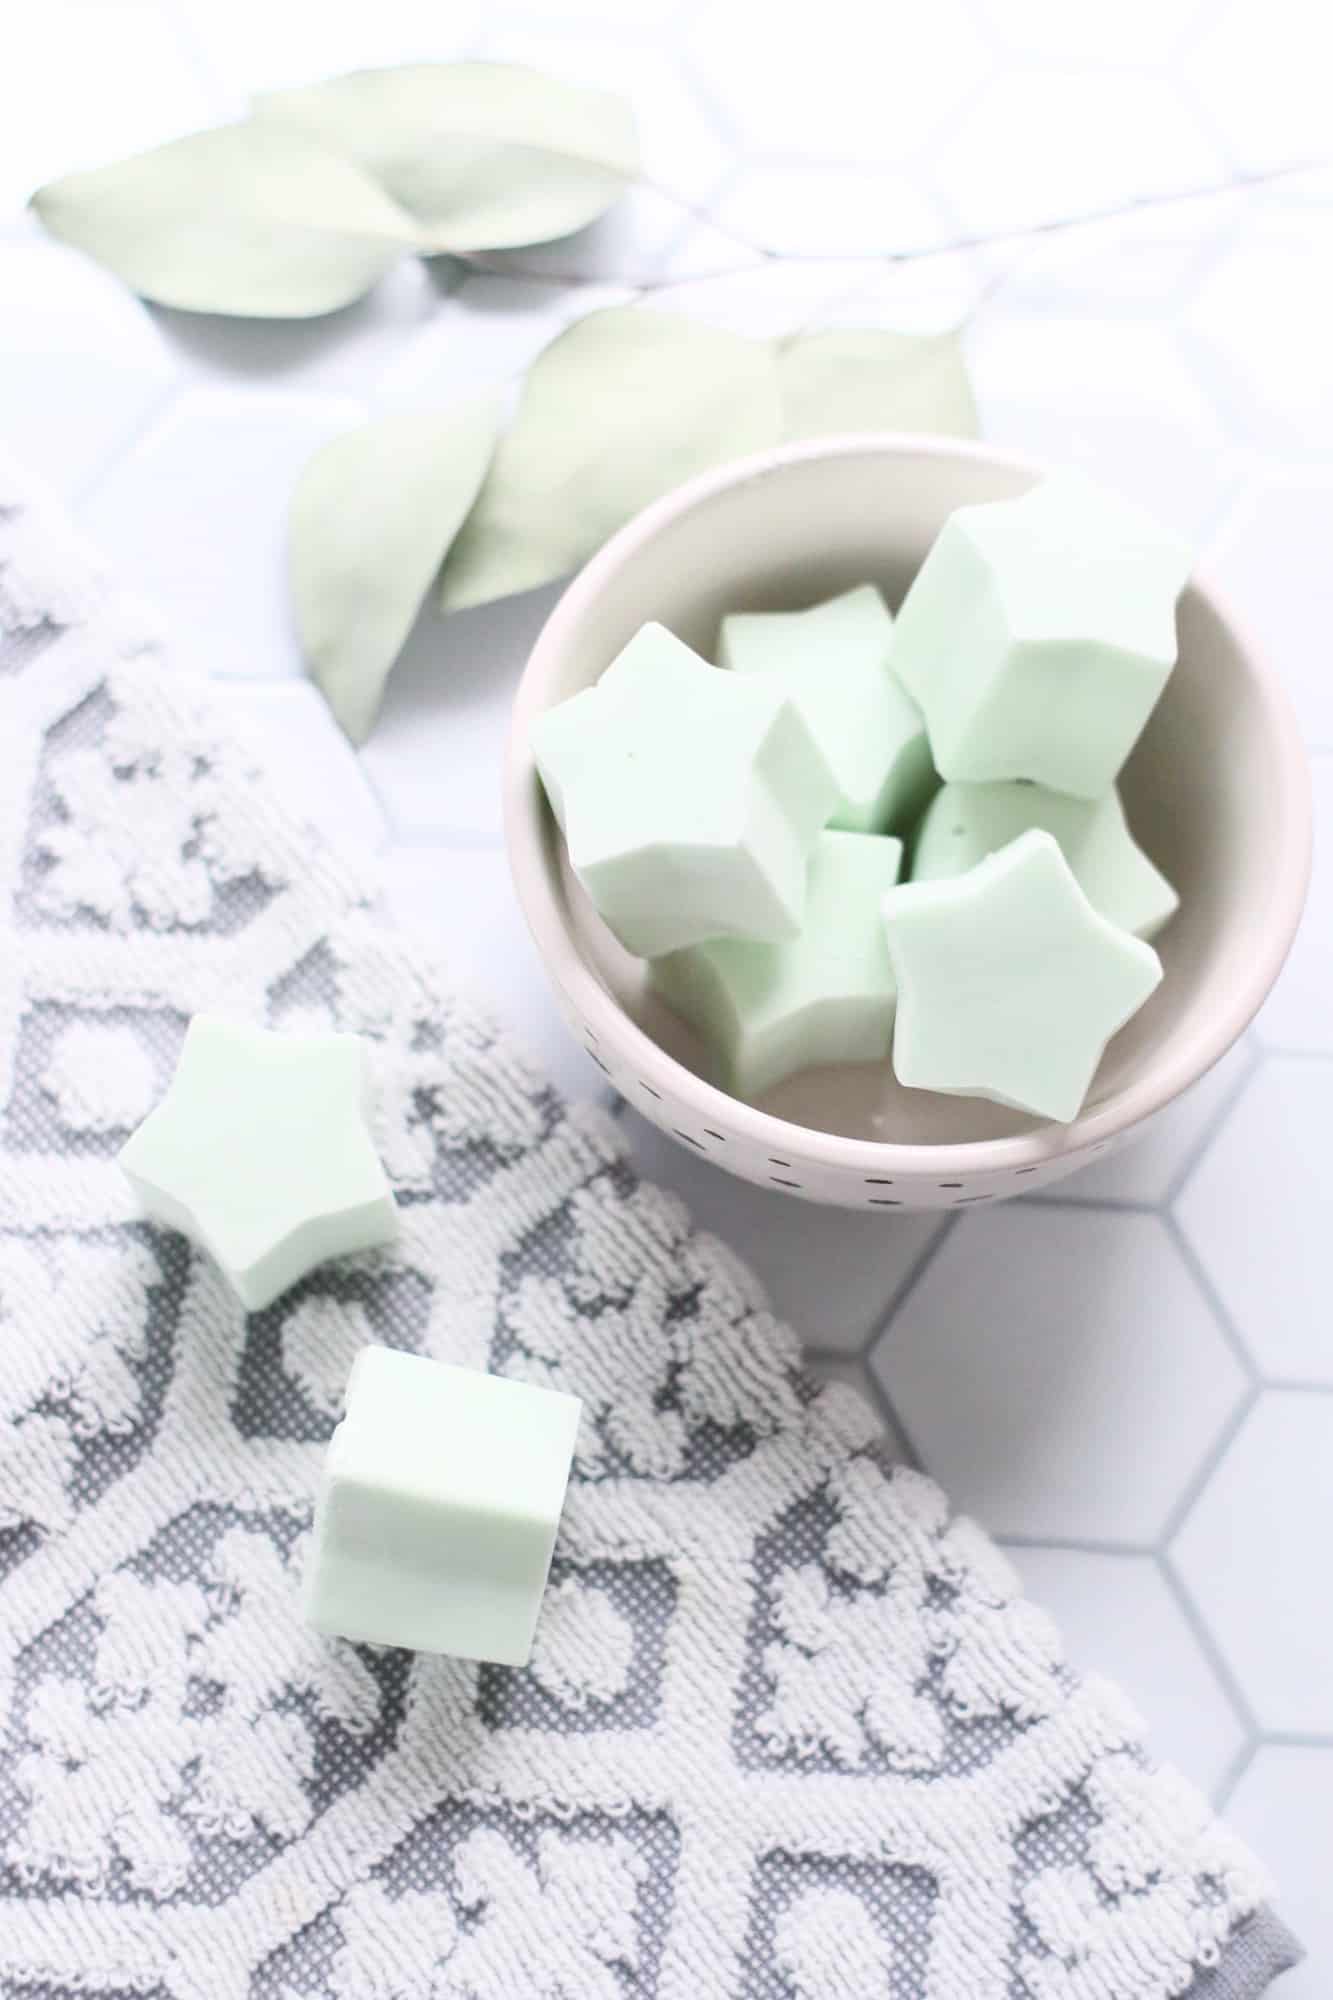
The peppermint and eucalyptus (with a touch of orange) smell SO incredibly refreshing and always make me feel more awake and ready for my day!
 Supplies:
corn starch
baking soda
witch hazel
peppermint, eucalyptus & orange essential oils
silicone mold
food coloring
Step One: In a bowl, combine 1/2 cup of baking soda and 1/2 cup of corn starch. Stir.
 Step Two: Slowly add 5 tablespoons of witch hazel to your mixture, making sure you get out any lumps. Once combined, add in a drop of food coloring. I added a touch of green to give it a minty looking color. If your mixture seems a little dry and hard to stir, add just a touch more of witch hazel. Finish by adding in 5 drops of orange, 10 drops of peppermint and 6 drops of eucalyptus essential oil to your shower melts.
Step Three: Once everything is combined, use a spoon to fill your silicone mold. This recipe made 8 small stars.

 Step Four: Put your shower melts in the freezer overnight to harden. Keep in a cool place like the fridge to prevent them from melting. When you’re ready to use your melts, simply put them in your shower away from direct water so it can melt slowly. I like to put mine on the ledge of the bath in the corner or on a soap holder. For a little boost of smell, add an extra 1-2 drops of essential oil to your shower melt once it’s in the shower. Breathe in and enjoy!!

 These make the perfect gift for anyone in your life in need of some “me time”! (or try another one of our spa/beauty DIYs for more relaxation) 😉 Store or give them in a cute jar or bowl, and don’t forget to keep them chilled! If you love the idea of a shower melt but don’t want to make your own, you can also just grab a ready-made one and get right to the relaxing part (or try these bath bombs when going for a soak!)…Lots of love, Sav.
P.S. Check out more self-care and beauty items on our wishlist and shopping pages!
Credits//Author and Photography: Savannah Wallace.
Love this post? Sign up for our newsletter for more ideas!

Get creative ideas for recipes, crafts, decor, and more in your inbox!
 Get the How-To

Supplies
- ½ cup corn starch
- ½ cup baking soda
- 5 tablespoons witch hazel
- 10 drops peppermint essential oil
- 6 drops eucalyptus essential oil
- 5 drops orange essential oil
- 1 drop food coloring
Equipment
- silicone star mold
Instructions
- In a bowl, combine 1/2 cup of baking soda and 1/2 cup of corn starch. Stir.
- Slowly add 5 tablespoons of witch hazel to your mixture, making sure you get out any lumps. Once combined, add in a drop of food coloring. I added a touch of green to give it a minty looking color.If your mixture seems a little dry and hard to stir, add just a touch more of witch hazel. Finish by adding in 5 drops of orange, 10 drops of peppermint and 6 drops of eucalyptus essential oil to your shower melts
- Put your shower melts in the freezer overnight to harden. Keep in a cool place like the fridge to prevent them from melting. When you’re ready to use your melts, simply put them in your shower away from direct water so it can melt slowly.
For anyone concerned about the melting of these! I added more baking soda and kept mixing until it was way more crumbly than what I started with. It also stopped melting as much in the mixing bowl. I pressed into molds and they’ve been refrigerated for about a week but I’ve left them out all day today and no melting!
What is the difference between these and the cold shower melts? These shower melts use witch hazel but the cold ones have citric acid i believe. why?
Ok. So cornstarch and water create a nom-newtomian fluid. I grew up calling it ooblek. Idk why just what I was told. It acts like quicksand, where it acts like a solid when handled roughly, but if you go slow, it’ll act like a liquid. If we want these to be a solid, I suggest adding more cornstarch/baking soda so that it’s almost like bath bomb consistency
How long do these keep once they’ve been made? I know some recipes I saw said 1-2 months. Super excited to give these as a present, thanks!
Does it have to be corn starch or can it be corn flour? Also, where did you get the star mould?
Love this idea!!!
Hi Alison! Here’s the updated link: https://amzn.to/2yf5izg
I made them but it didn’t work. After I put them into the fridge to store, they all melted. I was hoping to give as gifts but I can’t if they can’t hold their shape after they come out of the freezer.
Made these last night for Mother’s Day gifts! Bad idea- when I took them from their gift packaging to hand out, after storing in the fridge (as recommended), they were a giant puddle in a cup! Not cool. Could have used some additional instructions and recommended to store in freezer permanently. Quite the disappointing gift!
Jess – most recipes have you leave the recipe out to dry for a few days – there’s no need to freeze. Freezing means the water doesn’t evaporate and they don’t get hard and maintain their shape.
They are perfect for showers !
I made them yesterday and used them in the shower today. They are cute (giving to my spouse for Vday) but they really didn’t have much smell. While mixing, I thought I’d overdone it. But in the shower, even with a few of them on my ledge, I couldn’t smell anything.
Hi Megan! Make sure you’re putting them on the shower floor so they get damp from the water– they will start to disintegrate and you’ll be able to smell the oils.
I made these today – they smell so good! I had the same problem as Joanna, where the melts started to liquify if they weren’t kept in the freezer all the time.
I wish I could buy these, I have rhumatoid arthritis and can make them. They would be so wonderful to have and enjoy!
What a super Idea. 🙂
Hi! I tried these as my first DIY off your site this past weekend. Just a quick note… I think it would be helpful if you added in a bit more about the consistency of the mixture as you’re making it. Based on the photos and description, it looks like the mixture should be a liquid. What we got was a (very cool) hard mixture that seemed to liquify as you stirred, but was ultimately a solid. As a result of it being so firm, we added way more witch hazel and our melts melted in the fridge! Will probably just keep this batch in the freezer until I’m ready to use, but thought a bit more clarification and some updated photos or gifs would be helpful for anyone else wanting to try this out!
Love this idea!! Could arrowroot powder replace the corn starch?
These sound perfect – love the idea! xx
I did it, but it wasn’t liquid. I am guesssing you stir for every tbsp of witch hazel? Even added more. Hope it still works or I will try again
I have everything to make these! LOVE the site upgrade : D
Definitely making these! Eucalyptus is my all-time favorite essential oil (the smell reminds me of growing up in Australia) 🙂
I never knew these were a thing! They sound amazing.
This looks so easy and I am already thinking of other essential oil combos to try. And I use Thayer’s Witch Hazel as my toner so I already have a bottle in my bathroom. Winning!