
 Hey guys! It’s been a while since I shared a project here at A Beautiful Mess, because I’ve been up to some pretty crazy stuff. In May, we fell in love with a mid-century house (complete with a sunken conversation pit) and decided to quickly put ours up on the market so we could be in a position to buy it.
Within a week of our idea, we had sold our home to a friend of a friend, and lost out on the dream home that had hatched this crazy idea in the first place. But the following week, we found a 1980s home that probably suited our family better than the mid-century home, and ended up entering into contract right away!
When we closed on the house at the beginning of June, we began demo immediately—ripping out everything on the entire first floor. To say that our life has been hectic would be an understatement! Raising two toddlers while living in the midst of a construction zone is not for the faint of heart.
When we first viewed this home, we all fell in love with the little sunroom with high ceilings and charming French doors. I immediately knew this would be a space for reading books, playing games, and eventually, doing homework. Visions of tufted banquettes and tulip tables danced in my head as we signed papers finalizing the sale of the home.
So during the first week of demo, I focused my efforts on clearing the way to build out this special area, knowing it would be refreshing to have one small completed space to act as an area of refuge in the midst of renovation. I wasn’t wrong, and we’re so glad this room is finally finished!
Related: Pink Channel Tufted Banquette DIY
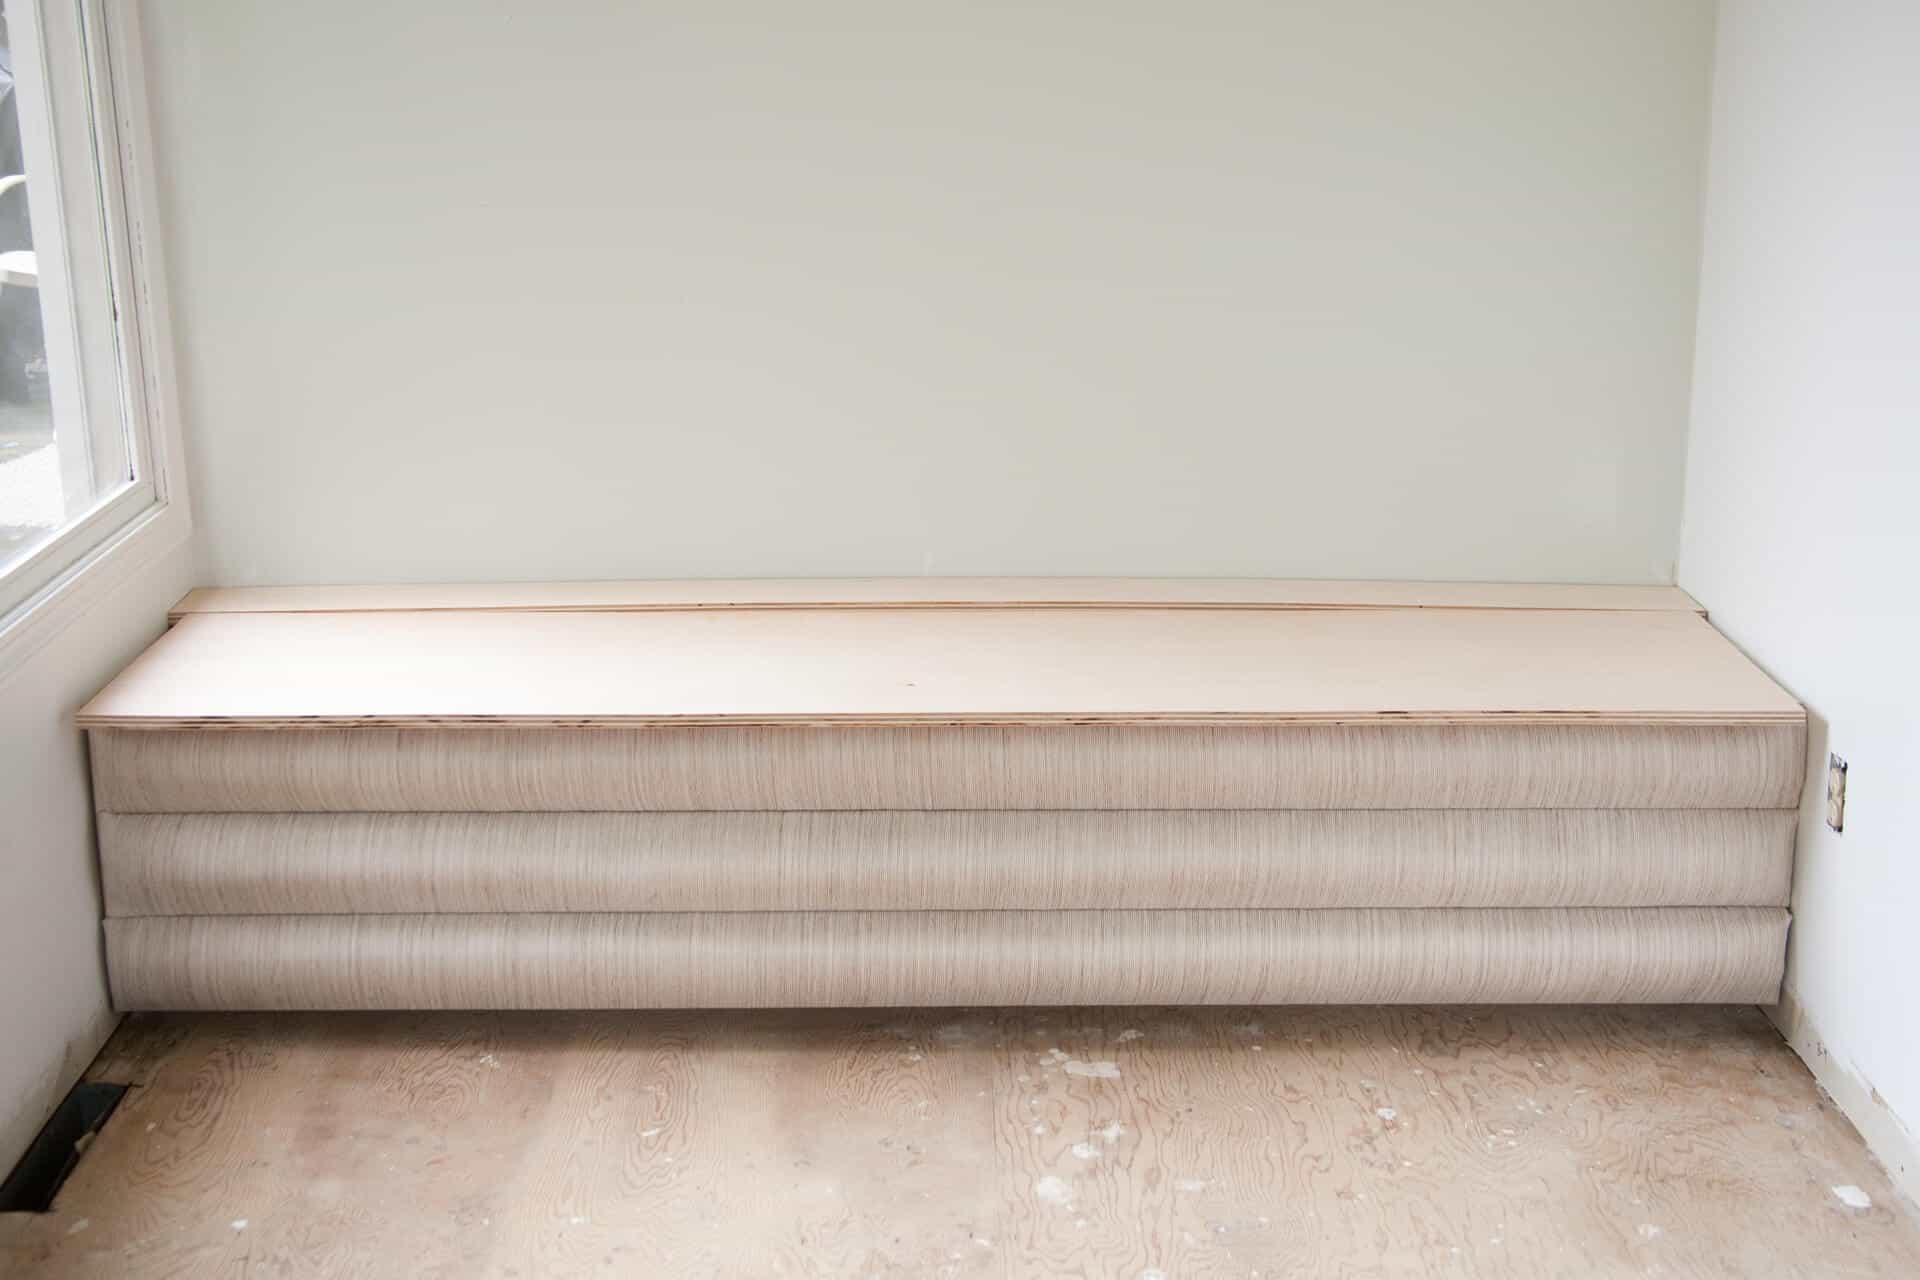
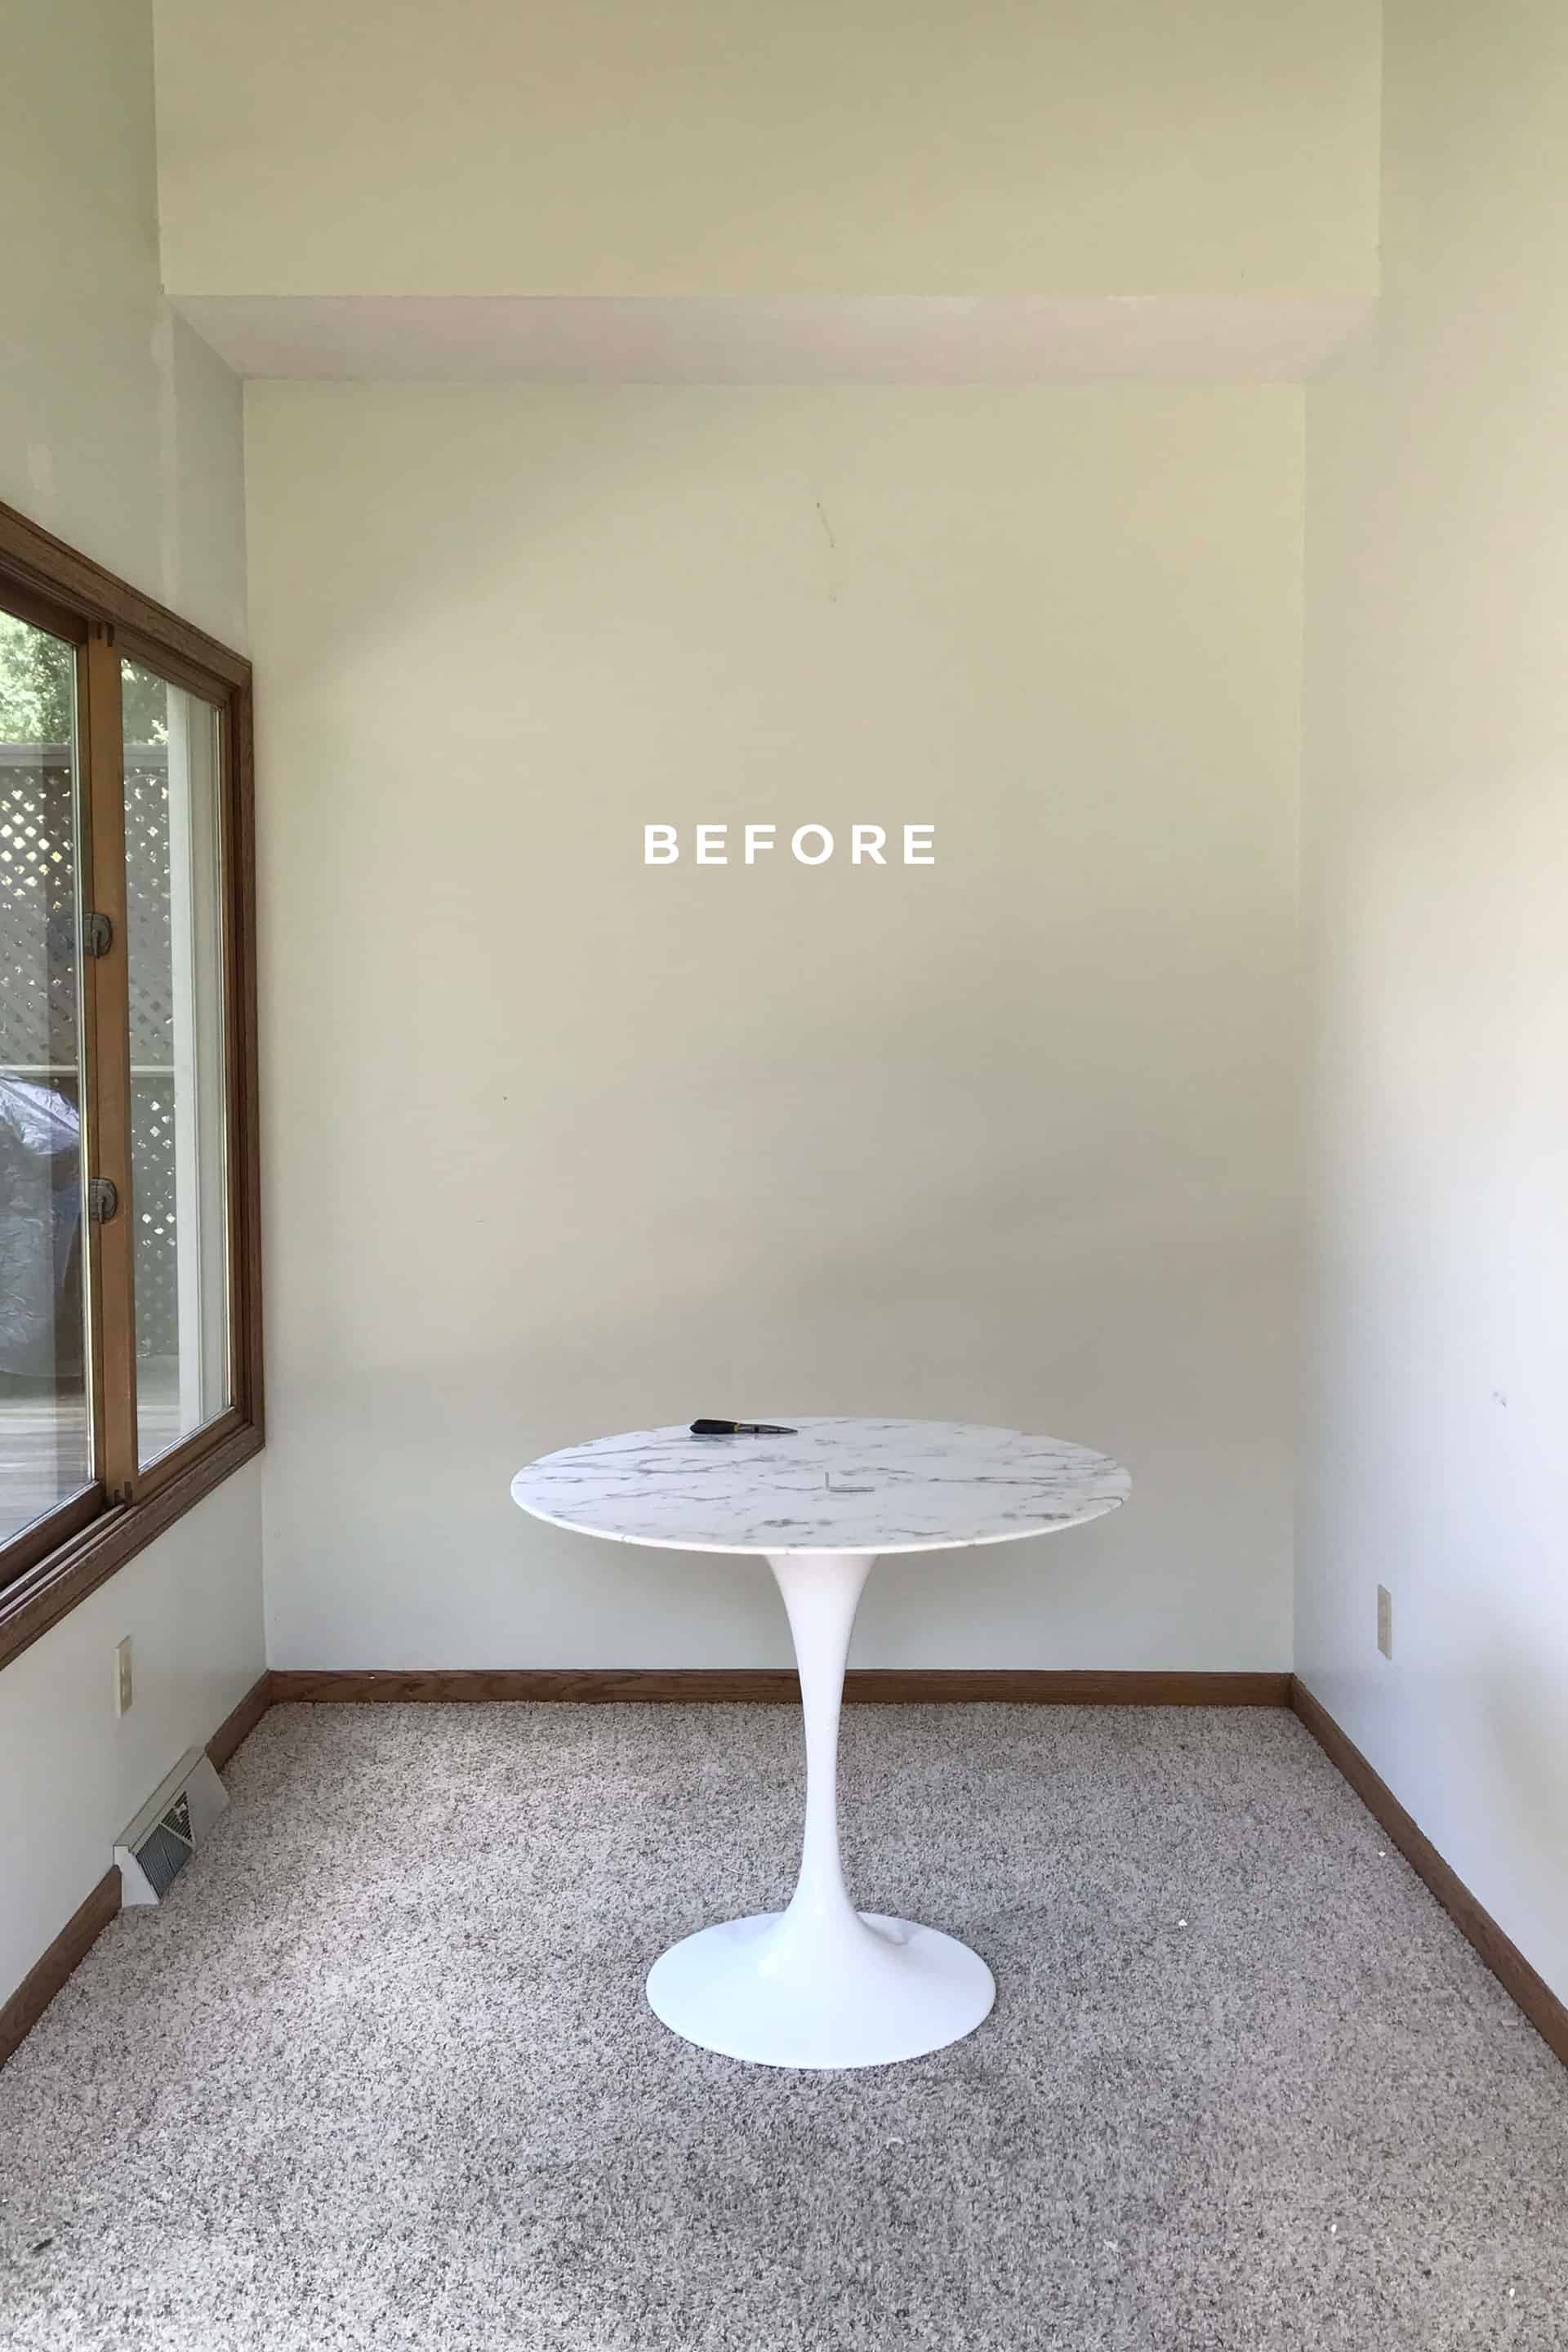 Here’s how this space started out, with dark oak trim, shaggy carpet, and a soffit on the ceiling that was really cramping my style.
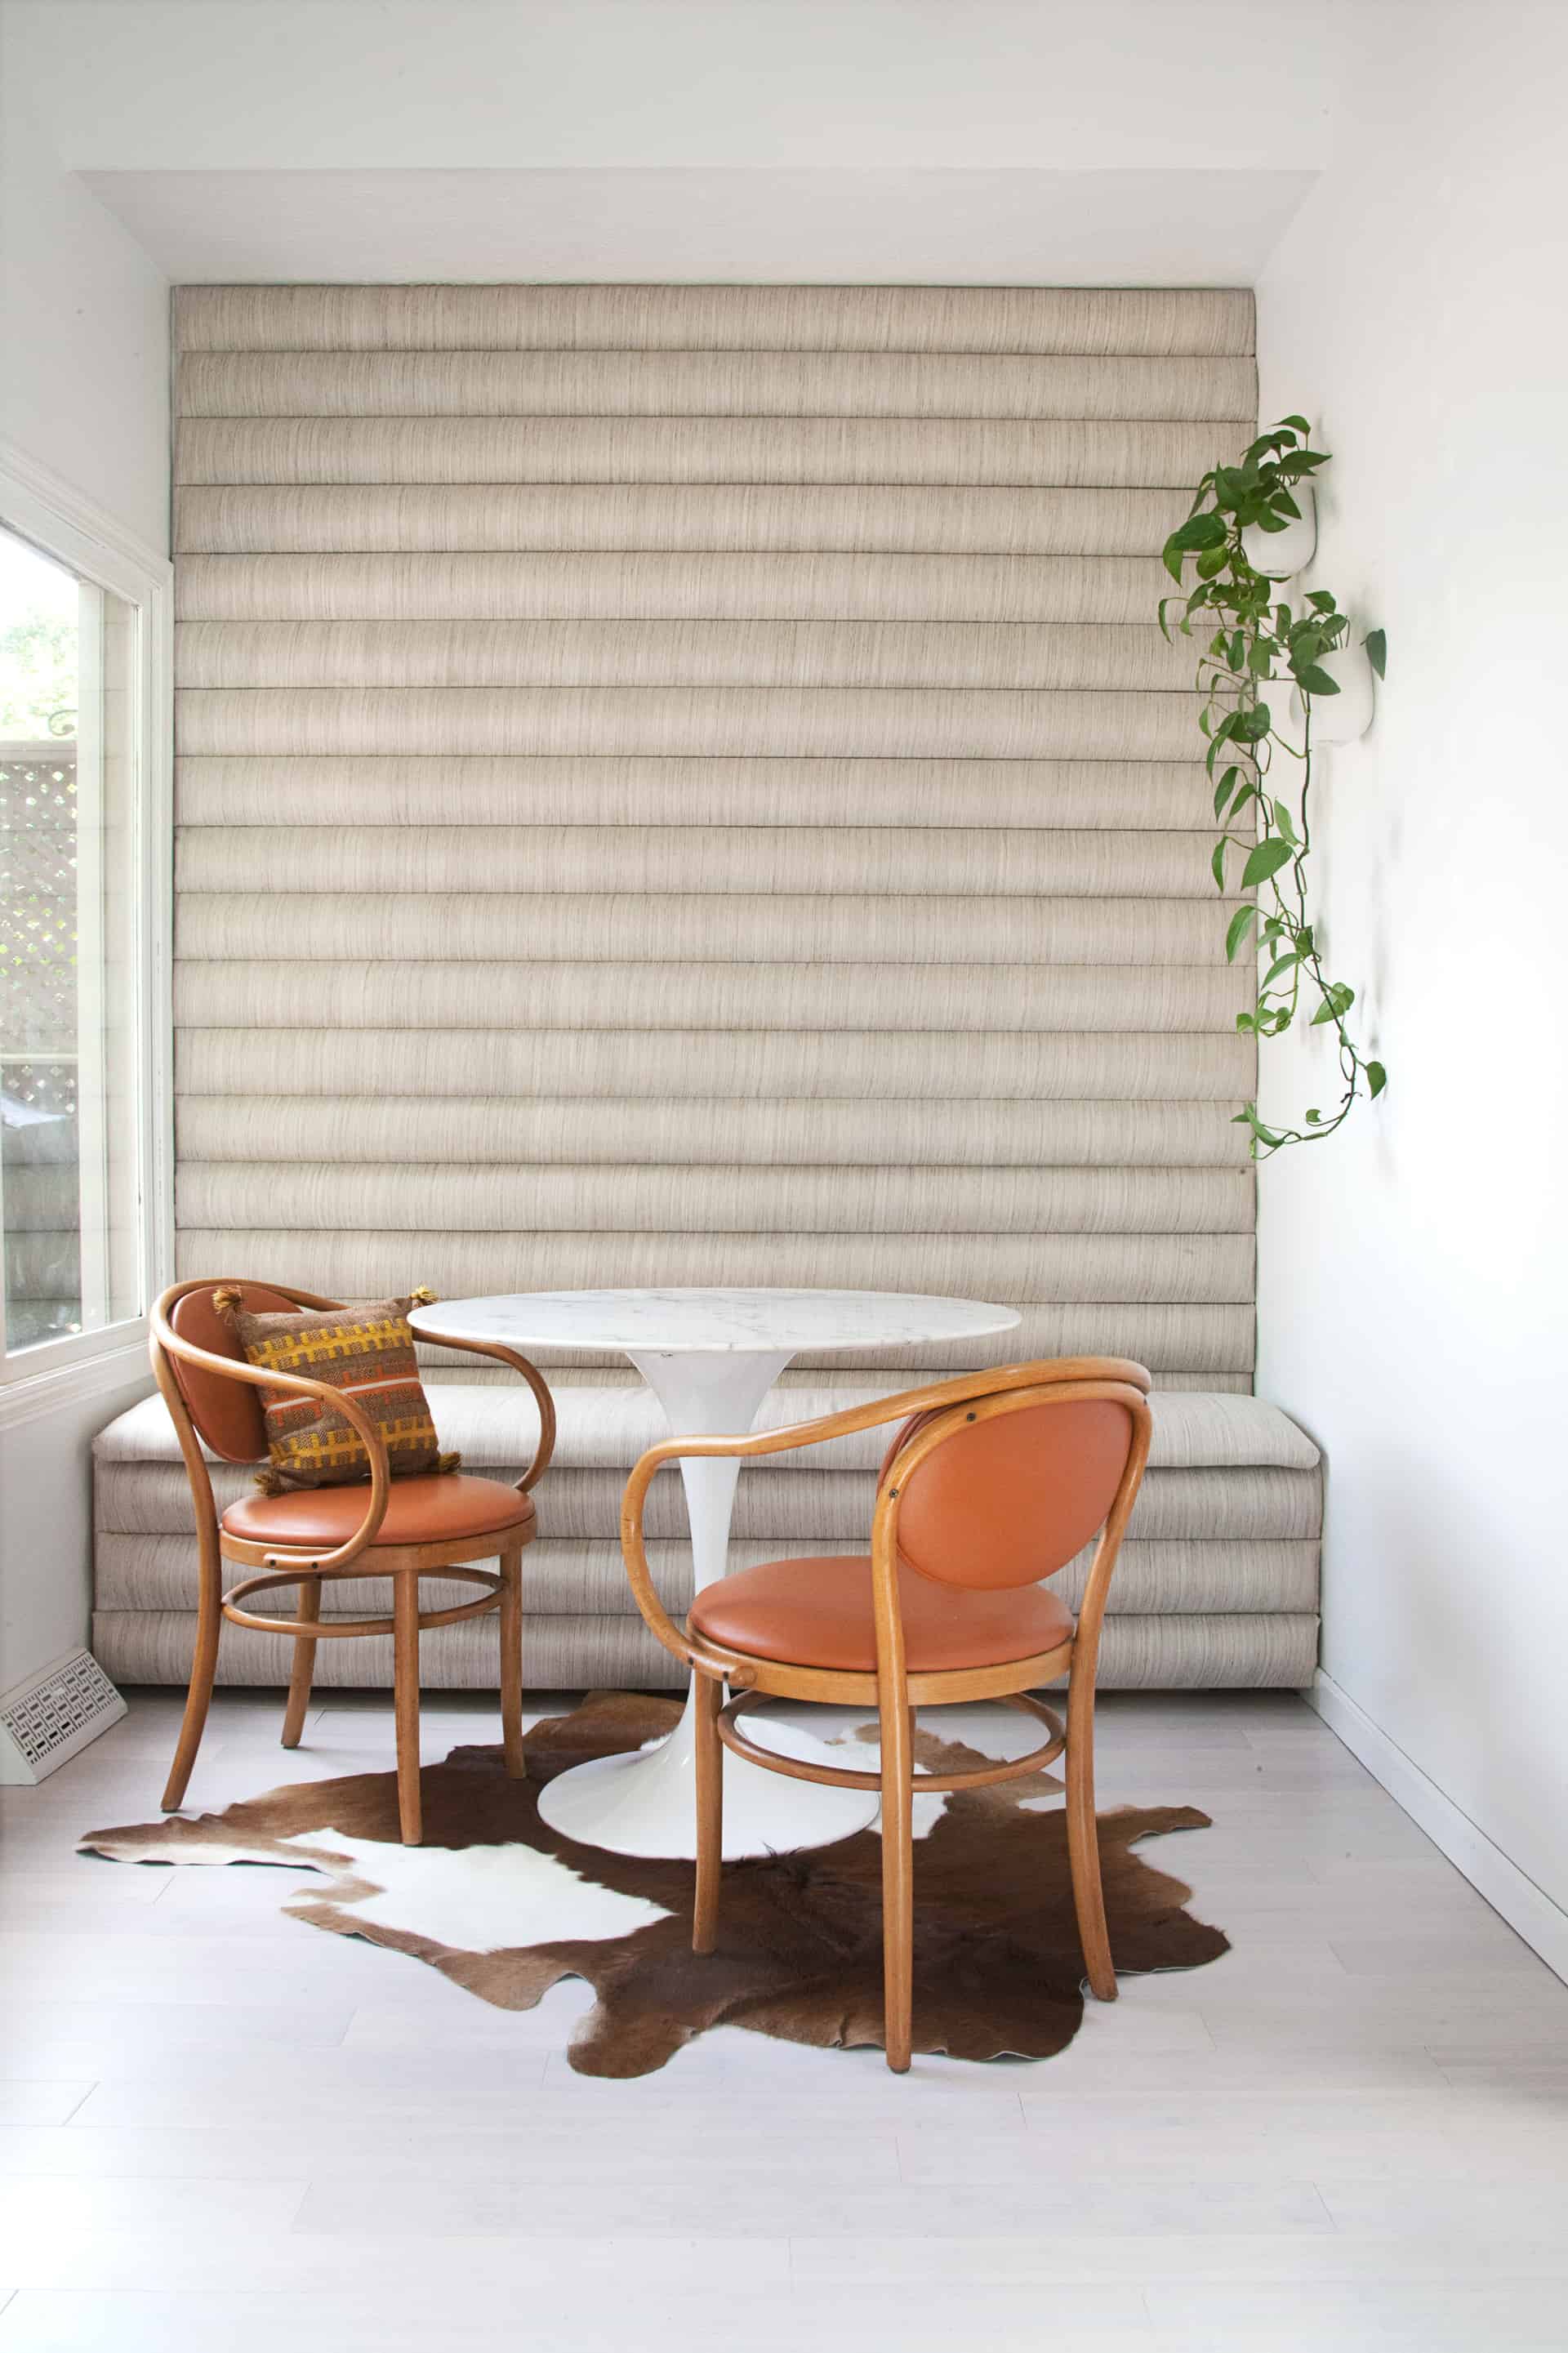
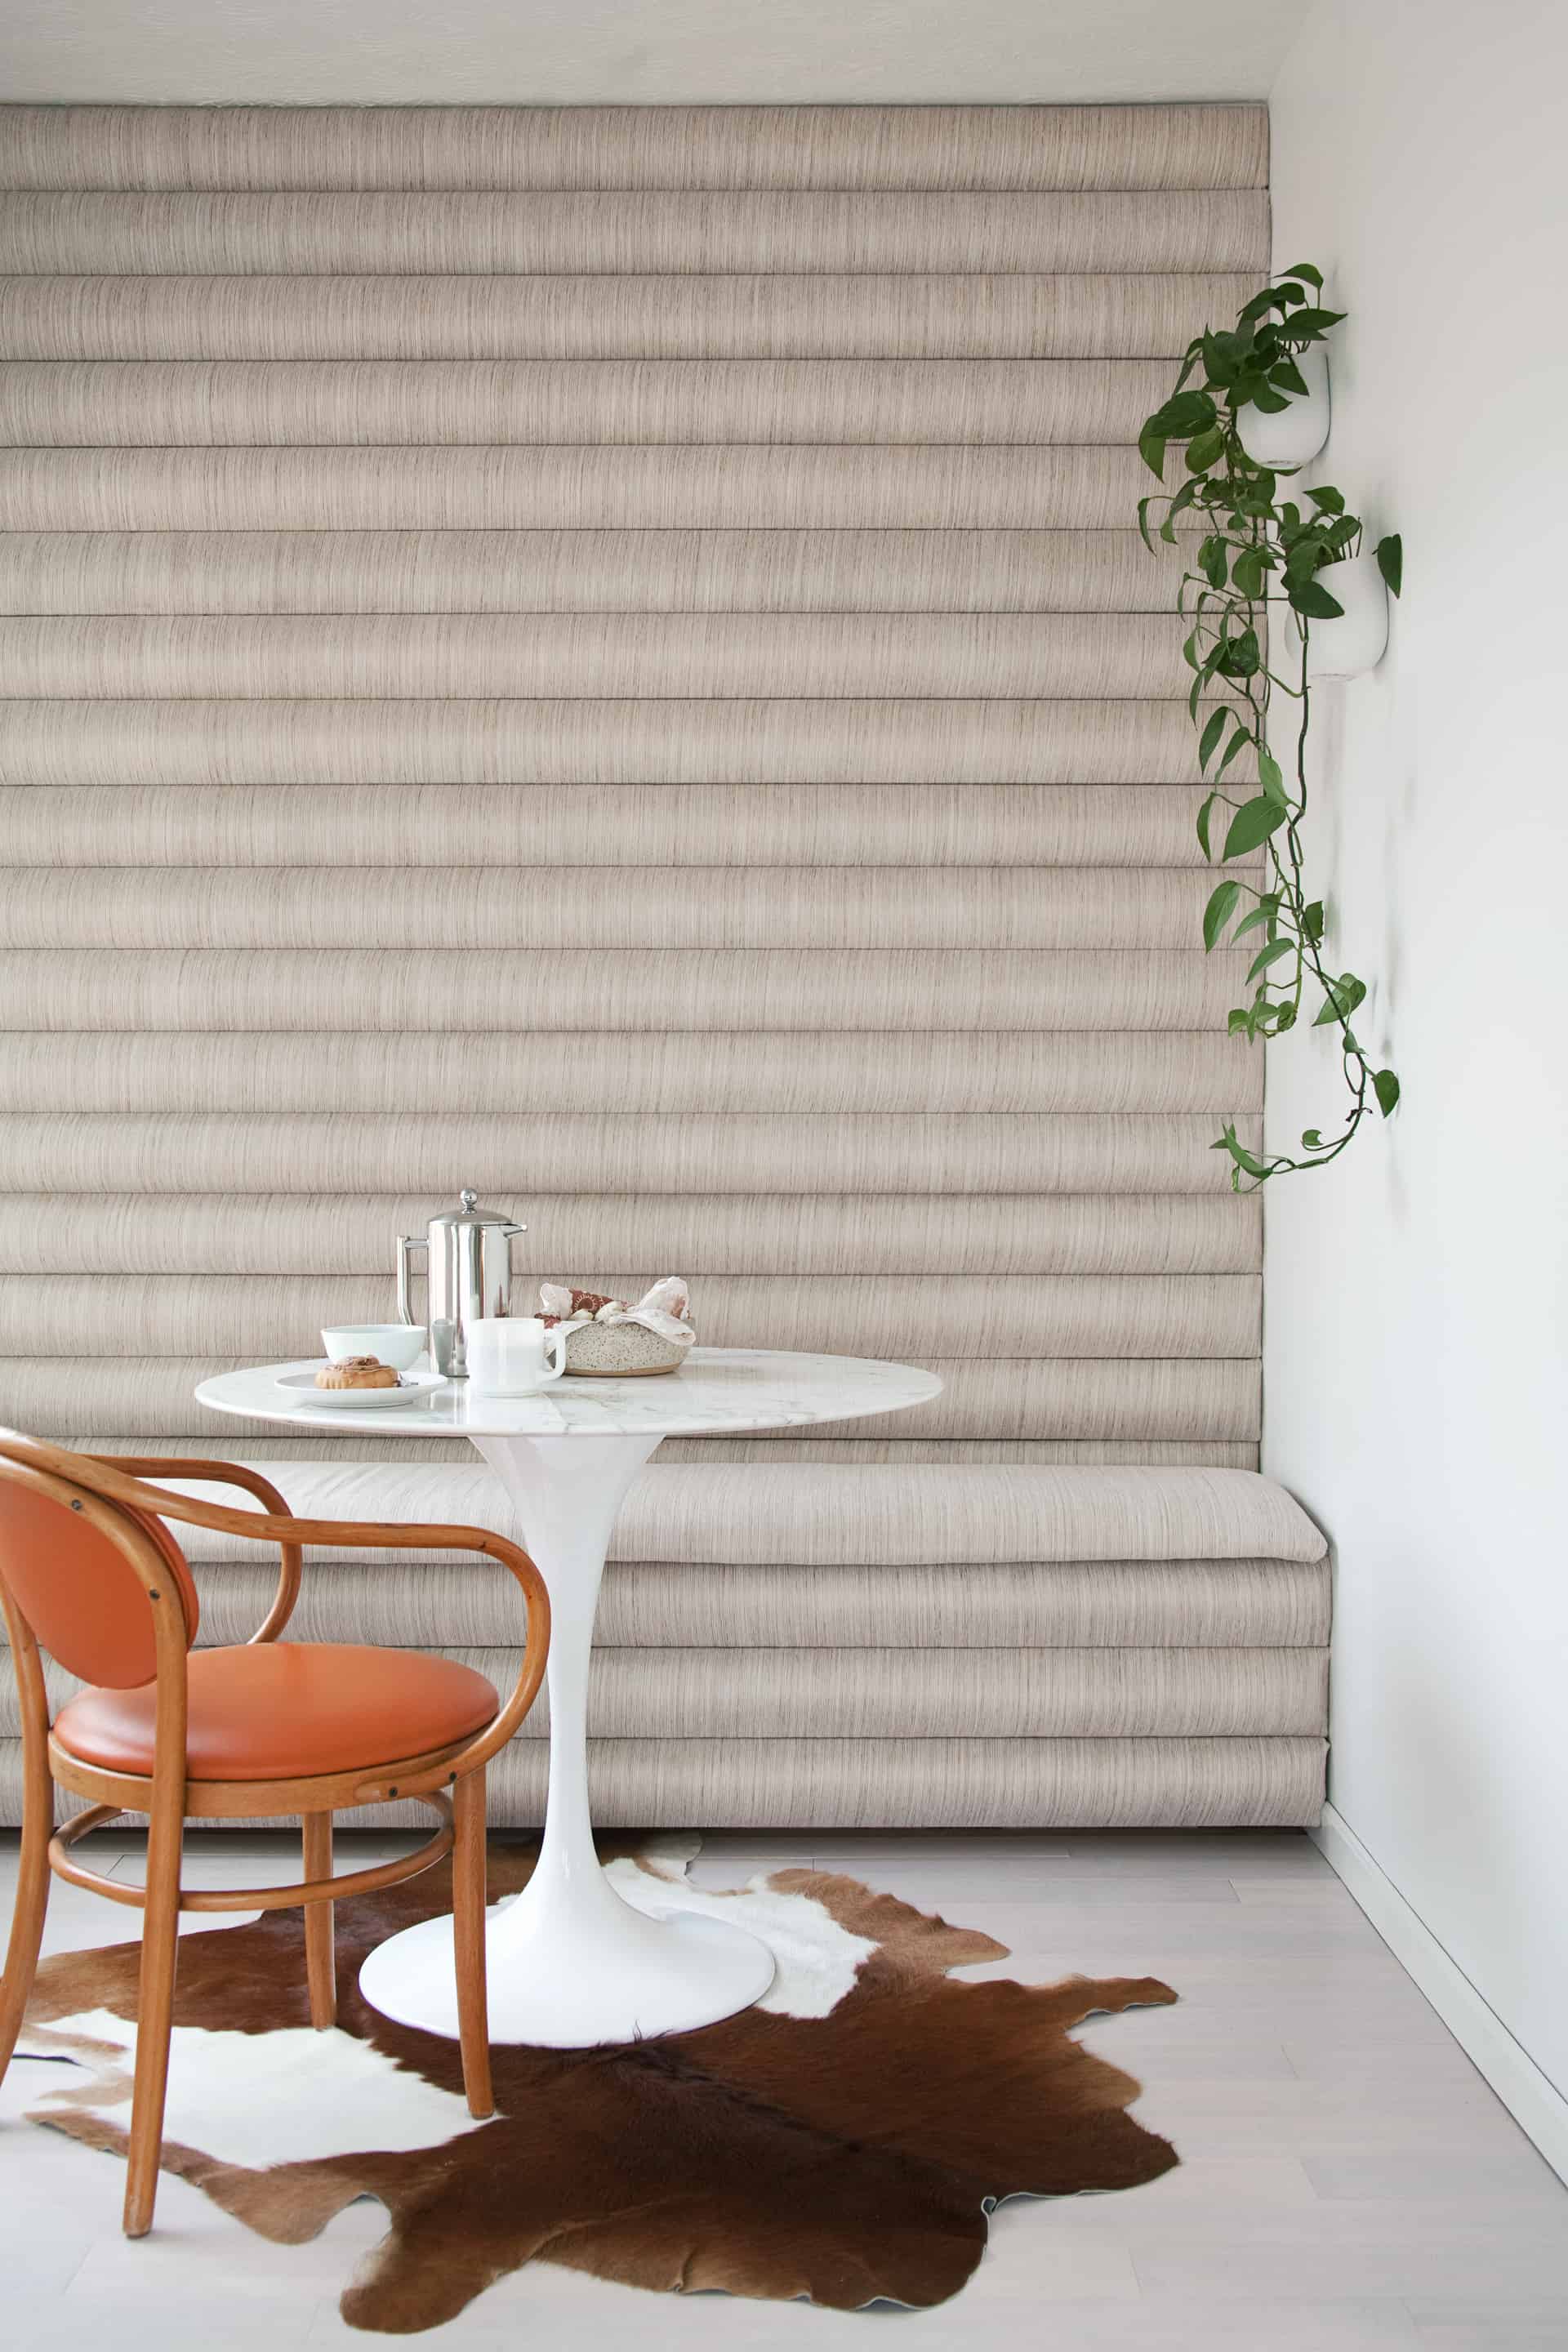
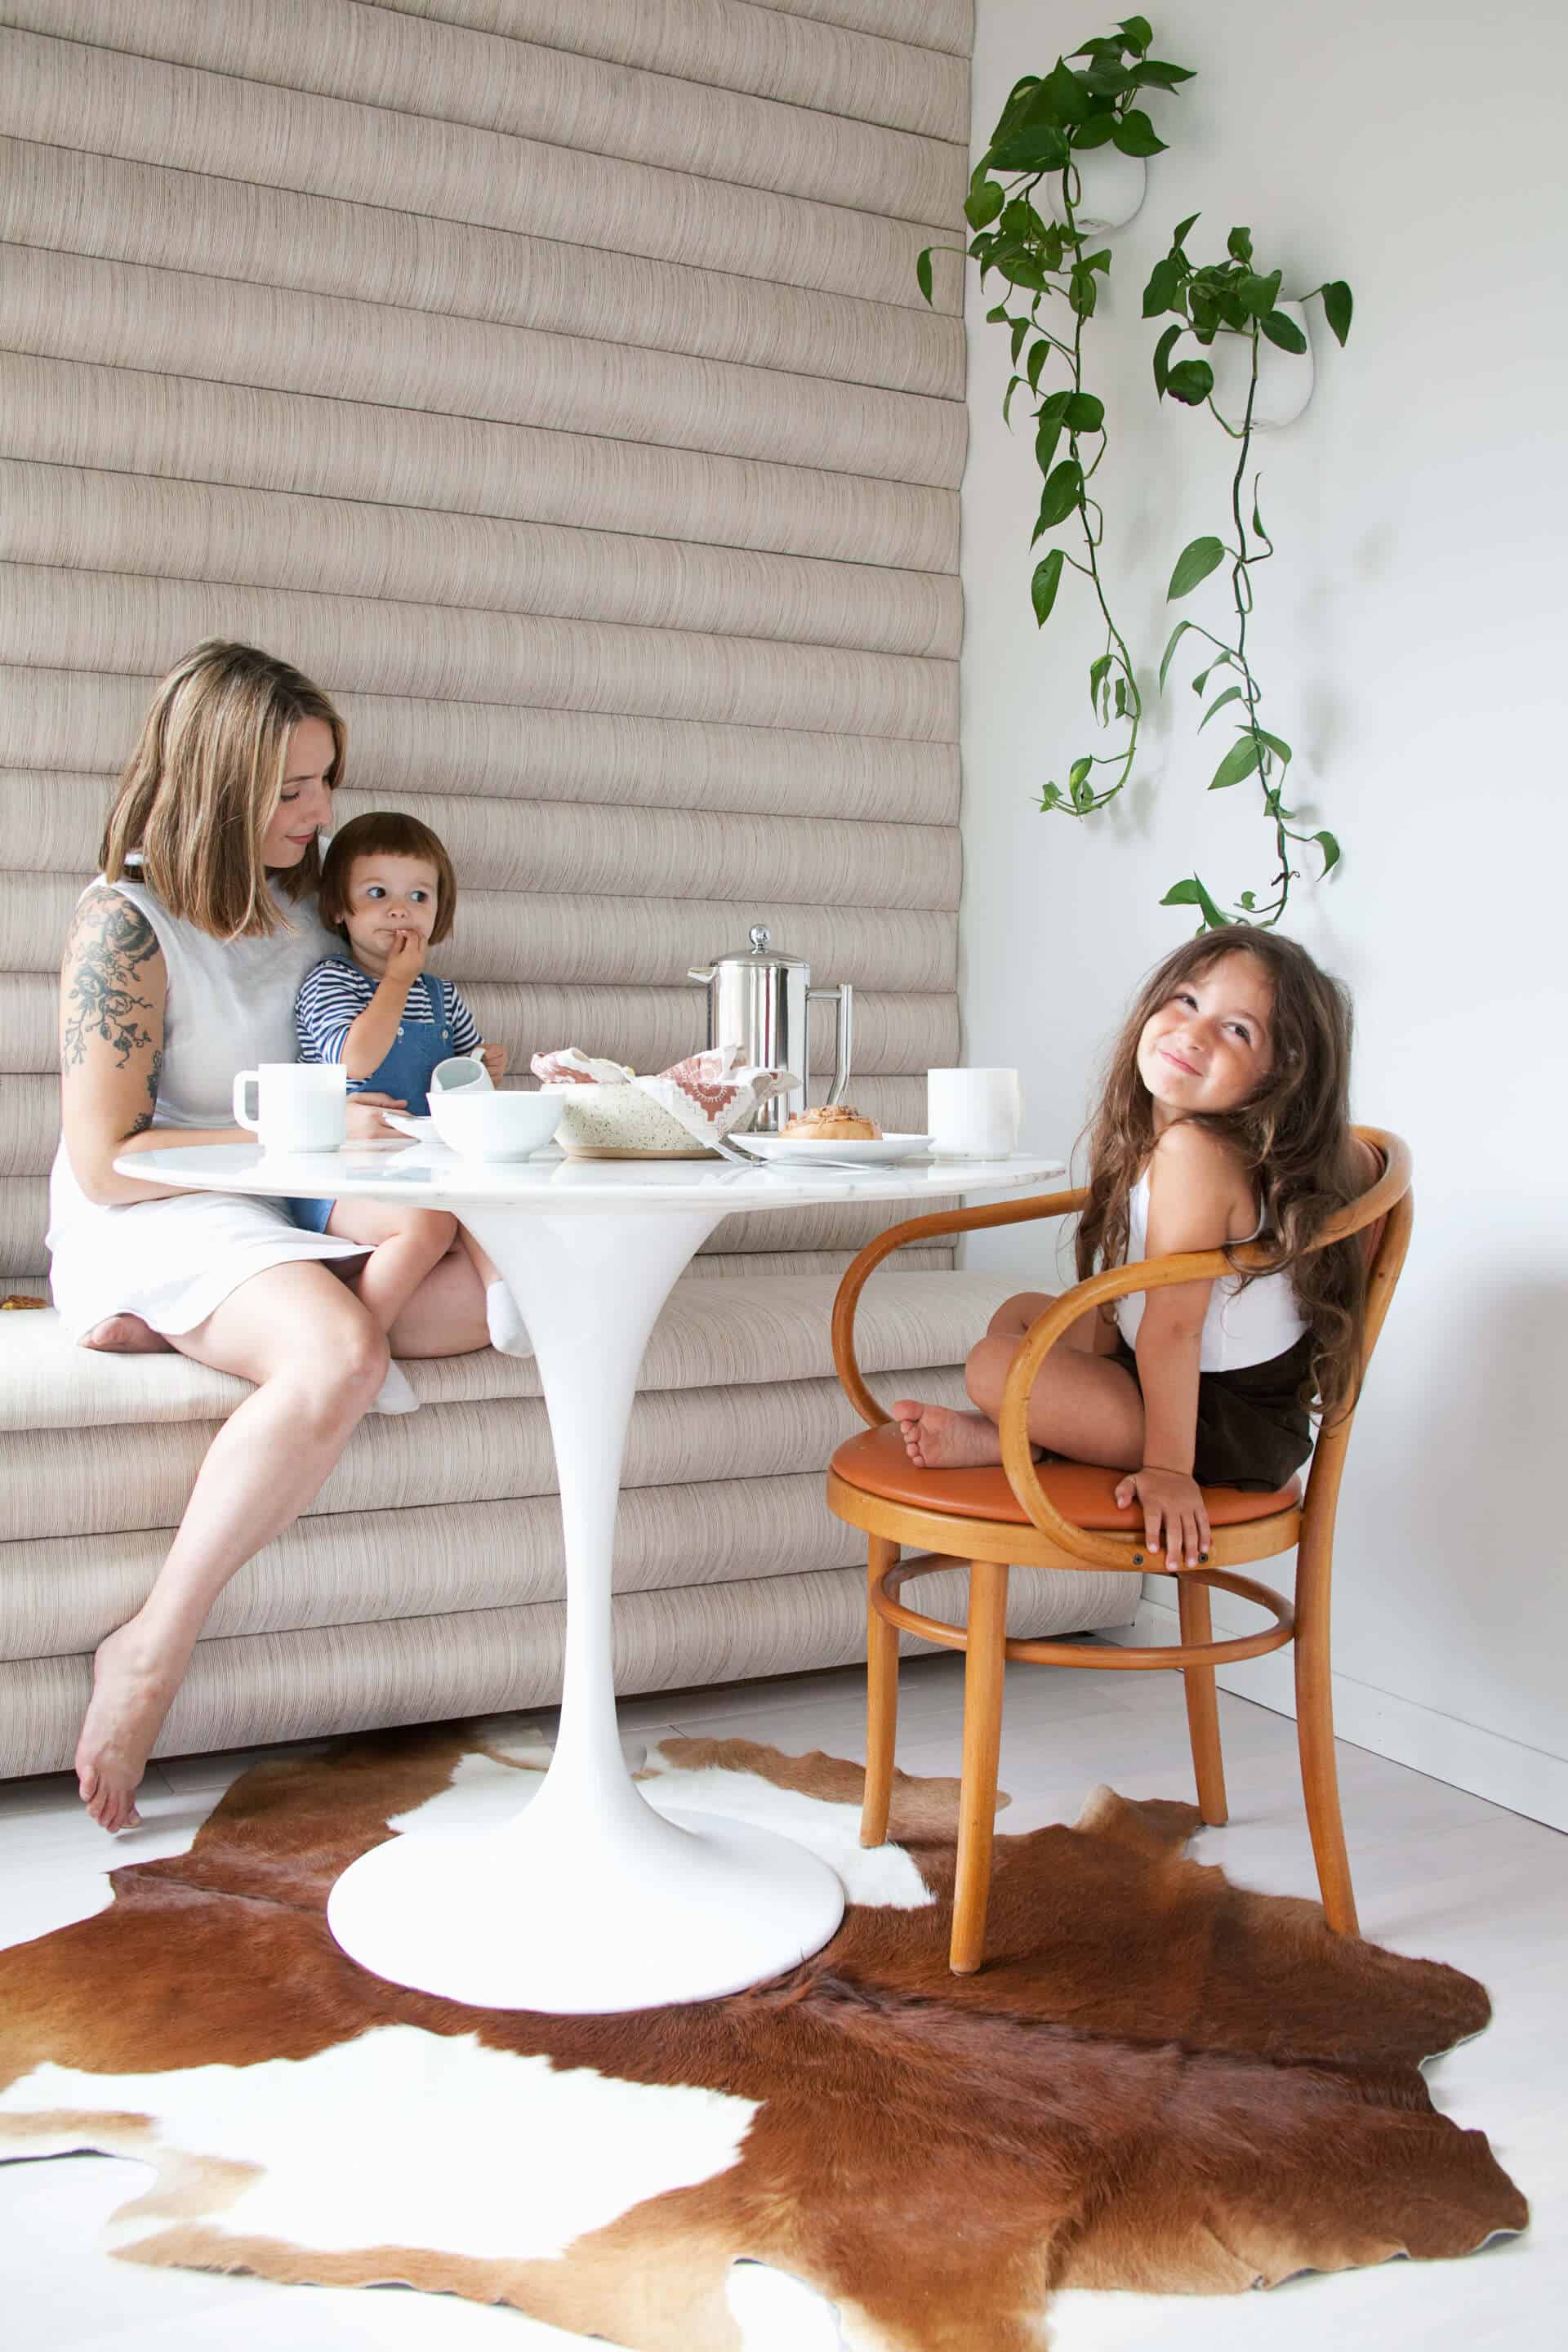
I decided to embrace the nook-effect that was created by the soffit and upholster the entire wall up to it! That tulip table from LexMod was begging for a dramatic backdrop to showcase its sensuous curves.
Now this space feels fresh, fun, elegant, and inviting. And the channel tufting on the wall and bench are the perfect nod to our home’s 1980s beginnings.
 I was inspired to use a channel tufted upholstery method for my bench after seeing this image on Pinterest. Then after researching a bit to figure out the easiest method to achieve this look, I stumbled upon Brady Tolbert’s channel tufted headboard on Emily Henderson’s blog. I can’t believe I had never seen it before, since I do follow her blog. Such a beautiful project!
I used his method of upholstering individual plywood panels and connecting them with metal straps before I attached them to the wall. Super simple method, though because I was covering a large space, it was not quick nor inexpensive. But read along to see how I constructed the bench!
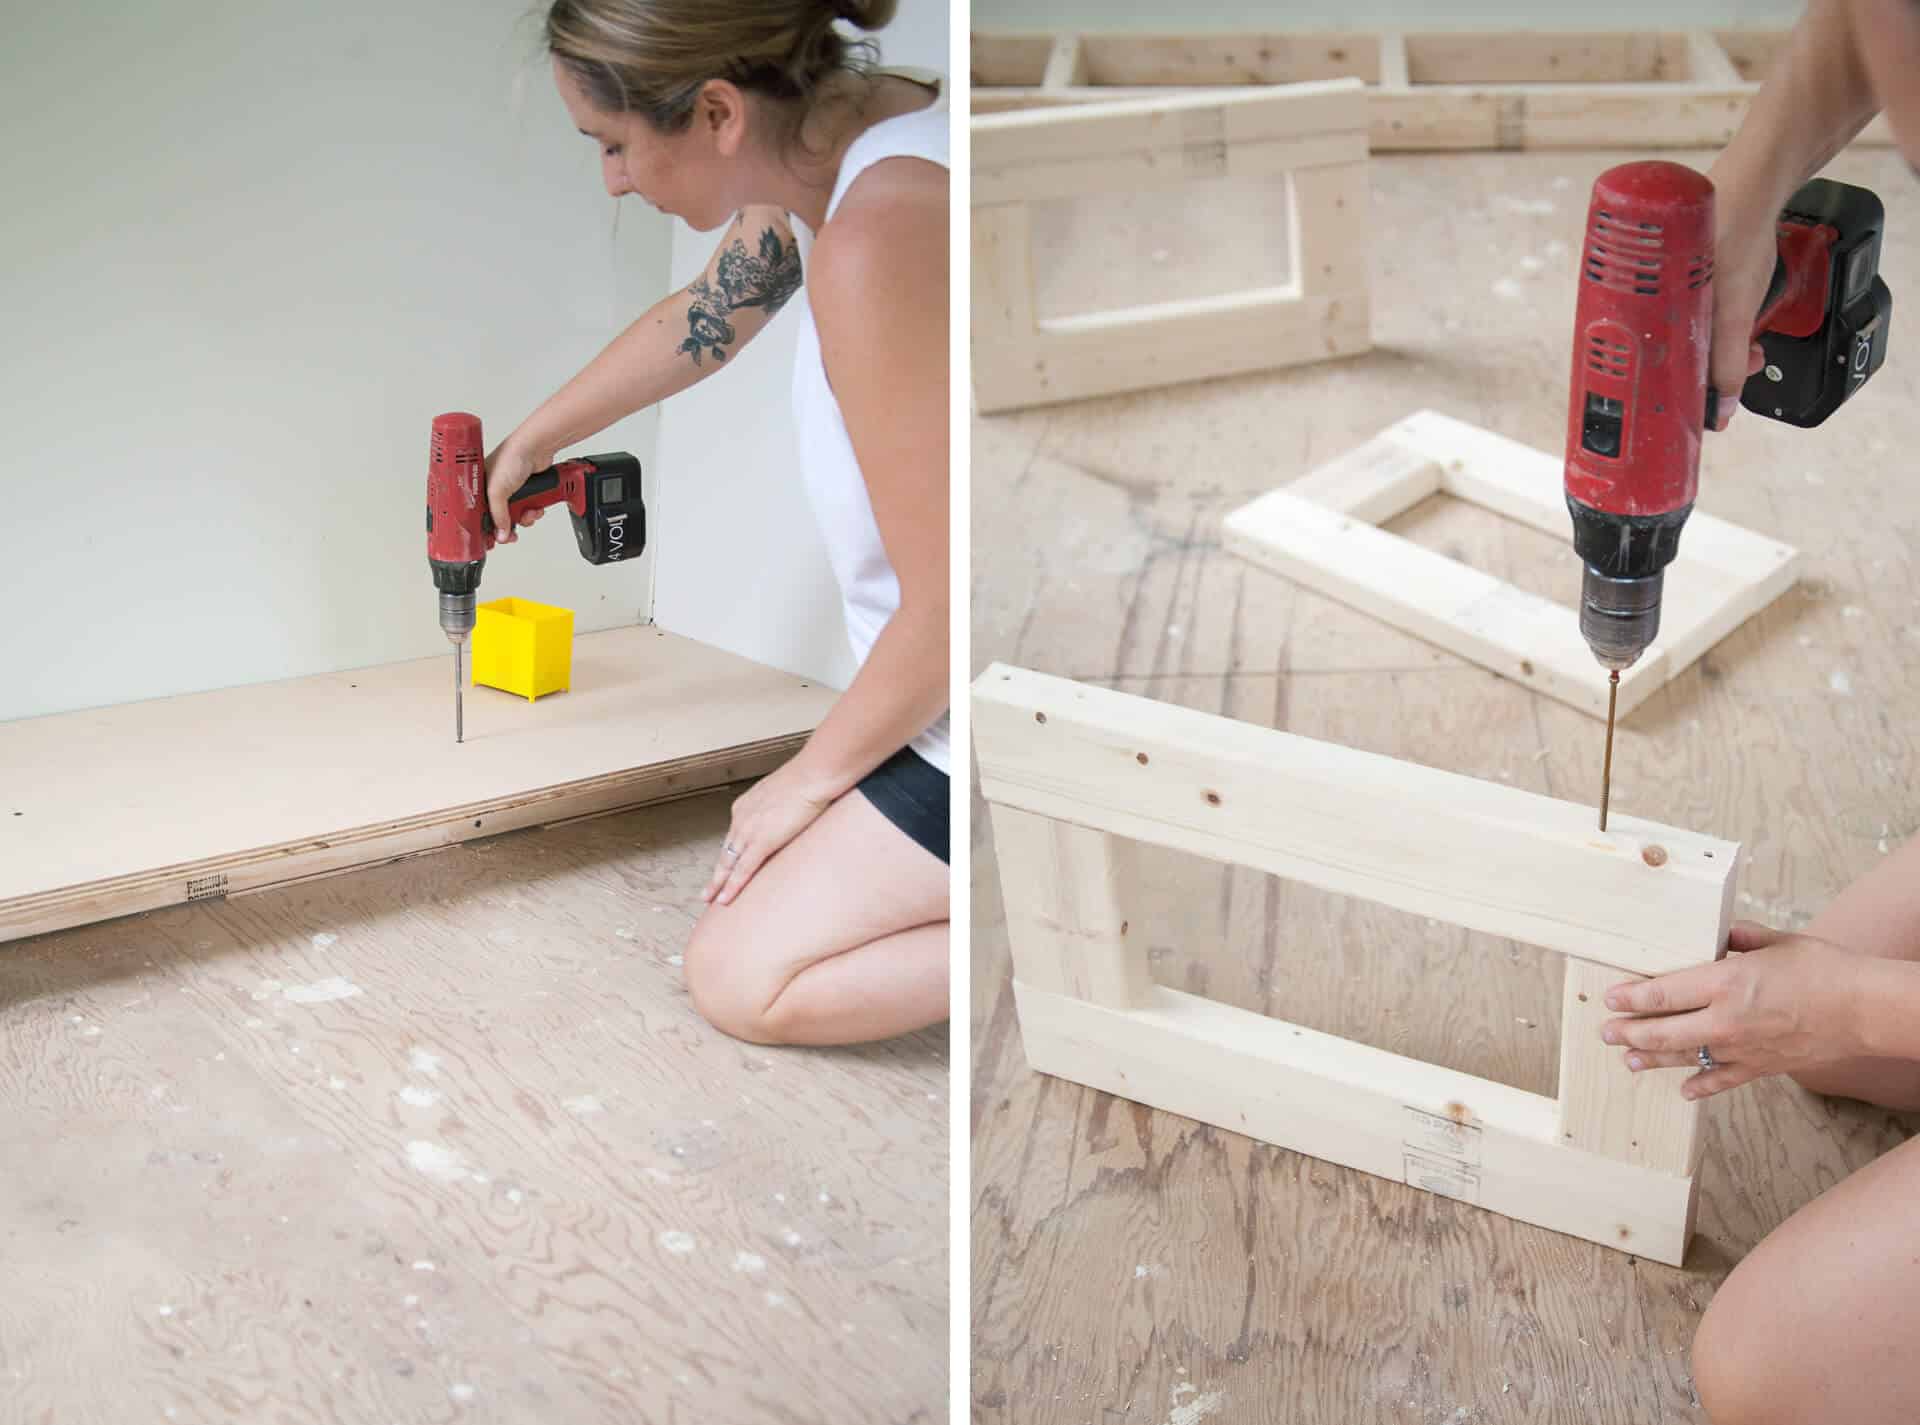
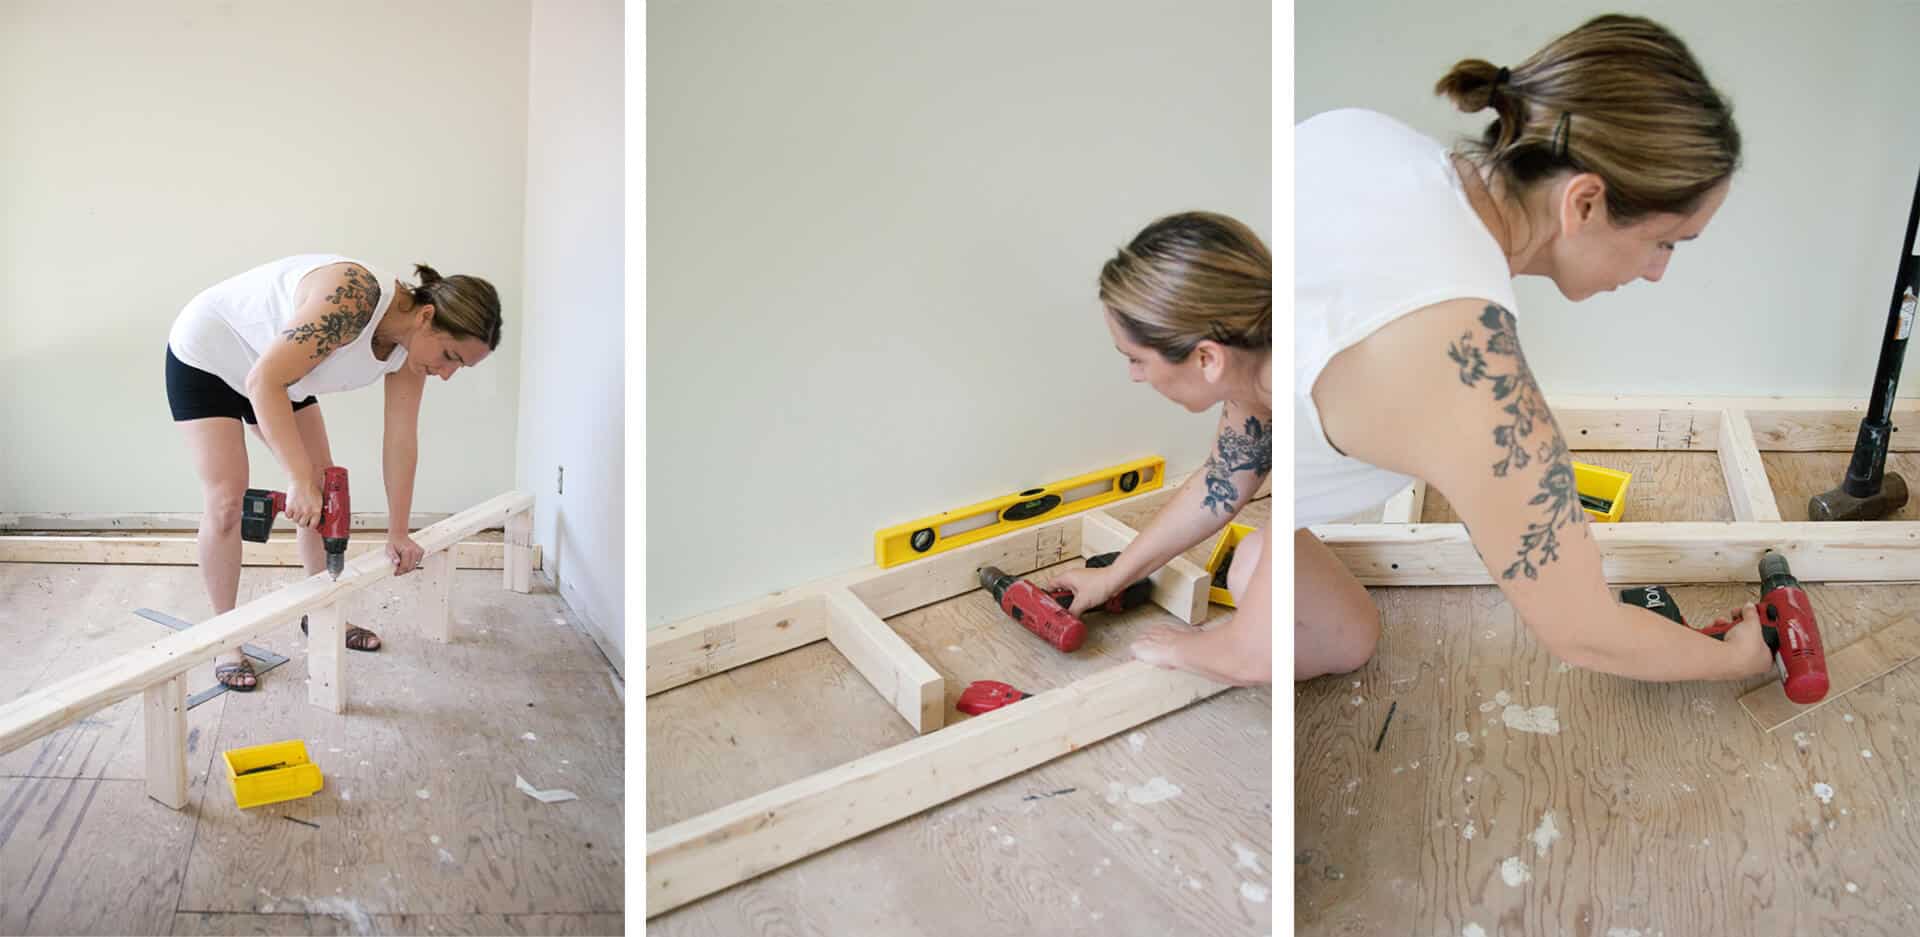 Step One: Create a platform for the bench to sit on, which will give toe-kick space to the bench as well as give it a floating effect.
I created the base by screwing 2x4s together as shown above, creating a base that is 14″ wide. I evenly spaced out the braces in the middle around 20″ apart from each other, though standard construction methods would recommend doing them 16″ apart on center.
Then, I attached the braces to the back piece first, then attached the back piece to the studs in the wall, making sure it was level. I used shims in areas that didn’t quite meet the floor. Then I attached the front piece of the base, again using shims to ensure it would be level.
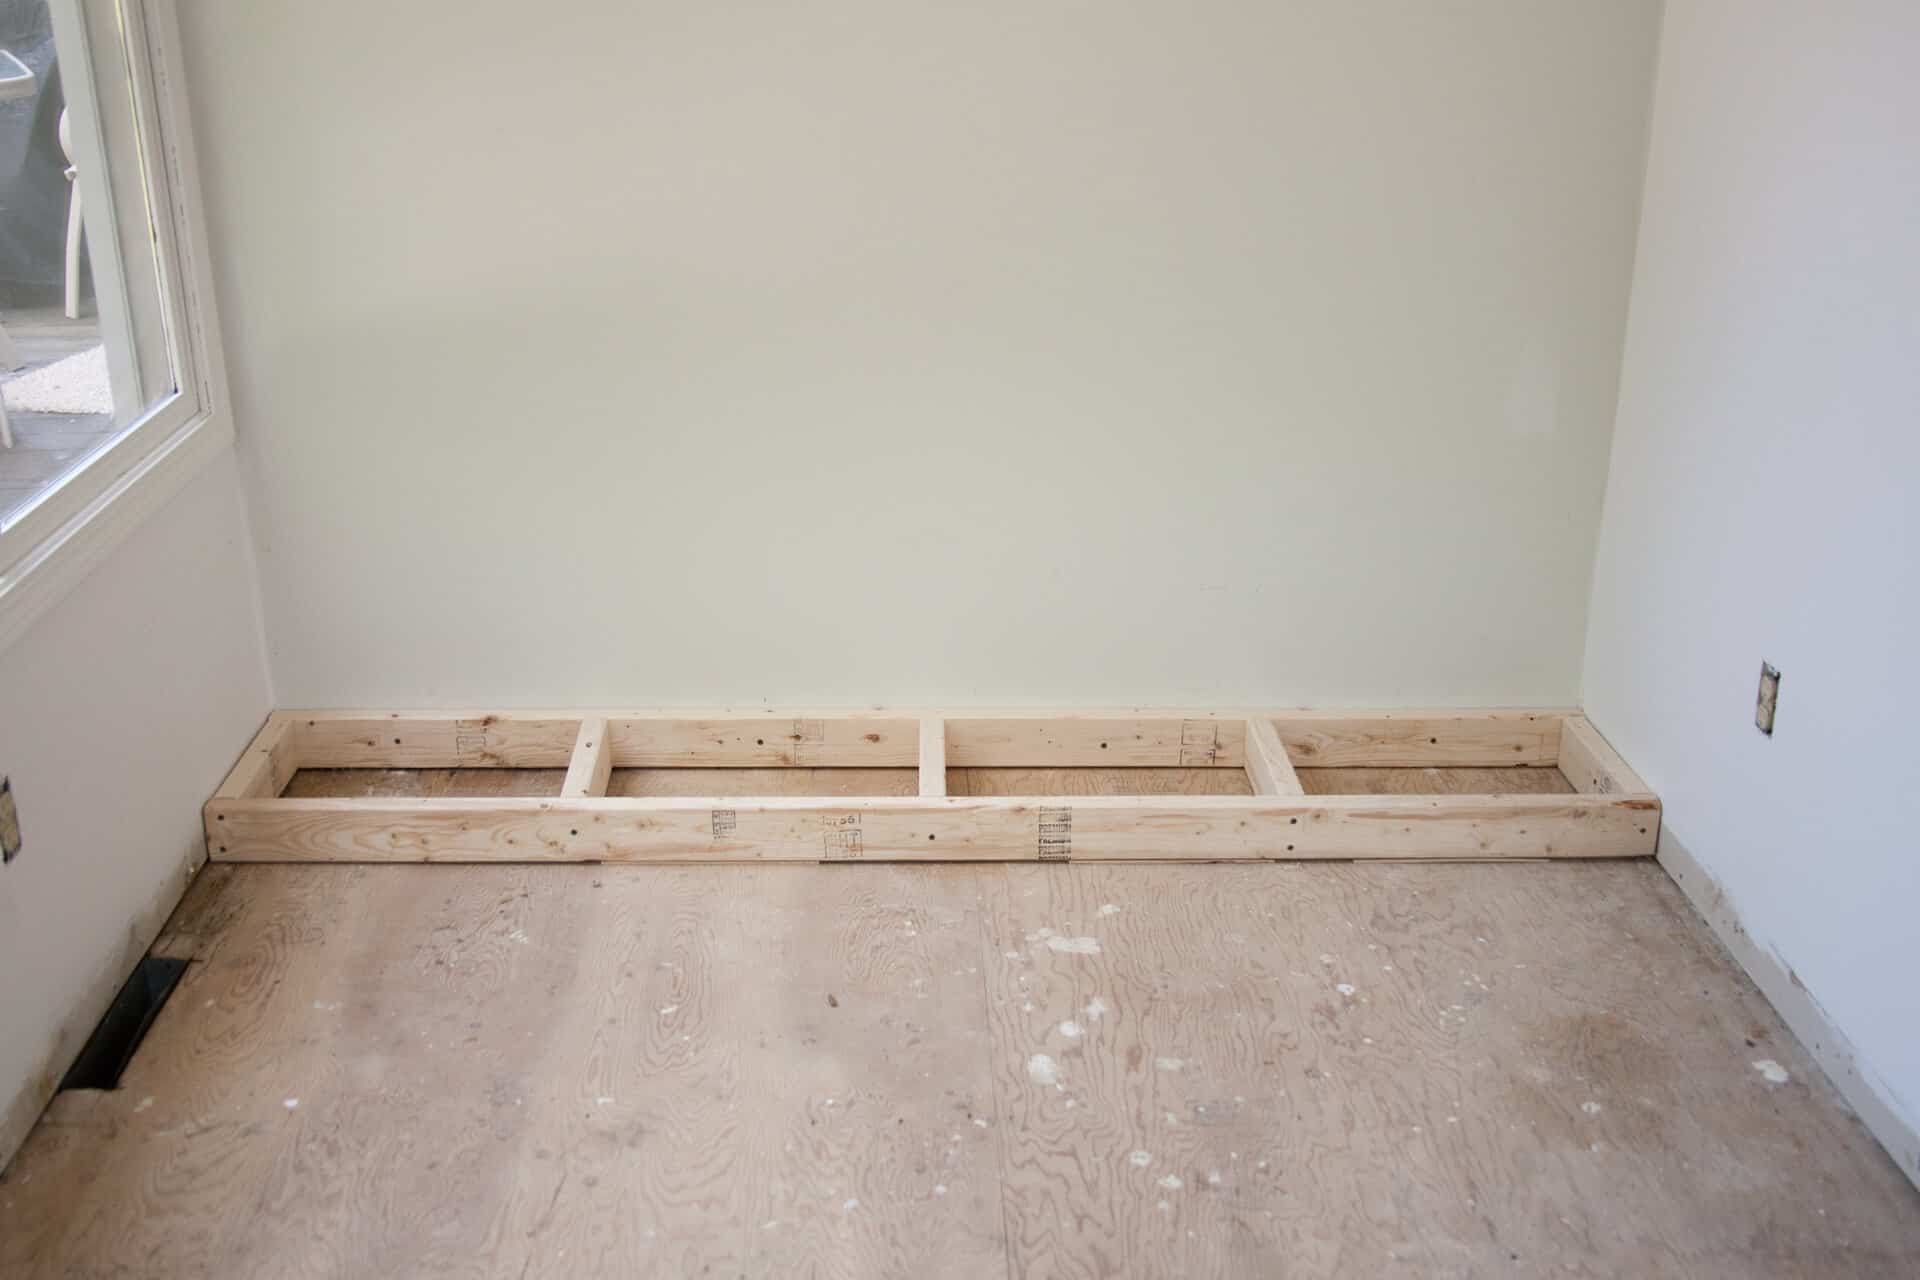
 Step Two: Attach plywood to the base, creating the bottom of your storage cabinet. The plywood bottom should extend out beyond the base. I made my base 19.5″ deep. I attached it to the braces/studs of the base with wood screws.
Step Three: Create supports for the bench lid using 2x4s and long screws, as shown above. My vertical pieces measured 6″ high, and the horizontal pieces measure 19.5″ long.
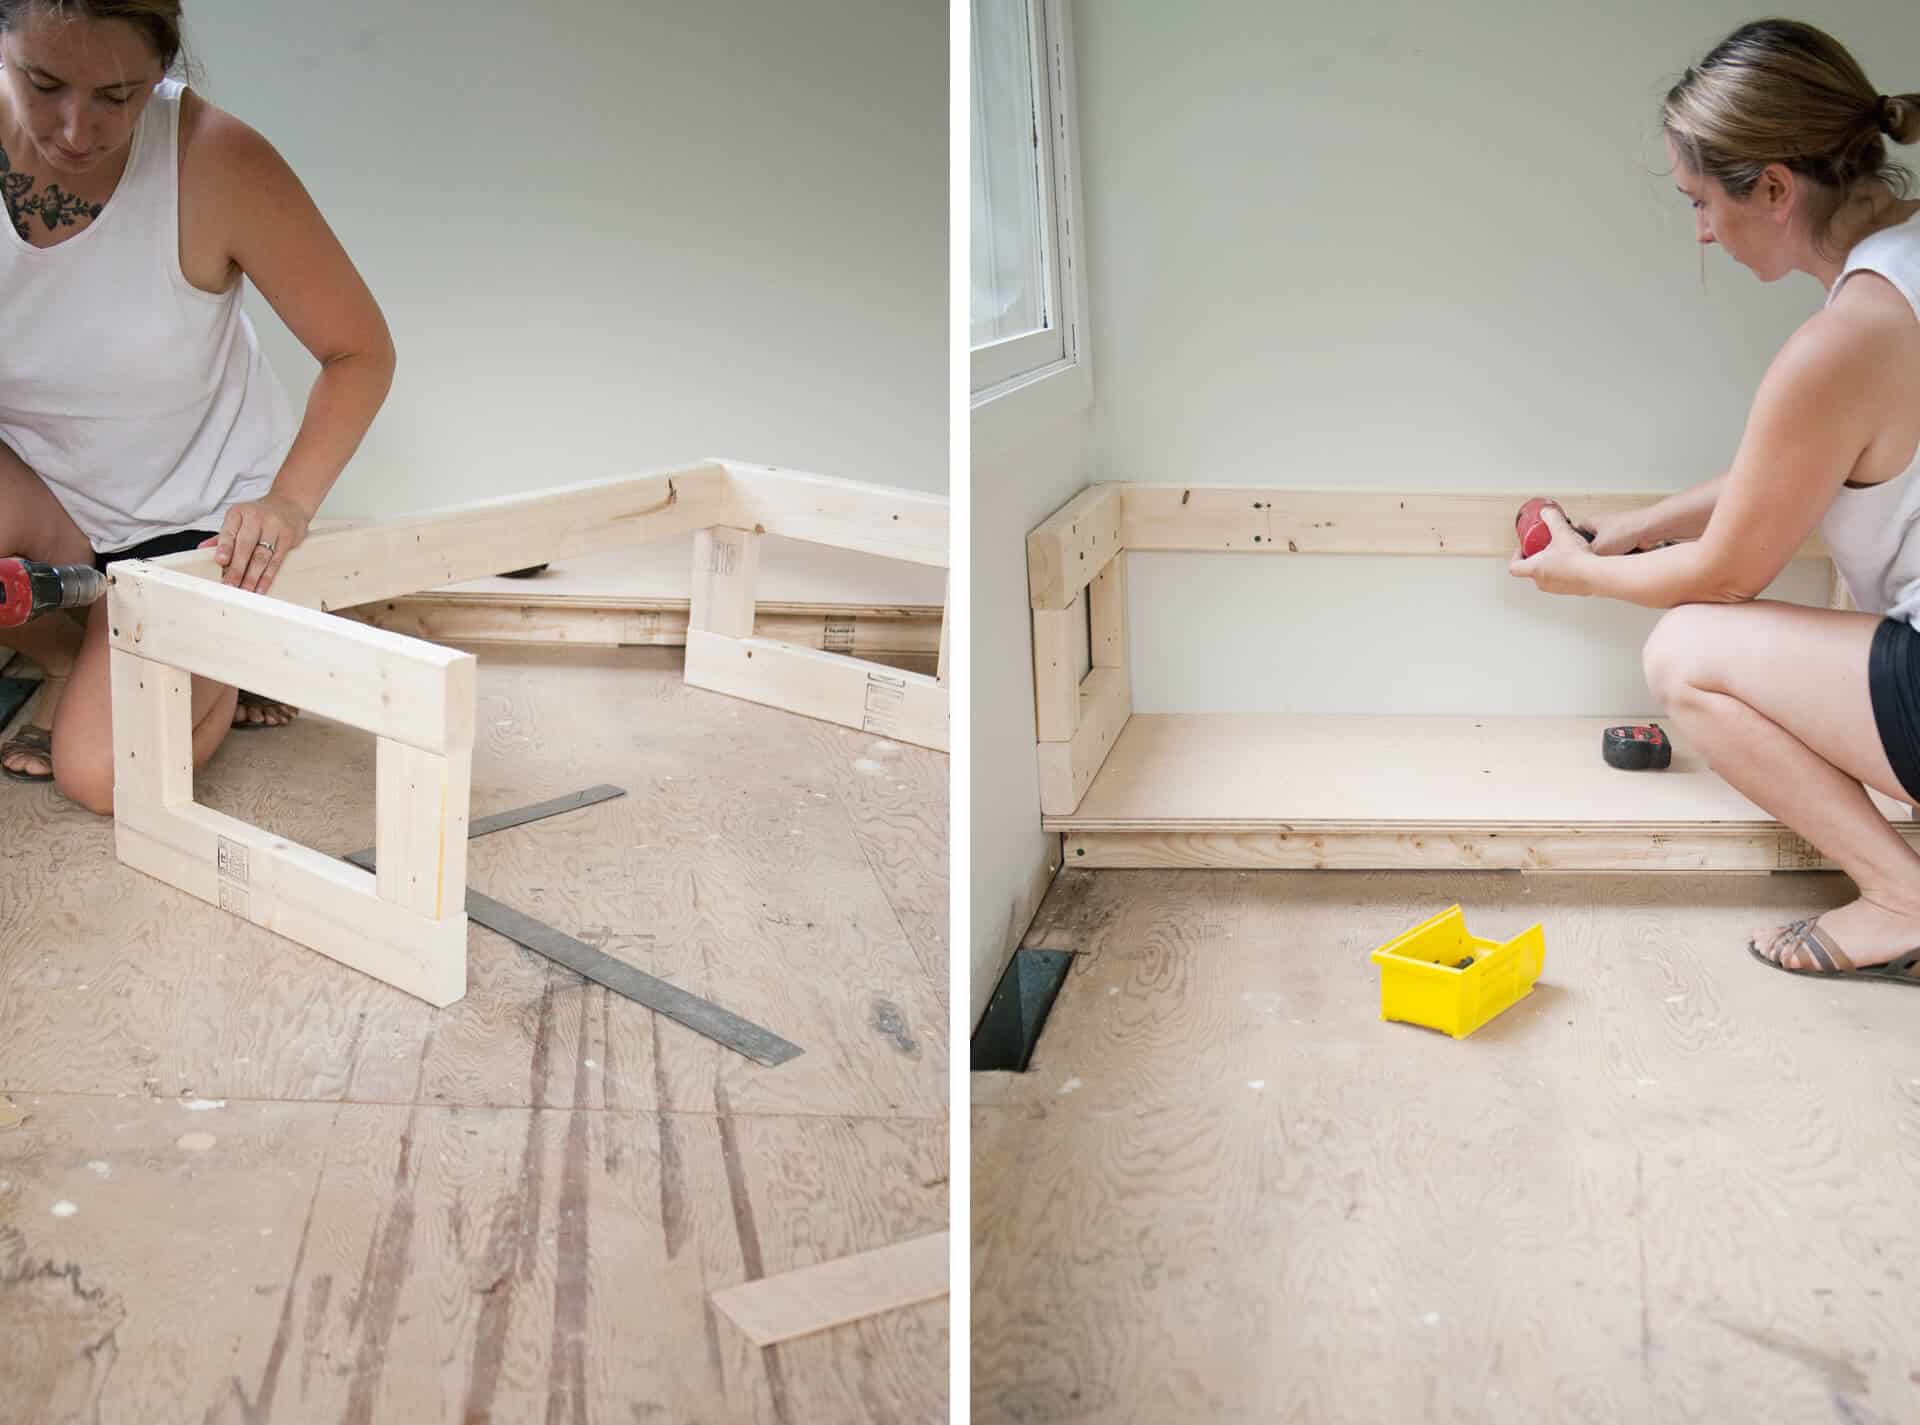 Step Four: Measure the distance between each brace, and cut pieces of 2×4 to connect them together. Attach the long 2×4 to the braces as shown above left, and then screw it onto the studs of your wall, making sure it’s level as you go.
The reason I screw my pieces together and not nail them is because if you find out you made a mistake, it’s very easy to unscrew them and fix your pieces of wood to correct the mistake. I had to do that a few times.
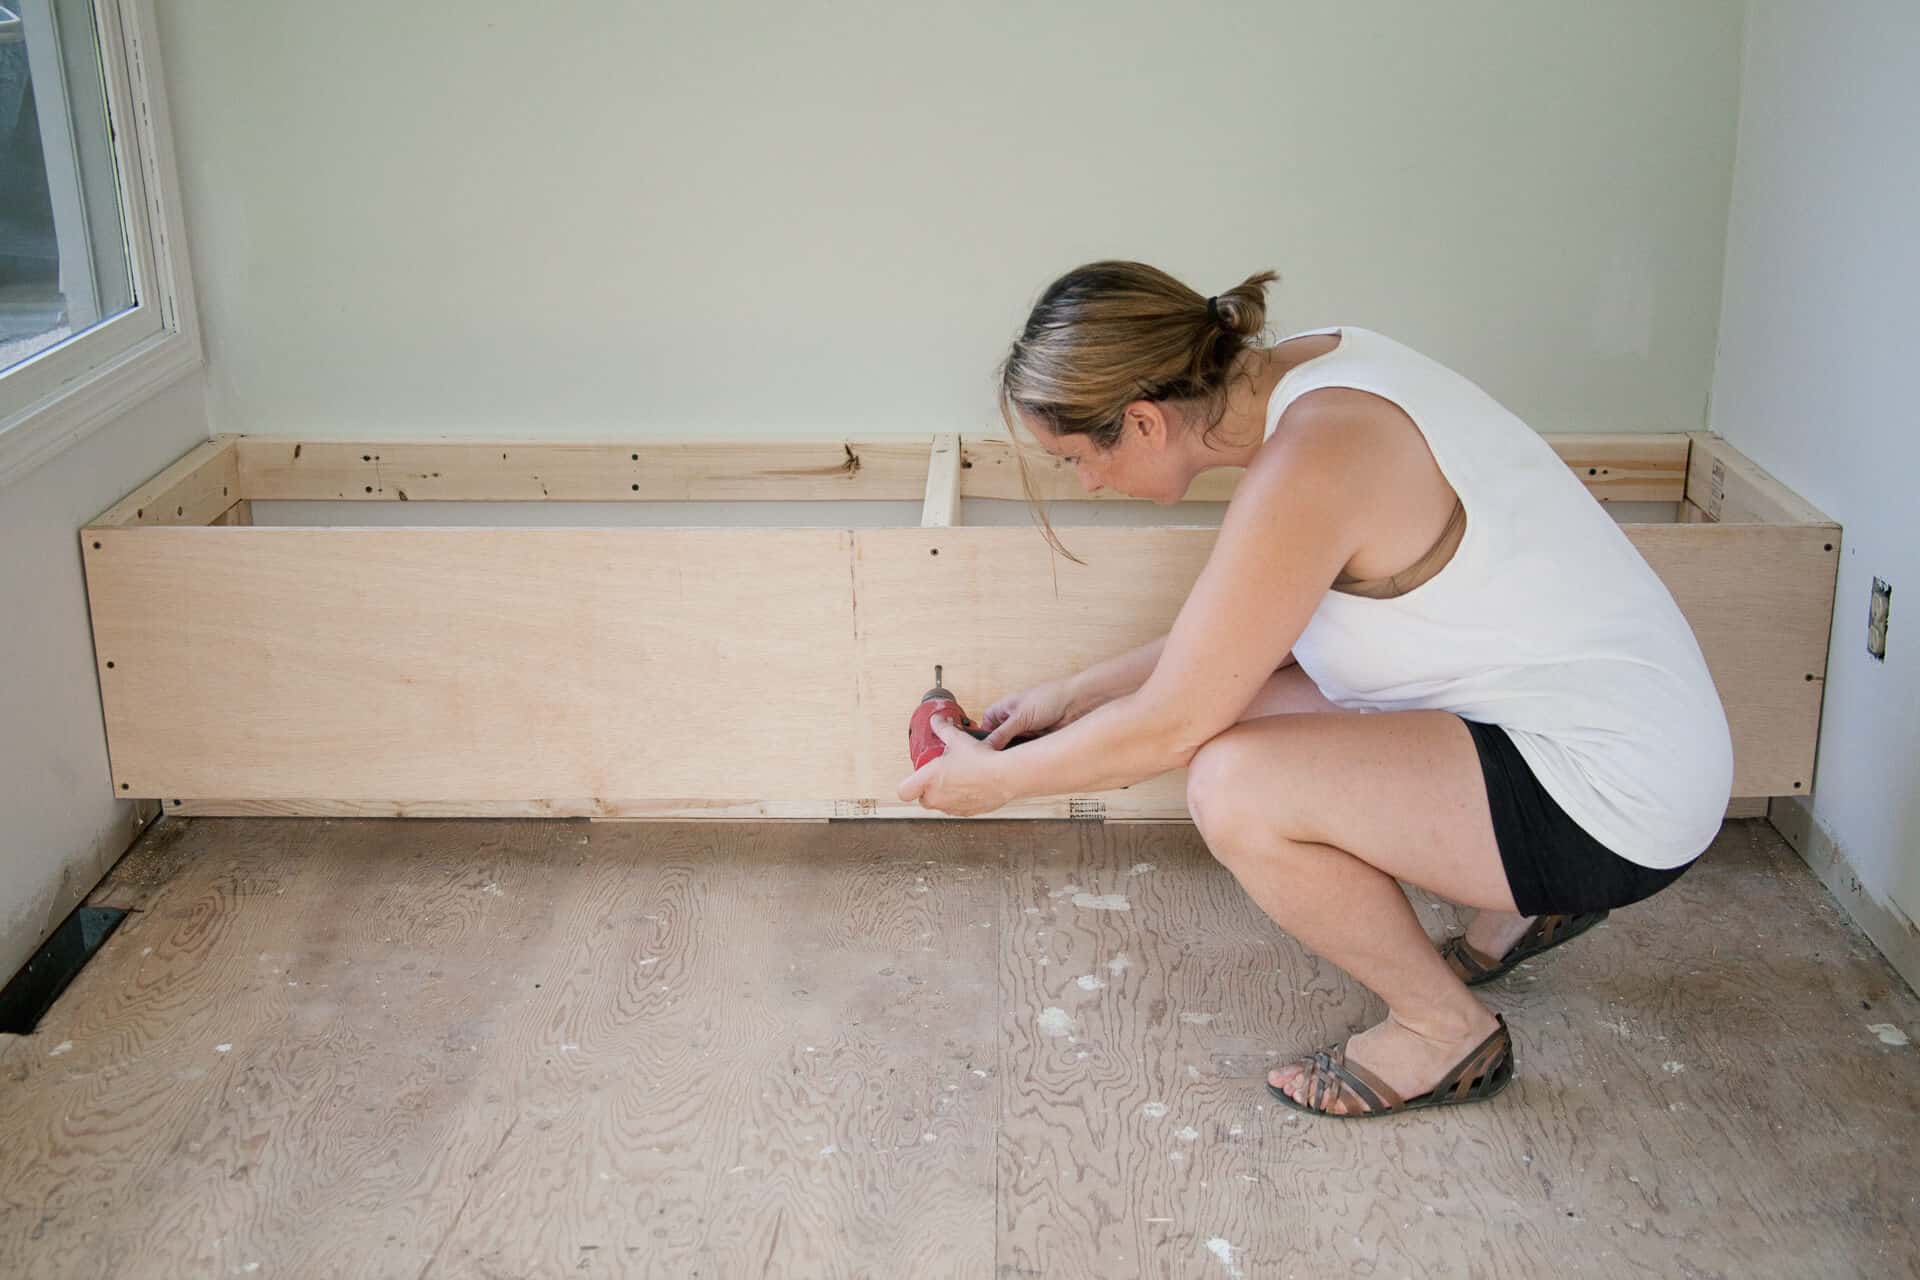 Step Five: Attach a plywood front to the braces with wood screws, as shown above. I recommend countersinking your screws so they don’t stick up and interfere with the upholstered panels you will attach later.
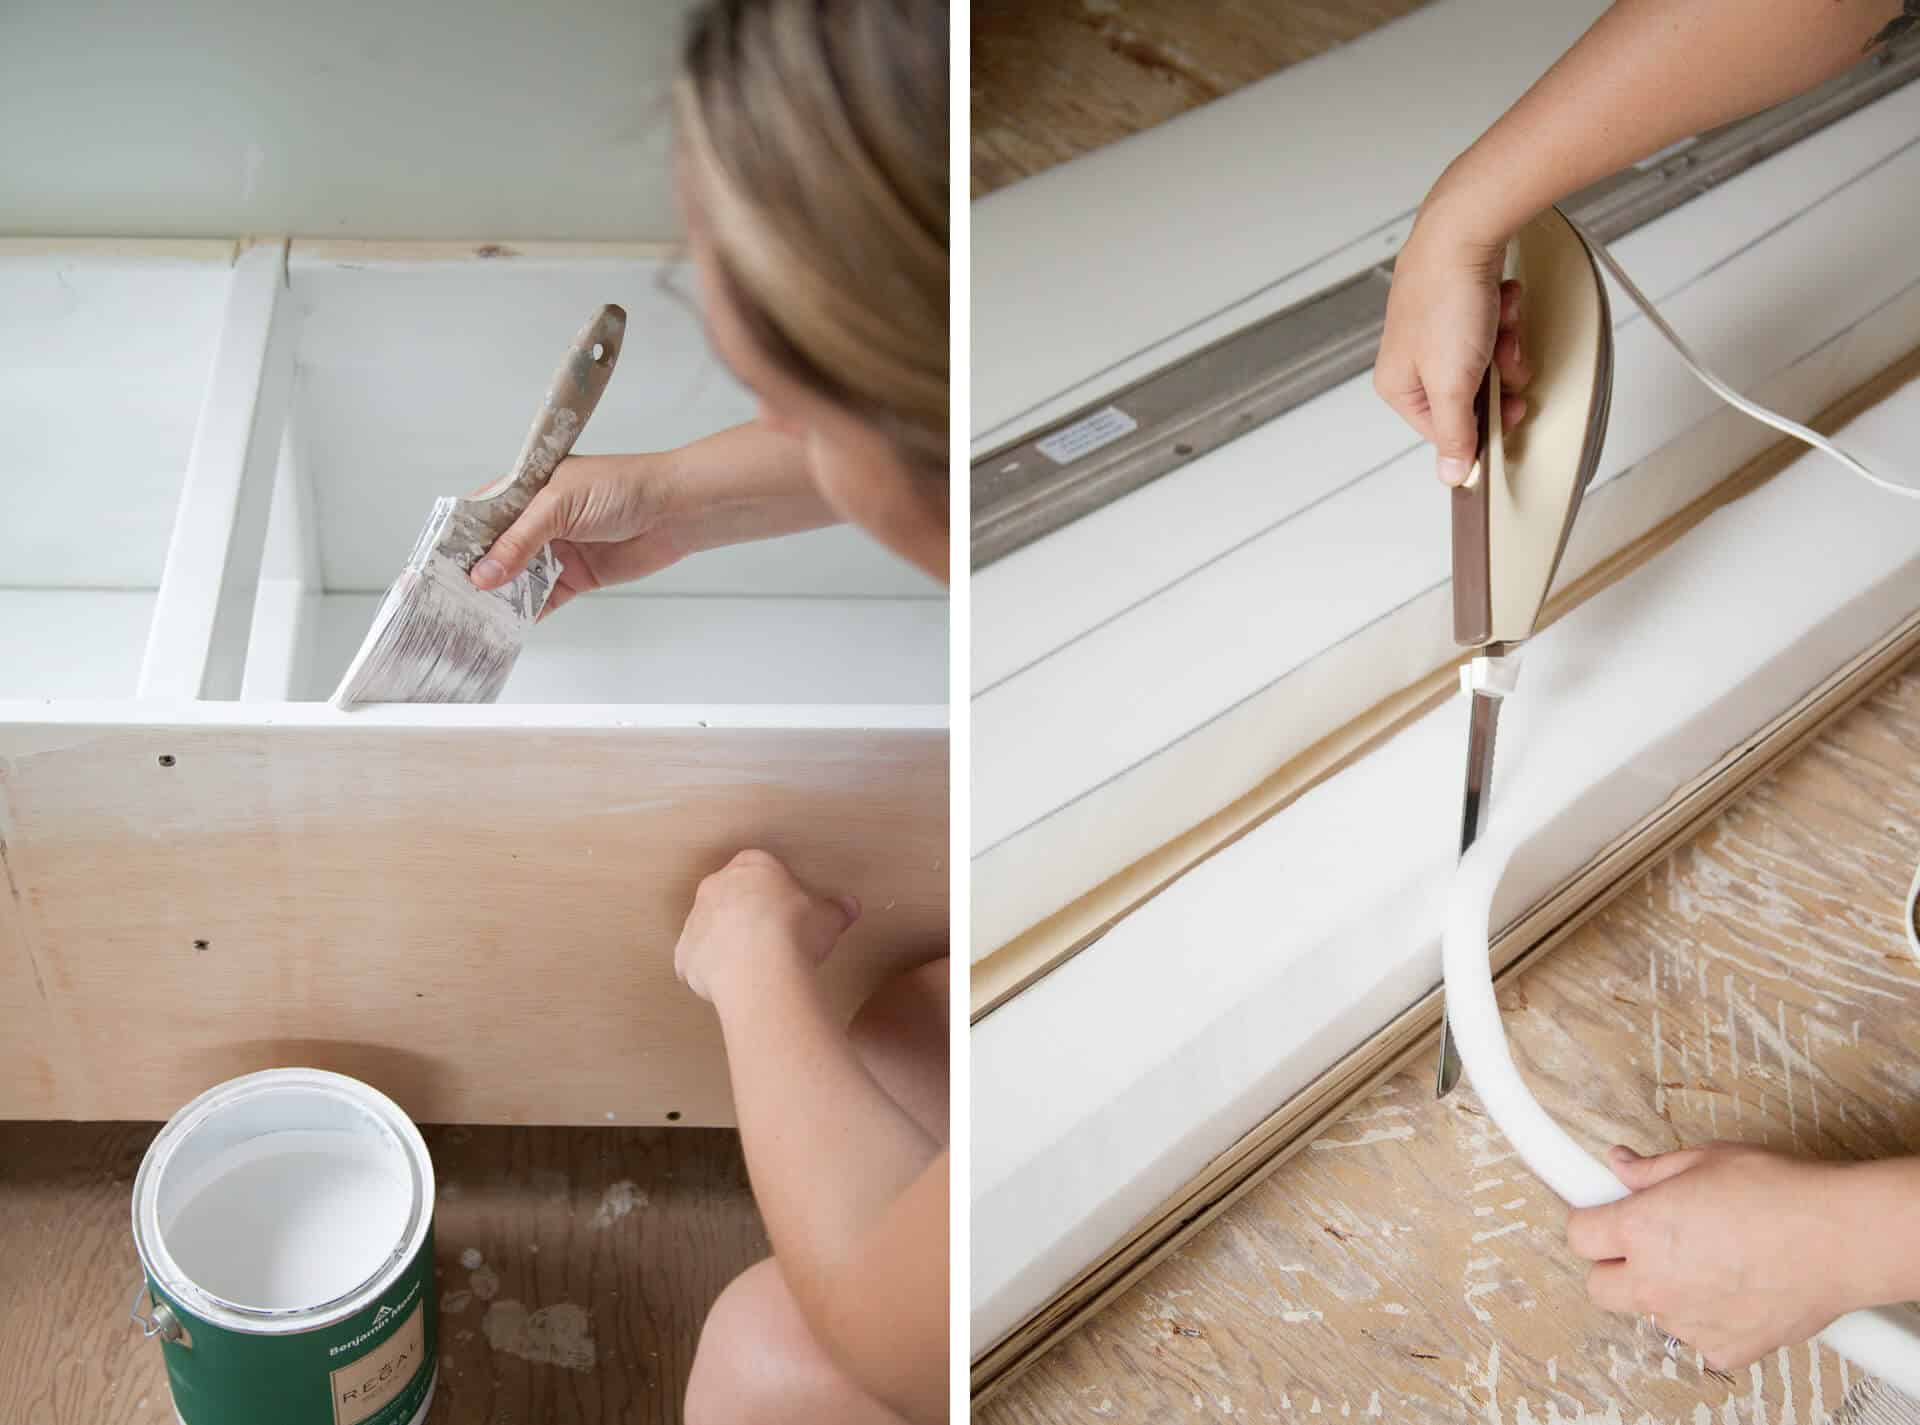 Step Six: Prime and paint the inside of the cabinet. I did two coats of primer, than sanded it with 400 grit sandpaper before doing one last coat of primer. Then I painted with Benjamin Moore’s Regal Select semi-gloss paint in Super White, the same color as my walls.
Now it’s time for upholstery!
You will need to have plywood cut into strips for each channel of your wall and bench. My pieces were 7′ long, so I bought two pieces of 1/2″ plywood (which comes in 8′ long pieces) and cut them into 5″ wide strips.
Because upholstery foam is expensive, I didn’t buy long bolster foam for each plywood strip, as Brady Tolbert did in the tutorial I linked to above. Instead, I bought 2″ thick foam slabs from JOANN and cut them into 4″ wide strips and beveled the edges so I could achieve the rounded look of dramatically plush channel tufting.
To cut your foam, you will need an electric kitchen knife, which I was able to borrow from my mom. I drew the lines with a long straight edge and permanent marker, then cut out the strips and bevelled the edges, as shown above.
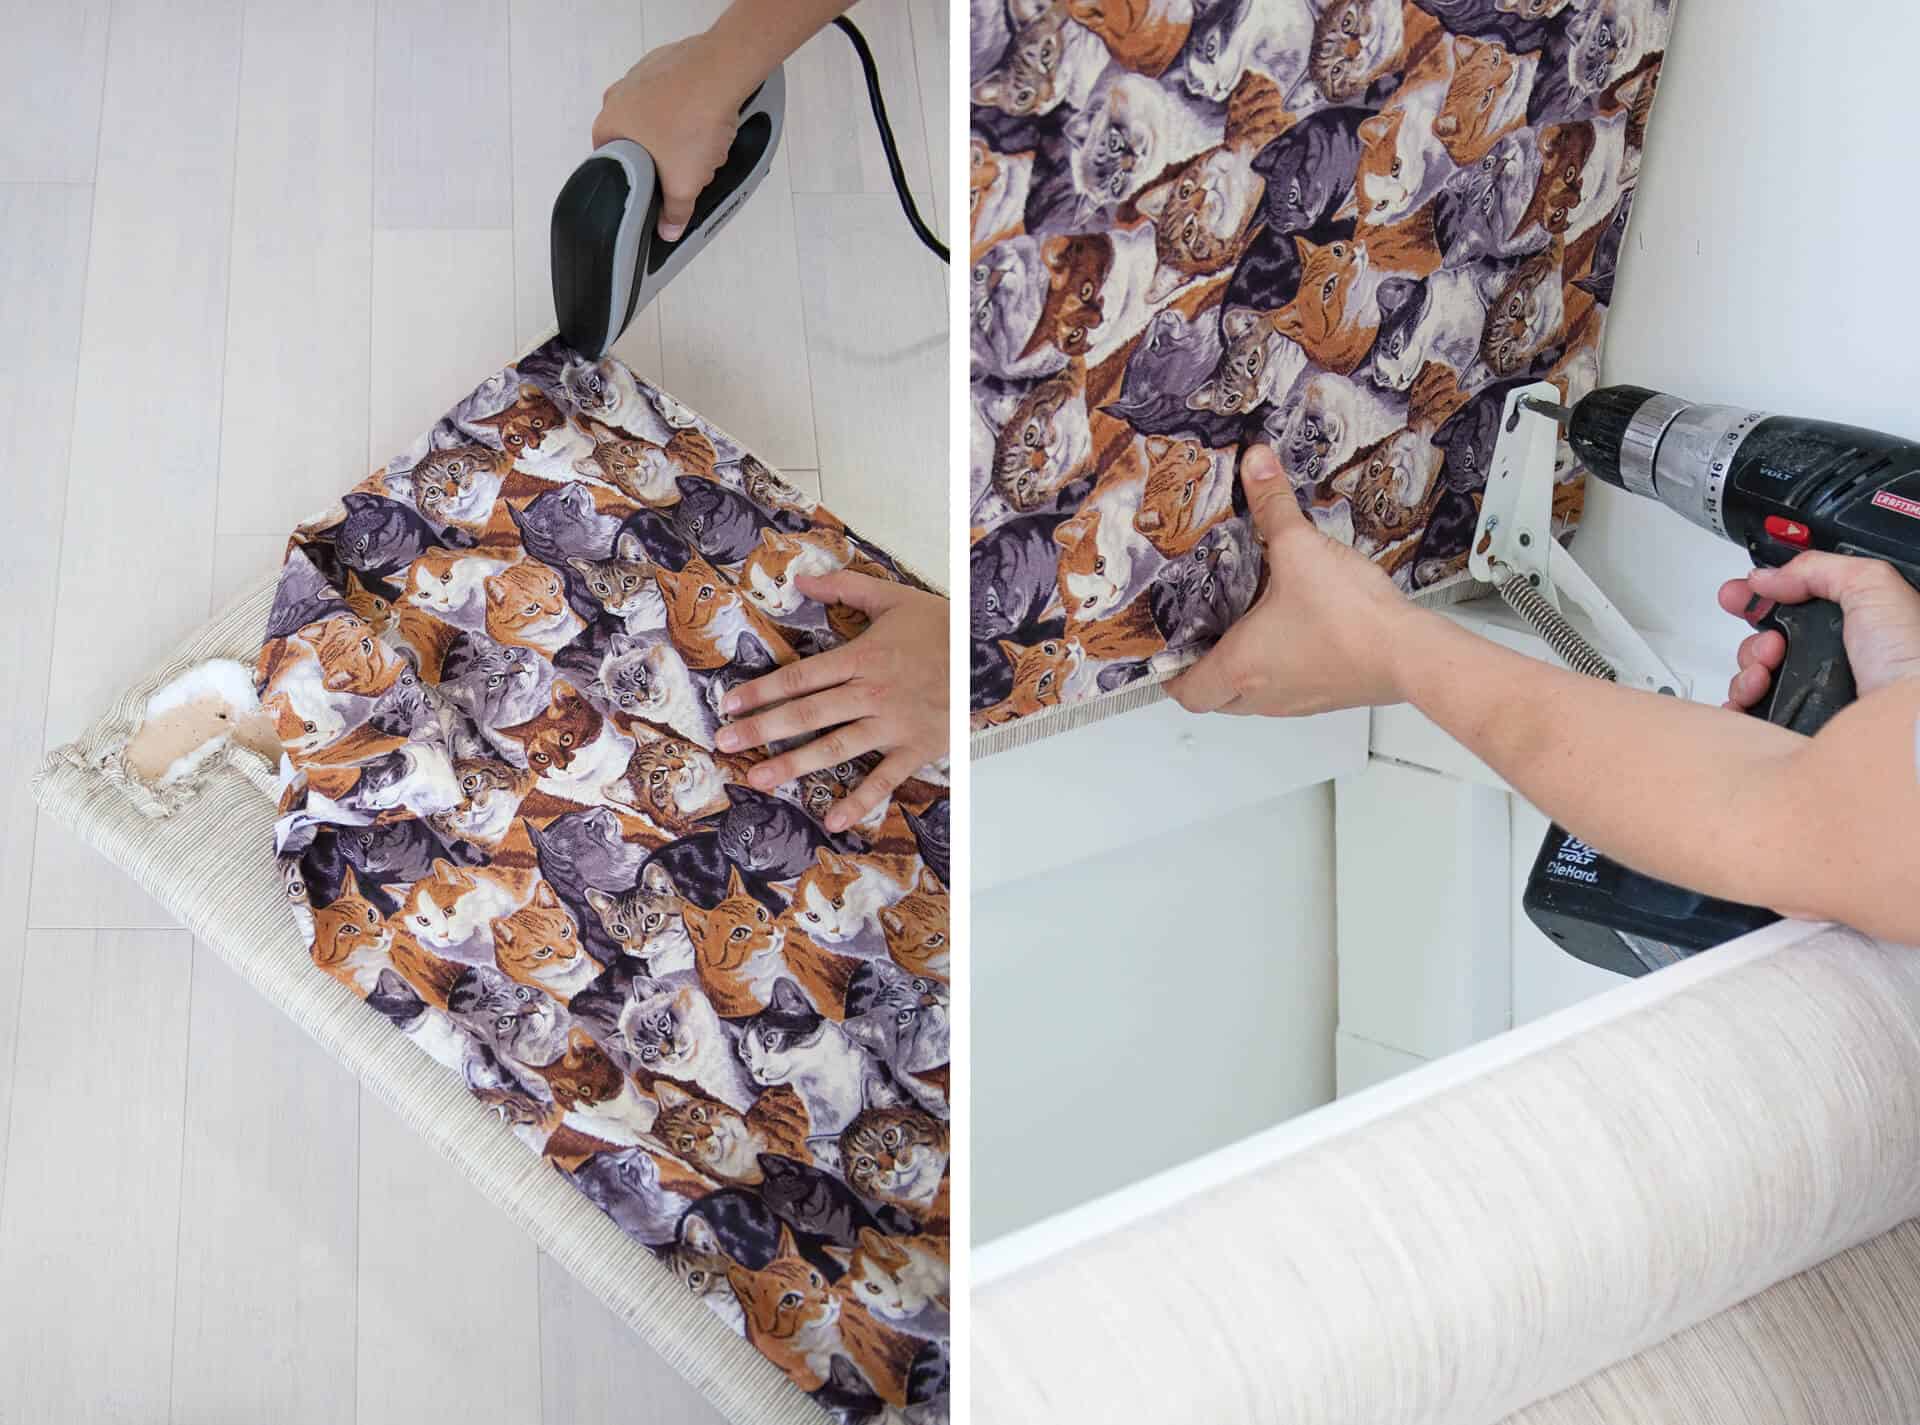
 Step Seven: Upholster each plywood panel. I cut out strips of my fabric and also two layers of batting, laid my foam over the top of them, then placed my plywood on top of the foam.
I tightly stapled the fabric and batting to the back of the plywood using an electric staple gun. Do not try this project with a manual staple gun, or you will need a hand transplant after completing only two panels. Trust me on that one.
The trickiest part of this project is keeping even tension across the length of your fabric as you staple the fabric in place. It can look lumpy very easily if you’re not consistent.
You can see the panels I used on the front of my bench are lumpier than the pieces on my wall, because they were the first ones I completed, and I was still getting the hang of things.
Step Eight: Attach three panels to the front of your bench as shown above. I drilled pilot holes in the cabinet front first, then used simple wood screws from the inside of the cabinet to secure the panels.
 Now that your bench is completed, it’s time to cut plywood for the top!
Step Nine: I cut a 3″ wide spacer for the back of the bench (the lid needs somewhere to go when you open it), and then the bench lid extends 2″ beyond the bench front.
Notice I left some space on either side of my bench lid so the lid could clear the trim of my window as well as not scrape the wall as it opens.
 Step Ten: Upholster the spacer the same way you did the panels, and screw it into place from the inside of the bench. Then upholster your bench lid, but don’t forget to finish the underside with a fun fabric!
I simply folded under the edges of the fabric as I went along, stapling on top of the material. I chose a busy fabric to disguise the staples, and also for a fun surprise when you open the bench. Be sure to leave space without fabric or batting to screw in the hinges you have chosen.
Step Eleven: Attach the bench lid. I chose this white swing-up hinge which holds the lid up once it’s lifted. I attached it to the side braces of the bench first, then measured and drilled pilot holes in the bench lid where the top of the hinge would attach to it. I love these hinges—they were easy to install and work like a charm!
 Step Twelve: Lay out all of your panels in a row and connect them with metal straps*. Be sure your straps are attached where the studs in the wall will be when you hang the panels.
I recommend doing this in sections if you are paneling a whole wall, because it was impossible to get the whole piece up and in place, and I was just silly enough to try!
*You can find these metal straps in the lumber and building area of hardware stores like Lowes or Home Depot.
Leave a panel off the top of each section so you have somewhere to attach the straps to the wall. In those spaces where the panels are missing, glob a generous amount of a quick-setting construction adhesive to glue the panels to the wall.
 This project was certainly fulfilling, and I love, love, love the end result. Halfway through, I certainly asked myself what kind of a crazy person I was to embark on such a project. But it was worth the bruised knees and calloused fingers from all of the time it took to upholster each of the channels.
I saved some fabric to reupholster the bench lid if something happens to the fabric down the road, but in the meantime, I’m going to spray it with Scotch Guard to protect it from any stains.
I would say from my kids, but let’s be honest, I’m usually the one who gets a little rowdy after my second glass of red wine, especially when playing card games!
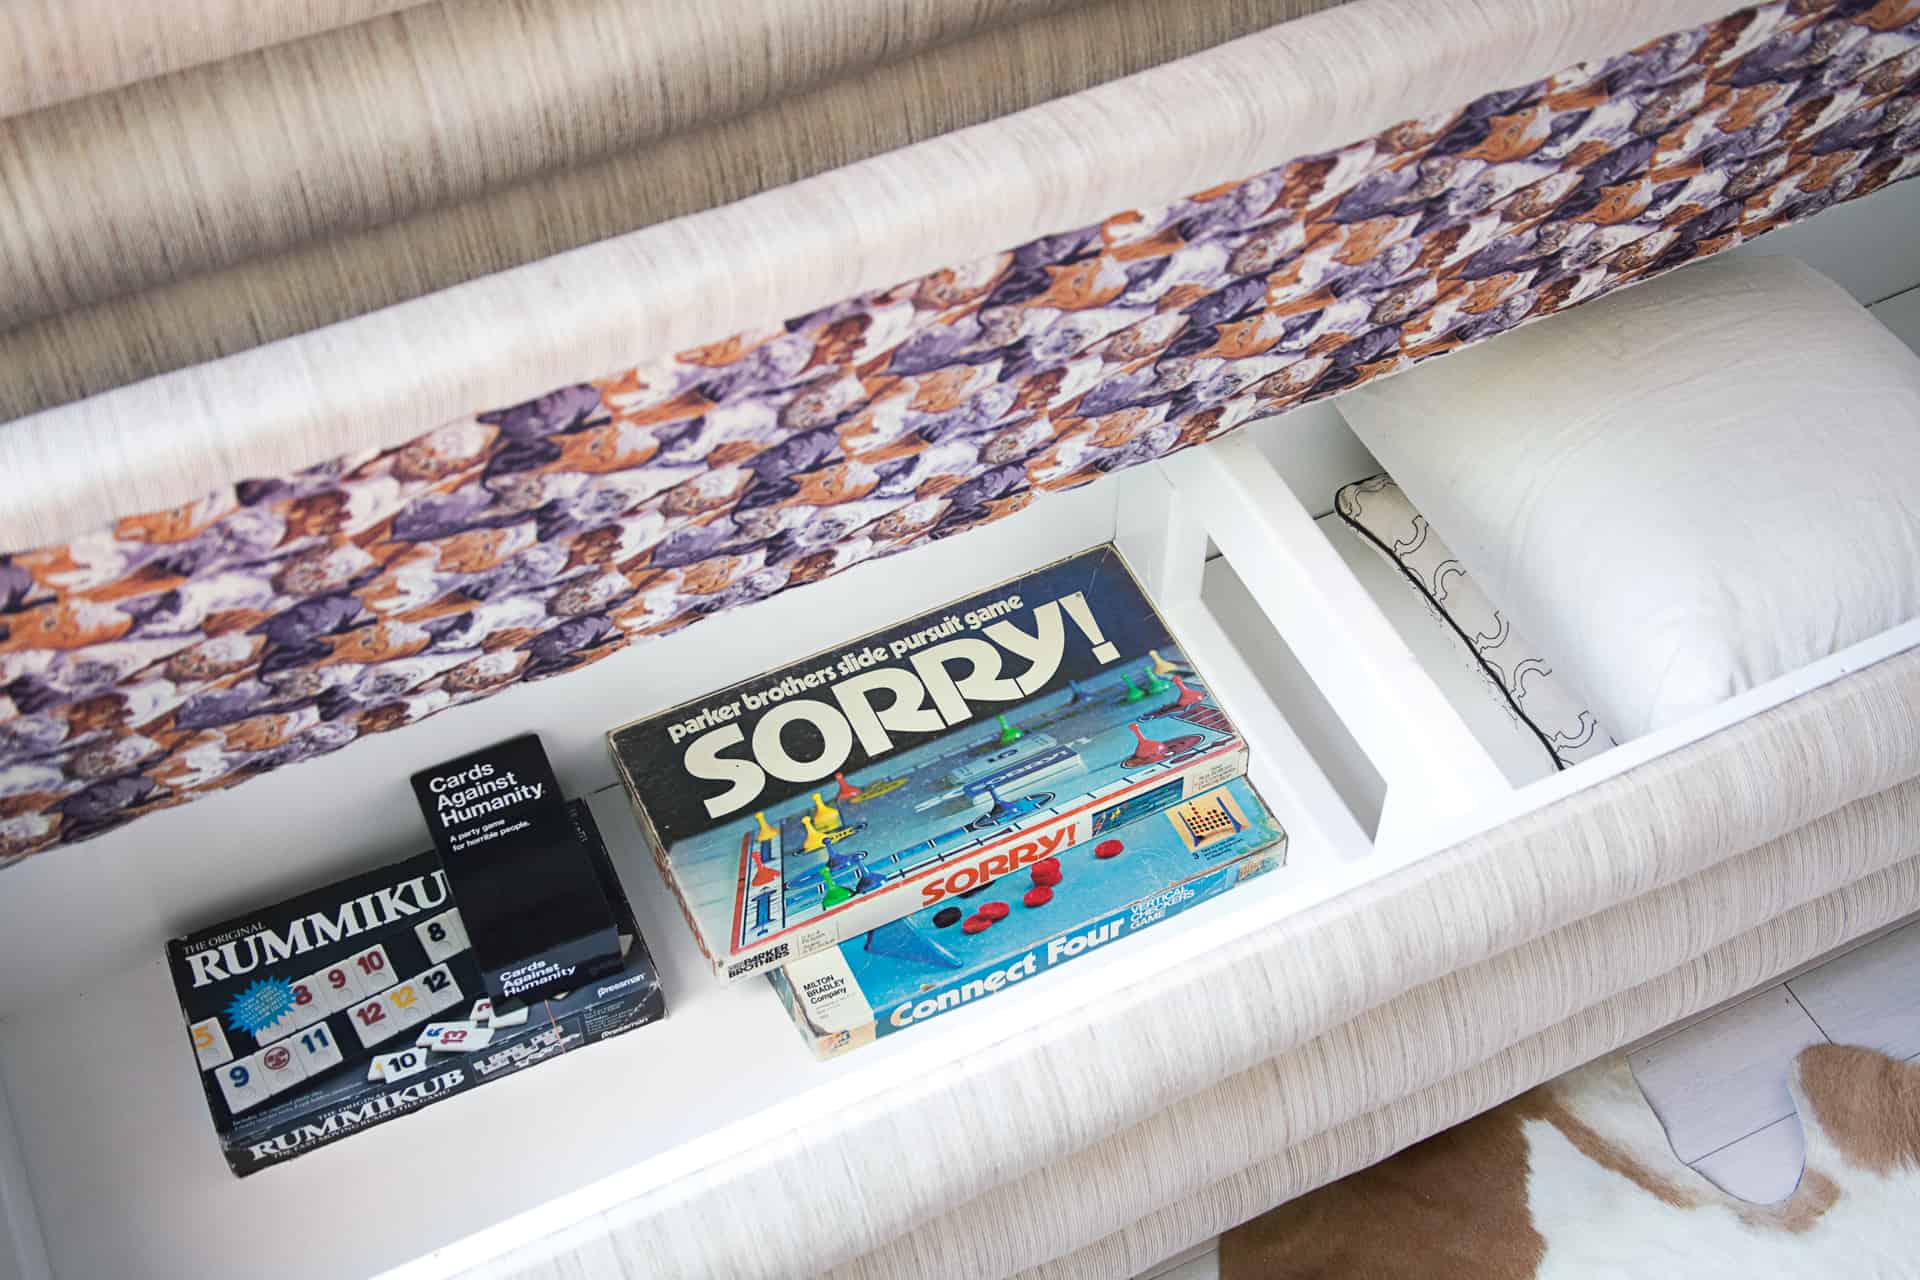
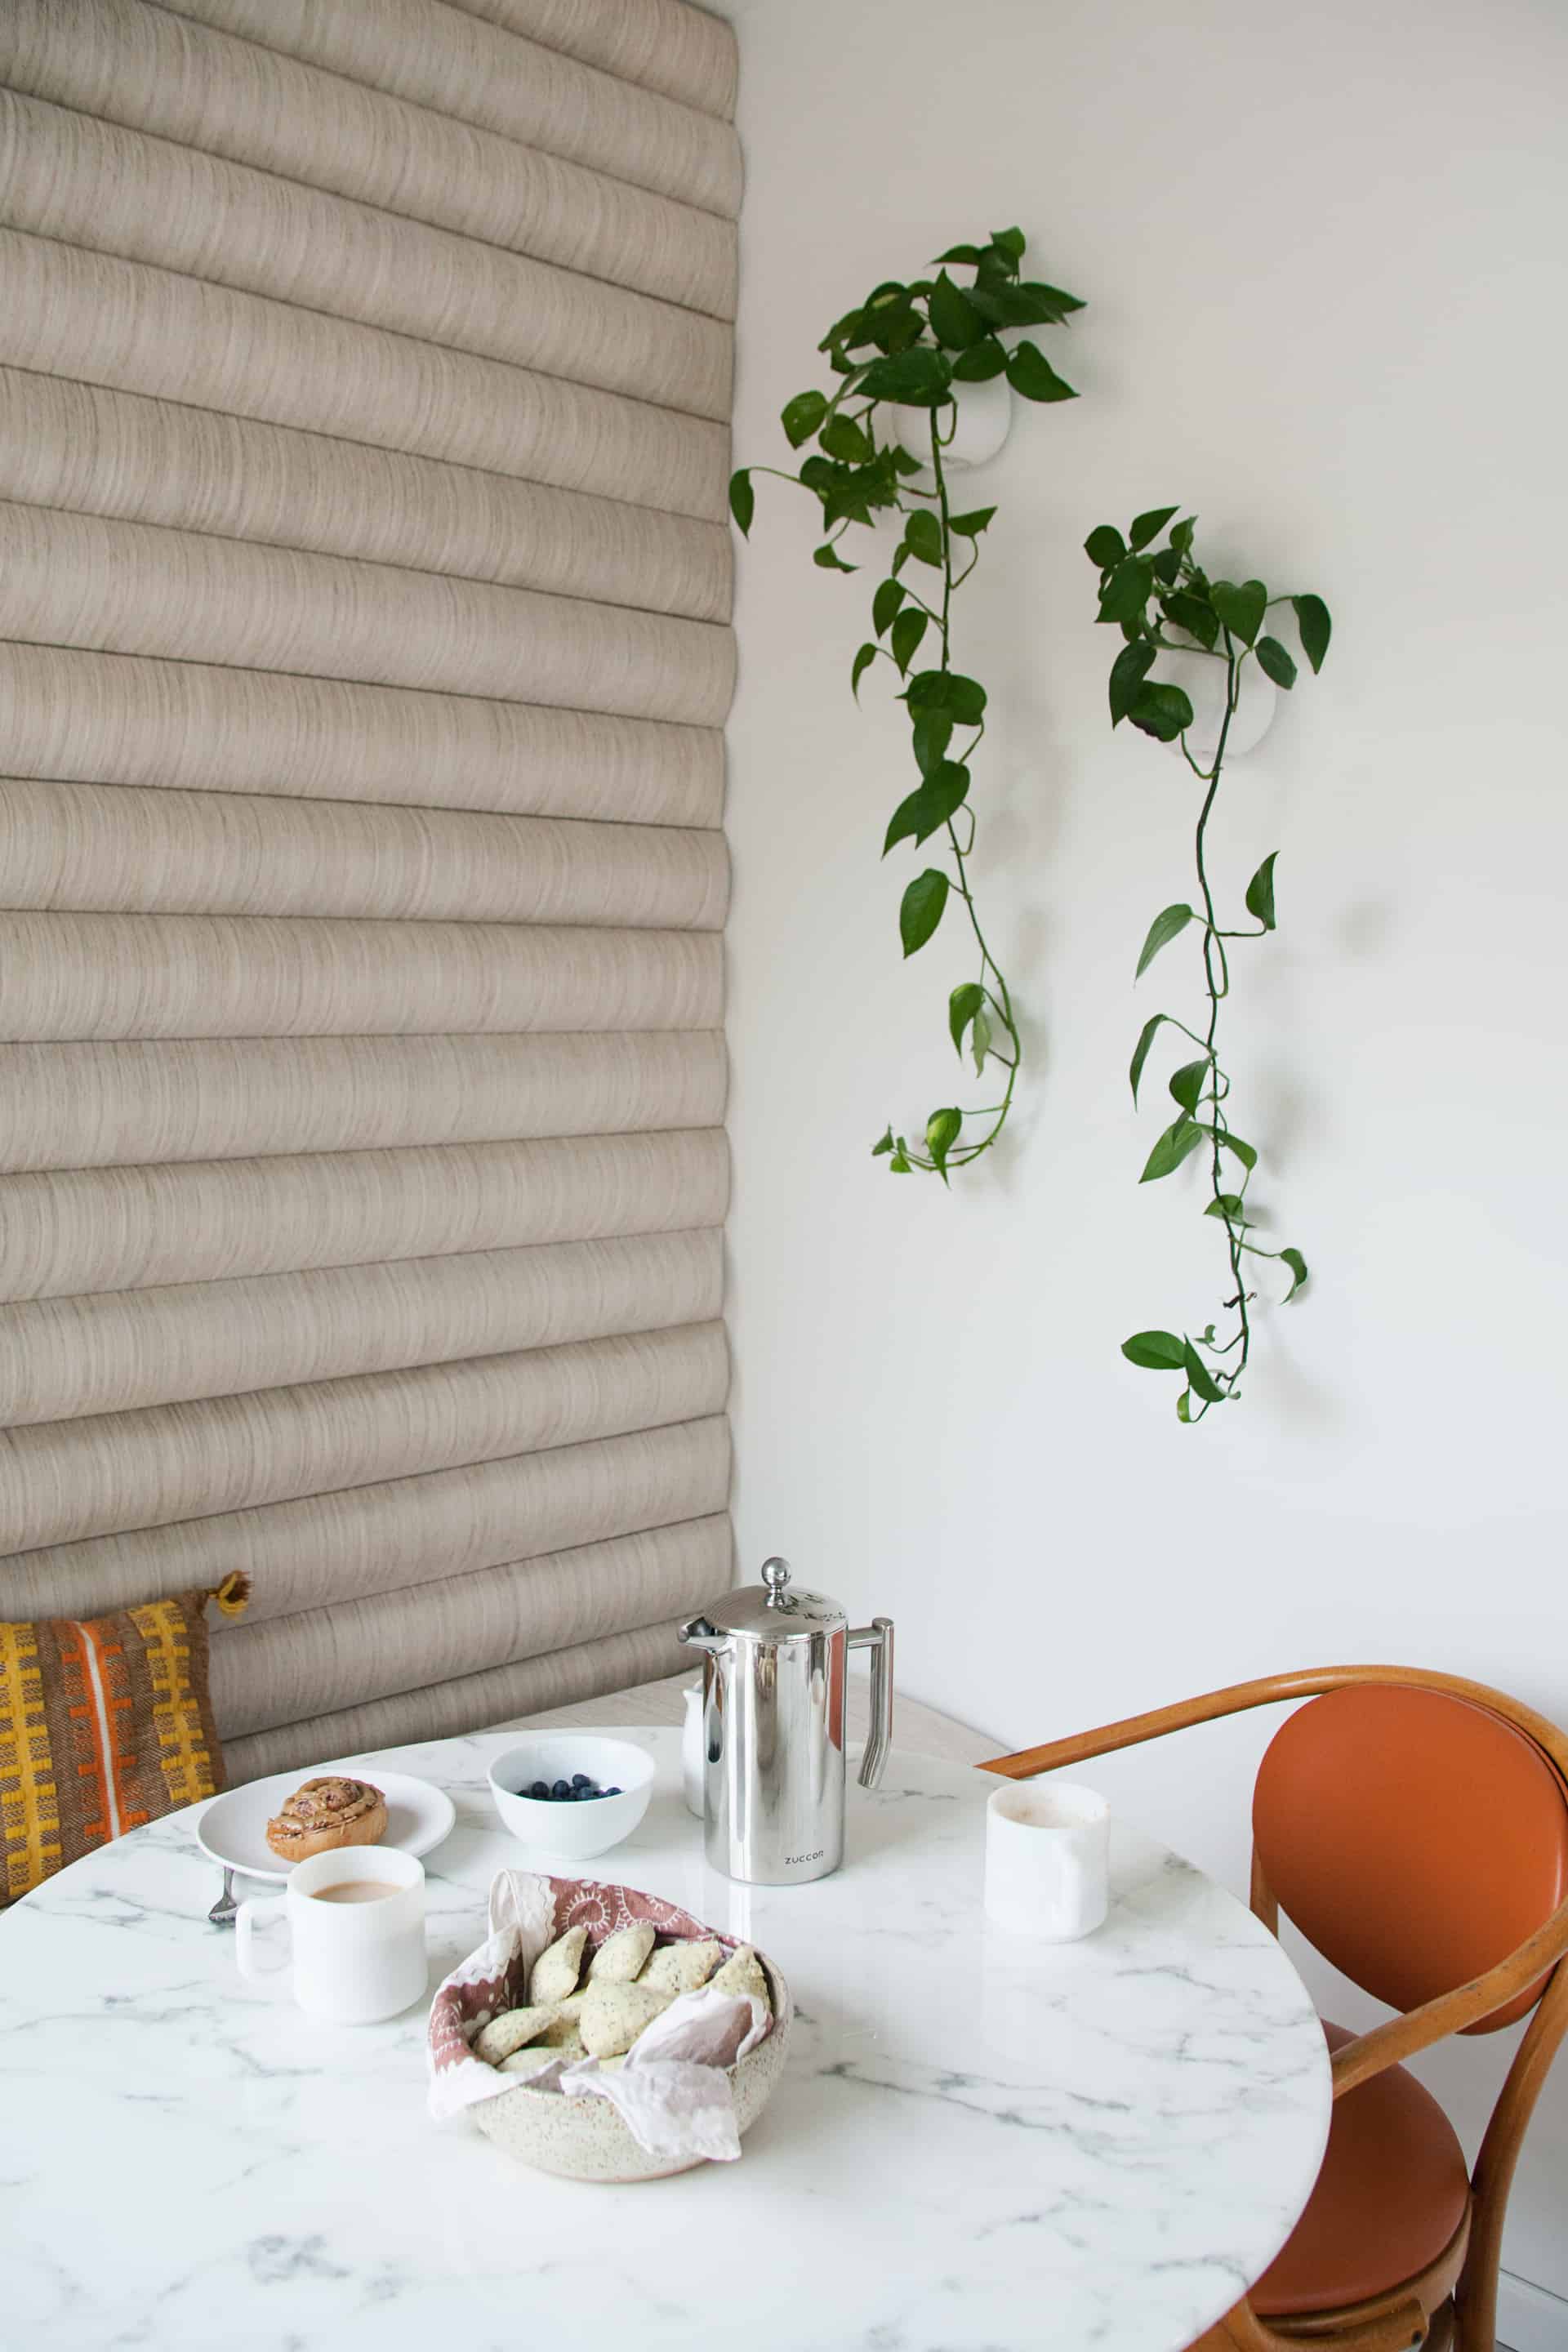 We’ve been eating our meals in here until our kitchen/dining reno is complete, but eventually this space will see less food and more party games.
 I can’t wait to share more of the projects we’re working on in our new home! This banquette is a dream come true for me, and well worth all of the effort.
If you’re not up for such a big project like this, I encourage you to still try to build the storage bench, which was shockingly easy, and maybe add upholstery to the front and top of the bench, if the idea of upholstering an entire wall is a bit too intimidating.
But if you do decide to upholster your wall, please be braver than me and do it in pink velvet! And then send us pics! – Mandi
This is stunning how did you go about calculating the right amount of fabric. I would like to do a banquette with this on, not sure how to do that?
Many thanks Tanya
Hi Mandi,
Just wanted to say that I really love this. It’s so cool that you DIY’d it, from design to r&d to construction. This and the mirrored side tables- our apartment will be ready for us to renovate in a couple of months and I’m so excited to try these two DIYs! Totally fan-girl right now and had to comment just how much I love your work. Even the dollhouse stuff. Definitely also going to try the foldaway dollhouse diy for our little girl. Keep on inspiring, Wonder Woman!! Xx
what do you think of your lexmod table?
how is it holding up compared to saarinen?
Great job on the tufted storage banquet! It is GORGEOUS. I have that exact dining table but in oval and I just love it!
Hi, we just bought a house (our first!) and take possession in March. In the basement, there are existing large, L shaped banquette seats with storage already installed, with sweet but gaudily-fabricked (I don’t think that’s a word) cushions sitting on top that I was just going to recover and be done with it, since it is actually more comfy that expected….. but…. seeing this project and how awesome it is makes me wonder if I should up my game a little… because it’s L shaped and huge, I think the fabric and foam costs for this would be through the roof… do you think pool noodles cut in half lengthwise would work for this instead of the foam ? That’s the only cost cutting idea I can come up with….
omg that baby that sweet little haircut on that precious darling face!!
I love this project! It looks so polished and sleek that I’d venture it was professionally installed. Good for you rolling up your sleeves and making the space gorgeous.
this is BANANAS good!
Such a cozy nook…happy nesting!
That looks amazing!!! I also love your choice of flooring. Would you mind sharing what brand and color did you select? Is it hardwood? Thanks
Okay, I just saw this on EHD and WOW! I had to come over to comment on how amazing this is. Keeping this as inspiration for LIFE!
The fabric is stunning and the subtle pattern on it. I can really see how much effort you’ve put into this. But it’s worth it for sure
It looks beautiful. I love the texture of the upholstery fabric, it’s very chic!
The tulip table is fab too 🙂
http://www.thislifeisbelle.com
Just incredible!!!
Awesome..nice work \m/
Obsesssedd, Mandi. Ob. Sessed.
Wow! This is SO inspiring! I’ve done enough upholstery projects to know how much this was a labor of love (two lines of staples! down every channel!), and it really, really turned out. Congratulations!!
Just wow! So gorgeous, so impressed! Wow!
This is seriously the best DIY I’ve seen in ages. LOVE LOVE LOVE IT <3
INCREDIBLE really well conceived and executed