 When my husband and I purchased our small ranch home, we knew the bedroom closet wasn’t big enough for the both of us. So instead of having a showdown at high noon, or doing something even crazier like becoming a wardrobe minimalist, I decided to implement an open closet system onto one of the bedroom walls.
What really happened, though, was that we lived with a hodge-podge bedroom for three years, making us feel like we were actually sleeping in a messy closet each night. Not exactly relaxing at the end of the day.
This January I felt super motivated to start fresh on the opposite side of the room with a neater attempt at creating a nice looking closet system. We also finally changed up the light green walls that came with the house for a calmer color scheme to help make our bedroom a more enjoyable place to relax.
 Check out how I went about installing and organizing the closet system below!
 Step One: Decide where to place the closet system. I originally had mine on a wall with no windows, which didn’t end up working well for our room’s arrangement. The reason I had decided to place it there was because it gave me more space for my clothes.
But recently, I decided to downsize my wardrobe and move the closet system to the opposite wall, incorporating my husband’s dresser and space for the window into the arrangement.
 Step Two: Determine the height for your top shelf by deciding what’s important for your shelf spacing.
Option One: Do you have objects you plan to place on the top shelf? If so, use those to space the top shelf brackets from the ceiling. (Be sure to leave a little bit of breathing room!)
Or if you are planning to hang dresses, be sure your longer dresses don’t drag on the floor. If you have maxi dresses, I recommend making the lower row of clothes shorter than the top row, so long dresses can be hung on the top rod and hang down alongside the clothes on the bottom rod.
Option Two: If you don’t have any specific items you plan to place on the top shelf, then grab a hanger and see what your comfortable reach is. Mark your bracket screw holes where you are comfortable reaching, and move onto hanging the brackets.
 Step Three: Align your bracket marks with the studs in your wall. Your wall studs will be approximately 16″ from the corner of the wall, or evenly spaced 16″ apart from each other.
Use a stud finder to be sure you’re drilling into a stud. You must fasten the shelf brackets into a stud or their will not be stable. The last thing you want is for your entire closet system to come tumbling down in the middle of a peaceful night’s sleep!
Tip: Use a level to make sure each bracket’s drill holes are spaced perfectly level with each other.
Step Four: Drill into the marks you made with pilot holes a bit smaller than the size of your screws. (Don’t worry, I was only posing for the above photo after I had drilled the holes.
Baby wanted held, so baby was held for the posing of this picture! No drywall dust fell on this angel face, but this is a pretty realistic look into how I manage to get a lot of things done with a baby!) Step Five: Screw the brackets into place, making sure to only tighten the screws once you’ve made sure the brackets are level with each other. (You can do this by placing a shelf with a level on top of them.)
Step Six: Trim the rods to fit your allotted space using a pipe cutter. I used aluminum conduits for my rods because they were less expensive than the chrome ones at the store.
Twist the (black) end of a pipe cutter as you circle it around the circumference of the pipe, making the blade go deeper into the pipe with each round until the pipe is cut.
At this time, you can cut your shelf boards to the same size as your pipes, or note their lengths to have them cut at the hardware store where you plan to purchase the shelving material. My shelves are standard laminate coated particle board, which is inexpensive and perfectly suited for closet shelving.
 Step Seven: I used iron-on banding to finish off the cut edges of my shelves. Super simple, and no trimming needed, since the banding came in the same width as my laminate shelves.
Repeat this entire process with as many closet sections as you need or have the wall space to accommodate. I did one section on either side of my window. Hey—the racks of clothes are like added insulation, right?
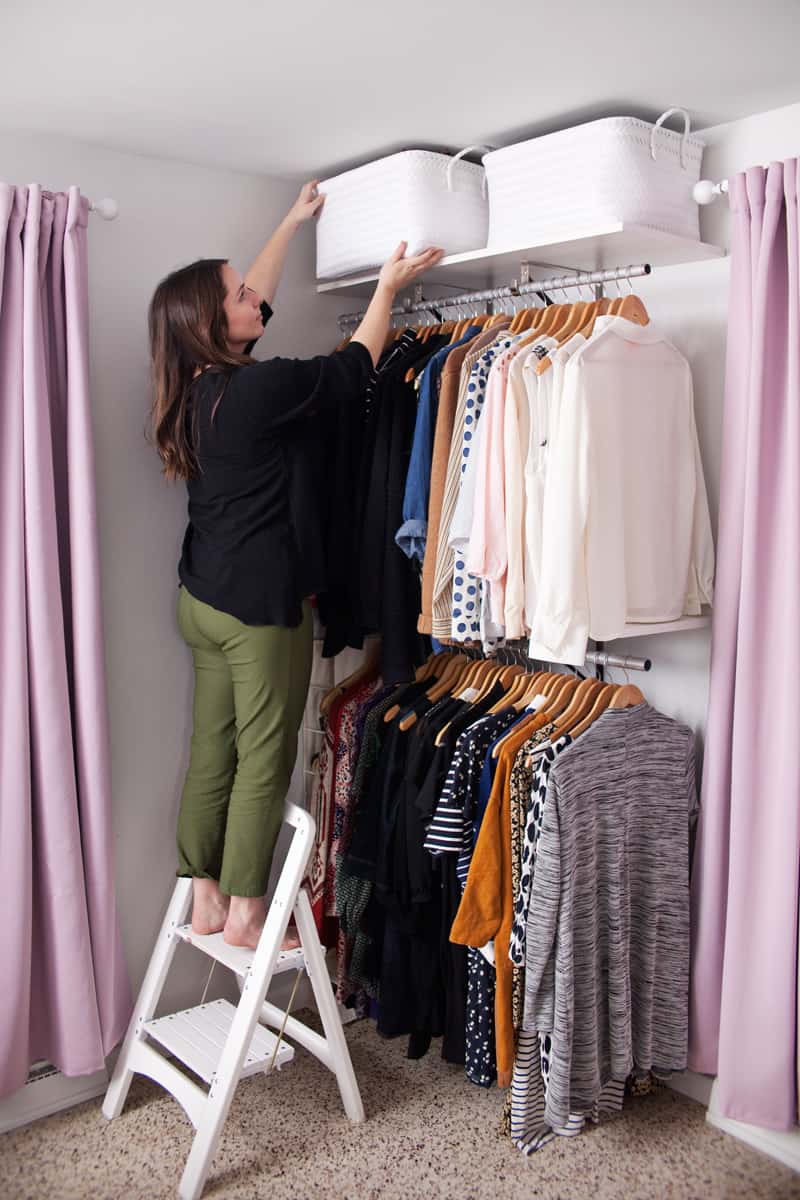
 Step Eight: Fill the rods and shelves with your clothes and storage accessories. I used white baskets to store items that aren’t hung, such as purses, scarves, and other less frequently used items up top, and gym clothes and knits down lower for easy access.
It’s important for me that this system looks nice, so I used the same style of basket for a neat, organized appearance.
 Here you can see a bit how small our bedroom is, with the bed in the photo. The doorway off to the right is my husband, Phil’s, closet. I’ll share more about what space-saving ideas I used on the opposite wall in a later post. But taking advantage of the entire window wall for a closet system has been such a sanity saver!
 Creating this open closet system was also a great opportunity to reevaluate which items in my wardrobe needed to go and which of my favorites could stay.
Now the trick is to not be so tempted by the clearance rack in stores so my bedroom doesn’t become overwhelmed with more clothes than I need. I’ve noticed the items I rarely wear will eventually acquire dust, which is a great indication that they probably should be ousted from the gang.
So what do you think? Would you ever install an open closet system in your bedroom? –Mandi
Looking for more closet content? Check out …

Great ideas! Also, if you brought the curtain rod down a bit, you could have the shelf go all the way across the top.
Hi. I would like to ask where did you buy that type of bracket. Thanks.
Wow this is an amazing concept, i just loved the idea. surely doing to try it as i have a small closet at home,thanks for it.
Weird question: Is your bed a full size? It looks a bit smaller than a queen. Also, do you find it to be comfortable with the two of you? My husband and I are thinking of downsizing! Love the open closet, too!
Yeah! Even I was also looking for wardrobe minimalist ideas for my not so big bedroom. I think its just simple and outstanding way to create an open wardrobe. Keeping above the baskets is quite a unique idea. I would love to try this out!
A Idol DIY projects with mom and baby,
Smart and attractive usage of space. Sharing!!!
What’s the 411?
Afro-Centric Times
Reflective Style
It’s so funny! I’ve got some holes I need to drill today and I was just trying to figure out how and when to do it: usually I do these kinds of projects while my toddler is napping… but I don’t want to wake him with the drill noise… but if I do it while he’s awake he’ll probably get himself into some sort of mischief while I’m in the middle of it… and then I’ll have to keep stopping and starting… life with a 1-year-old is complicated!
That’s awesome
Xoxo
http://fashionbackyard.blogspot.co.uk
Very nice, I have way too much stuff for this.
I LOVE all the open closet systems so much, and yours, Mandi, is a top 🙂 But in a practical way I would be kind of worried about the dust because there is no chance to wear & wash all my clothes in a period of week or two… How do you deal with this?
Just wondering what made you decide against a freestanding wardrobe?
This looks astonishingly great, I like it that you can see your clothes and can easily decide what would fit together!
https://www.makeandmess.com/
This looks great! http://www.hannamarielei.com
Love it! And good job working on the project while also being a momma!
Such an awesome post!
xo
www.dylanasuarez.com
I love this!!! All these posts are so creative and fun 🙂 Thank you so much!
Lucy xoxo
http://lucyannblog.blogspot.co.uk
This looks amazing and it is such a great idea. So many houses I’ve lived in have had tiny closets and I wish this post had been around back then so I could have used your solution. You did such a nice job of incorporating everything so that it looks neat and tidy, well-designed and still purposeful.
The first time I did this was in our old apartment that we had before this ranch. And then I actually have had this system, though a different arrangement, since we moved in here. It has worked for me over time, as long as nothing is in front of it (like an unpacked suitcase!) blocking me from easily reaching the racks. Then clothes end up draped on a bench or something. When I moved this arrangement to the other side of the room before writing this post, I literally had three blouses that were absolutely covered in dust, so I just donated them. I like being able to see exactly what I have, what I shouldn’t hold on to any more, and what I have available to wear each day. 🙂 -Mandi
haha! Yeah, I guess you have to know yourself and your needs. This wasn’t an ideal situation for me, but it’s the only thing I could do with the space I have. If I had trouble keeping this tidy (which it isn’t an issue for me), a curtain in front could be an option. 🙂 -Mandi