 Subway tile is one of the most classic, beautiful tiles out there. We love how there are a ton of amazing options to choose from. You can choose from a variety of tile and grout colors and the possibilities for patterns are endless! I’m a renter and unfortunately, I’m not able to add a tile backsplash at our current rental home. However, I have been given the “go-ahead” to paint, so I’ve really had to get creative with paint to update the home and incorporate my own style into this otherwise cookie cutter home. I decided that painting a faux backsplash was the best way to get this look in a rental and on a budget. This entire project costs less than ten dollars and looks like a million bucks!
 Supplies:
-carpenter’s square
-pencil with eraser
-ruler (clear works best!)
–(2-3) black paint pens
-subway tile or 3×6″ cardboard template
-touch-up paint
 Step One: Start at the top corner of the wall and place your carpenter’s square in a “V” position. This will allow you to create the perfect angle for your herringbone pattern. Using a piece of subway tile or cardboard template, begin tracing the outside of the template with a pencil to create the rectangle shape. Repeat, moving down vertically until you reach the bottom of your wall.
 Step Two: Start your next column of rectangles, this time going the other direction to create the “V” shape.
 Step Three: Alternate directions with each column creating the herringbone pattern. Erase mistakes as you go. The pattern can get a bit confusing, so just make sure you work in columns and alternate directions as you go. This will keep the pattern going the right way.
 Step Four: Once you have your entire wall covered in the penciled pattern, begin going over the lines with your paint pen. Use a ruler as you go to ensure straight lines, especially on textured walls. Keep touch-up paint handy for mistakes or drips. Repeat until your whole wall is complete.

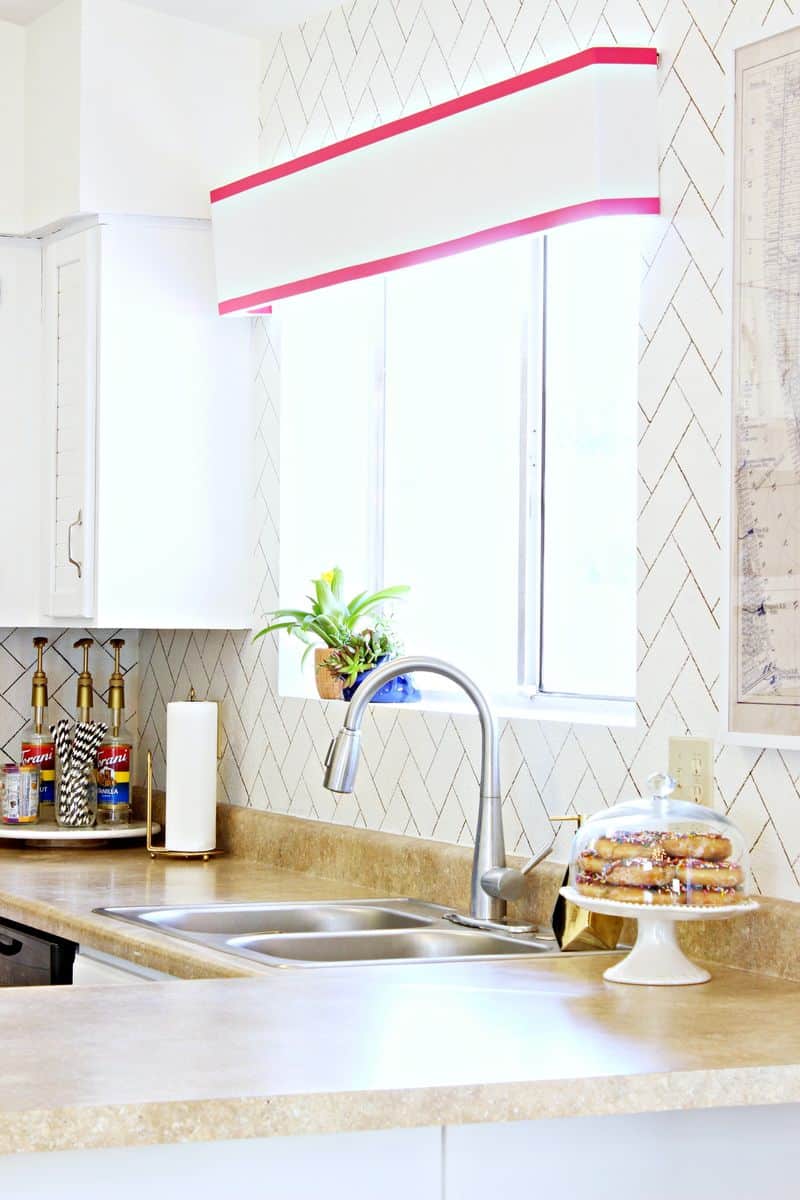
 I’m super excited with how it turned out and we were able to complete this project in one afternoon. I love how the black paint looks like dark grout and taking the pattern all the way to the ceiling adds to the drama of it all.

 It would be really cool in a gold metallic too! It would be awesome behind a headboard, down a hallway or wherever! This was the last of many projects in my kitchen makeover, and I’m beyond excited that my kitchen is finally done! What do you think? –Mallory & Savannah
Credits // Author and Photography: Mallory Nikolaus and Savannah Kokaliares. Photos edited with Celeste from The Fresh Collection.
I love this and gonna do this to my kitchen.
Where’s the big round flushmount from?
I could not believe that it was actually traced on! At a glance it looks like the real thing!
Hi!
I love how this looks!!do you have any other finished pictures or tutorials anywhere else that you share for this project?
Thanks,
Jodi
I love it but don’t understand the directions
I just did this yesterday during the blizzard! Thank you for sharing! Yours looks amazing, I love that you did the whole wall!
What a fun idea! I might need to try this in my powder room.
I love the idea. I wonder if there a narrow washi tape that could be used to create the faux grout lines. It might be easier to remove for renters.
That looks great!
love and totally want to do this!
GORGEOUS!!! And TOTALLY copying!!!
Hey Andrea, try searching online for tile decals. You can cover those flowers easily!
You’re 100% right – this really would be amazing in gold metallic.
Very interesting concept!
Cool idea, thanx for sharing
This looks great and I love how little this update cost.
Dat rug, tho. I am in love! Please, please, please share details.
This looks totally awesome – I would love to see it in gold… or with certain rectangles picked out in a bright colour.
Hannah x
Http://crafternooncabaretclub.com/blog
Kind of a tangent… But we’re starting a kitchen remodel and we’re looking at a really similar layout. Does it work for you to have your back to the bar/counter when you’re at the stove? Just curious if you’re willing to share!
I really like this! Now i am thinking where i can do it…(although not sure i could ever do such a perfect job) I have never seen those paint pens before, the possibilities are endless! Thank you for sharing. x
I’m not a renter. I’m a landlord. And I would fine my tenants for wall damage if they did this.
True story guys, pencil and marker DO NOT cover easily with house paint. It is visible, however slight, even through darker colours.
I’m a little flabbergasted that you would do this and advise other renters to follow suit. It’s not that it doesn’t looks good – it does. But it is damaging and this would be very costly for me to repair when I was looking for new tenants.
If you ever want to make a big change to a space that you don’t own, instead of finding strange work arounds, it might be worth it to talk to your landlord. I’ve paid for all supplies when my tenants want to make changes that I wouldn’t make on my own. But because it improves the space I’ve offered to pay for supplies / give them a rent reduction.
Thanks for the insight. I once did a Charlie Brown design in paint markers in my son’s room (owned the house), and it took primer and several coats of white paint to cover enough when we wanted to sell. Especially with black. Go with peel & stick.