 I’m so excited to share how we DIY planked our living room ceiling today. This one week project adding a TON of personality and made our living room feel much more expensive, polished and true to 1965 when it was built.
This project is surprisingly affordable (around $800!) and can be used to cover over popcorn or any ceiling that is not your taste or needs more detail. It’s the single BEST DIY we’ve done in this home so far!
But first, a walk down memory lane. Here’s how it looked when we purchased the home last December—
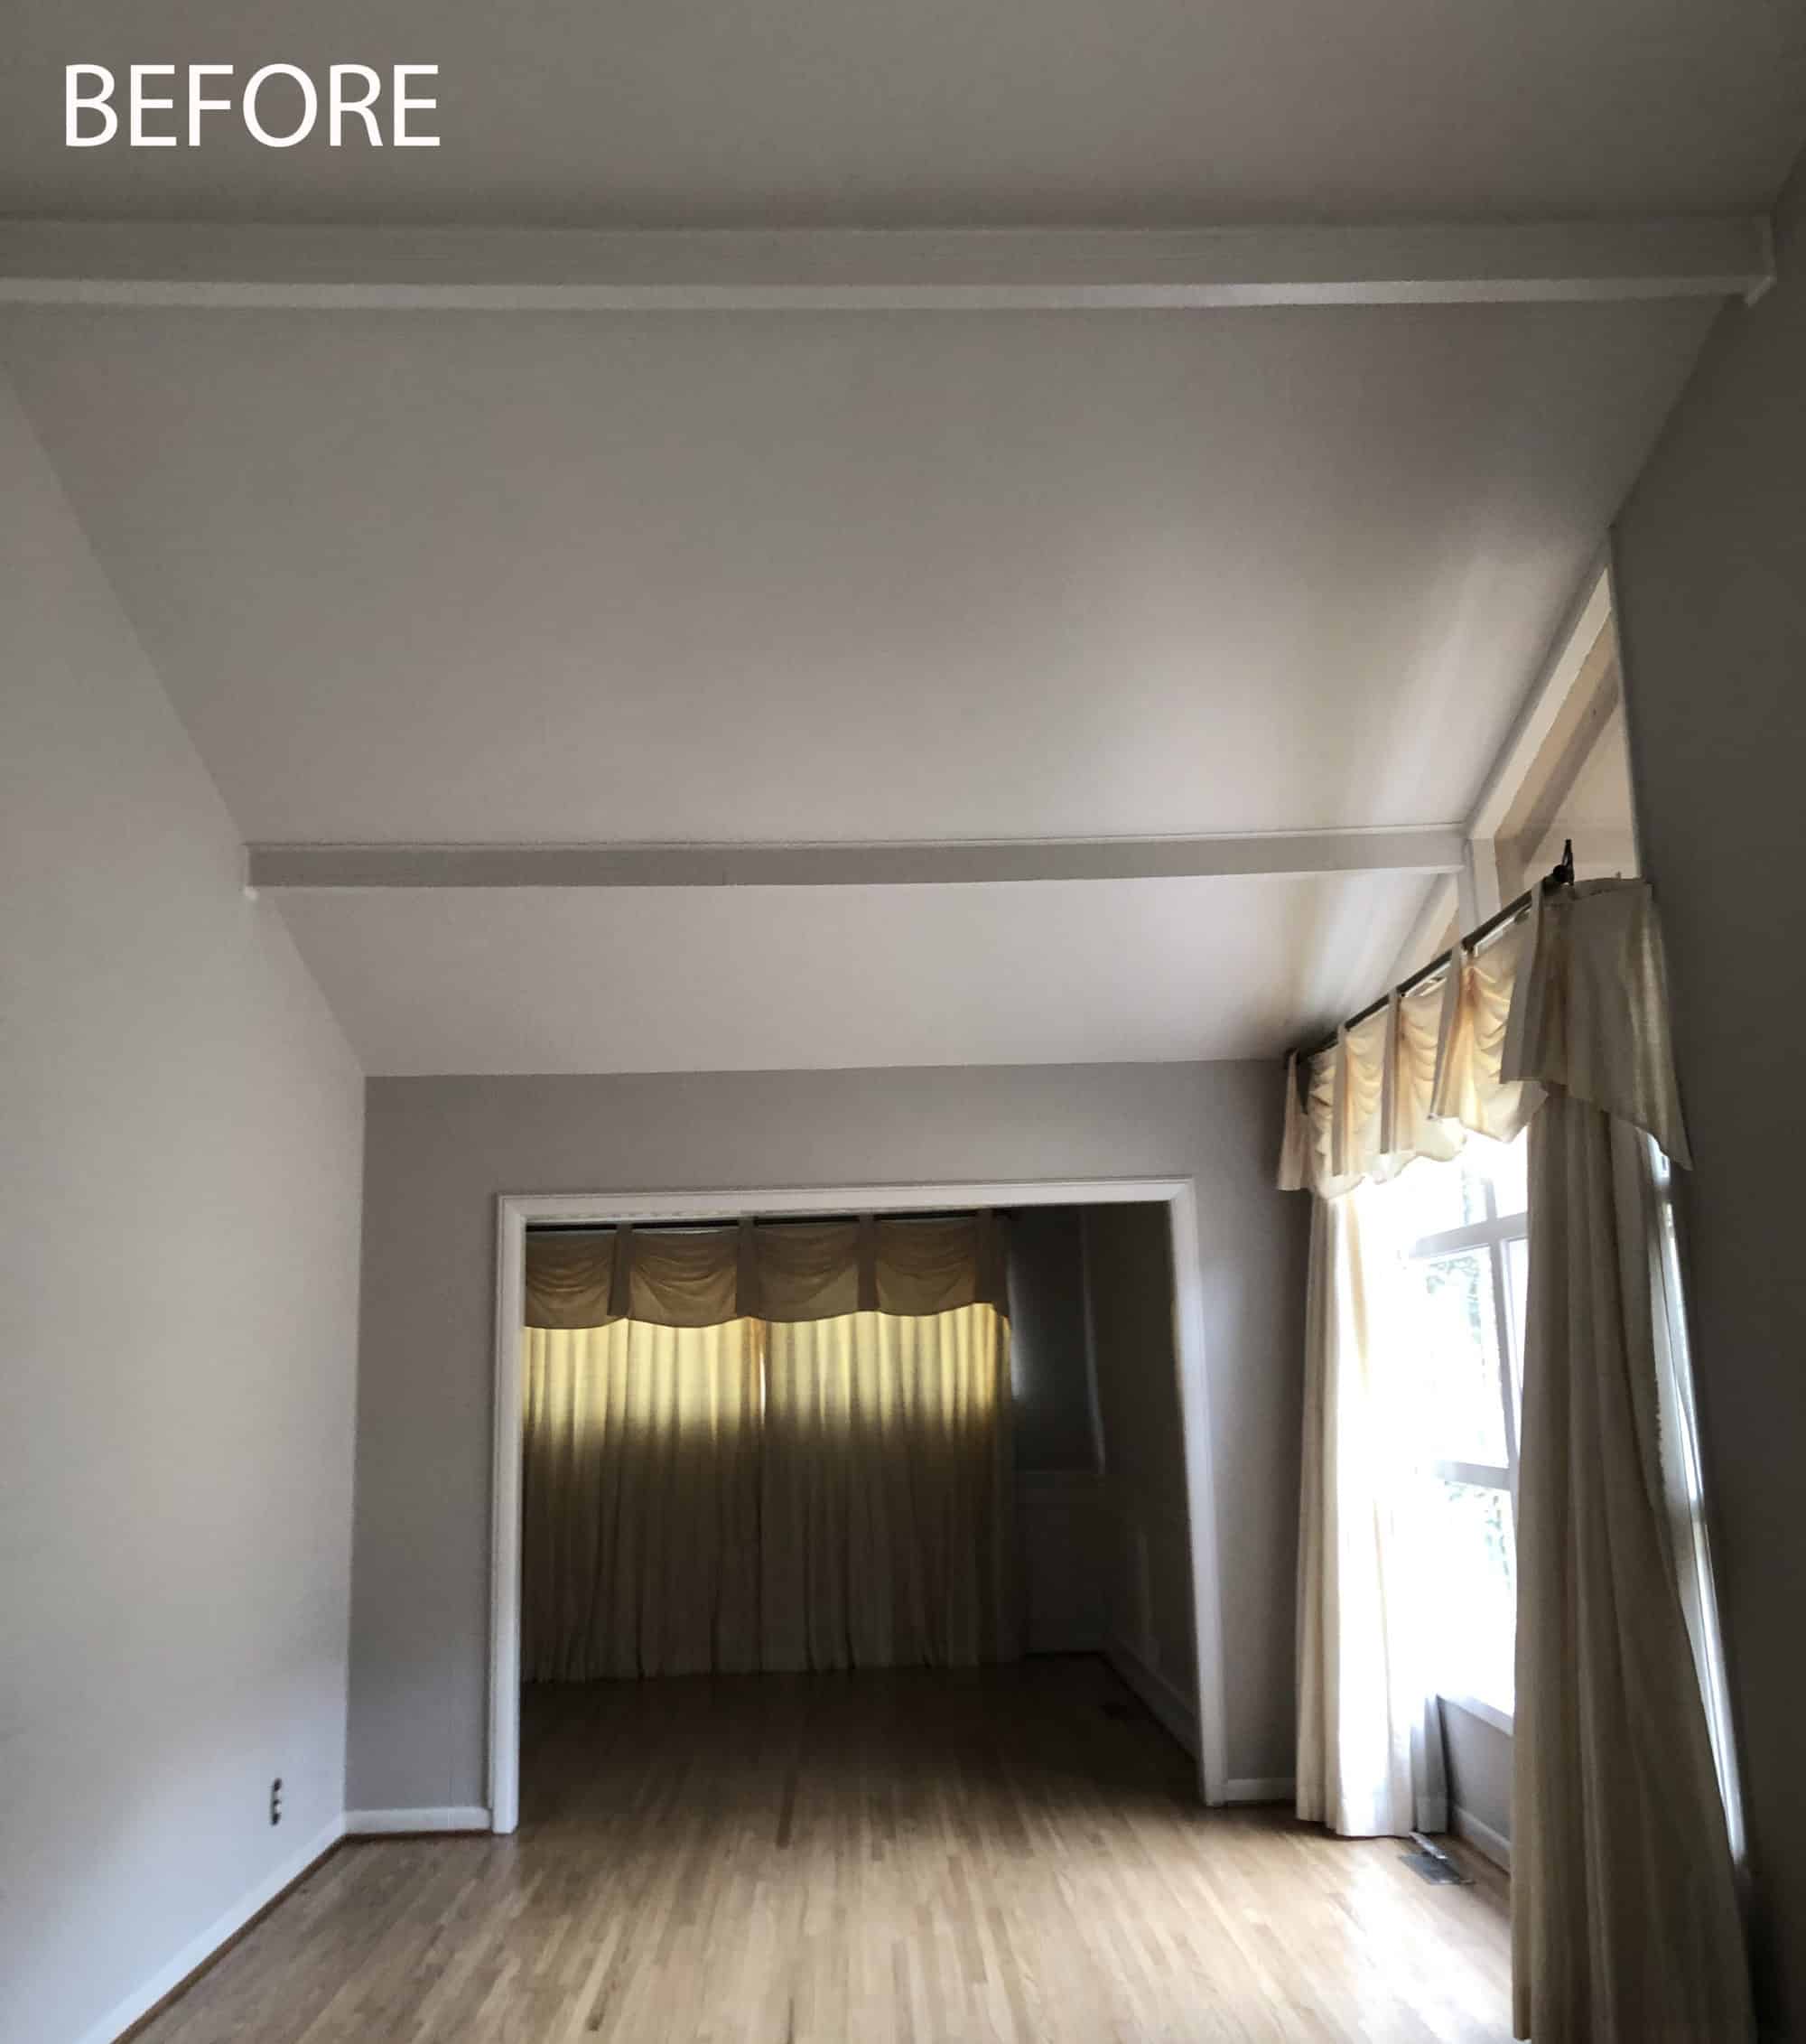 As you can see here, when we bought this home the ceiling was painted gray to match the walls. We were excited to have a vaulted ceiling, and to remove the curtains to modernize this room.
That said, the room felt very off. It felt tall, but small, and very boring. We were pretty confident that with some vision and DIY work we could make it really special, but it felt a bit overwhelming as we had never taken on a wood ceiling before this.
Thankfully, some guy named Collin (inside joke from our podcast if you don’t listen yet) is the most fearless DIY-er I have ever met in my life. He assured me that we could figure it out, no matter what. So we went for it!
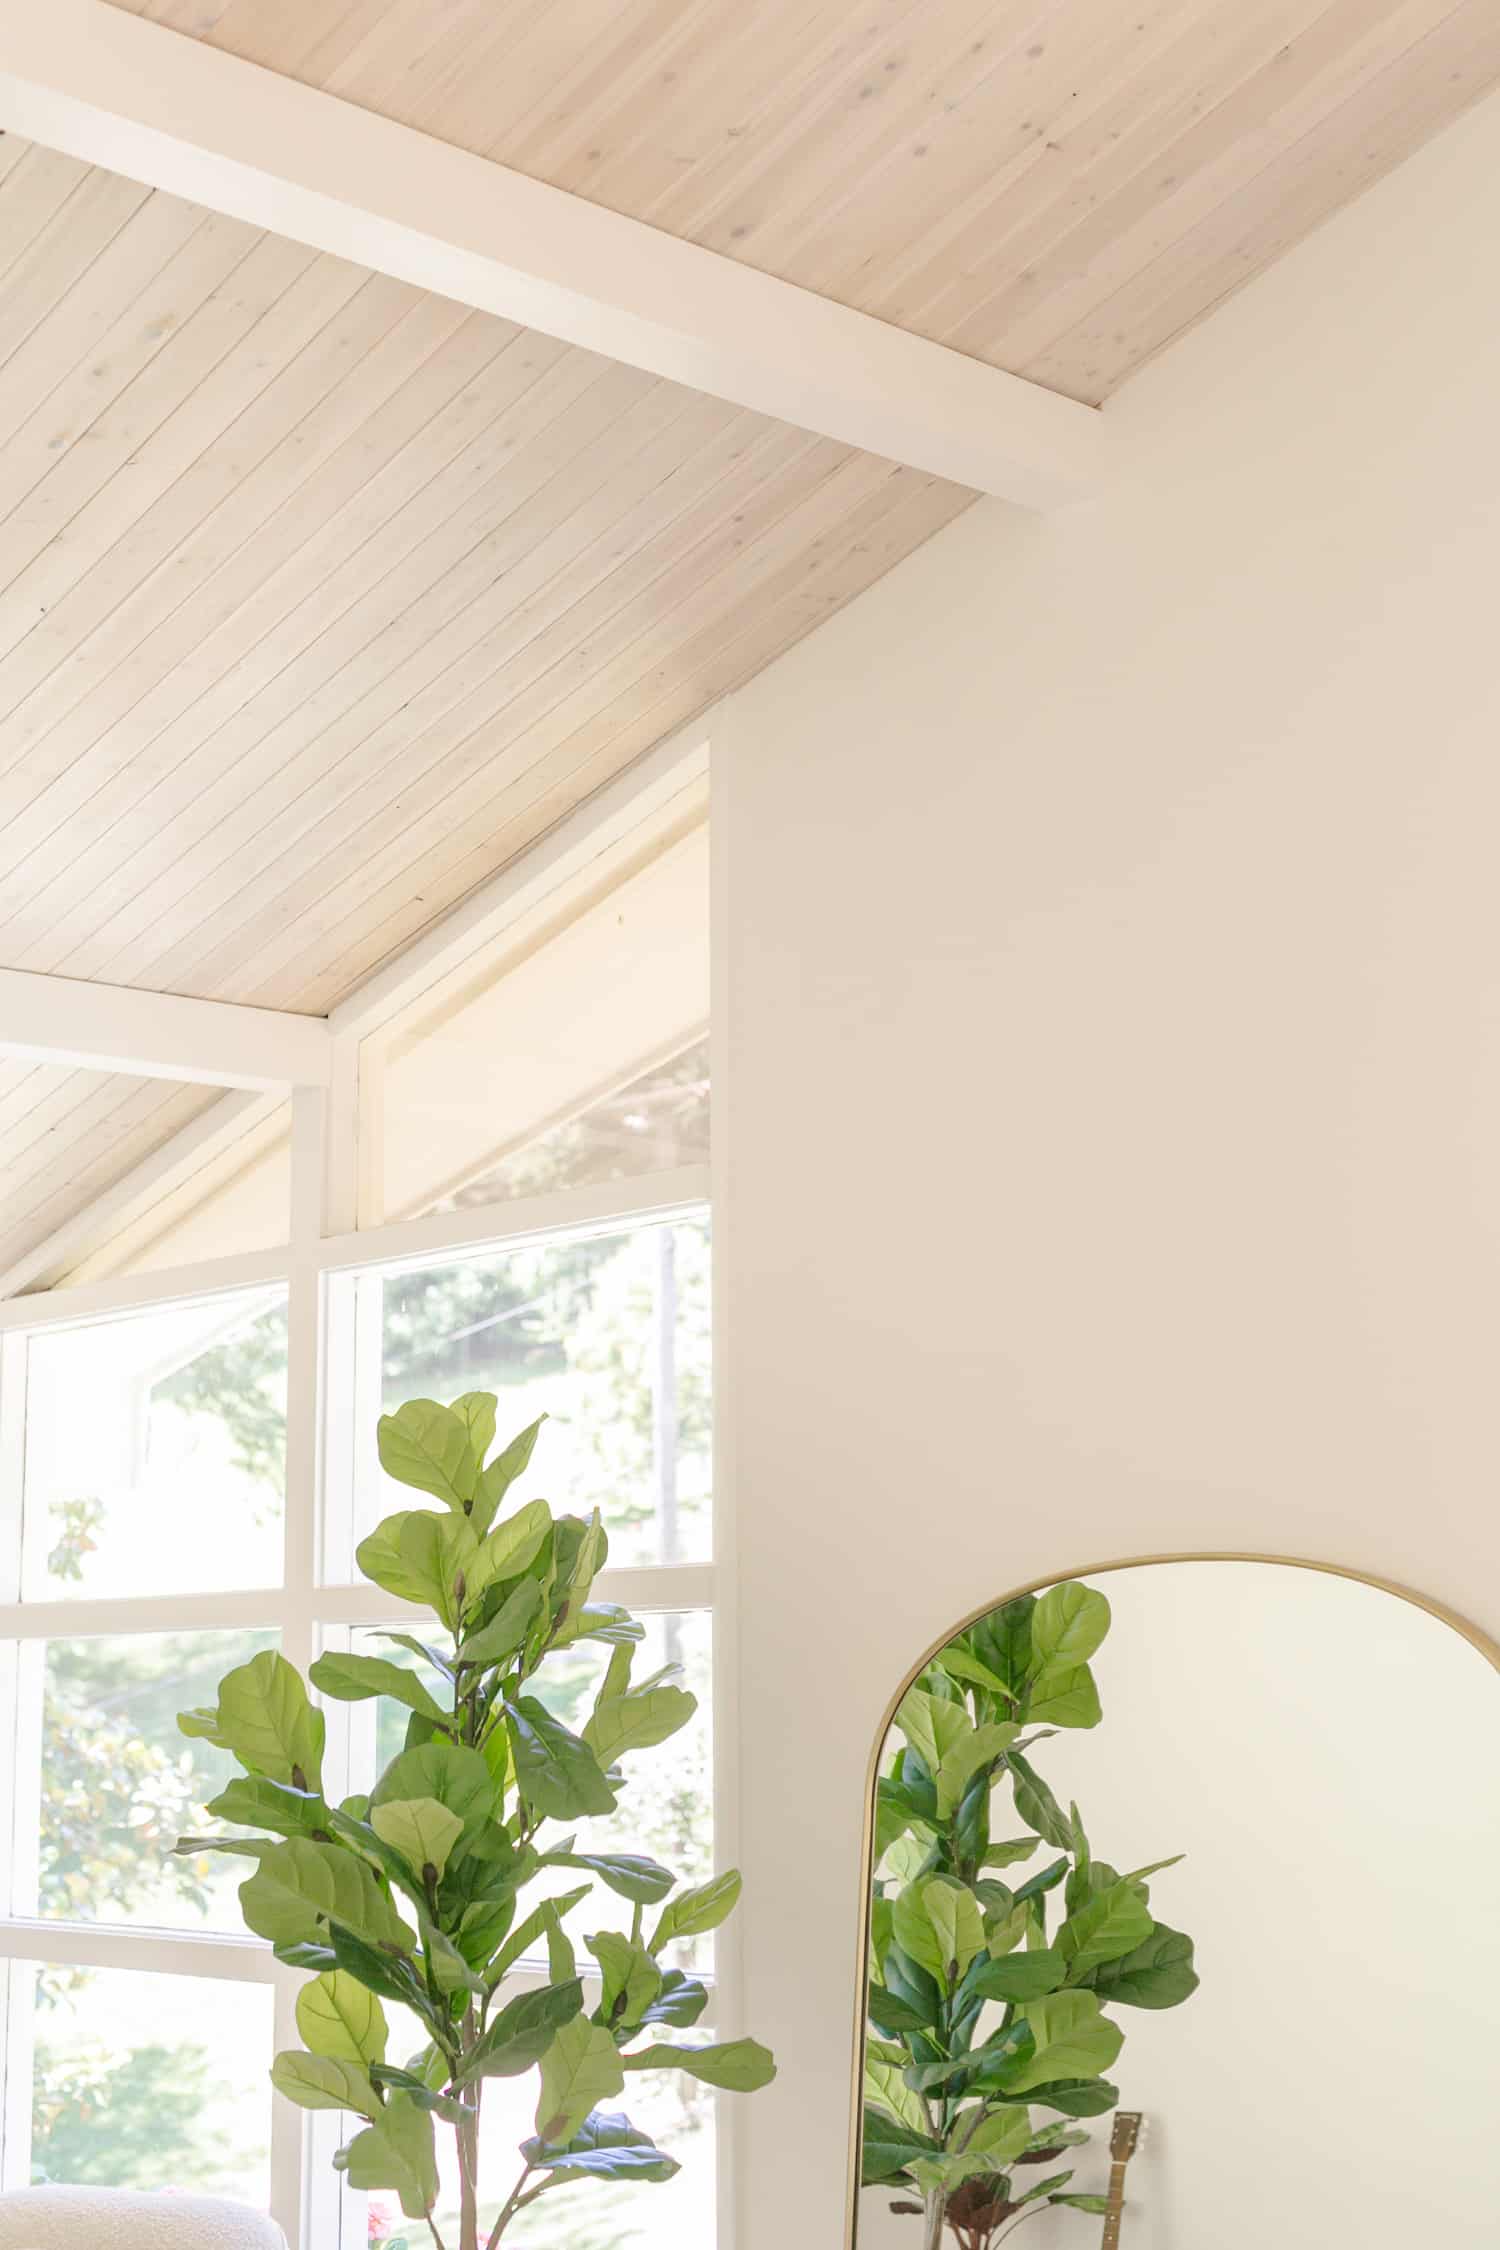
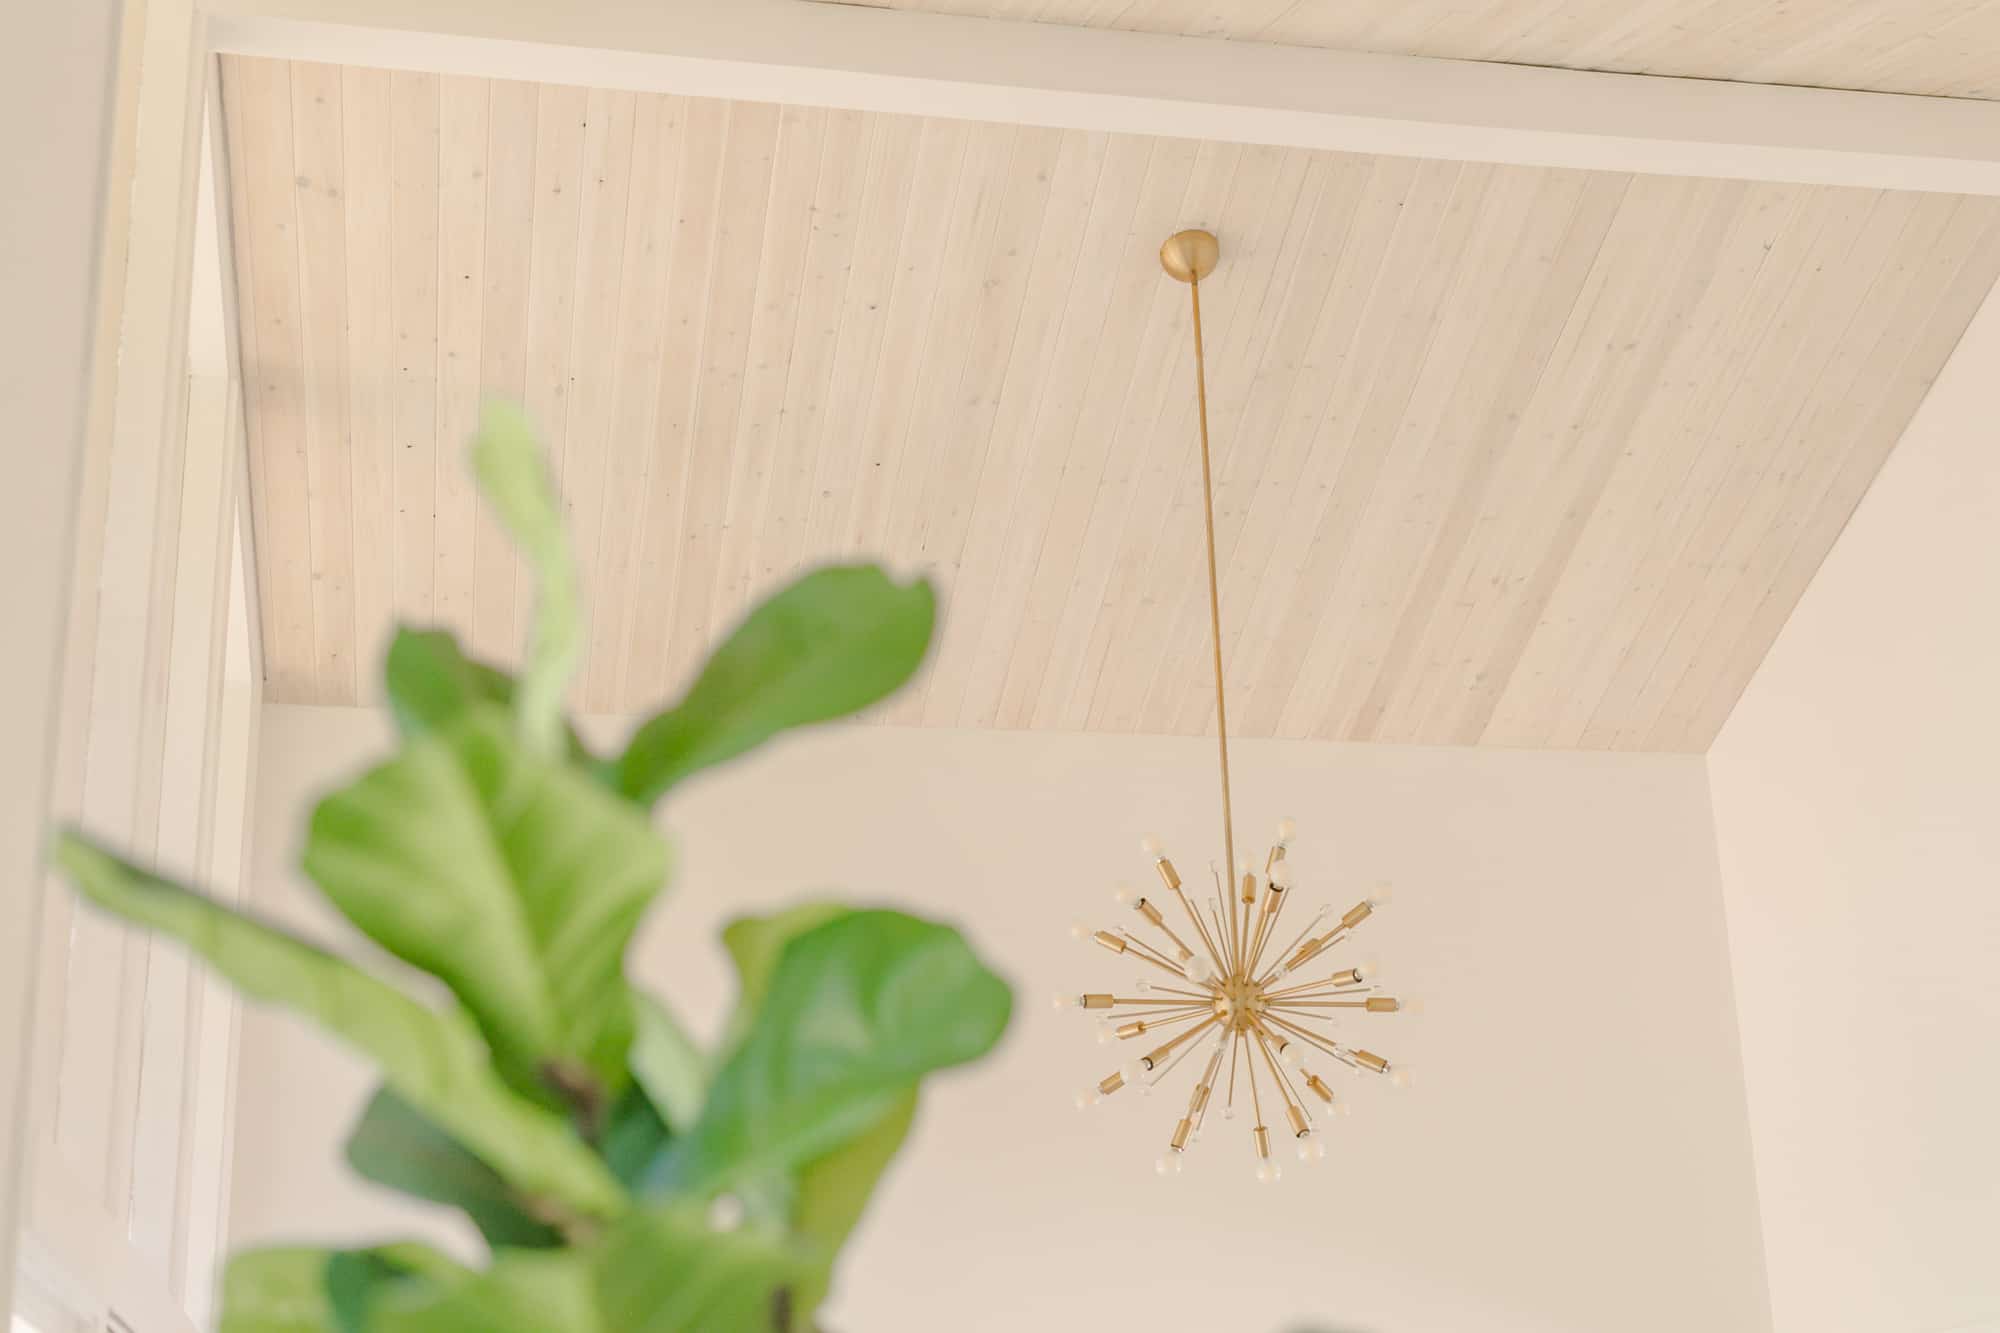
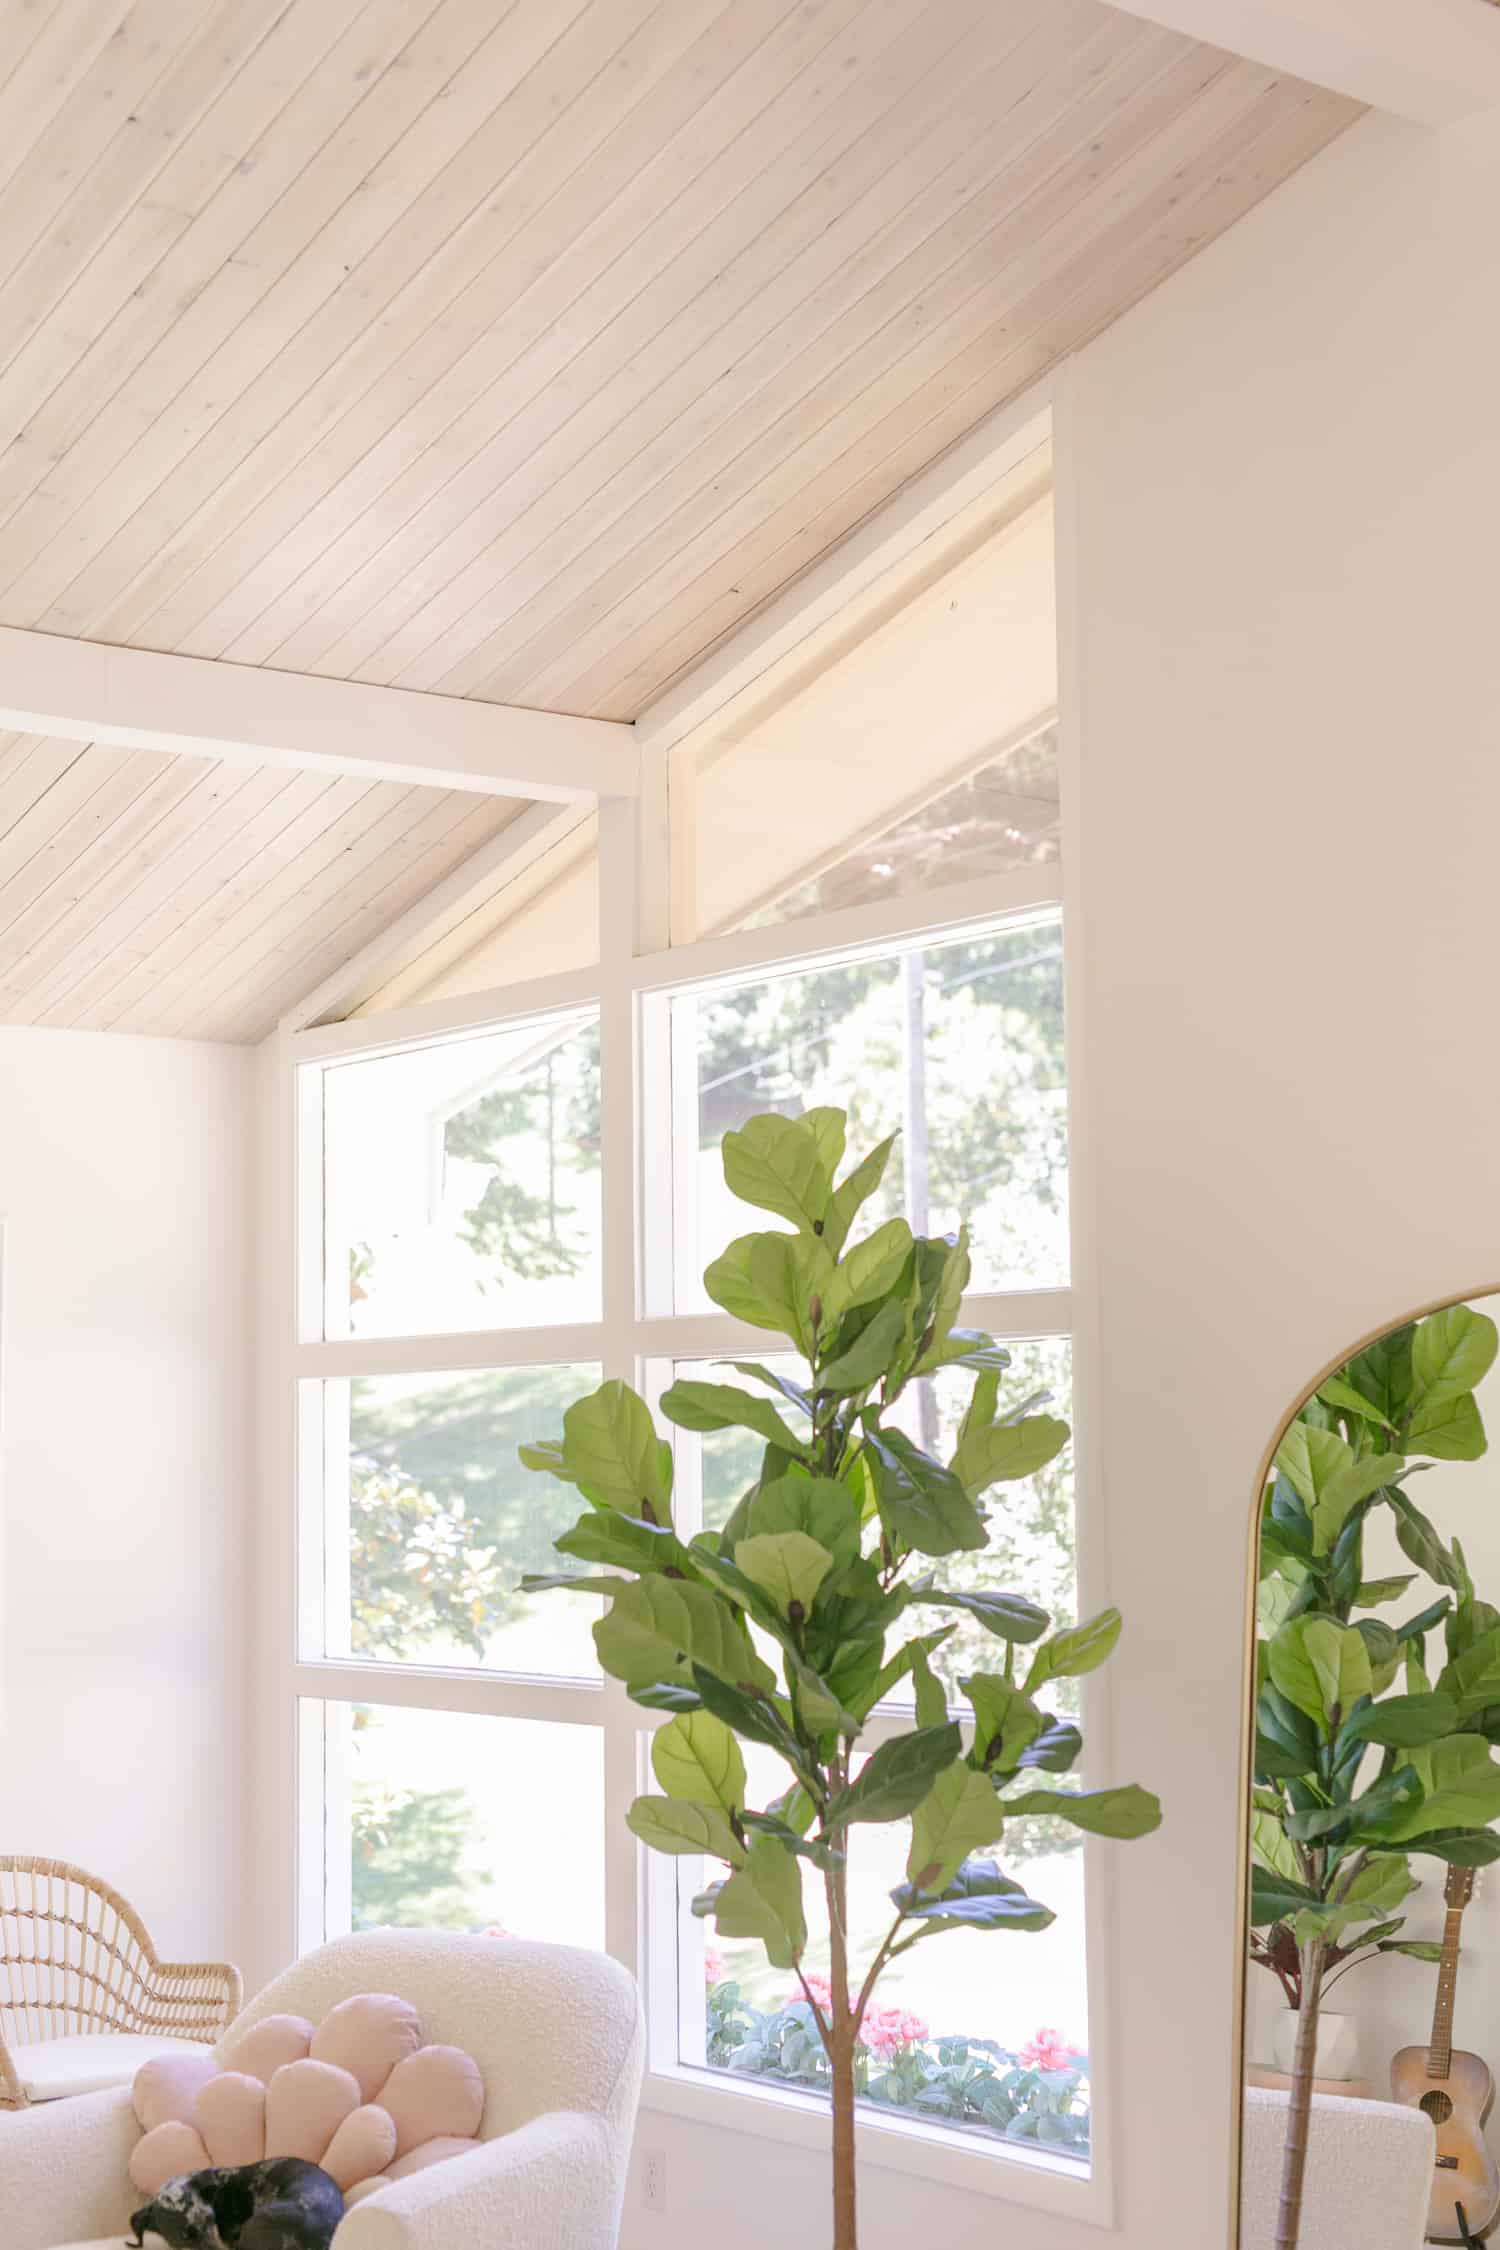
 This is “after,” WOW-WOW-WOW, right? What we did was add pre-made paneling to the entire ceiling, white washed it, and then rewrapped the beams so they are just a tiny bit more substantial and modern.
It was absolutely the right call for this home and made a NIGHT and DAY difference in the overall vibe when you walk into the home.
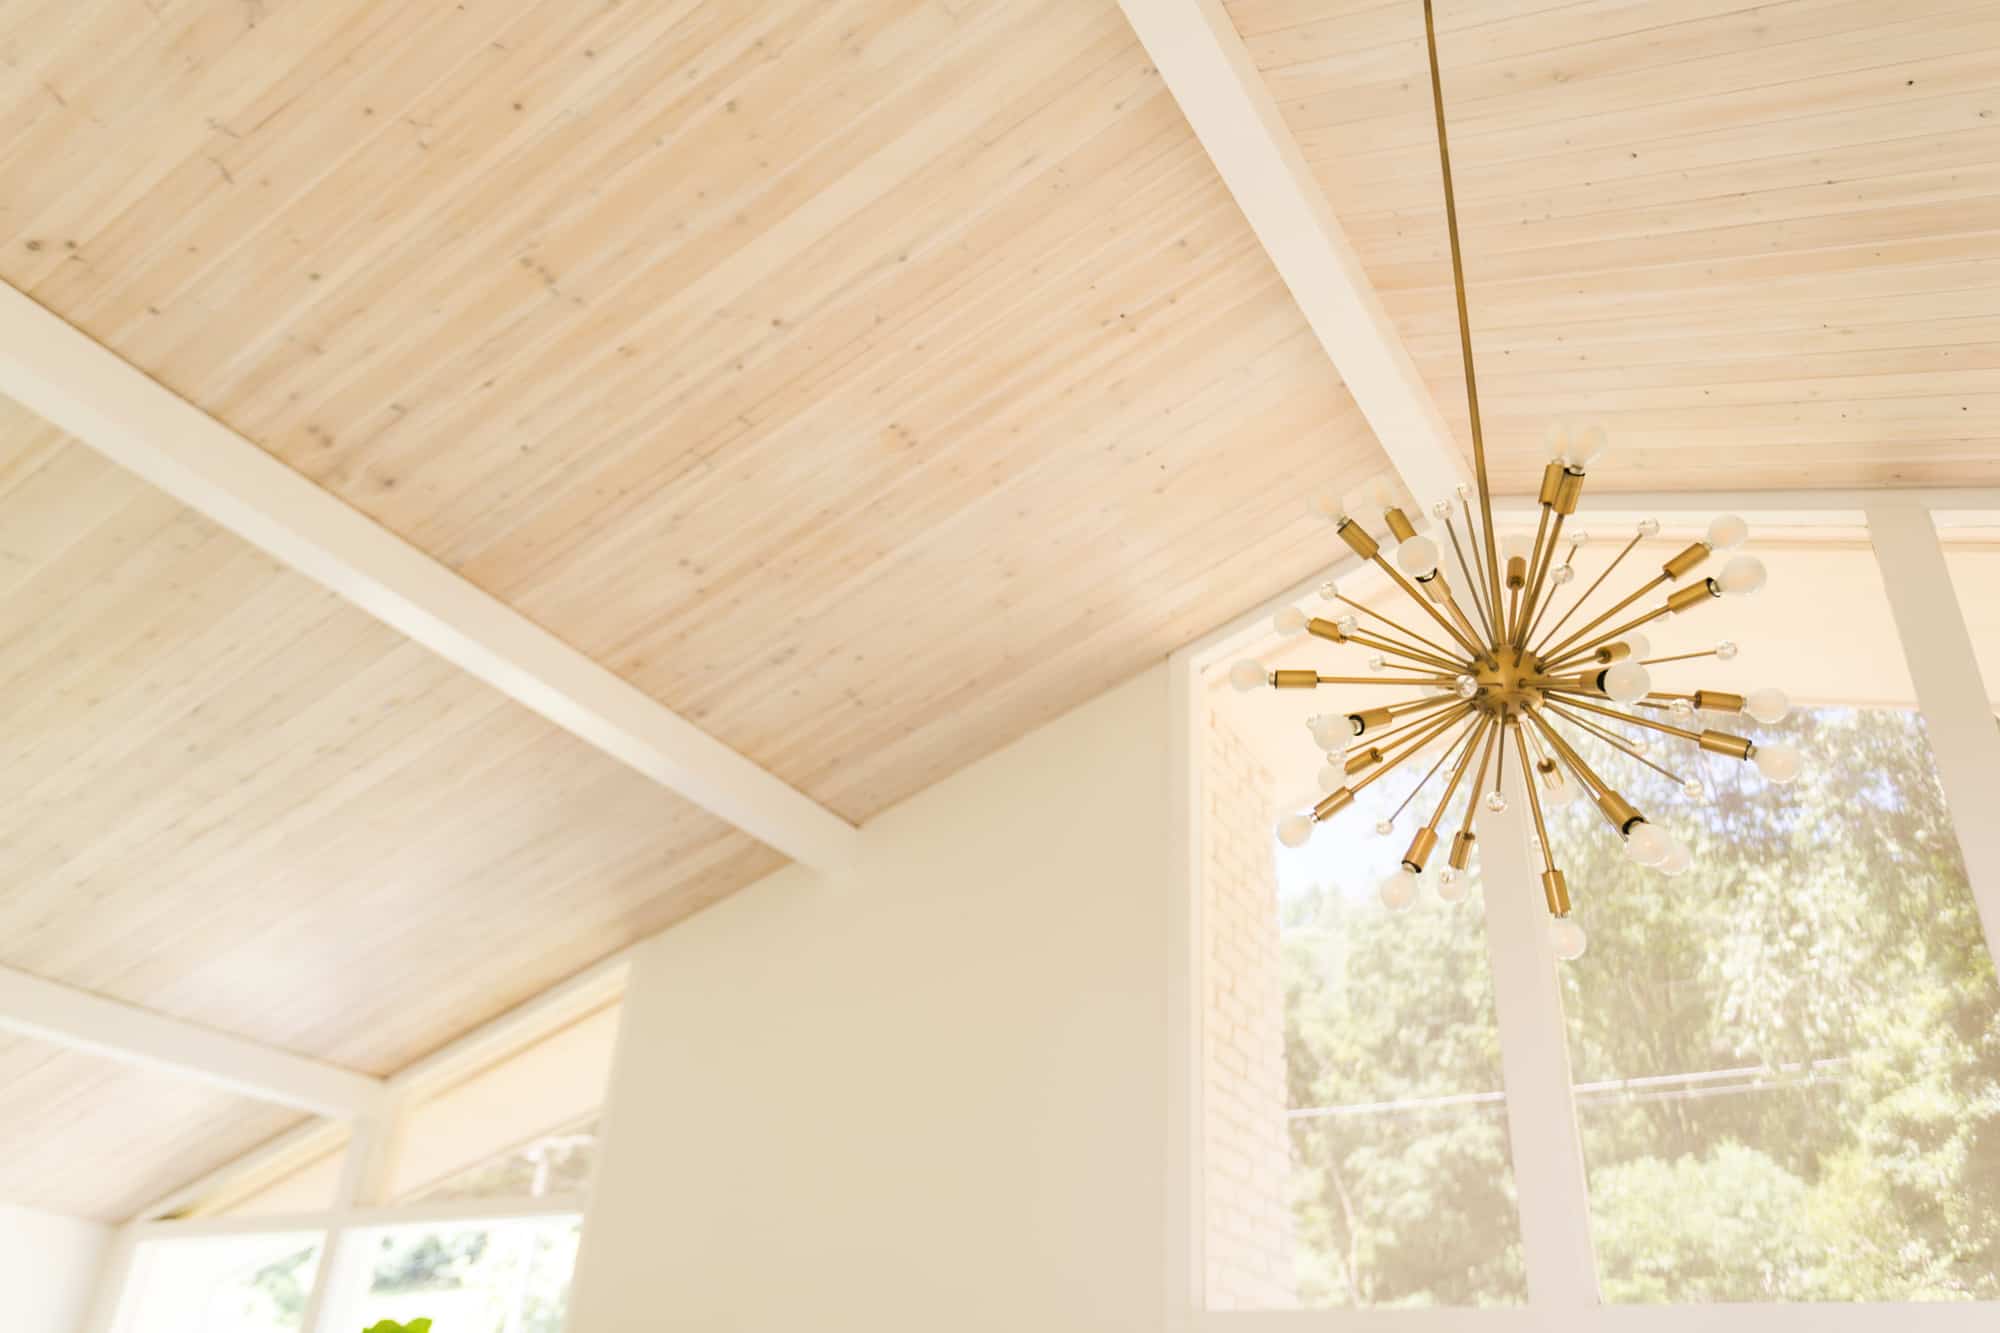
Oh! And by the way, here’s the chandelier we chose for our entryway.
Alright, I am going to pass the baton to Collin to tell you the DIY information. I really hope this DIY will be one you all keep doing for years and years to come.
Supplies:
–cedar wood planks
–white wash stain
-liquid nails
Tools:
-circular saw
-measuring tape
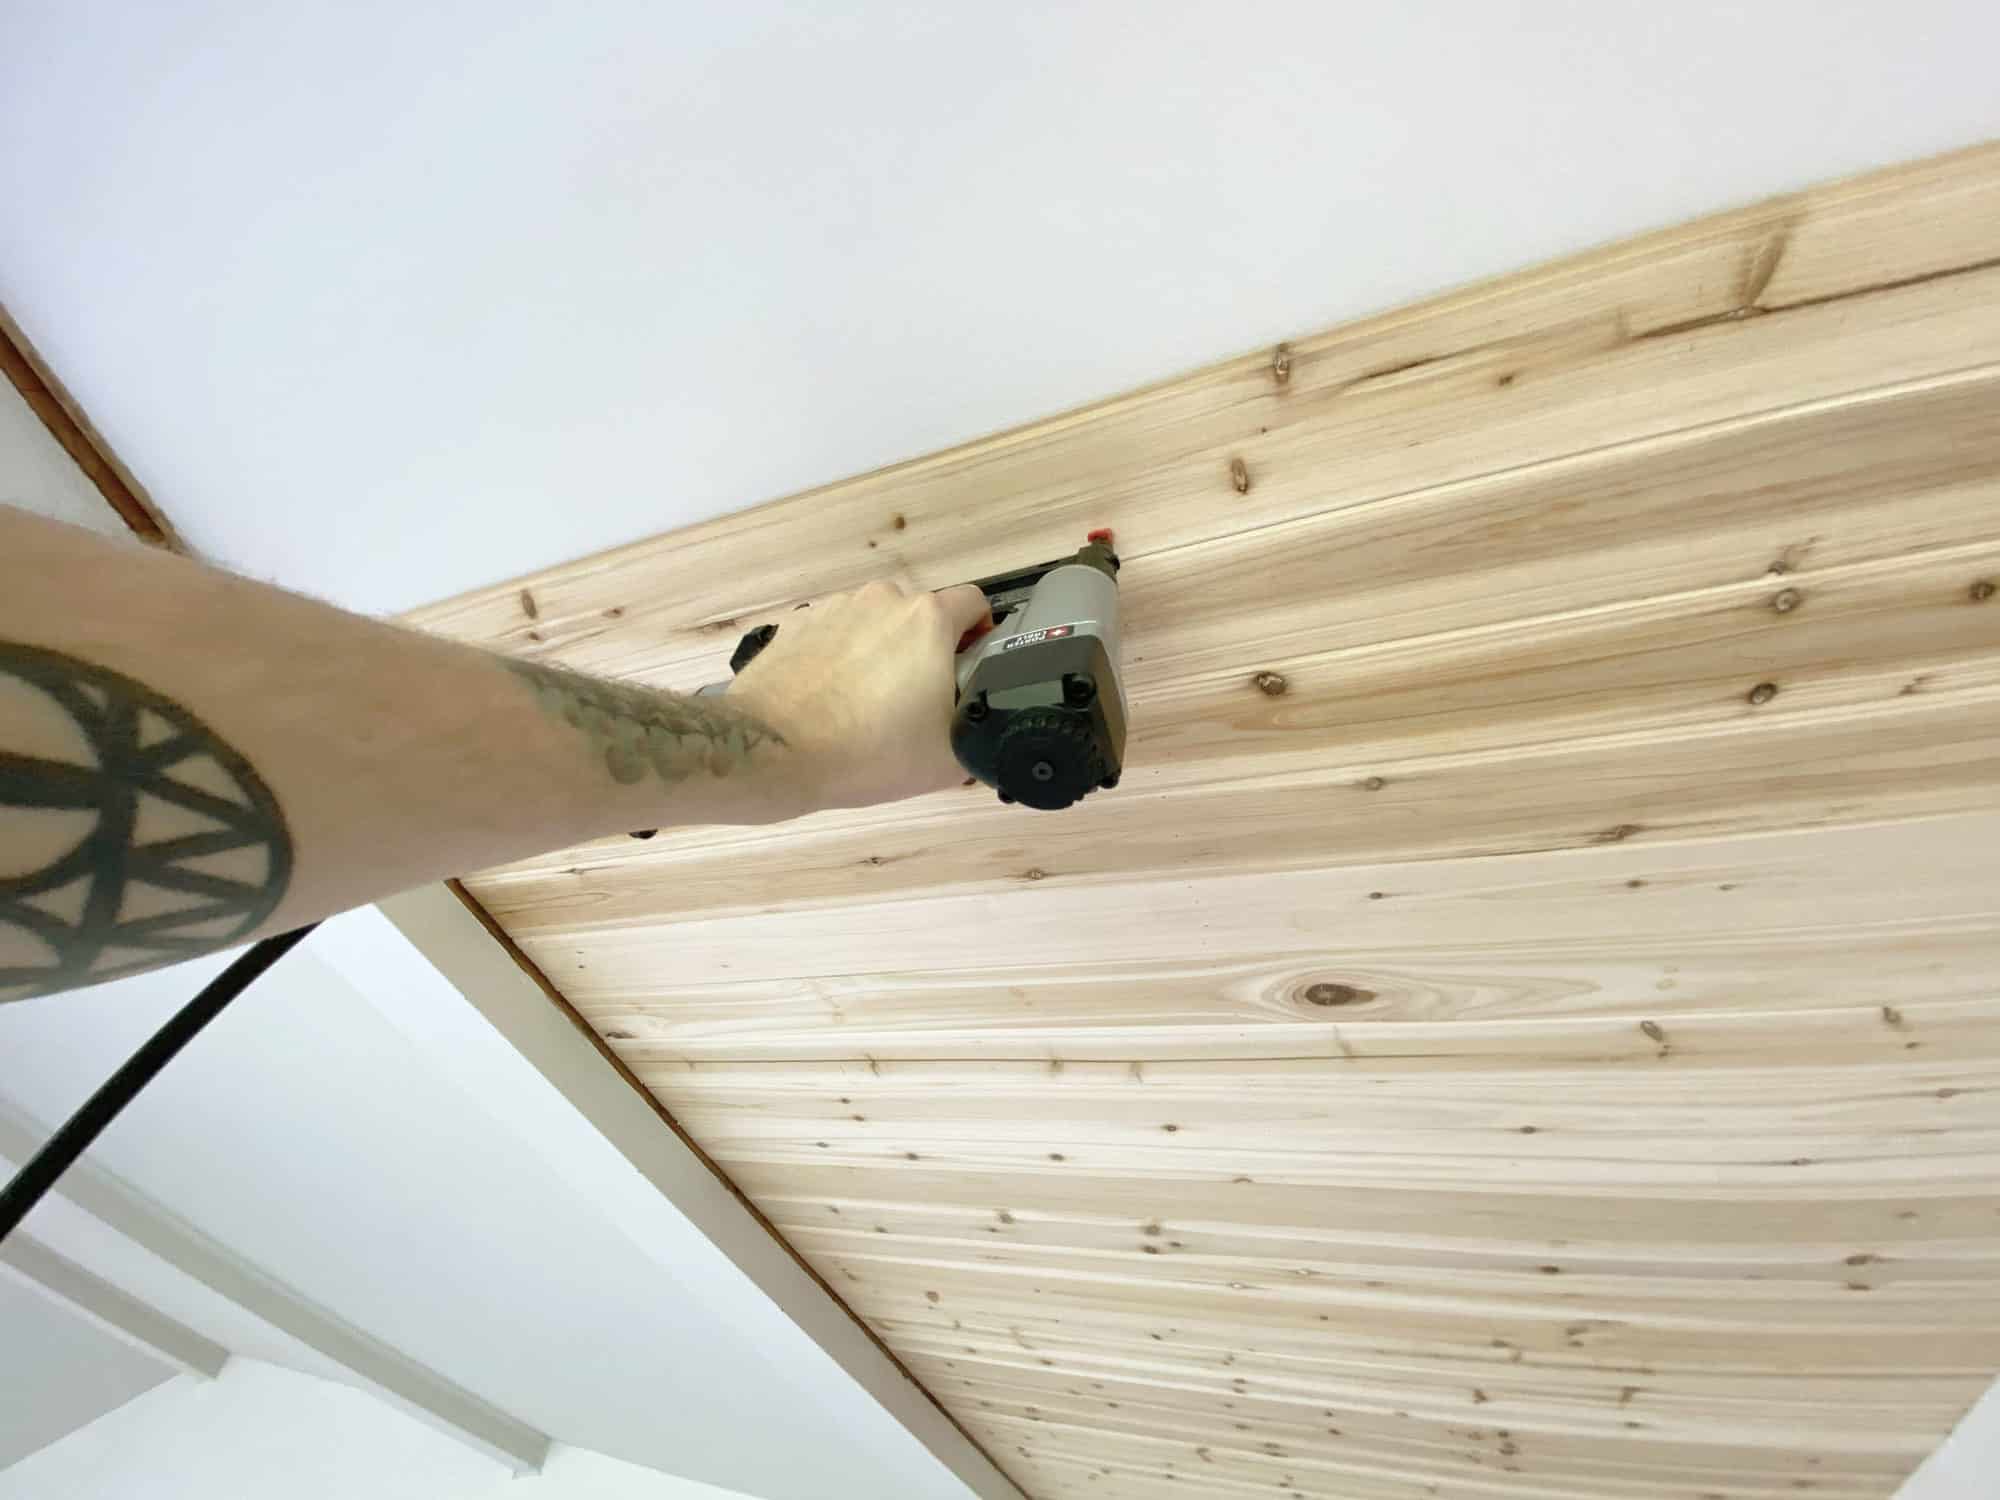
-pneumatic nail gun
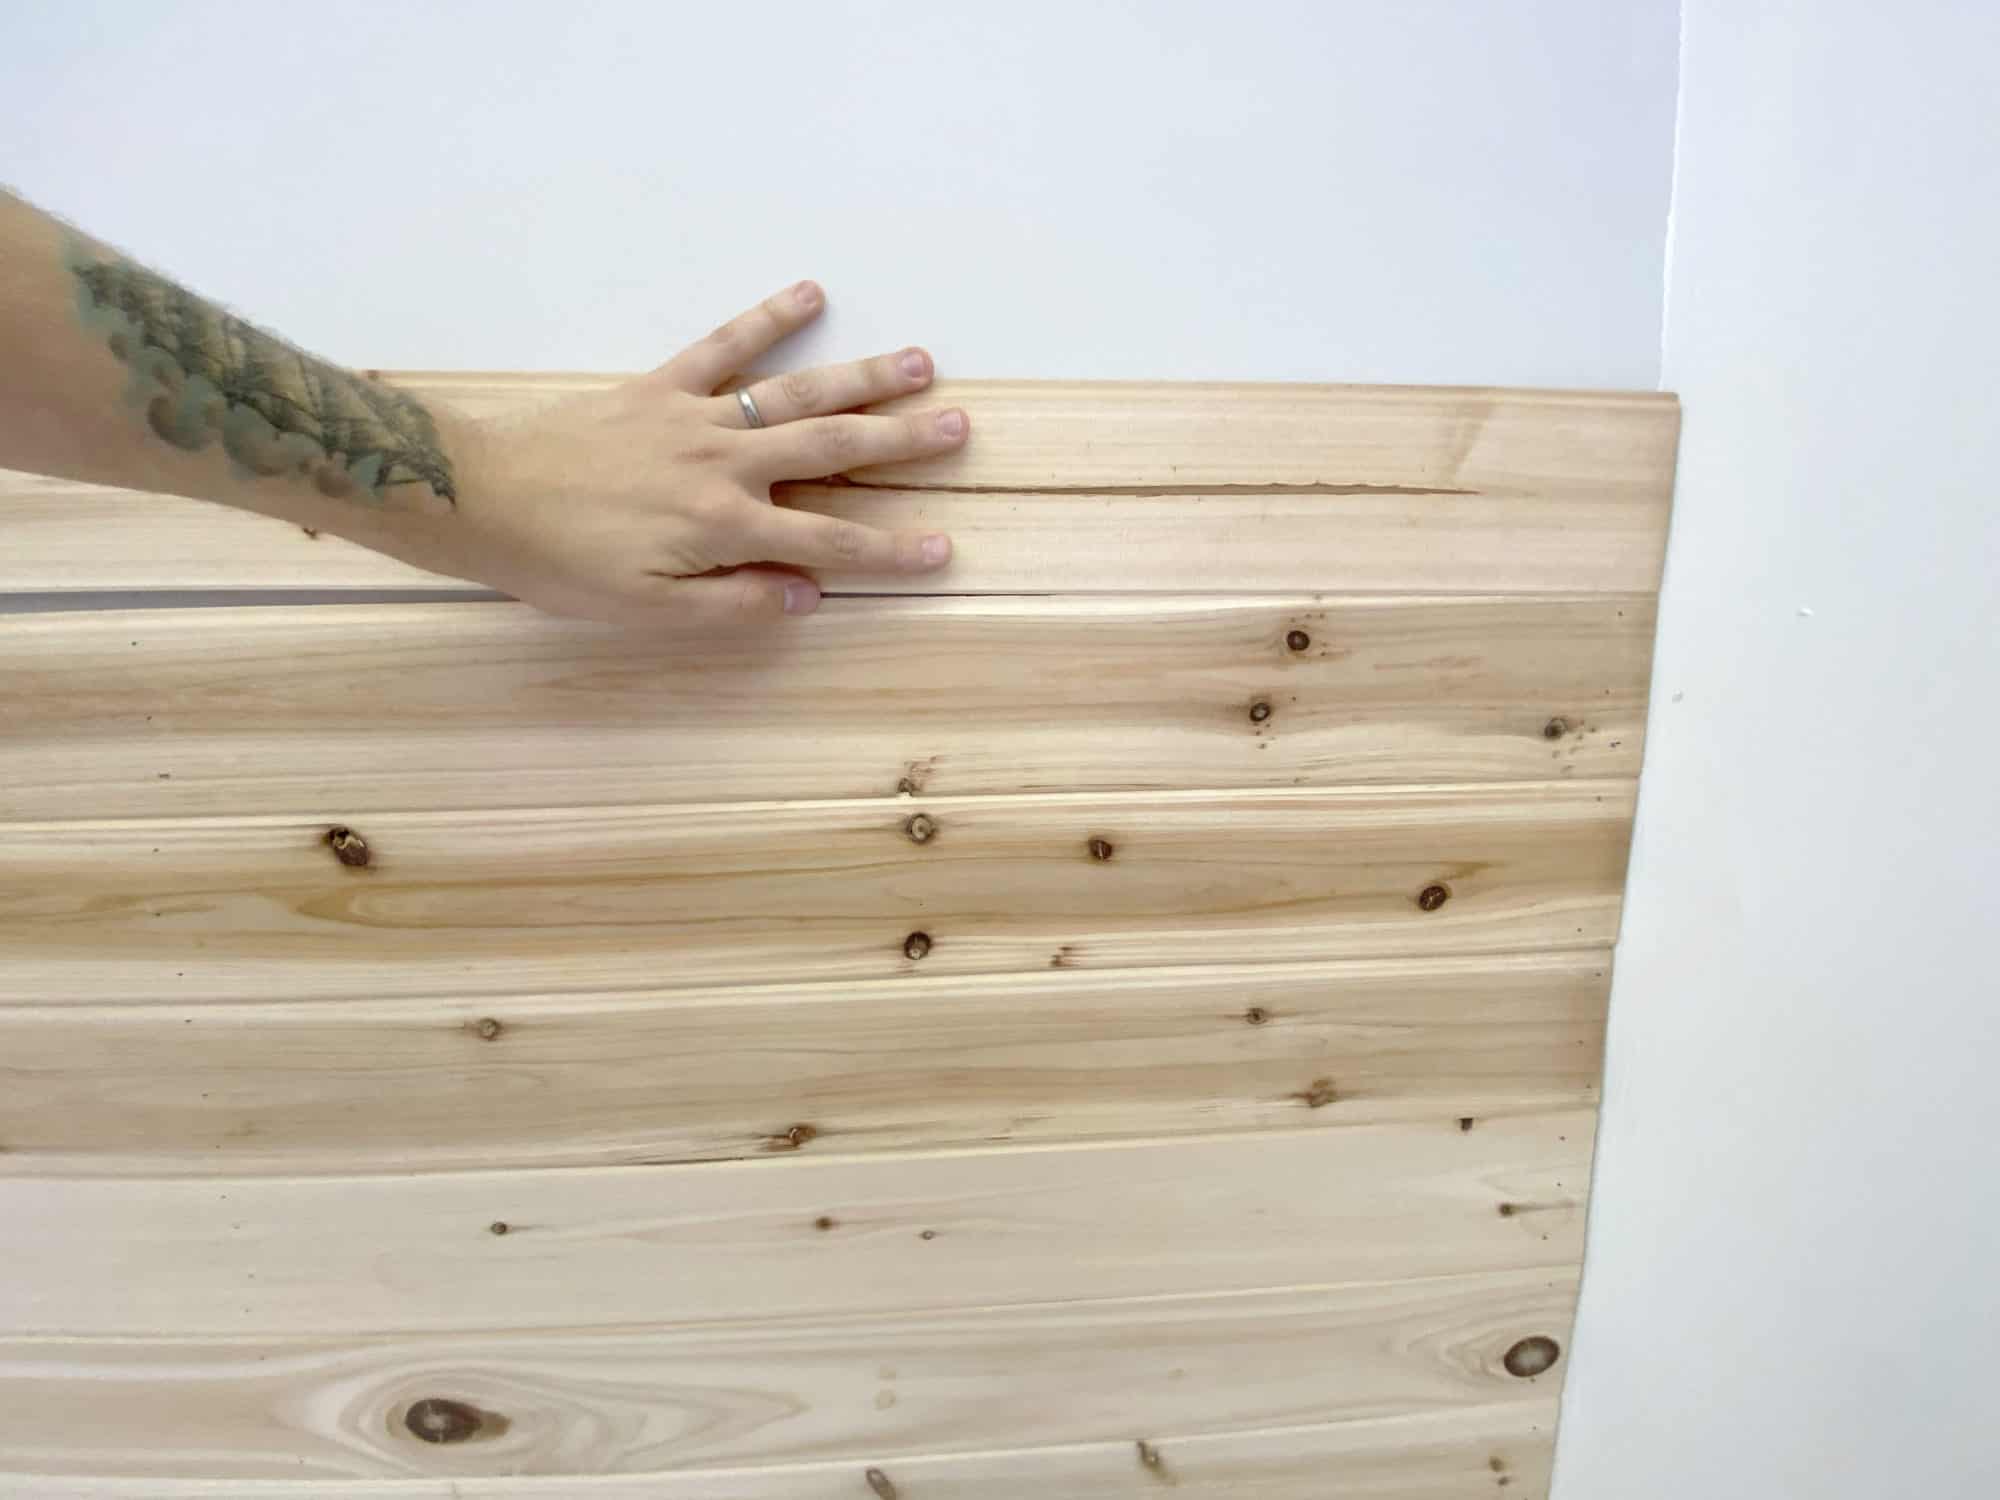 Measure the square footage of your space to determine how many planks you’ll need. The wood planks come in packages of 14 square feet, so this makes it easy to calculate how many you will need! We had about 425 square feet to cover, so we needed roughly 30 packages.
 The panels are suuuper lightweight so it makes this pretty easy! Especially if you have an extra person to assist, which i would recommend if you’re adding them to a really high ceiling.
It can get a little intimidating attaching them yourself while up on a really tall ladder if you don’t have much experience with ladders or aren’t great with heights. So, play it safe and ask a friend or family member to help!
To attach them, you will need to use liquid nails and a nail gun. Simply put a bead of liquid nails on the back side of each panel, stick it in place and shoot nails into each end and into the middle of each panel.
These panels are also tongue and groove, which means they actually connect into each other, making a really seamless look!
 This next part is optional, but i think worth it for how beautiful the finished product is! After all of the panels are attached, take a brush and white wash stain and brush it onto the planks, making sure to brush in the direction of the grain.
We just did one coat, but if you want a really dramatic white wash, give it a few more coats until it has the desired look.
Additionally, the existing beams that run across the ceiling in this space were awkwardly thin and didn’t look right, so we simply added some pieces of 3/4″ wood to the 3 sides of each beam to make them bigger and look more appropriate for the size of this room.
And let’s wrap up this post with a few more completed images!

 Thank you so much for reading. Be sure to pin this project for the future! xx- Elsie + Collin.
Sources: White Chairs/Article (c/o), Standing Mirror/Rejuvenation, Hygge Rug/Apple & Oak, Pom Pom Pillow/ Anthropologie, Stripe blanket/ Lucky Collective Shop, Chandelier/Wayfair.

This is so gorgeous! Where did you purchase the wood planks? Can you provide a link? Did you consider wood panels that look like wood planks or faux-wood? Thank you!
Hey! Beautiful job! Can you tell me the paint color of your walls? Love the whole look. Thank You.
Hello! Can you give the link to the light at Wayfair please? The one in your original post is not working. Not sure if it’s sold out?
Hi! If the link isn’t working it’s most likely sold out. It’s been a few years. You can definitely find something similar though. XX!
Is there a reason you didn’t white wash the paneling first? Also, I assume you need to nail it to the studs or whatever they are called on the roof?
Hi. I can see how white washing before installing would be smart. 🙂
Where is light from? How much did this cost to complete?
Hi! The light came from Wayfair. The ceiling paneling was around $800 for the room.
I love this project!
These are great tips!
Hi Elsie! This looks great, and I’m definitely pinning it for a future project!
Really off-topic and you might not even see this, but I just listened to the podcast about how to get your home ready to sell (since we’re currently entering that stage) and heard you talking about the girls’ outgrowing clothing so quickly, getting the girls’ clothes mixed up with each other, and having to constantly look at tags to tell them apart since there are so many sizes for even just one of your daughters. You may have found a solution since the podcast first aired, but I had an idea! I was wondering if it would help to write an “N” on the tag with a marker for Nova’s clothing and an “M” for Marigold’s, and then as Nova outgrows her stuff just adding a line to the N to make it an M. It means a lot of unattractive marks on the tags of the clothes, haha, but since you’re looking at the tags anyway when you’re folding and putting them away the clothes would be “pre-sorted” already according to size. Like if Nova has dresses in 3T, 4T, 5T etc you wouldn’t have to then find the smaller matching dress just to know which girl it belongs to. Hopefully that long run-on brain rant makes sense! 🙂
Thanks for the idea! XX
Wow! I really think wrapping the beams made the biggest difference. The color also really helped lighten up the room.
I see Collin likes Radiohead – I have the same tattoo on my shoulder.
The final result is simply wow!!!
You did an amazing job!
xx Elisa
www.francinesplaceblog.com | DIY & LIFESTYLE BLOG
Any tricks/recommendations to make it easier To get the wood to go around the light fixture in the ceiling?
Hi! This is so beautiful! Can it be done the same way for walls? My old family house has big popcorn all over ? thank you!
Do the nails go into ceiling battens? Or just drywall?
That fiddle tree fig looks gorgeous in that space! ?
I have been obsessed with the idea of doing this to our (rather boring) vaulted ceiling since I saw you do a version of it at your old house. LOVE it here too! Tactical question…did you put the new “fake beams” around the original beams before doing the planks? We would have to just create the hollow “beam” ourselves, so trying to understand order of operations. Thanks!
I get scared just thinking about putting something like this on such a high ceiling… but it looks like it was worth it!
Wow, this is brilliant! I actually wish we had popcorn ceilings… I could wet and scrape them. Instead, we have stomped ceilings. They’re not painted, but in our bathrooms, I’ve tried wetting and scraping to remove the texture and skim coating. It still doesn’t look great…that rosette pattern is persistent! We might be doing this in one area of our house!
Have you had any issues with contraction and expansion between the wood pieces?
Beautiful Elsie! So over the top! Question: would this work on a popcorn ceiling that has heated electricity in it?
I have got to get a Collin in my life!
Yeah, U and me both