Hi, friends! I don’t have a lot of experience making soaps, so when it came to creating this DIY, I was surprised to find how relaxing and fun it was to create different colors and combinations for these gemstone soaps.
At first I was going to go with JUST the rectangle silicone mold and then hand slice facets to create a gemstone look.
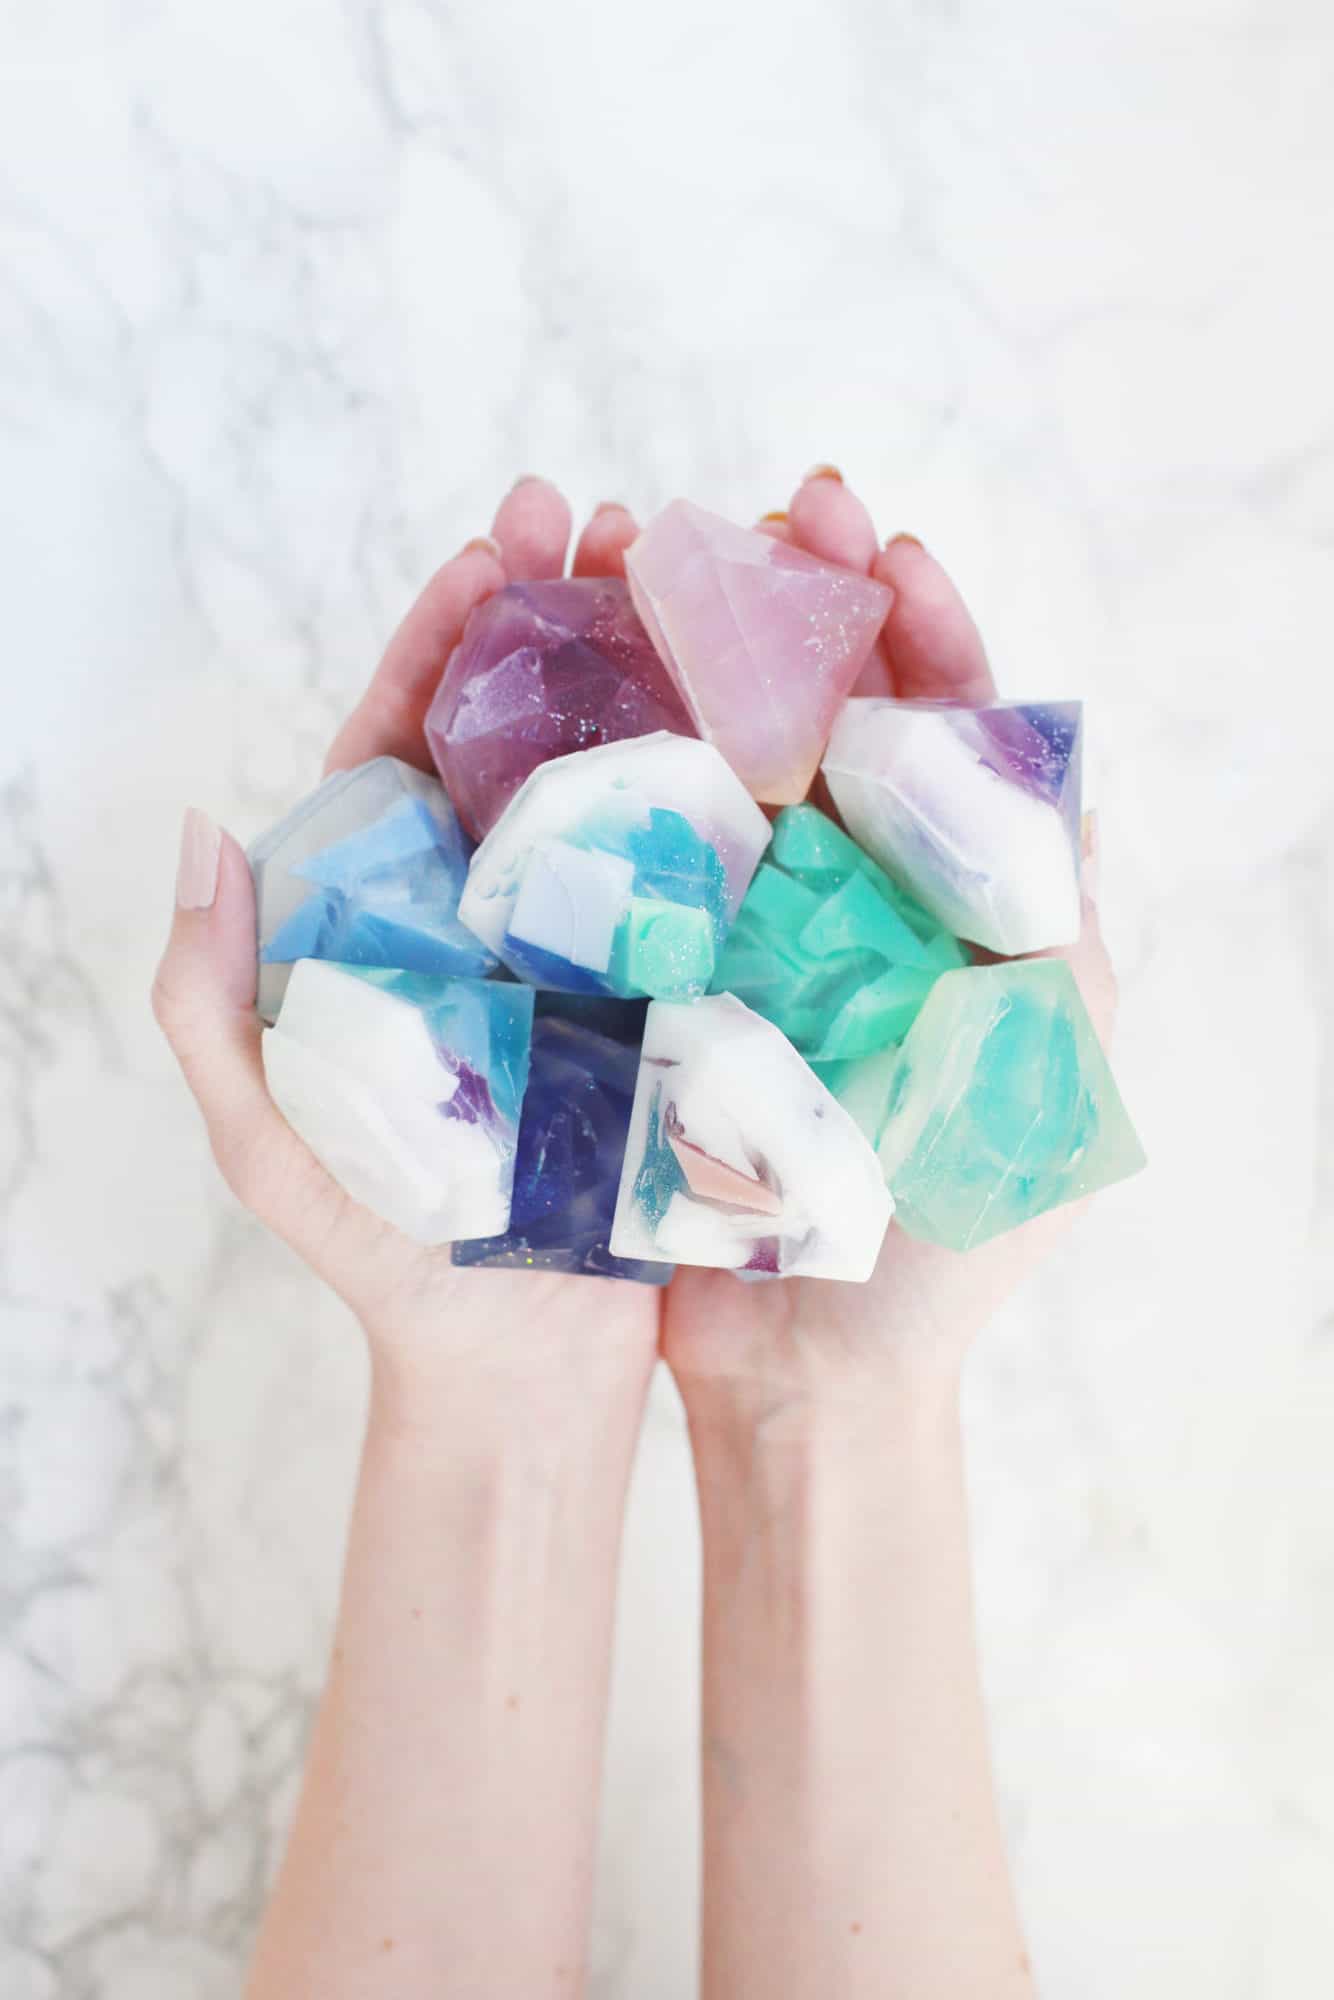
However, I got this crazy idea at the last minute to find a diamond shaped silicone mold and show you how those look too using this method. I couldn’t resist! I just love how each one came out unique and beautiful… just like a gem.
Related: Learn to make DIY Body Scrub – Ultimate Guide and check out our DIY Soap Archives.

 Supplies:
-melt and pour soap base in clear and opaque
–soap colorants
-favorite essential oils
-silicone molds (I used this rectangle one and this diamond one)
-knife
–glass pyrex cups
–silicone spatula
-disposable plastic cups

 Step One: To create the different colors that you’ll need for your soaps, first create 6-9 solid colored soaps. I used a combination of clear and opaque soap base and mixed in various soap colorants to create the colors I liked. This part is really the creative part.
Have fun mixing up colors and using different soap bases for a beautiful variety. I found that using the same color and pairing it with the opaque or the clear gave me a totally different look.
To melt down your soap base, simply (and carefully) cut away small cubes of your melt and pour soap and pop a handful in the microwave in a pyrex pitcher. Use your spatula to mix the base until it’s completely melted. At this point you’ll add in your desired essential oils (I used a citrus scent) and colorants.
Mix together and pour your color into a plastic cup. You’ll repeat this for each color you want to create. I ended up doing 9 but probably could have done more since I enjoyed this step so much. 🙂
Let your soaps cure before moving on to the next steps. I left mine overnight, but if you’re impatient, you could store them in the fridge for a few hours, I won’t tell. 😉
 Step Two: Once your colorful soaps are done setting, take them out of their plastic cups. I ended up having to break the plastic cups to get them out, which was totally fine since they were disposable. Next, slice up your soaps into various shapes and sizes. Set aside.
 Step Three: To create the hand-cut gemstone soaps, I started by adding a sprinkle of cosmetic grade micro glitter to the bottom of the silicone mold. Please note that you definitely want this to be cosmetic grade and not craft glitter!
After having a little too much fun with the glitter, I started adding the slices of colors into each mold. I liked adding a lot more to the bottom of the mold and making the pieces more sparse at the top. I also made sure to use colors randomly in order to get really unique looks.
 Step Four: Melt a block of opaque and clear base in two separate glass pitchers. I found that having them hot and melted at the same time created a more organic look to the soaps in the end since one or the other didn’t get time to set too long before pouring in the other base.
I started with the clear base and slowly poured it over each mold and finished it off with the opaque base filling it to the top. Let your soaps sit overnight or in the fridge for a few hours.
 Step Five: Peel your soaps out of their molds. I loved this part! It was so neat to see how each one turned out and the variations. Using a knife, I slowly cut facets into each soap bar to create a gemstone.
There really wasn’t any method to the slicing, I was just cutting away to see how each soap formed. Again, each one ended up looking totally different and so beautiful!


To use the diamond silicone mold instead of the rectangle, I did the exact same steps except that for the second batch, I used only clear soap base and one color for each soap to see how they would turn out. I love the semi-clear gem look with the single color a lot, especially with that deep indigo color!

 Easy and beautiful! While I loved making these, you can also get some beautiful gem soaps already made if DIYs aren’t your thing (these are so pretty).
These seriously make the most charming gifts (maybe with a cute soap dish!) and would be great for a guest bathroom. Lots of love, Sav.
Love this post? Sign up for our newsletter for more ideas!

Get creative ideas for recipes, crafts, decor, and more in your inbox!
 Get the How-To

Supplies
- melt and pour soap base in clear and opaque
- soap colorants
- favorite essential oils
- silicone mold, I used this rectangle one and this diamond one
- knife
- glass pyrex pitchers
- silicone spatula
- disposable plastic cups
Instructions
- To create the different colors that you’ll need for your soaps, first create 6-9 solid colored soaps. I used a combination of clear and opaque soap base and mixed in various soap colorants to create the colors I liked. This part is really the creative part. Have fun mixing up colors and using different soap bases for a beautiful variety. I found that using the same color and pairing it with the opaque or the clear gave me a totally different look. To melt down your soap base, simply (and carefully) cut away small cubes of your melt and pour soap and pop a handful in the microwave in a pyrex pitcher. Use your spatula to mix the base until it’s completely melted. At this point you’ll add in your desired essential oils (I used a citrus scent) and colorants.
- Mix together and pour your color into a plastic cup. You’ll repeat this for each color you want to create. I ended up doing 9 but probably could have done more since I enjoyed this step so much. ? Let your soaps cure before moving on to the next steps. I left mine overnight, but if you’re impatient, you could store them in the fridge for a few hours, I won’t tell.
- Once your colorful soaps are done setting, take them out of their plastic cups. I ended up having to break the plastic cups to get them out, which was totally fine since they were disposable. Next, slice up your soaps into various shapes and sizes. Set aside.
- To create the hand-cut gemstone soaps, I started by adding a sprinkle of cosmetic grade micro glitter to the bottom of the silicone mold. Please note that you definitely want this to be cosmetic grade and not craft glitter! After having a little too much fun with the glitter, I started adding the slices of colors into each mold. I liked adding a lot more to the bottom of the mold and making the pieces more sparse at the top. I also made sure to use colors randomly in order to get really unique looks.
- Melt a block of opaque and clear base in two separate glass pitchers. I found that having them hot and melted at the same time created a more organic look to the soaps in the end since one or the other didn’t get time to set too long before pouring in the other base. I started with the clear base and slowly poured it over each mold and finished it off with the opaque base filling it to the top. Let your soaps sit overnight or in the fridge for a few hours.
- Peel your soaps out of their molds. I loved this part! It was so neat to see how each one turned out and the variations. Using a knife, I slowly cut facets into each soap bar to create a gemstone. There really wasn’t any method to the slicing, I was just cutting away to see how each soap formed. Again, each one ended up looking totally different and so beautiful!
- To use the diamond silicone mold instead of the rectangle, I did the exact same steps except that for the second batch, I used only clear soap base and one color for each soap to see how they would turn out. I love the semi-clear gem look with the single color a lot, especially with that deep indigo color!
You do not need to ‘cure’ melt and pour base. It is good to go as soon as it is cooled and set
Can you share the exact link of the colors you used? 🙂
These are so beautiful! What a fun project to make with friends and give as gifts. I appreciate that there are so many photos in the tutorial. Thanks!
Can you use any soap instead of the clear or opaque soap?
Yes. It will just change the final look of the soaps.
I do not understand step 2 or you say Once your colorful soaps are cooked you have to cook them how long? at what temperature? can you answer me please?
Hi! You’ll want to melt the soap in the microwave (step 1) and then once they harden in the molds, you can pop them out (step 2). Let us know if you have anymore questions. 🙂
You never ‘cook’ melt and pour soaps. You carefully melt them in a double base bain Marie or the microwave. The temperature should be 60- 80 degrees Celsius or 140- 150 degrees Fahrenheit. You stir until it is melted, then wait until it cools down to 50 degrees Celsius or around 130 degrees Fahrenheit before pouring it. Do not overheat your soap, or it will become spongy.p
I love this tutorial! Pretty soap.
Wow! I love the color made. I cannot work out so beautiful. DIY crafts
This soap looks like a diamond ! They are awesome ! Thanks for posting this craft idea
They are beautiful but I don’t have all the supplies to make it.???????? ????????????????
cool and thicc
cool! my and my friend will be sure to make these!
A few of the diamond shape ones look almost marbled. How did you do that or are they all the colored pieces?
Where can I get ahold of the diamond shape mold?
Wow these look amazing! I’ve made soap before but never like this! x
A Blushing Beauty Blog x
Very cool idea. Love the colours!
Those are awesome! My Mom makes soap that she sells in her online boutique. I have come to HATE store bought soap now. She makes regular shape and all kinds of different unique shapes but she’s never made a gem =) Maybe I can talk her into it for me!
Bridget
http://nuttyhiker.com
OMG this is so cool.
That was so cool
Such a great idea. Would be wonderful presents. Thank you so much for sharing this with us.
Elf www.elfeelgoodsvintage.uk
I think these are the prettiest soaps I’ve ever seen!
x Maria