 Before putting my holiday mugs away for the year, I had a goal to touch up a few that had chips in the paint or stains on the bottoms. I thought I would share how I touched up the painted ceramic mugs I had, but I’d LOVE for anyone with more pottery/ceramics experience than me to share if they have other products or tips in the comments!
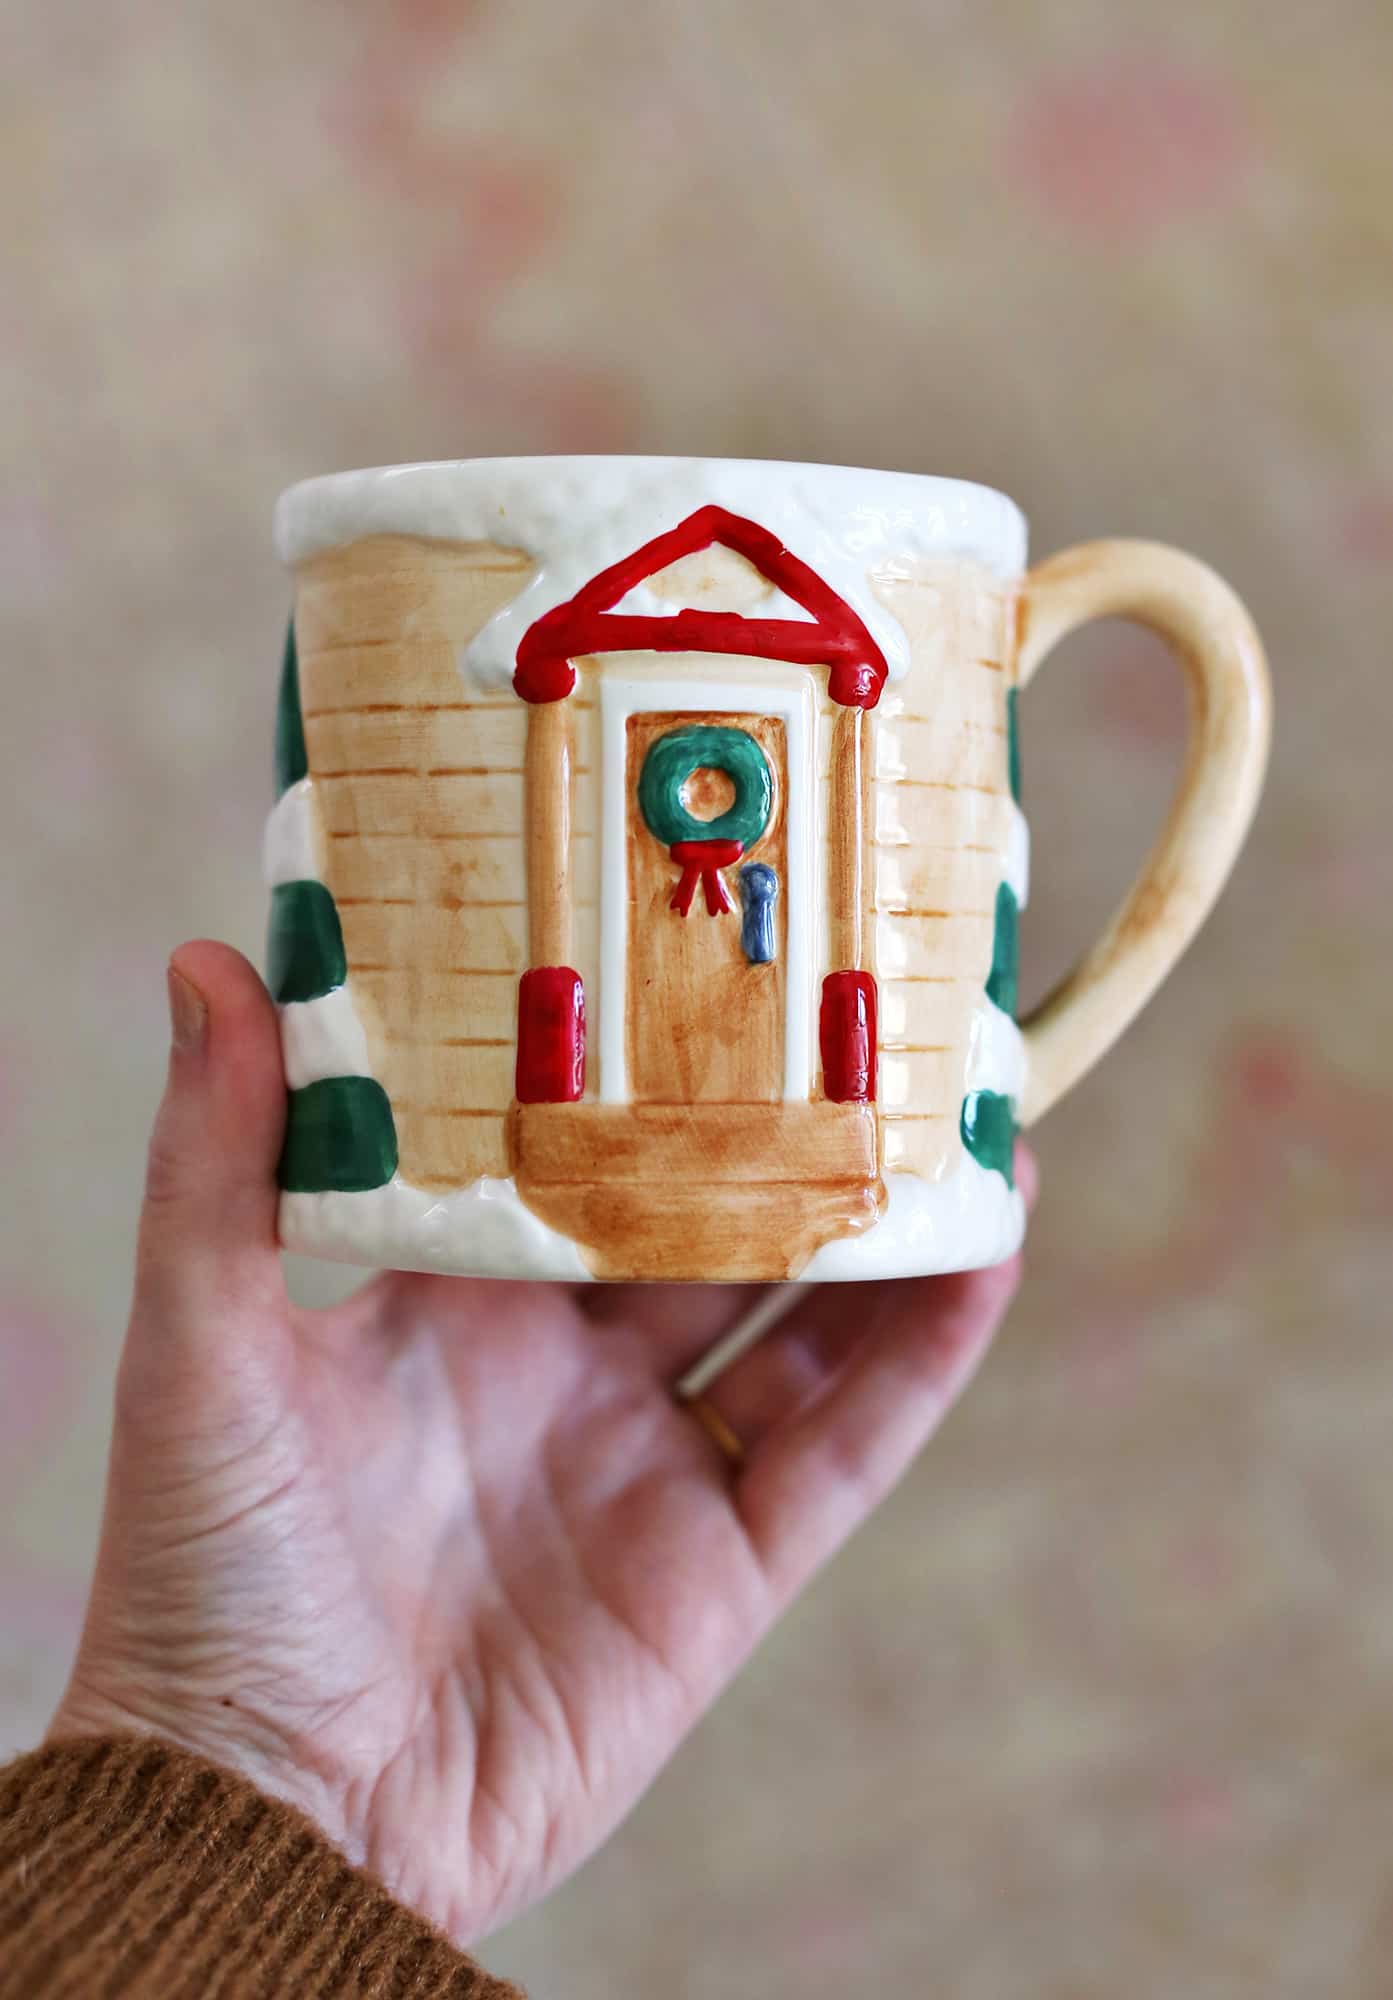
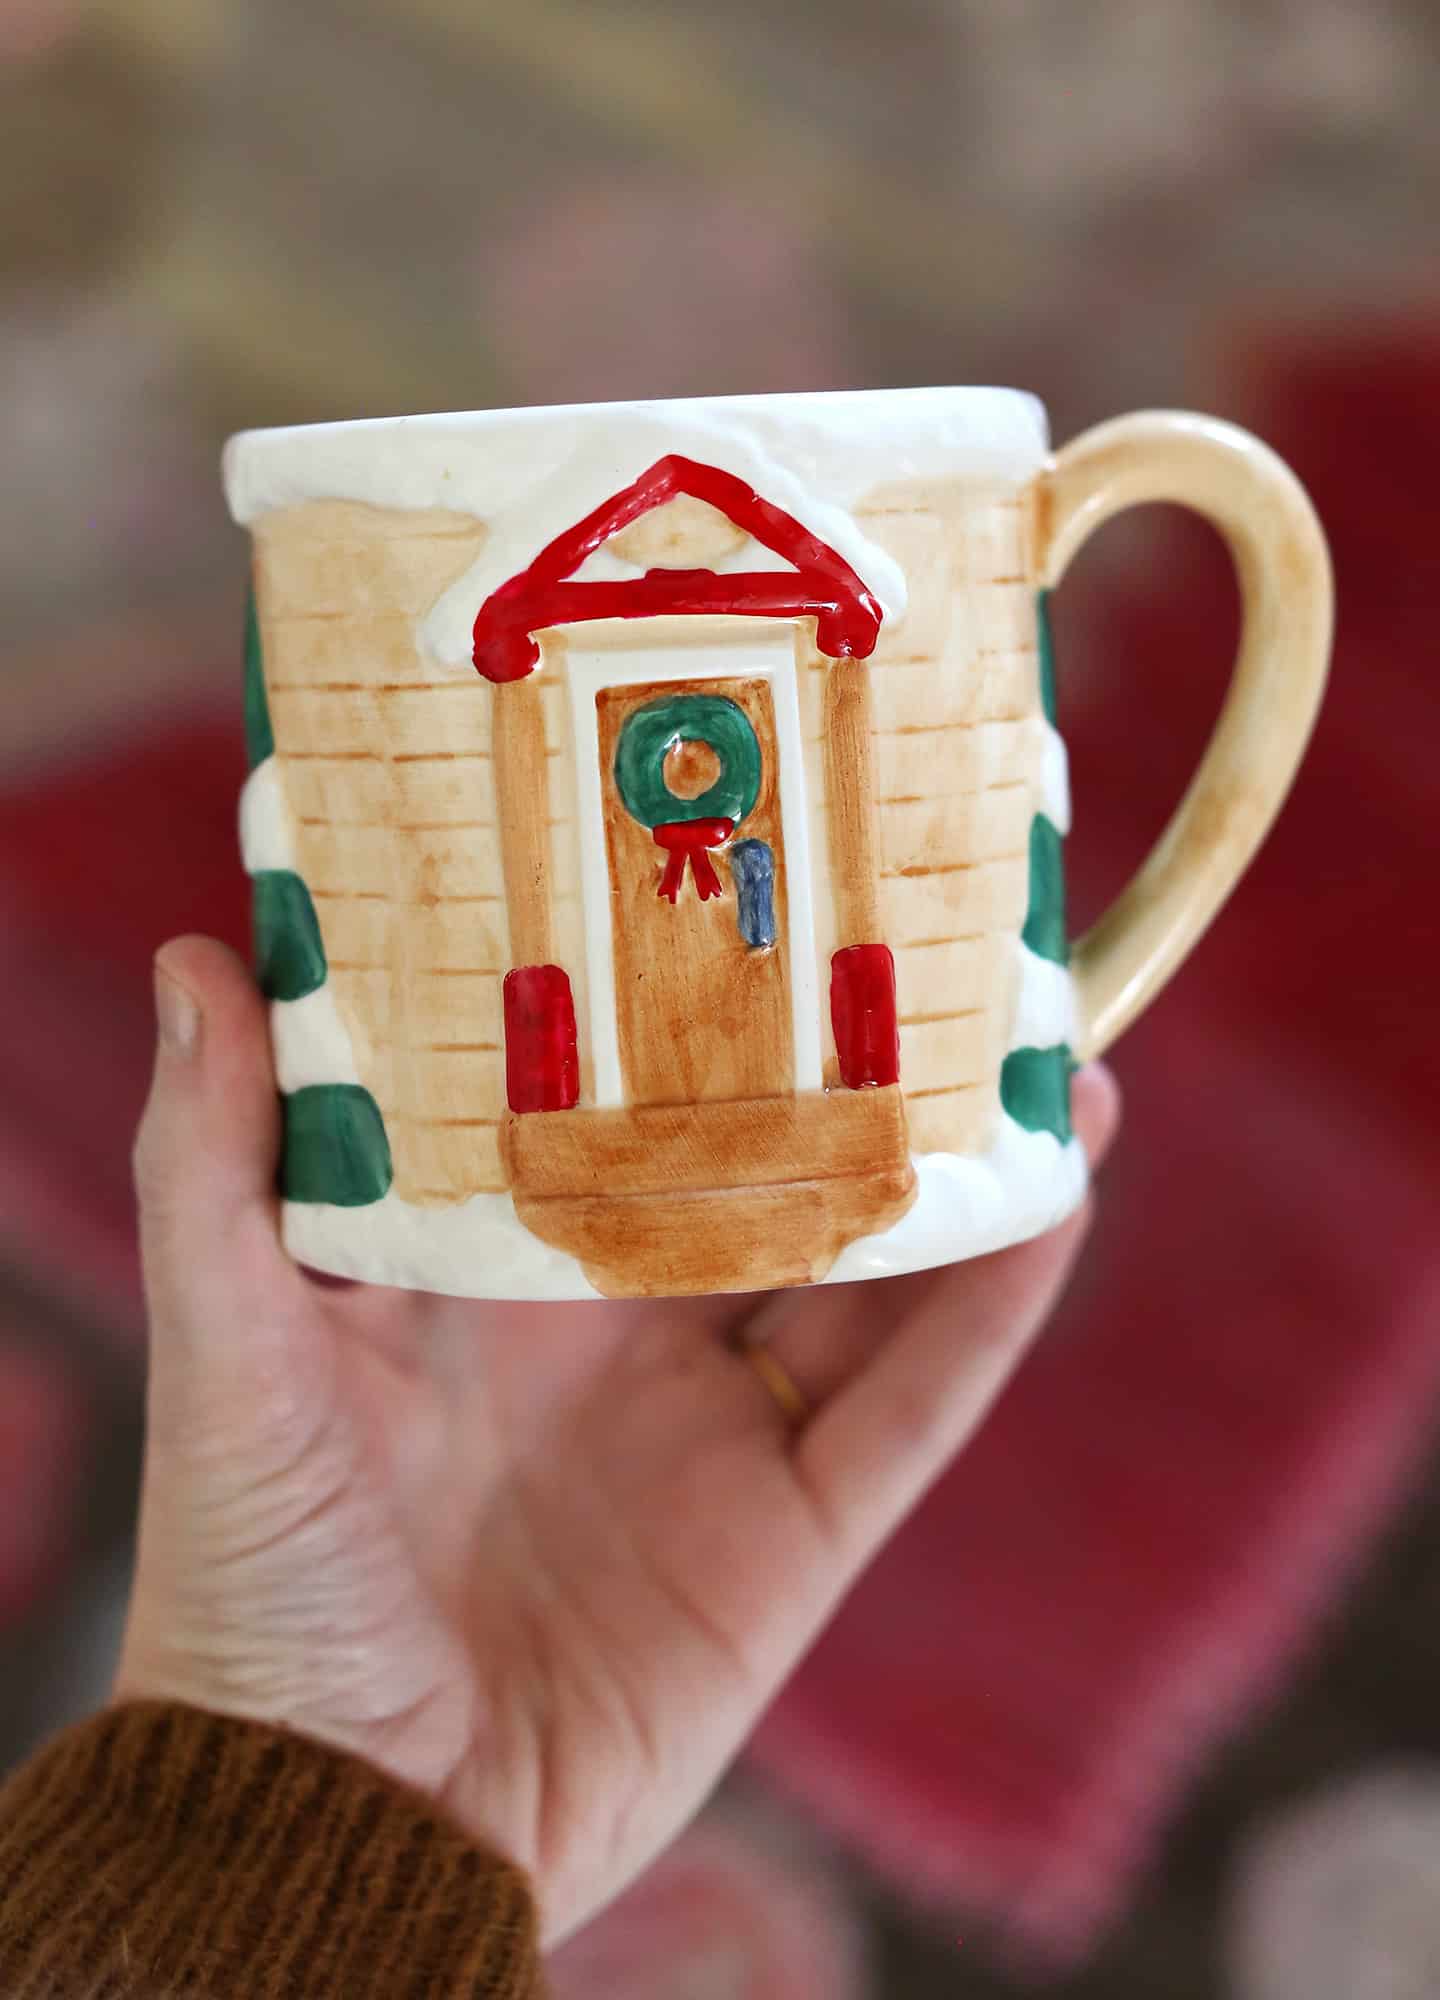
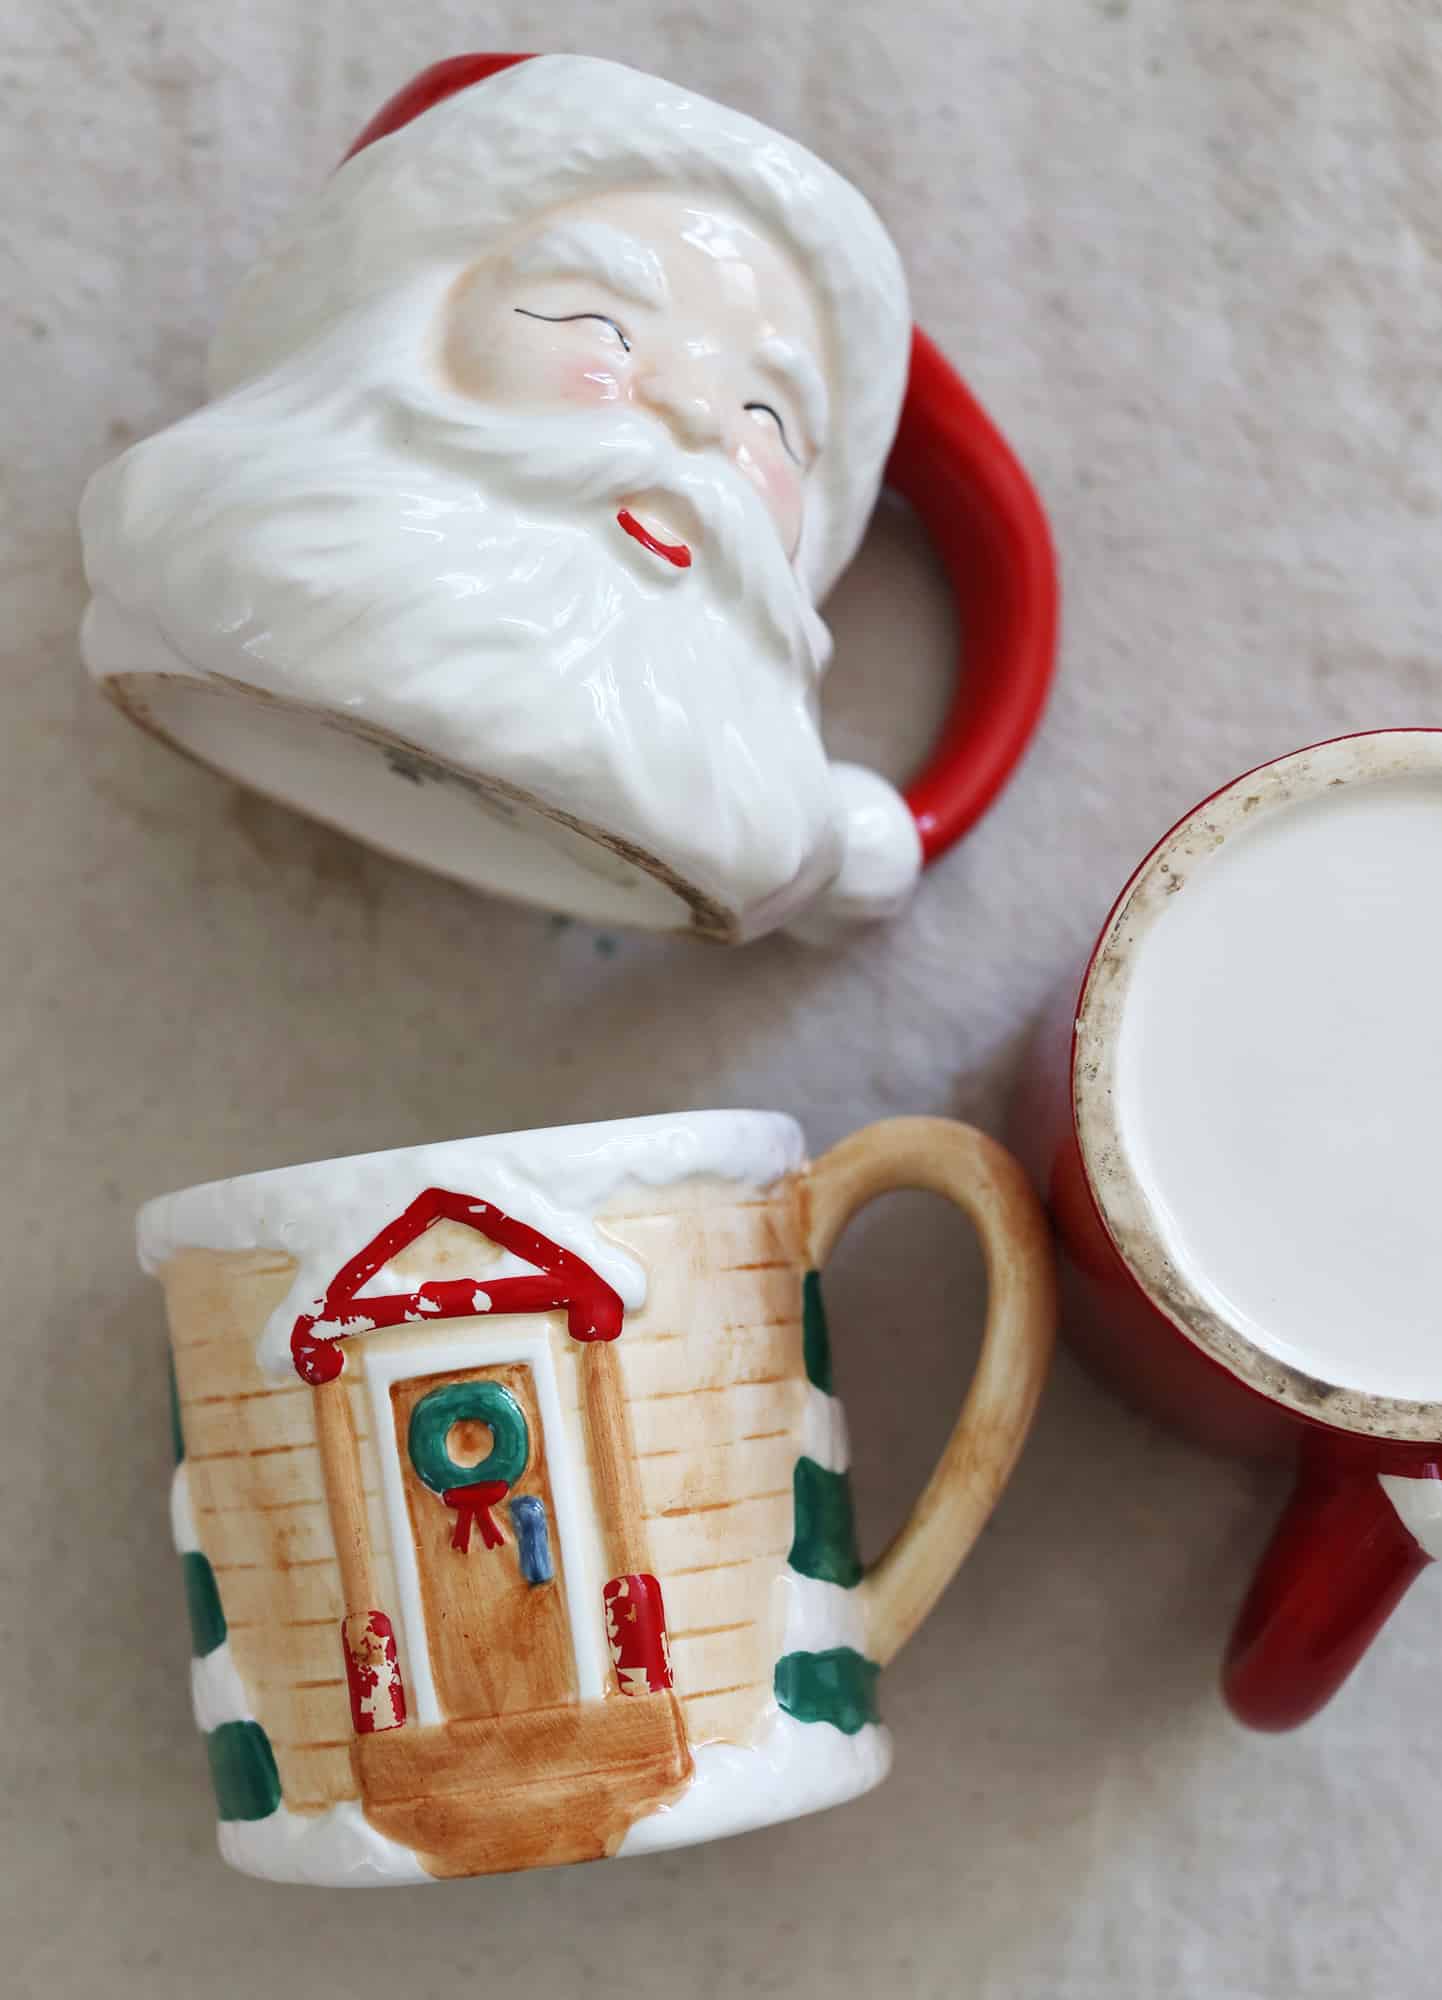 Here are the mugs I wanted to fix. The one that looks like the front of a house was a vintage mug I bought off eBay. The seller actually contacted me after I purchased and said she hadn’t noticed before, but the paint was chipping so she went ahead and mailed it to me but refunded my purchase—which was too nice. The paint chipping was pretty substantial, but I loved the design of this mug so I was hopeful I could fix it.
The other two mugs just had very gunky looking bottoms. I had already washed them numerous times and even tried some Goof Off, but the discoloration/residue from I think the store stickers was still there. Even though it was only on the bottom, I didn’t like how you could see it when I actually use the mugs, like lifting them to drink from. I kept noticing it in Zoom meetings all month and it just looked gross to me. So I wanted to touch those up as well.
 Supplies:
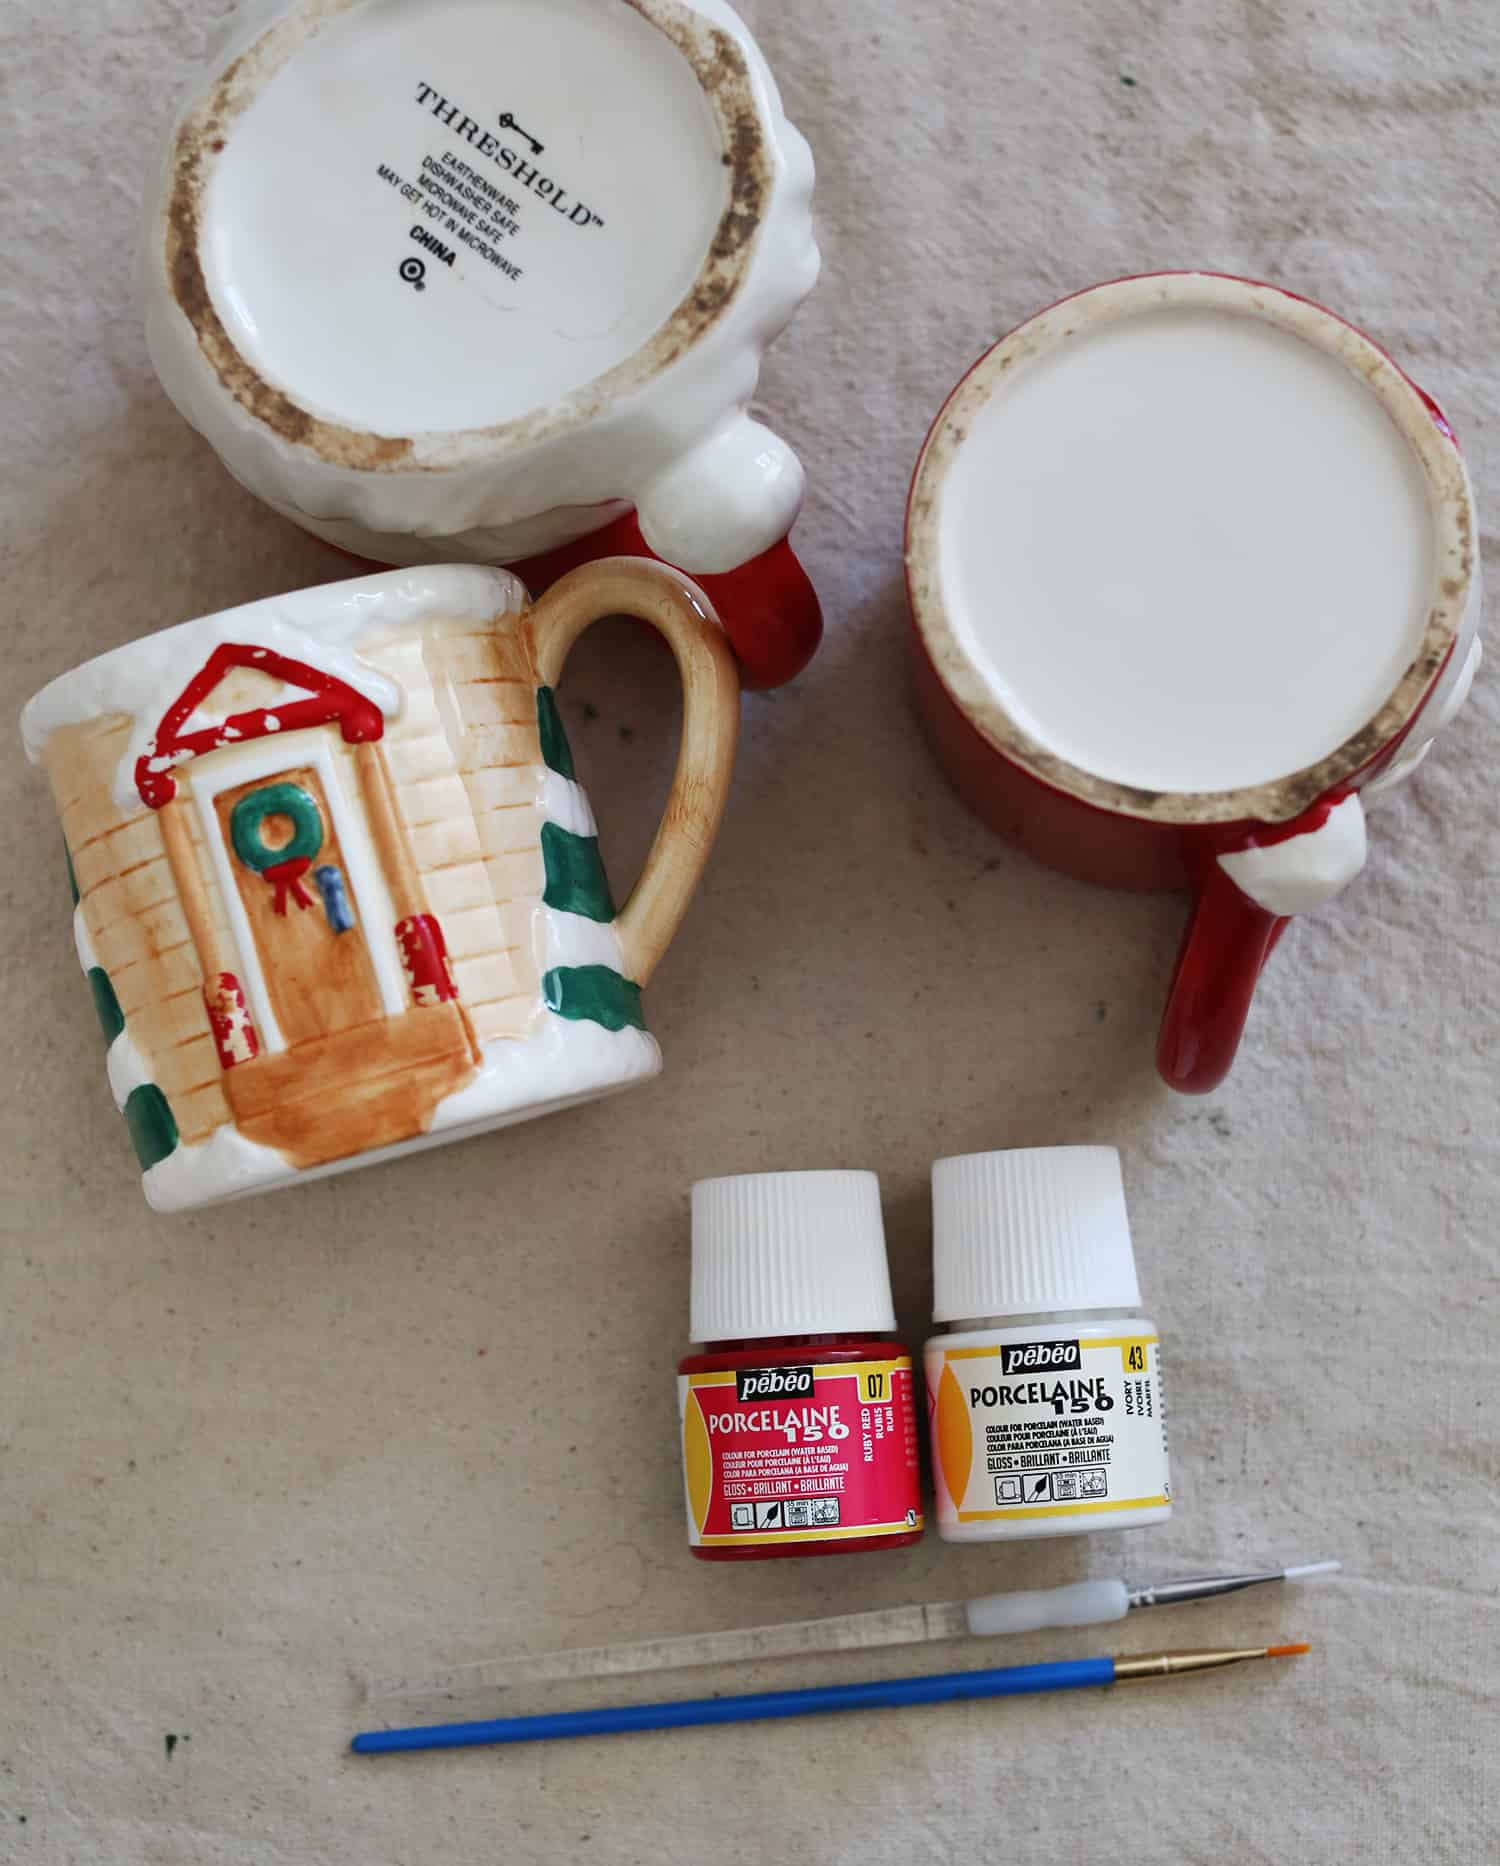
-Pebeo Porcelaine 150 paint (in Ruby Red and Ivory)
-Small/fine paint brushes
-baking sheet
-drop cloth or scrap paper to work on
Step One: Use a small brush to paint in the areas that are chipped. This paint is sort of a medium consistency, not as thick as an acrylic paint but certainly not a super watery/runny paint either. It covers better than you might think, but for the white mugs I had to use a couple coats. Then let the paint fully dry.
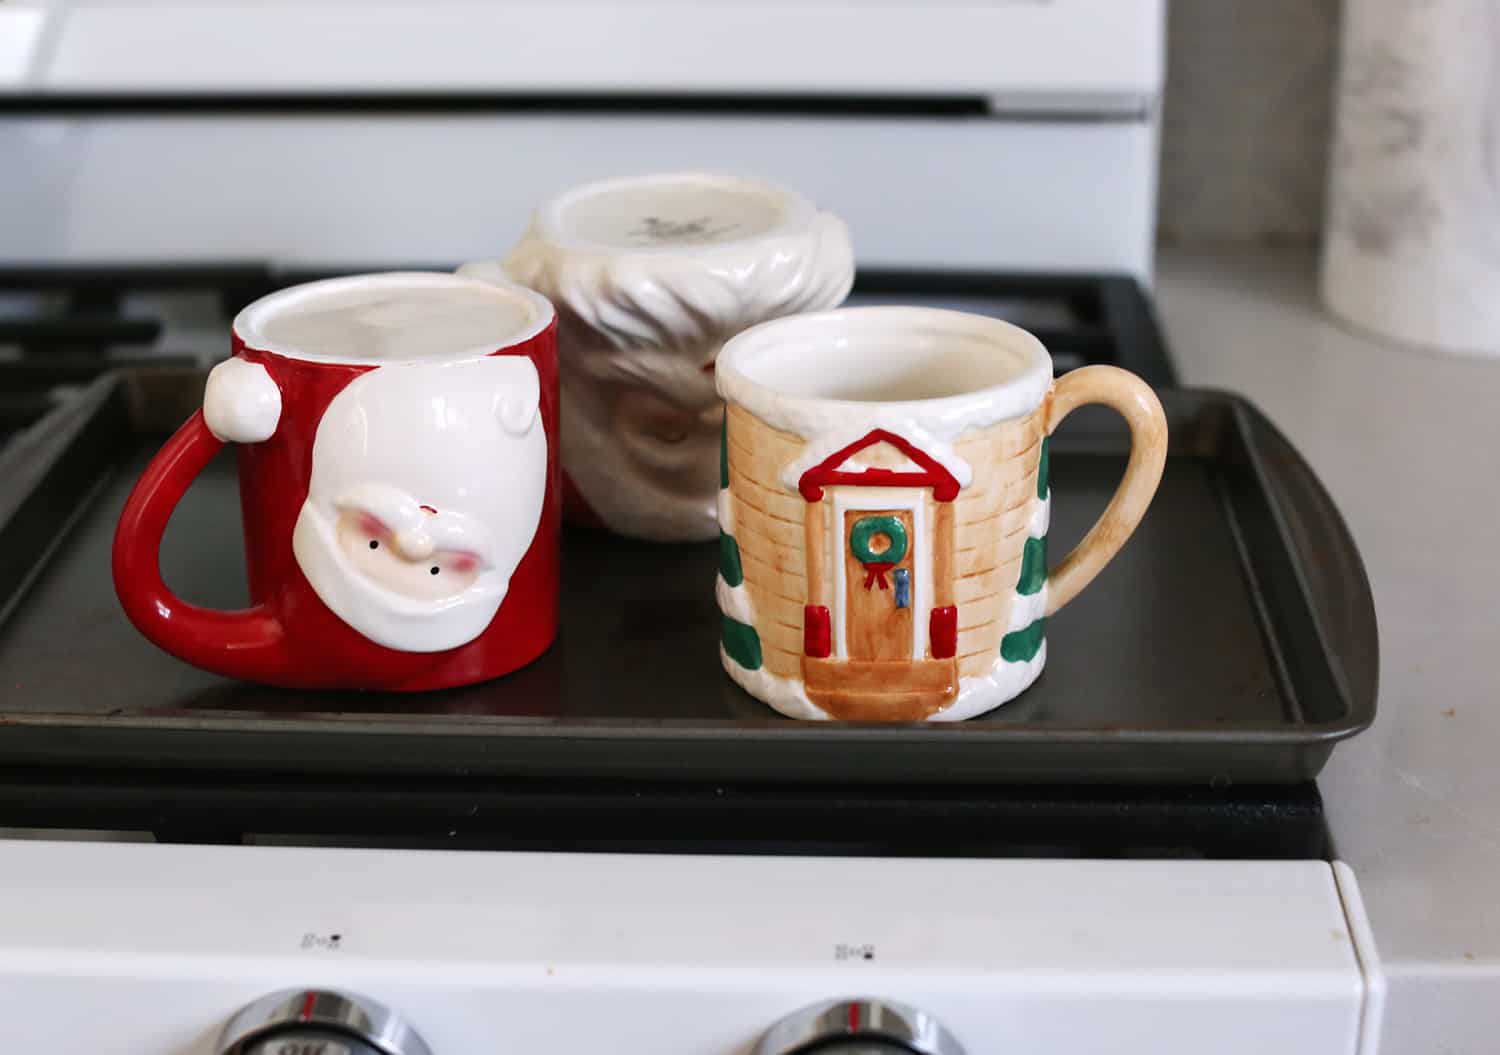 Step Two: Bake the ceramics at 300°F for 35 minutes. When you place the mugs on a baking sheet, take care that the new paint is not touching the sheet or other ceramics you might be baking.
Once your ceramic mugs cool down from the oven, the paint will be very hard and shiny. These are dishwasher safe as well.
 Is this paint food safe? I am not sure. I found this article, which seemed to suggest either one might be true? The paint is nontoxic, but I would avoid using it on areas that will come in contact with your mouth OR that will get heavy use from spoons, forks, or knives. For the mugs I was touching up this worked well. But, if you are painting the inside of a mug or bowl, I am not sure it would be the best choice.
Happy to give my mugs a little touch up before they go into storage until next year. Thanks for letting me share. xo. Emma
I finally looked up how to repair the chipped paint rim on a beautiful favorite mug I’ve been loathe to toss! So glad I found this post and it’s this easy! Upon ordering this same Pebeo porcelain paint on Amazon, I did discover it states the product is food safe, FYI. Since it is a mug rim, finding out was a necessity!
I just looked up this paint on Amazon and it does in fact say food safe. I plan of repainting the chipped rim of a beautiful ceramic mug I’ve kept for years unwilling to part with it! Hoping for the best!
I bought a glazed pottery wall hanging (a swallowtail bird) as a gift for a close friend. It’s primarily beige-ish in color but I noticed a small glob of brown on it that I’m not really happy with. Is there anything I can do to possibly cover it somehow? I’d like to be able to camouflage the dark spot. Could I use a dab of acrylic or porcelain paint? Maybe I’m just stuck with it as it is lol!
My ceramic piece has a large piece missing what could I use to repair that before I paint it.
Depending on the size of the piece missing I would maybe try molding some air dry clay to the area, the removing it and allowing it to fully dry. Then glue in place. Then paint with the ceramic paint to try and match so it’s no longer noticeable.
Good luck!
Hi Emma, thank you for making this! Do you know if its okay to put mugs that are not microwave safe in the oven? I just got a mug that sadly has a chip in the paint and Id love to do this hack, but the bottom of the mug states not microwave safe and I didn’t know if that affects being oven safe at all.
Thanks!
Hi! As long as the mug is made out of ceramic, it should be fine.
How do I know if it is percaline or ceramic or is there a difference?
I love this ! I thrift mugs all the time so happy to know this !!
I wanted to make a quick comment. The Mr. Clean Magic Erasers takes all the dirt and stains off the bottom of mugs, plates etc. I have been doing this for some time. It works well. I just wanted to pass this along.
I was just coming to say magic erasers. They really work great on mug bottoms. Baking soda has also been a good food safe abrasive cleaner for those rough mug bottoms.
Did you paint over the whole area (i.e. the red of the house) or just touch up the white spots on the red? Because I don’t see the touched up spots at all! Also, does the color change when you bake it? Worried about getting the color matching right for a patch on a candy dish.
I touched up the chipped spots only (not the entire area). I was worried about matching colors too! And the red turned out to match even better than the white, which surprised me. I think if it had been super off it still would look better than it did without the touch up, so that gave me the confidence to try. But yeah, it’s a little bit of guessing game especially if you buy the paint online.
So this may be old news already, but I’ve found that the fastest way to whiten the unglazed bottom on any dish is simply to rub it with a magic eraser (Mr. Clean brand or generic). It works almost all the time, and gets rid of most, if not all of the grey/black discoloration. It’s also great for removing sticker residue, and doesn’t have the yucky smell that Goof Off or Goo Gone do. A magic eraser will also usually take off the grey streaks that remain in white dishes from silverware rubbing them (Bar Keeper’s friend works too). I’ve rehabbed many fun dishes so they’re pretty to gift this way (my dad loves the old diner-style coffee mugs) and they look lovely when I’m done!
That’s a helpful reminder about the Magic Eraser. Thank you!!
I swear, you guys have the most timely posts, EVERY time I need them! I have a vintage ceramic decoration from my grandma that’s had the ceramic/porcelain chipped in places over the years. I contacted companies to see how much it would cost to fix it, and they all estimated $300+. I think I can fix it with the method you described! Thank you, thank you!!!
Whoa, yes this cost me quick a bit less than $300. Since you’re doing a family heirloom I would take care to carefully match the paint colors. I had no problem with my project, but the stakes are higher on yours. 🙂
I think the dark rings on the bottom of the mugs might just be unglazed parts, which makes it pretty easy for the porous ceramic to pick up dirt and stains which is pretty difficult to get off. When ceramic is glazed and then baked it needs a glaze-free part to stand on, since it would get stuck to the oven if the glaze was touching it (just like with the porcelain paint). So most mugs and other tableware has a part that isn’t glazed, which has a tendency to get discoloured over time (especially if it comes in to contact with stuff that stains a lot, like tea and coffee).
That makes sense! It felt like a different texture too, much more rough.
That rim on the bottom of mugs is definitely unglazed…I wanted to share my experience with this. I have several Threshold Christmas mugs from Target that, because they are for the holidays, I had in a plastic storage container, in a closet that backs up to my garage, which has a non-insulated wall. I noticed while looking for something else in the closet, that there were droplets of water forming in my container. I opened it and was horrified to find that all those unglazed rims were growing mold! I had to soak the bottoms of my mugs in a bleach solution to kill the mold and remove the stains. I still haven’t put them back into storage yet…and may try this for long-term remedy. Thanks for this post, and to others for the Magic Eraser tip!
this was very helpful!
another thing I tried when getting stickers off of different surfaces is using Lemon essential oil- It makes the sticker just slide off. without barely touching it! it works SO well 🙂
Love it. Thanks for the tip!