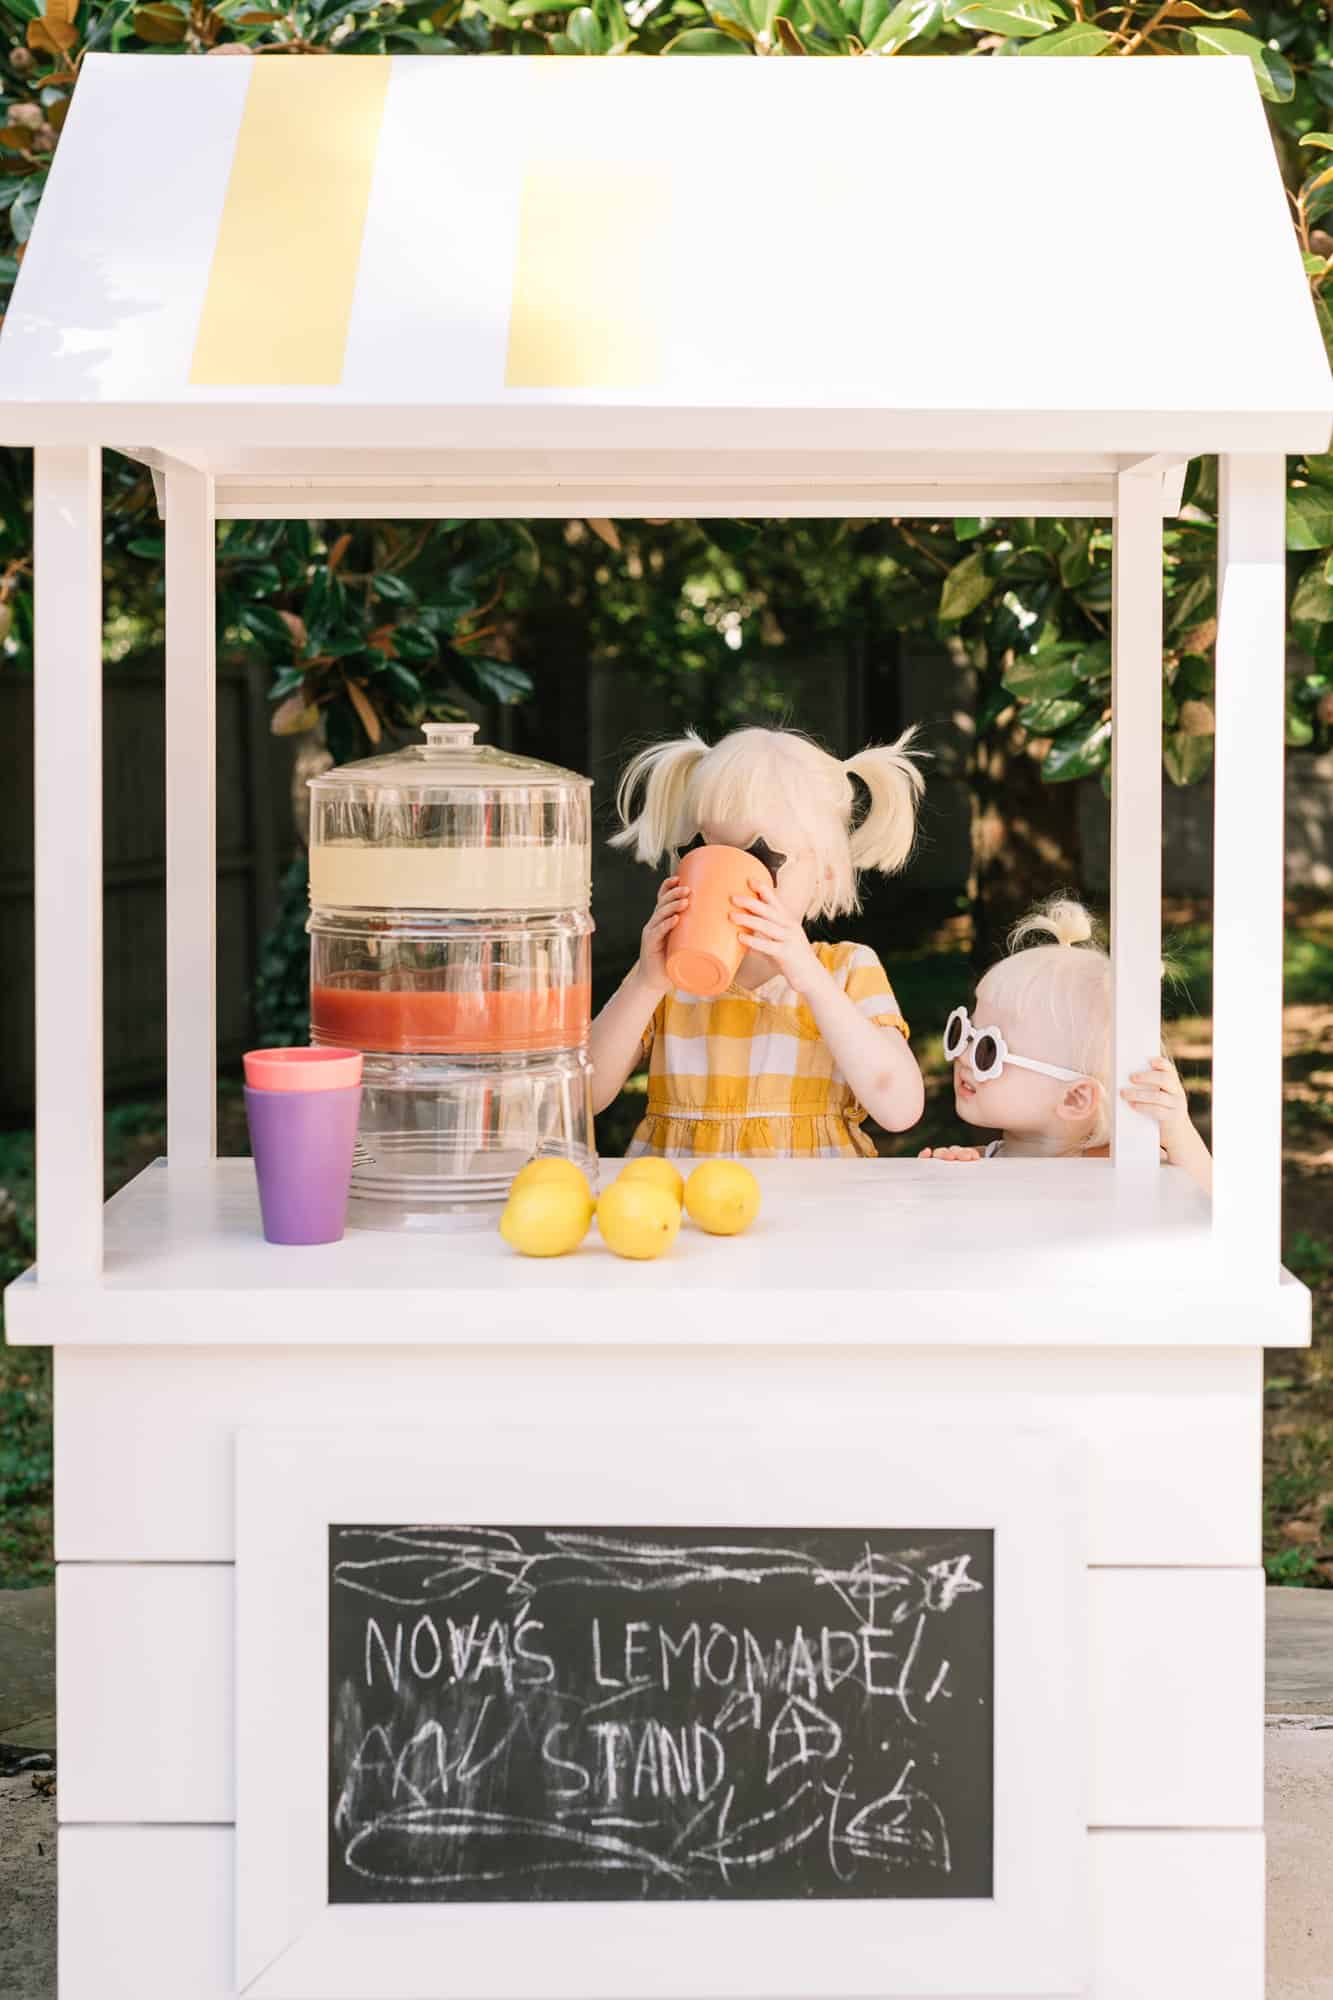
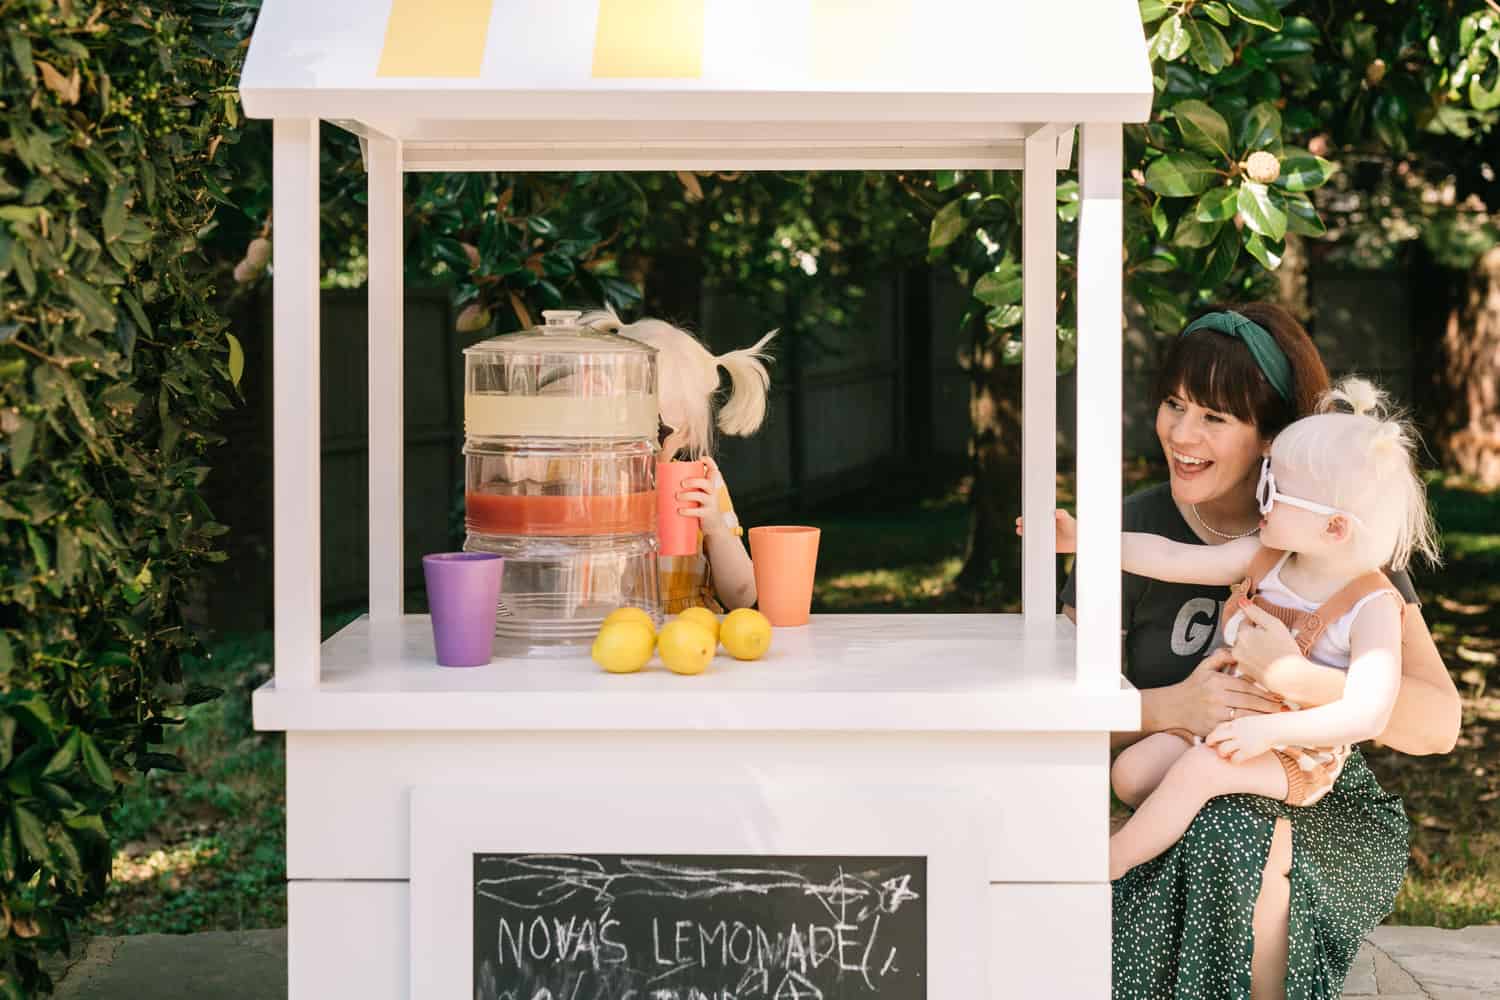
 I’m so, so excited to share today’s DIY with you! We’ve been wanting to make a lemonade stand for what feels like forever, but after we saw one on Daniel Tiger, we knew it was the perfect time to go for it.
Nova has brought it up over and over and over to us. Then, one magical day, it appeared in our garage (thank you, Collin) and her 5-year-old-world was complete!
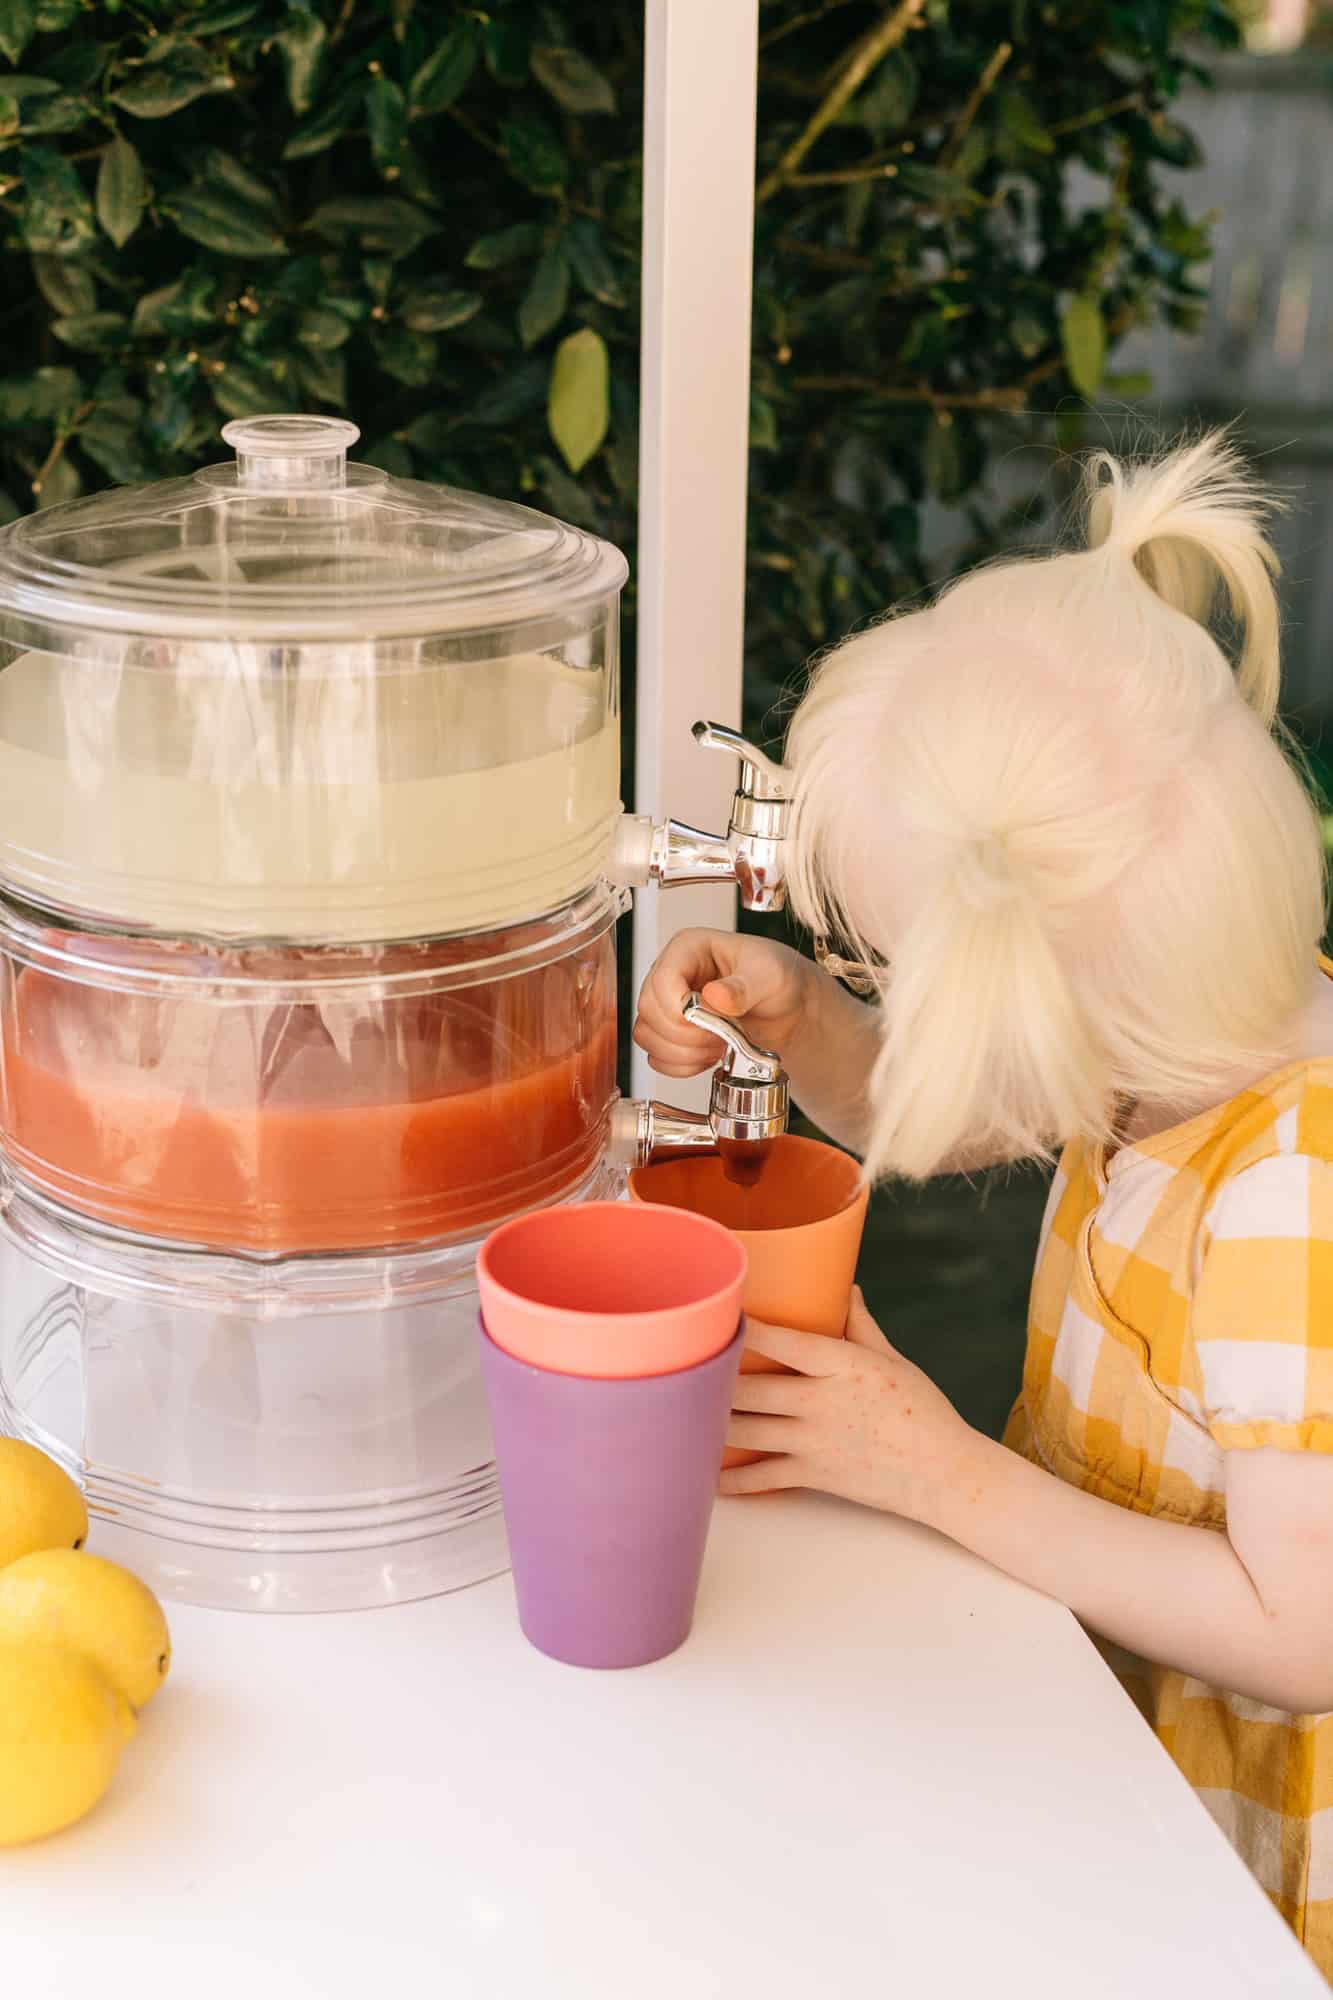
Related: Make your own homemade lemonade for this stand, and for more kids activities and printables check out Childhood Magic!
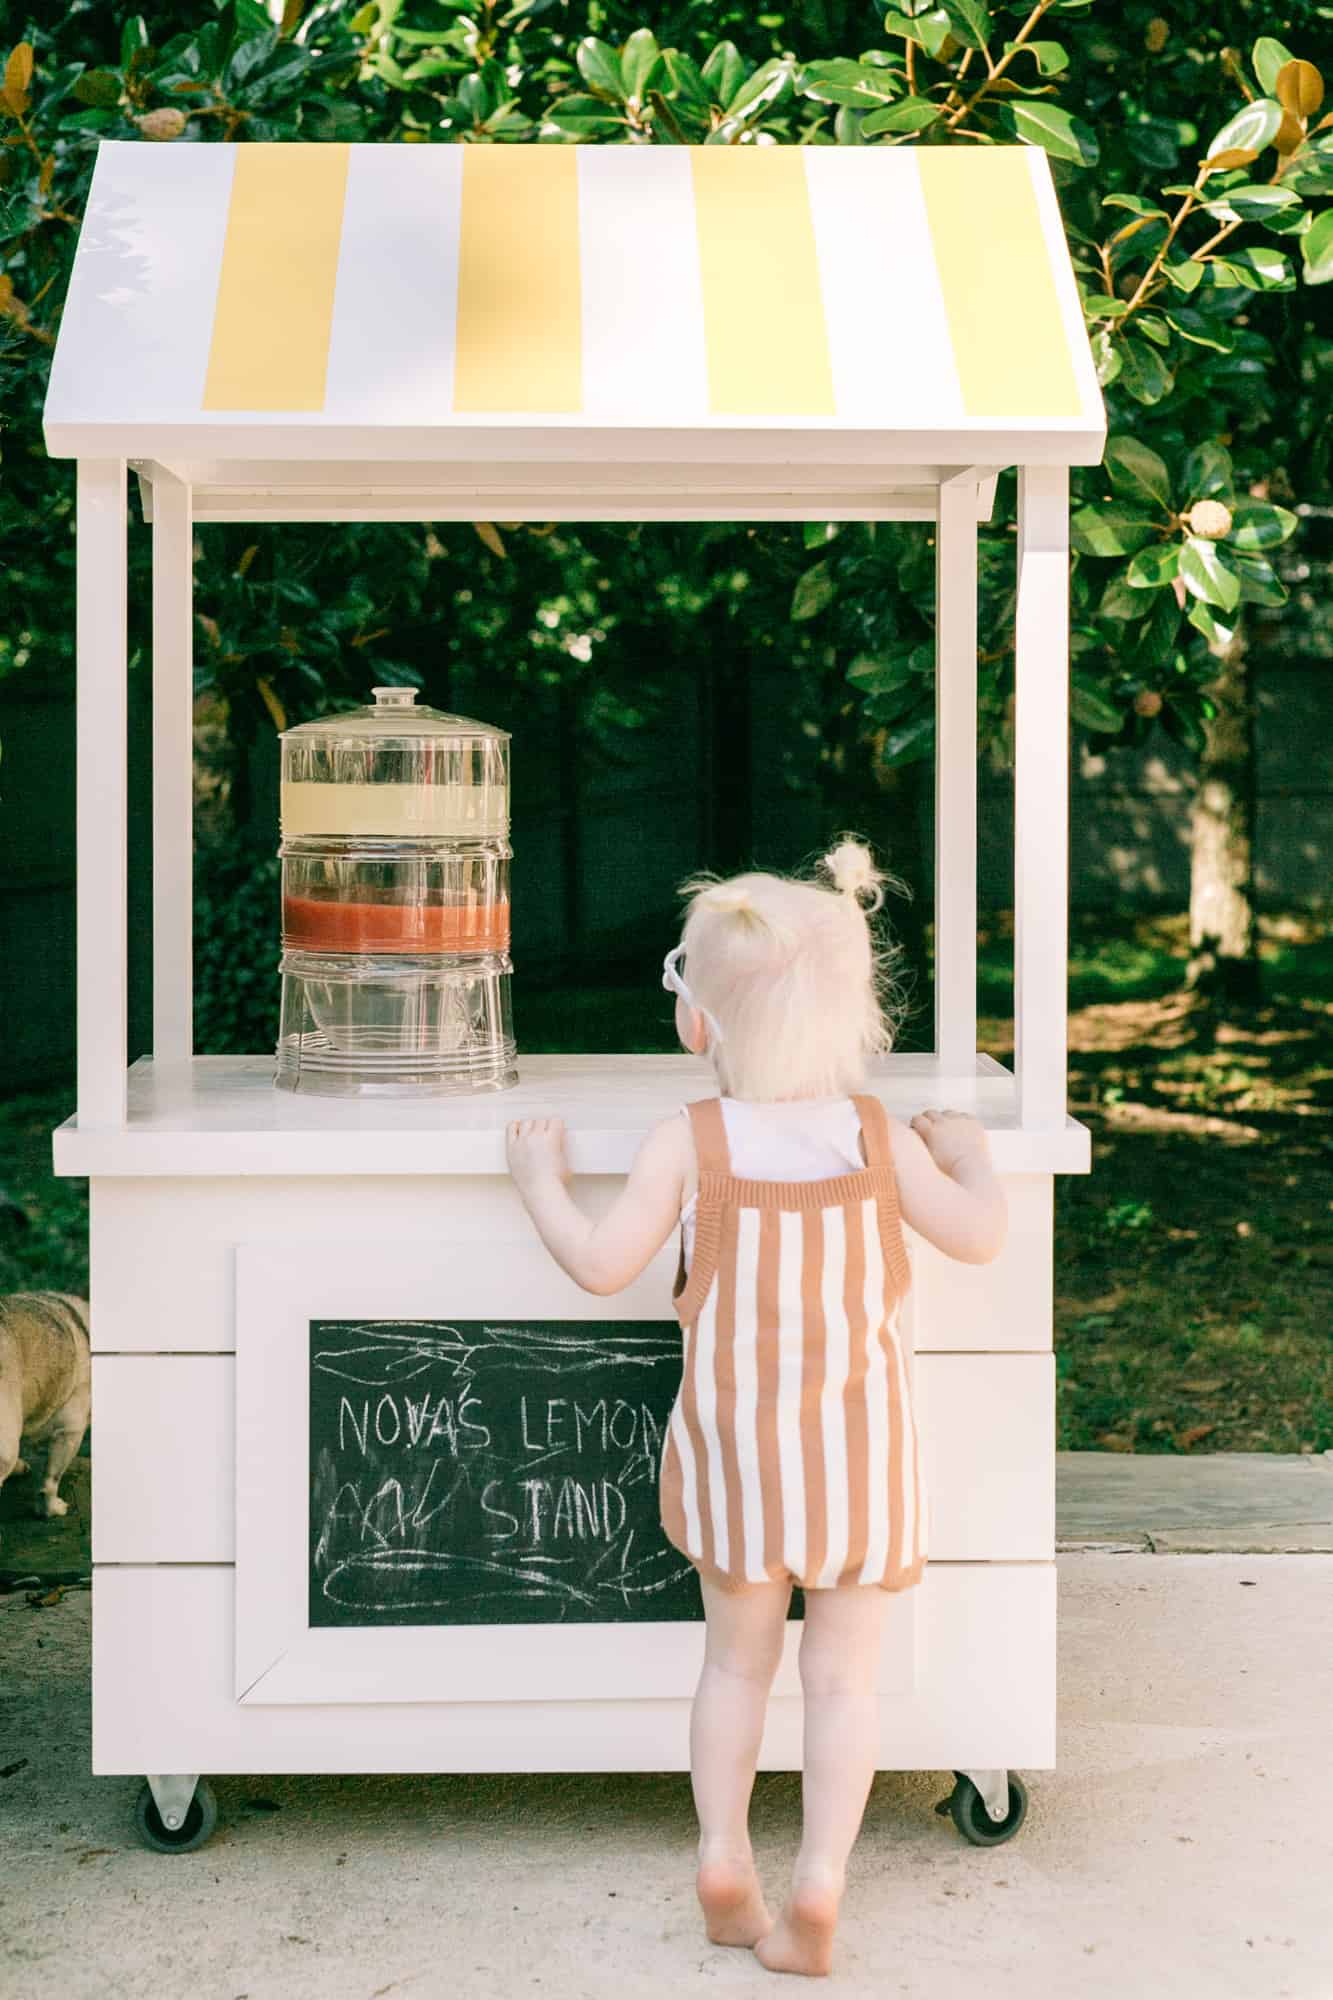
Since we moved, we’ve been rolling it out every weekend. Nova loves serving lemonade. And someday (after COVID) maybe we’ll even get to use it the traditional way as well. But for now it’s all good—we’re her eager customers!
First, I’d love to share some cute photos with you! Then I will pass it over to Collin for the full DIY steps!


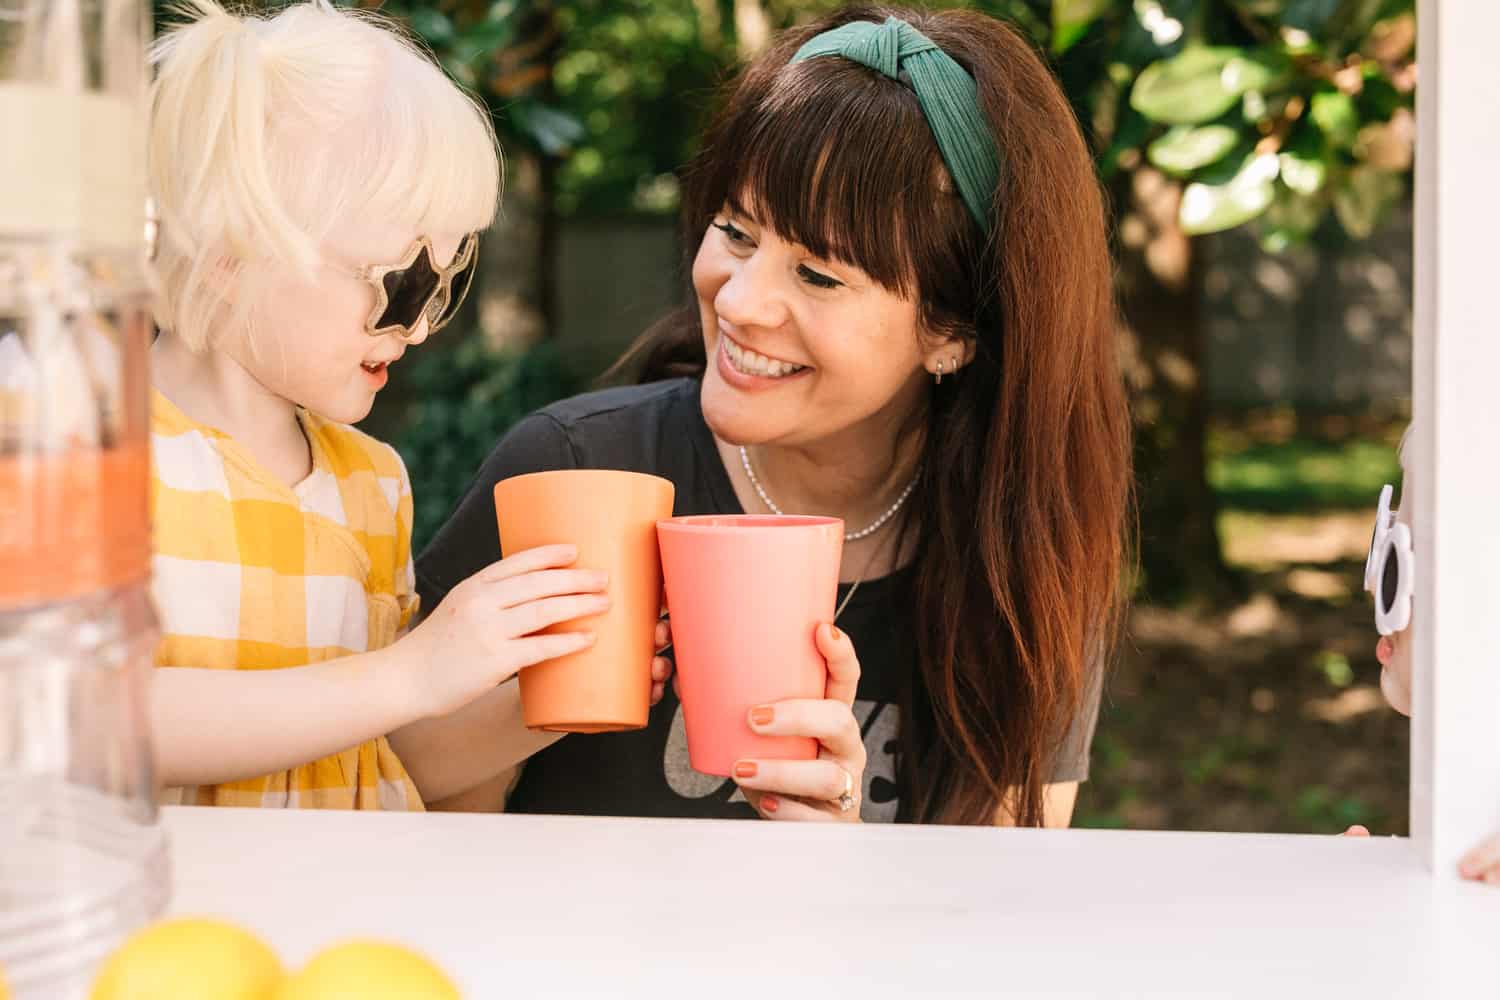 Cheers, girl!
Supplies:
-four 2′ x 4′ x 8′ boards
-three 3/4″ x 8″ x 8′ primed boards
-six 3/4″ x 4″ x 8′ primed boards
-two 3/4″ x 2′ x 4′ plywood boards
-four 3/4″ x 1.5″ x 8′ primed boards
-nine 1.5″ x 1.5″ x 3′ boards
–two 4″ fixed casters
–two swivel casters
–2″ square head wood screws to use with pocket hole jig
-wood filler
-caulk
-painters tape
-paint brush or mini roller
-exterior white and yellow semigloss paint
Tools:
-miter saw
-circular saw
-jigsaw
-electric drill
-nail gun
-clamps
-speed square
–pocket hole jig
 Start by making the square frame for the base out of your 2″ x 4″ boards. The base frame measurements are 3′ wide by 23.25″ tall x 2′ deep. Cut your 2’x4′ boards to make two identical 23.25″ x 2′ side boxes and then connect the two sides together with 4 boards cut to 33″ as shown above. Now is also a good time to attach the casters to the bottom with some screws. Initially, I was going to only use 2 casters on one side, but ultimately went with 4 to make it easier to roll. The picture above was taken before I changed the plan 🙂
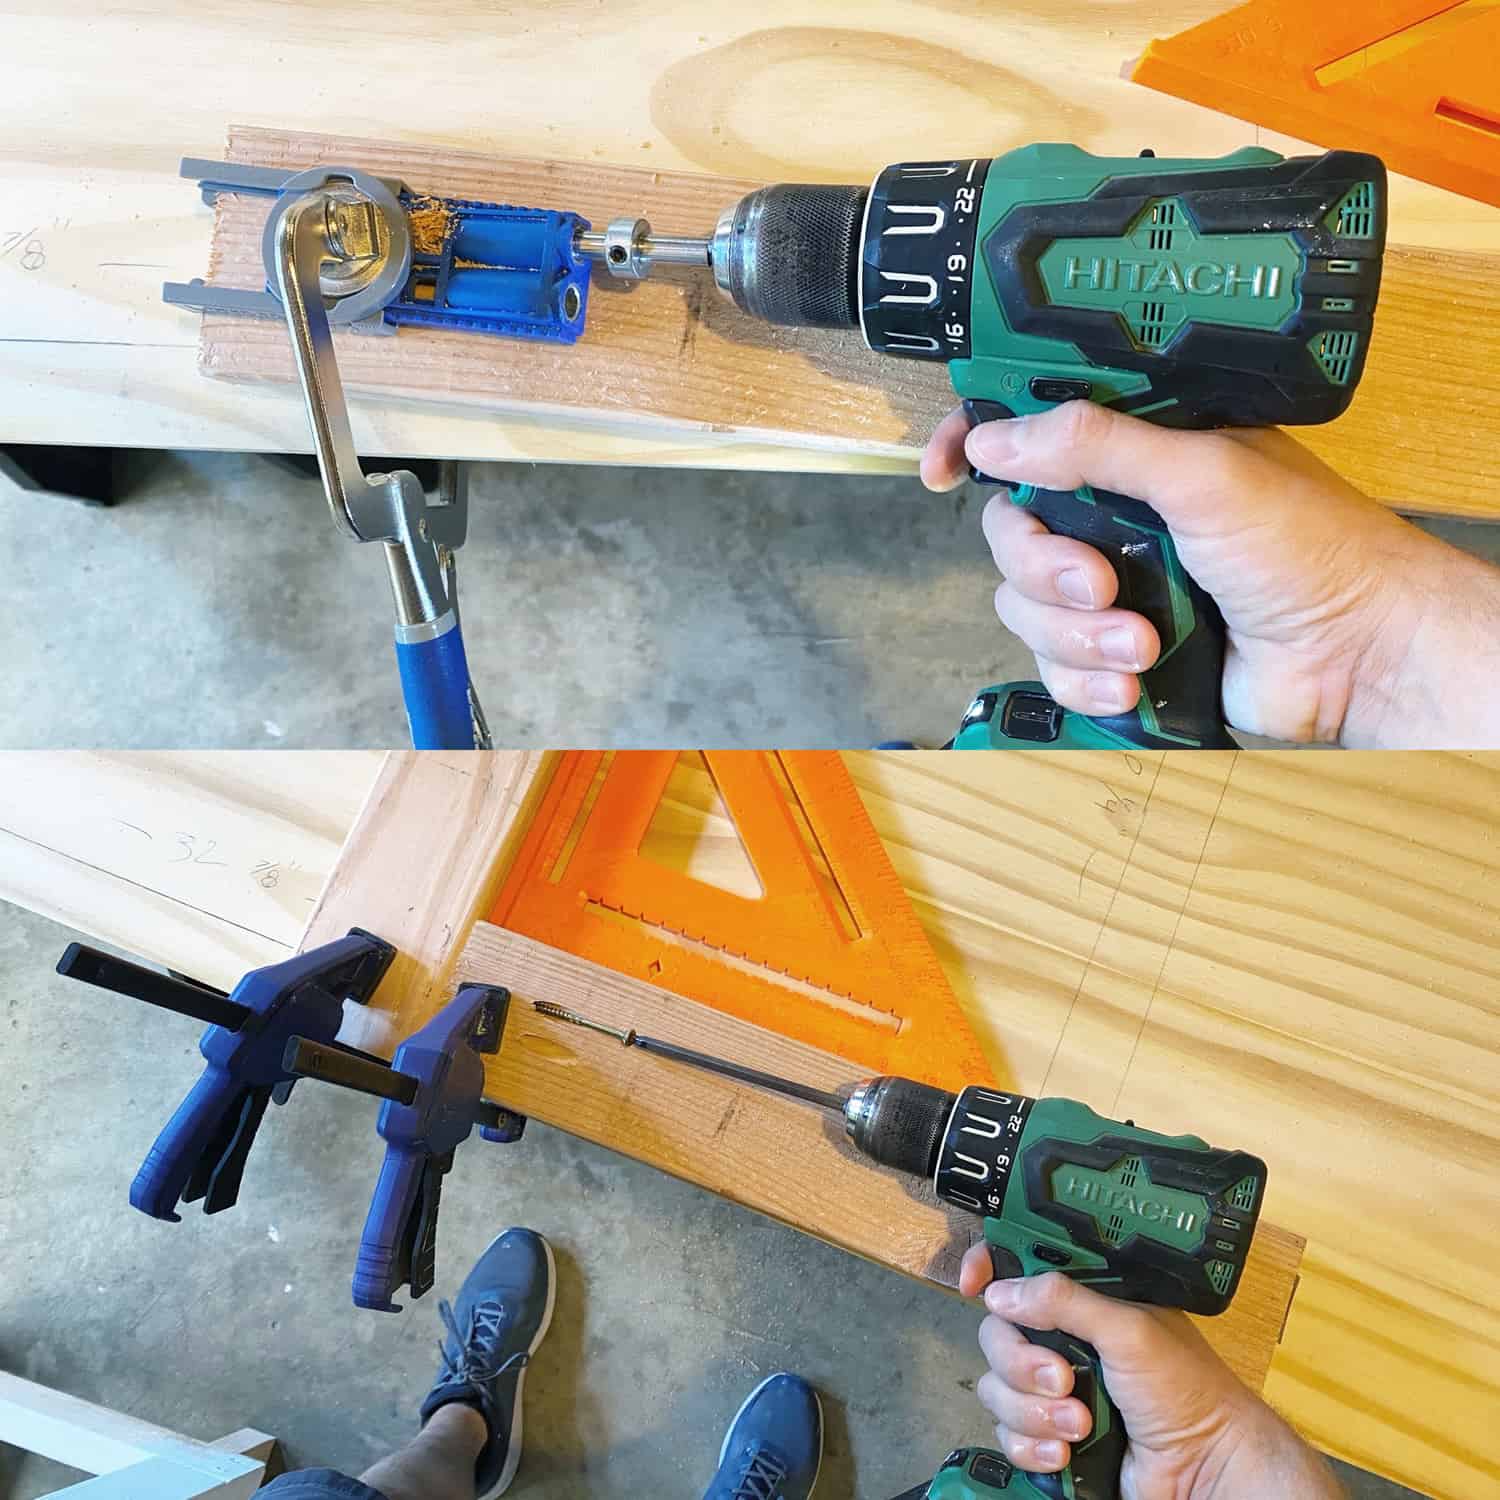
To attach all of the 2″x 4″ boards together, use wood glue as well as a pocket hole jig and wood screws (the pocket hole jig will come with an extra long square driver bit as shown above). It’s a good idea to use some clamps to hold the pieces of wood in place while you screw them together, as well as a square to make sure everything is as a perfect right angle.
 Next, cut your 3/4″ x 8″ x 8′ primed boards into six 2′ side boards and three 37.5″ front boards. Attach the side boards first with a 1/2″ gap between each board and then attach the front boards the same way so the front boards cover up the cut edge of the side boards.
Attach pieces with wood glue and a nail gun. Pro tip: cut some small 1/2″ wide pieces of wood from some scrap wood to use as a guide for the 1/2″ spacing of these boards!
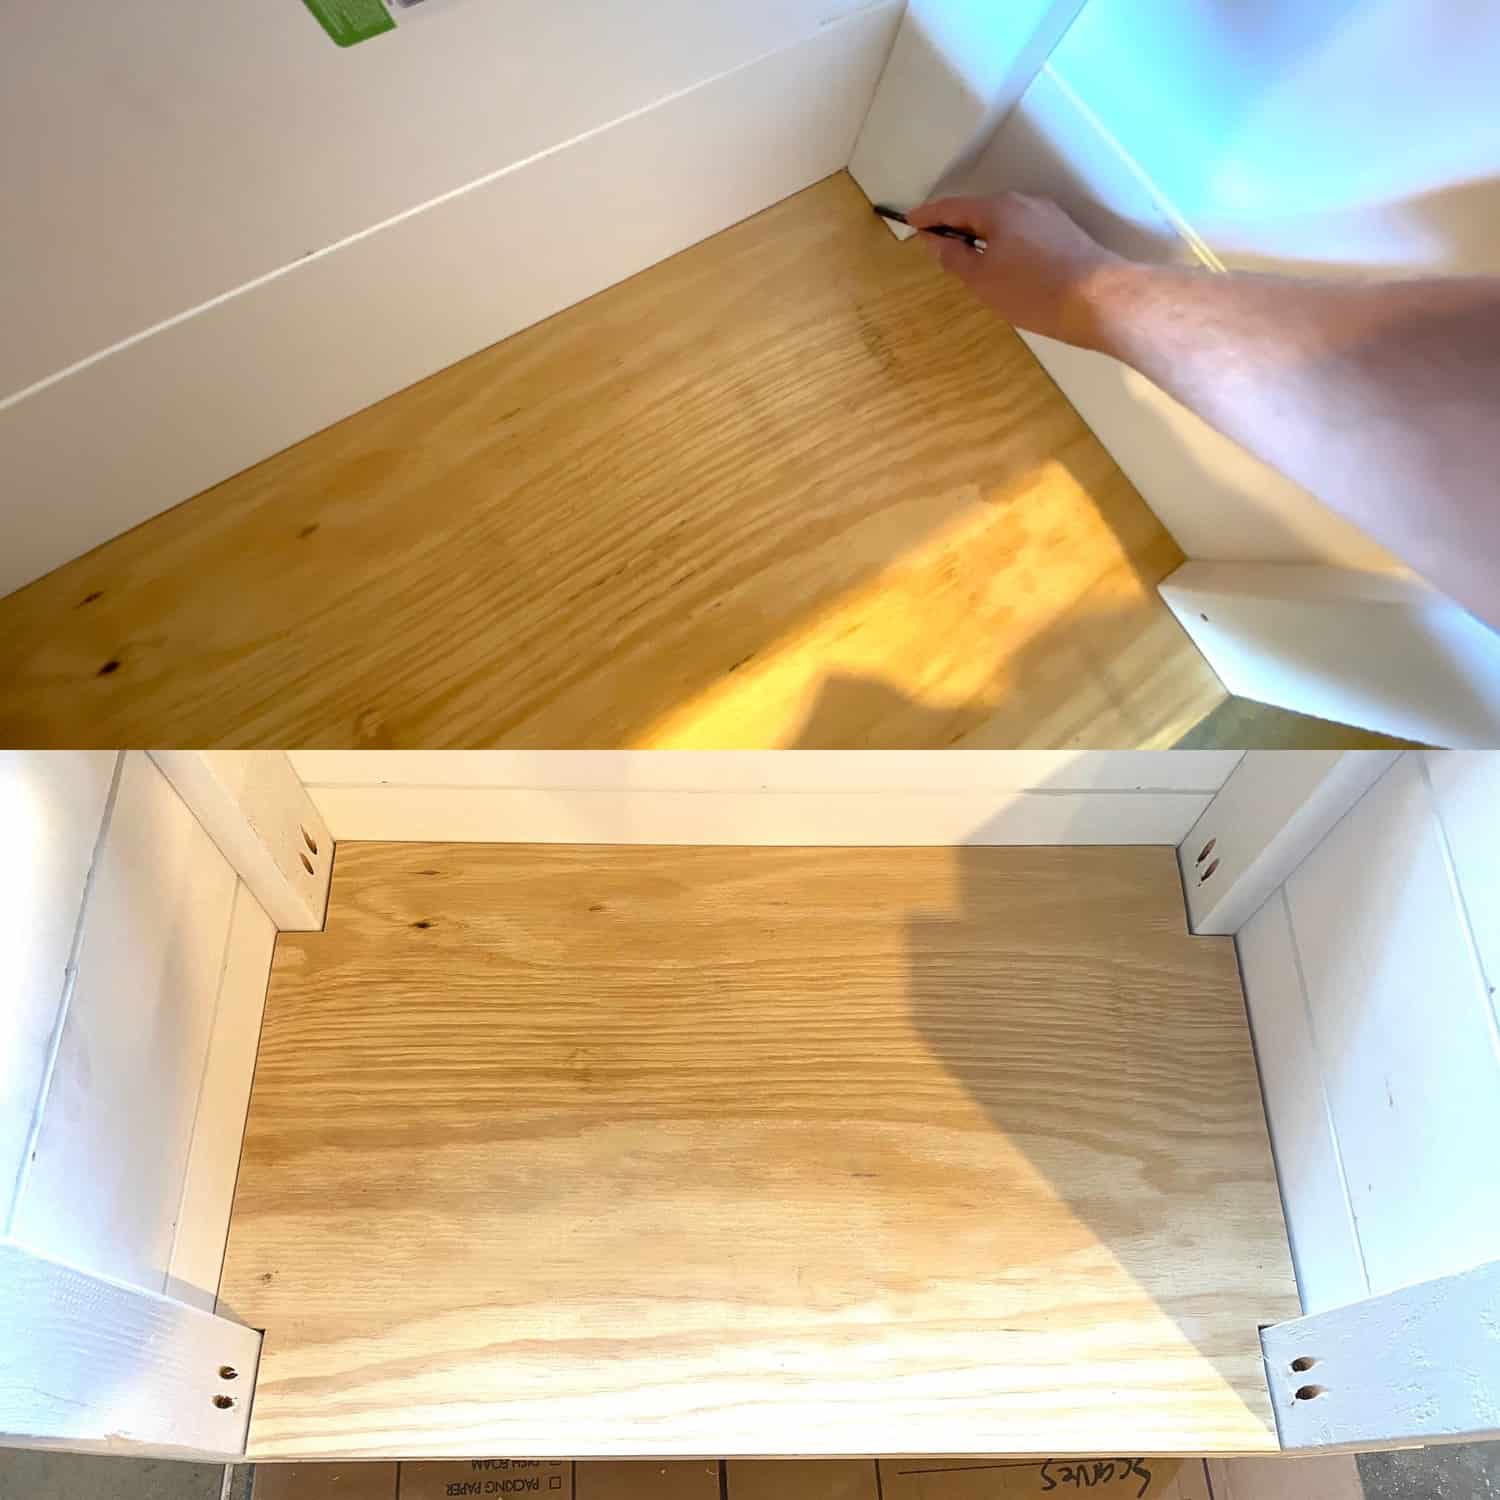
Now that the base of the stand is mostly done, flip it upside down and place it on one of your 3/4″ x 2′ x 4′ plywood boards and trace the inside of the base onto the plywood as shown above. Now cut out the shape with a jigsaw and lay it into the bottom of the base and attach with glue and nail gun.
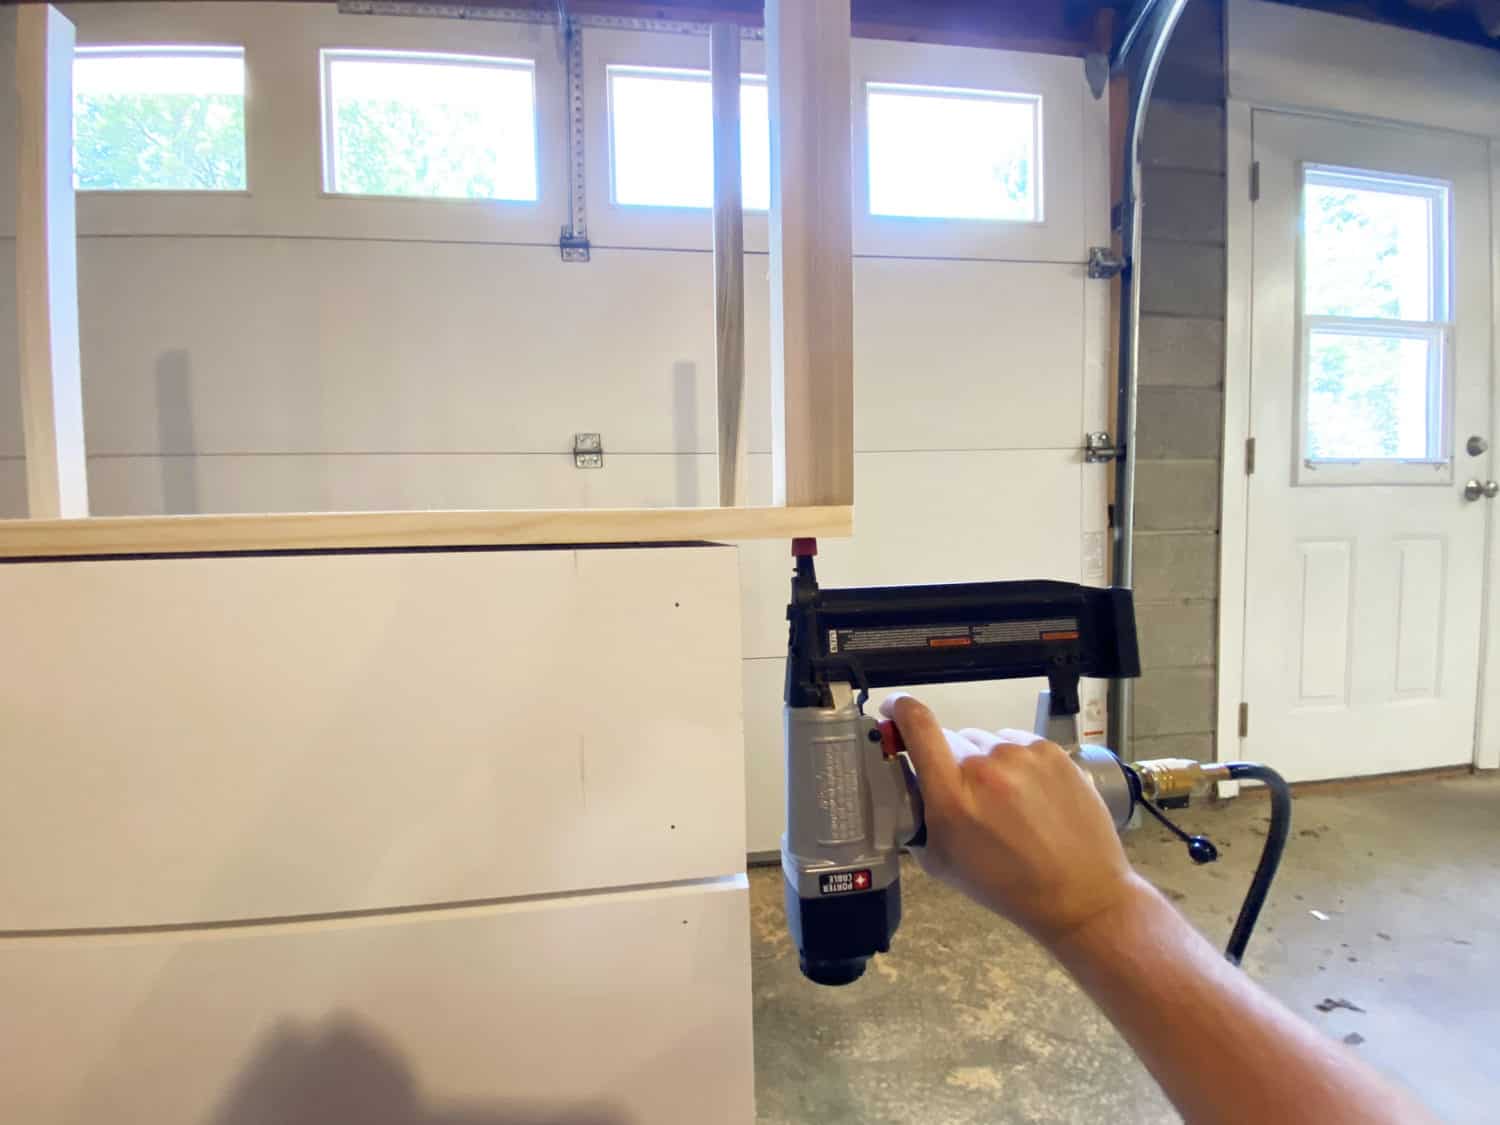 Cut the other piece of plywood to 37.5″ x 24.75″ for the table top of the stand. Next, cut four of your 1.5″ x 1.5″ x 3′ boards to 2′ to make the posts for the roof and attach them in all 4 corners. To do this, hang the piece of plywood off the edge of a table.
Hold one of the posts boards in place on the corner and attach with wood glue and a few nails with the nail gun. Repeat with the other 3 posts and then flip the whole thing upside down and put 1 screw in to each post for stability.

Place the table top with the 4 posts on top of the base. Making sure it’s evenly spaced, attach to base with wood glue and nail gun.
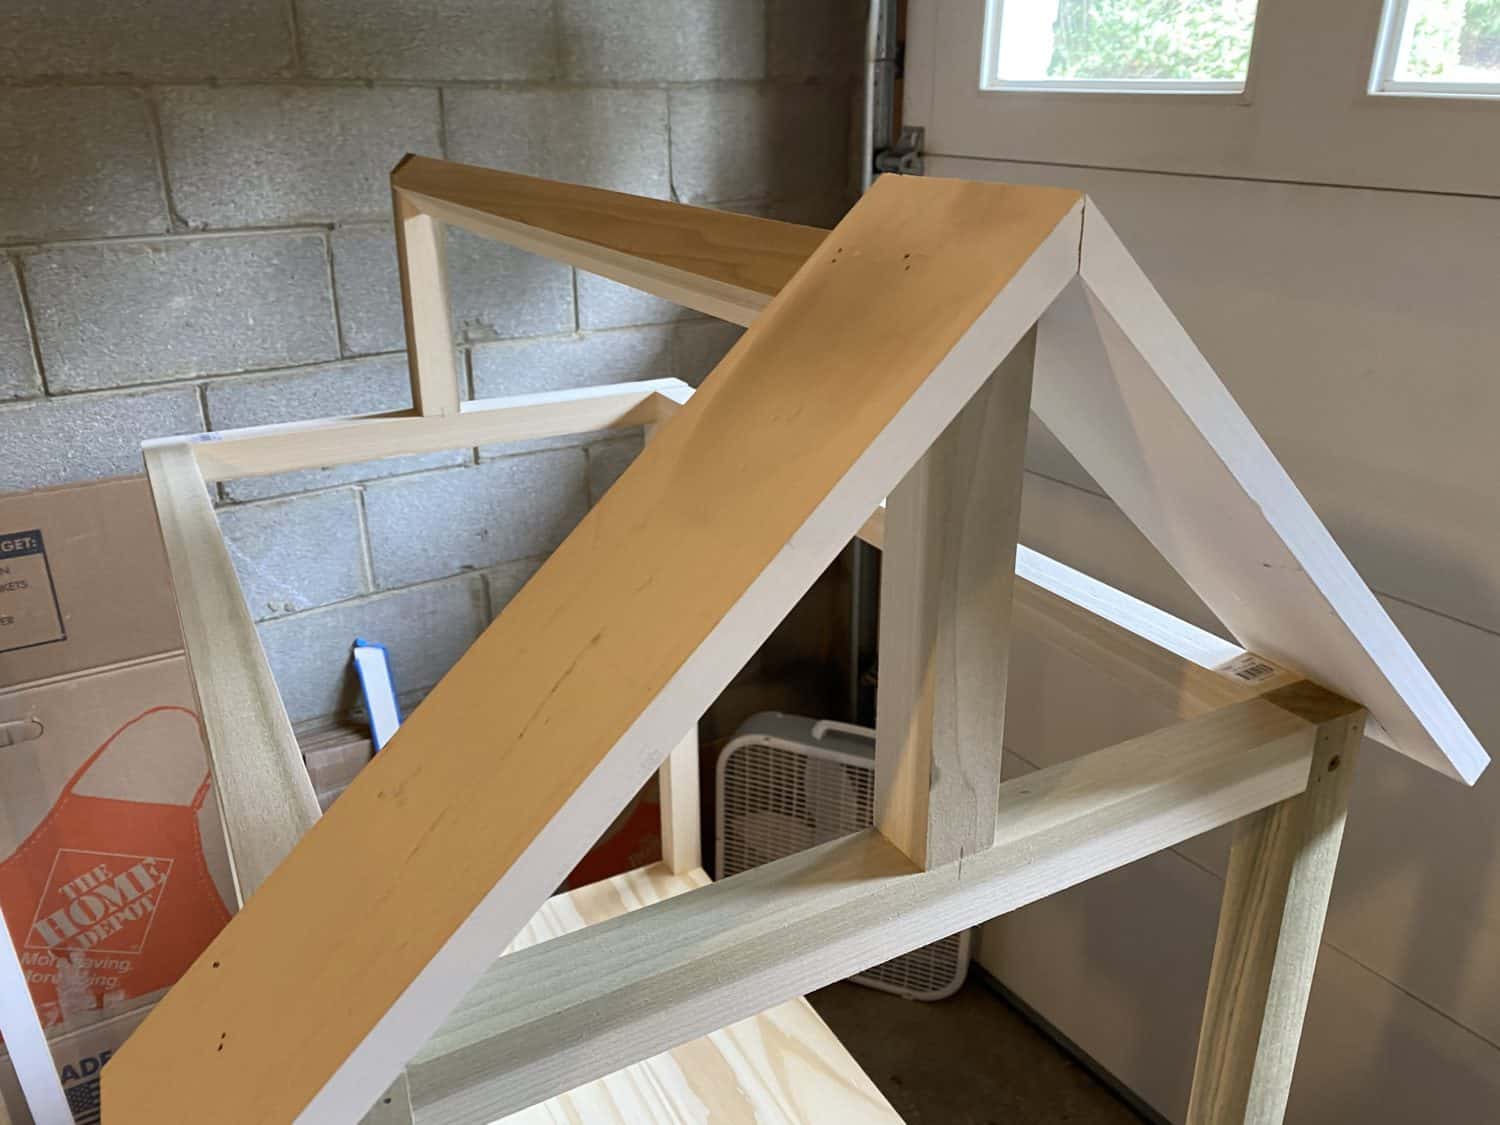
Next, to make the roof frame, cut two 1.5″ boards to 34.5″ and two to 21.75″ to attach in between the 4 posts. Now cut two 8″ pieces with two 45º cuts at the top to make an arrow and attach them in the middle of the two sides of the roof frame.
Cut one more 1.5″ board to 34.5″ and attach at an angle in between the two arrow point pieces as shown above.
Pro tip: I like to use glue and a nail gun to attach all of these pieces together to get it into its shape and then go back through with some wood screws to give it the stability it needs.
 Next, cut your 3/4″ x 4″ x 8′ primed boards into sixteen 18″ pieces with a 45º cut at the top end. Attach the boards to the roof frame one at a time, lining up the 45º cuts at the top. Attach with wood glue and nail gun.
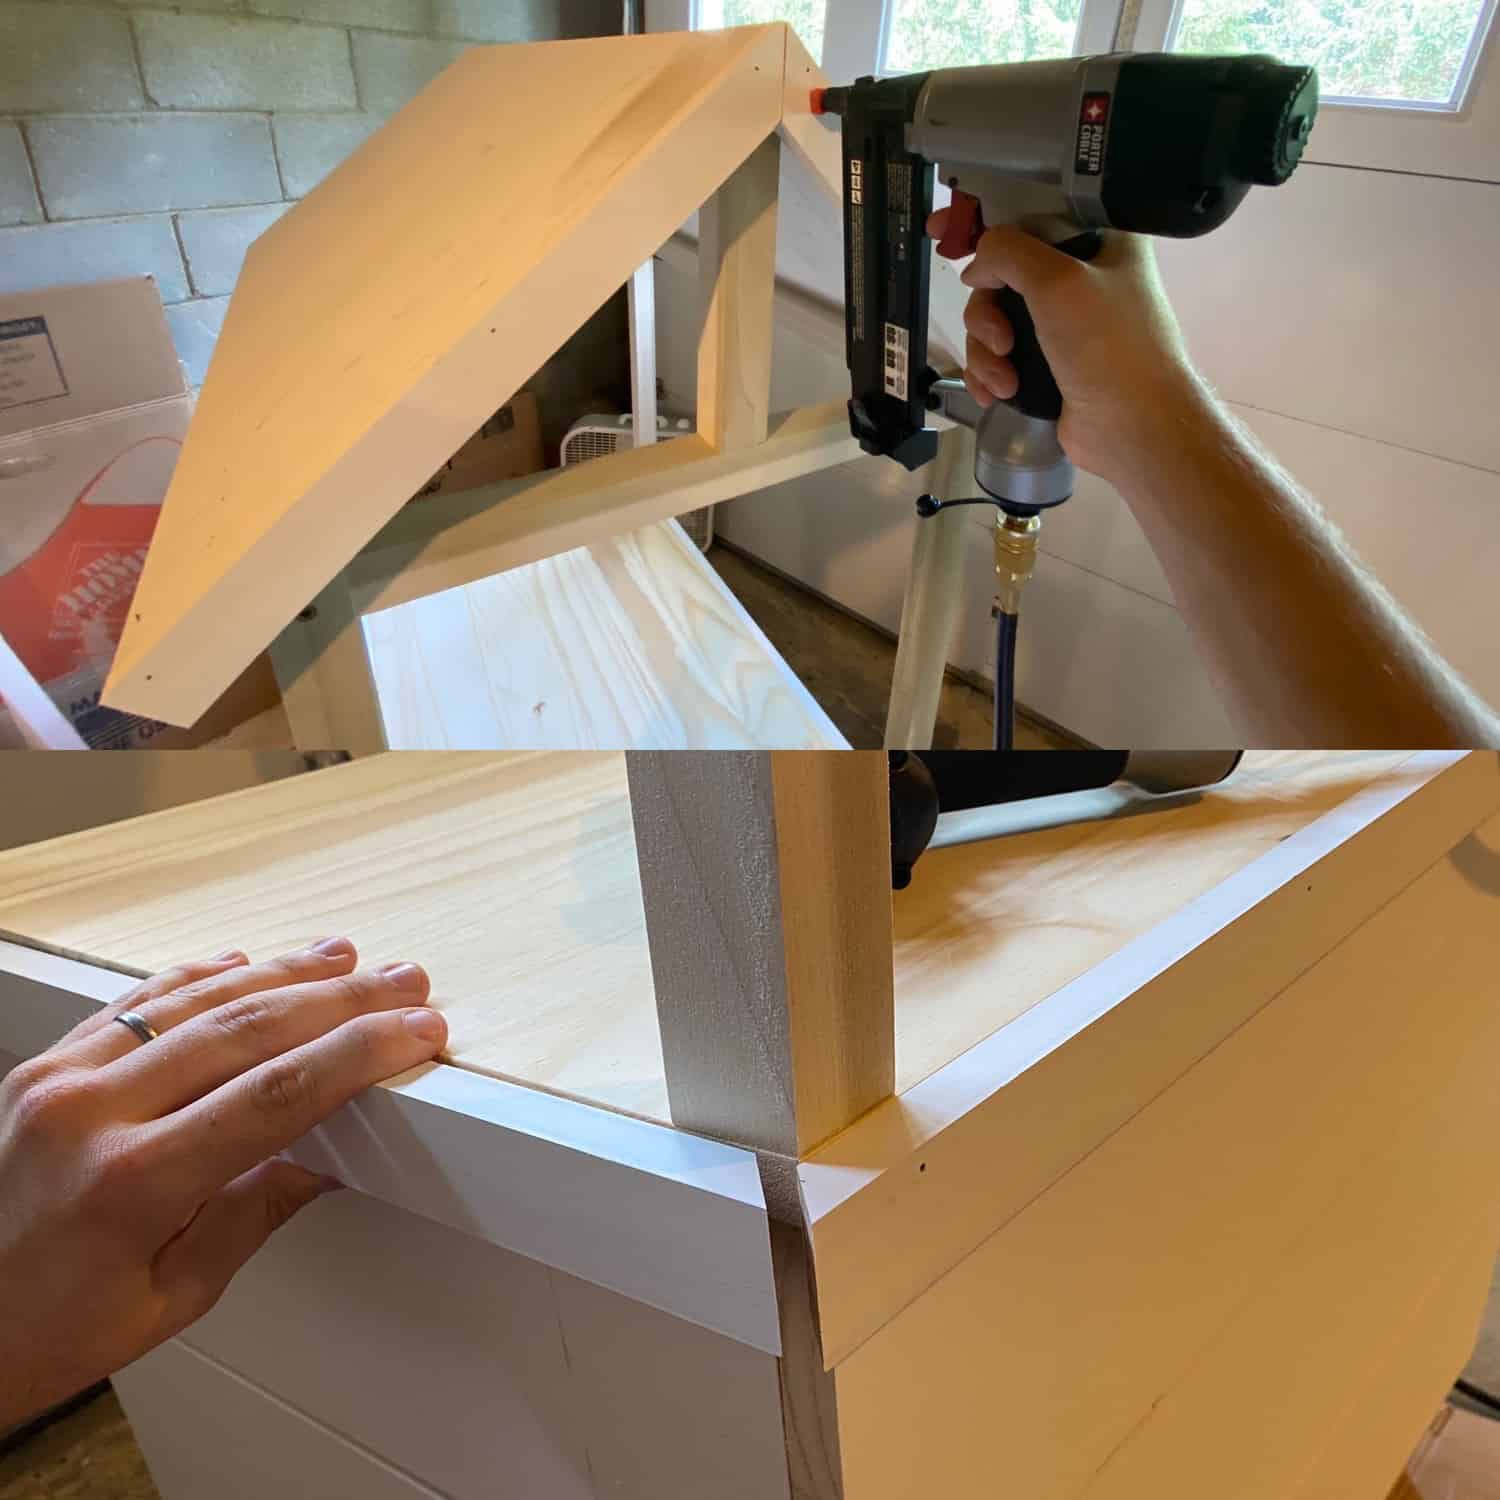
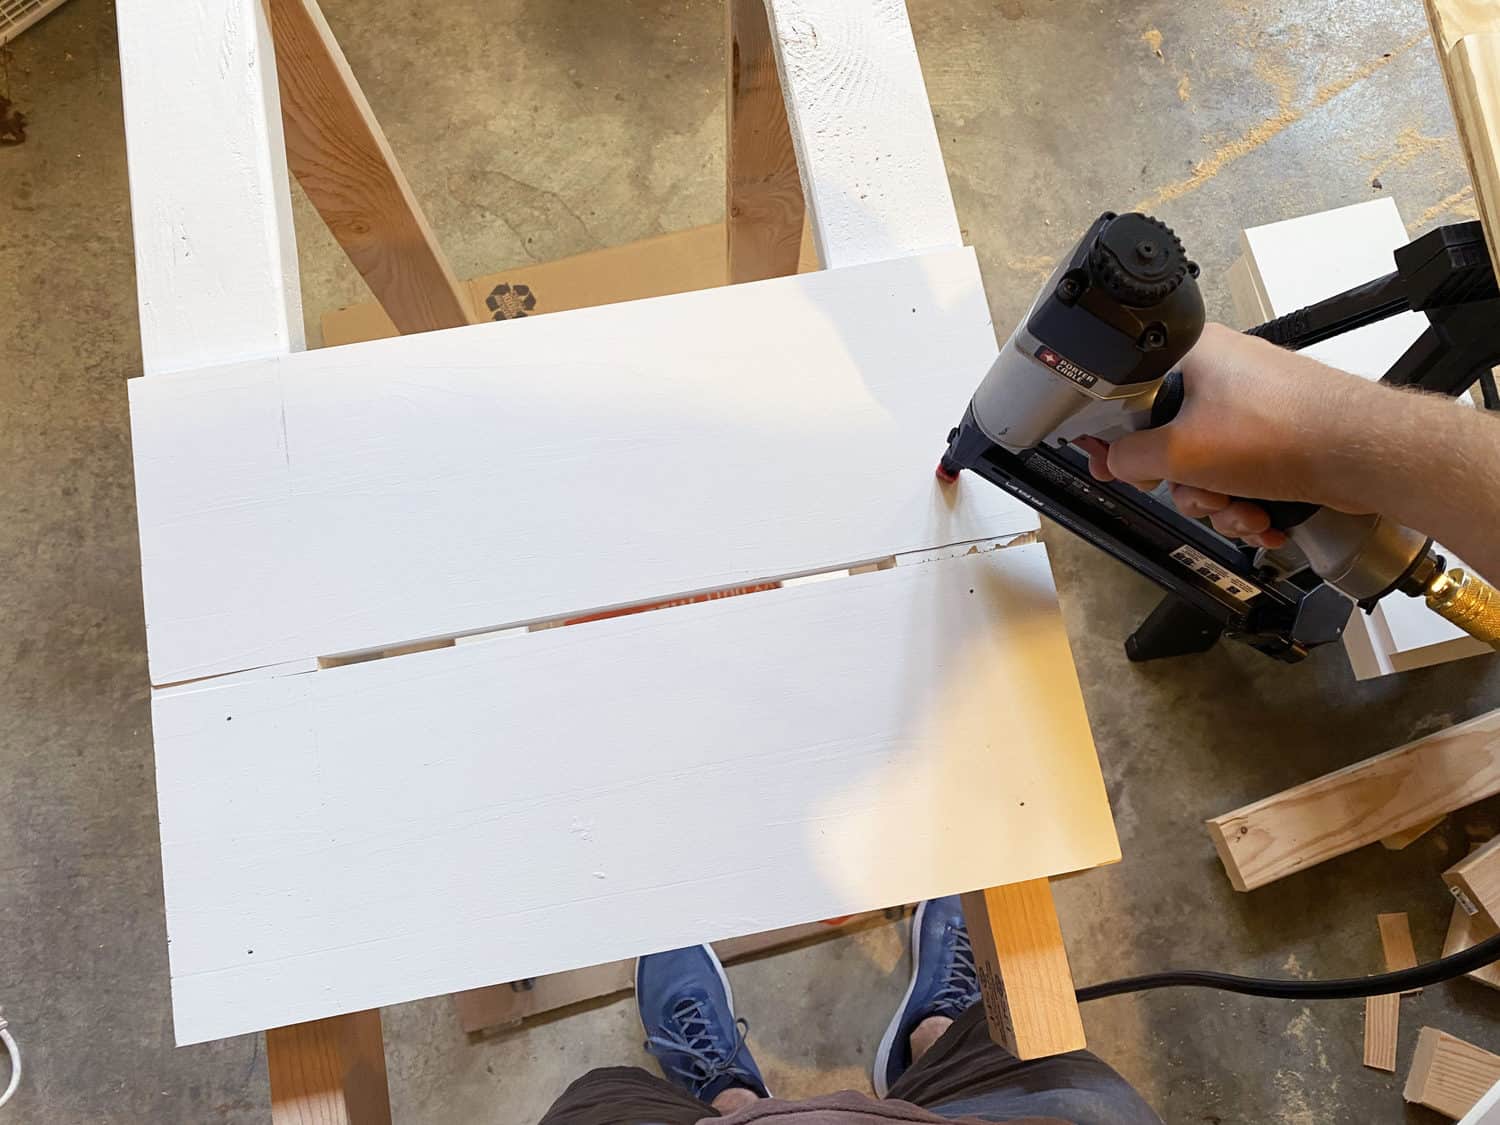
Lastly, cut your 3/4″ x 1.5″ x 8′ primed boards to trim out the roof and the table top of the base. Attach with wood glue and nail gun as shown above!
Fill any gaps/cracks/nail holes with wood filler or caulk and it’s ready to paint! To paint the roof, give the whole roof a coat of white and then tape off every other board and paint yellow.
Thank you so much for reading! If you make one of these, we’d LOVE for you to tag us on IG. Also, I’m pretty sure I missed a good opportunity for making lemons into lemonade, a 2020 metaphor … next time! 🙂 xx- Elsie

Thanks for the reply!
Hi another follow up since we’re committed to this project :). How did you attach the 4 inch swivel and fixed casters with the 2×4 wood? These casters are larger than the 2×4. I’ve referenced the affiliate links for the 4 inch casters for context. Thanks so much!
Hi Dolls,
I’m sorry the person who originally created this project no longer works for us so I can’t get specific help on this. Thank you so much for reading and we hope your lemonade stand turns out beautiful!! :))
Hello, thanks for sharing! We recently came across the lemonade stand and love it! Had a few questions about how post were attached after seeing comments how you use wooden glue and nails for stability
The first picture, square frame, how did you attach the bottom 2x4s to the base? The thinking is wood glue and nails and wondering if you used an extremely long size 3-4 inches for nails . The wooden glue alone wouldn’t be stable enough to carry the weight.
As for placing the table with the 4 posts (reference the 4 pictures the one at the bottom right), how did you attach the post on top of the base? Similarly with the above, wood glue wouldn’t be stable enough and using the nails would have to be really long? Thanks for your help!
Words can’t describe how much this has made me smile today! Thank you so much for sharing such a lovely, lighthearted DIY with all of us during this troubling time.
This lemonade stand is almost as adorable as the photographs. All of it looks like the perfect way to sit down, enjoy some family/friend time, and soak in the simpler pleasures of life. Absolutely perfect! 🙂
Sending my love and very best to you and your family. I pray each of you are well! ♥
SO cute!! love it and their cute little faces
It’s so lovely to see you being a mom and enjoying every minute of those girls. We get to enjoy your love of all seasons; they get to live in it. It’s been really fun to watch the journey so far.
Those pictures are so super duper cute! I especially love you Mama “oooh” face while toy are being served – that is just so priceless!
I’ve really loved seeing the girls getting bigger! They seem to have such sweet, simple joys:)
I have to get this off my chest, though! Is it a DIY if you have someone else do it? I know you do so, so many of your own projects, but some of these feel a little out of reach for a DIYer without a contractor on call!
Hi! I completely understand how our woodworking projects can be frustrating if you aren’t into woodworking or have the tools/skills. It makes sense! We try to always keep a balance between highly skilled projects like this and smaller projects that are much easier. I don’t have any woodworking skills, but before I worked with Collin I would always call my dad to come over to help me. :))
Surprisingly- we have some woodworking projects that are among our most visited/popular posts of all time!
Anyway- I am proud to work with Collin. He’s an amazing employee, a father of two and a passionate DIYer himself. So when I post something that he worked on here try to think of it as a group project if that helps. I *DO* think the posts Collin works on with me are still DIY for sure.
Anyway- if your feedback is that you’d like to see more projects that don’t require woodworking skills- I hear you and I will make some! I’m already working on fall stuff and holiday gift ideas. It’s going to be so much fun!!
Thank you so much for responding! I totally understand how you feel about working with Collin- I think it’s wonderful to have someone like that, (or your dad, who was probably cheaper ha!) We can agree to disagree on what constitutes a DIY:)
I’m not really sure what my feedback was meant to be, which is kind of embarrassing. Maybe it’s the Covid quarantine brain, I’ve been at home, with two little kids, non stop for 5.5 months. Maybe my idea of a DIY is a pretty low bar these days! I am totally looking forward to your fall and winter contest!
Maybe it would be really fun, and helpful for other parents of little ones, to have some more “parent and me” DIYS? I know Laura has a few a while back and this strange time might be a perfect time for some more?
Anyhow, your response is one of the reasons I love your blog. You’re a good person! You keep it up my dears!
Oh wow!! Guys this is amazing! I’m definitely pinning this DIY so if I ever have nephews/nieces or my own children I can make it for them 🙂
xx
Eli – Curly Style
Super cute! Do you have info on that lemonade dispenser? I love that too!
On the topic of DIY, are there any plans to do another check-in on how certain DIY projects have held up? I so love those posts!
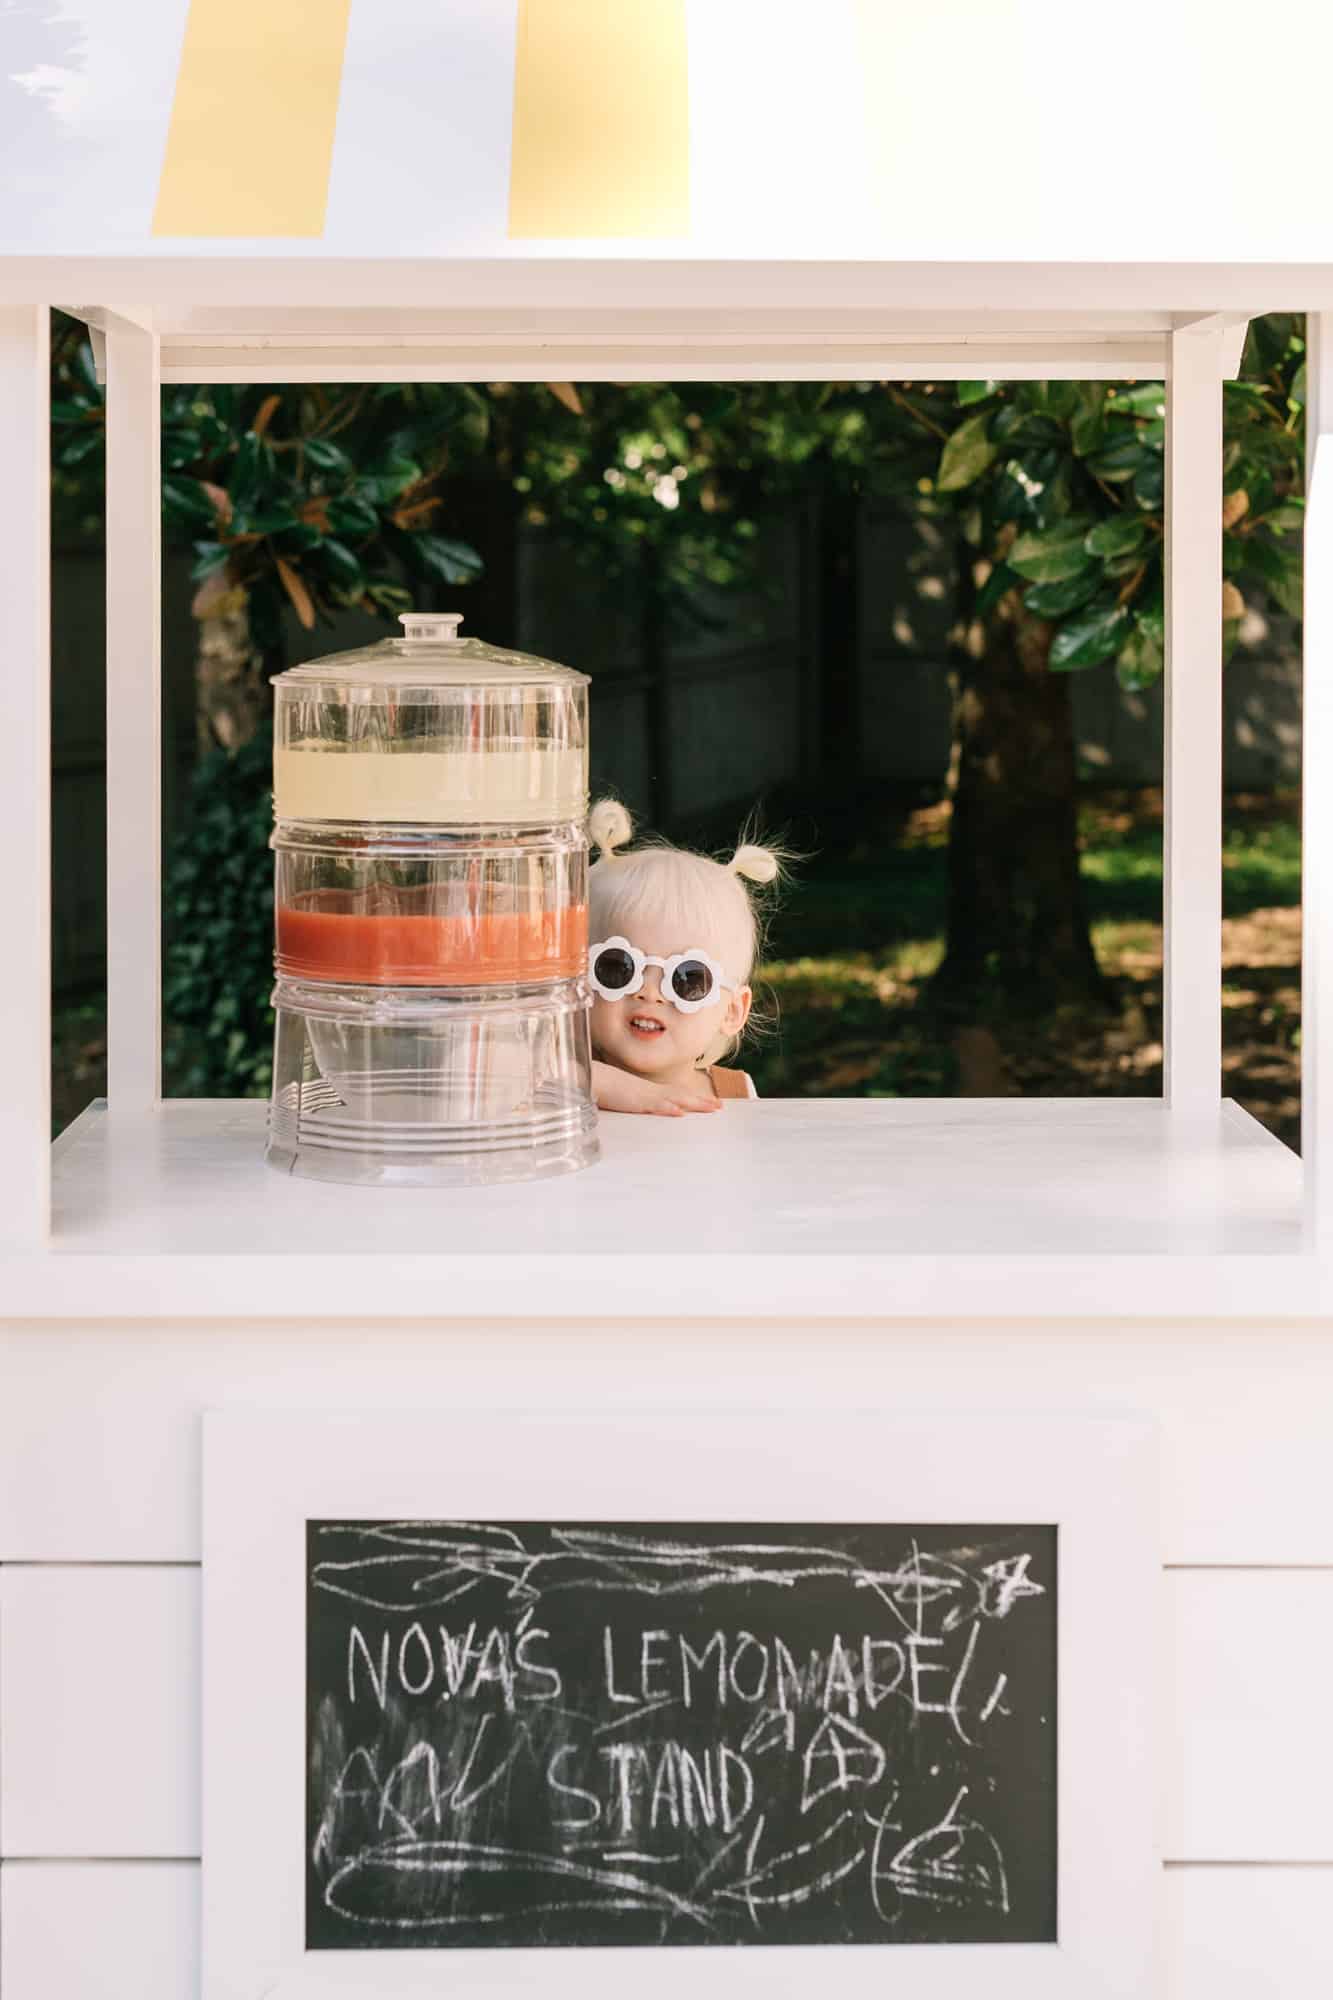
Hi! The dispenser is from Crate + Barrel (probably like 5 years ago).
I would love to write a new “how has this held up” post, what projects would you be interested to see??