") Soooo, remember when I shared this woven rag rug tutorial with you and I gave my solemn vow to hunt down other good rug projects? Well, I can hold my head up high because as of today I have kept that promise.
Soooo, remember when I shared this woven rag rug tutorial with you and I gave my solemn vow to hunt down other good rug projects? Well, I can hold my head up high because as of today I have kept that promise.
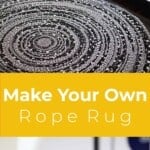
No applause, please. You’re all welcome. Take a look at what some rope and fabric strips can become! We’ve got a lot of rugs in our DIY archives, but this is one of my favorite!
") Supplies:
Supplies:
-1/4″ clothesline (I used three of this brand)
–fabric scissors
–fabric cut into 2″ wide strips (I used four different patterns and 9 yards of total fabric)
–standard sewing machine
") Take the beginning of your rope and wrap the end with one of your fabric strips. There’s no special way that you need to wrap the end; just make sure the tip is covered with the fabric, and then start to wrap the fabric from either right to left or left to right (depending on which is more comfortable for you if you’re right- or left-handed).
Take the beginning of your rope and wrap the end with one of your fabric strips. There’s no special way that you need to wrap the end; just make sure the tip is covered with the fabric, and then start to wrap the fabric from either right to left or left to right (depending on which is more comfortable for you if you’re right- or left-handed).
Use your sewing machine to sew straight down the rope a few inches to hold the wrapped end in place. I would suggest using a heavy needle, like a jean needle, since you are sewing the rope as well as the fabric.
") Keeping your machine needle in the rope, continue to wrap the rope with the strip at a slight angle so you are continuing down the rope (instead of just wrapping the same spot).
Keeping your machine needle in the rope, continue to wrap the rope with the strip at a slight angle so you are continuing down the rope (instead of just wrapping the same spot).
Once you get a foot or so of wrapped rope, sew straight down the middle of the rope until you reach the end of your wrapped rope (I put my sewing machine on the longest stitch length). Continue this process until you have 10-15′ of wrapped and sewn rope.
I switched my fabric every time I got to the end of a strip and alternated between my different patterns. Just wrap the beginning of the new strip overtop of where the old strip ends so the rope never shows through.
Try and switch up the pattern rotation every so often to keep the patterns looking random overall. When you get to the end of a pack of rope, just place the beginning of a new rope right after the end of the old rope and wrap around them as you normally would. Once you sew straight down that spot, it will join them together.
")
") Take the beginning end of your wrapped and sewn rope, and make a small clockwise coil. Once you coil a complete circle, use a medium to long stitch length and the widest zigzag setting to sew between the ropes and join them together.
Take the beginning end of your wrapped and sewn rope, and make a small clockwise coil. Once you coil a complete circle, use a medium to long stitch length and the widest zigzag setting to sew between the ropes and join them together.
Keep turning the coil and joining new rope to the coil until you reach the end of your sewn and wrapped rope. Once you reach the end, continue the process of wrapping and sewing straight down the rope until you get another 10-15′ sewn, and then zigzag stitch that rope onto your coil. And you know what? That’s pretty much it.
You just do that over and over and over until the rug is as big as you want it to be. To keep the sides from curling up as you go, try not to pull on the rope you’re joining to your rug. Just lay the rope next to the coil as you sew without either pushing or pulling on it.
") Once the rug gets to be too big for the table your sewing machine is on, you’ll need to add another side table or desk next to your sewing machine to keep the rug flat and even with the sewing machine platform at all times (this really helps it not curve up like a giant bowl).
Once the rug gets to be too big for the table your sewing machine is on, you’ll need to add another side table or desk next to your sewing machine to keep the rug flat and even with the sewing machine platform at all times (this really helps it not curve up like a giant bowl).
I had to add a few books, etc., under the legs of the second table to make it the right height.
") Once it got too big for the desk, I moved it to the dining table and finished the process there. You can see I took a side table and put a box under it to make it the right height. Definitely a makeshift solution, but it worked! When I was done with the rug, I did still have some slight waves that wouldn’t lie flat.
Once it got too big for the desk, I moved it to the dining table and finished the process there. You can see I took a side table and put a box under it to make it the right height. Definitely a makeshift solution, but it worked! When I was done with the rug, I did still have some slight waves that wouldn’t lie flat.
To fix those, I placed the rug on top of a carpet, gave the rug a good spray of water with a spray bottle, and ironed the rug with my iron on the highest steam setting. Once it felt damp with steam, I put some heavy books on the trouble areas and allowed the rug to dry.
Goodbye, waves! I will say, though, if you feel the edges are getting too curled while you’re sewing, it’s best to just use a seam ripper and rip those rows out and resew them while not pulling so tight. I had to do it a few times, but it was worth it in the end.
If you’re not sure if it’s getting too wavy, you can do the steam/iron trick before the rug is finished, and if the waves disappear, then you’re good; if not, you probably need to redo those rows.
To finish the rug, use your fabric strip to wrap your end of the rope similar to how you wrapped the rope at the beginning of the rug (just make sure the end of the rope is covered), and sew down the middle to secure. Using the zigzag stitch, tuck the end of the rope under your rug so it disappears from sight, and sew over it to secure.
")
")
")
") As you can see, I ended up with a rather sizable rug (55″ wide!). I’m actually considering continuing the rug and seeing just how big I can make it, but until I get that second wind of rug sewing strength, it’s going to hang out and look cute in our kitchen.
As you can see, I ended up with a rather sizable rug (55″ wide!). I’m actually considering continuing the rug and seeing just how big I can make it, but until I get that second wind of rug sewing strength, it’s going to hang out and look cute in our kitchen.
In case you’re wondering how long a rug like this takes, well, it all depends on how big you want to make it. It grows bigger much faster in the beginning because it doesn’t take much time to go all the way around the small coil, but the pace slows as the coil gets bigger.
Thankfully, our world-class intern Alex helped me with some of the prep work so we could get this rug finished and ready to share with you as fast as possible—thanks, Alex!
Just to give you an idea on how much time it takes, it took us 6 hours to make a 30″ rug, 10 hours to make a 38″ rug, 14 hours to make a 47″ rug, and 17 hours to make a 55″ rug.
Overall, I’m so happy with how this rug turned out. This is definitely a project that you come back to a few times rather than a one-day ordeal (especially if you want a bigger rug), but it’s totally worth it in my book (make sure to get something like this to go underneath!).
Go get yourself some rope and cute fabric, and get sewing! xo. Laura
Love this post? Sign up for our newsletter for more ideas!

Get creative ideas for recipes, crafts, decor, and more in your inbox!
 Get the How-To

Supplies
- ¼ clothesline
- fabric scissors
- fabric cut into 2″ wide strips (I used four different patterns and 9 yards of total fabric)
- standard sewing machine
Instructions
- Take the beginning of your rope and wrap the end with one of your fabric strips. There’s no special way that you need to wrap the end; just make sure the tip is covered with the fabric, and then start to wrap the fabric from either right to left or left to right (depending on which is more comfortable for you if you’re right- or left-handed). Use your sewing machine to sew straight down the rope a few inches to hold the wrapped end in place. I would suggest using a heavy needle, like a jean needle, since you are sewing the rope as well as the fabric.
- Keeping your machine needle in the rope, continue to wrap the rope with the strip at a slight angle so you are continuing down the rope (instead of just wrapping the same spot). Once you get a foot or so of wrapped rope, sew straight down the middle of the rope until you reach the end of your wrapped rope (I put my sewing machine on the longest stitch length). Continue this process until you have 10-15′ of wrapped and sewn rope.
- I switched my fabric every time I got to the end of a strip and alternated between my different patterns. Just wrap the beginning of the new strip overtop of where the old strip ends so the rope never shows through. Try and switch up the pattern rotation every so often to keep the patterns looking random overall. When you get to the end of a pack of rope, just place the beginning of a new rope right after the end of the old rope and wrap around them as you normally would. Once you sew straight down that spot, it will join them together.
- ake the beginning end of your wrapped and sewn rope, and make a small clockwise coil. Once you coil a complete circle, use a medium to long stitch length and the widest zigzag setting to sew between the ropes and join them together. Keep turning the coil and joining new rope to the coil until you reach the end of your sewn and wrapped rope. Once you reach the end, continue the process of wrapping and sewing straight down the rope until you get another 10-15′ sewn, and then zigzag stitch that rope onto your coil. And you know what? That’s pretty much it. You just do that over and over and over until the rug is as big as you want it to be. To keep the sides from curling up as you go, try not to pull on the rope you’re joining to your rug. Just lay the rope next to the coil as you sew without either pushing or pulling on it.
- Once the rug gets to be too big for the table your sewing machine is on, you’ll need to add another side table or desk next to your sewing machine to keep the rug flat and even with the sewing machine platform at all times (this really helps it not curve up like a giant bowl). I had to add a few books, etc., under the legs of the second table to make it the right height.
- Once it got too big for the desk, I moved it to the dining table and finished the process there. You can see I took a side table and put a box under it to make it the right height. Definitely a makeshift solution, but it worked! When I was done with the rug, I did still have some slight waves that wouldn’t lie flat. To fix those, I placed the rug on top of a carpet, gave the rug a good spray of water with a spray bottle, and ironed the rug with my iron on the highest steam setting. Once it felt damp with steam, I put some heavy books on the trouble areas and allowed the rug to dry. Goodbye, waves! I will say, though, if you feel the edges are getting too curled while you’re sewing, it’s best to just use a seam ripper and rip those rows out and resew them while not pulling so tight. I had to do it a few times, but it was worth it in the end. If you’re not sure if it’s getting too wavy, you can do the steam/iron trick before the rug is finished, and if the waves disappear, then you’re good; if not, you probably need to redo those rows.
- To finish the rug, use your fabric strip to wrap your end of the rope similar to how you wrapped the rope at the beginning of the rug (just make sure the end of the rope is covered), and sew down the middle to secure. Using the zigzag stitch, tuck the end of the rope under your rug so it disappears from sight, and sew over it to secure.
Thank you so much for sharing. I’m 78 and want to make some rugs but have no clue and get some mixed info. Love your work.
This is such a great and unique idea! I love how you can make this rug to fit any space and it looks so cozy.
This is such a great and unique idea! I love how you can make this rug to fit any space and it looks so cozy.
Hi! I’m just wondering how you wash the larger sized rugs?
Beautiful!
😊
I wonder what a long, thin runner would be like to do?
Could try using thicker rope? Or even chunky yarn! Could help make the rug itself more cushy. 🙂
I have a question. What did you do to deal with the unfinished edges of the strips of fabric? What kept them from unraveling over time? Did you sew a finished edge before wrapping the rope?
This is just adorable. Have an idea to use my Spoonflower sample purchases to make one of my own – very scrappy! Thanks for a great idea! xo
Oh… I thought it was handwoven… nevermind, I guess.
This has been on my to make list for 5 years now, and I can’t wait to finally get started but I just now wondered if it doesnt fray too much?
Looks absolutely beautiful I love white and black together great job.
Wow, this is beautiful, I love it and will love to try my hands on it. I think its worth the effort…List of items to get-A sewing machine…I must appreciate you for the tutorials. I am in Nigeria viewing this now and new on the DIY trend.
Just bought an adorable old house in a small cow town in Wyoming. I have been looking for rugs to put in the kitchen and dining room to decorate them with a farmhouse look and feel – cows, pigs, sheep, chickens, eyelet, white milk pitchers, milk cans … This rag rug tutorial is perfect for the kitchen!! My search is over! But is there a way to make one of these rag rugs into an oval shape for underneath my oval dining room table? Can’t tell you how excited I am about this rug! Thanks for sharing, girls!
Achei lindo,gostaria aprender em português. Grata.
As an experienced weaver of rag rugs I can tell you this isn’t a woven rug. It is sewn not woven.
I was wondering can’t you just make a tunnel with the different fabrics and put the rope inside? When your wrapping if your not stitching in the middle the whole time than where are you stitching?
I love this! I also adore your kitchen. Any chance you want to share your paint color info? I’m in love with it.
You’re machine should be fine! I just started making one again and I have had problems!!!
1. Cut your fabric strips to 1 inch. This will allow for a tighter wrap and much easier to work with
2. Instead of straight stitching down the middle, just go right into coiling it and attaching it with the 3 zig zag stitch (longest zig zag and 2.5-3 for stitch length) instead of sewing straight down the middle first. MUCH easier this way and you get it done much faster and it looks better!
3. It might help to tighten the tension of your thread
4. Release some tension on your pressure foot.
That should help a wee bit 🙂
Just a heads up for anyone who is reading, You only need ONE INCH of fabric strips. 2 inches is a waste of fabric and it is MUCH harder to wrap. You can get the wrap tight with using 1 inch strips and wrapping covering half of the strip. Also, it is a HUGE overkill to sew the rug down the middle first. Huge waste of time. If you wrap the fabric around the rope tight, and pin it at the bottom, it won’t unravel and you can sew to that point. So instead of sewing down the middle then zig zagging it together, DO NEITHER. Use the 3 zig zag stitch. It makes it much more secure. Using the widest zigzag and only a 2.5-3 for the stitch length. This way you go straight into making your rug rather than having to go back and forth and back and forth between sewing it down the middle and the normal zig zig.
I’m going to make one of these each for my girls and one for my kitchen starting this week! I’m doing it similar to the bowls though, I’m not going to sew down the cord, just wrap and zigzag it onto itself as I’m coiling.
I wanted to make this after I saw fabric bowls, but wasn’t sure it would work! Thanks!