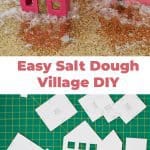
 Who can resist the charm of gingerbread houses for the holiday? The problem is, sometimes I can’t resist the candy decorations either. I thought I’d skip the temptation all together by making a village of salty houses—no temptation there! These buildings pack the charm of vintage putz villages with the oven-baked look of gingerbread. And you can use them year after year! (I’m always so devastated at the thought of throwing away a beautiful gingerbread house.)
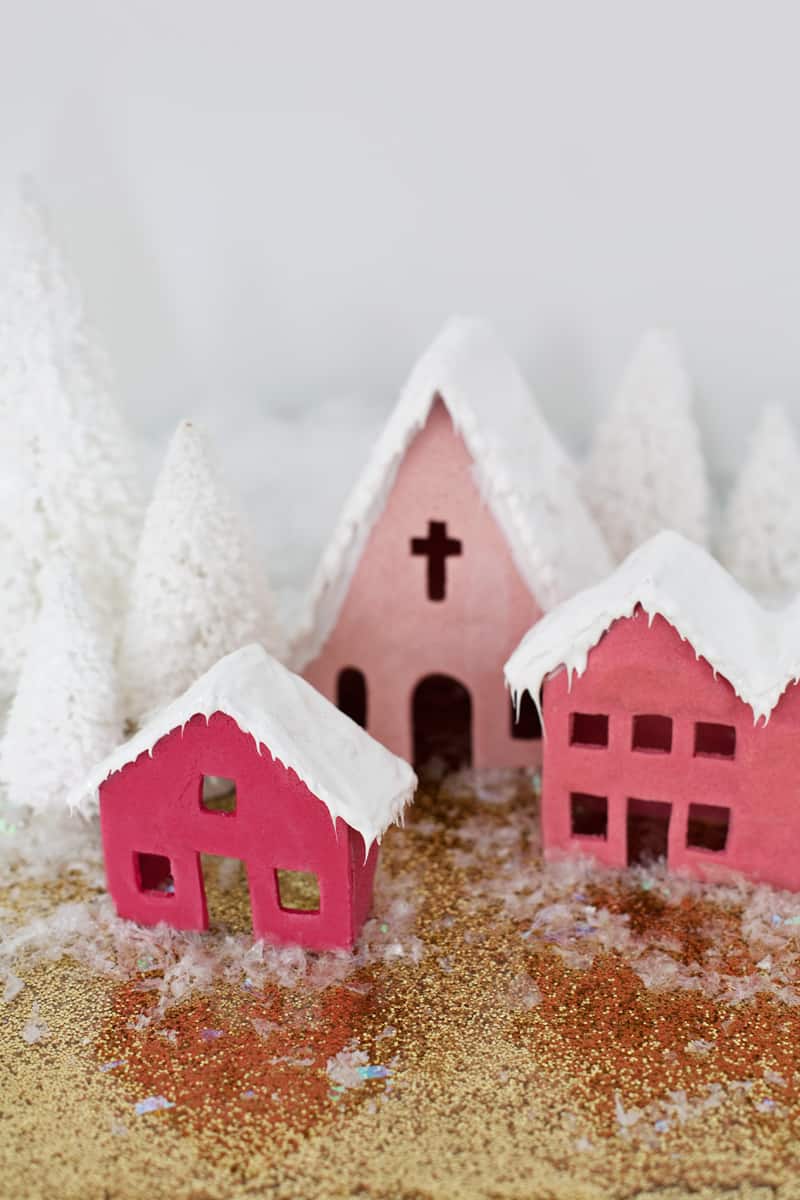
These salt dough homes can be dyed any color you choose, or left a natural flour color. Of course, I chose pink, but wouldn’t an aqua blue village be beautiful, too?
Try making salt dough ornaments with cookie cutters!
 Materials:
-2 cups flour
-1/2 cup salt
-3/4 cup water
-acrylic paint in colors of your choice
-parchment paper
-caulk
-quick grab tacky glue
-glitter (optional)
Tools:
-rolling pin
-parchment paper
-cookie sheets
-oven
 Use these templates, or get extra creative and design your own little cookie homes. Click the links below and print the images without resizing them. Then trim and use!
–Large House
–Small House
–Church
 Step One: Make your salt dough. Mix 2 cups of flour with 1/2 cup of salt. Then stir in 3/4 cup of warm water. The dough will require kneading to come together like a dense cookie dough. If you’d like to color your houses, then mix in acrylic paint as you make your dough. You can knead in extra paint later to make portions of your dough more brightly colored than the rest.
 Step Two: Roll out the dough into 1/8 inch thickness and place on parchment paper. Then use the templates as guides to cut out each piece needed to make the buildings. I used an X-Acto blade with a cutting mat under the parchment paper, but you can use whatever kind of knife or metal scraper you have to cut out the shapes.
 Step Three: Bake the cookies at 200ºF for 2-3 hours until hardened. I made the mistake of baking my cookies at 300º to begin with, and they puffed up like crackers. Don’t do that! Keep the heat low to avoid any puffing. Be sure to keep parchment paper under the cookies while baking, or they will stick to your cookie sheets. (Another lesson learned! This was my first time using salt dough. So many lessons learned!)
 Step Four: Use quick grab tacky glue to assemble the building parts. Use tape if necessary to hold the pieces together as the glue dries.
 Step Five: Fill any gaps and decorate the roofs of the buildings with caulk. That’s right—caulk! It acts like icing without any of the edibility. You need to work quickly when using caulk, though, because it gets goopy quickly. I sprinkled mine with glitter just after applying the caulk.

 I placed battery-powered tea lights inside of my little homes to create an enchanting glow on my dining room cabinet. I’ll have to carefully pack them away after Christmas, and then make a couple of new ones to add to the village next year! –Mandi
Credits // Author and Photography: Mandi Johnson. Photos edited with A Beautiful Mess actions.
Hi!
This is by far the best kind of easy Christmas village I’ve seen 🙂 and thanks a tonne for the templates.
Do you know if I can keep this for the next year!? Because last time I tried making a few salt dough ornamgooey but they went gooey when I checked out after a few months :/
Thanks!
Anna
Mandi, yours look so good. Your dough color is so consistent. We’re waiting for ours to come out of the oven as we speak. We have a very marble-like sketchy situation.
I can imagine the struggle not to play with them. They’re so cute!
I love how they turned out! just wondering, why did you dye the dough with paint and not food coloring? thanks!
This village is so cute! You did an awesome job!
Paige
http://thehappyflammily.com
I have never seen anything like this before! so cute! xx, kenz http://sincerelykenz.com
I actually just had a friend whose dog ate their salt dough ornament and apparently its super toxic to dogs?… could you edit your post to include that maybe? I know a lot of you girls have dogs!
Aw these are so cute! I’ve never thought to put the paint in the dough, I’ve always painted salt dough things after baking. I’d love to make a tiny little village for next year.
These are so whimsical and delightful! How cute!!
Hi Rose— I can imagine you are inundated with Christmas things this time of year! This is the perfect project for you, since it’s actually not Christmas related at all. It’s a winter village. You can do it in any color scheme you like, and if you’re Jewish, you could certainly cut a star of David in place of the cross, or just make normal windows in that building. I also shared a star light which could easily be made into a star of David light which you can see here: https://abeautifulmess.com/2015/12/star-light-holiday-decoration.html, and also a few napkin DIYs for hosting dinner parties— Christmas or non-Christmas: https://abeautifulmess.com/2015/12/dress-up-your-dinner-napkins.html
-Mandi
Absolutely adorable. Thank you for the templates, too! I can’t wait to make these with my niece.
Such a great idea for next week when the kids are home from school.
This is the cutest thing – so so creative 🙂 thanks for sharing the lovely idea! Such a cute decoration.
Lucy xoxo
http://lucyannblog.blogspot.co.uk
So totally cute!!! It could be an awesome as group project!
I’ve requested each year for the past 5 years to make a tutorial for a DIY craft for those of us who are jewish or don’t celebrate christmas. Im starting to lose faith with this site. PLEASE be considerate towards your readers who celebrate other holidays and have our own diverse traditions. I’ve grown weary of asking for a tutorial for at least one Hanukkah craft every year from your site. You have so many readers who don’t celebrate Christmas traditions.
Just a recommendation! Salt dough, is dough. It falls apart! They say you can preserve them with a coat of polyurethane. I do not think they will last at all if you do not. Think of a biscuit or cookie that sits out….. it will crumble over time.
Years ago, I restored a 10 x 12 foot 3D topographical plaster map for my local county government. I used a mixture of Pottery Plaster and 4 parts Elmers White Glue to 6 parts of water. It would set up in about five minutes and become very hard but very moldable, much as the commercial Durarock compound. If you mixed your salt flour with a similar water glue mixture in the right proportions, it might also set up and not crumble, You might have to test out different glues to see if they will set up in the presence of salt. You could also mix in plaster to see how effective that would be. Don’t forget, before the age of plastics, dolls were often made out of “Compostion”, which also used a glue for a binder. Curing at a low temperature, might allow the dough to dry on top of saran wrap, which does not easily stick to most glues. Then again, you could cast Durarock in a mold, or as a sheet, and cut it with a knife before it gets too hard…just a few thoughts…
They look incredibly cute, and I really like that you used salt dough! I used this a lot as a kid, never thought about using it for such a DIY!
https://www.makeandmess.com/
These are gorgeous – we’ve all seen gingerbread houses, but these are so simple and elegant. It would be a great activity to keep children occupied for hours. Perhaps boys could choose a different colour.
These are adorable!! I would like to try with my grandsons!!
This is literally is the cutest thing that I ever seen!!!
Vik
http://suckerscloset.com
Caulk is a type of sealant/adhesive used for filling/sealing cracks in certain architectural instalations, such as around a bathtub or where a tiled wall meets a countertop. It’s sold in large tubes which require a caulk gun, and also in small squeeze-tubes that you can get for about $2 at most hardware stores. -Mandi