 Hi! I am so so so happy to share this DREAM PROJECT with you today!
I became SUPER inspired when I stumbled on this vanity on Etsy last year. It’s honestly the most incredible handmade thing I’ve EVER seen on Etsy. The price tag definitely reflects that as well (it’s $15K!!!).
I knew right away that this would be a super fun challenge for Collin—he is such a talented problem solver and he gets super excited when I give him a project like this that is creative versus other projects that are more boring (haha, just being honest. This is way more fun than painting a deck or trimming out a doorway, right?). Anyway! I drew up a simple sketch and he got to it right away. We built the vanity specifically to fit this tiny wicker chair. I knew I wanted it to have working lightbulbs, even though we would rarely turn them on (it plugs in the back). And I knew it would be fun to have a drawer for Nova to keep her special “getting ready” stuff as she gets older. Currently, she uses it for sunnies, her prescription glasses, and hair clips.
It feels super special to decorate our kids rooms with unique and handmade items that are custom made just for them! To me, there is probably nothing more magical in the world than a childhood bedroom, so it’s super fulfilling to make special pieces for the rooms.
OK … I’m going to pass it over to Collin to teach you how to build this bad boy! 😀
Supplies:
-eight 2″ x 4″ x 8′ boards
-three 2′ x 4′ x 1/4″ birch plywood
-one 2′ x 4′ x 1/2″ birch plywood
-four 4″ x 1/2″ x 3′ boards
-12″ drawer slides
-string lights
-wood glue
Tools:
–circular saw
-pneumatic nail gun
-electric drill
-tape measure
–jigsaw
-drill bits
-clear silicone
 Start by making the frame of the vanity. To do this, make two identical boxes out of 2″x4″ boards for the sides of the frame. The dimensions of this vanity’s base is 3′ wide x 2′ tall x 1′ deep, so the side boxes will need to be 1′ x 2′. Next, add the cross boards to connect the two side’s boxes, two on top and one along the bottom back side. You’ll also need to add some brace pieces for the drawer slides to mount on, as shown above.
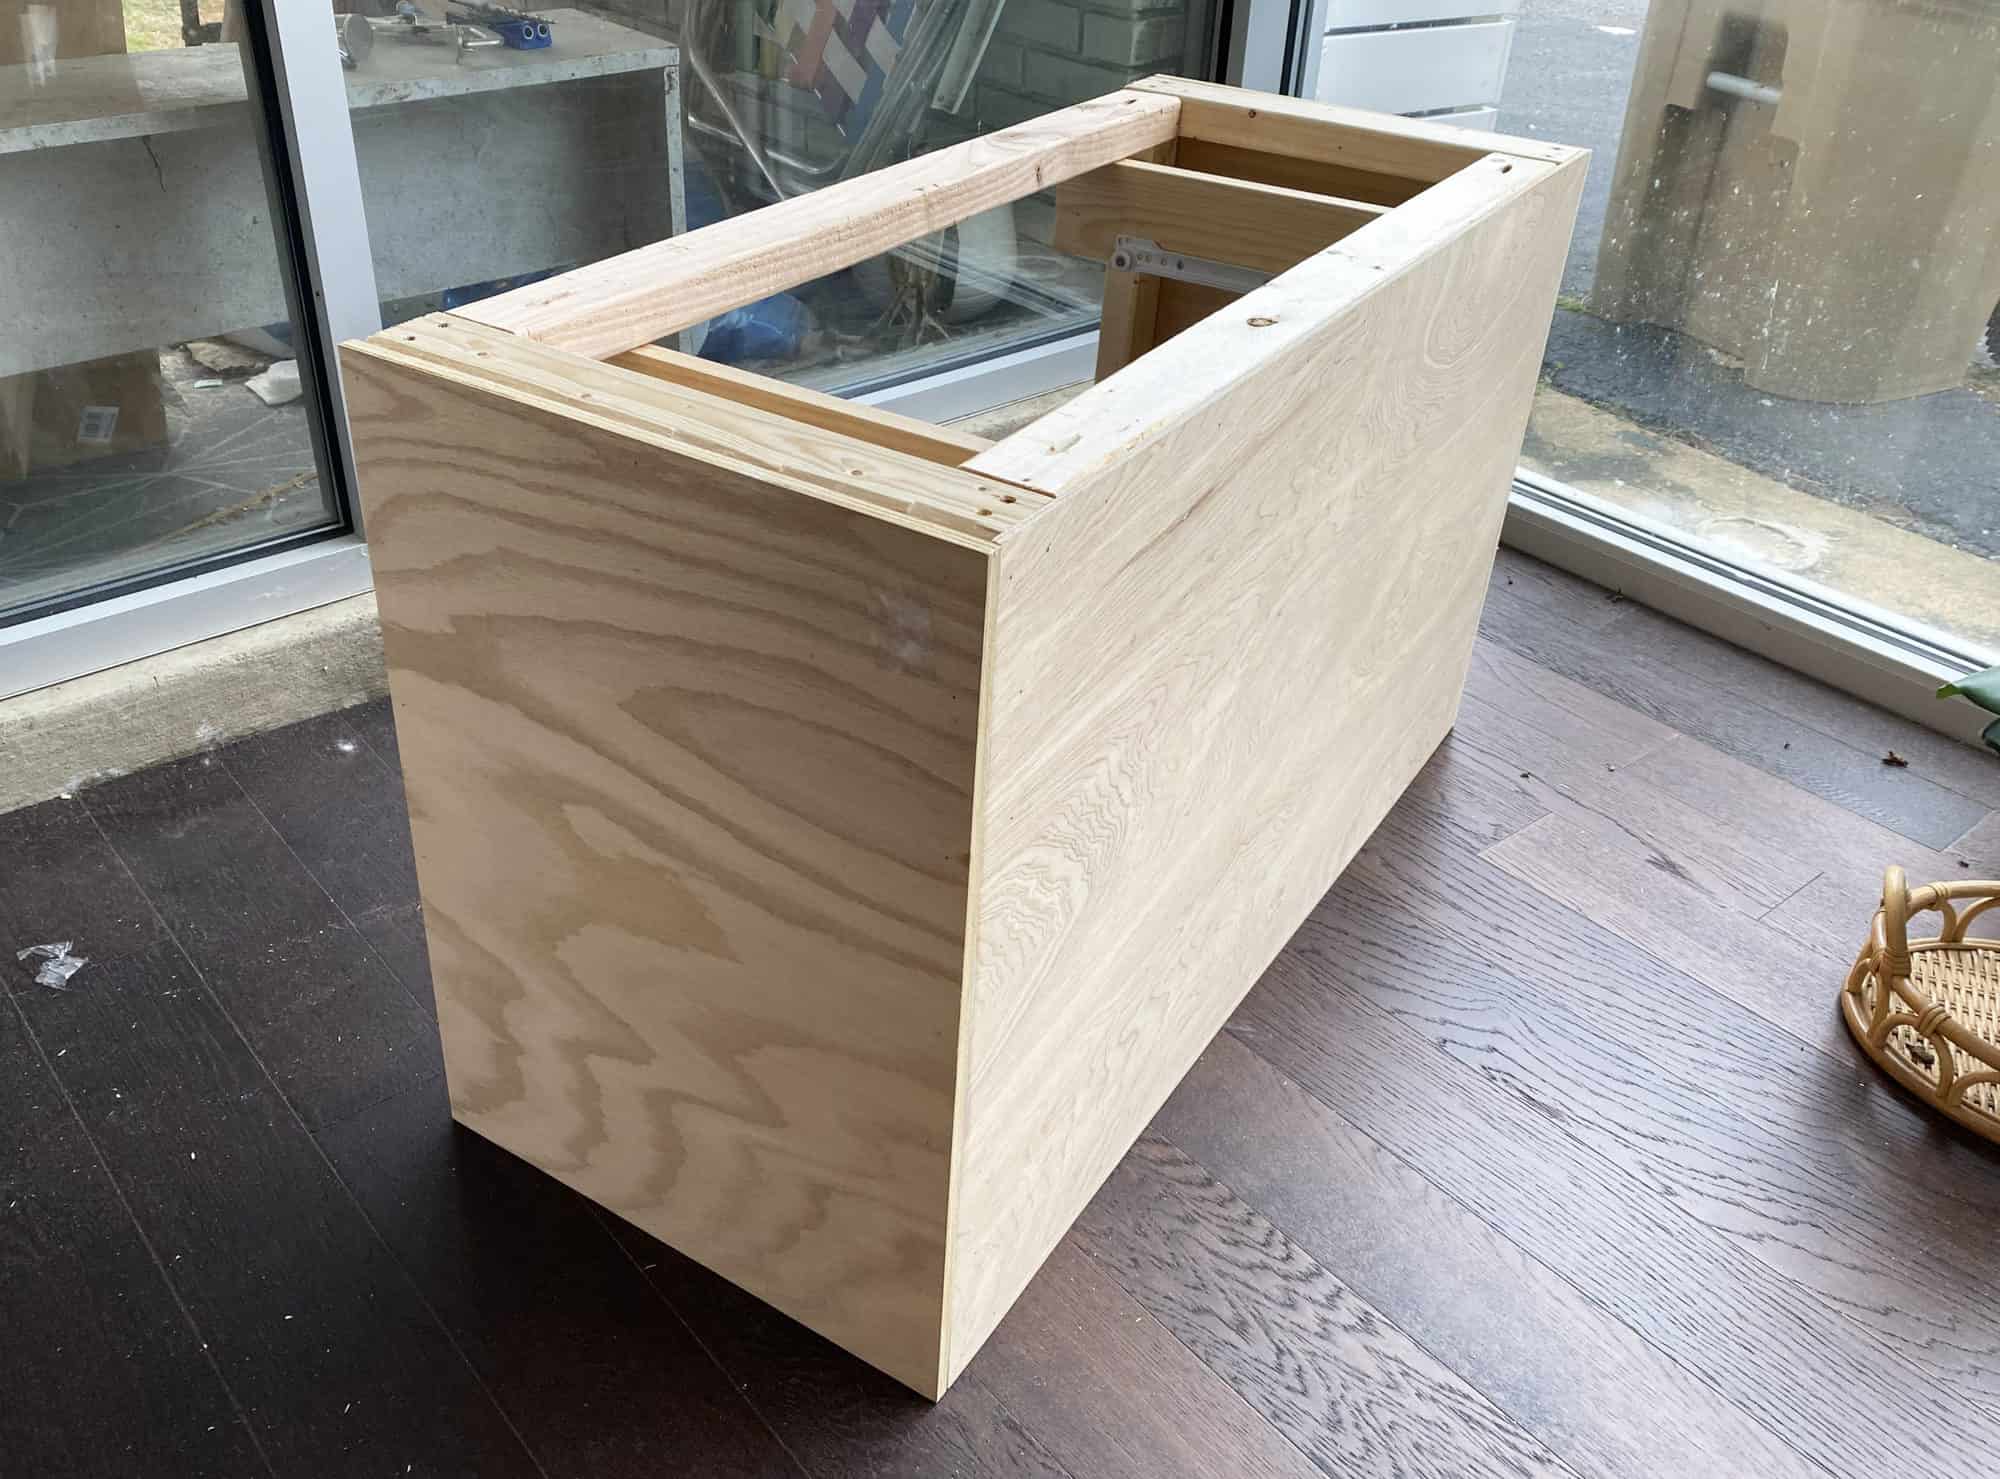 Next, cut 3 of your 2′ x 4′ x 1/4″ birch plywood boards to fit the back and sides of the vanity and attach them with wood glue and a nail gun.
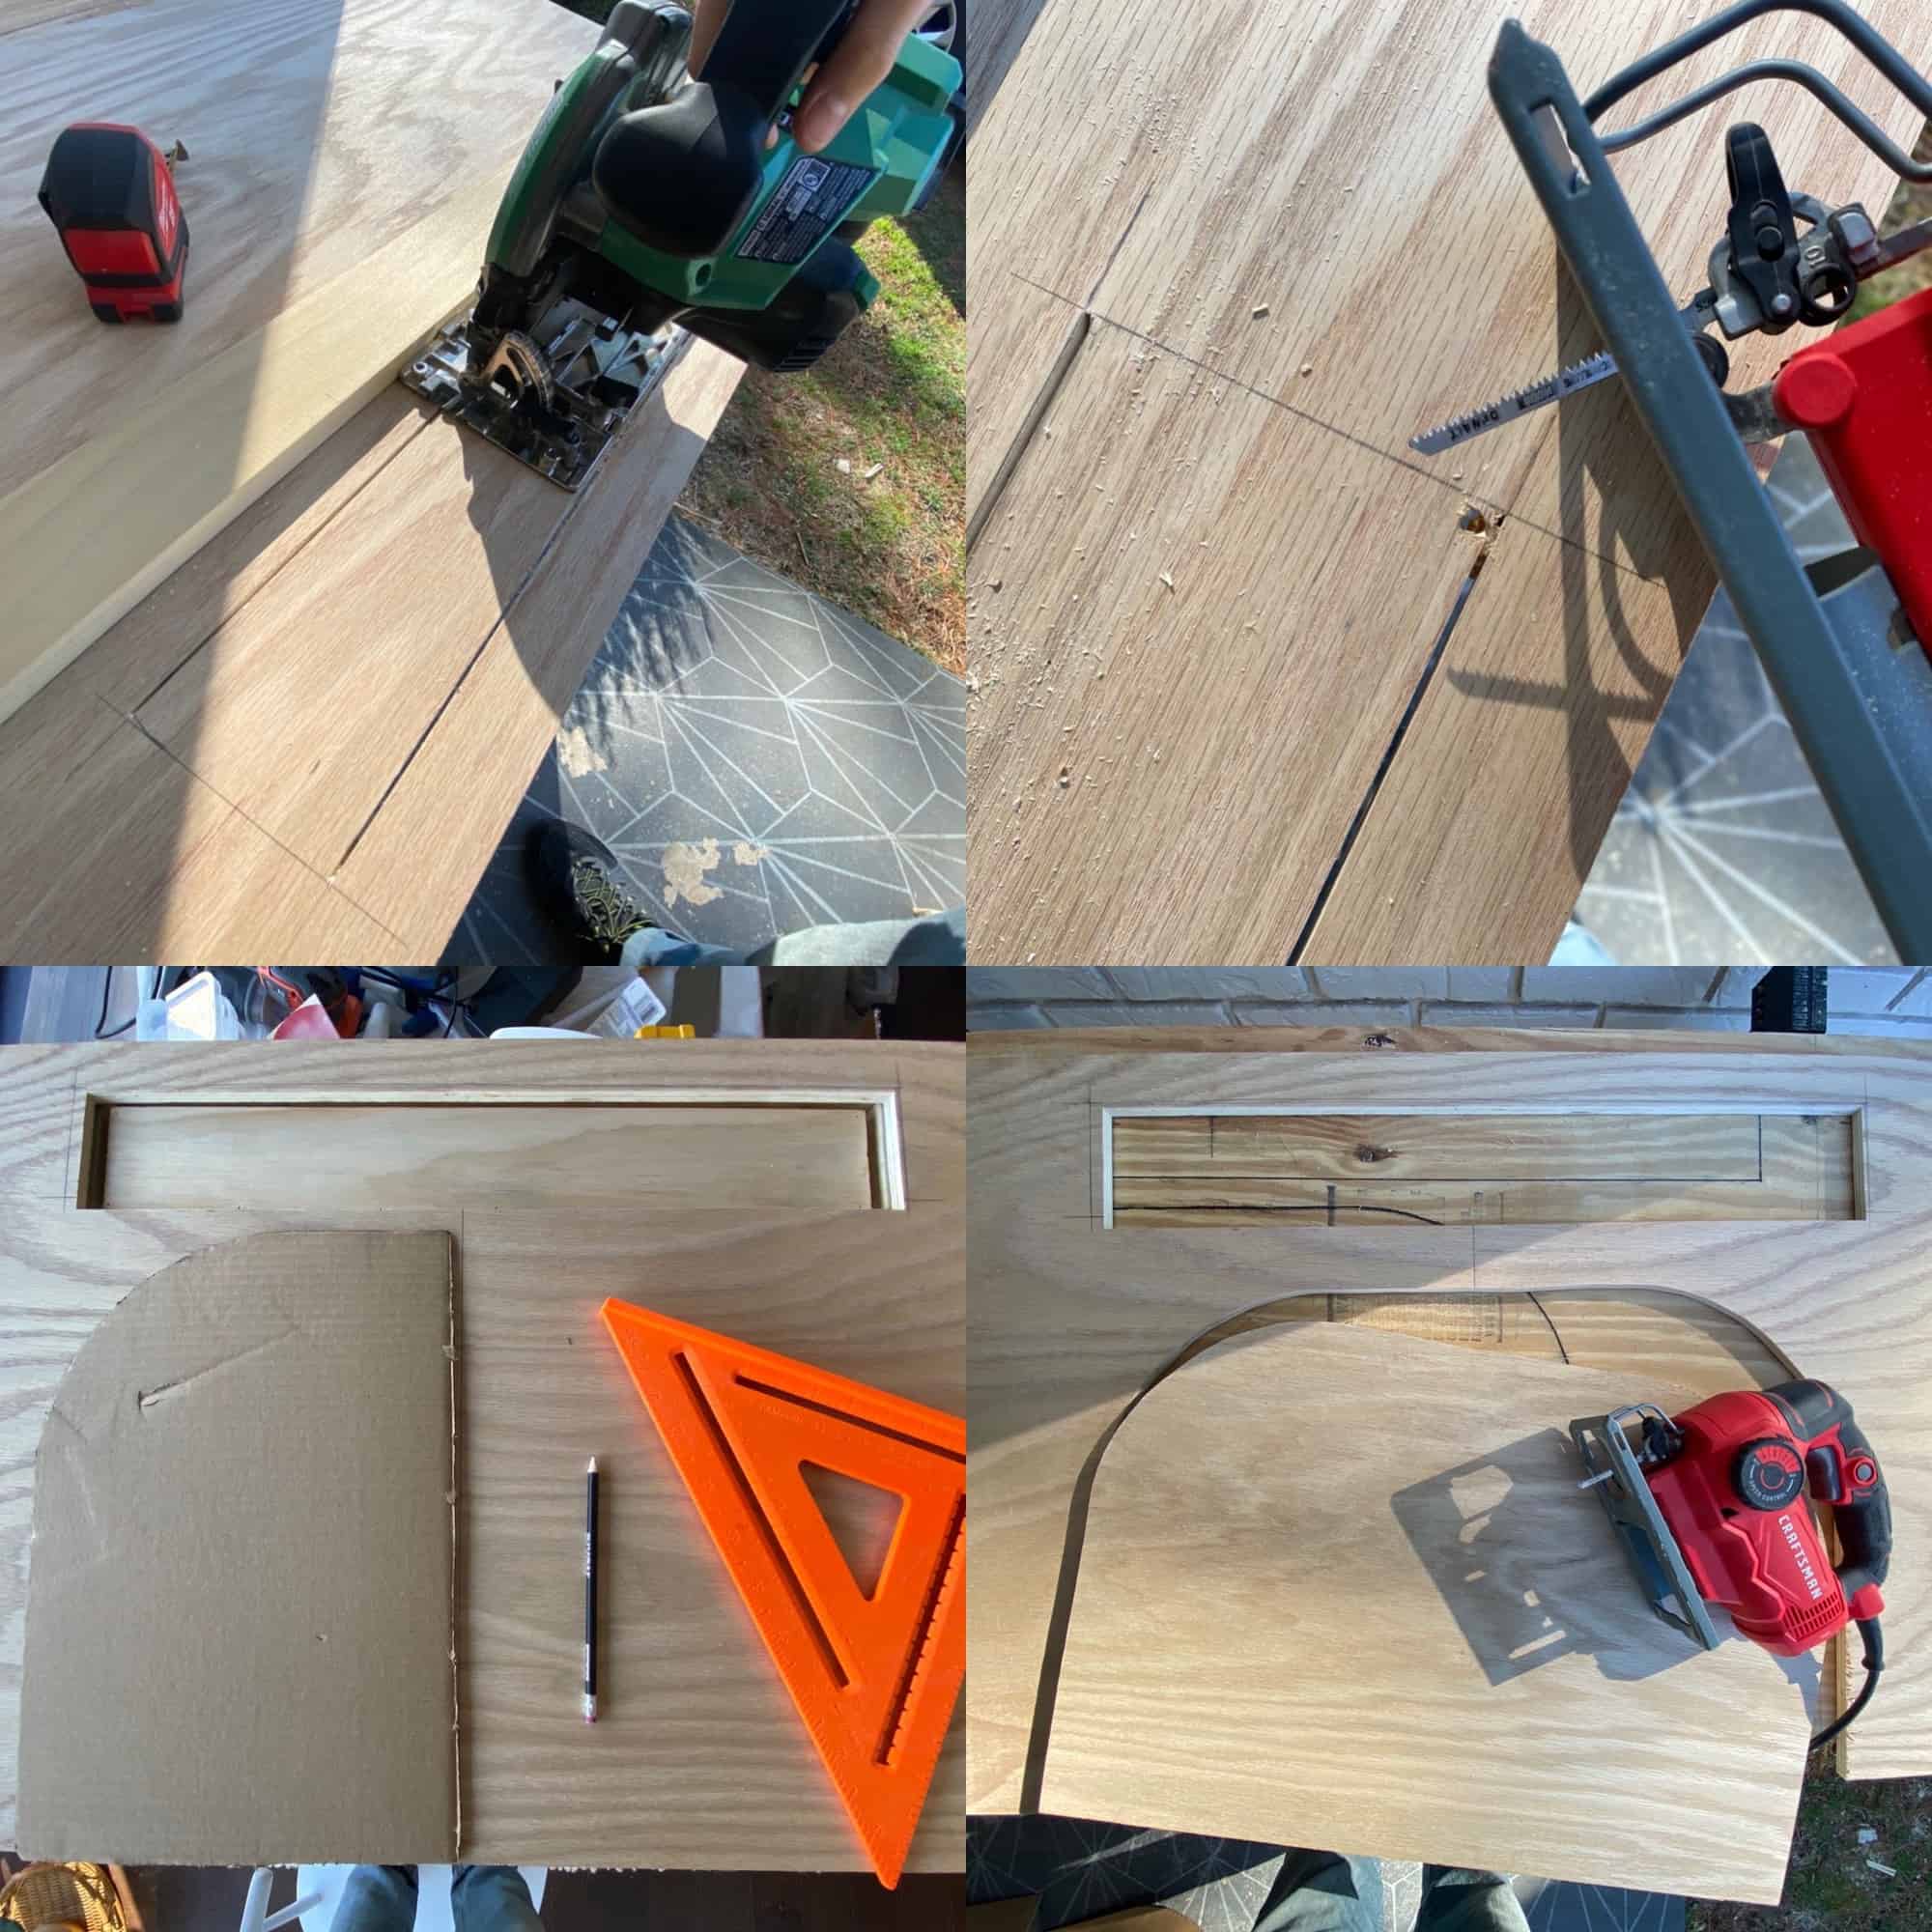 To cut the hole for the drawer, measure where the drawer will be. Ours is centered from side to side and 2.5″ from the top of the vanity and the opening is 4.5″ x 2′. Trace the shape onto the piece of plywood and use the circular saw to cut the long sides of the drawer and a jigsaw to cut the shorter sides (it’s easier to make straighter cuts with a circular saw rather than a jigsaw). For the arch, trace the shape onto a scrap piece of cardboard and make sure it’s perfect; you might need to do it a couple of times to get it right. Then trace the cardboard onto the plywood and cut out with a jigsaw. Attach to the front of the vanity with wood glue and a nail gun.
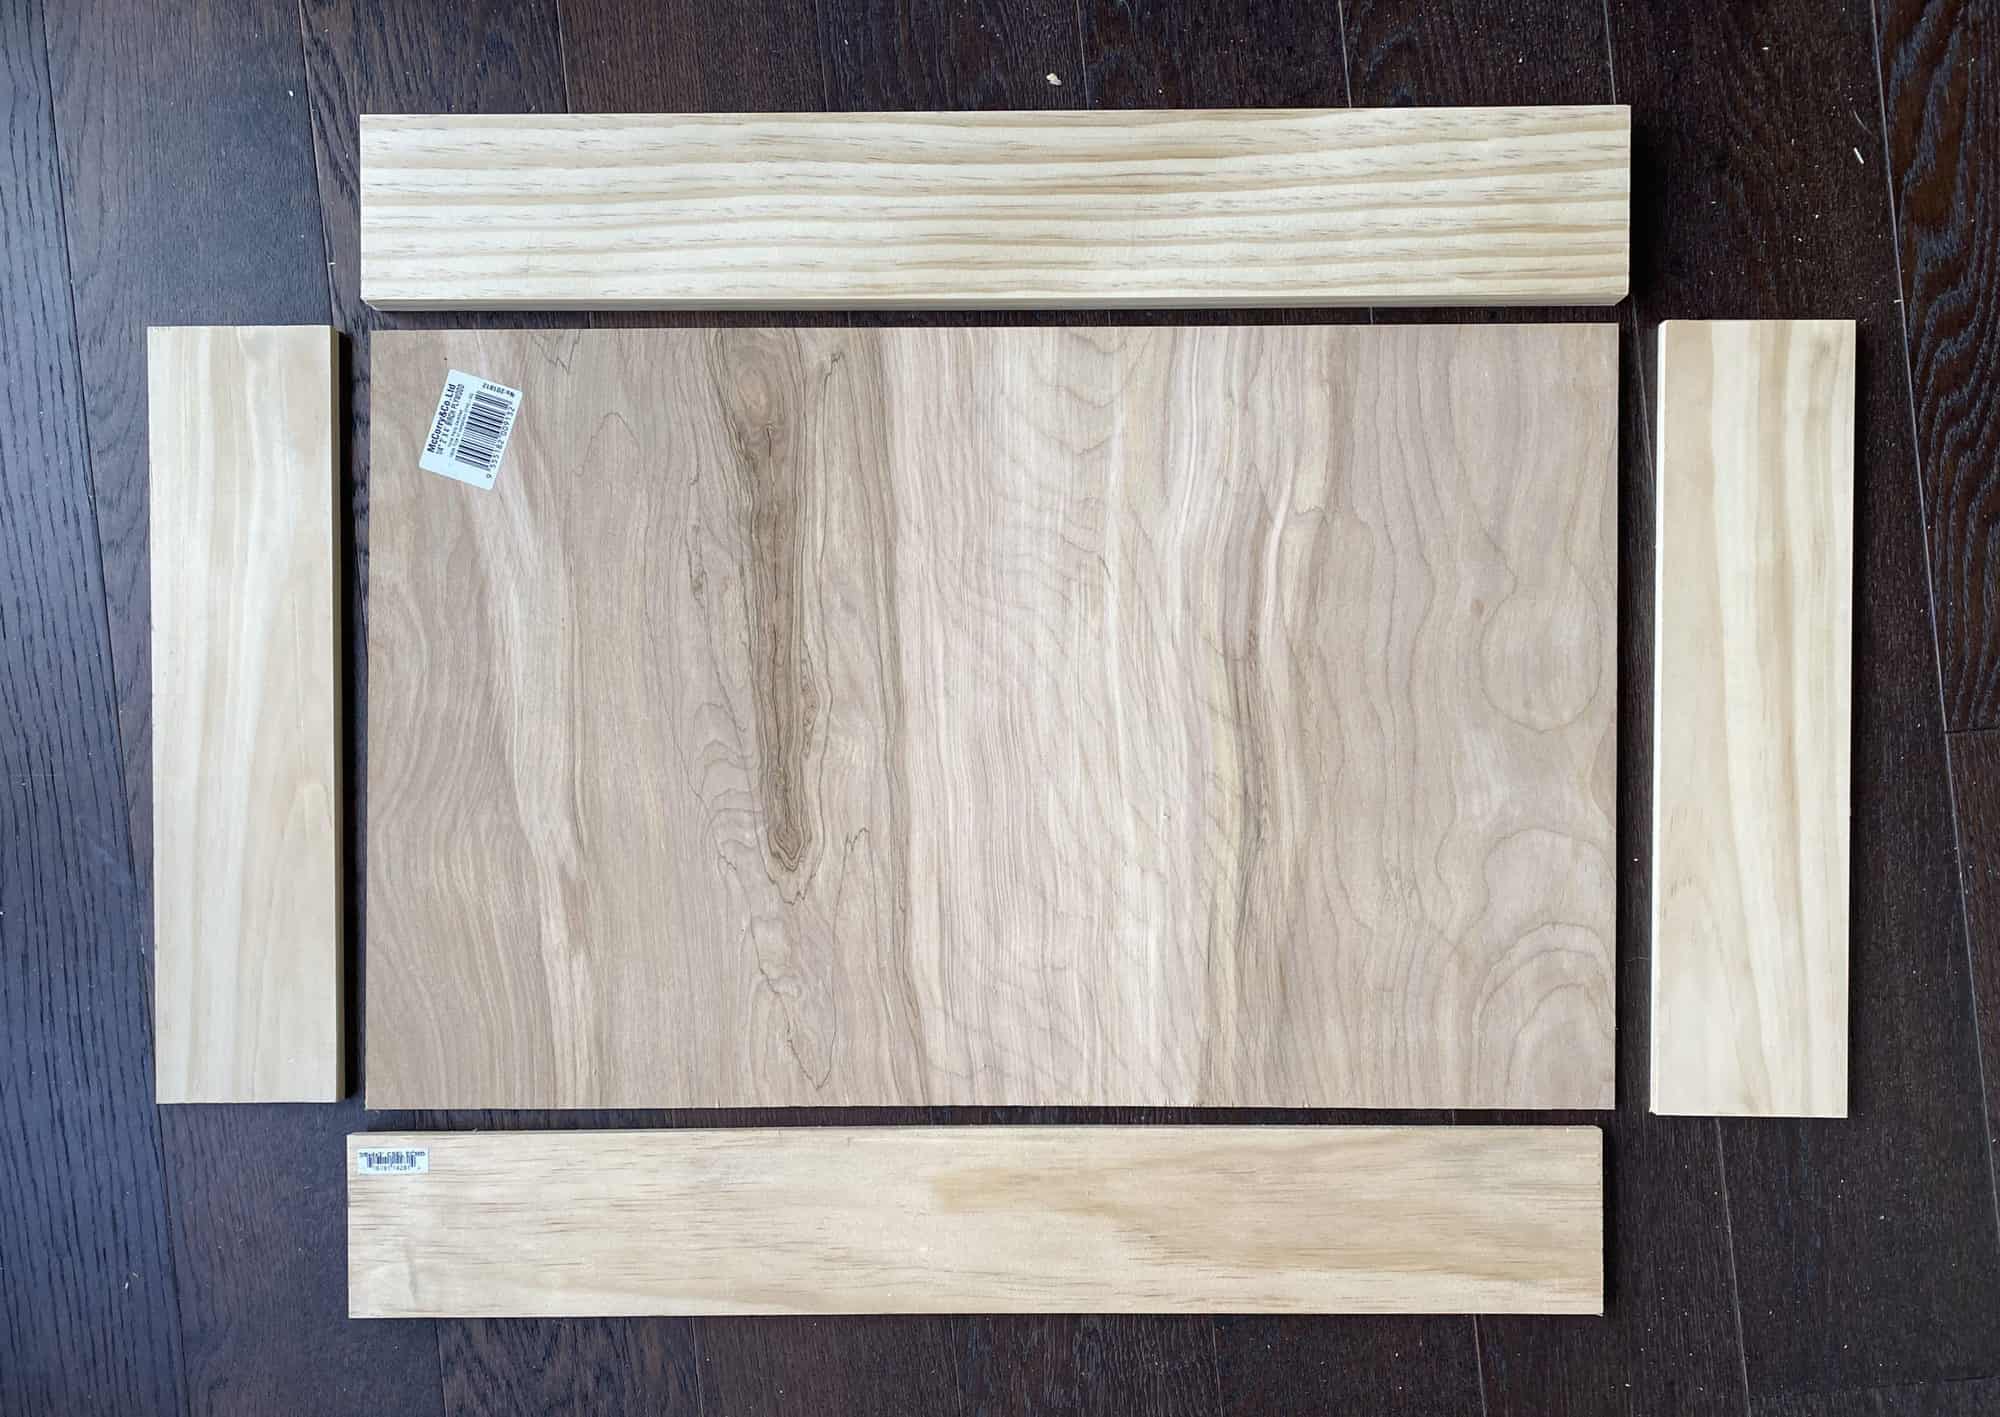 To build the drawer, cut a piece of 1/4″ plywood to 21.5″ x 12″ for the base of the drawer and cut the side pieces from the 4″ x 1/2″ x 3′ boards to fit the sides and front and back of the drawer. Attach them with wood glue and a nail gun. Attach the drawer slides to the drawer as well as the inside of the vanity.
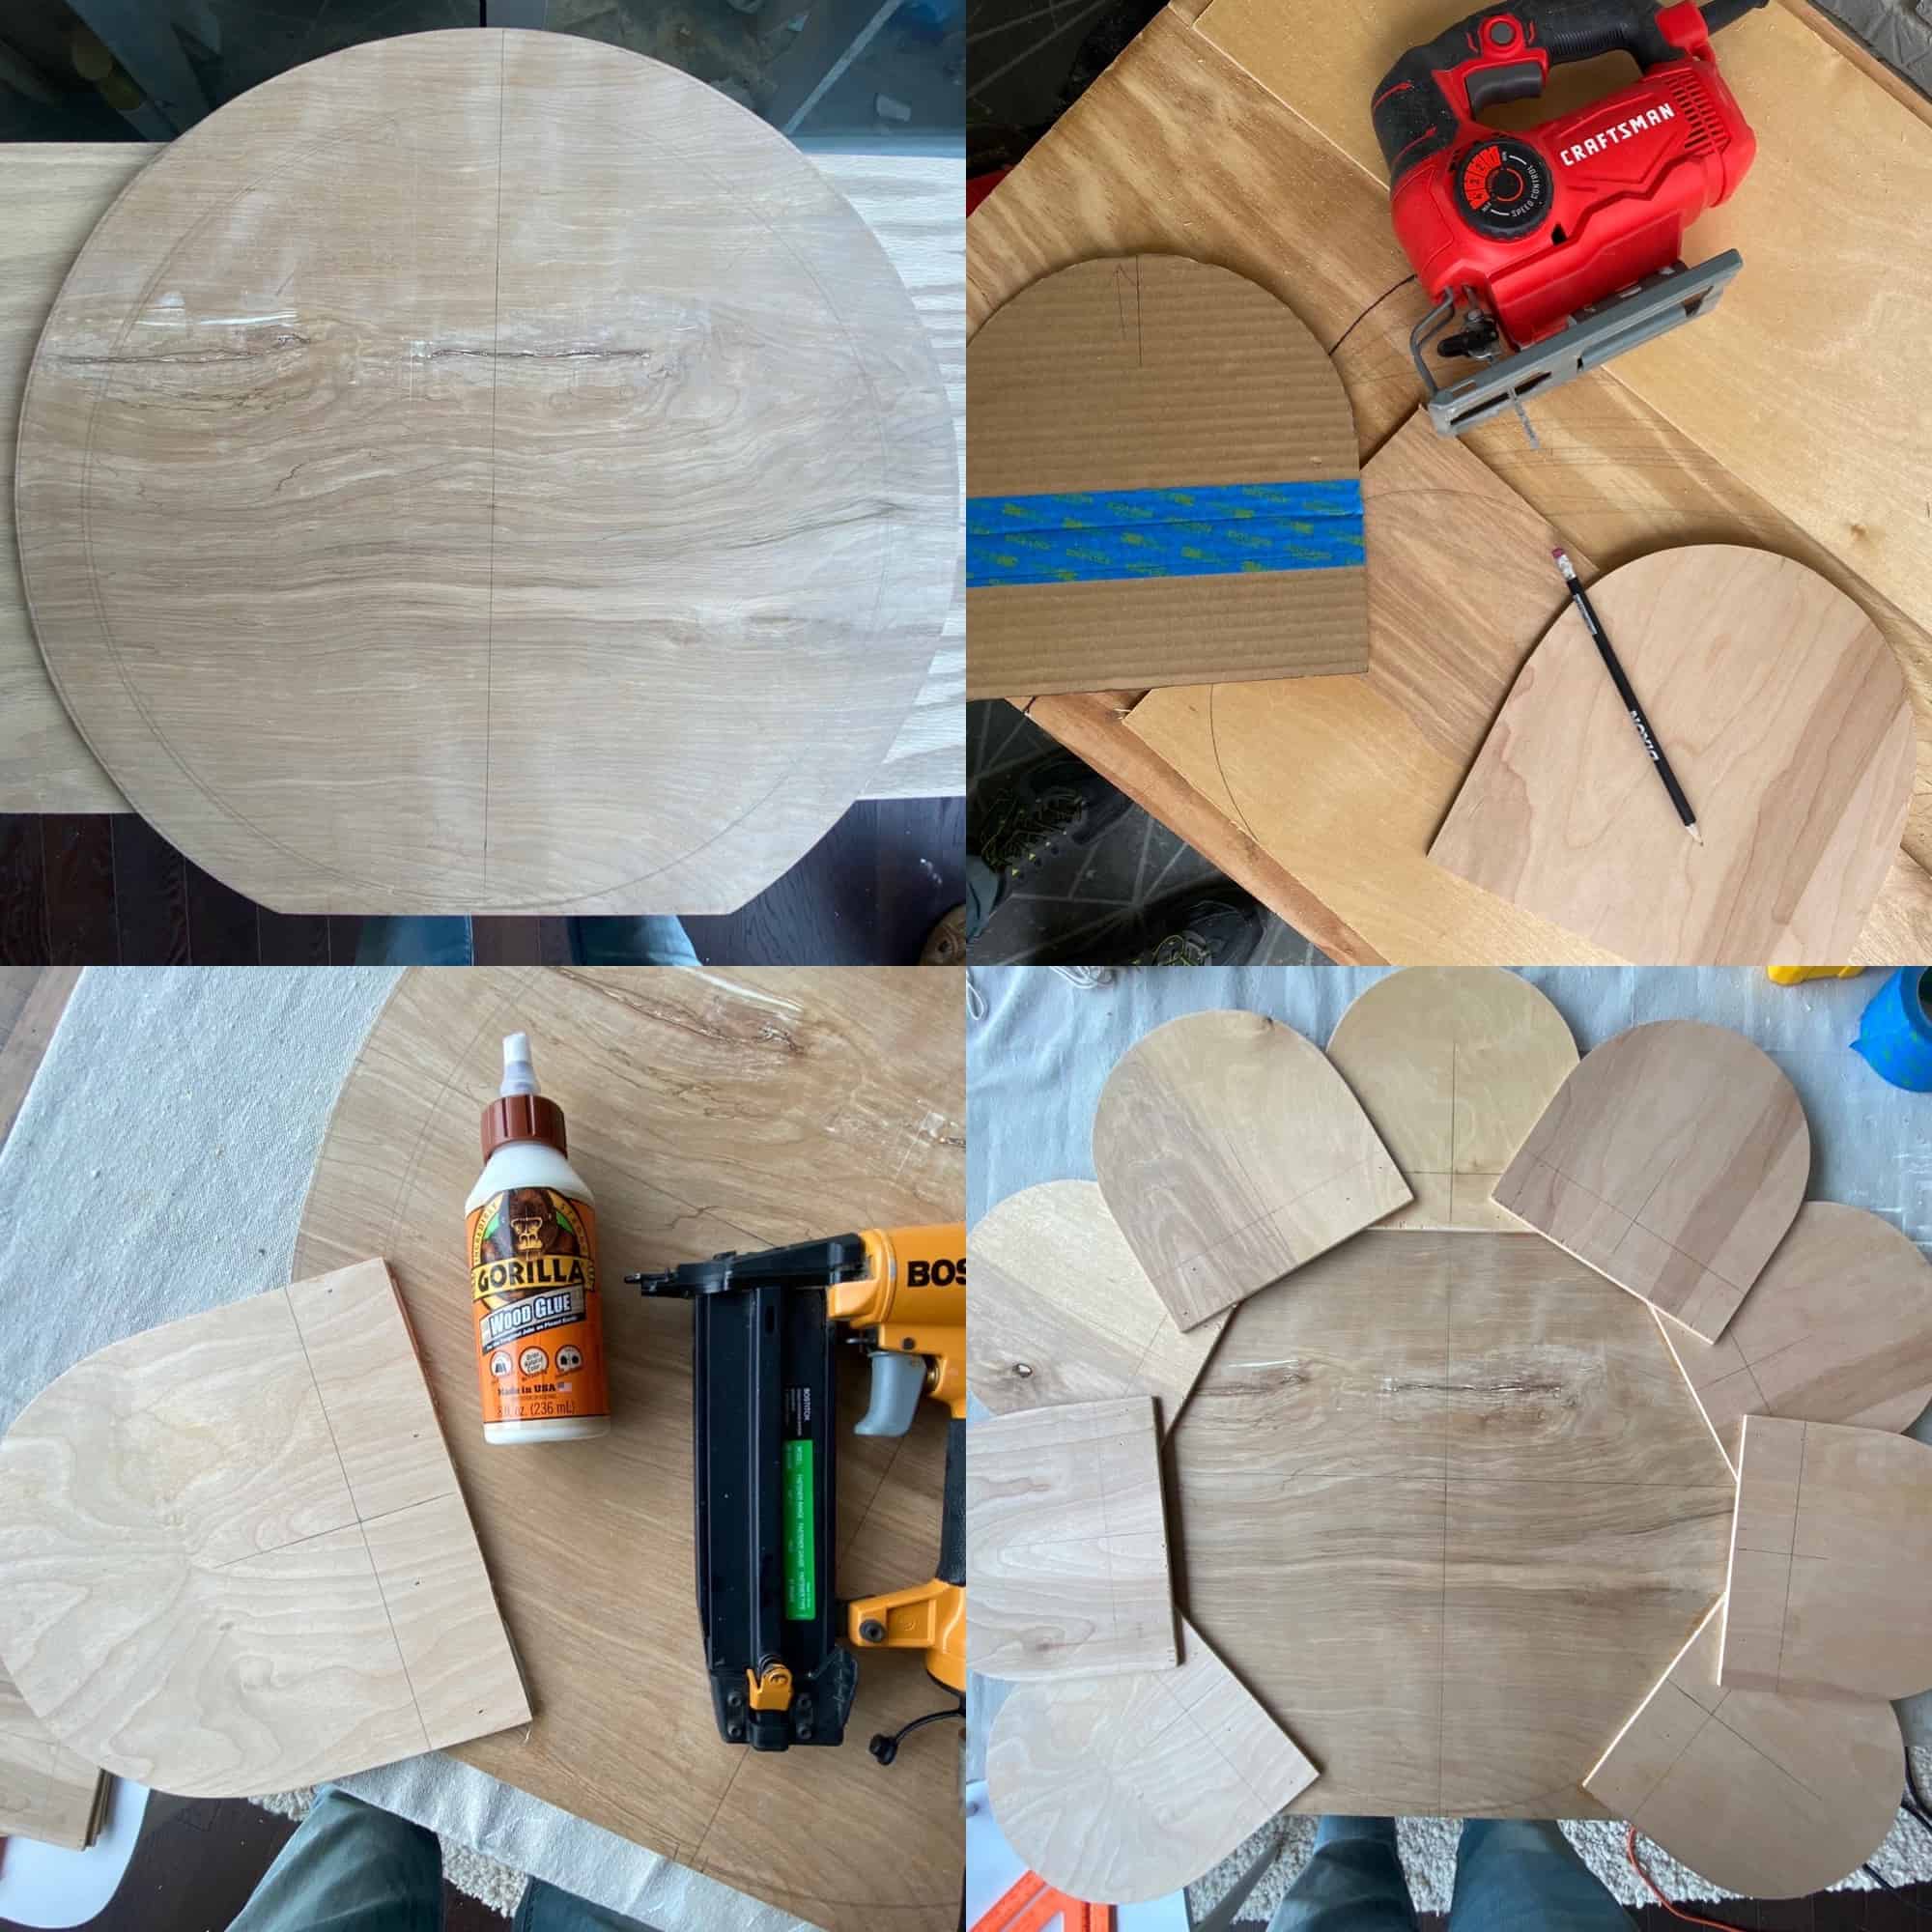 For the daisy mirror, cut a 24″ circle out of the 1/4″ plywood with a slight flat bottom edge. For the petals, trace the shape onto a piece of cardboard and cut it out, and then trace 9 petals onto 1/4″ plywood and cut out with a jigsaw. Attach petals with wood glue and a nail gun as shown above.
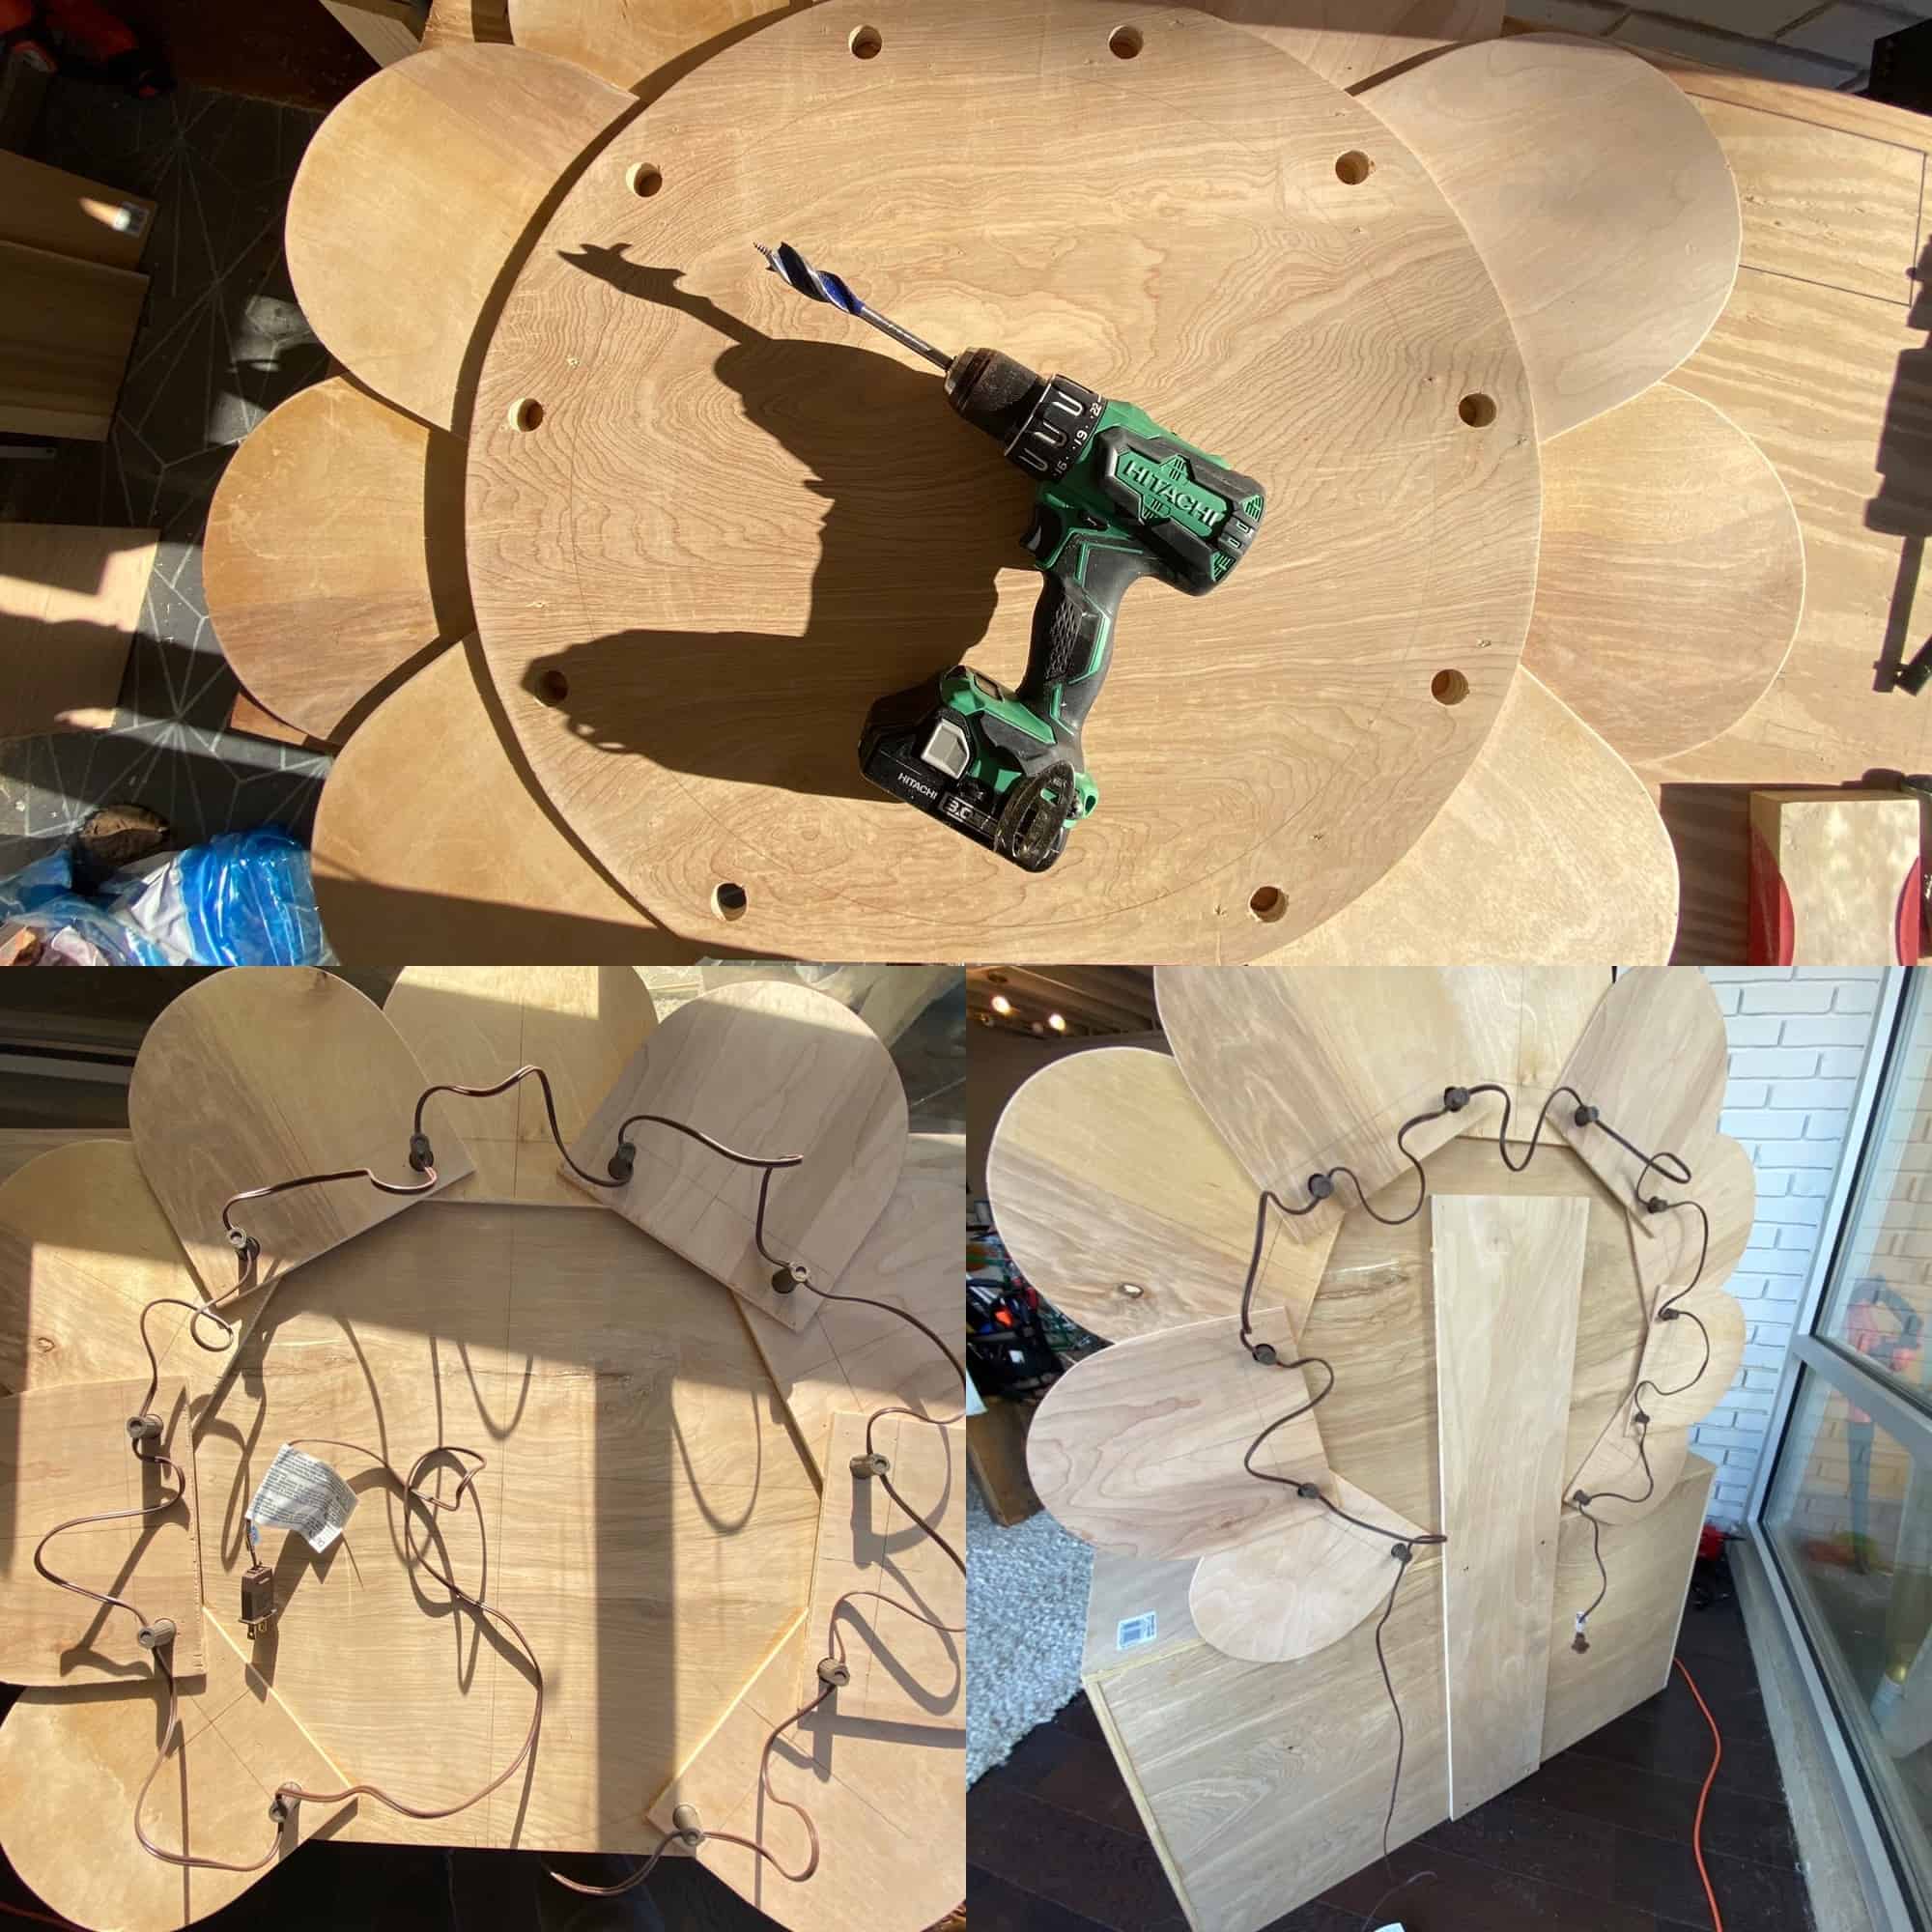 Measure out and evenly space 10 holes for the lightbulbs. You will need to measure the size of the light sockets and use the appropriate size drill bit. I believe the lights I used required a 1/2″ sized drill bit. Place the light sockets into the holes and you can secure them with either glue or a clear silicone to keep them from falling out. Cut a long rectangle strip of 1/4″ plywood to attach the daisy mirror to the vanity base as shown above. Lastly, sand any rough edges, paint, and attach a 18″ circle mirror in the center of the daisy!


 This is far and away the most fun we’ve ever had making a DIY—and the most magical! It is definitely a family heirloom that we will pass down. It’s the best feeling in the world to make something special like that.
Oh yes! And before we go … here’s a photo of it illuminated.
 Thanks so much for reading!!! xx- Elsie (and Collin too!)
Nova is living my dream. I need one of these in my size!
This is amazing, Nova must be so thrilled with it ?
Oh, that is so super precious! Fantastic workmanship as well. Is this in a shared room for the girls? It’s obvious that Nova loves it.
Oh gosh, I love it! I want one 🙂 Love the design Elsie and beautiful job, Collin!!
Love this so much!
That is so adorable!! I love the idea of creating unique custom pieces for your kids that they’ll cherish. Thanks for sharing this DIY! They are so inspiring and have motivated me to make some and create my own! 🙂
I can see an Ikea hack working for this too… use an ikea desk and add the diy flower!
Totally!
It turned out so cute! Good work! What color green did you use? It looks so cute with the wallpaper.
Hi! It’s actually more mustard yellow but the filter my photographer used changed the color a little. XX!
Wow wow wow!!!!!!! Best DIY EVER omg nova must love it!
Wow, it turned out so fantastic!
xx from Bavaria/Germany, Rena
www.dressedwithsoul.com