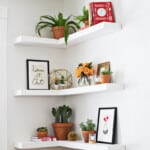
Floating Corner Shelves
How to build your own floating corner shelves.
Ingredients
- six 2'x4'
- two 1 x 8 x 12 kiln-dried cedar
- one ¼″ x 4′ x 8′ plywood
- 1 ¼″ wood screws
- heavy duty fasteners
- spackle
- paint
- caulk
- wood glue
- miter & table saw
- drill
- pocket hole jig
- sander & paper
- level
- stud finder optional, but useful
Instructions
- Cut all your wood. I find it more productive if I figure out all (or at least most) wood material I need and cut it all at once.
- Next, sand the pieces that will be visible.
- Assemble figure A (see diagram). I found it easier to clamp down the 1 1/2″ piece before screwing in the 6 1/2 x 3 1/2 pieces. I put in two screws per piece.
- Assemble the pieces. I have included diagrams in the post you can also print to use for this project.
- Once you have the spacing all set up, studs found, and material at hand, you can start putting up the shelves .A good way to visualize spacing is to use painter’s tape.I started at the bottom and worked my way up. Install all of the A pieces first. The HeadLOK fasteners did a great job of making everything super sturdy; just make sure you’re hitting studs!
- After you have the A pieces up, you can put on the B pieces. You can screw or nail those on.
- Screw or nail on the underside and end pieces.
- Putty any nail or screw holes. One thing I wish I would have done is caulk around the shelves so that there were no spaces showing.
- Sand once everything is dry. I attached my vacuum hose to the sander to minimize dust.
- Tape the wall if you are going to paint another color.Once you paint, you’re done!