First, you’ll want to print out your labels and icons. Cut out your labels and icons with scissors or an X-Acto knife, leaving a small border of white around the boxes. Peel off one self-adhesive sheet and arrange your squares in a row with space between them. Put as many as you can fit on one page. Peel off another sheet and place it on top of your page, pressing down to smooth out any bubbles.
Cut out your icons and labels leaving 1/4″ of film around the edges.
Once your printables are cut and laminated, stick a magnet of the back of each icon and you’re ready to work on your board!
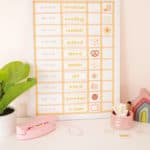
To make your board, get your calculator and divide your board into as many segments as you have categories in your day. I have 10 sections on my board, but if you were doing a lot more you could always buy a bigger white board to have more space. An easy way to add tape lines on a board is to make a dot with a light colored dry-erase marker where each section should be on the left and right sides of the board and then simply connect the two dots with a line of washi tape. Once I had all my horizontal lines on, I did the same connect-the-dot thing to add three vertical lines to make two boxes on the right-hand side for the icons (she moves them to the right box when the segment is complete) and then divided the left area into two rectangles where I would write the time for each segment and put the segment label. Once I had my grid I put tape all the way around the edges to finish out the look and cover over the tape ends from the other lines.
Once your grid is on you’re ready to add your icons and labels and start your day!
