
.")

.") If you follow me on Instagram, you might already know that this past winter Trey and I added a hot tub and deck to our backyard. We’ve been using it at least once a week, and it’s great for when we have friends over. My favorite was during the the snowy season. We love sitting in the warm water while it lightly snows around us. Super freezing getting in and out. But once you’re in, it’s perfect.
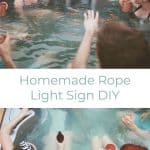
If you follow me on Instagram, you might already know that this past winter Trey and I added a hot tub and deck to our backyard. We’ve been using it at least once a week, and it’s great for when we have friends over. My favorite was during the the snowy season. We love sitting in the warm water while it lightly snows around us. Super freezing getting in and out. But once you’re in, it’s perfect.
Our hot tub and deck were professionally installed, but Trey and I have been dreaming up ways to add our own homemade touches to the decor of the space. We really wanted to add a little more light to the area, as it can feel a bit spooky out there at night. Our first thought was to string up outdoor holiday lights around the railing of the deck. But then one night we were out at a bar (Trey was singing with The Mixtapes), and I noticed how they had rope lights illuminating all their pathways and stairs around the stage area. This got me thinking about using a rope light to add light but also maybe a little message to our space.

")
 There’s a lot about this project that just works for our space. But I thought it would be fun to share how we installed our rope light sign, in case you’re curious.
 Supplies:
-1 outdoor rope light kit (48ft in length)
-50 nails (we didn’t use all 50, but it’s good to have a few too many than not enough)
-printed-off grid of your word
-string or embroidery thread
-outdoor light switch (optional)
Tools:
-hammer
-measuring tape
-tall level/ruler or additional measuring tape
Approximate Cost: $55 (does not include cost of tools)
Step One: We created a grid featuring our word. Trey did this in Illustrator, but any software that allows you to put a measured grid behind text would work. I bet you could pull this off in Word or PowerPoint. Anyway, Trey just measured the height of our wood panels in our siding, converted the feet to inches, and created a small-scale version to reference in Illustrator. He created a grid that used the height of the wood siding as horizontal lines and then just standard feet for the vertical lines. This helped us plan where the nails would go and approximately how tall and wide the letters needed to be. When choosing the font, we weren’t looking for the exact font we wanted on our wall, just something with all the right curves, corners, and proportions. Considering that it’s a sign made out of rope light and nails, we knew it wasn’t going to look exactly like any font we chose. (We used Miniver from the ABM app.) Then, we just marked dots on the printout in all the spots needing nails.
 Step Two: When adding the nails, the wood siding made a great reference point for us when translating our grid on paper to something huge. But Trey probably relied more on his measuring tape and level with a ruler on it than anything. We needed the nails sticking out a few inches from the wall, as these act as the hooks that hold the rope light in place. The dark color of the wood on our house made it pretty ideal for this project. We weren’t using the biggest nails to begin with, but the dark color hides any excess holes pretty well. That’s extra nice considering how many woodpeckers our house attracts. So moving nails around wasn’t an issue. When we take it down some day, we’ll decide if we need to pick up some wood filler. If you were thinking about doing this yourself, we’d definitely recommend an area with darker wood siding, or just a board of some kind.

 Step Three: Once we had all the nails in place, we added the rope light. We looped it around the nails, helping it to bend into place. This was a lot easier to do with the two of us.
When we first had our word spelled out and stepped back, it looked super wonky. It just had too many harsh corners where they shouldn’t be. There were just enough nails to get the idea up there, but not enough to round out the letters. What’s nice about the rope light is its durability and elasticity. We were able to go in and add nails anywhere that needed a little rounding out. It was actually very similar to playing with points in Illustrator.
 Step Four: For areas where the rope light was doubled up, we added ties (they came with the rope light kit) to alleviate gaps between the rope light. We wanted the rope to look like one smooth line when the lights were on. We were actually kind of nervous that the light would be awkwardly bright in the areas where it doubled up, but we’re happy to report that wasn’t the case with the rope light. Not sure why not, but I’m not gonna complain.
 Finishing touches: One end of the rope light plugs into an outdoor outlet. The other end looks like this. Not too attractive, huh? We decided to make our cursive word look like it continued off over the edge of our rail so we could hide the end of the rope light. We secured it to the other side of the rail using a plastic loop that came with the rope light kit.
So right now, it plugs into an outlet that’s just underneath the deck. We knew we didn’t want to have to plug it in and unplug it every time we came out to the hot tub. Huge hassle and probably dangerous. So we just bought one of those waterproof timers for outdoor Christmas lights that also has an on/off switch and installed that on the rail.

.") If you’re thinking about doing anything similar, as with any outdoor lights (like holiday lights), turn them off when you are not using them. Always check that your outdoor lights do not contain any exposed wires, as some weathering can occur over time.
If you’re thinking about doing anything similar, as with any outdoor lights (like holiday lights), turn them off when you are not using them. Always check that your outdoor lights do not contain any exposed wires, as some weathering can occur over time.
Thanks for letting us share our weird, little outdoor lights with you. And remember, relax! xo. Emma (+ Trey)
Credits // Author: Emma Chapman and Trey George, Photos by: Sarah Rhodes and Emma Chapman. Photos edited with Willis of the Folk Collection.
This comes at a good time, since PATIO is now high on the to-do list. I have just discovered your blog – via Food52 and the black bean veggie burger. You seem like the kind of people who could be unruly gardeners, just like me. My blog: http://unrulygardener.me/
Can’t wait to spend a few hours traveling around A Beautiful Mess!
This is such an awesome idea…and so easy!!!! Love it, thanks for sharing!
xoxo,
Andrea
www.andreaeveryday.com
Wah, super cute. I’d even use something like this inside on a backboard or something.
http://xfallenmoon.blogspot.com
I love it!!!!!!! I am totally stealing the idea. 🙂 🙂
Emma where did you get your swimsuit? I’ve been looking for a one piece black and white striped design for the summer… 🙂
http://annescribblesanddoodles.blogspot.com/
Amazing!! I wish I could have an outside area like this to relax with family and friends.
http://shibarita.blogspot.com.es/
Really like this idea!! It looks really cool
This is seriously amazing, such a great idea!x
electra-violet.blogspot.co.uk
So fun, absolutely love it 🙂
Just brilliant. I love how you guys put so much effort into making your home space so inviting and unique!
Maria x
www.cheekypinktulip.blogspot.com
Such a clever idea 🙂
Love the pics <3
Wow, is it really that simple?!
very cool
wow
i really love it!
This is amazing! Lucky to have such a relaxing place in your back yard.
This is a totally nosy question – but would love to have a hot tub someday 🙂 What kind of hot tub did you go with and do you like it?
I love this! And I’m definitely making plans with David to make a headboard using the rope lights! So cute!
xoxo
Taylor
OMG!It´s amazing!
www.modaonlinegelolasvintage.com
so cute!!
xxoo,
nikki
www.dreaminneon.blogspot.com
This is so awesome, I WILL find a way to do this. Somewhere!