 I have to admit that when I first realized that marbling was back in style, I was totally surprised. It’s not that I didn’t like marbling to begin with, but I had just kind of forgotten that it was an option. But once I saw the array of products in pretty, swirly rainbow hues, I was like, “Oh, right! Glad you’re back, marbling; you deserve it!” Our pal Elise made some really pretty cards recently, and we started wondering how this technique would look on a photo. So as part of our Canon USA collaboration we made some large marbled photo art!
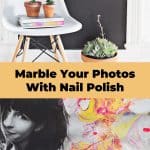
While the options of how to marble (and what to marble) are varied, this nail polish version is pretty much as easy as it gets, and you can marble paper, wood, slick surfaces—just about anything! Since marbling is at its best when done in colorful hues, we decided that a bright marble pattern would be the perfect addition to a black and white photo.
 Supplies:
-nail polish in several shades (don’t use quick-dry if possible). We used bottles of half-used polish from our collections, ones we hadn’t touched in over a year.
-disposable container (I used paint liners)
-disposable stick to stir paint
–Canon Fine Art Paper, “Photo Rag”
-plastic gloves to protect your hands
 Step One: Print photo. Choose a photo that has a good amount of white space, meaning you won’t have to cover an important part of a photo, like someone’s face. We printed ours with the Canon PRO-100 on their “Photo Rag” paper, which worked much better than traditional photo paper on this project. We highly recommend it.
Step Two: Add a couple of inches of water to your container. If you are going to dip an object, use a container that can hold enough water to submerge your object, but you only need a shallow container with a few inches of water for objects that just touch the top of the surface.

 Step Three: Unscrew all the tops to your nail polish containers, and place them next to the water. Using one color at a time, pour some polish into the water at different spots across the surface. Once you have all the colors poured, use the stick to pull the colors across the surface until you get a mix that you like. You’ll have to work really quickly when pouring the colors and stirring them. It helps to have another person pour the colors with you—the less time the polish sits before being transferred to the object, the better the end result will be.
 Step Four: Once your pattern is where you like it, carefully place your photo into the area you like the best, and pull the photo straight up to remove. If you missed a spot on your photo, you can dip it again in another area that still has some polish remaining. You can also make a new batch of polish marbling to dip into again, but you’ll want to start over and change the water first. Once you have dipped all the spots you like, allow the photo to dry flat.


 So pretty, right? The marbling has such a magical and fresh feel that it’s a perfect way to add some color to almost any object, and it definitely gives these already pretty photos a boost to the next level. xo. Elsie
Credits// Author: Elsie Larson, Project Assistant: Laura Gummerman, Photography: Elsie Larson and Sarah Rhodes. Photos edited with Stella from The Signature Collection. 
Great idea! It’s so fun to think about new surfaces to put these techniques on 🙂 I wonder if it can be done on fabric?
can you do this on a normal photo printed off from the store?
Has anyone tried this with fabric paper (not sure what it’s called, but quilters sometimes use it when they want to add a photo or other image to their quilt)?
Also, does anyone have any great ideas on how to mask one area of a photo that you don’t want to have marbling on, especially if the area has an odd shape?
I tried this with both nail polish and acrylic craft paint and it sinks to the bottom of the water. Are you using non-tap water? I can’t get it to float on top.
Did you frame or mount the finished photos? I’m curious, as I really like the look of it. Thanks
Never would have thought of that on my own! x
Haaaan. THIS. I’m doing it asap!
__
The curated aggregation of the best luxury designer fashion on sale on www.thebrokecurator.com
I love this and I think it will make a great anniversary gift for hubby. I wanted to ask you did you frame the pictures, i can’t really see but I like the way they are hung!
This is beautiful! I’ve been looking for some things to redecorate my room with that won’t be too cost effective and this is perfect 🙂
So CUTE! Love this! Putting this in my back pocket for the future!!!
Please say that this can be used on cloth. I would love to use in to make gorgeous embellished fabric, but I wonder if it would be very stiff.
Such a GREAT idea! ♥ I love it, thanks for sharing.
xo Maria
http://www.marygoesround.de
Super neat! You guys are great at sharing ideas I never would’ve thought up on my own.
This is so adorable and a lovely idea! A definate must try!
Trissa Marie
Awesome idea! Can’t wait to try this. Is there a reason you chose nail polish as opposed to something like craft paint?
What an awesome idea! The colors on the pictures turned out great.
This is SO cool. I love the pop of color on the black and white pictures.
It’s so pretty! Live it ??
Same Concept except I used a disposable cup, water, nail polish (Dollar store polish) an orange stick for swirling and tape (masking, scotch, anything except duct tape). It just takes A LONG TIME!!! Seriously, do this on a friday night when you just want to vegetate.
1. If I want to paint all my nails marble, I paint my all fingernails a bright white because the colors will be see through. If I just want to do the ring finger, I paint my ring fingers white first before settling on the color for the other fingers, because this is M-E-S-S-Y!!!
2. Pick my finger that I’ll be paiting, tape around the skin of my finger leaving just my nail eposed. And by tape around I mean you’re turning your finger into a mummy!! If you’re doing your ring fingers, do both at the same time (saves you trouble), if you’re doing individual fingers, I’d go one finger at a time.
3. Instead of dropping the bottle into the cup, like they used here, put several drops of polish ontop of the water and layer the colors on top of each other.
4. Like above, take your orange stick and swirl till you like the pattern.
5. Dunk your mummified finger into the cup with the top of your nail is the first that is going into the mixture and the first that is coming out (think of it as a scooping motion).
6. Let it dry a bit first, it’s going to look like a big mess. I’d say about 1-2 minutes. Then pull the tape off, you’ll have excess on the edge, but a nice flat brush (I use the E.L.F. contour brush for it’s only a $1) and nail polish remover will take it off!
Done!
Done!
Love this!
Black and white photos are my favorite (always have been), but I love that little pop of color that helps the picture shine even more. And the best part is I should have almost everything I need for it!