 Our home was blessed by amazingly sleek walls and ceilings—no orange peel or popcorn textures in sight! Except for the one wall I couldn’t avoid—the one behind the stove. It was covered with a textured finish that couldn’t have felt more out of place (in my mind, at least). Removing the cabinets above the stove area further exaggerated this problem texture because I now had a wall that was half smooth and half textured.
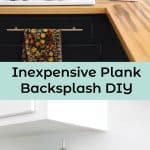
Instead of wasting pounds of sandpaper, replacing the drywall, or attempting to skim-coat over it, I decided to cover up the textured wall with a plank backsplash. This little project turned into the easiest and least expensive change in our kitchen that made such a dramatic change. Check out how I made our plank backsplash below!

 My first choice for a kitchen backsplash was white subway tile. I know, I know—the darling of kitchens all across Pinterest. I wasn’t up for the price tag or work involved with preparing our wall and installing tile, though, so I decided on a more rustic plank backsplash. Instead of vertical planks you see in wainscoting or beadboard, I wanted to do something a bit wider and horizontally oriented. Of course, this meant I couldn’t go out and buy a sheet of wainscoting without compromising my vision or having an awkward seam where I pieced together the boards. So I decided to make my own planks of wood for the project.
 I selected lauan plywood as my material because it is thinner than 1/4″ plywood, takes paint well, and—best of all—is really inexpensive! One 4′ x 8′ sheet of lauan is about $15 at most hardware stores in my area of northeast Ohio. I used 1 1/2 sheets of lauan for this project. In case you’re interested in the cost of my particular kitchen backsplash, I broke it down for you below:
Cost of Materials:
-lauan plywood: 2 sheets at $15 each = $30 (I only used 1 1/2 sheets)
-construction adhesive: $2
-caulk: $2
-primer: $10 for a quart (I used leftover from our cabinets)
-paint: $15 for a quart (I used leftover paint again)
-finishing nails: $2
Total Cost: $61*
*My personal cost of $36 was lower because I didn’t need to buy paint or primer.
 I cut the plywood into 4 1/2″ wide planks by setting the fence of the table saw to the correct distance from the blade, then pushing the plywood through with the assistance of Phil to catch the wood. The lauan is so flexible that the middle kept bending up, so I had to get kind of close to the blade to keep it down. This was really unsafe. So if you do that, you should use a piece of scrap wood or something to hold it down. I made sure to keep my eyes on my hand until the spinning blade had come to a stop. It’s easy to not notice your hand move as you pull the scrap wood away from the table. Be careful! Another safety tip is to make sure the blade is as low as possible while still being able to cut the wood.

 We had a big pile of planks to work with after about a half hour of cutting the plywood into pieces. I lightly sanded the edges of each piece, then got started on putting them on the wall!

 I used construction adhesive to put the planks into place and a nail gun to secure them. Because I wanted the planks to be staggered, I did cut some of the planks shorter with a miter saw for variation. If you have smaller areas to work with, like I did around my window, cutting those planks might give you just the variation you need.
In addition to cutting some pieces shorter, I had to cut out holes for outlets and switches. I did this by measuring the space and then cutting the planks with a jig saw.
 If you don’t have access to a nail gun, you could certainly use a hammer and nails! We had borrowed an air nailer, so that’s what we used.
 After all of the planks were in place, it was time to get painting! This took a long time. We worked until 4 AM on this part because I just wanted to get it done, and that was the only time we had available to do it! Oh, man. The worst part was waiting for paint to dry in between coats.
We did two coats of primer followed by two coats of semi-gloss white paint. I selected semi-gloss because it wipes clean very well—a great quality for a backsplash!
Note: I didn’t realize that the next step (caulking) would make the area around the gaps too matte, leading to me having to do a light coat of semi-gloss paint over where I had caulked. So that means you should either buy paintable caulking and caulk before painting the planks, or if you choose to paint first (as I did), make sure you’re prepared to brush over the area where caulk gets on the panel fronts because that stuff doesn’t completely wipe away. You may need to use oil-based paint to cover the caulk.
 The next step was caulking the gaps between the planks. I had left about a 1/8″ gap to give interest to the backsplash. That space needed to be filled because of two things: I didn’t paint the wall behind the planks, and the gap was deep enough to be an issue with food and other matter getting stuck in it.
To caulk, I applied a ribbon of waterproof caulking to the gap between planks, smoothed it into the gaps with my finger, then squeegeed off the excess with a caulking tool. This left residual caulk on the planks as noted above. To avoid that, you could tape off the planks or brush over the dried caulk with oil-based paint. Do not use a damp cloth to clean off the caulk because it won’t get rid of the residue, and it could compromise the integrity of the caulk.
When caulking this backsplash, don’t work on too big of an area at a time because the caulking will start to set up and you won’t get as nice of a groove in the gaps.

 After the backsplash was up, we put up the shelves. If there are any weird gaps around the cabinets or the shelf brackets, feel free to caulk that space too! It will make a big difference visually.
 If you ever need to fill nail holes in this backsplash, it’s as simple as sanding the area, applying wood filler, sanding again, and then priming and painting with leftover paint. To make sure you have leftover paint on hand, you could store some in a small jar and keep it in a kitchen cupboard.
 No more textured walls! Just simple, somewhat rustic planks that set the tone for the rest of the kitchen. What a difference a little cover-up makes, eh? –Mandi
Update about the exhaust hood: So many of you have asked about the exhaust fan, so I thought I should probably include something about that in this post. We removed the hood above the stove, but we are not getting rid of an exhaust system from the kitchen. Instead of a hood, we are installing an exhaust fan in the ceiling, similar to what you might see in a bathroom. You can’t see the gaping hole in many of the pictures I shared. The shelf above the stove is high and narrow enough to not be an issue with steam, and the fan will be a little further out from the wall above the stove area, which will pull steam slightly away from the wall and into the ventilation, leaving the house. The switch for the fan can be seen beside the outlet above the wood canisters. I’ll talk more about this decision later, but I won’t be sharing about how to change ventilation because quite frankly, I won’t be doing that work myself. Dad to the rescue!
Credits // Author and Photography: Mandi Johnson. Photos edited with Spring of the Signature Collection.
Did you seal it with anything to protect from grease or other splashes?
How did you get the perfect spacing in between the boards? Did you use something as a spacer?
Looks fantastic! How did you affix the lowest plank over the tiles?
So, I know this is quite a few years old and subway tile is probably going out of fashion or has gone out but I did this backsplash for a quick, cheap upgrade in my kitchen. I updated it slightly, by carrying the planking up the wall to the ceiling, where I could, and painted it in a “hot” ( or so I was told). popular color. It’s so much cleaner and brighter and so easy, I could do it! Saying it was easy, doesn’t take away from it being time consuming. But, all in all, it was easy, compared to doing tile – which I have also done. Overall,, really happy. I spent more money than Mandy did, as I didn’t have the colors I wanted. I did two coats of primer and two coats of a HIGH GLOSS paint. Very important, to make it water proof. Wish I could post some pics but I don’t see a pic button. I didn’t even have to use power tools. The lumber yard cut the lauan into strips for me and then I used an exacto knife to trim and cut around outlets. SOOOOO easy! And I hand nailed it, with 1 1/2″ finishing nails. Thank you for sharing this. I’m thinking about doing it on a whole wall in my living room but figuring out how I can just leave the lauan “natural”. I found it to quite pretty when I had it on the wall, before I painted it.
How has the maintenance of the backsplash been? I’m really loving this idea for our kitchen, but want to know how easily it cleans up.
Hey Mandi, I found your post about your DIY back splash on pinterest. I am going to try to tackle this next week! I wanted to ask; did you have to buy extenders for your electrical outlets or were you able to just pop the face right back over the plywood without there being any gap?
great project! where are the butcher block countertops from? ikea?
We got ours from Lumber Liquidators and Menards. Ikea’s was too short and thin for us.
Hi! I had a very hard time finding someone who put white planking above a wood countertop. So glad I found you and then I realized I had found you long ago when my son was attending school at MSU. So Hi again! Anyway, I know you are long past this by now, but I am doing the same thing and I am trying to decide what to do about caulking the seam where plank meets countertop. Do I caulk white? Put up a piece of trim? I couldn’t find where you said what you did at that point. Any advice would be greatly appreciated. Thank you.
This idea is brilliant. I’m writing an article about cheap DIY backsplashes for a new RV makeover blog I’m starting, and I wanted to include a cheap shiplap option, and this seems to be the simplest and best-looking I’ve found. Would you mind if I included a photo and a link back to this post in my article?
That’s totally fine! 🙂
THANK YOU! This post saved me so much $$$! We’re in the midst of an unexpected DIY renovation due to mold remediation in the kitchen. I was about to spend hundreds on a backsplash, but we have leftover Luaun plywood from fixing the floors. I’ve got caulk, white semi-gloss paint – this will cost us $0 and it looks AWESOME! You are superwoman, and your kitchen looks gorgeous. Where is your cabinet hardware from?
Thanks a bunch!
Would it be possible to do something like this over existing tile? I too would love to cover our old off white tiles with bright white subway tile, but it’s just not in the budget.
So cute! I did the same exact think in our bathroom (http://www.runtoradiance.com/2014/03/24/white-planked-walls/) but I love the idea of using it as a backsplash! Your kitchen is looking lovely. 🙂
Love it! So clear and beautiful!!! Great job, Mandi!!! 🙂
Thanks! Yes, we actually have many saw horses but they were all being occupied as drying surfaces for our numerous cabinet doors and drawers that had just been painted earlier that day. My dad has a couple of those rolling stands (not sure what they’re called, but it’s a conveyer belt style roller atop a heavy duty pedestal) that we tried to use to help the wood along, but the lauan was still too bendy for those to work. We would’ve needed a table surface or a makeshift table made of plywood resting on something like saw horses, and just didn’t have the means to do that because of all of those things being occupied, unfortunately. We definitely took our time and were very mindful/watchful of all things— especially hands! 🙂 I thought I should still include pictures of the process, though, and add that readers should be much more careful than I was.
-Mandi
Thank you! Yeah, we just used caulk in the corner. I actually need to go over it again because some of the caulk settled into the groove.
-Mandi
I used a chisel to remove the tile from the drywall. I didn’t bother to repair the wall much since it was just going to be covered with the plywood.
-Mandi
I’m not the biggest fan of the lauan grain, but if it was a simpler grain, like what you’d see on maple, I may have been tempted to white wash it. 🙂
-Mandi
Hi Mandi, the kitchen looks awesome! I wish I was able to do this to my rental. Oh well, that day will one day come. I’m actually here to comment on the safety issue of cutting thin lauan on a table saw. You are right- very dangerous!! Next time, invest in some saw horses or build custom ones that are the exact same height as your table saw. This will help support the lauan. If you want to get fancy, they even sell saw horse type contraptions that have a rolling pin mechanism on top which helps guide the wood as you cut. Sorry I don’t know the names of them. I used a table saw with them a lot in college and it makes using the table saw way less stressful!
So beautiful Mandi!
Waauuw,
That just look amazing!