") If you saw this post and thought, “Whoa, that looks great! I should make that! Wait, glass cutting? I’m out!” then you probably aren’t alone. I had wanted to try mirror cutting for a while now, but just the sound of it gave me the shivers. I think I have a mild case of aichmophobia with some materials (the irrational fear of sharp objects), so the thought of trying to break a mirror into several pointed edges sounded less than ideal. However, life is for facing and conquering your fears, right? I looked up a few tutorials on the technique, and I was shocked at what I found—it looked so easy to do. Of course, I was skeptical that they were just making it look easier than it was, but I asked Josh about it and he said that he had done it before and assured me that, yes, it was in fact that easy. Sweet! I’d been wanting to make a gem mirror for a while, and I thought this would be the perfect technique to learn in order to achieve that goal. Let’s do it!
If you saw this post and thought, “Whoa, that looks great! I should make that! Wait, glass cutting? I’m out!” then you probably aren’t alone. I had wanted to try mirror cutting for a while now, but just the sound of it gave me the shivers. I think I have a mild case of aichmophobia with some materials (the irrational fear of sharp objects), so the thought of trying to break a mirror into several pointed edges sounded less than ideal. However, life is for facing and conquering your fears, right? I looked up a few tutorials on the technique, and I was shocked at what I found—it looked so easy to do. Of course, I was skeptical that they were just making it look easier than it was, but I asked Josh about it and he said that he had done it before and assured me that, yes, it was in fact that easy. Sweet! I’d been wanting to make a gem mirror for a while, and I thought this would be the perfect technique to learn in order to achieve that goal. Let’s do it!
") Supplies:
Supplies:
–glass cutter tool![]() *
*
–mirror
-metal ruler + marker
-gloves and safety glasses
-gem line drawing and cutting guide (right click to download)-fine grade sandpaper
-contact paper
-X-Acto knife
-gold spray paint
-clear spray paint
*Note: Most of these glass cutter tools come with an area in the top where you can put oil that runs down to the blade, but you don’t really need the oil to score the glass. The oil helps keep the blade sharp longer, but you can still cut just the same without it.
") To make your octagon gem shape, first you’ll want to cut your mirror into a square. Use a metal ruler and marker to measure out and draw a square the size of your desired finished width onto the mirror (don’t worry about the marker, glass cleaner will take it right off). Position your glass cutting tool on your line and place your metal ruler up against the cutting wheel. Use your glass cutter tool to score a line into the mirror that runs the entire length of the mirror (make sure to keep your tool right up against the ruler as you score). You want to firmly score the line in one single pass, so don’t go over your line again once you’ve scored it. You are basically cutting off the entire chunk of mirror that is to the left (or right) of your marked square line. It basically feels the same as cutting with an X-Acto knife. And if you worried it will make a “nails on a chalkboard” sound as you score the glass, don’t worry. It hardly makes any noise at all.
To make your octagon gem shape, first you’ll want to cut your mirror into a square. Use a metal ruler and marker to measure out and draw a square the size of your desired finished width onto the mirror (don’t worry about the marker, glass cleaner will take it right off). Position your glass cutting tool on your line and place your metal ruler up against the cutting wheel. Use your glass cutter tool to score a line into the mirror that runs the entire length of the mirror (make sure to keep your tool right up against the ruler as you score). You want to firmly score the line in one single pass, so don’t go over your line again once you’ve scored it. You are basically cutting off the entire chunk of mirror that is to the left (or right) of your marked square line. It basically feels the same as cutting with an X-Acto knife. And if you worried it will make a “nails on a chalkboard” sound as you score the glass, don’t worry. It hardly makes any noise at all.
") Once your line is scored, scoot the mirror to the edge of the table and line up the scored line with the edge. In one swift motion, push down on the piece you are breaking off and it will snap at the scored line leaving a clean break between the two. It’s a bit scary to actually go through with the breaking part because your brain is convinced that the mirror will shatter as soon as you press down. But once you do go through with it, the mirror only makes a tiny snapping sound and you feel a bit silly for building it up so much in your mind.
Once your line is scored, scoot the mirror to the edge of the table and line up the scored line with the edge. In one swift motion, push down on the piece you are breaking off and it will snap at the scored line leaving a clean break between the two. It’s a bit scary to actually go through with the breaking part because your brain is convinced that the mirror will shatter as soon as you press down. But once you do go through with it, the mirror only makes a tiny snapping sound and you feel a bit silly for building it up so much in your mind.
You’ll want to wear gloves and eye protection for this step just to be extra careful, but Josh is a bit of a daredevil as you can see, so he skipped the gloves part. I still felt a little nervous at this point, so I wore really thick leather gloves just to be safe when I did my pieces.
") Once your four sides are snapped and you have a square, measure, mark, score, and snap off the corners of the square to get your final octagon shape. Clean the lines off the mirror with glass cleaner.
Once your four sides are snapped and you have a square, measure, mark, score, and snap off the corners of the square to get your final octagon shape. Clean the lines off the mirror with glass cleaner.
") Now that we have our shape, let’s create our gem lines! Cover the whole front of your mirror with contact paper. Use this handy dandy line making and cutting guide that Josh made for you (right click to download) to draw and cut the lines of your gem with your marker and then X-Acto knife. It looks complicated, but just draw and then cut all the lines in the order he has shown. It’s a lot easier than you’d think. You can make your lines as thick or as thin as you want depending on the overall size of your mirror, but ours are about 1/4″ thick. So we cut 1/8″ on either side of the lines. Peel off all the lines to expose the mirror underneath.
Now that we have our shape, let’s create our gem lines! Cover the whole front of your mirror with contact paper. Use this handy dandy line making and cutting guide that Josh made for you (right click to download) to draw and cut the lines of your gem with your marker and then X-Acto knife. It looks complicated, but just draw and then cut all the lines in the order he has shown. It’s a lot easier than you’d think. You can make your lines as thick or as thin as you want depending on the overall size of your mirror, but ours are about 1/4″ thick. So we cut 1/8″ on either side of the lines. Peel off all the lines to expose the mirror underneath.
") Before painting, use a fine grade sandpaper to lightly sand the edges of your mirror in case there are any sharp spots.
Before painting, use a fine grade sandpaper to lightly sand the edges of your mirror in case there are any sharp spots.
") Spray your mirror with a few coats of gold spray paint and top it off with a clear coat spray. Use the X-Acto knife to lift up the corners of your contact paper shapes and peel off each piece. I love this part of projects like this. There’s something so satisfying about peeling off each square to reveal the design, isn’t there? Once all the contact paper has been removed, you’re done!
Spray your mirror with a few coats of gold spray paint and top it off with a clear coat spray. Use the X-Acto knife to lift up the corners of your contact paper shapes and peel off each piece. I love this part of projects like this. There’s something so satisfying about peeling off each square to reveal the design, isn’t there? Once all the contact paper has been removed, you’re done!
")
")
")
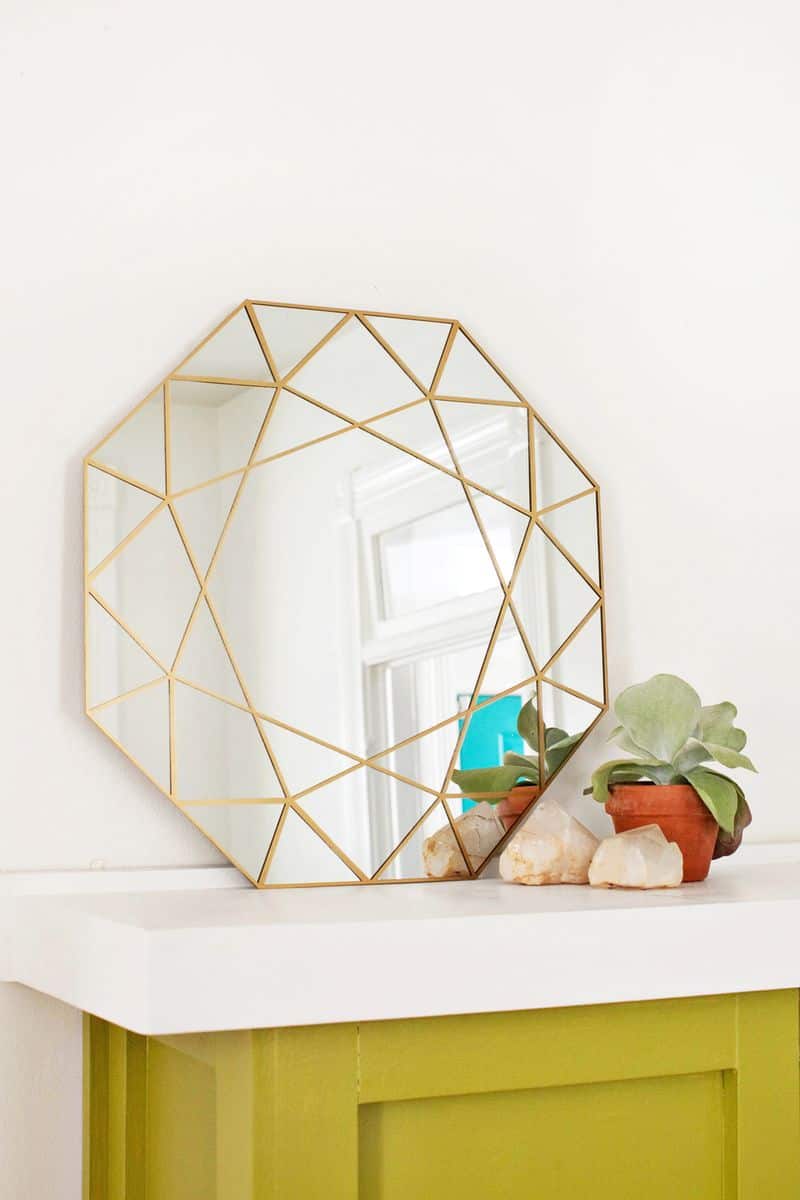
") You can either set the mirror on a ledge or shelf like I did, or you can get mirror clips to install the mirror on a wall. I suggested using the clear coat on top of the gold so you can clean your mirror with glass cleaner as needed, but depending on the paint you use, it may not be necessary (test an area with your chosen paint on a scrap piece of mirror to find out first).
You can either set the mirror on a ledge or shelf like I did, or you can get mirror clips to install the mirror on a wall. I suggested using the clear coat on top of the gold so you can clean your mirror with glass cleaner as needed, but depending on the paint you use, it may not be necessary (test an area with your chosen paint on a scrap piece of mirror to find out first).
This is the same process you would use to cut clear glass as well, so it’s great to have another DIY tool under my belt that I can use without being afraid. I think the final result of our mirror is adorable and looks totally profesh! It would also be fun to do with colored gem lines or make a group hanging with a few different shaped gems (like with an emerald shape and a radiant cut). Think you’ll have the courage now to try glass cutting? If I can do it, you can too! xo. Laura (+ Josh)
Credits // Author: Laura Gummerman and Josh Rhodes, Photography: Laura Gummerman and Janae Hardy. Photos edited with Stella from The Signature Collection.

Awww it soo amazing. What have you used for the frame
Nice job with the frame. Amazing design.
Check this
http://www.tooldunia.com/home-diy-tools
this looks wonderful! Mind sharing the brand and color code of gold spray you used? I want to have the same exact look. Many thanks!
I bought an octagon mirror and printed the cutting guide and tackled this tonight. It’s beautiful, my one complaint.. you didn’t specify that not all of the cut lines are removed. I didn’t get why mine looked much busier until I went back and compared your finished product to mine. I used a razor blade to remove the “extra” lines. Anyway, it would be very helpful for others if you added that information into your tutorial, thanks! I love the finished product
I wonder what will be the price if I wish to buy this from you. It’s beautiful!
Wow! Awesome! Thanks for sharing.
Well, I pretty much love everything that you do, but this is AMAZING! I love finding out about new techniques and tools that I can try my hand at…so, this will definitely be at the top of my list of things to do once the snow has melted and I can spray paint again (hopefully SUPER soon)!! TY TY TY!
It looks really nice. Have to try to make one. As someone said, how the lines have kind of 3D effect.
Just to make sure, its all because of few coats of spray paint, right??
Few runs with gold and then with clear coat on top??
And yes, since I see many people are woried about cutting, have to add. You have to press the cutter harder and you can hear the sound of your run. Then its ok to brake it. As they explained how to come to the edge of the table and snap it, you can also come to the edge of the table, and lift it up a little bit and then hit it on the edge where your cut line is. I think they will agree with me.
Once again, thank you!
Very nice idea.
Wow, this looks like something straight out of a store! I can’t believe you can create something as elegant and pretty as this, for so cheap and easy. All I need to do is get that gold spray paint, because I already have a mirror I can use, and the exacto knife.
This is fabulous. The pattern makes the mirror look dimensional!
What a great idea! I just picked up a mirror a the local Goodwill. I think this will be my weekend project.
Woah, that is really impressive! Great project! I love that.
Wow, that is really impressive! Great project! I love that.
That looks stunning! Thanks for posting this. I’ve been thinking about glass cutting for a while now, and I don’t know what’s holding me back. I just bought the tool! So inspiring!
http://aweekfromthursday.com
I actually tried to use this tutorial to cut a big glass mirror, not much bigger than the size that you worked with. No injuries but the project still ended HORRIBLY. I wanted to have the octagon shape so I wasn’t doing anything too crazy.
Here are a few more “real life” pointers from someone who tried to use this tutorial and failed. Things I would have liked to know…
1. The glass she is using in the tutorial is fairly thin. Use thin glass. Mine was thicker and thus the scoring didn’t work so well. When we pushed down instead of breaking cleanly it broke it BIG, SHARP, POINTY, DANGEROUS SECTIONS. You know that fear she tells you that you shouldn’t have? I would not be so confident. Be careful, ours definitely was dangerous.
2. She doesn’t really talk much about scoring. It sort of looks like you just use it like an exacto knife… which is partially true but you have to press REALLY HARD. Because if you don’t score deep enough, you won’t get the nice clean cut. You’ll get big sharp shards (see #1).
3. In a few instances, instead of just breaking off cleanly it was crack the entire piece of mirror… making the entire piece useless.
4. I don’t know if this happened to her, because she doesn’t cover it at all but I was left with tiny pieces of glass all around my working area. Only a few were big enough to cause bodily harm but it still isn’t pleasant to have glass sand all over my dining room. I would have thought twice about doing this indoors even though she clearly did. I will probably attempt it again… but with a smaller, thinner mirror and outside, not inside.
Anyway, it was a lovely idea for a project but we ended up just wasting a few hours and wasted a big mirror. Hope my notes make others that are thinking of doing this think twice about attempting this tutorial.
I gave this a shot today! I had a round Ikea mirror that had been sitting around for a couple of years because I couldn’t figure out what to do with and I figured it would be the same idea as the square mirror. WRONG.
In case anyone tries this with a round mirror- you may want to get some proper glass-cutting pliers. There wasn’t enough glass for me to be able to apply swift force on the round mirror to break the edge off so I ended up breaking in a bad way :/
I went and got a square mirror and that worked much better! though I still found you have to be committed with the scoring and apply decent force as you run the cutter along the glass, especially towards the edges of the glass, otherwise the glass won’t break perfectly at the end. Maybe if you’ve never cut glass before I’d suggest practicing with a piece of glass you don’t care about. I found I got the hang of it by the end of the cutting.
Otherwise, the contact paper works like magic! I spray-painted it black, instead of gold and I’m so happy with the way it came out. Rad idea and tutorial.
Many thanks!
-Christina
Amazing what stuff you create! I really like this mirror it looks gorgeous!
http://anovamelody.blogspot.com
We featured your DIY on our blog for our weekly Friday Faves post! We absolutely love your blog!!
xx
Always Me
http://alwys.me/ff21
This DIY is so good !!
I’m really impressed !
LOVE this mirror! Who knew glass cutting could be so easy?? Thanks again 🙂