") You can call it a coping mechanism, but the colder it gets in winter, the more plants I add to my house. Adding tropical or desert plants into my space totally tricks my brain into thinking warm and happy thoughts. So I’ve been looking for any excuse to add more. We are getting pretty close to completing our front sitting room, but I had an area of open wall space that was too narrow to add furniture but really needed a little something-something. Since plants are making me so happy right now, I thought a tall narrow planter would be just the ticket to fill the space and add a little more greenery as well. Large planters can get crazy expensive, so of course a DIY version was in order!
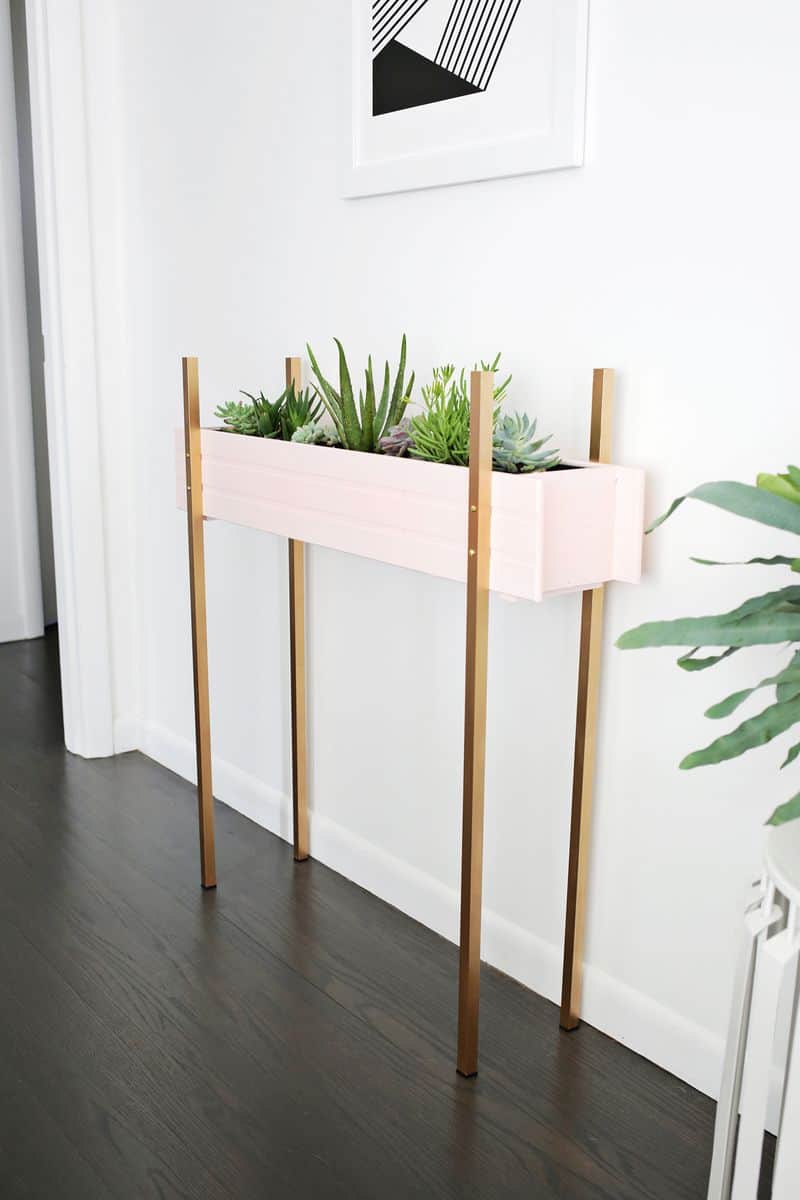
You can call it a coping mechanism, but the colder it gets in winter, the more plants I add to my house. Adding tropical or desert plants into my space totally tricks my brain into thinking warm and happy thoughts. So I’ve been looking for any excuse to add more. We are getting pretty close to completing our front sitting room, but I had an area of open wall space that was too narrow to add furniture but really needed a little something-something. Since plants are making me so happy right now, I thought a tall narrow planter would be just the ticket to fill the space and add a little more greenery as well. Large planters can get crazy expensive, so of course a DIY version was in order!
") Supplies:
Supplies:
–36″ window box
–window box insert
–36″ square aluminum tube (x4)
-paint for window box (I used Baby Blush by Valspar)
–gold paint for legs
-drill and metal drill bits
-brass machine screws (1 1/2″ long) and nuts
–peel and stick felt for bottom of legs
-clamps (optional but helpful)
") Depending on how tall you want your planter to be, you can adjust where you mount your legs to the window box. It was helpful for me to use small clamps so I could stand back and see different heights, but I ended up having the bottom edge of the window box be 10″ down from the top of the square tube leg.
Depending on how tall you want your planter to be, you can adjust where you mount your legs to the window box. It was helpful for me to use small clamps so I could stand back and see different heights, but I ended up having the bottom edge of the window box be 10″ down from the top of the square tube leg.
") Once I had the measurement of leg placement, I unclamped the legs and used a metal drill bit to drill two holes through the aluminum tube (just use a bit that’s big enough to fit your machine screws through). It may sound complicated to drill through metal, but aluminum is really soft, so it’s actually easier than drilling through some hardwoods.
Once I had the measurement of leg placement, I unclamped the legs and used a metal drill bit to drill two holes through the aluminum tube (just use a bit that’s big enough to fit your machine screws through). It may sound complicated to drill through metal, but aluminum is really soft, so it’s actually easier than drilling through some hardwoods.
") I re-clamped the legs back in place on the planter and used the same drill bit to drill into the two holes and through the wood of the window box behind the metal tube (that way the holes would line up exactly). If you don’t have clamps, you can just lay the box facing up on the floor and have someone help you hold the leg in place. The clamps make it easier to do it by yourself if needed.
I re-clamped the legs back in place on the planter and used the same drill bit to drill into the two holes and through the wood of the window box behind the metal tube (that way the holes would line up exactly). If you don’t have clamps, you can just lay the box facing up on the floor and have someone help you hold the leg in place. The clamps make it easier to do it by yourself if needed.
") I would normally use gold spray paint to paint the legs, but it’s a high of 28 degrees today (too cold to spray paint outside). So I used my favorite gold paint instead. Just make sure to keep track of which leg goes on which spot on your planter so you know the holes will line up exactly when you go to put them back on (I put a post-it next to the legs to mark which was which). Once the paint is dry, cut to size 4 squares of peel and stick felt for the bottom of the tubes so the metal doesn’t scratch your floors.
I would normally use gold spray paint to paint the legs, but it’s a high of 28 degrees today (too cold to spray paint outside). So I used my favorite gold paint instead. Just make sure to keep track of which leg goes on which spot on your planter so you know the holes will line up exactly when you go to put them back on (I put a post-it next to the legs to mark which was which). Once the paint is dry, cut to size 4 squares of peel and stick felt for the bottom of the tubes so the metal doesn’t scratch your floors.
") I painted the box with a pale pink called Baby Blush by Valspar (it’s the same color as our pink dining room on the other side of the sitting room).
I painted the box with a pale pink called Baby Blush by Valspar (it’s the same color as our pink dining room on the other side of the sitting room).
") Use your machine screws and corresponding nuts to attach the legs back onto the planter. Make sure to tighten the nuts well on the inside so you don’t have wobbly legs.
Use your machine screws and corresponding nuts to attach the legs back onto the planter. Make sure to tighten the nuts well on the inside so you don’t have wobbly legs.
") Add your plants to your window box insert and your planter is in business!
Add your plants to your window box insert and your planter is in business!
")
")
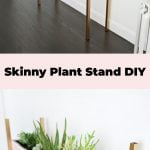
") It’s such a simple shape, but I really love the clean lines of the long legs with the wide skinny planter box. The gold, pink, and shades of green feel really fresh together, and it’s versatile in that you could also buy a bigger box and the next thickness of legs to make a bigger version if desired (a bunch of tall snake plants would look awesome in one of these!). No matter what the climate is where you are, I bet this planter is a good decision for your space too! xo. Laura
It’s such a simple shape, but I really love the clean lines of the long legs with the wide skinny planter box. The gold, pink, and shades of green feel really fresh together, and it’s versatile in that you could also buy a bigger box and the next thickness of legs to make a bigger version if desired (a bunch of tall snake plants would look awesome in one of these!). No matter what the climate is where you are, I bet this planter is a good decision for your space too! xo. Laura
Credits//Author and Photography: Laura Gummerman.
Where can I get the box liner? The links doesn’t work and I don’t know what size it is.
Hi Lucy! I updated the link– you’ll need one that’s 36″, or the same length as the window box.
Where can I buy this beautiful planter. Or can you please make me one. I truly love it. I am 70 and just can’t build it. Thank your
Hi Laura!
LOVE this DIY, thank you for sharing! I’m thinking of recreating this in my apartment. Where did you get the legs from?
Thank you!
Hi Genevieve! I just updated the link – https://www.homedepot.com/p/Everbilt-36-in-x-3-4-in-x-1-16-in-Aluminum-Square-Tube-801287/204274003
Any chance you sell these on Etsy? I love it but do not have the time for this DIY project 🙁
I love this stand. It definitely seems like a doable project. Where is the white plant stand next to it from?
Wow that is so beautiful! I think it is perfect for herbs that can’t survive the winter outdoor
Oh my gosh, this is the exact DIY piece I’ve been looking for…without knowing it! I’ve been slowly picking up greens for my new home, but need to fill up one spot under a few shelves. Can’t wait to give this a try!
It’s from here!
http://www.minted.com/product/wall-art-prints/MIN-4Z3-MGA/untitled-bw-1-2012
Laura 🙂
Where can i buy this? I really loved it
It’s from here!
http://www.minted.com/product/wall-art-prints/MIN-4Z3-MGA/untitled-bw-1-2012
Laura 🙂
I just painted one side of the tube at a time, let it dry, and then turned the tube to do the next side, etc. until it was done. Multiple thin coats are best for this sort of thing 🙂
Laura
The insert is solid and doesn’t have any holes so you don’t need to take it out to water the plants 🙂
Laura 🙂
So cute! That pink is amazing.
Laura
http://laurelandfern.com/
Love this project!
http://misadventuro.us
I love this planter! It is seriously so so cute!
Paige
http://thehappyflammily.com
This is amazing – I really want to try this for my hallway because it’s so slim and fits into any small space!
Lucy xoxo
http://lucyannblog.blogspot.co.uk
This is adorable. You seriously have the cutest stuff in your home, Laura! And I love that it is all very fitting to your style and specifically you.
Hi Laura! Can you share where the black and white art is from too?? Thanks!!
Love the colors you chose and the simple design. A perfect small space fix with big impact. And the crazy cat can’t get to the plants(!)
http://doodlet.me/
So lovely
Xoxo
http://fashionbackyard.blogspot.fr
I’m just so enamored with how that gold paint turned out! Mind if I ask what your process was? It looks like a perfect spray finish to me!
Of course I love the whole planter – I have pretty deep sills but I’m always weary of water damage. I’ll make one come spring for all those plants I buy and subsequently kill…