 I am really excited to share today’s DIY with you because I LOVE how it turned out. I have admired modern, floating frames from afar, but this is my first time to try to do anything with acrylic.
It is easier than it looks (seriously, the hardest part is just having the correct supplies), and it looks SO polished and pretty in my dressing room.
We’re working with Canon USA for this project, and I used my Canon PIXMA iP8720 Crafting Printer because I knew I wanted a big 13×19 print. Absolutely love how the print came out.
Alright! First, here’s the video tutorial. Read the written instructions as well for a little more info about drill bits.
Supplies:
-piece of acrylic a few inches bigger than your photo (You can get this at most home improvement stores, and they will cut it to size for you.)
–standoff mounting hardware
-printer and printer paper
-screws to mount hardware (Remember that the screw head has to be big enough to fit inside the hardware tube that attaches to the wall, so take the hardware with you when you go to buy screws.)
-drill and screwdriver
-gold spray paint
-painter’s tape
-glue dots
–Canon PIXMA iP8720 Crafting Printer
Step 1: Print your photo. Like I was saying before, I used the PIXMA iP8720 printer and 13×19 inch Luster paper. If you’re using a Canon PIXMA printer, you can just set the print to be borderless in the print setup screen on your computer so you don’t have to trim off any white edges.
Step 2: Cover the corners of your acrylic, front and back, with painter’s tape. Mark on top of the tape where you want the holes to go. Use a small drill bit to drill a hole into the acrylic (keep a piece of scrap wood under the sheet to protect your surface).
To drill into acrylic, it’s best to drill a little bit into the acrylic to get the hole started, but then switch the drill into reverse and press down with pressure to complete the hole.
You’re trying to avoid cracking the acrylic, so going backwards and basically melting through the sheet is the best way to go. Keep switching to bigger and bigger bits until you have the right hole size drilled for your hardware. Remove the tape and the protective film from your sheet.
Step 3: Use glue dots to attach your photo face down onto the acrylic. Hold your photo and center it on the wall where you want to hang the frame.
Mark where each hole should be drilled (try and be really precise, there’s not a whole lot of wiggle room if the holes are really off), and pre-drill each hole with a small drill bit.
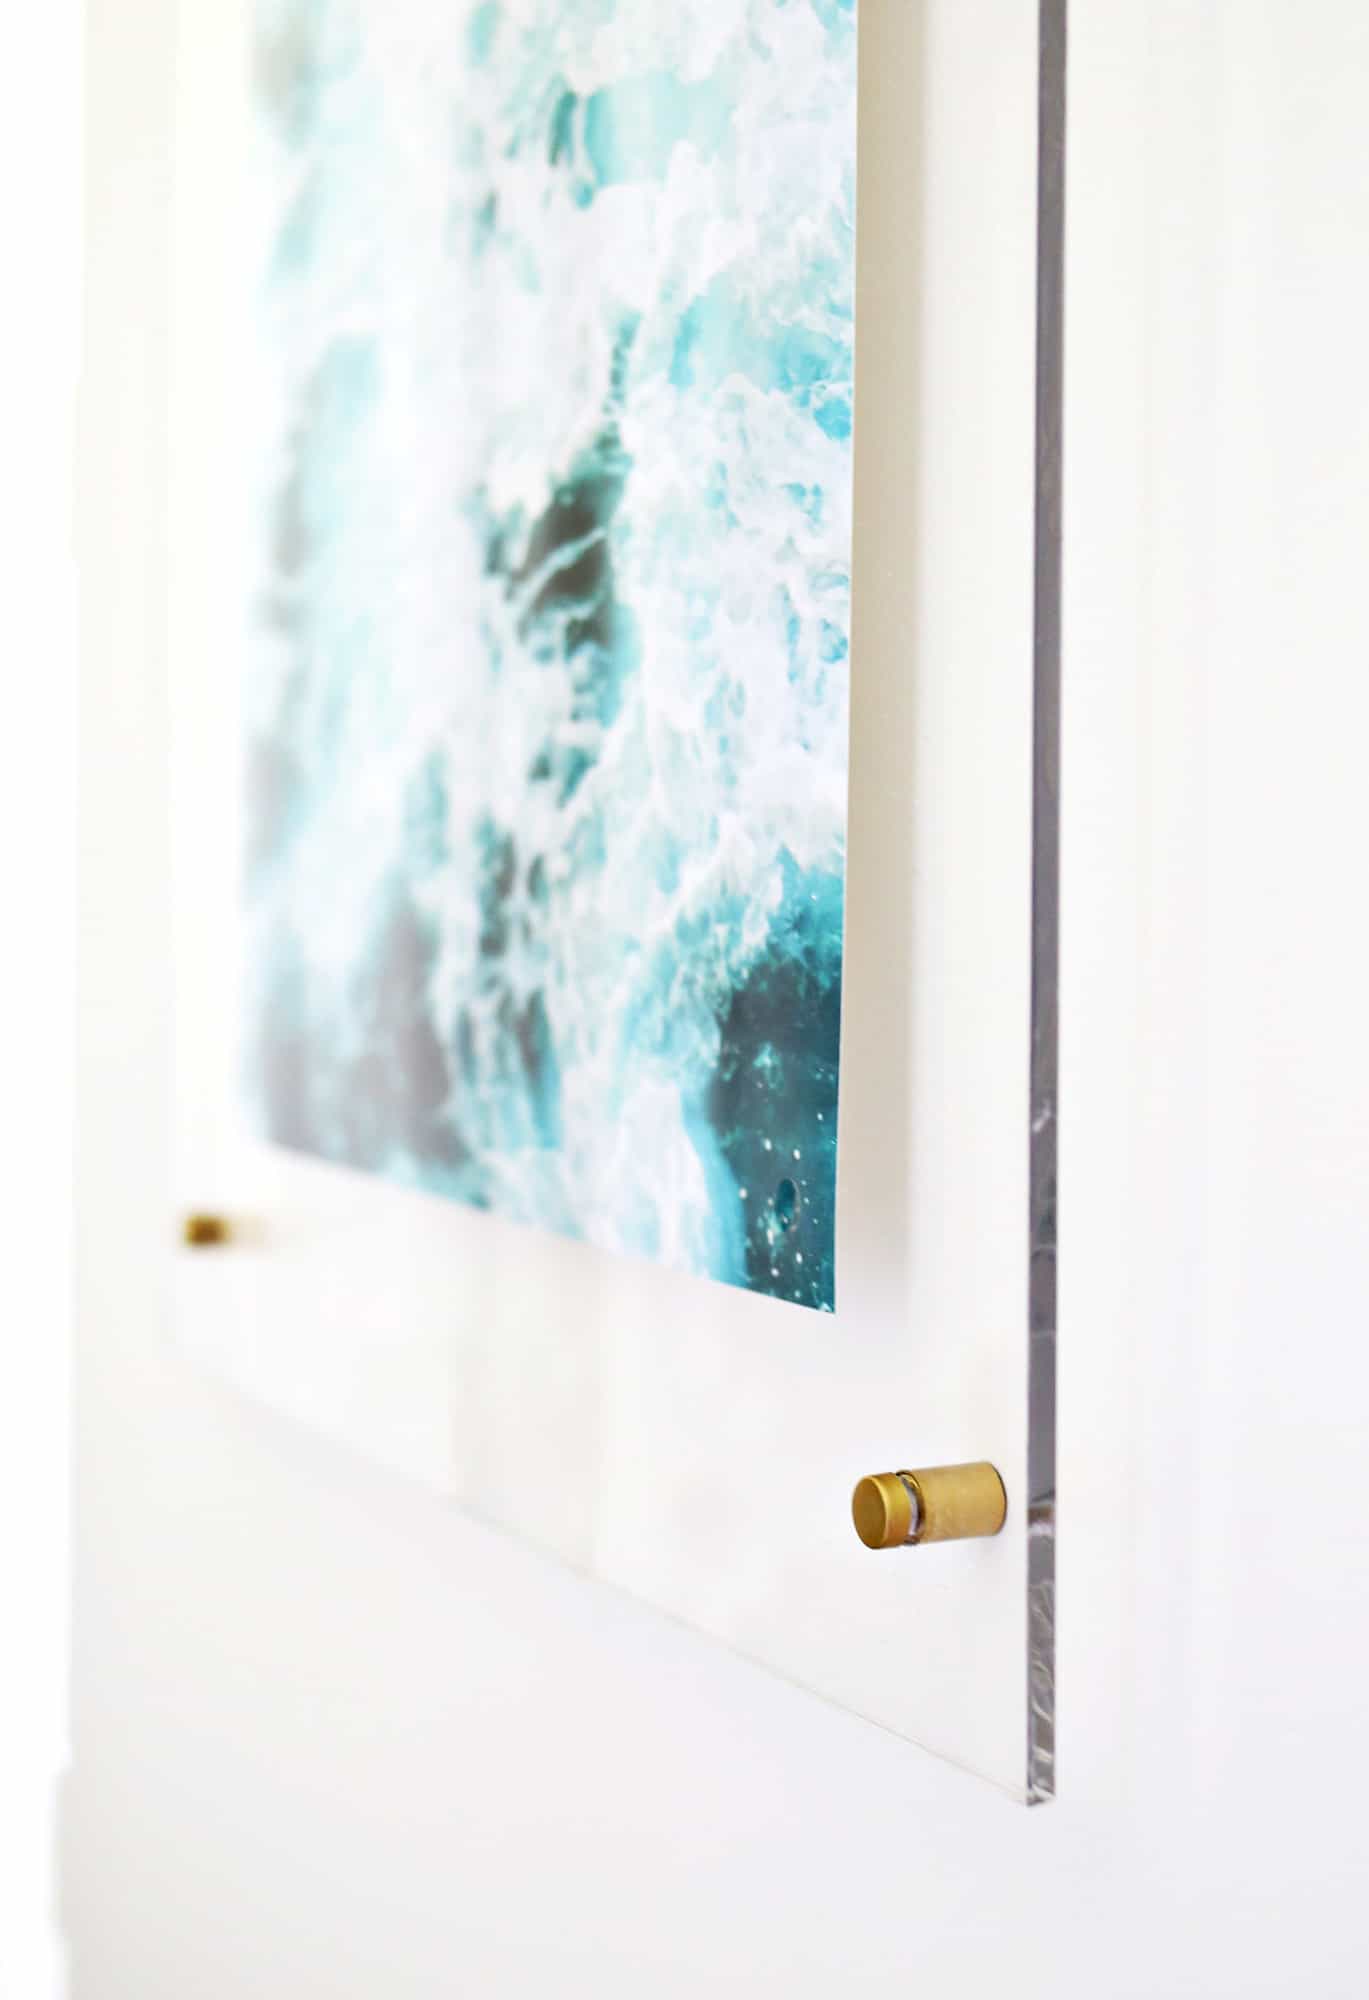
Paint your mounting hardware gold and let it completely dry. Mount the tube part of the mounting hardware into your predrilled holes with a screw and screwdriver.
Line up the holes of your frame with the hardware and screw in the front screws to secure the acrylic in place.


 I am REALLY loving the clean, modern look of this frame. This design is light and airy.
For my photo, I used a photo taken by my friend Arielle Vey. (She edited it with A Color Story. That’s how I initially saw the image and fell in love with it.)
I really wanted an image that was soft and dreamy, NOT a giant photo of Jeremy and I since it’s in our bathroom/dressing room. Haha! Different moods for different rooms, am I right?
 The acrylic feels heavy and substantial and because of the busy nature of the photograph, you don’t really notice the glue dots in there.
 I HIGHLY recommend this project if you’re looking for an affordable, modern DIY frame. It was about $40 to make this project, by the way!
I’ve noticed a shift in my art taste lately. Instead of wanting a lot of small art and gallery walls, I am gravitating toward larger, single statement pieces. I really believe that the right print in the right room can tie EVERYTHING together. A room without art isn’t a finished space!
Hope this DIY is helpful! Please let us know if you make one and feel free to request future DIYs for your art/photo/decorating needs… we’re ALWAYS curious to hear what solutions and projects you are in need of. Have a great day. xx! Elsie
P.S. Looking for more photo display ideas and tips? Click here!
Credits//Author and Photography: Elsie Larson. Project Assistant: Laura Gummerman. Video and Music: Jeremy Larson.
Love this post? Sign up for our newsletter for more ideas!

Get creative ideas for recipes, crafts, decor, and more in your inbox!
 Get the How-To

Supplies
- 1 piece of acrylic a few inches bigger than your photo (You can get this at most home improvement stores, and they will cut it to size for you.)
- standoff mounting hardware
- screws to mount hardware (Remember that the screw head has to be big enough to fit inside the hardware tube that attaches to the wall, so take the hardware with you when you go to buy screws.)
- gold spray paint
- glue dots
Equipment
- printer I used my Canon PIXMA iP8720 Crafting Printer
- printer paper
- drill
- Screwdriver
- painters tape
Instructions
- Print your photo. Like I was saying before, I used the PIXMA iP8720 printer and 13×19 inch Luster paper. If you’re using a Canon PIXMA printer, you can just set the print to be borderless in the print setup screen on your computer so you don’t have to trim off any white edges.
- Cover the corners of your acrylic, front and back, with painter’s tape. Mark on top of the tape where you want the holes to go. Use a small drill bit to drill a hole into the acrylic (keep a piece of scrap wood under the sheet to protect your surface). To drill into acrylic, it’s best to drill a little bit into the acrylic to get the hole started, but then switch the drill into reverse and press down with pressure to complete the hole. You’re trying to avoid cracking the acrylic, so going backwards and basically melting through the sheet is the best way to go. Keep switching to bigger and bigger bits until you have the right hole size drilled for your hardware. Remove the tape and the protective film from your sheet.
- Use glue dots to attach your photo face down onto the acrylic. Hold your photo and center it on the wall where you want to hang the frame.Mark where each hole should be drilled (try and be really precise, there’s not a whole lot of wiggle room if the holes are really off), and pre-drill each hole with a small drill bit. Paint your mounting hardware gold and let it completely dry. Mount the tube part of the mounting hardware into your predrilled holes with a screw and screwdriver. Line up the holes of your frame with the hardware and screw in the front screws to secure the acrylic in place.
Do you remember what size screws you used in the mounting hardware?
Is there a way to do this without having to drill the wall?
Thanks! This looks great. Can you tell me what weight clear acrylic sheet you used? What was the thickness? Thanks again.
How thick was the acrylic you used and where did you purchase it?
Hi,
This is too good to be true. Literally.
1) I’m not sure what size of acrylic you purchased, but a 36×48 piece is $90.00. I need a 32×45
2) Home Depot/ other hardware stores WONT cut it for you. I was nice, smiled, almost begged at Home Depot and Lowes and no cigar. My god woman how did you get it done? they wanted me to purchase my own glass cutting kit.
Yours,
Pretty disappointed
I just finished mounting mine on the wall and it looks so spectacular thanks to your guide!
Sorry how many inches of border did you leave around the photo? Thanks!
Love this project.
What was the thickness of the acrylic sheet you used?
How many inches did you leave around the border? Thanks!
Around the border or the photo or the hardware?
xx
I have been wanting to do this DIY, but with my engineer sized print so 36×48 I think. That’s the largest size I have seen at Home Depot so… I guess I have to trim my print? Also not sure if the glue dots will hold such a huge print? Any suggestions? Thanks!!
I don’t know that it would work with that kind of paper- especially if the room has any moisture. I’d use this tutorial with photo paper only and for engineer prints I would stick with a traditional frame. I agree- the glue dots may not hold it.
xx!!
I love this project and dying to try it for a more affordable float frame option. Do you have any other suggestions as alternatives to the glue dot? I want to do this with some wedding photos, but afraid that the glue dot will show through, especially on the darker corners of some of our photos. I’m trying to think of other options. Thanks! 🙂 looks gorgeous.
I mean, if you didn’t use adhesive you could try two pieces of acrylic, but it would have to be thinner.
I love this but am worried that the glue dots wouldn’t hold a print that’s on heavier paper. I am also hesitant to put glue on the front of my artwork. Any alternative ideas? I guess just do the sandwich?
Thanks for posting it.
I tried this and turned out beautifully.
Totally loved the pic of Antelope Canyon.
Sounded and looked amazing until you mentioned the glue dots. Sure it might work for this particular piece if you don’t look too close … but surely you can come up with a more polished way of executing this for art that needs to be displayed without damage or grease stains from glue dots … right?? :/ Come on…
What size piece of acrylic did you use? trying to decide how much room I need to leave around the edges of my print & i like the look of this one
I would love to do this with a small print i have that is white.. will the glue dots show?
Amazing! You guys have the best DIYs! 🙂
Loving this idea. You guys always have the best DIY’s that look great and are easy to do.
www.throughmyowneyes.com
I loveee this! And going to try it out this weekend! What was the thickness of your acrylic piece?
Looks gorgeous! Is the print for sale? I checked her blog but cannot see anything. Also, I have seen a tutorial somewhere that if you want to use 2 sheets of acrylic and worry about splitting to heat a nail the same size as the screw and melt in a hole….apparently the excess ‘melted’ acrylic can be picked off once cooled.