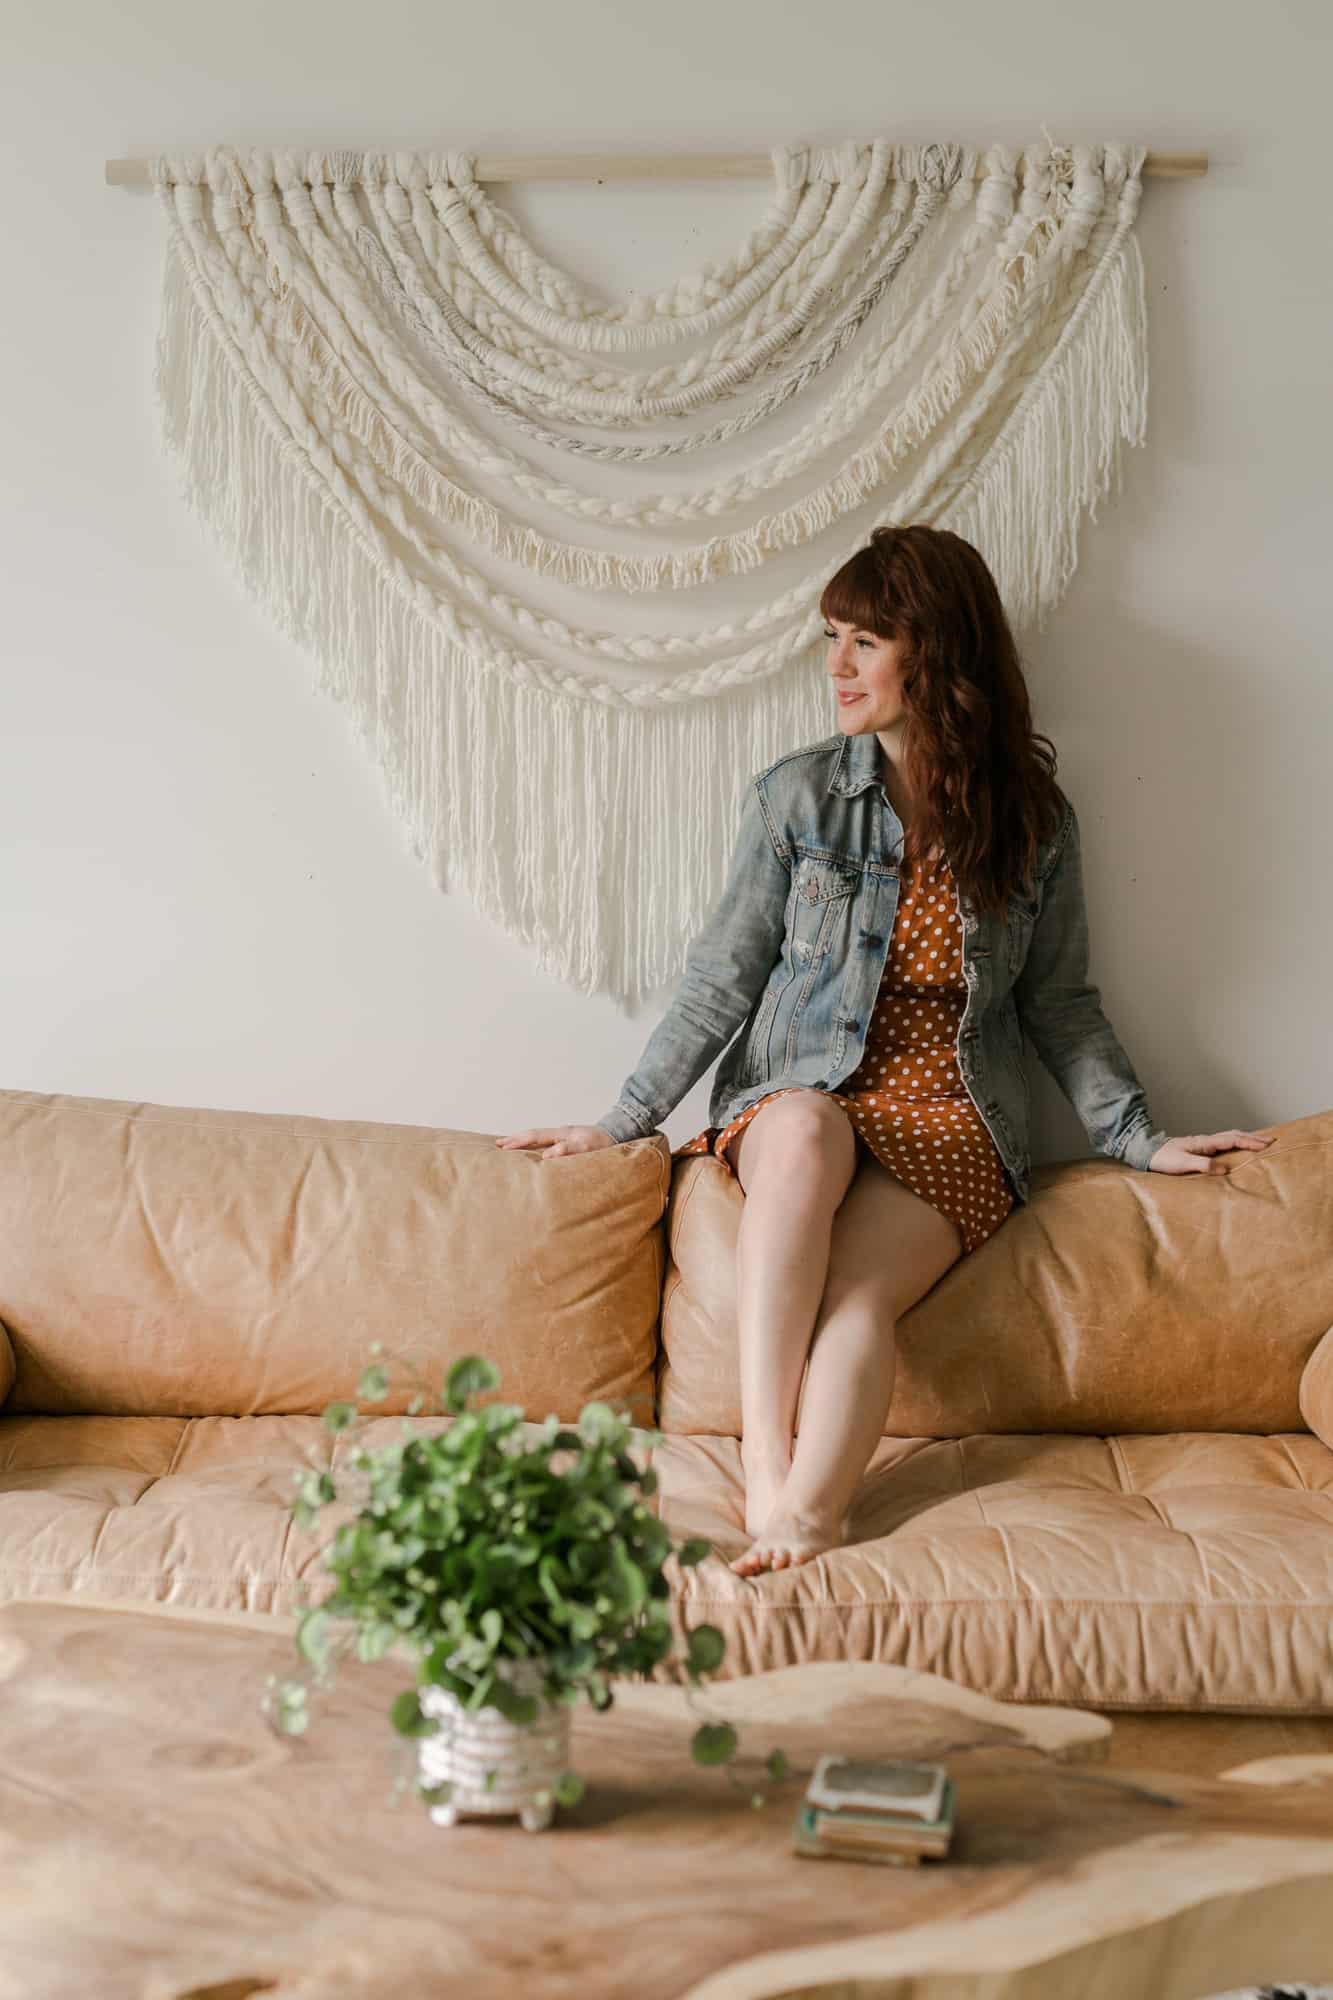
 I’ve been wanting a new all-white wall tapestry in our living room for a while now. I knew that for the scale I wanted (it’s huge!) that it would be pretty time consuming.
If you want to learn to weave, start here: Weaving for Beginners
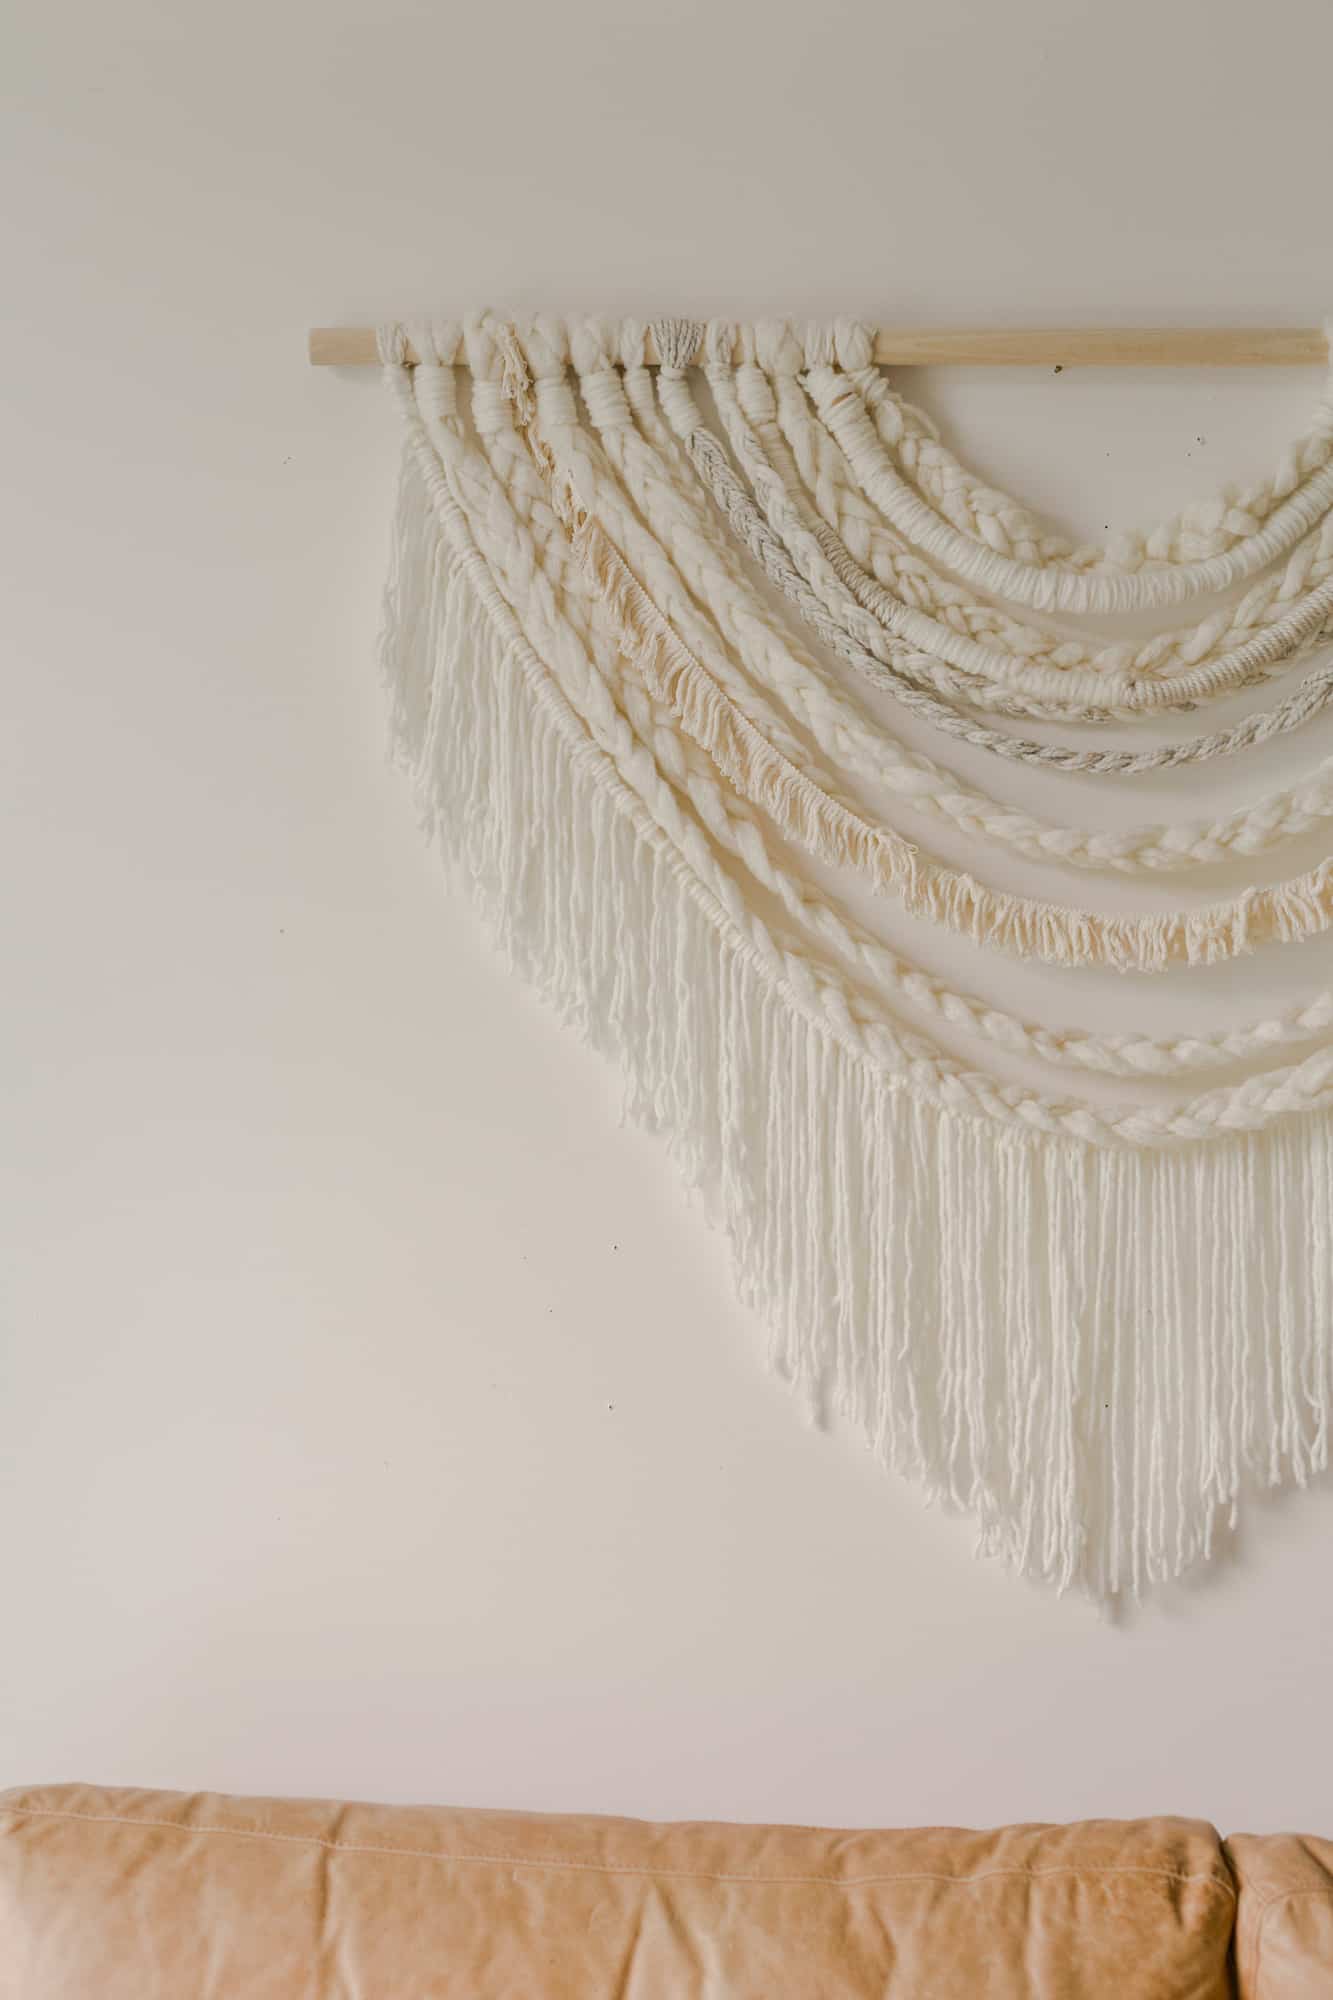
Today, I’m partnering with JOANN to teach you to make this large, but totally doable wall hanging for your home. It’s easier than it looks! If you can braid, you can make this! And what I love most is that there are endless ways to customize it to make it your own!
R
 Supplies needed: I want to teach you how to make exactly what I made, but also leave room for you to customize it. Feel free to add colors and make it your own, or copy mine exactly (that’s what it’s there for!).
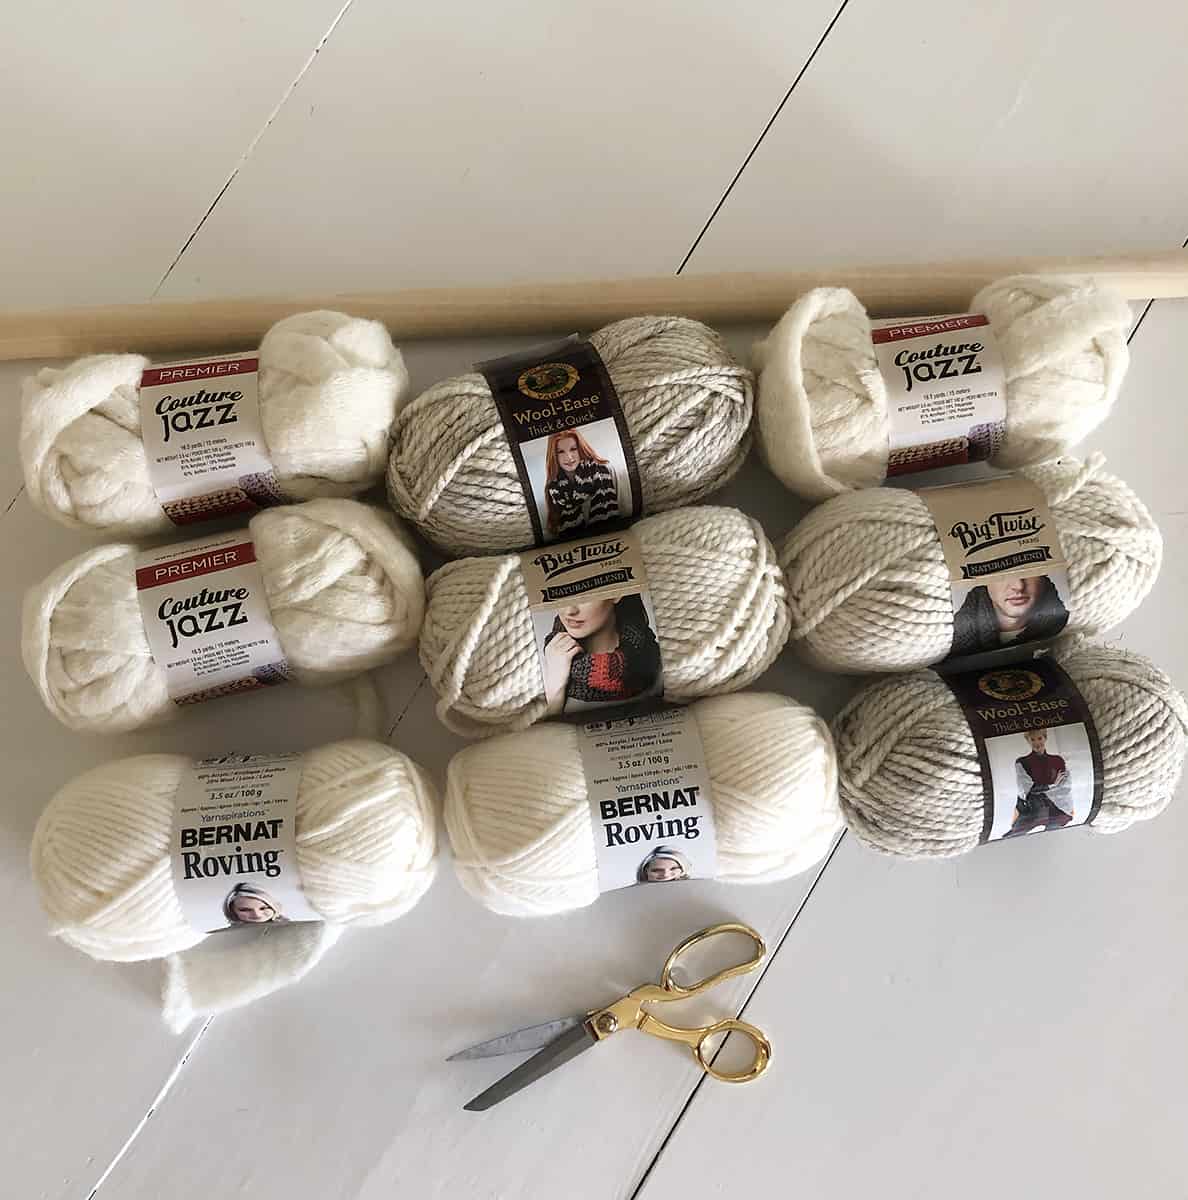
Lots of yarn! I purchased nine new bundles and used five of them completely. I also used a bit of yarn I had left over from a previous project. For a very large wall hanging, I would say you need at least five skeins of yarn.
You can, of course, choose any yarn that fits the look you are going for, but here’s what I used. Premiere Yarn Couture Jazz Multis Yarn, Bernat Roving, Lion-Brand Wool-Ease Yarn and Big Twist Natural Blend Yarn.
There’s also one piece of fringe trim in there that I stole from my stash of old supplies (there are tons of options for trim at JOANN that you can mix and match into your project!).
My wood rod is 54 inches across (just over 4 feet). We purchased it at a hardware store. This is very large, but if you are making a smaller one, you’ll be able to find what you need at JOANN as well!
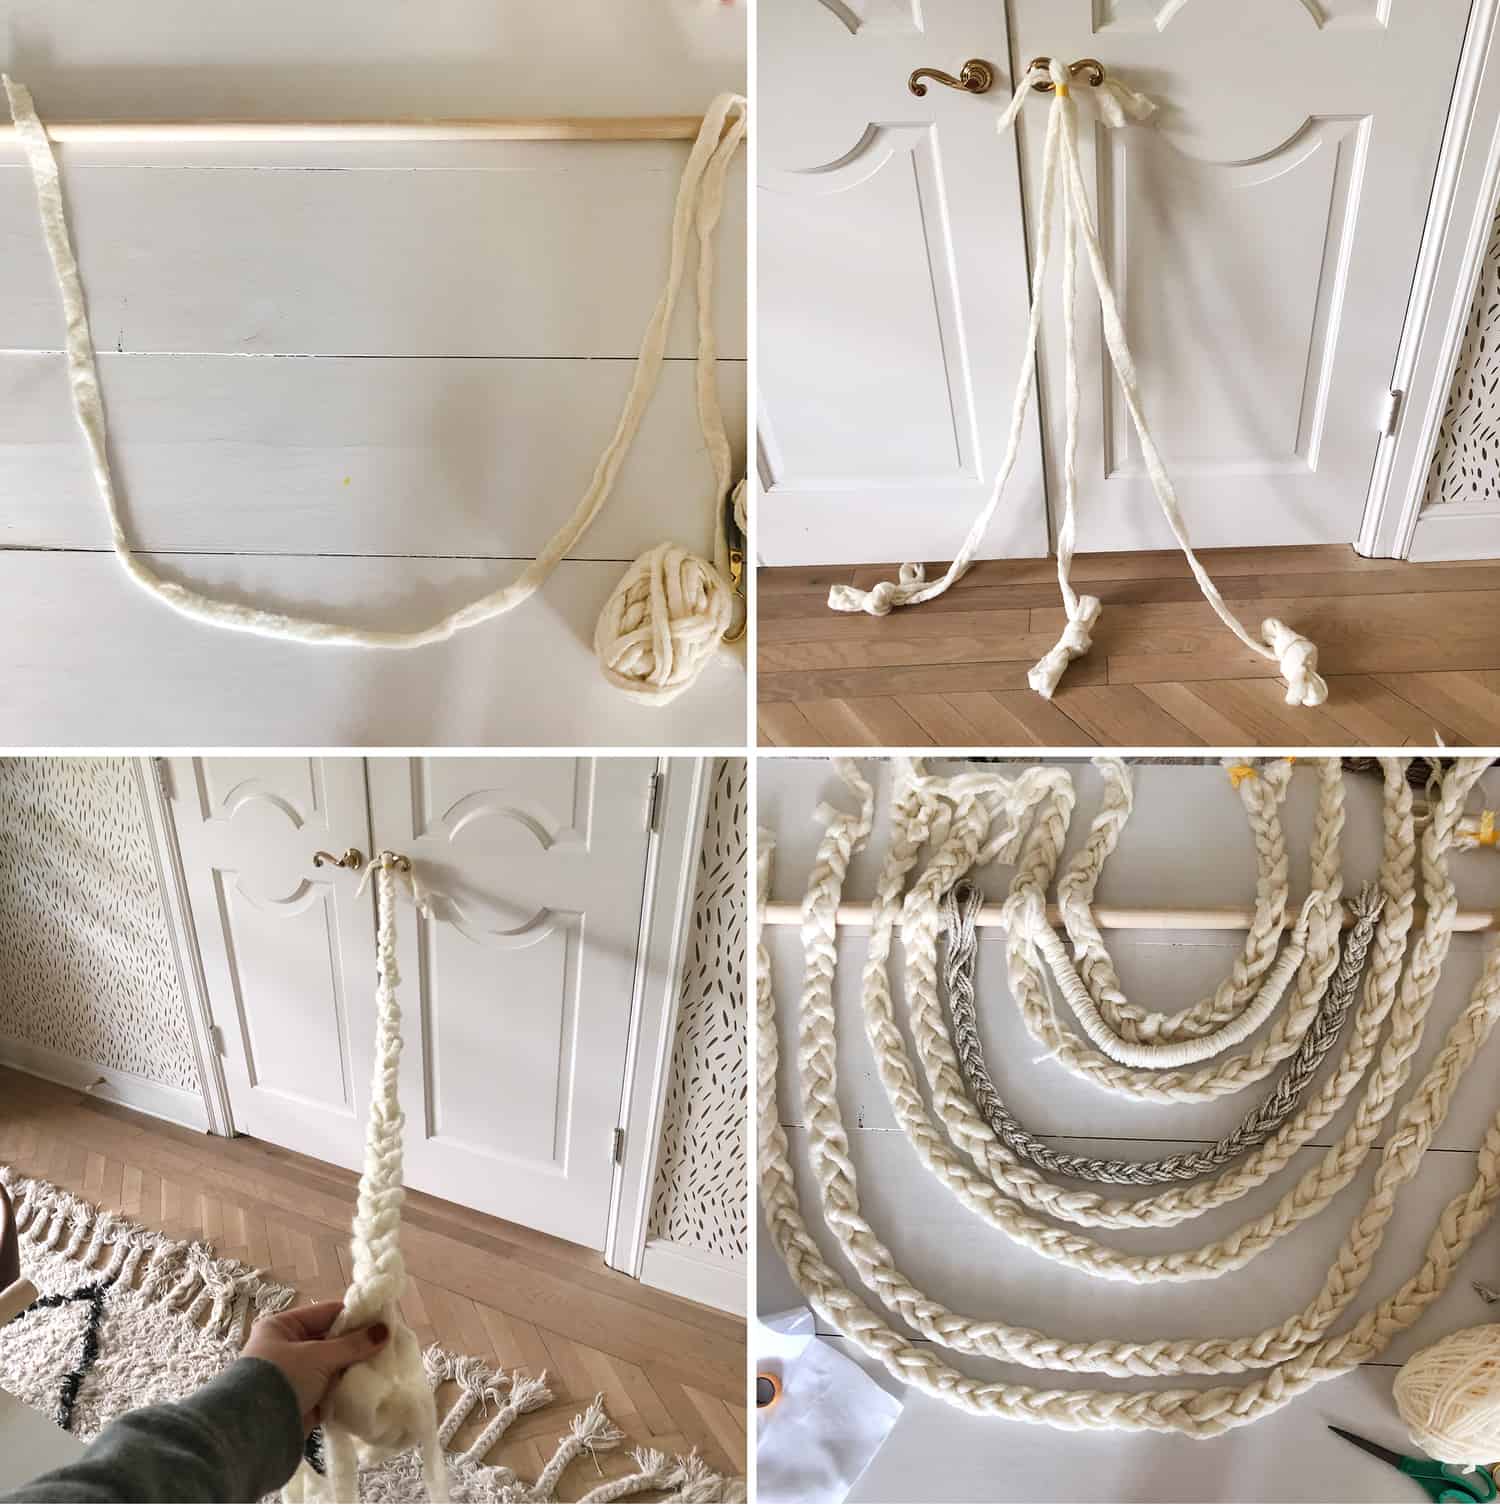 Step 1: First, I mocked up how large I wanted the longest braid to be. Remember to make the pieces longer since braiding will shorten each piece.
Step 2: Here’s my hack for braiding really long pieces of yarn. I tie the ends into bundles so they don’t get tangled.
Step 3: Braid, braid, braid. Then keep braiding.
Step 4: Lay out your progress as you go. This photo was taken after just one podcast (like 45 minutes), so the first part went pretty quickly.
Keep adding until you are happy!
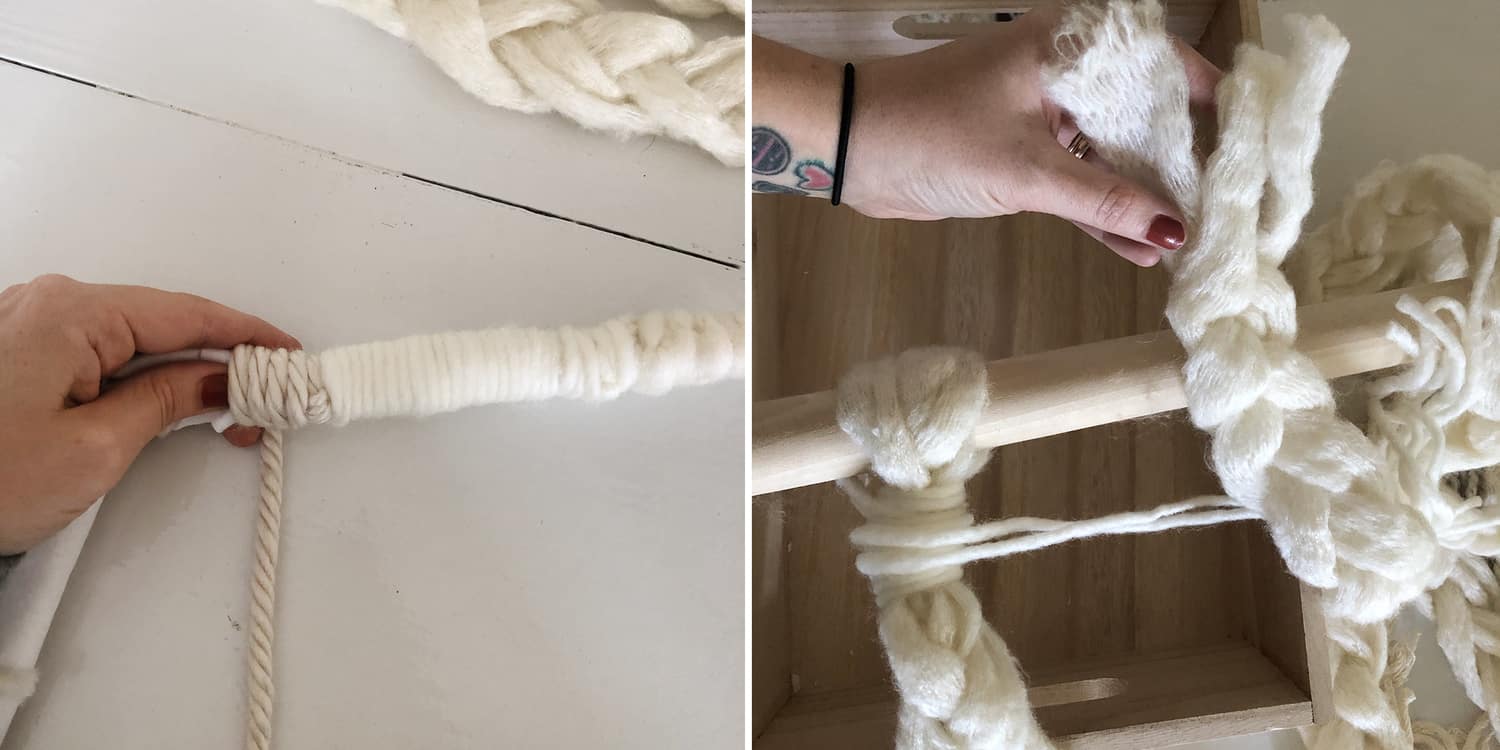 Step 5: I wanted more than just braids, so I added some wrapped sections. I didn’t have anything bulky to wrap, so I folded up some scrap felt to add bunk under my wrapped braids. This part was considerably more time consuming than the braids, but I love the variety it adds!
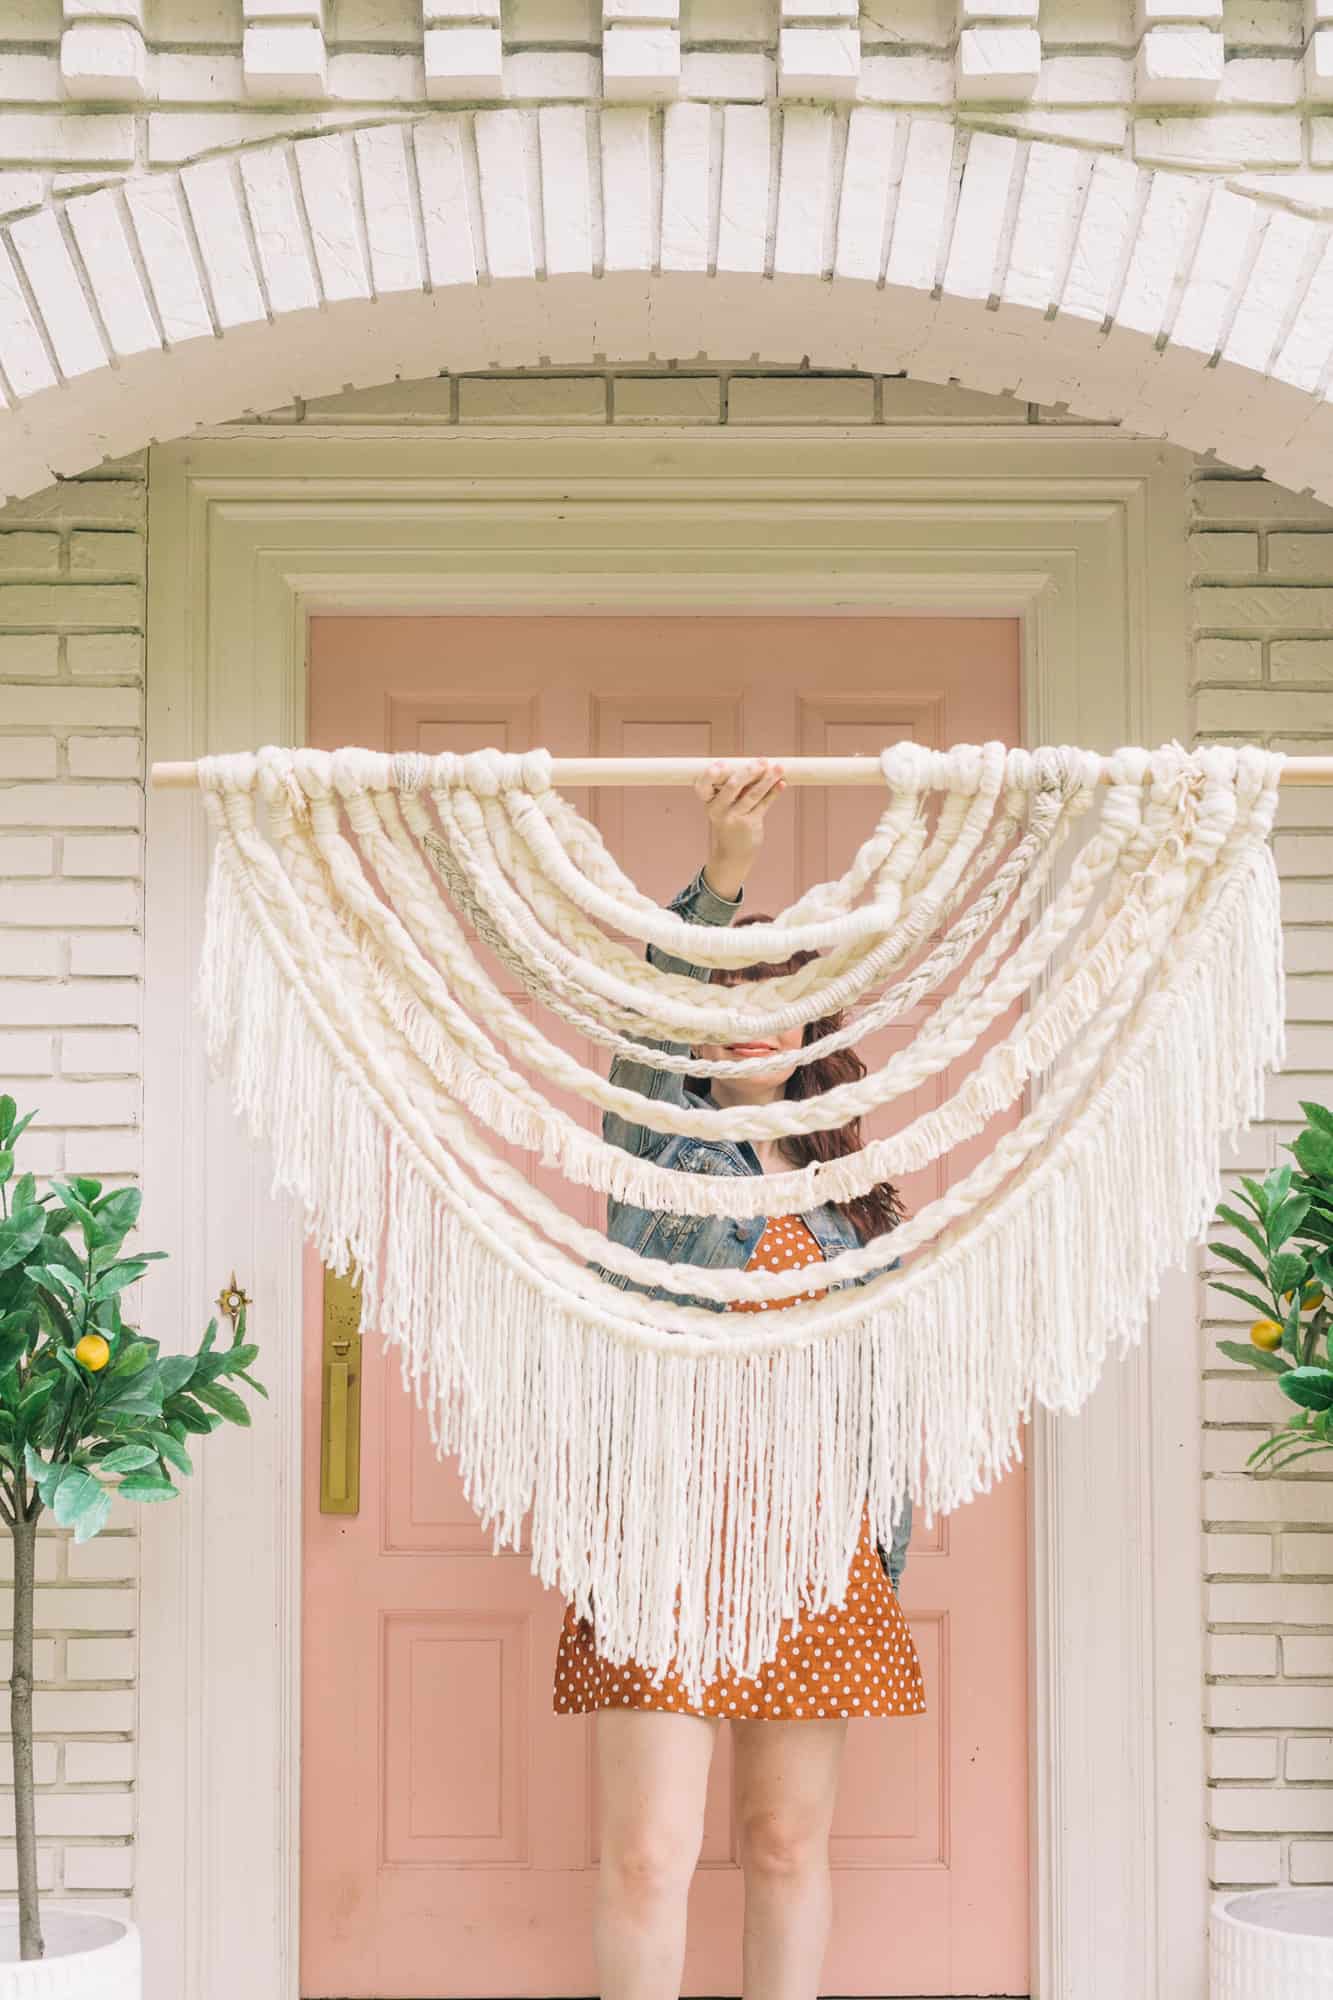
Step 6: Once you have plenty of pieces, secure them to the top of the rod. The first side is easier because you don’t have to measure. Just wrap the ends around the back and tie them up with a long piece of bulky yarn.
For the second side, you’ll want to measure each piece to make sure it’s falling like an upside down rainbow. Having it laid out of a big table or floor is easiest.
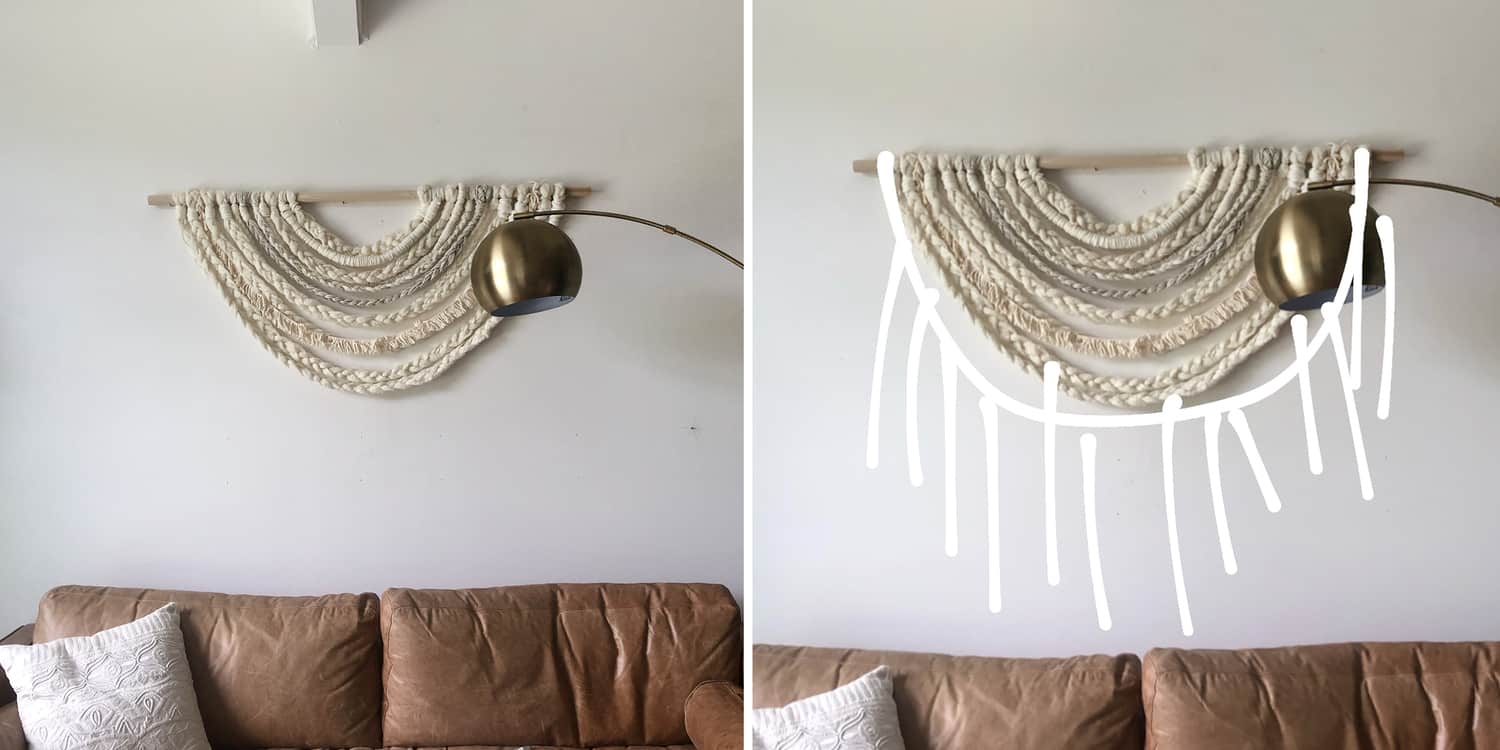 I thought I was done at this point, but when I hung it up, I wasn’t happy with the scale of the piece. I had two options: Add way more braids hanging lower (which could make the top feel squished) or add a fringe section.
I decided to add fringe to the bottom. This little sketch made me feel good about how long the fringe needed to be. I used two whole packages of Bernat Roving to make the fringe. It took several hours, but it was worth it.
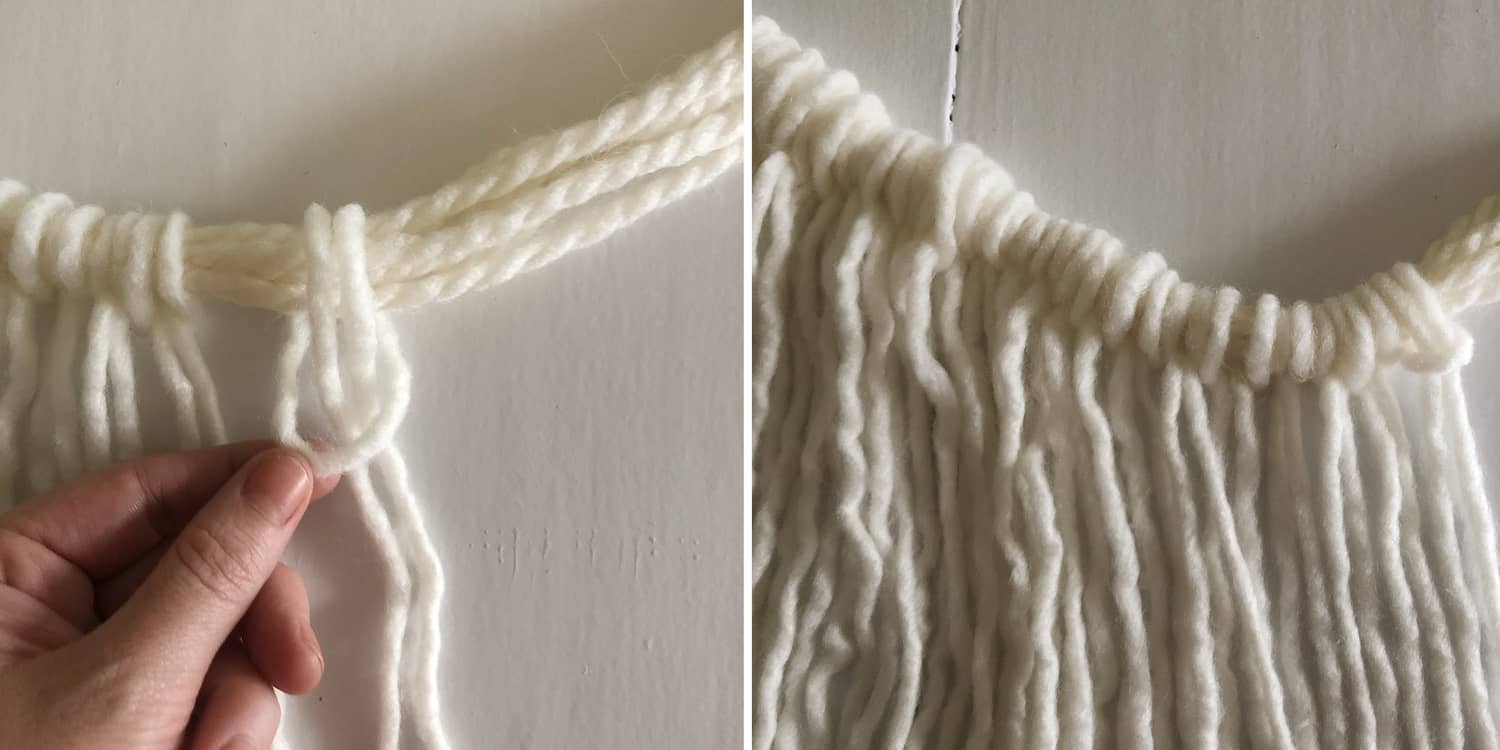 Step 7-8: I found it easiest to cut a bunch of pieces, then add a bunch in sections. It took me quite a white to get it as full as I wanted. Each piece is secured with a simple knot.
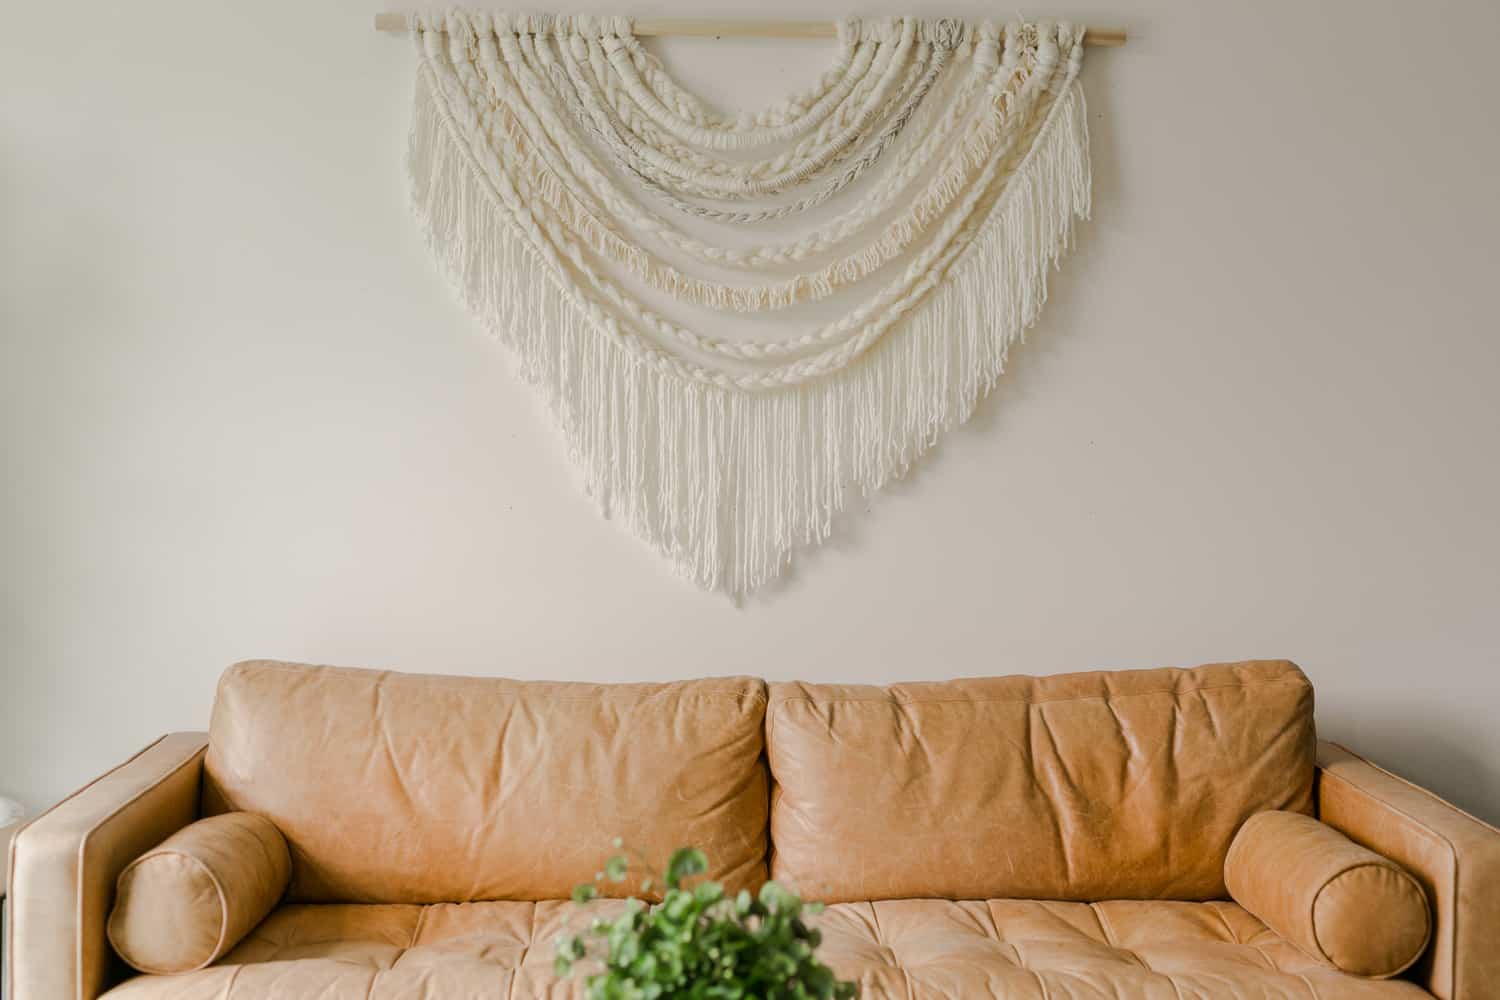
In all, I spent around 5-6 hours making this piece. It’s very large though, and to do almost any other kind of wall hanging on this scale would take much longer. So overall I was very happy with the time spent and I am SO happy with the outcome. It’s exactly what this room was needing!

 I’d love to see you recreate this for your home! If you make one, be sure to tag us on Instagram so we can take a look!

Can you give some measurements for the lengths?? I’m a newbie and have no idea how long to make the braids or cut the length on the fringe.
Thanks!
Will you make me one and I’ll pay you? 🙏🏻🙏🏻
I am also wondering what colors of yarn you used. Since I have to order online during this time I can’t see what colors in store. Thank you so much.
Can you list the colors of each that you chose? It’s hard to tell what the colors look like on their website. Thanks!
I am also wondering if you can share the exact colors of yarn you used. Thank you
Hello, love this! Am I missing the measurements you used? Thanks
What size dowel? Thanks. This is beautiful.
Loved how this came out and for all the materials it cost under $30 for me (I used a couple coupons at a hobby store). I originally wanted to place it in our living room, but due to the wall color being closer to a white than beige, it’s home will be on a darker gray wall.
This inspired me to finally make something to go above my bed! Thank you, I love it!! ????
https://ibb.co/qjV2m63
Thanks for the inspiration, Elsie! I’m going to upcycle some opshop clothing in a multitude of delicious colours xx
Oops! Just found the answer to my question up there! I guess I was too taken with the beautiful pictures!
I couldn’t figure it out- what was it?
“There’s also one piece of fringe trim in there that I stole from my stash of old supplies (there are tons of options for trim at JOANN that you can mix and match into your project!).”
Just cur6what you used for the fourth row from the bottom? It looks like some sort of fringe, but I do t see anything like that listed in your supplies list. It must be something you had on hand already? It does add a nice dimension to the whole piece.
Beautiful job!
K
I recreated the hanging you have in your bedroom and I absolutely love it! I have a large empty wall in our dining room that I think I will give this a try in. Thanks for the beautiful DIY!
I absolutely love this! Is there a video of it. That would be helpful.
Love this! Definitely want to try.
Wow.
This is my very first blog post EVER, and while I’ve been reading your blog for quite a while, this project is the only one that has moved me enough to actually come out of my shell and post a comment. And now all I can say is WOW, that tapestry is a*ma*zing. SO beautiful.
You should be incredibly proud of yourself.
so pretty! I’m excited to make a bunch of stuff for my new home so soon! was thinking of trying a weaving project for the closet and this adapted might work perfectly! in the meantime i’ve been working on smaller projects, more this way: https://tps-steph.blogspot.com/2019/06/0041-7-days-making.html
Awesome project. Will try soon
Loce this DYI project. I am gonna try this. Love all your posts as I love to decor my home.
Love love love this! Totally making one myself!
That looks incredible!!!