 Hi friends! Just wanted to share a super quick and easy photo frame project I completed recently. It’s all about making glass looked aged or antiqued. Of course, there are lots of ways to make something look old, but this is all about creating that classic aged mercury look that you can sometimes find on very vintage items (although this is much safer than working with real mercury). The final result is super subtle and pretty, and the technique is easy enough that anyone could do it! Which is my kind of craft. 😉
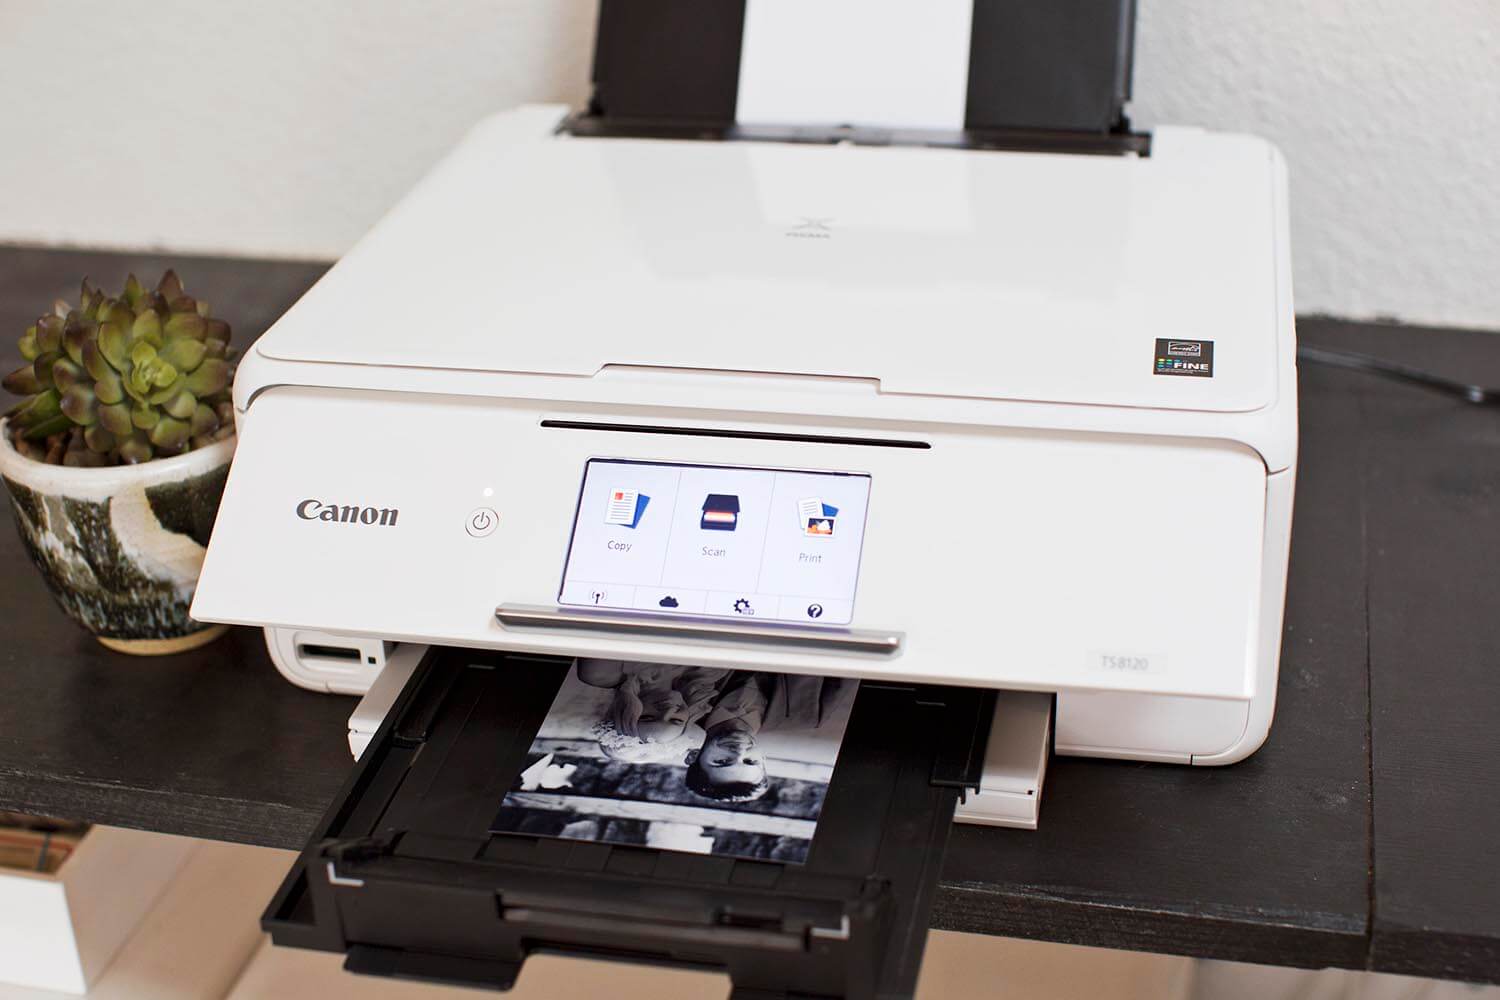
In this project, I am working with our friends at Canon USA. I’ve started using their new PIXMA TS8120 model (see a photo of it below) and I love it. This one is a little more compact, super sleek and pretty in design, and it’s a great printer for both at home photo printing/crafting AND work-related things, since it has a scanner function (a must for me, since I work from home). It also prints a little faster and has higher photo quality since it has photo blue ink. Pretty cool!

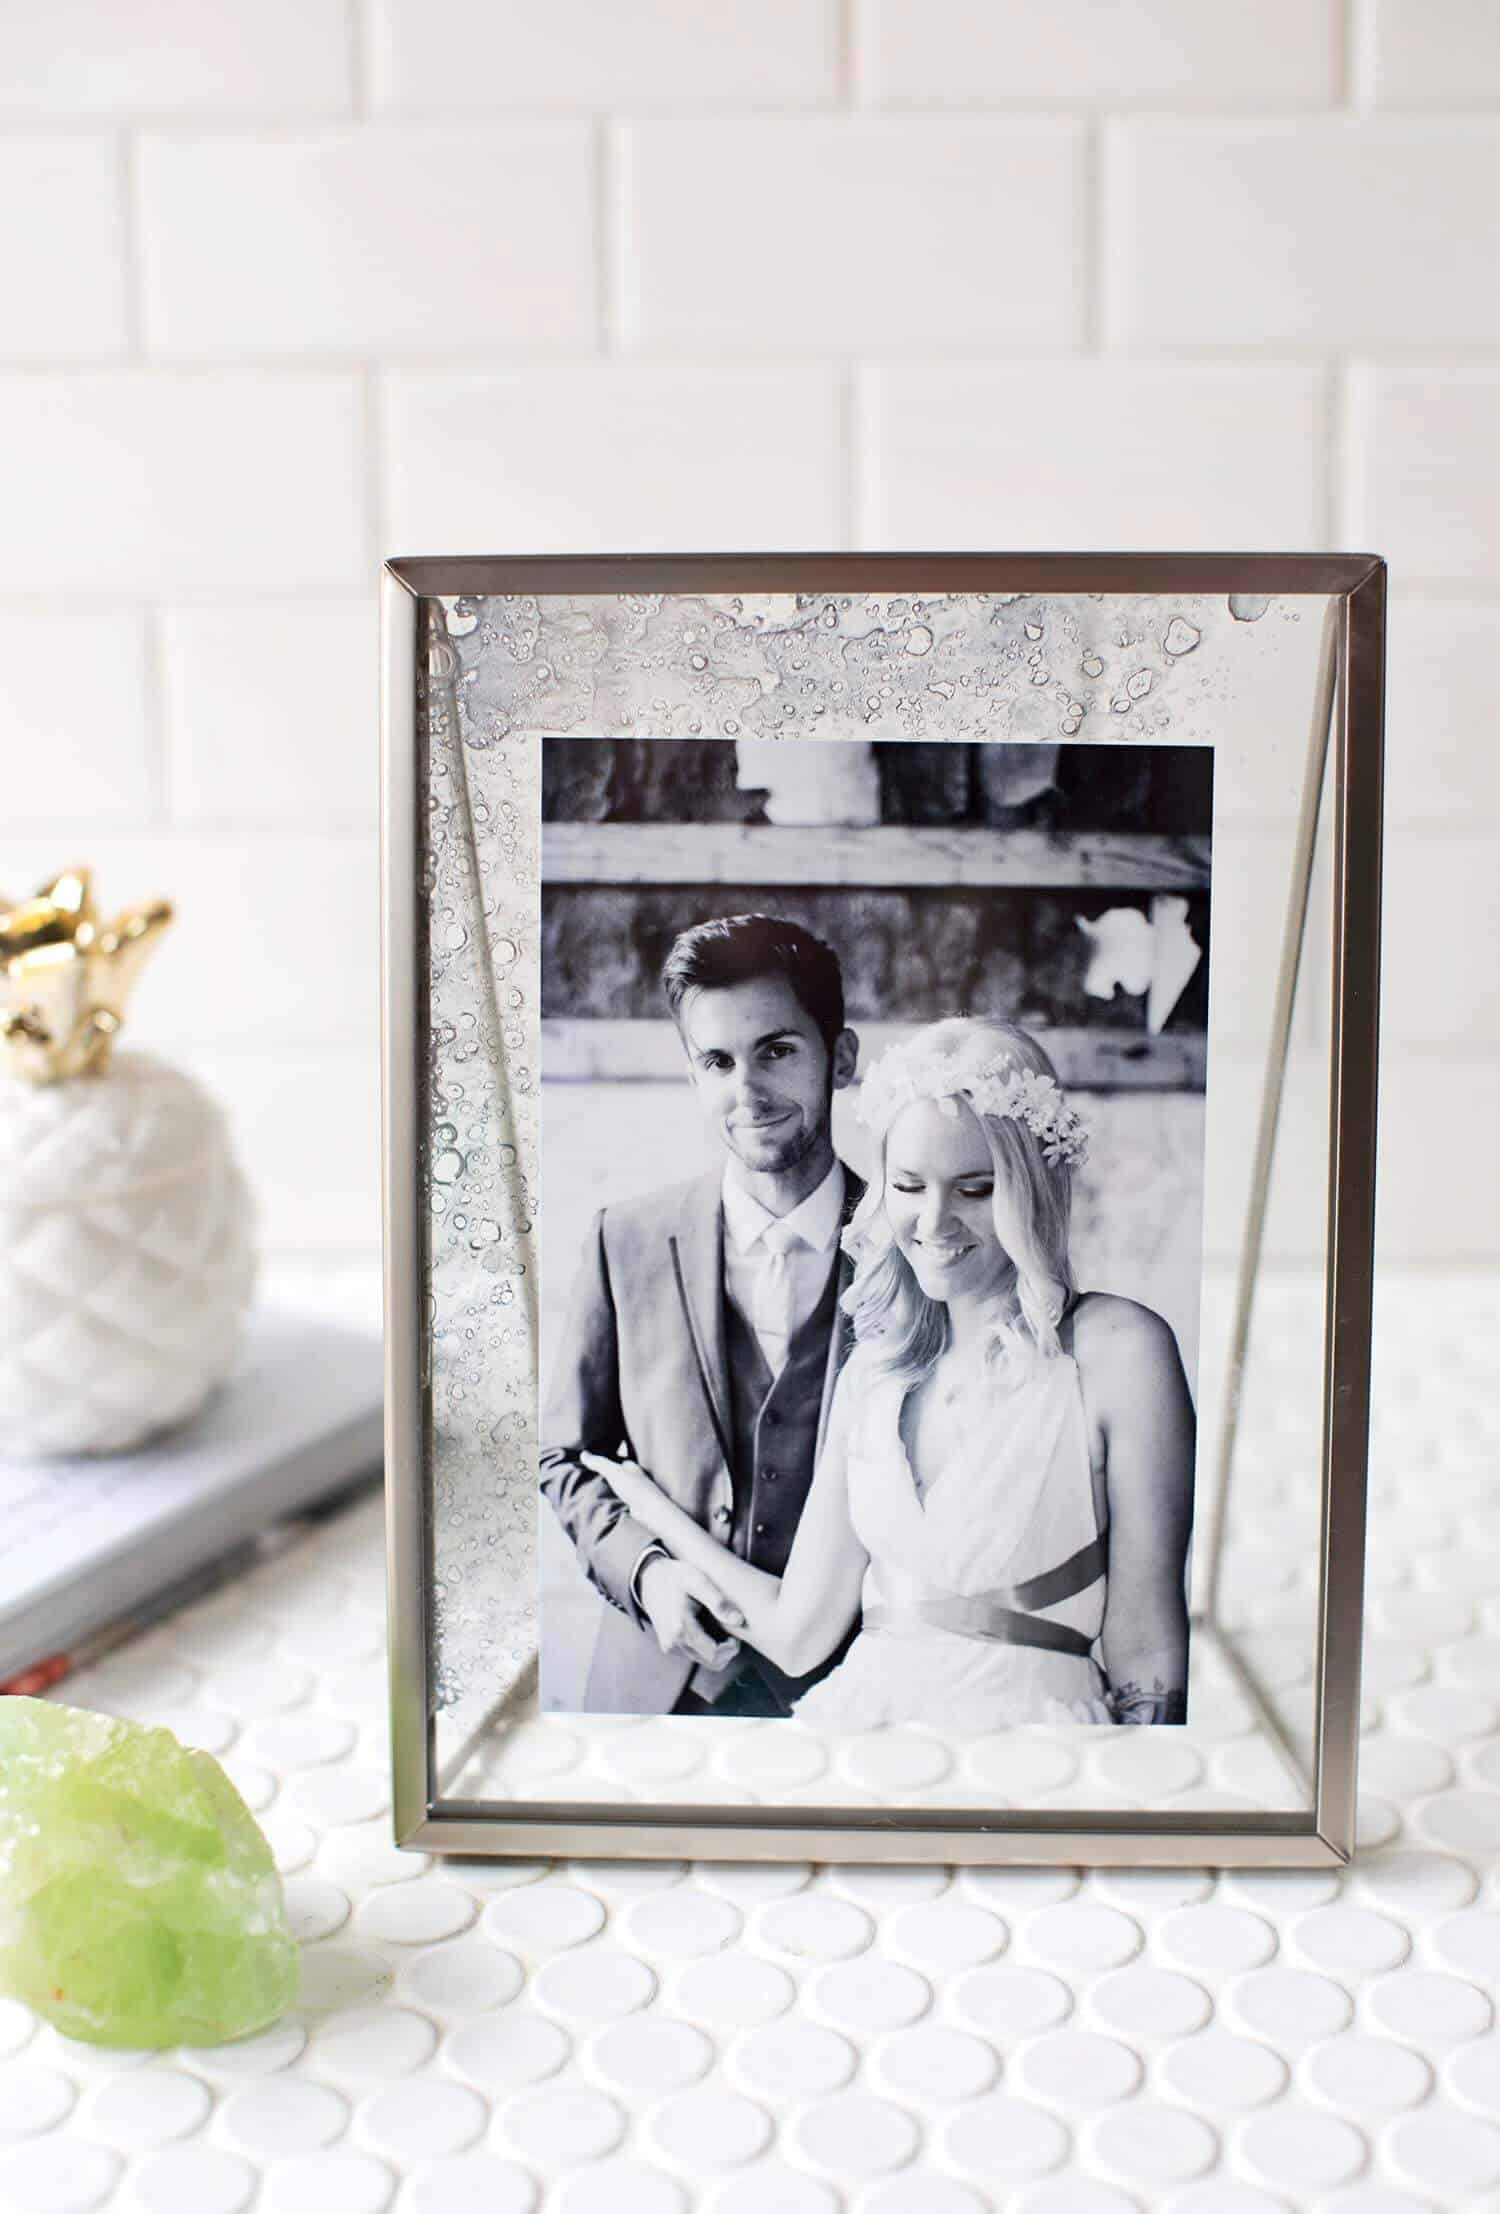
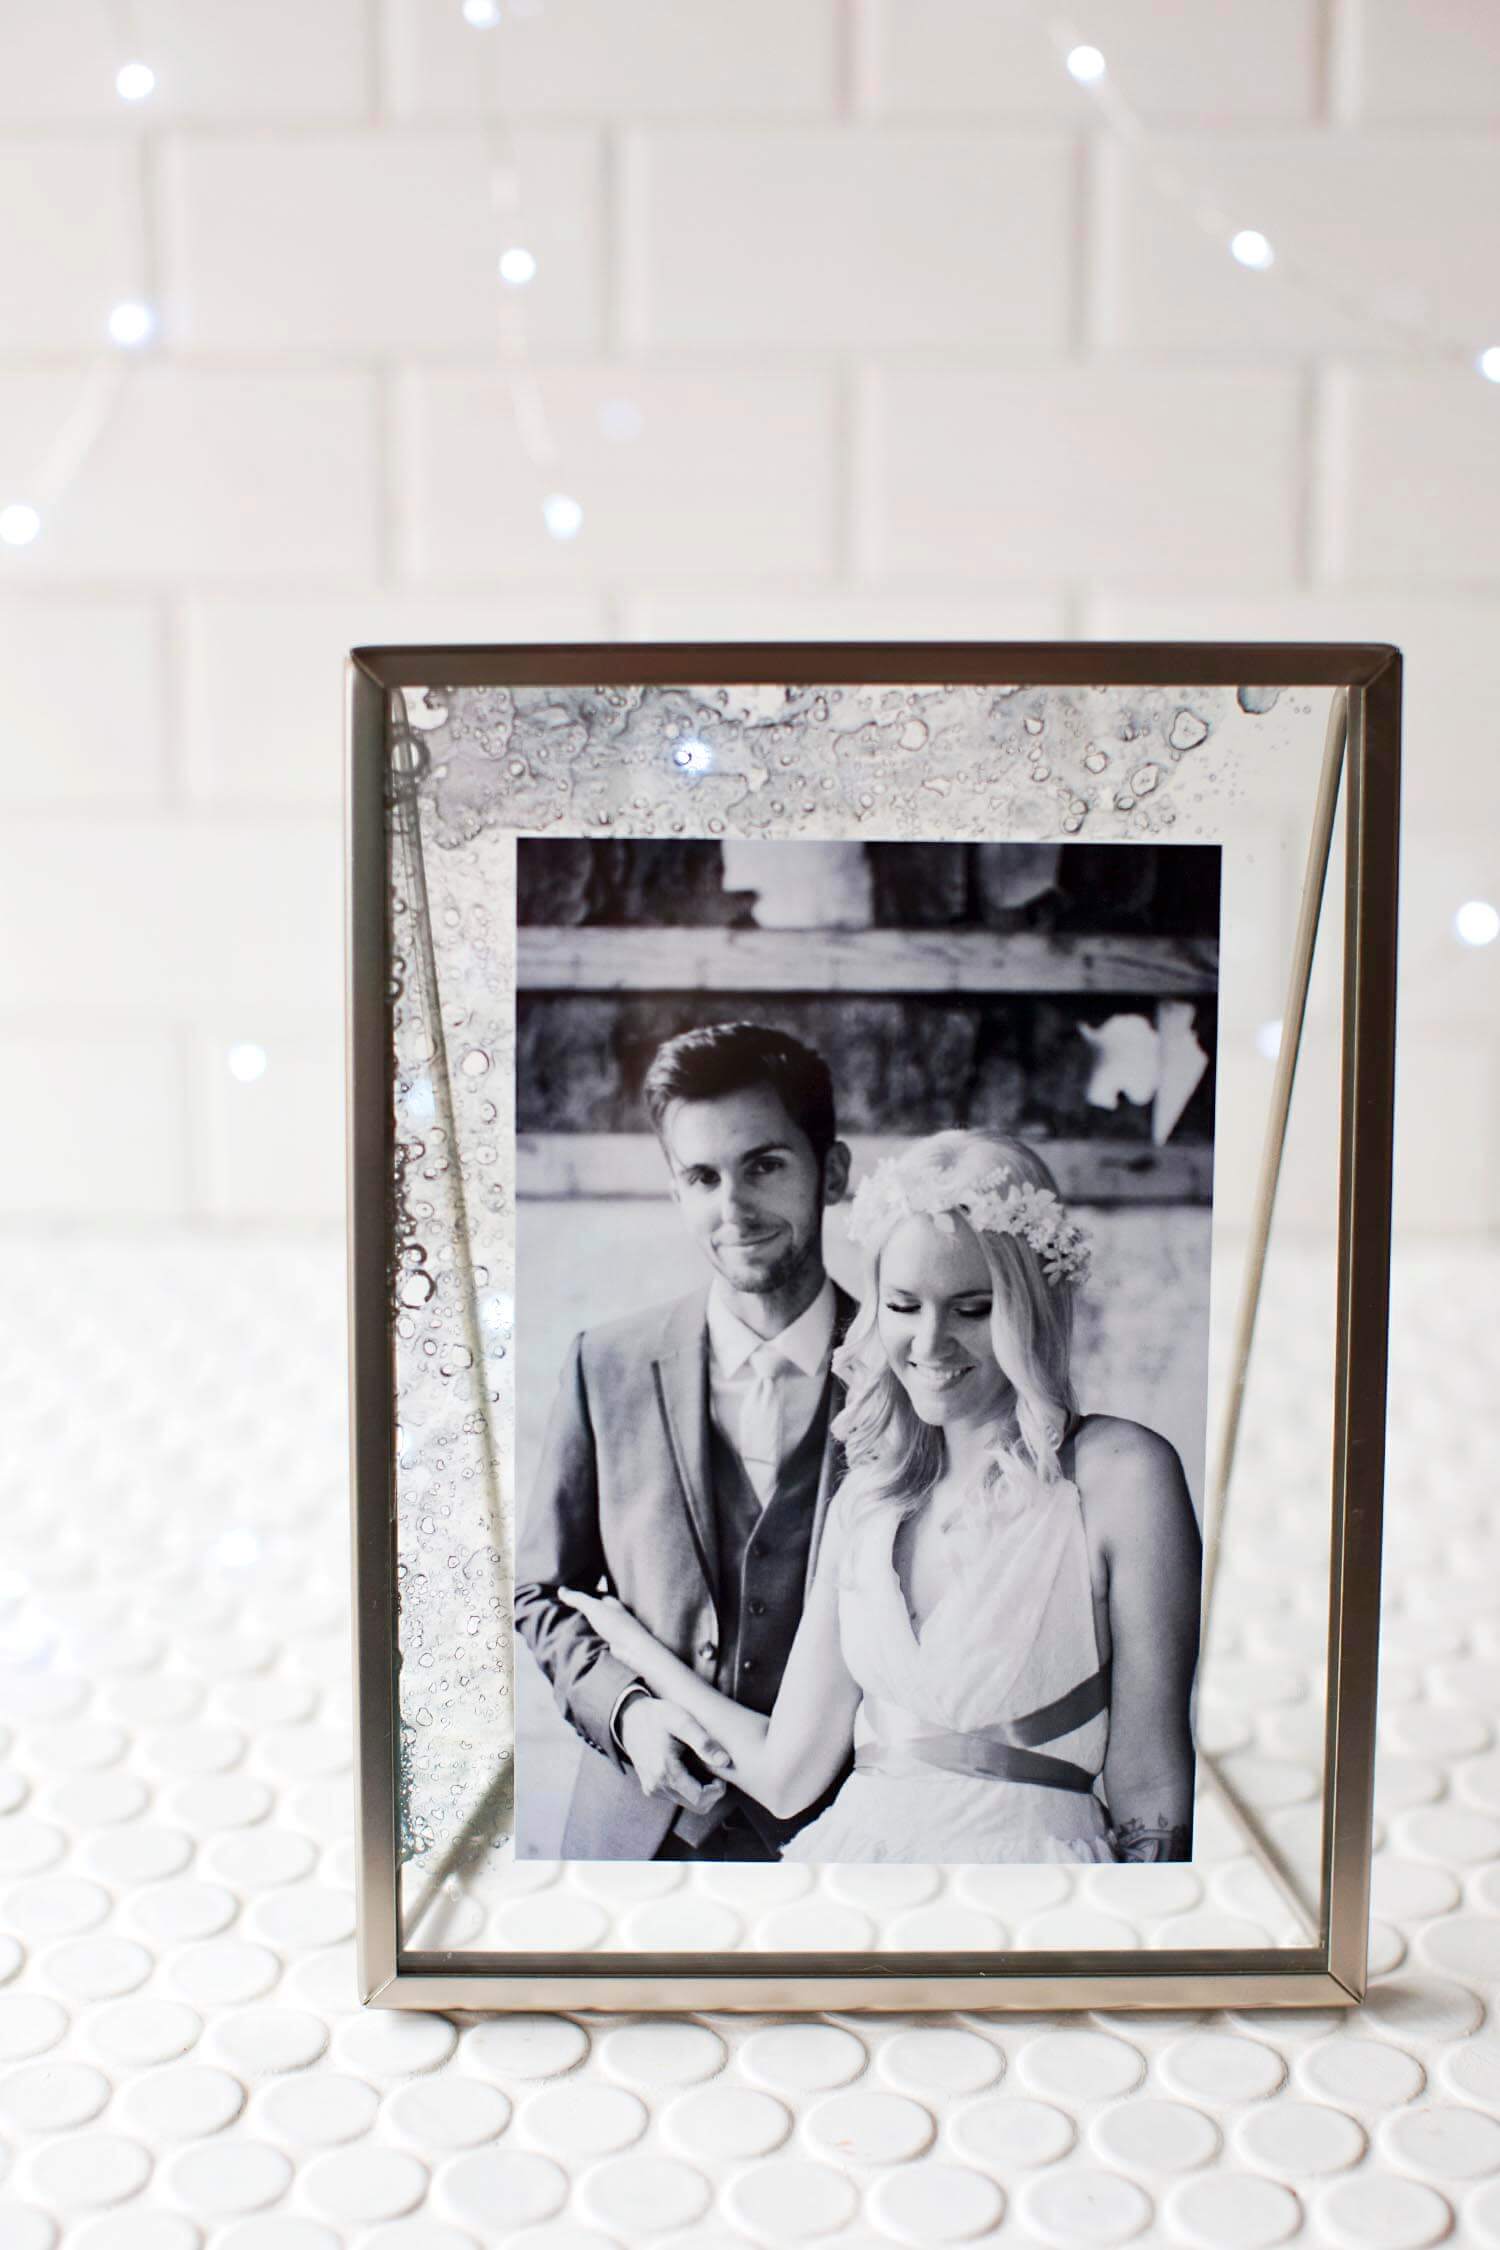
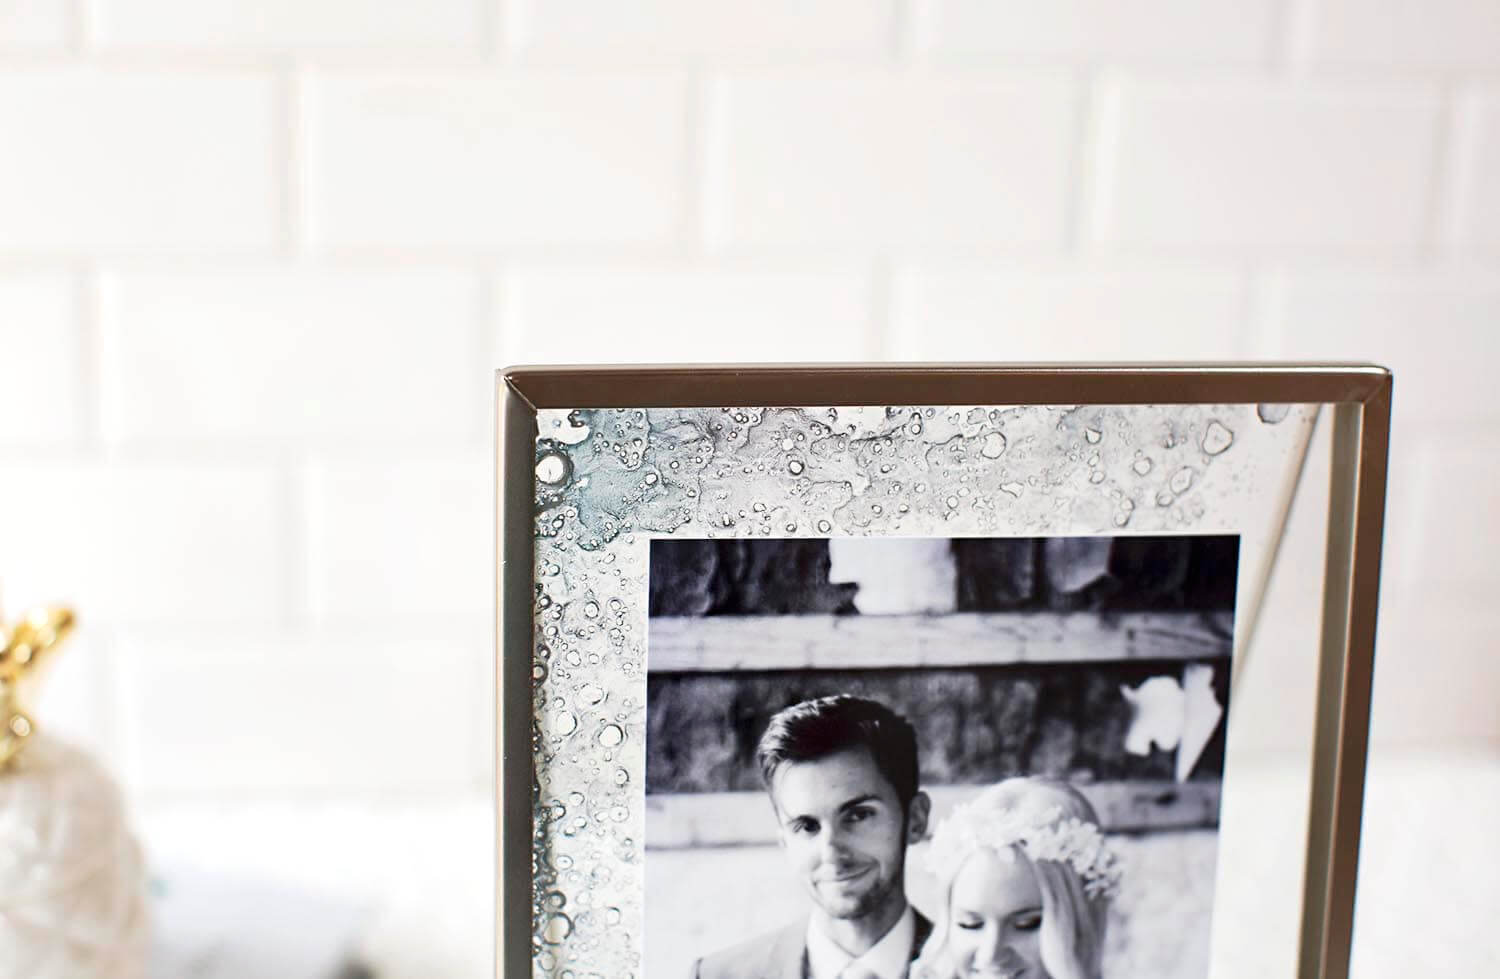 I recently bought a few of these sort of industrial-looking floating frames (from Target) and I loved the overall shape, plus I thought they’d be perfect to display a few of our wedding photos. I have a few that we took in our wedding day attire (the day before our ceremony actually … scandalous!) on the third floor of our old vintage shop. The space was really beautiful, but it has a very distinct kind of run-down warehouse look (in a good way). So some of our portraits reflect that space and I thought the vibe of these frames totally went with that.
But once I got home and started opening up the frames to add photos, there was one thing I didn’t love …
 There are these plastic little pieces that hold the glass in the metal frame and you don’t notice them when you look at the frame straight on (like I had online while shopping). But in person from any other angle, the plastic pieces really stand out. Or at least they did to me. Not really a big deal, but I thought maybe if I added a little something to the frame and kept the floating look which I liked, it might minimize the look of these pieces. So I decided to antique the frames using this aged mercury technique I had learned from Elsie a few years ago (see here), and then I added the plastic pieces in on in the areas where the antiquing was so you couldn’t see them as much or at all. Success!
Here’s a little video of the process:
I also tested a few other things, so I thought I’d share that as well as the full tutorial, too.
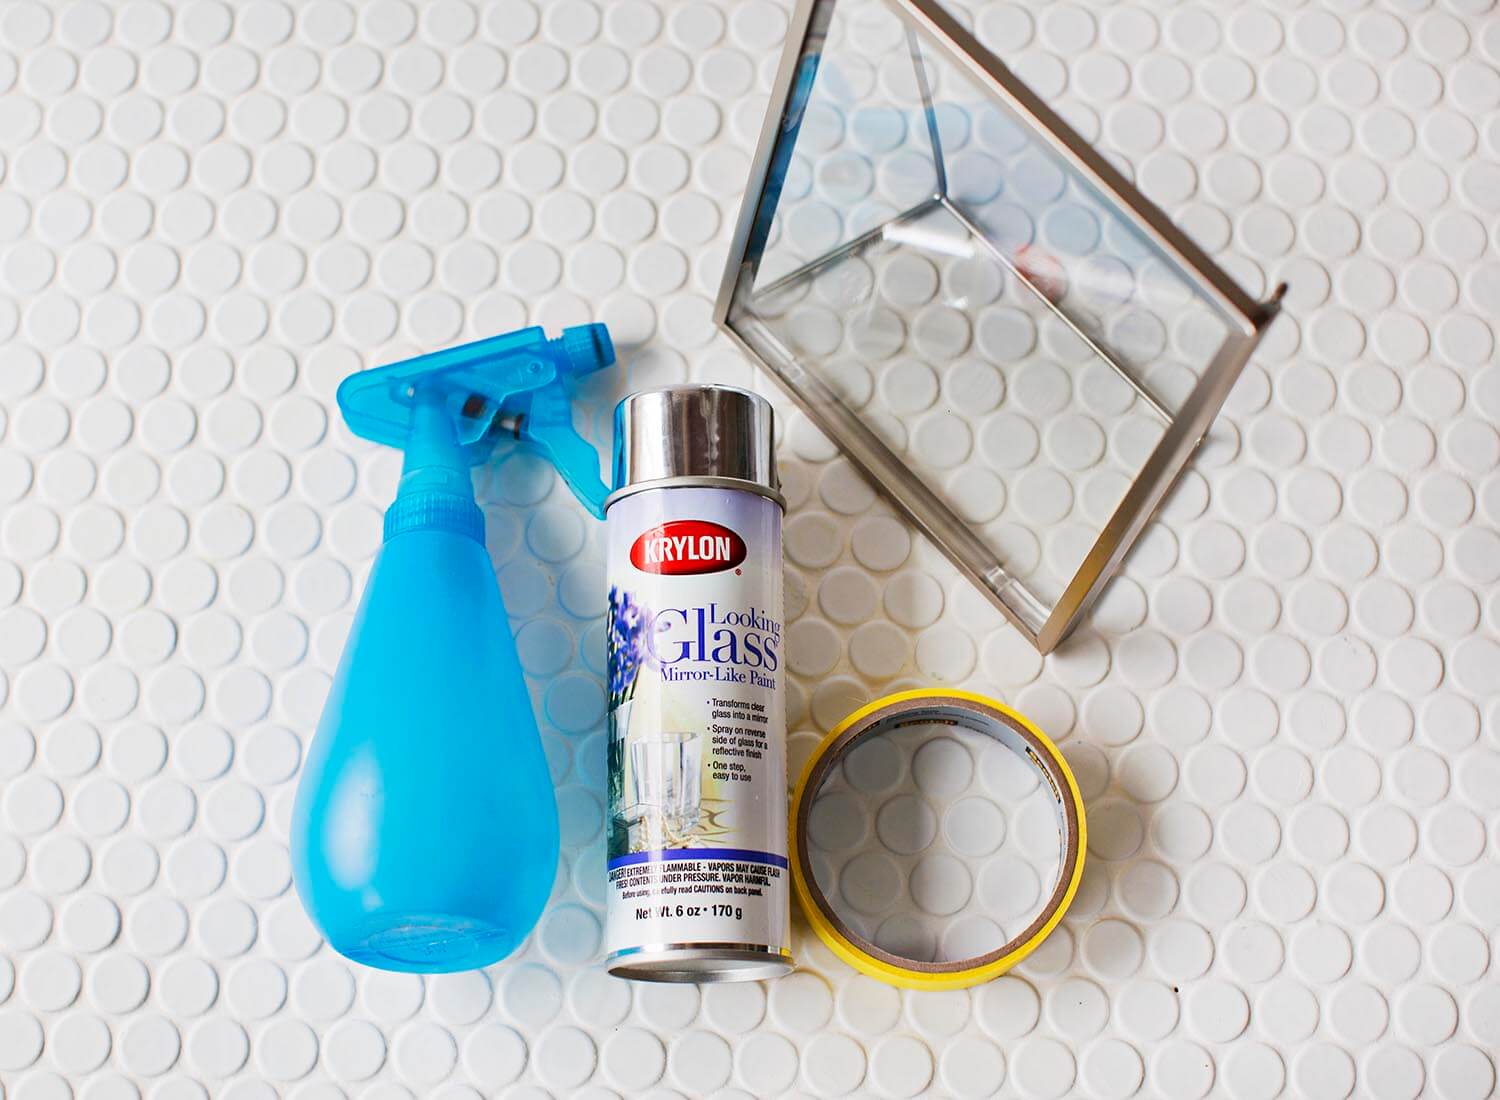 Supplies:
glass frame
water + vinegar spray bottle
mirror spray paint
tape
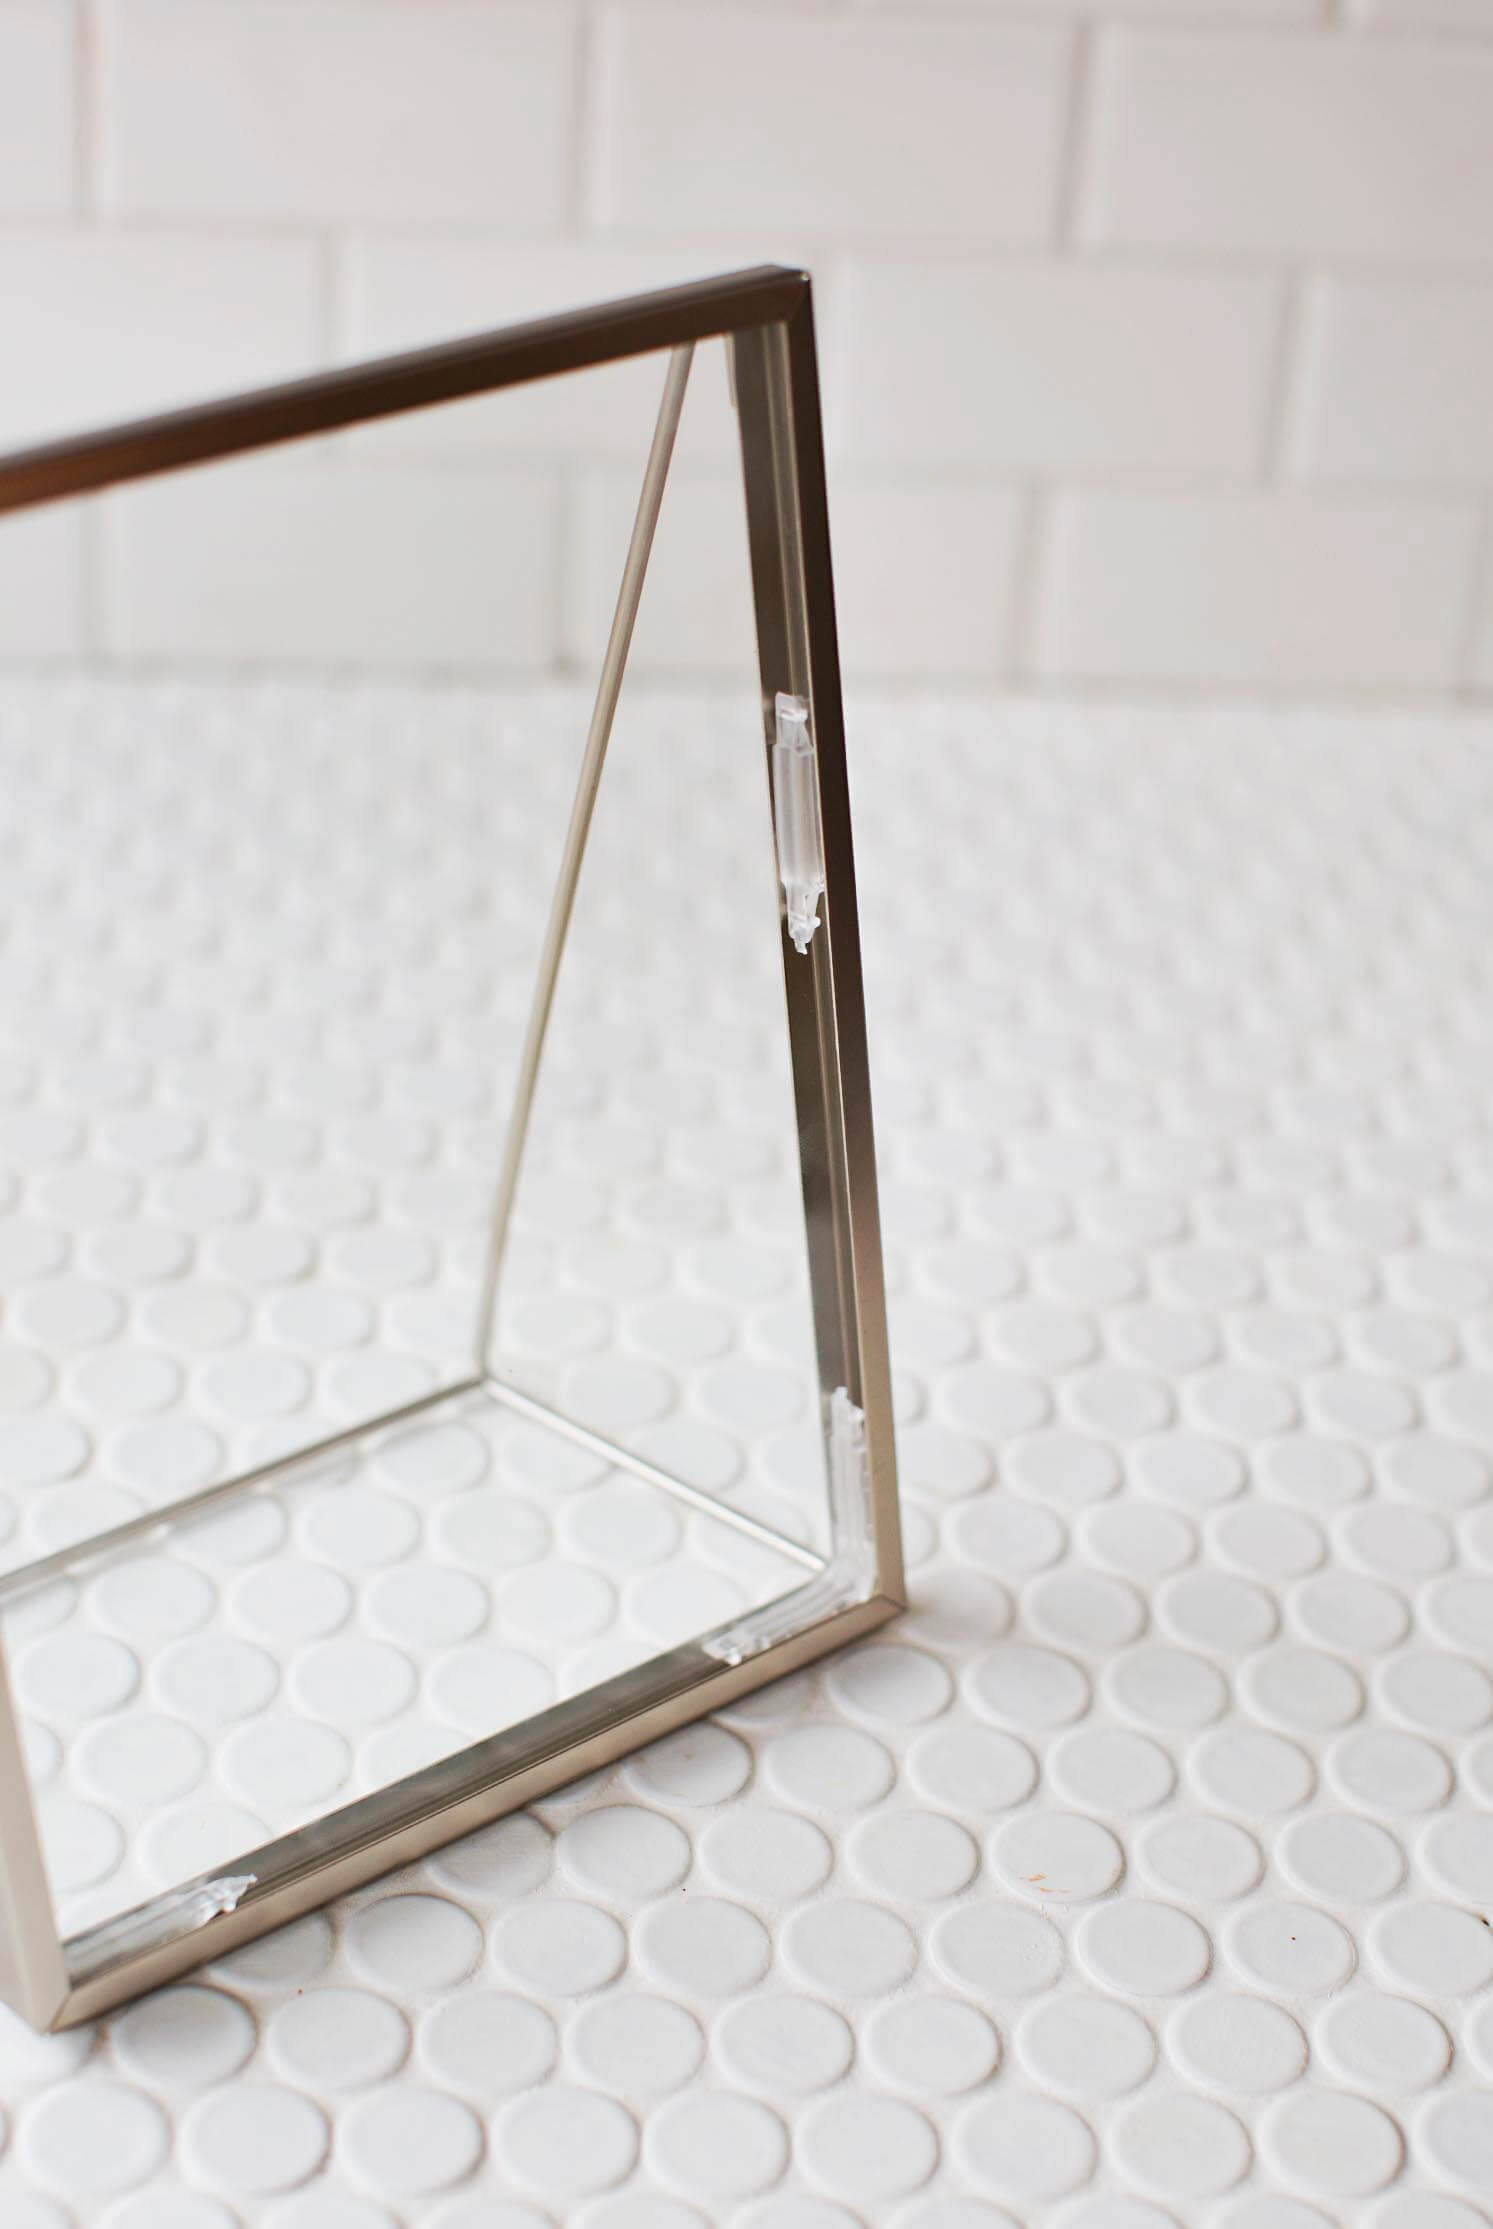
Step One: Prep the frame by removing any stickers and adding tape if you’re planning to only antique part of the frame. You could easily antique the entire thing if you wanted. If you are using a piece that will go on top of your photo, be sure to leave some space in the center so you will be able to see the photo.
 Step Four: Print your photo or photos. You can do this while you allow the frame to fully dry.
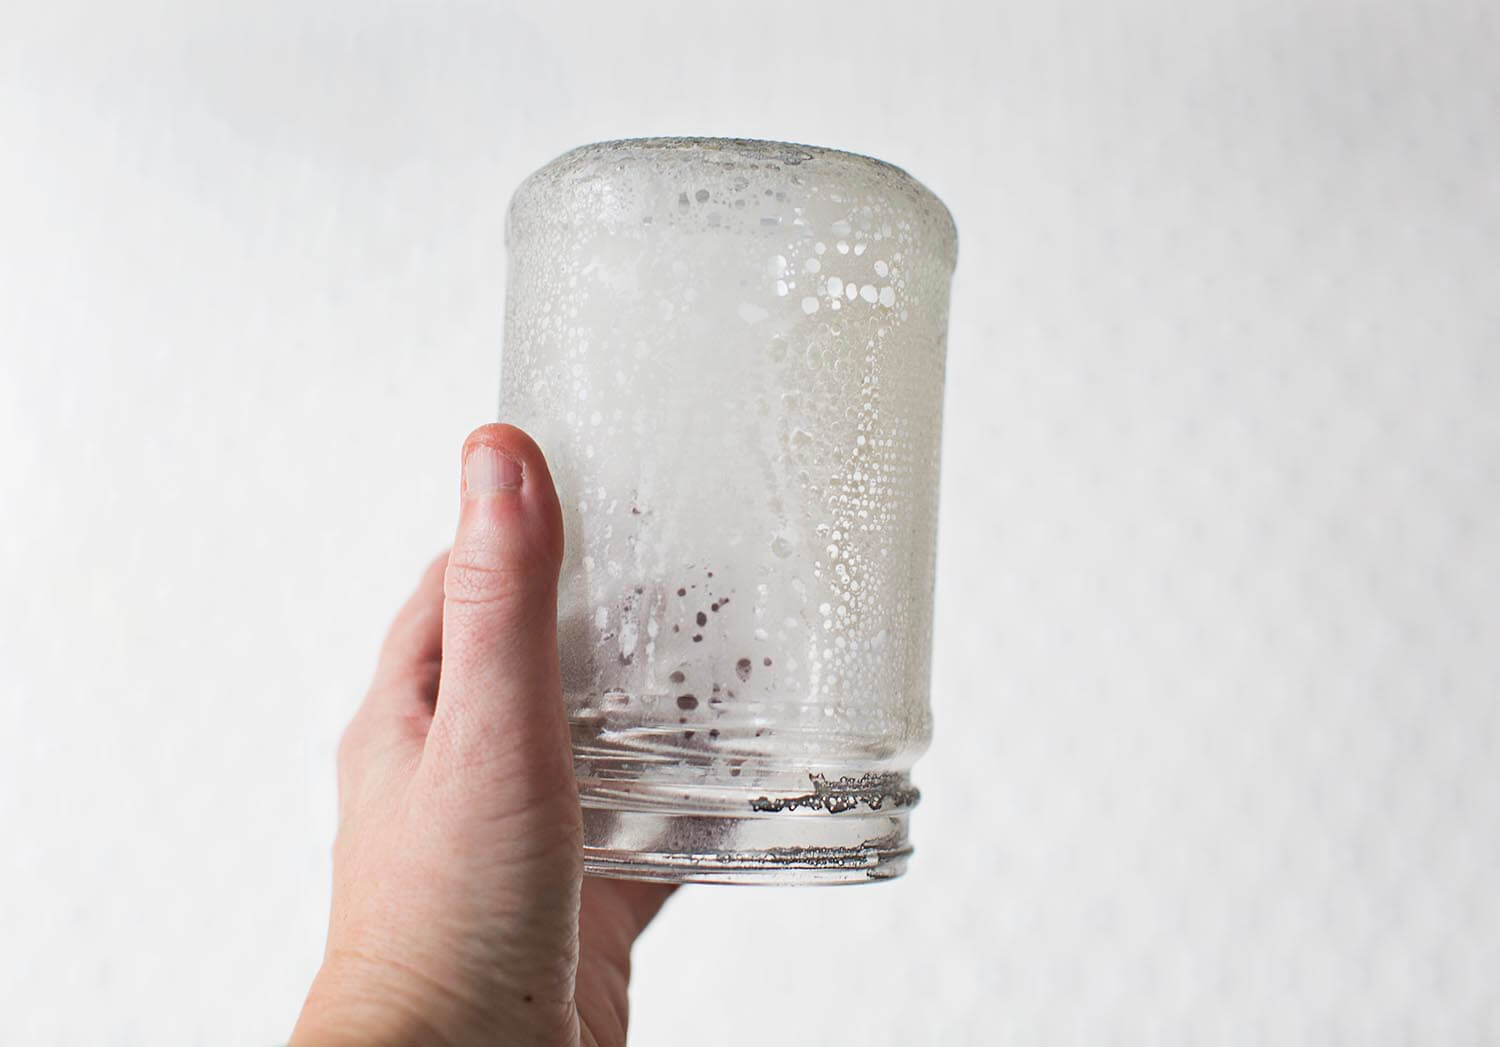 I was curious if the water and vinegar would work well with a different kind of spray paint and here you can see when I tried frosted paint. Although it’s sort of an interesting look, it wasn’t really what I was going for.
 Here, I was testing to see if I should find a way to set my glass frame upright before spraying or not. I was curious if the paint would run down and if that would look good or weird. Answer: It does indeed run down (makes sense, it’s quite heavy paint as I said). And although the look is pretty, it wasn’t quite what I wanted.
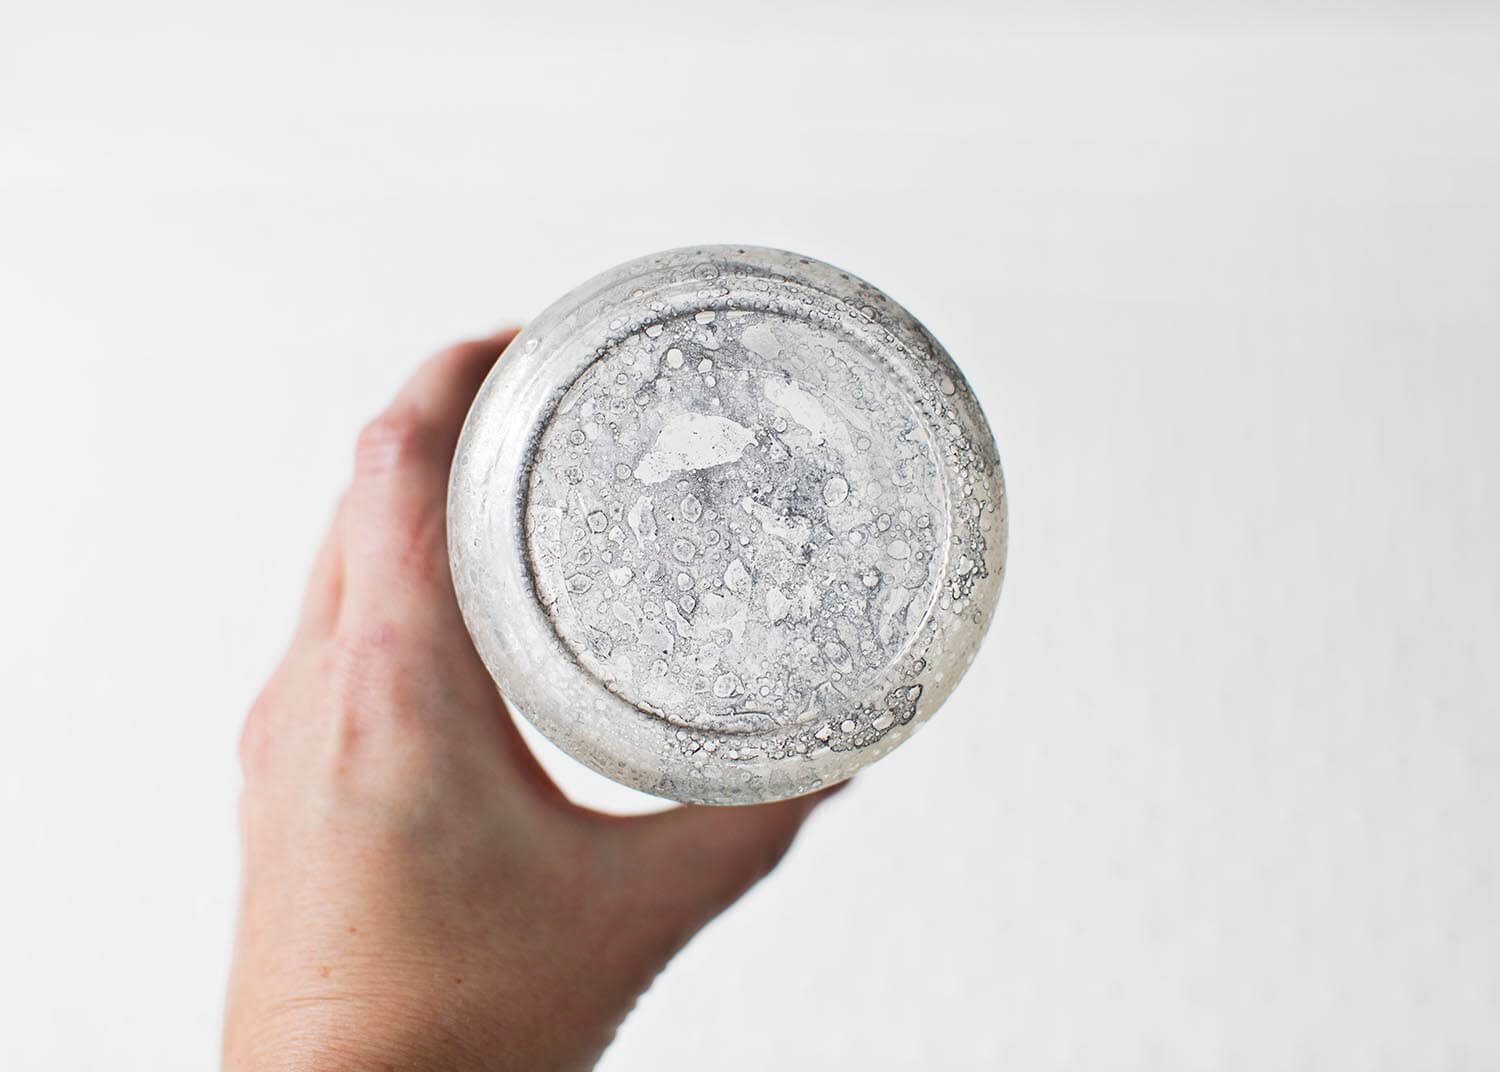 Here was more of the look I was hoping for. This was the top of the jar, so it would be like if I set the glass frame perfectly flat (on scrap paper). I decided to slightly title the glass before spraying to get just a little bit of movement (streaks) from this test. You can see me doing that in the video if you’re unsure what I mean. And this ended up being the look that I liked most. So, if you’re unsure, just test on an empty glass jar or bottle before spraying your frame glass.
 Love how this super simple project turned out. Thanks for letting me share! xo. Emma
I’m using this mirror spray to create floral arrangement containers for my wedding, but had never thought of applying it to frame glass too! Wonderful project 🙂
The effect looks so cool and extraordinary!
https://www.makeandmess.com/
Very neat idea 🙂
This looks so great! Happily, I already have some old frames and some of that mirror paint so i guess I’ll be trying it this weekend. Thanks for sharing.
I love the look of this photo frame. ❤️❤️ So elegant! One of my favourites from your blog. 🙂
Charmaine Ng | Architecture & Lifestyle Blog
http://charmainenyw.com
Love how easy this is! I’m planning my own wedding so this would be perfect for our table centerpieces or even our wedding photos afterwards. Thanks for the DIY!
Nice idea
https://thepinkpineappleblog.blogspot.com/2018/01/my-favorites-cozy-sweaters-for-this.html