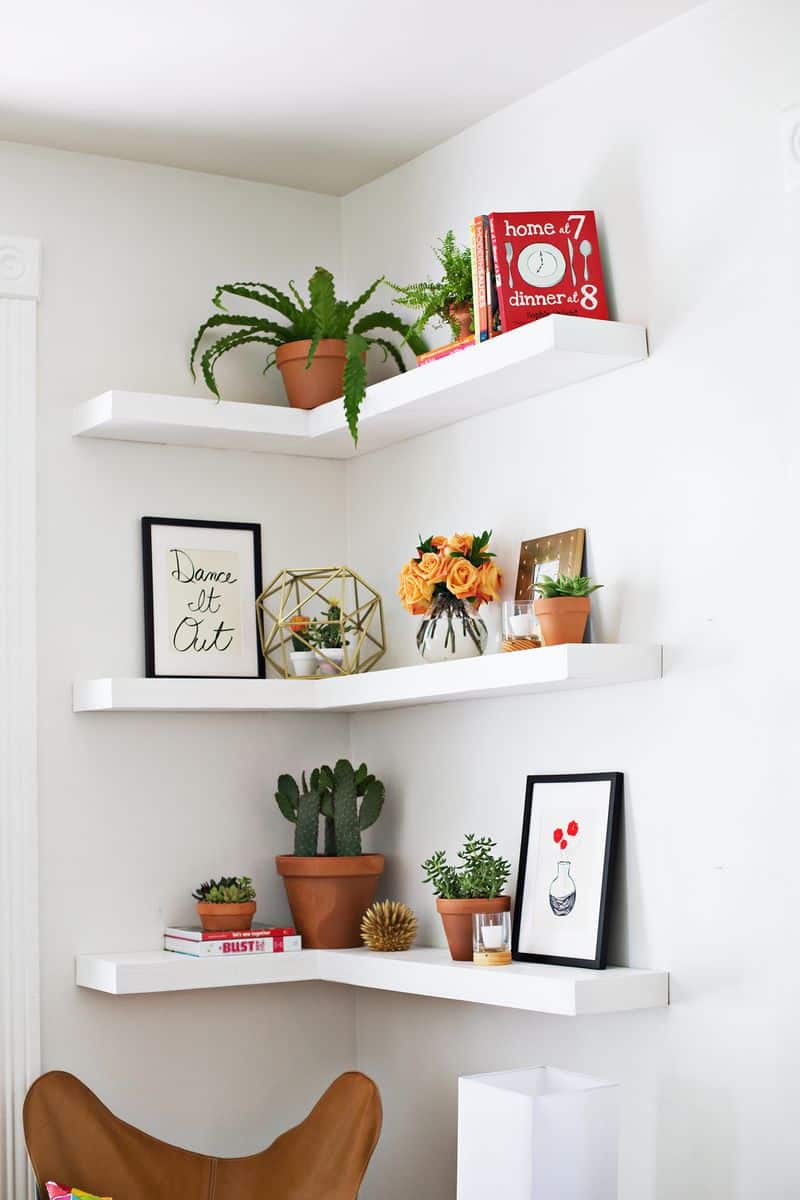
Shelving is a great way to organize and de-clutter a space. I want to show you how to make some clean shelving that appears to have no brackets (i.e., floating shelves).
I am also going to show you how to make corner shelves, as it’s a little different from straight across (no corner) shelving.
You can make them for less than 100 bucks, and the hardest part is figuring out what you’re going to put on them when you’re finished.
Related: Check out our home decor archive for more ideas.
")
Supplies:
This is list is for the three corner shelves built for a specific space. You can modify as needed for your own space.
-six 2 x 4s
-two 1 x 8 x 12 kiln-dried cedar (be sure to check for warping when choosing your lumber)
-one 1/4″ x 4′ x 8′ plywood
-1 1/4″ wood screws (I used these)
-heavy duty fasteners (I used these)
–spackle
-paint
–caulk
–wood glue
Tools:
–miter saw
–table saw
–drill
–Kreg pocket hole jig
–sandpaper
–sander
–level
–step ladder (ones like this are good since they don’t take up a lot of space and have the shelf on top)
–stud finder
 Step One: Cut all your wood. I find it more productive if I figure out all (or at least most) wood material I need and cut it all at once.
Here’s my cut list for three shelves:
-fifteen 6 1/2″ x 3 1/2″*
-three 26 1/2″ x 1 1/2″**
-three 46″ x 1 1/2″**
-three 28″ x 8 5/8″***
-three 20″ x 1 1/2″***
-three 37 3/8″ x 8 5/8″***
-three 37 3/8″ x 1/5″***
*2 x 4 **ripped 2 x 4 ***ripped 1 x 8
Cut list for skinning the bottom and ends (1/4″ plywood):
-8 5/8″ x 46″
-8 5/8″ x 26 1/2″
-six 2 1/8″ x 8 5/8″
Step Two: Next, sand the pieces that will be visible.
") Step Three: Assemble figure A (see diagram). I found it easier to clamp down the 1 1/2″ piece before screwing in the 6 1/2 x 3 1/2 pieces. I put in two screws per piece.
Step Three: Assemble figure A (see diagram). I found it easier to clamp down the 1 1/2″ piece before screwing in the 6 1/2 x 3 1/2 pieces. I put in two screws per piece.
") Step Four: Assemble the pieces for figure B (see diagram).
Step Four: Assemble the pieces for figure B (see diagram).
") Step Five: Once you have the spacing all set up, studs found, and material at hand, you can start putting up the shelves .A good way to visualize spacing is to use painter’s tape
Step Five: Once you have the spacing all set up, studs found, and material at hand, you can start putting up the shelves .A good way to visualize spacing is to use painter’s tape
") I started at the bottom and worked my way up. Install all of the A pieces first. The HeadLOK fasteners did a great job of making everything super sturdy; just make sure you’re hitting studs!
I started at the bottom and worked my way up. Install all of the A pieces first. The HeadLOK fasteners did a great job of making everything super sturdy; just make sure you’re hitting studs!
After you have the A pieces up, you can put on the B pieces. You can screw or nail those on.
")
") Step Six: Screw or nail on the underside and end pieces.
Step Six: Screw or nail on the underside and end pieces.
") Step Seven: Putty any nail or screw holes. One thing I wish I would have done is caulk around the shelves so that there were no spaces showing.
Step Seven: Putty any nail or screw holes. One thing I wish I would have done is caulk around the shelves so that there were no spaces showing.
I think they still look good, but that detail would have made them a little bit better. Sand once everything is dry. I attached my vacuum hose to the sander to minimize dust.
Step Eight: Tape the wall if you are going to paint another color.
")
") Once you paint, you’re done! Time to put your stuff on display (after the paint dries, of course). Enjoy your floating corner shelves!
Once you paint, you’re done! Time to put your stuff on display (after the paint dries, of course). Enjoy your floating corner shelves!
")
") Add a few cool frames with prints, plants, books with unique bookends and your shelves are ready to go!
Add a few cool frames with prints, plants, books with unique bookends and your shelves are ready to go!
We have lots of wood DIY projects in our archives (like building custom shelves and dollhouses) so make sure to see if any of those strike your fancy as well! Happy building!
P.S. If you aren’t the power tool type of person, you can also buy some floating shelves and get the same look (this three piece set is nice).
Love this post? Sign up for our newsletter for more ideas!

Get creative ideas for recipes, crafts, decor, and more in your inbox!
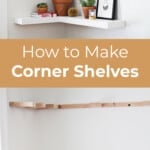
 Get the How-To

Supplies
- six 2'x4'
- two 1 x 8 x 12 kiln-dried cedar
- one ¼″ x 4′ x 8′ plywood
- 1 ¼″ wood screws
- heavy duty fasteners
- spackle
- paint
- caulk
- wood glue
- miter & table saw
- drill
- pocket hole jig
- sander & paper
- level
- stud finder (optional, but useful)
Instructions
- Cut all your wood. I find it more productive if I figure out all (or at least most) wood material I need and cut it all at once.
- Next, sand the pieces that will be visible.
- Assemble figure A (see diagram). I found it easier to clamp down the 1 1/2″ piece before screwing in the 6 1/2 x 3 1/2 pieces. I put in two screws per piece.
- Assemble the pieces. I have included diagrams in the post you can also print to use for this project.
- Once you have the spacing all set up, studs found, and material at hand, you can start putting up the shelves .A good way to visualize spacing is to use painter’s tape.I started at the bottom and worked my way up. Install all of the A pieces first. The HeadLOK fasteners did a great job of making everything super sturdy; just make sure you’re hitting studs!
- After you have the A pieces up, you can put on the B pieces. You can screw or nail those on.
- Screw or nail on the underside and end pieces.
- Putty any nail or screw holes. One thing I wish I would have done is caulk around the shelves so that there were no spaces showing.
- Sand once everything is dry. I attached my vacuum hose to the sander to minimize dust.
- Tape the wall if you are going to paint another color.Once you paint, you’re done!
Do you have a ballpark for how much weight these can bear – conservative estimate please.
I would like to know the weight limit as well.
these looks great! What program do you use to diagram your design?
wow.. an excellent idea! I’ll tell to my husband to make this!
When it comes time to move them, how could you do that without breaking them apart?
Thanks for sharing! This will definitely come in handy. I have two questions. Is there a reason you paint after they are installed? It seems like it would be easier to paint them before installing them. Also, on the 2X4 cutting list, you state re need 3 pieces that are 37 3/8 x 1/5” and I was wondering if the 1/5 is a misprint. I don’t see any boards that look that thin in the image.
Thank you.
Weight limit pls? Would they work for a serious loaf of books? See the weight q asked a few times….
I can tell you from experience If you secure it in as many studs as you can (std finders are cheap on Amazon around $18 and it is worth the investment, you will be able to load a lot of hard back books without an issue. I had over a 100 on a similar shelf and we just hit as many studs when installing them that we could. Mark that out before your build and you can move the support pieces a little if you need to so that you have room to screw if there is a stud on that section. I don’t like using wall anchors. As a renter they never worked out well in covering later and most of the time they didn’t seem strong enough. As a home owner I don’t want to deal with trying to match my own horrible wall texture if I change my mind. Normal sized screw holes are much easier.
Gonna share it with my boyfriend. Hope he would try this. Thanks for sharing this floating shelves tutorial.
Love this look! I only have 21″ in each direction from the corner – could I do this, or is that not enough space to hit 2 studs to hold them securely?
Studs are 16″ apart.
What size cut is 11/2 inch?
I love this idea and the way you decorated it. It’s something a lot of people would find valuable. I hope it’s alright if I share it! (Giving source credit of course!)
Please check out my blog on bringing the benefits of beach living inside at: zoomshack.com
These look really good! I like the way you decorated them too. I have a small room with big empty walls I need to fill somehow and this is a good idea.
http://www.kingskingco.com/listing.asp?dept_id=46040&nopopup=1
How much weight do you think these can hold?
Is there a ballpark weight limit you’d recommend for these shelves? I’m thinking about trying them in my kitchen to hold dishes and a small number of cookbooks, but want to be sure they’ll be sturdy enough for that application. Thank you! Wonderful tutorial!
I can never make this myself, but they look absolutely stunning and such practical use for a simple corner!
love these!
xxoo,
nikki
www.dreaminneon.blogspot.com
Love these! They look absolutely wonderful & so clean. I can’t wait to own walls of my own (woes of a renter) to drill things into them!
xoxo
Taylor
Thank John and Pattyo!
Ali, yea, this a great idea. Stay posted, I’m sure we’ll have something like this very soon.
-Josh
Hey Tara, you could paint before hand if you wanted. I just like to sand one more time after everything is assembled then paint.
-Josh
Hi Ali,
This is an excellent idea! We’ll get to work on this!
xx- Elsie