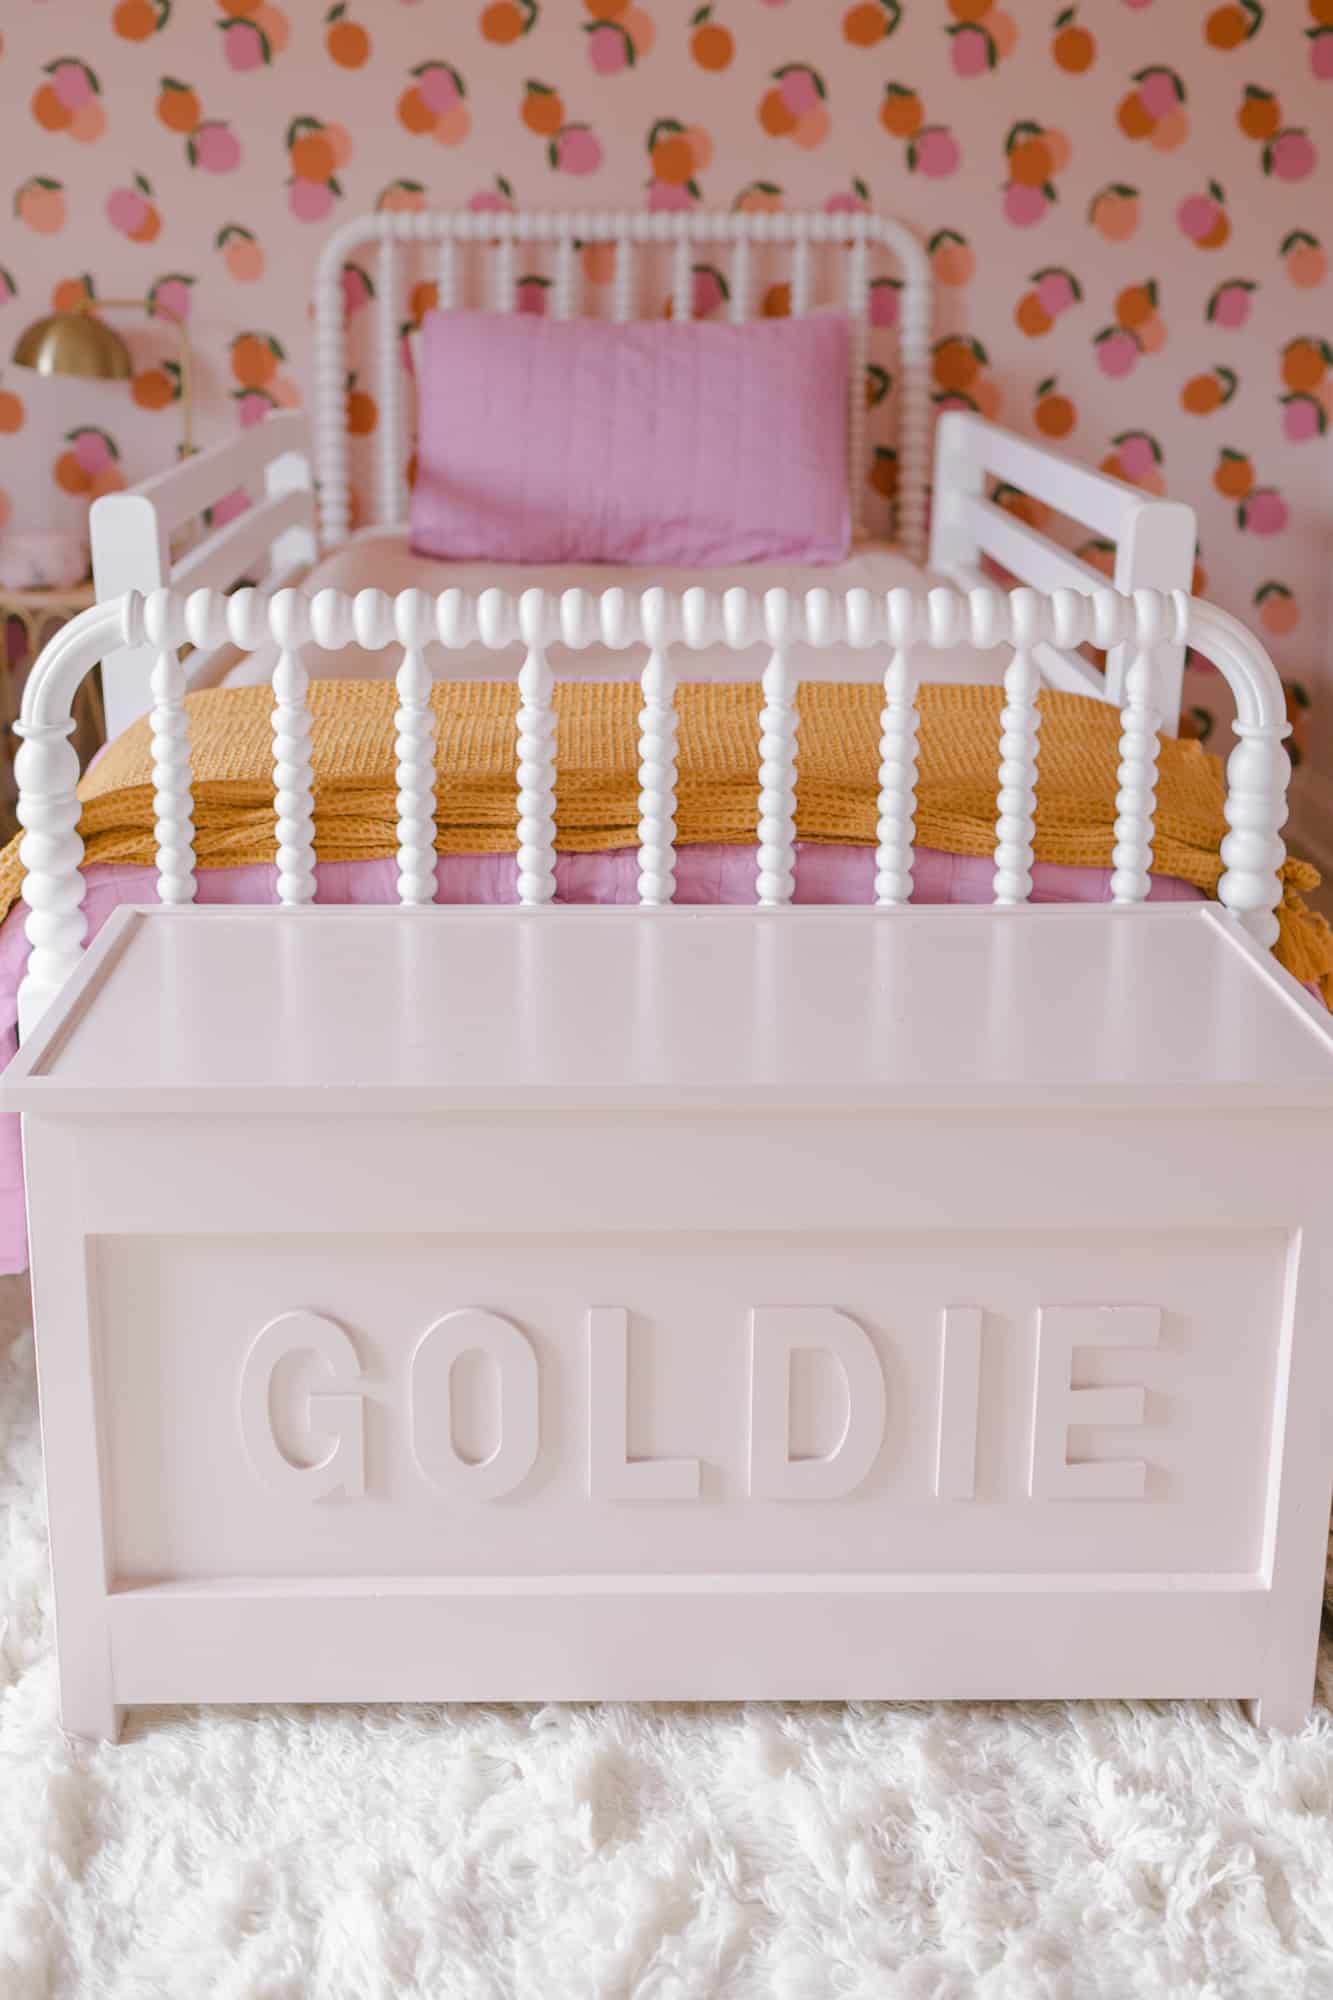
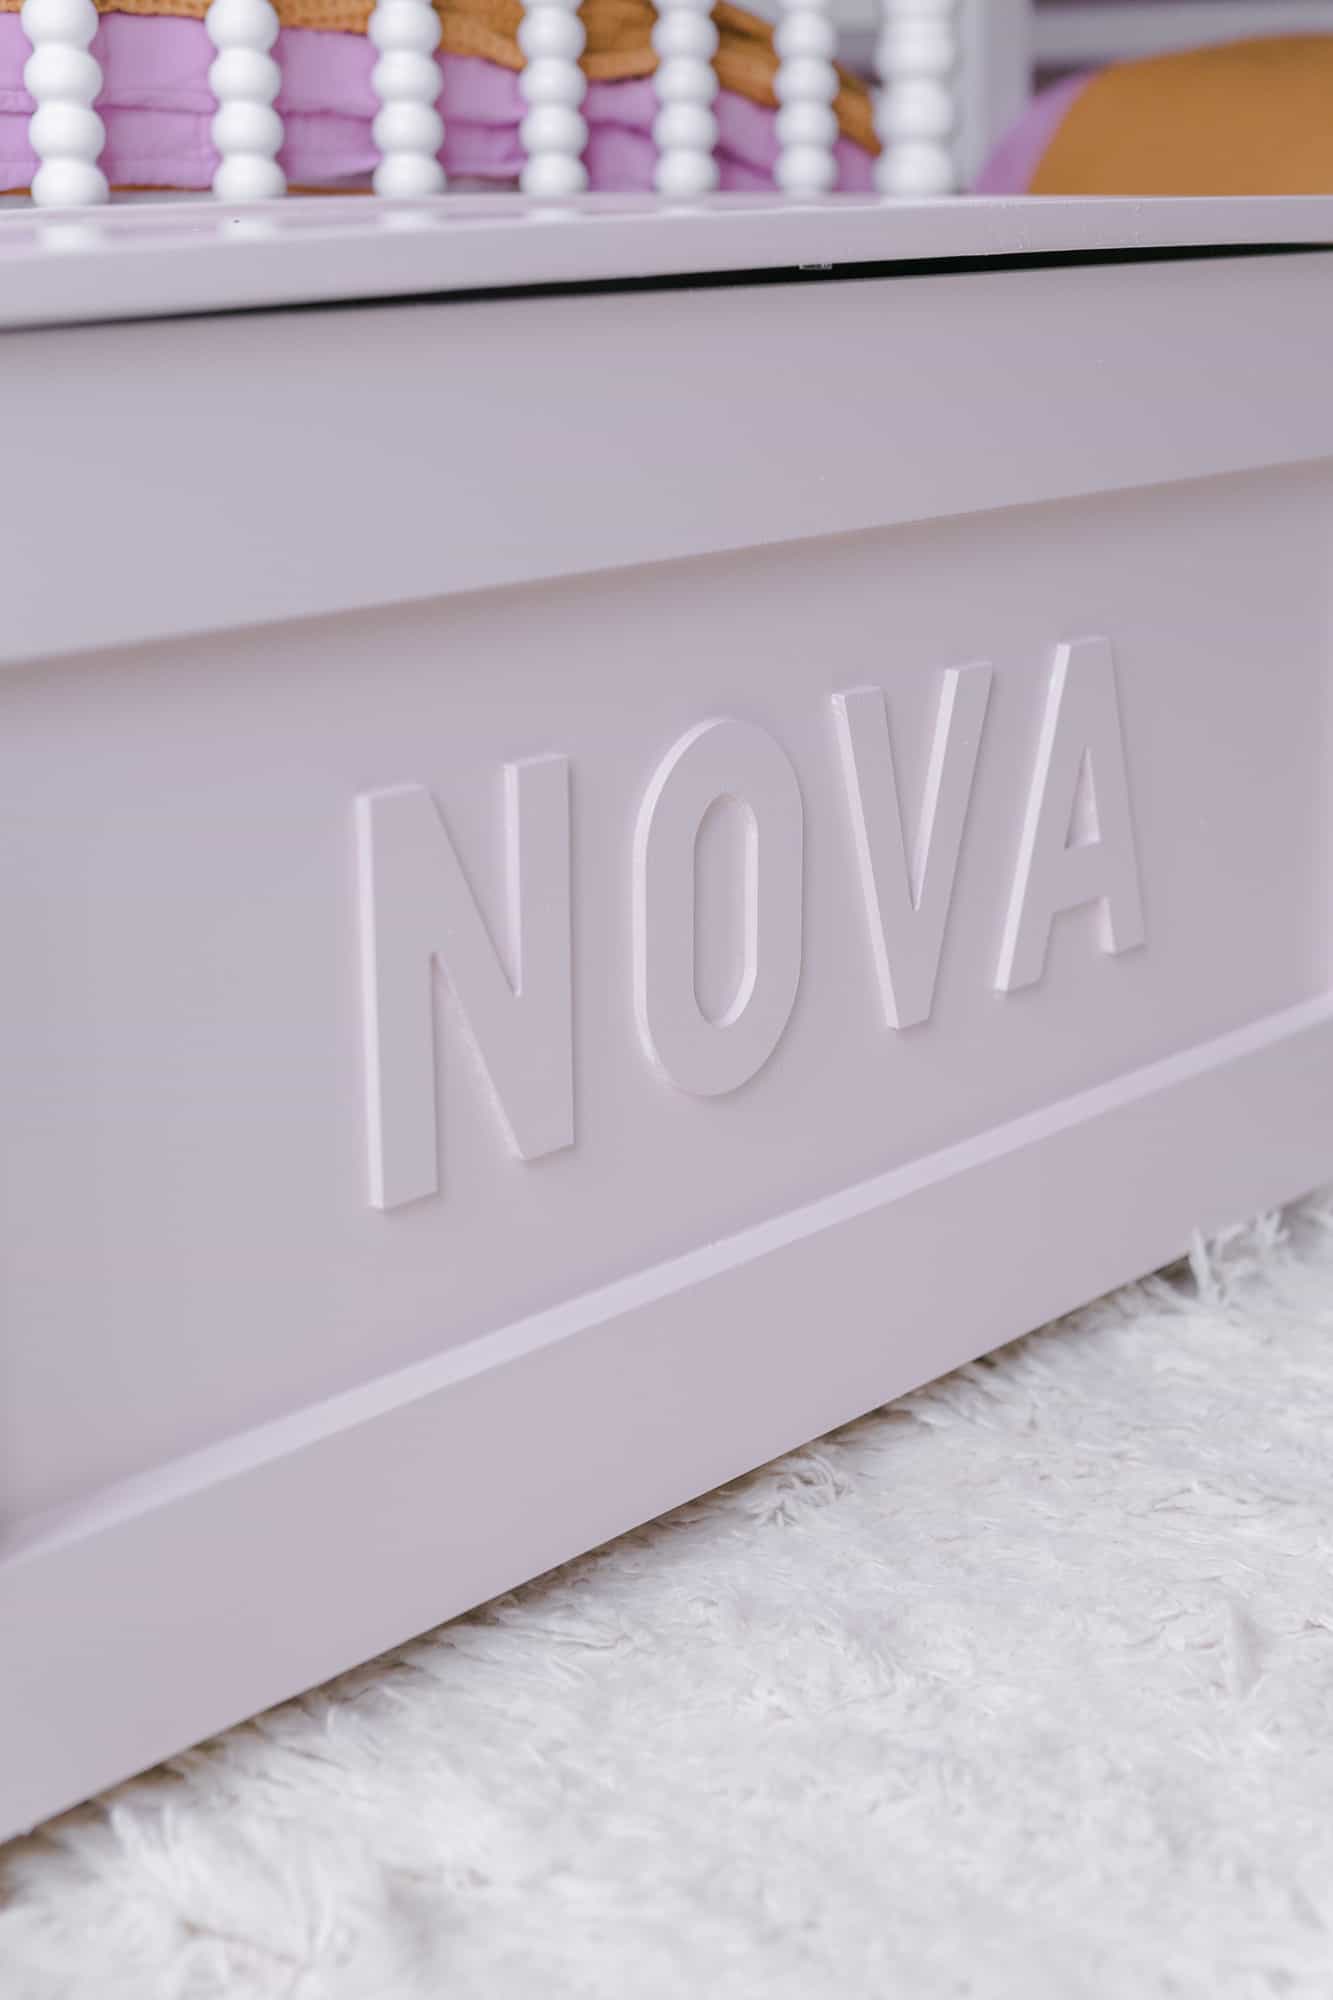
 Is there anything in this world more nostalgic than personalized toy boxes? I think not.
Today, Collin is going to teach you to make a DIY toy box. With these measurements, it fits perfectly at the foot of a twin bed. And for anyone who doesn’t have tools for this full project, remember you can simulate this look with any toy box simply by gluing the letters on and then painting it all one color.
Here’s a link for a storage chest and wooden letters if you want to make an easier (but still DIY!) toy box.
OK! Let’s jump in to the project!
Supplies:
-two 4″ x 3/4″ x 8′ boards
-four 1-3/4″ x 1-3/4″ x 36″ square dowel
-three 1/4″ x 2′ x 4′ birch plywood
-one 1/2″ x 2′ x 4′ birch plywood
-one 1-5/16″ x 1-5/16″ x 8′ outside corner moulding
-five-inch wooden letters
–one universal lid support hinge
–hinges
Tools:
-table saw or circular saw
-miter saw
-tape measure
–pocket hole jig
–1 1/4″ pocket hole screws
-nail gun
-drill
Dimensions: 40″ wide x 25″ high x 16″ deep

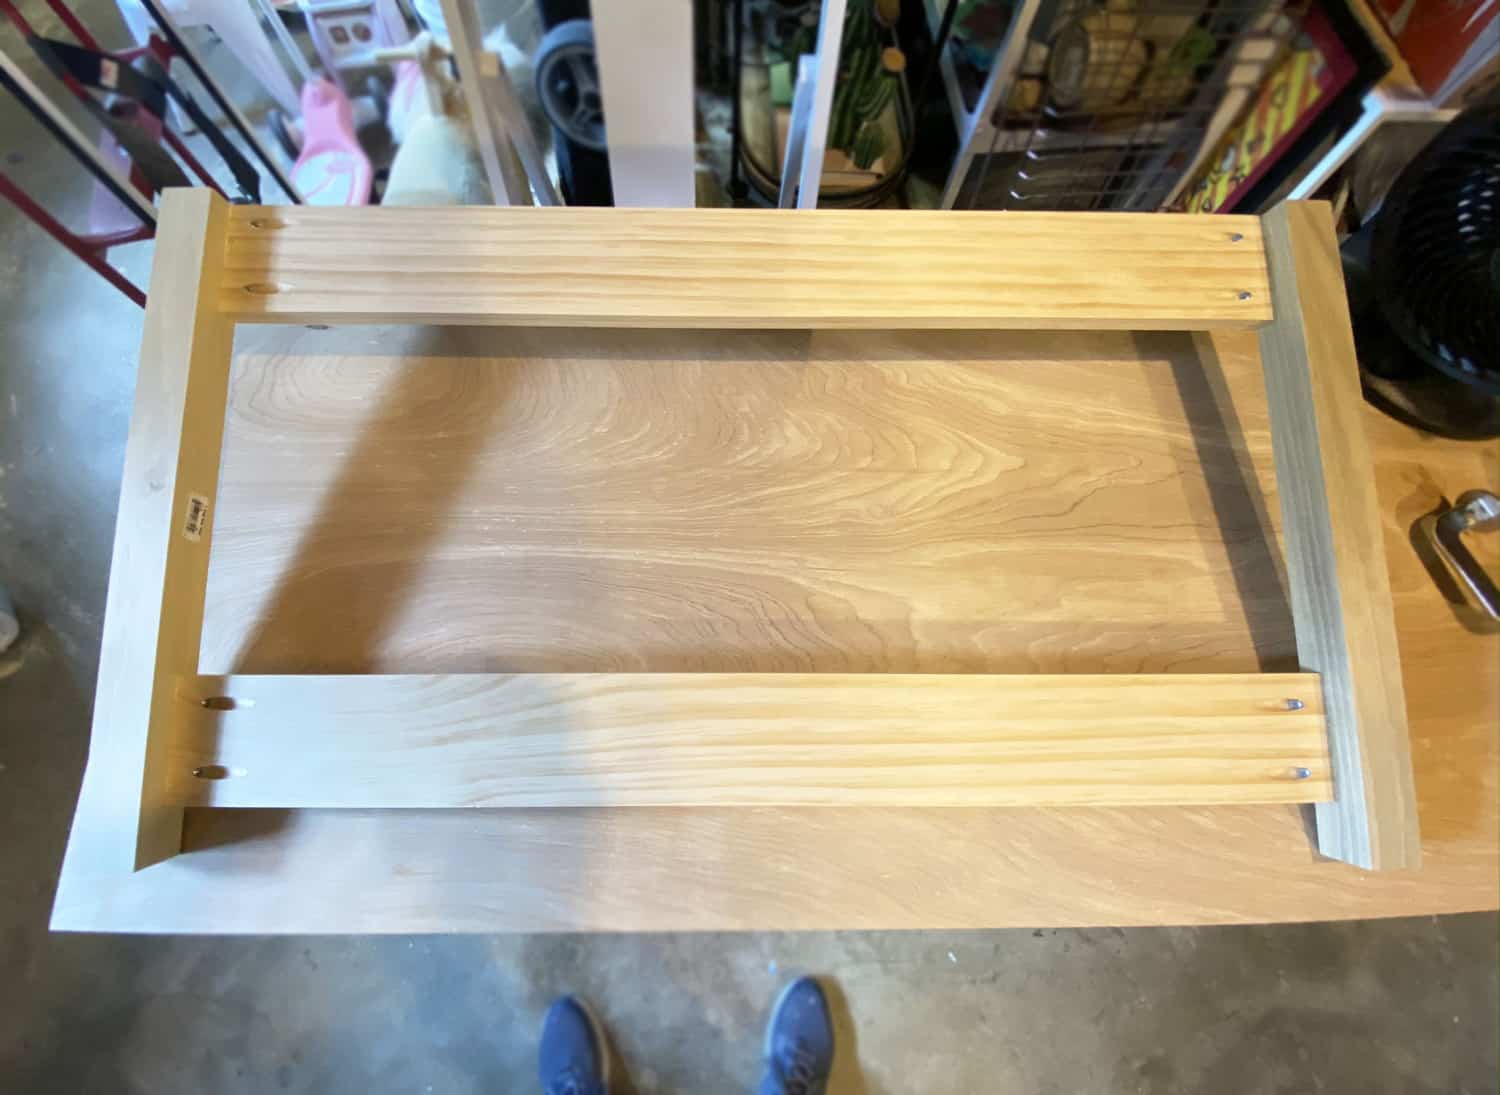 Start by cutting two pieces of your 4″ wide boards to 36.5″ in length and drill two pocket holes on each side of the boards as shown in the first picture above. Next, cut two of your 1 3/4″ square dowels to 23 1/8″ in length. Attach the 4″ wide boards to the square dowels with wood glue and pocket hole screws as shown above, leaving 2″ free on the bottom side. Now you have the front of the toy box frame finished. Repeat these exact steps to create the back side of the toy box.
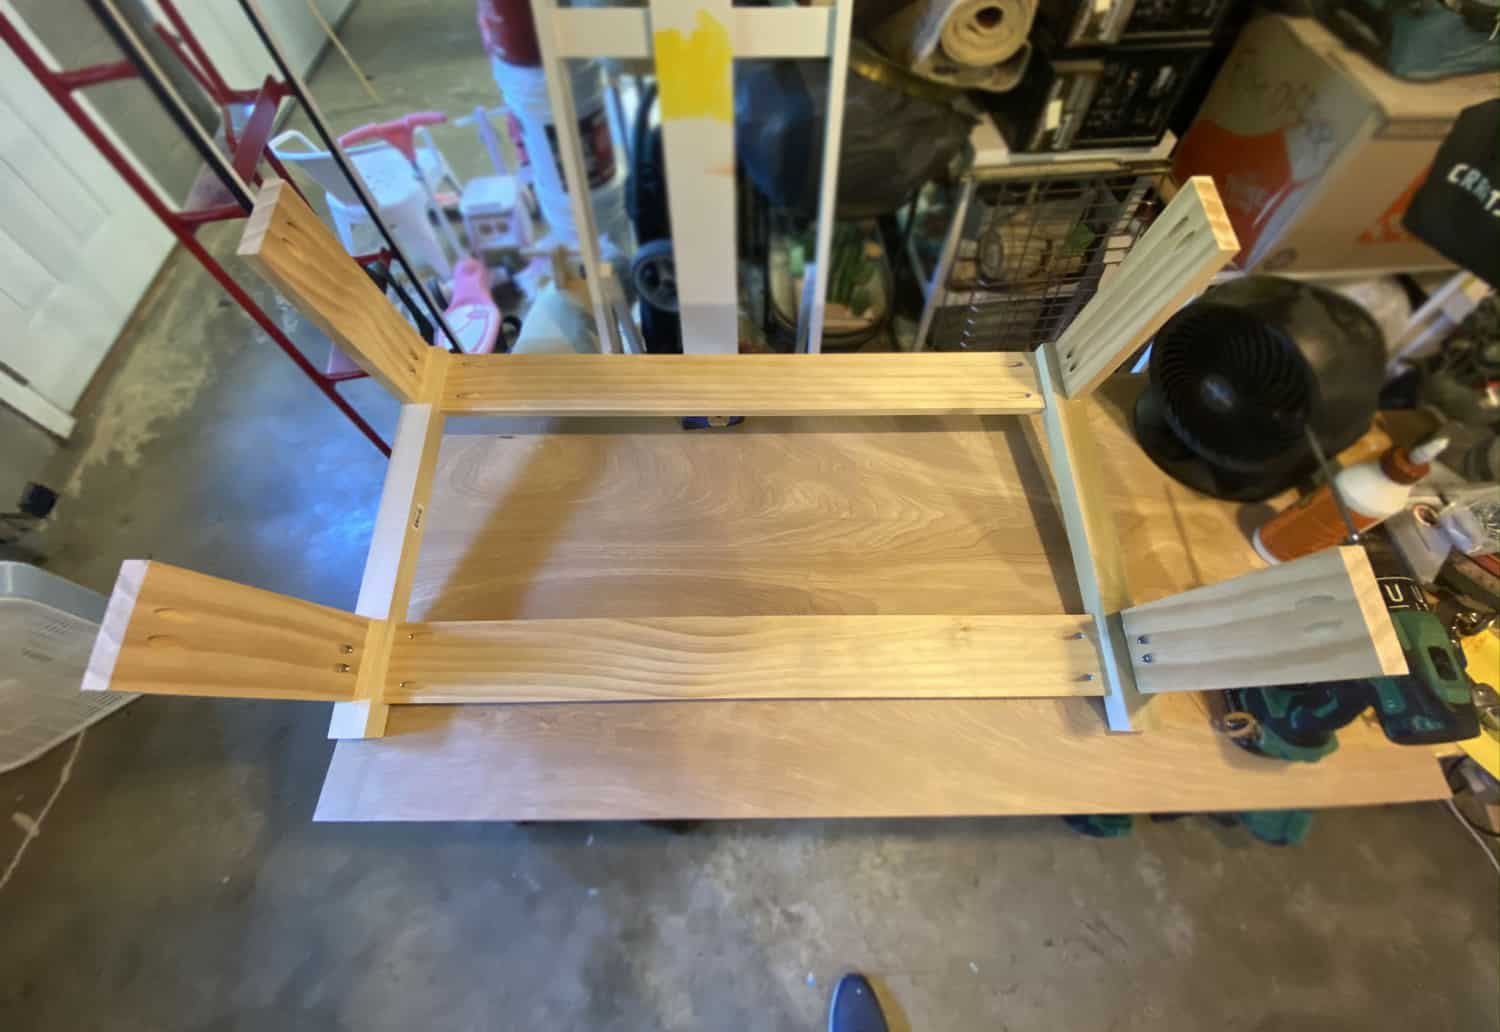
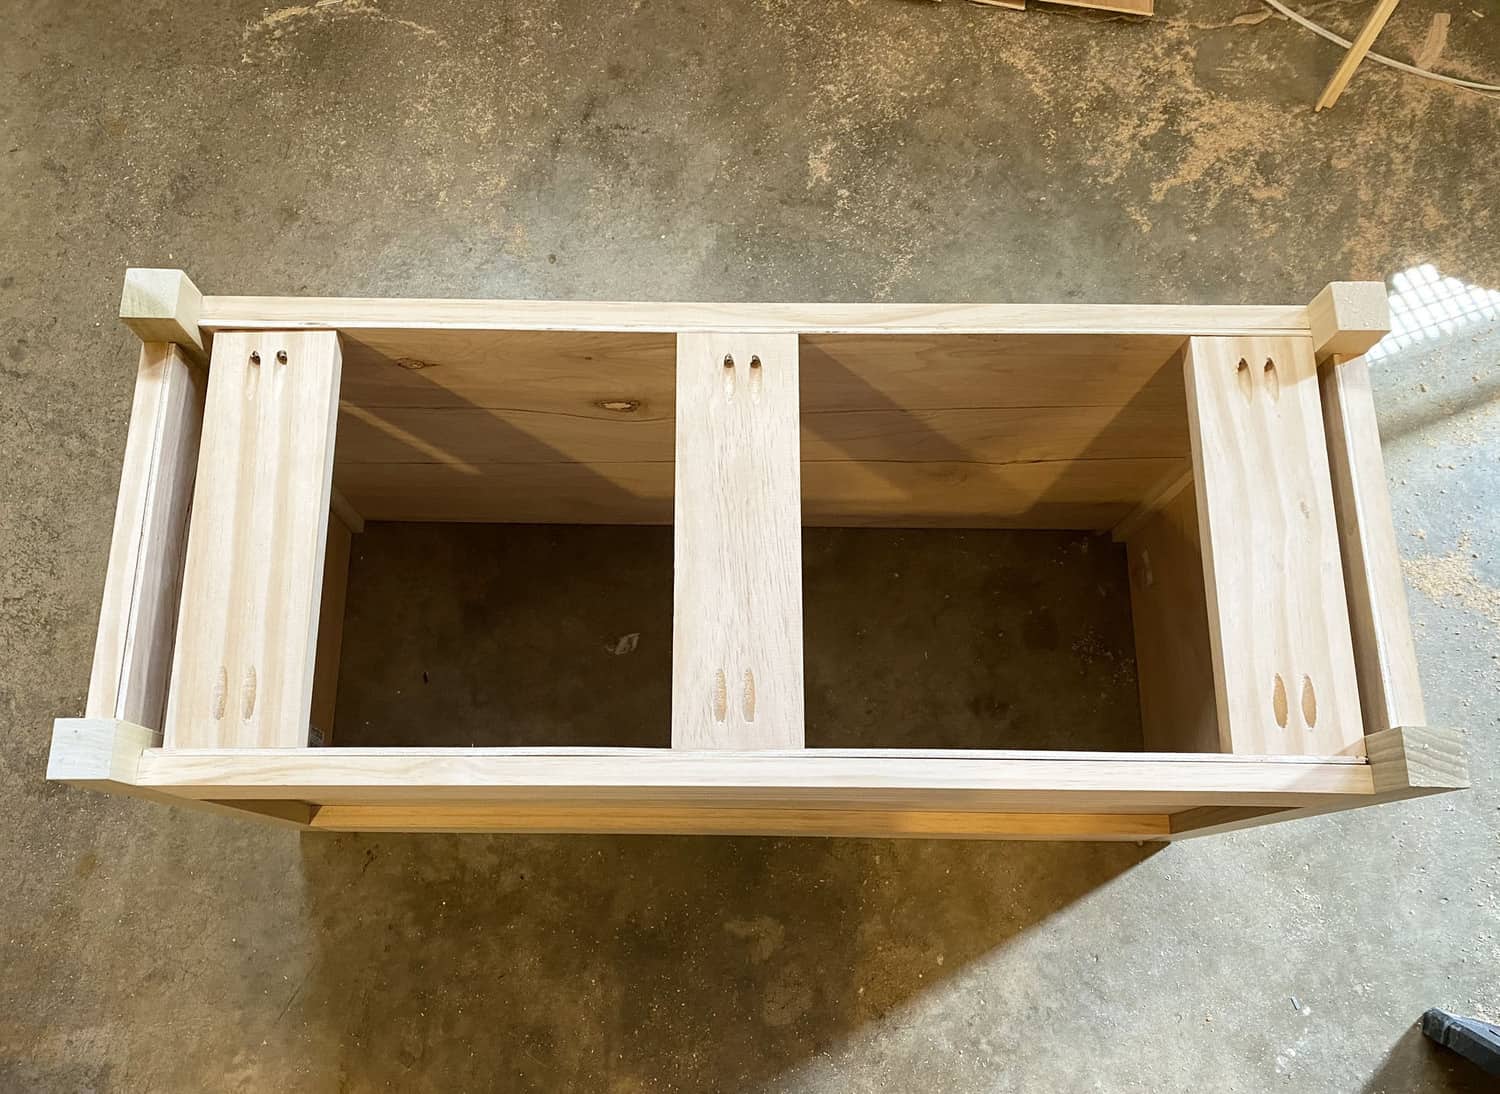
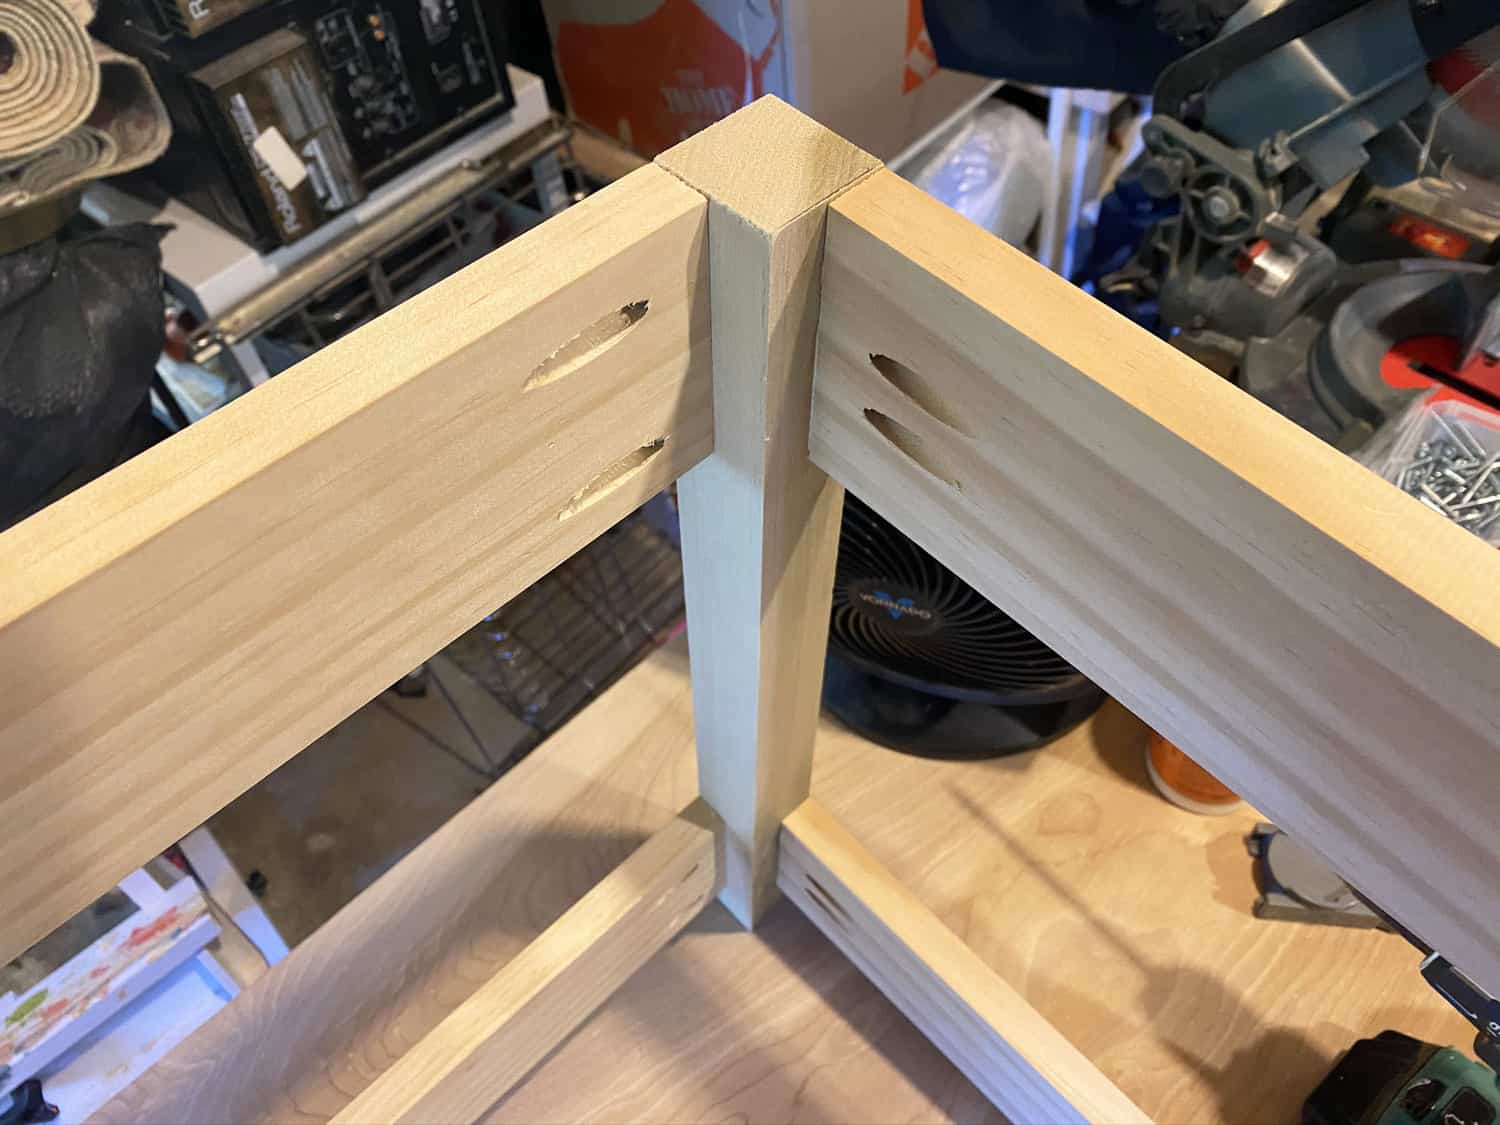 Next, cut four pieces of your 4″ wide boards to 12 1/2″ in length and drill 2 pocket holes on either side and attach them with wood glue and pocket screws to the back frame piece, in line with the other 4″ boards to create the sides.
 Take the front frame piece and attach it to the four 4″ side boards to complete the whole frame of the toy box. Next, measure the inside of each side of the toy box and cut pieces of 1/4″ plywood to fit in each side and attach with wood glue and a nail gun.
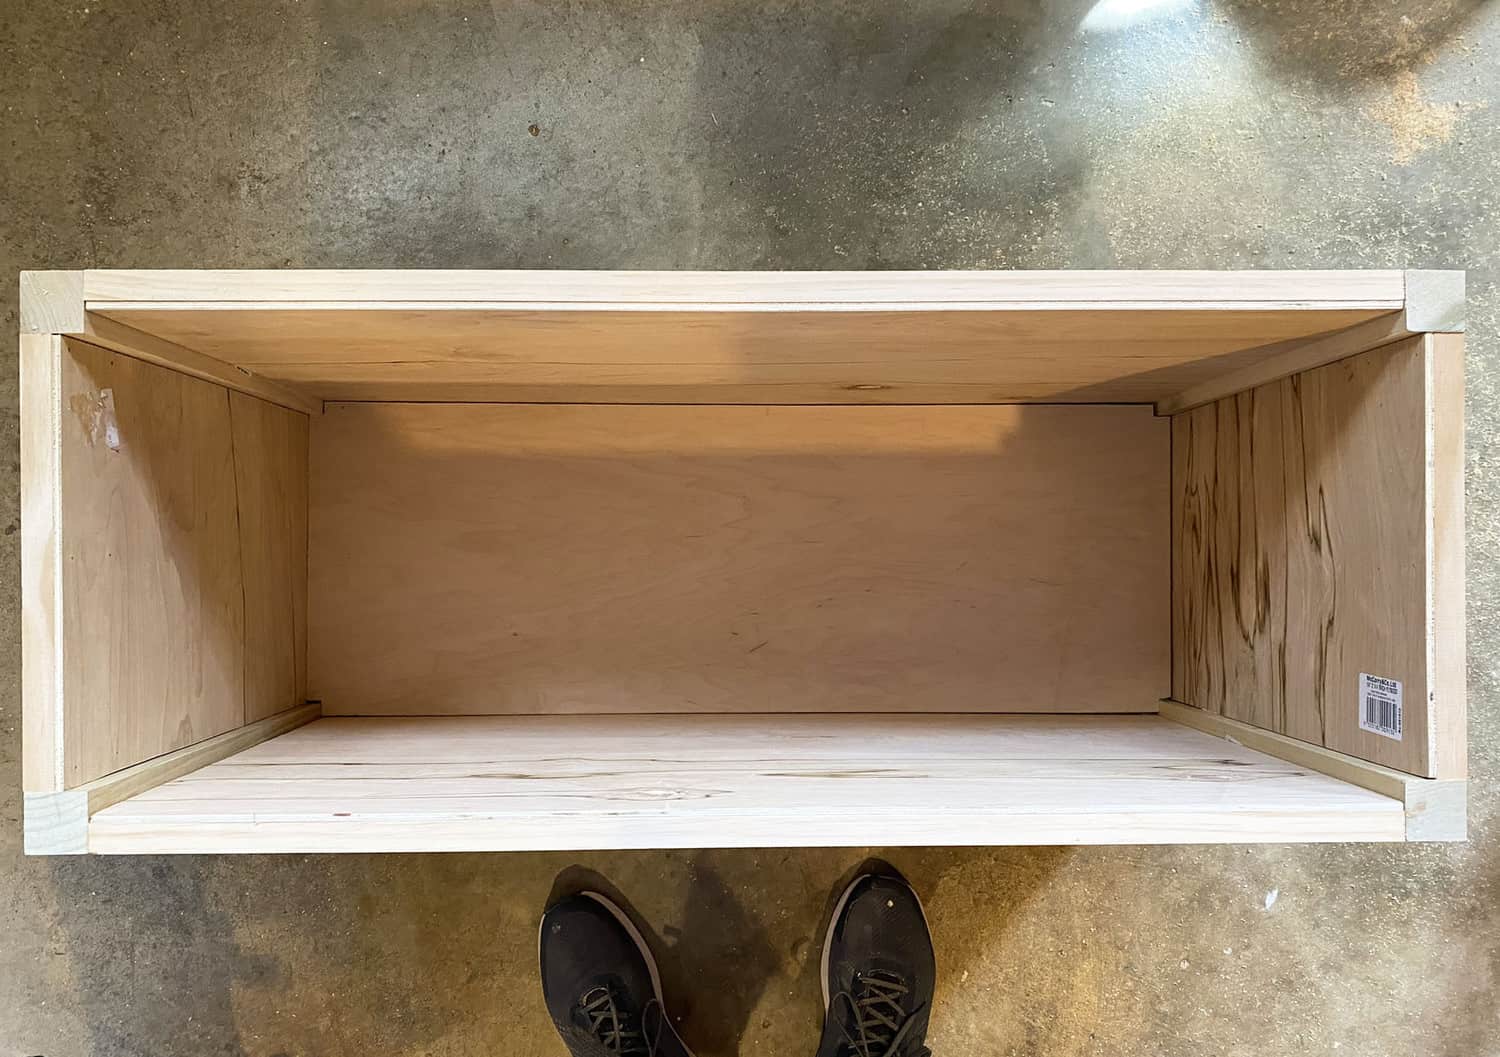 Flip the toy box upside down, measure the inside width of the toy box and cut three pieces of 4″ boards to that length. Drill pocket holes in each side and attach them to be flush with the bottom of the walls of the box. This creates supports for the bottom of the inside of the box. With the box still upside down, place it on top of a piece of 1/4″ plywood and with a pencil, trace the inside shape of the box. Cut out the shape you traced and flip the box right side up and you should be able to place the plywood into the bottom of the box. Attach with glue and nail gun with the nails going into those support boards placed underneath.
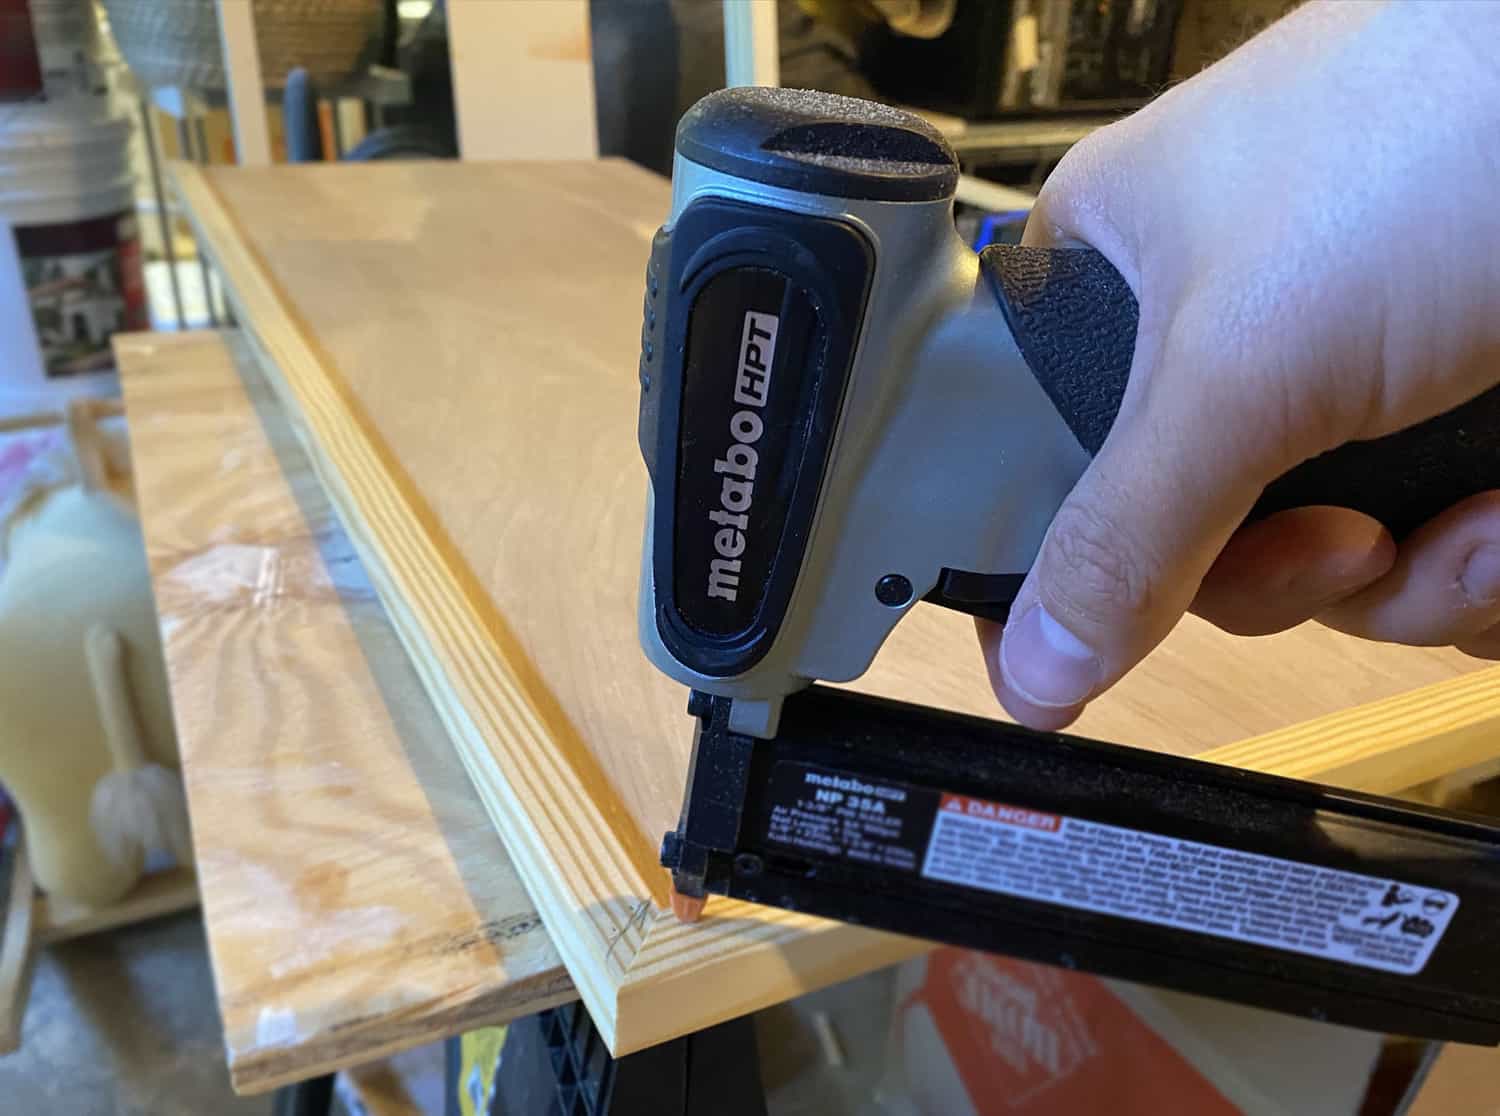 For the lid of the toy box, you want to take your 1/2″ plywood and cut it to 40 1/2″ x 16 1/2″. This creates a 1/2″ overhang on every side. Now, take your outside corner moulding and cut 4 pieces for each side of the lid, with 45-degree mitered angles and attach with wood glue and a nail gun.
 Lastly, attach the lid with the hinges and lid support hinge. Attach letters if you want and caulk any cracks or gaps if painting.
Here are some completed photos!
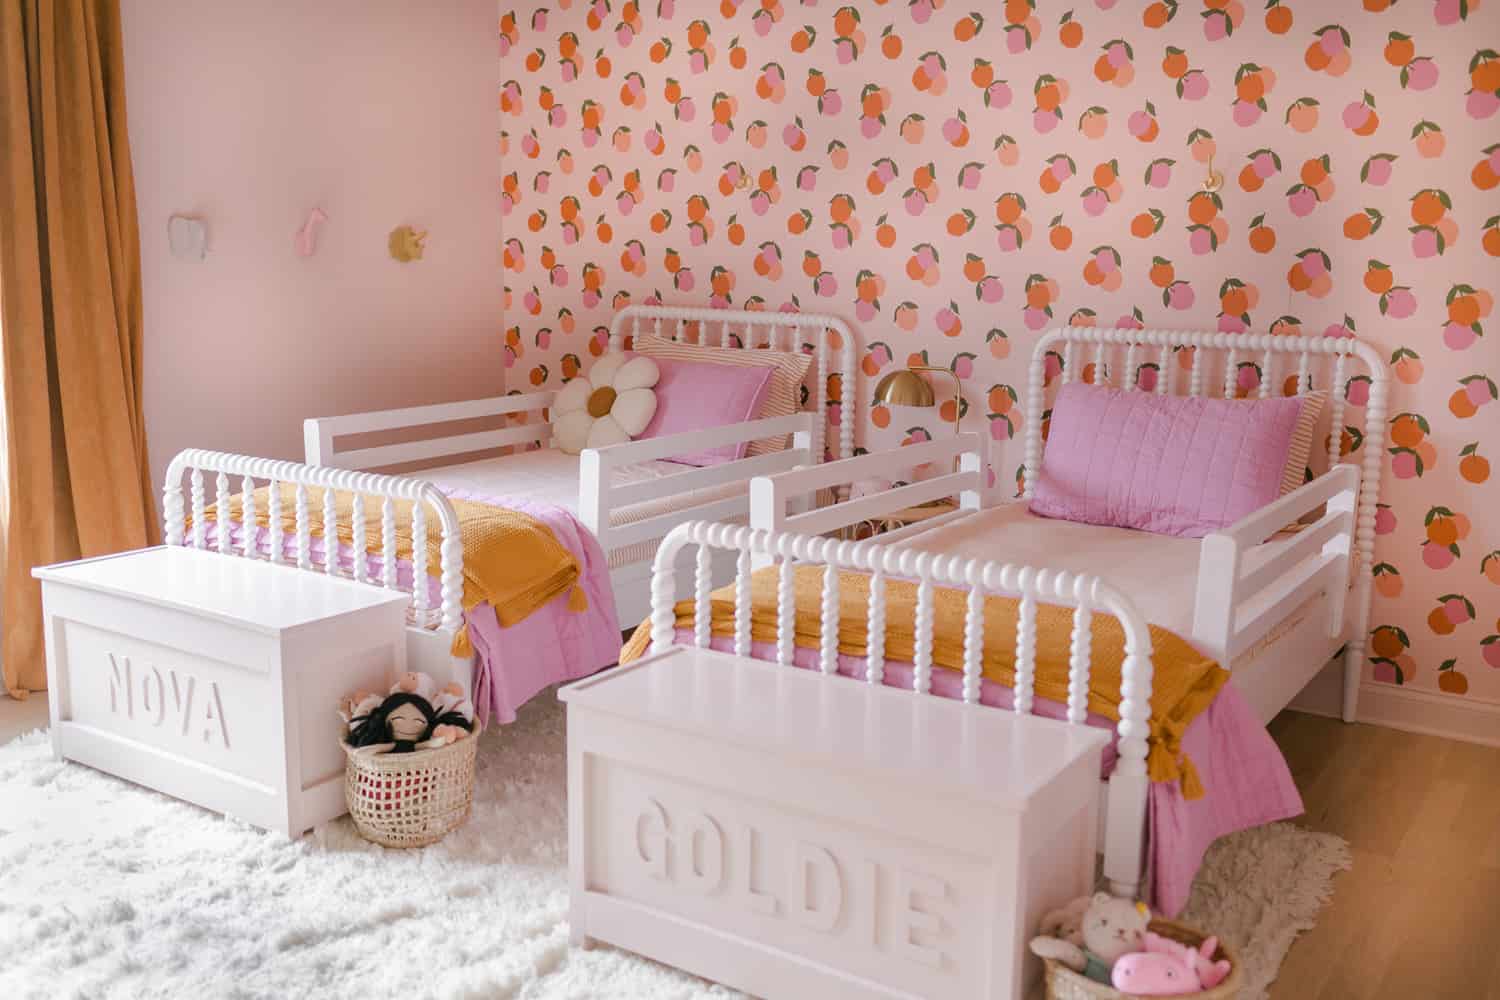
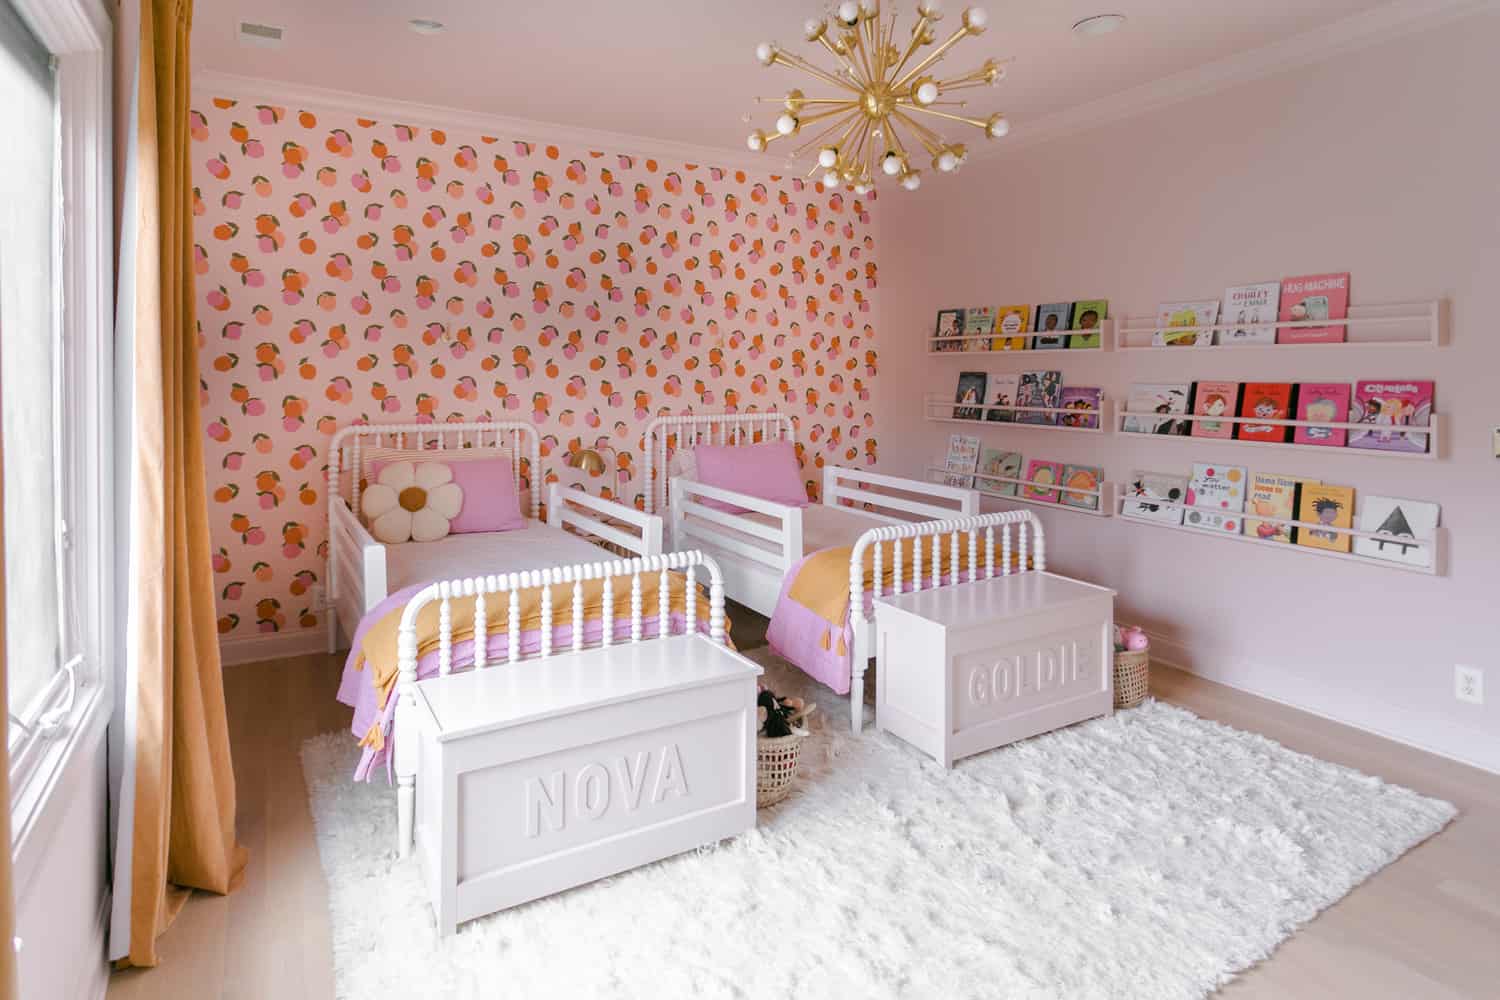
 I’m excited to see how the girls fill these with treasures as they grow! I also have in mind that we can always repaint them as they grow to fit new styles.
If you’d like to see the full tour of our girls’ shared room, click here.
Thanks so much for reading! Elsie + Collin
Elsie and Collin, I’m so grateful for this DIY! My daughter will definitely love it! Her room even has a perfect empty spot for one. For me, as a perfectionist, this is ideal! Hopefully, she will pick up her toys more often this way.
This is my 2021 favorite DIY! I think it will remain #1 too even though the year is young. Thanks, Collin!
I’ve been in love with these toy chests since Elsie shared glimpses at the girls’ room. I think it’s so special that in a share space that have a spot to keep things that are their own and the handmade and customized factor really are the cherries on top! And now we can try our hand at one. What! So neat.
I love these!
Laura