 I definitely blame the mom in me for it, but finishing Lola’s room first in our new home has been a big priority.
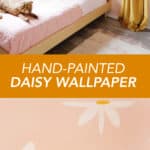
While I didn’t have a big vision for what I wanted to do with each room in the house before we moved in (buying a home over Skype while in another state is not easy!), I knew I wanted to do a fun pattern in Lola’s room since I had so much fun making her a custom hand-painted wallpaper in her nursery.
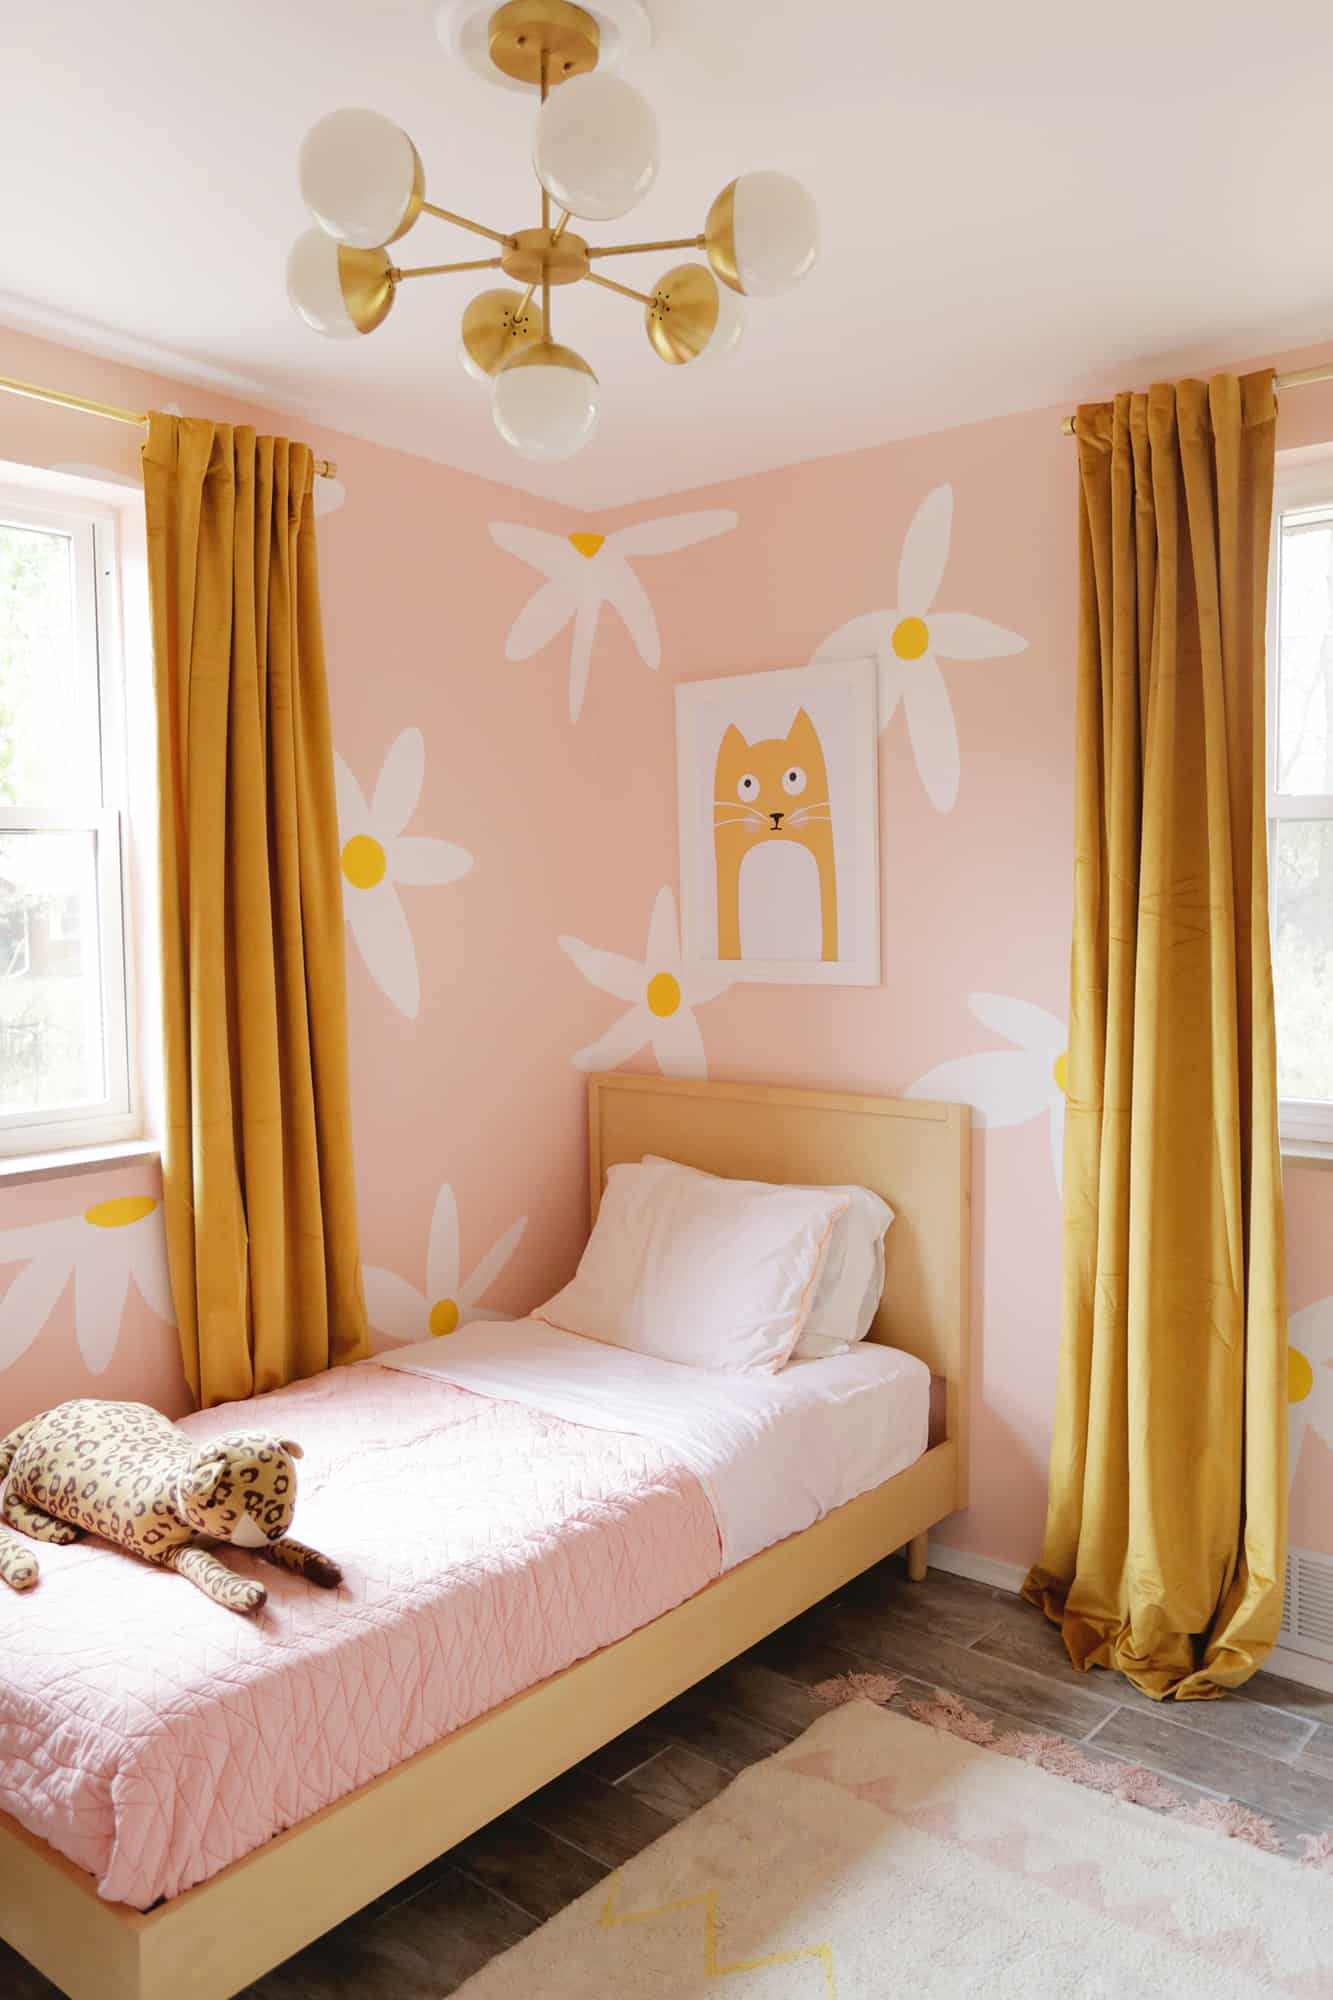
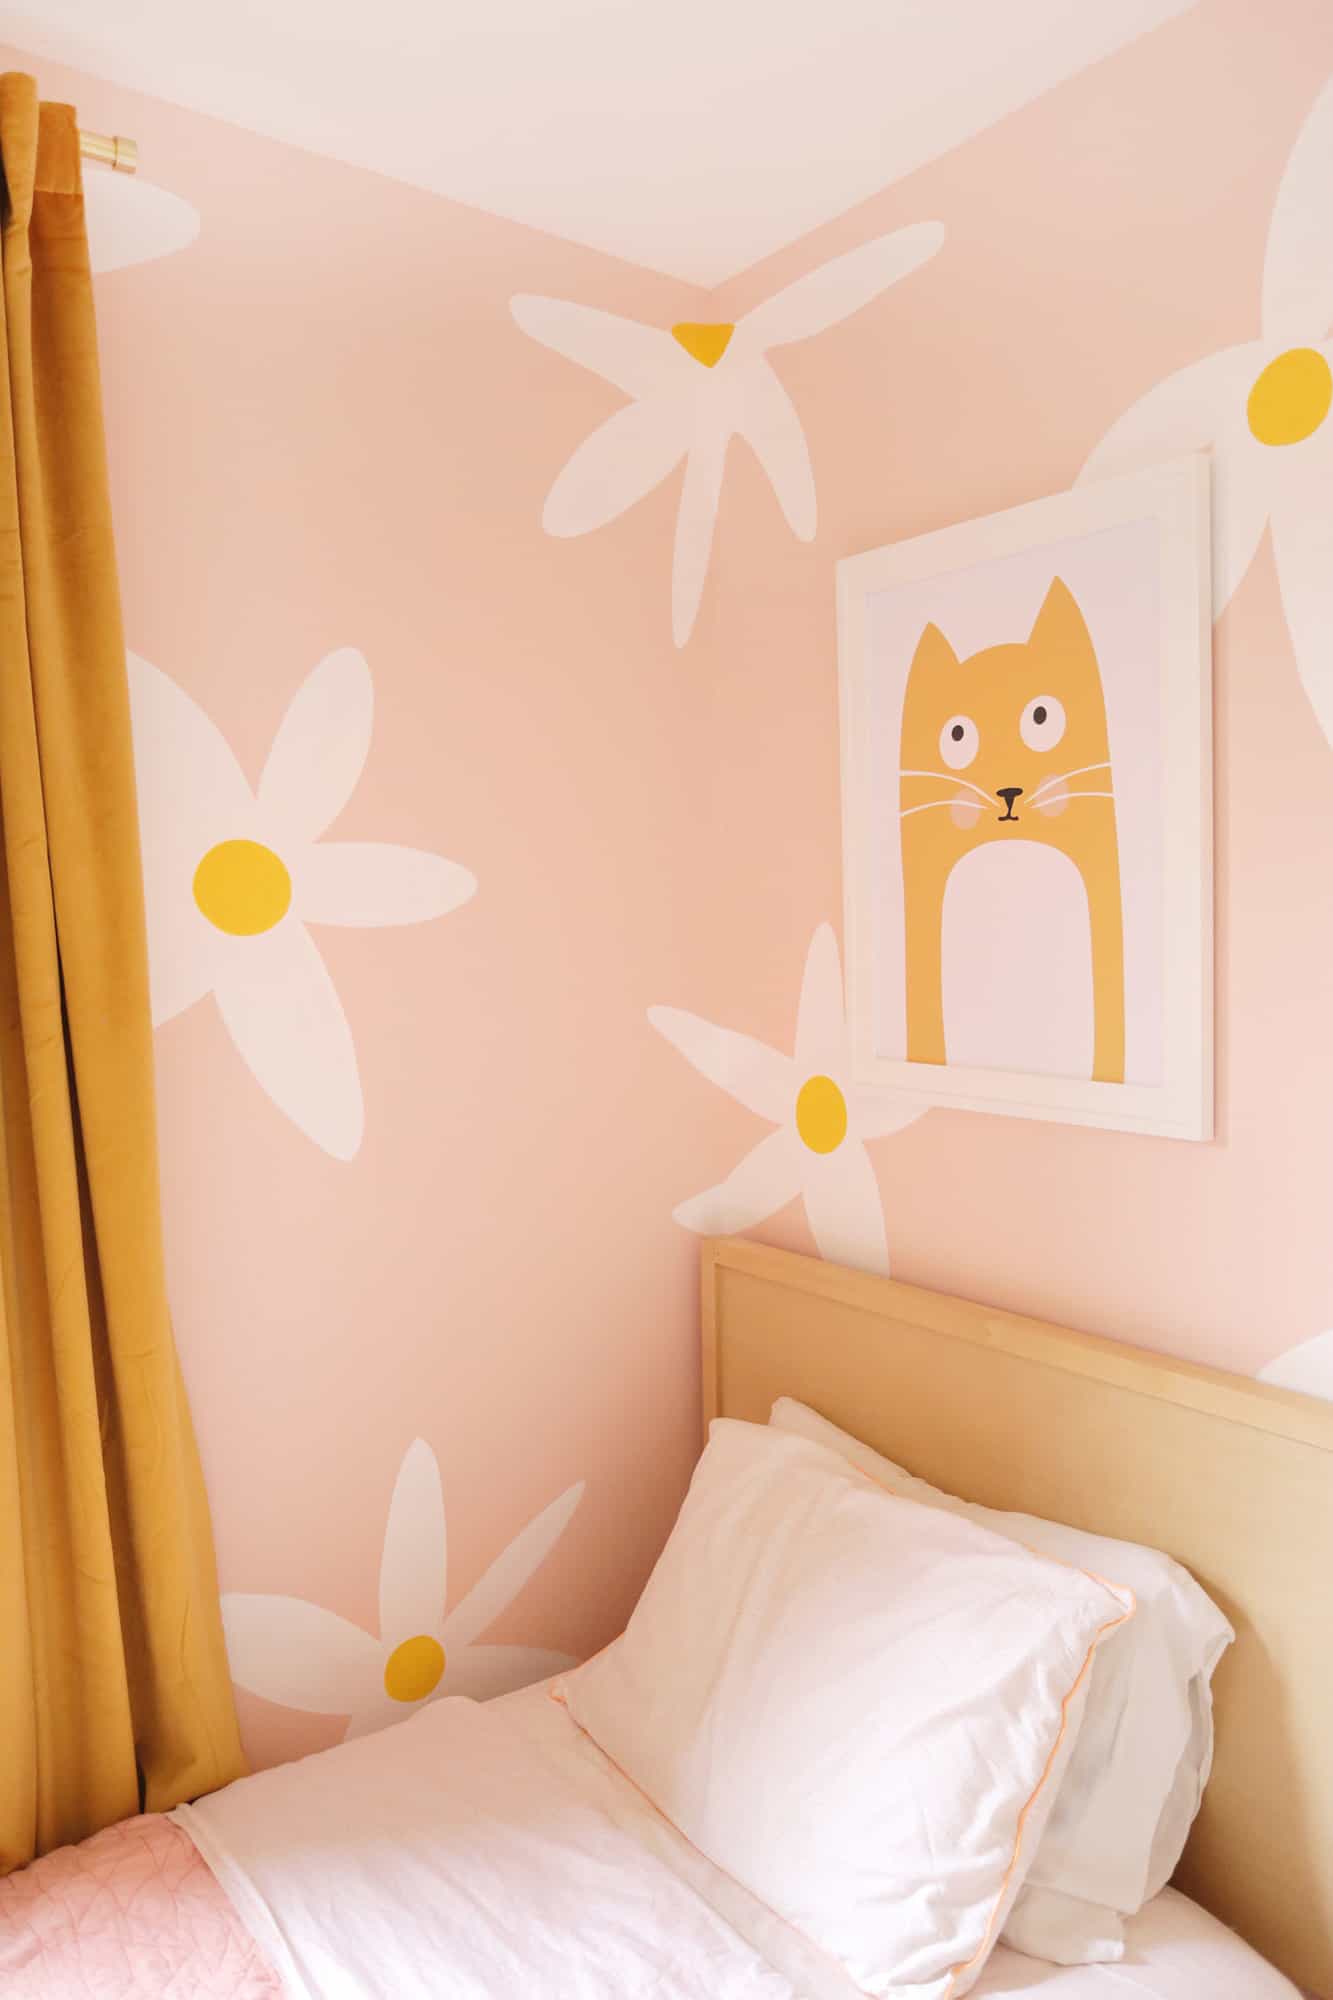
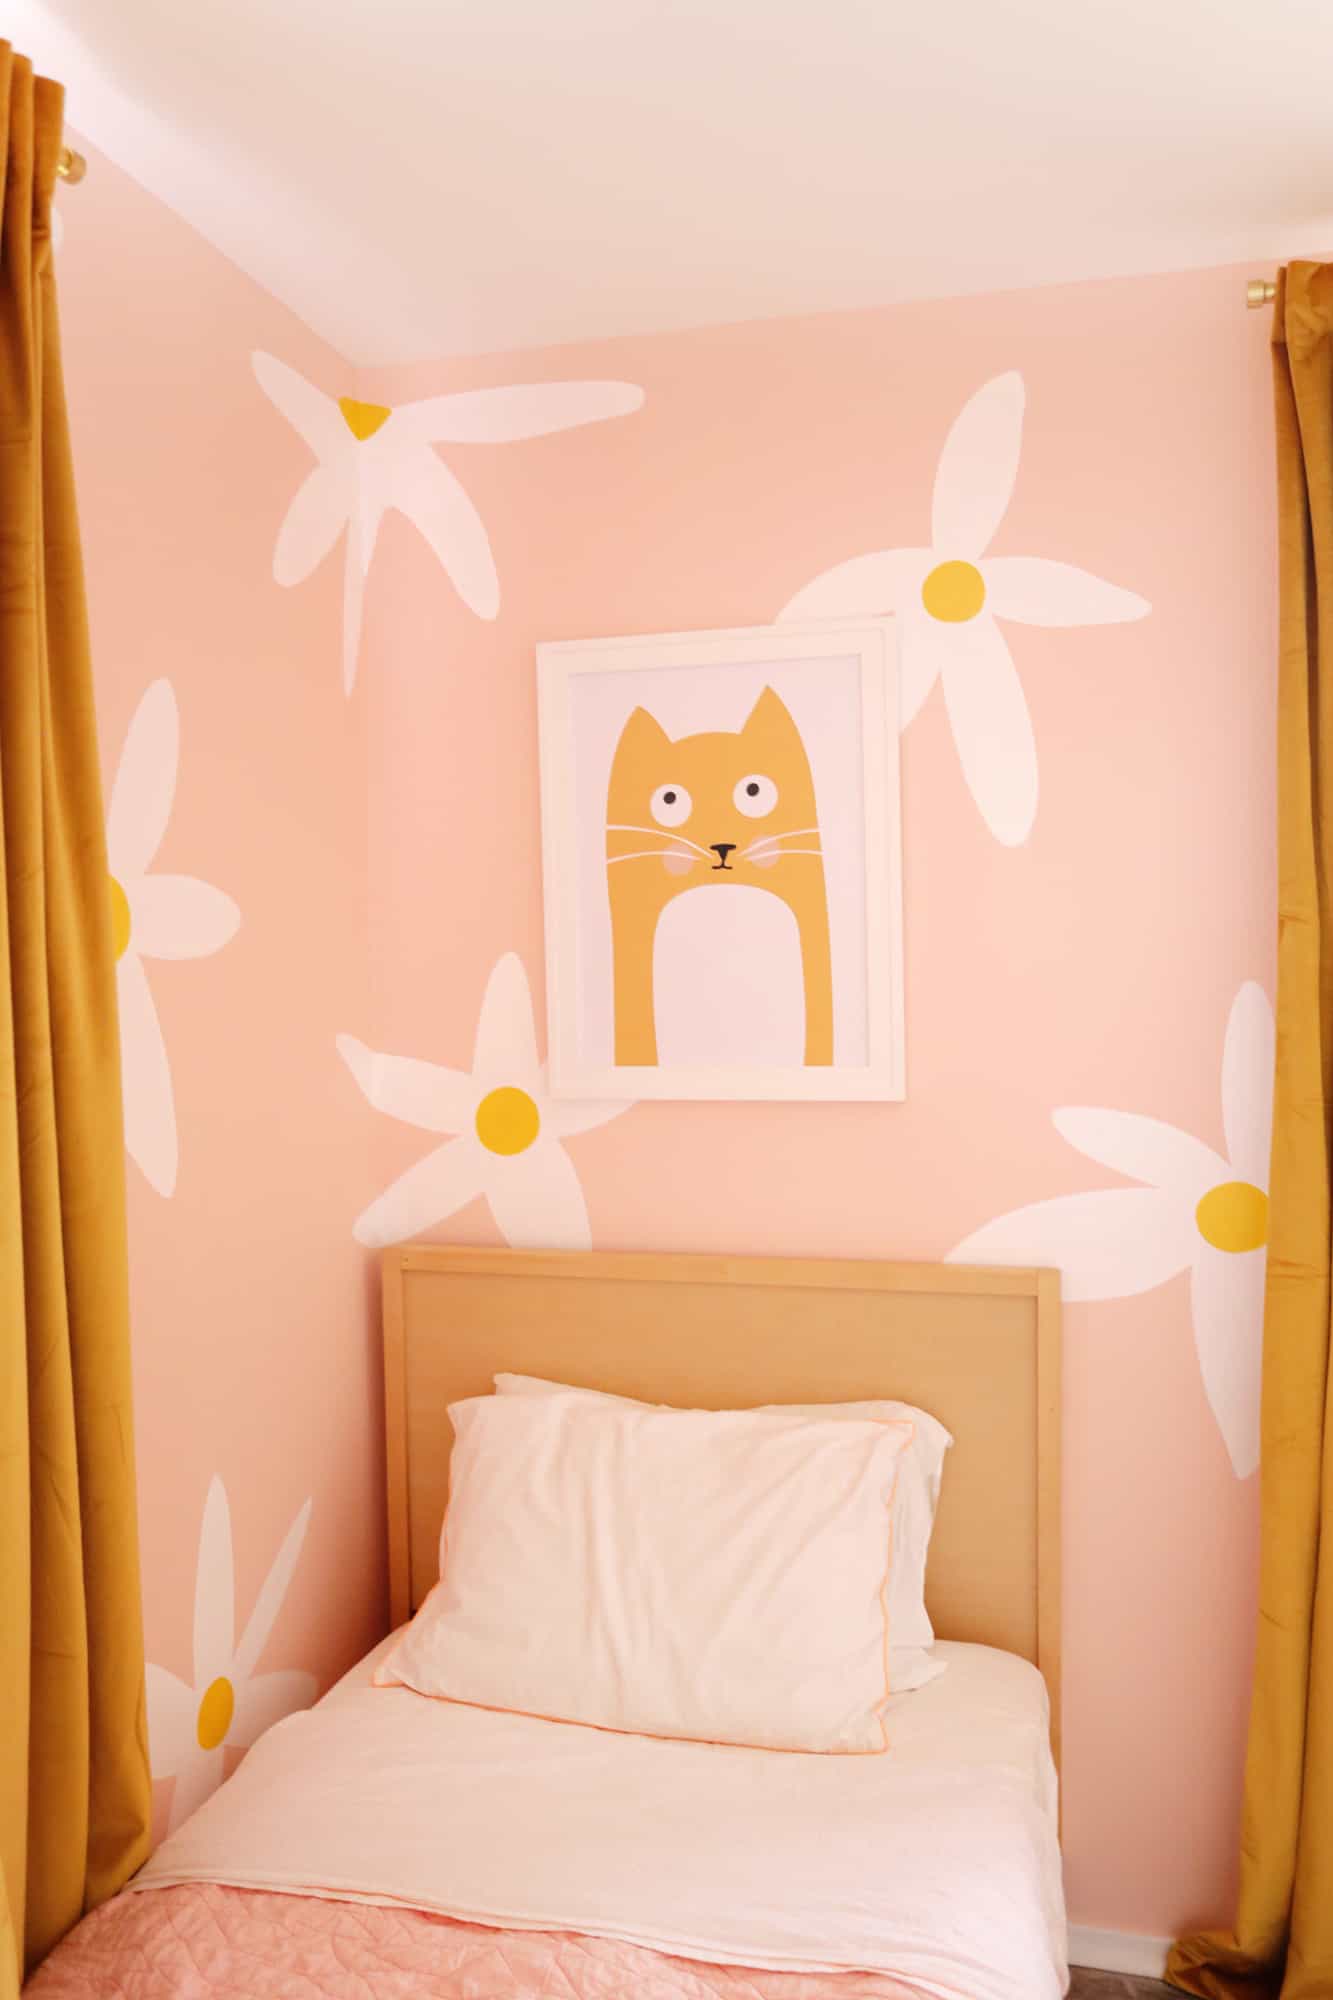
I’m mixing in some more ’70s decor in this house, so I thought it would be fun to do a ’70s-inspired daisy print for her walls and do a free form daisy with a big center to make it look a little pop arty as well (and I love how this artist has some sideways daisies that make them look more like fried eggs, haha).
Sometimes hand-painted wallpaper can be a really big commitment, but this method of not being really precise with my shapes didn’t take that long and was pretty easy overall—and you don’t have to be an amazing artist to get it done either since the flowers are much more loosey-goosey in their shape. Here’s the basic gist of what I did …
Related: When to Wallpaper an Accent Wall
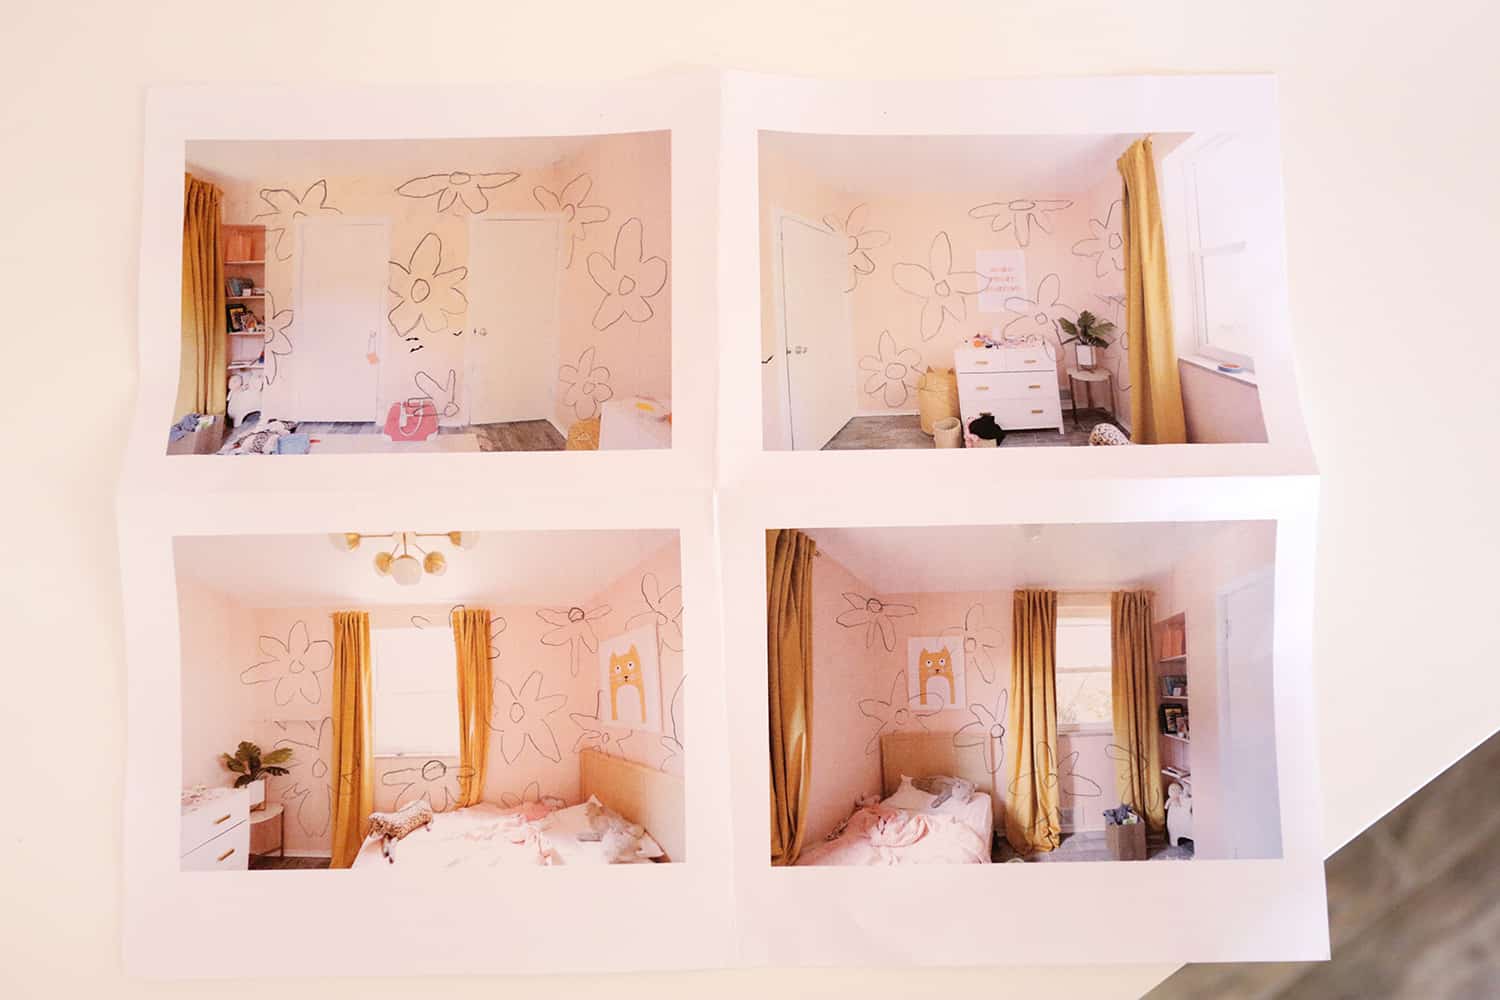 First, I like to plan out a pattern before it goes on a wall so I have a general idea of what’s happening and where things are going.
If you have Photoshop skills you can do this in a program like that to determine placement, but I just decided to print out some pictures of each wall and then draw the flowers on by hand so it would be more organic and have that not-too-perfect quality I was going for.
If you’re going to be moving around the furniture in a room quite a bit, I would space out the flowers as though the items weren’t there so you have every area covered.
But Lola’s room is pretty small and there’s kind of only one option for the furniture, so I placed the flowers to work around what’s already there and didn’t feel the need to paint them behind her bed and dresser since they won’t be moved from those spots.
 So, first we painted the room with a pink color to get the base for the pattern and I used ECOS Paint Strawberry Whip as the base pink color.

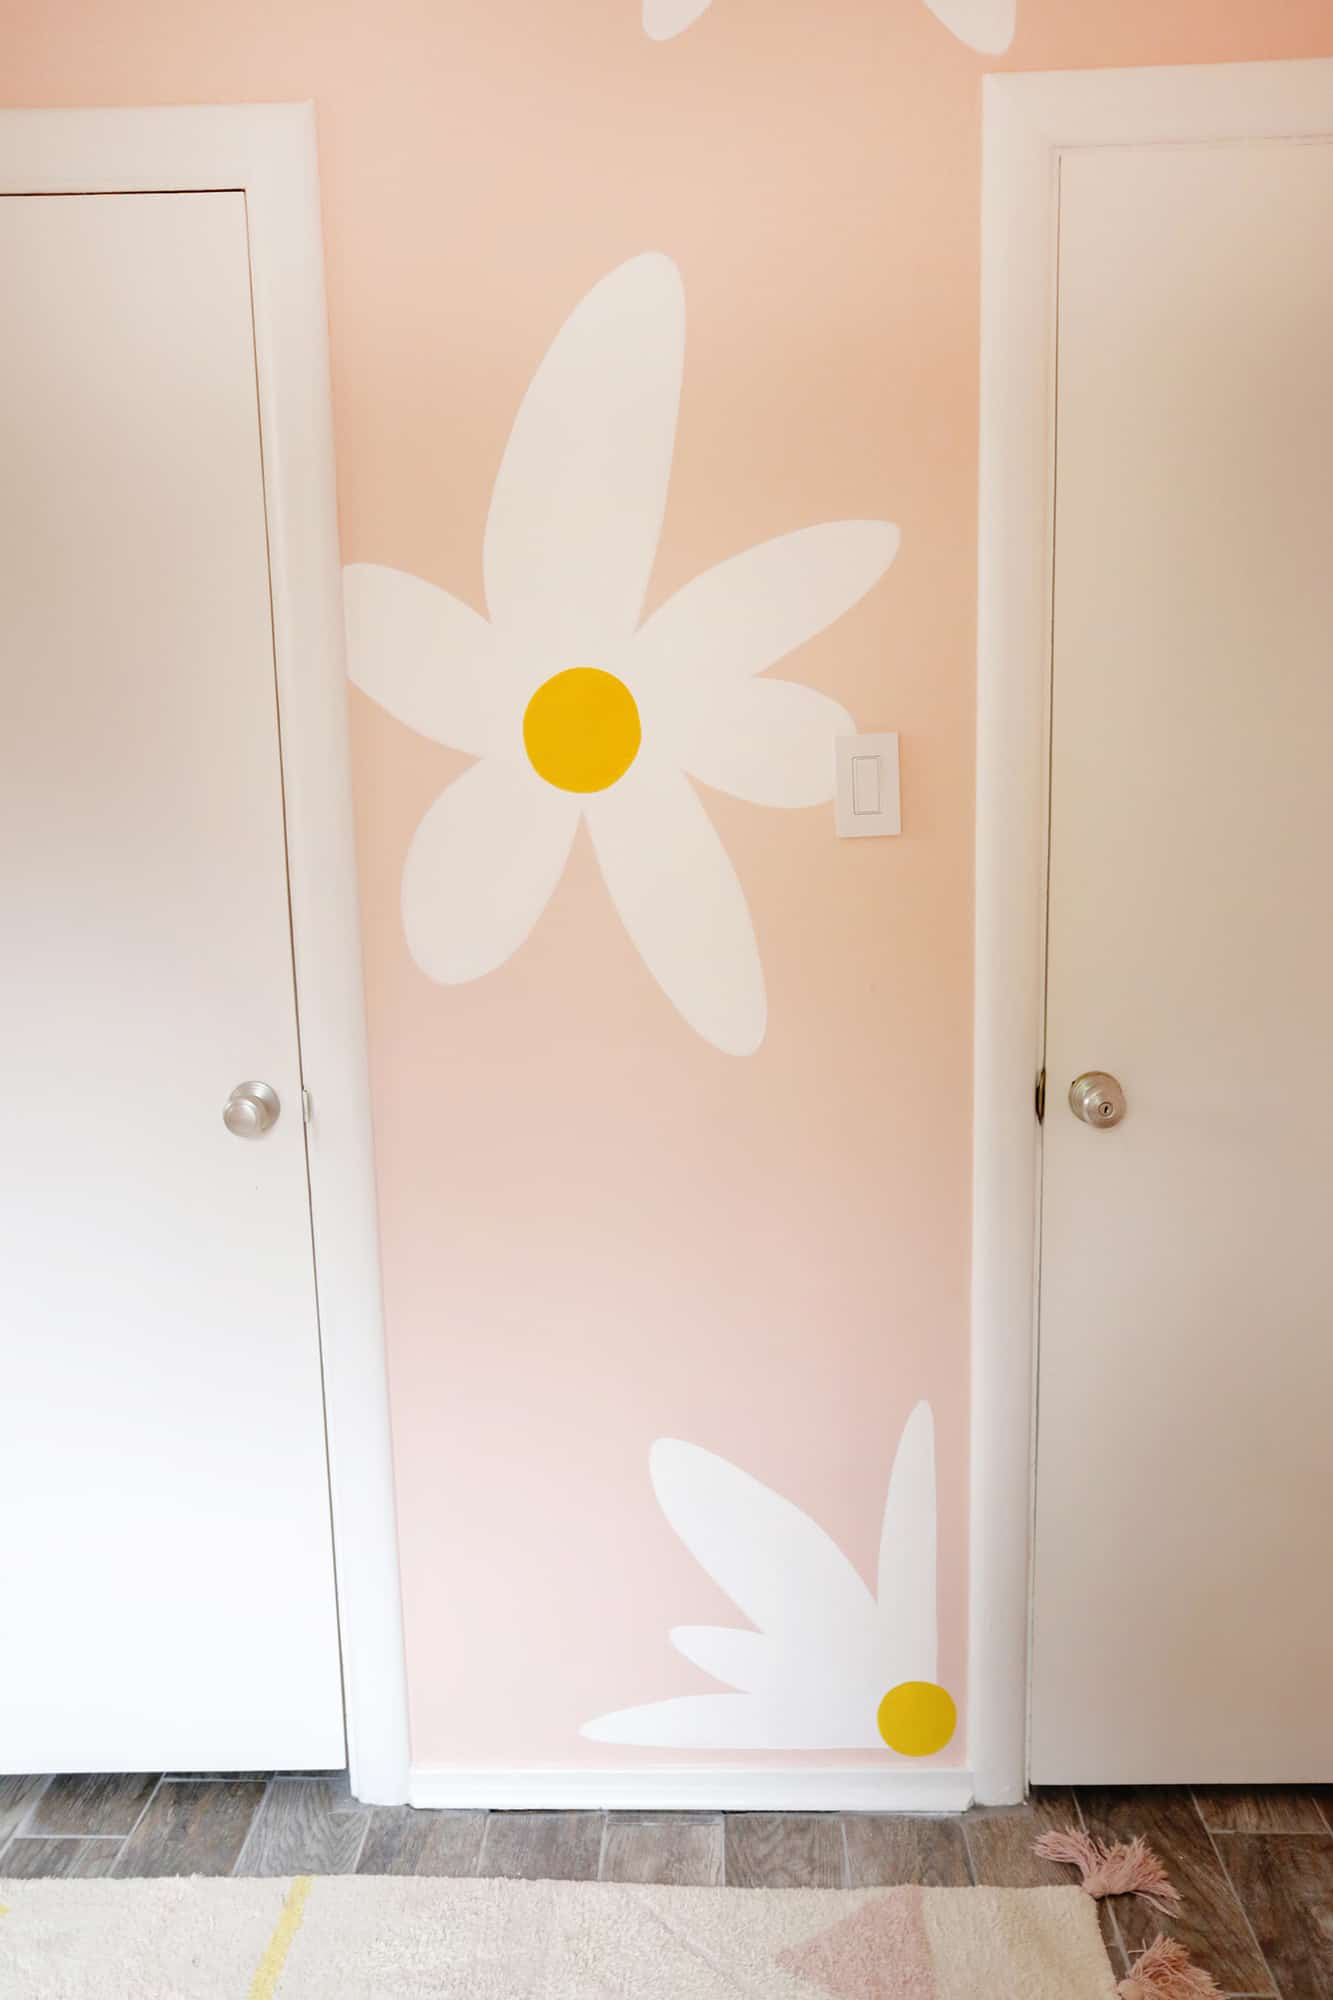
Next, I basically looked at my drawing for each wall and then used a smaller thinner paintbrush in the white flower color to make a quick outline of each flower.
The emphasis here is that it was a “quick” outline as I wanted to keep that imperfect flower look, but you can see places where I made a flower petal bigger if I stepped back and felt a petal looked too small.
Once you fill in the whole flower, you’ll go right over the smaller line, so I didn’t worry about trying to erase the smaller petal markings.
 Once the outlines were in, I used a bigger brush to fill in the whole flower (with untinted white wall paint) and let the paint dry.
You’ll get a different look (more or less opaque) depending on how many coats of paint you use, so if you like the more sketchy look then you may just want one or two coats of white (I ended up doing three coats).
Now that we live in Pittsburgh where my parents live, my mom actually helped me fill in the flowers and it was really sweet to work on that together! She was an art teacher so she’s basically a pro at all things like this …
For painting shapes like this, I would try a soft angled 1.5″ brush to make the overall shape and then an angled 2.5″ brush to fill it in.
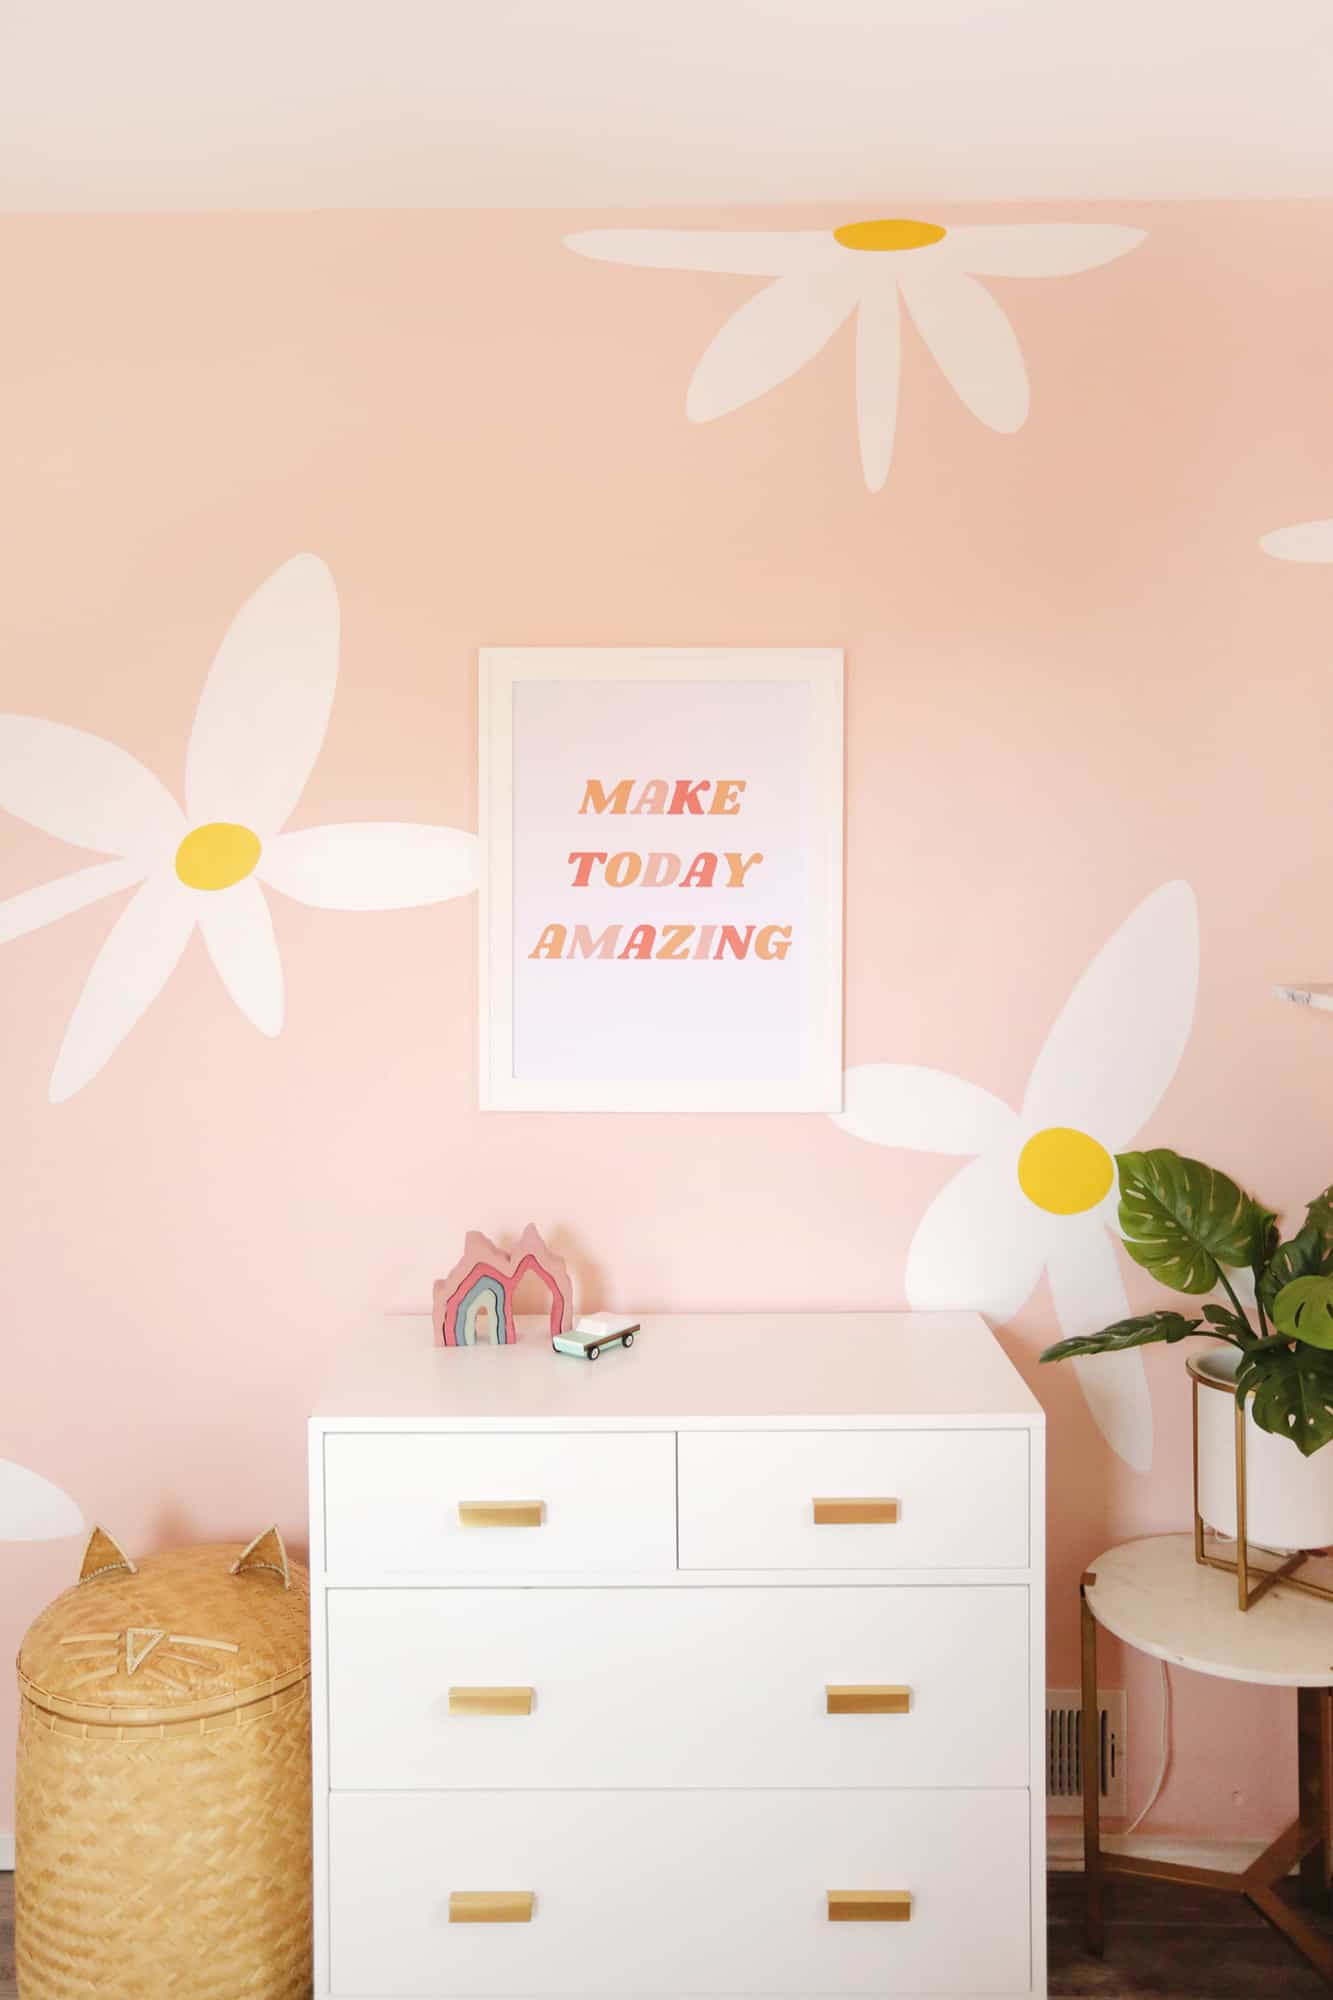
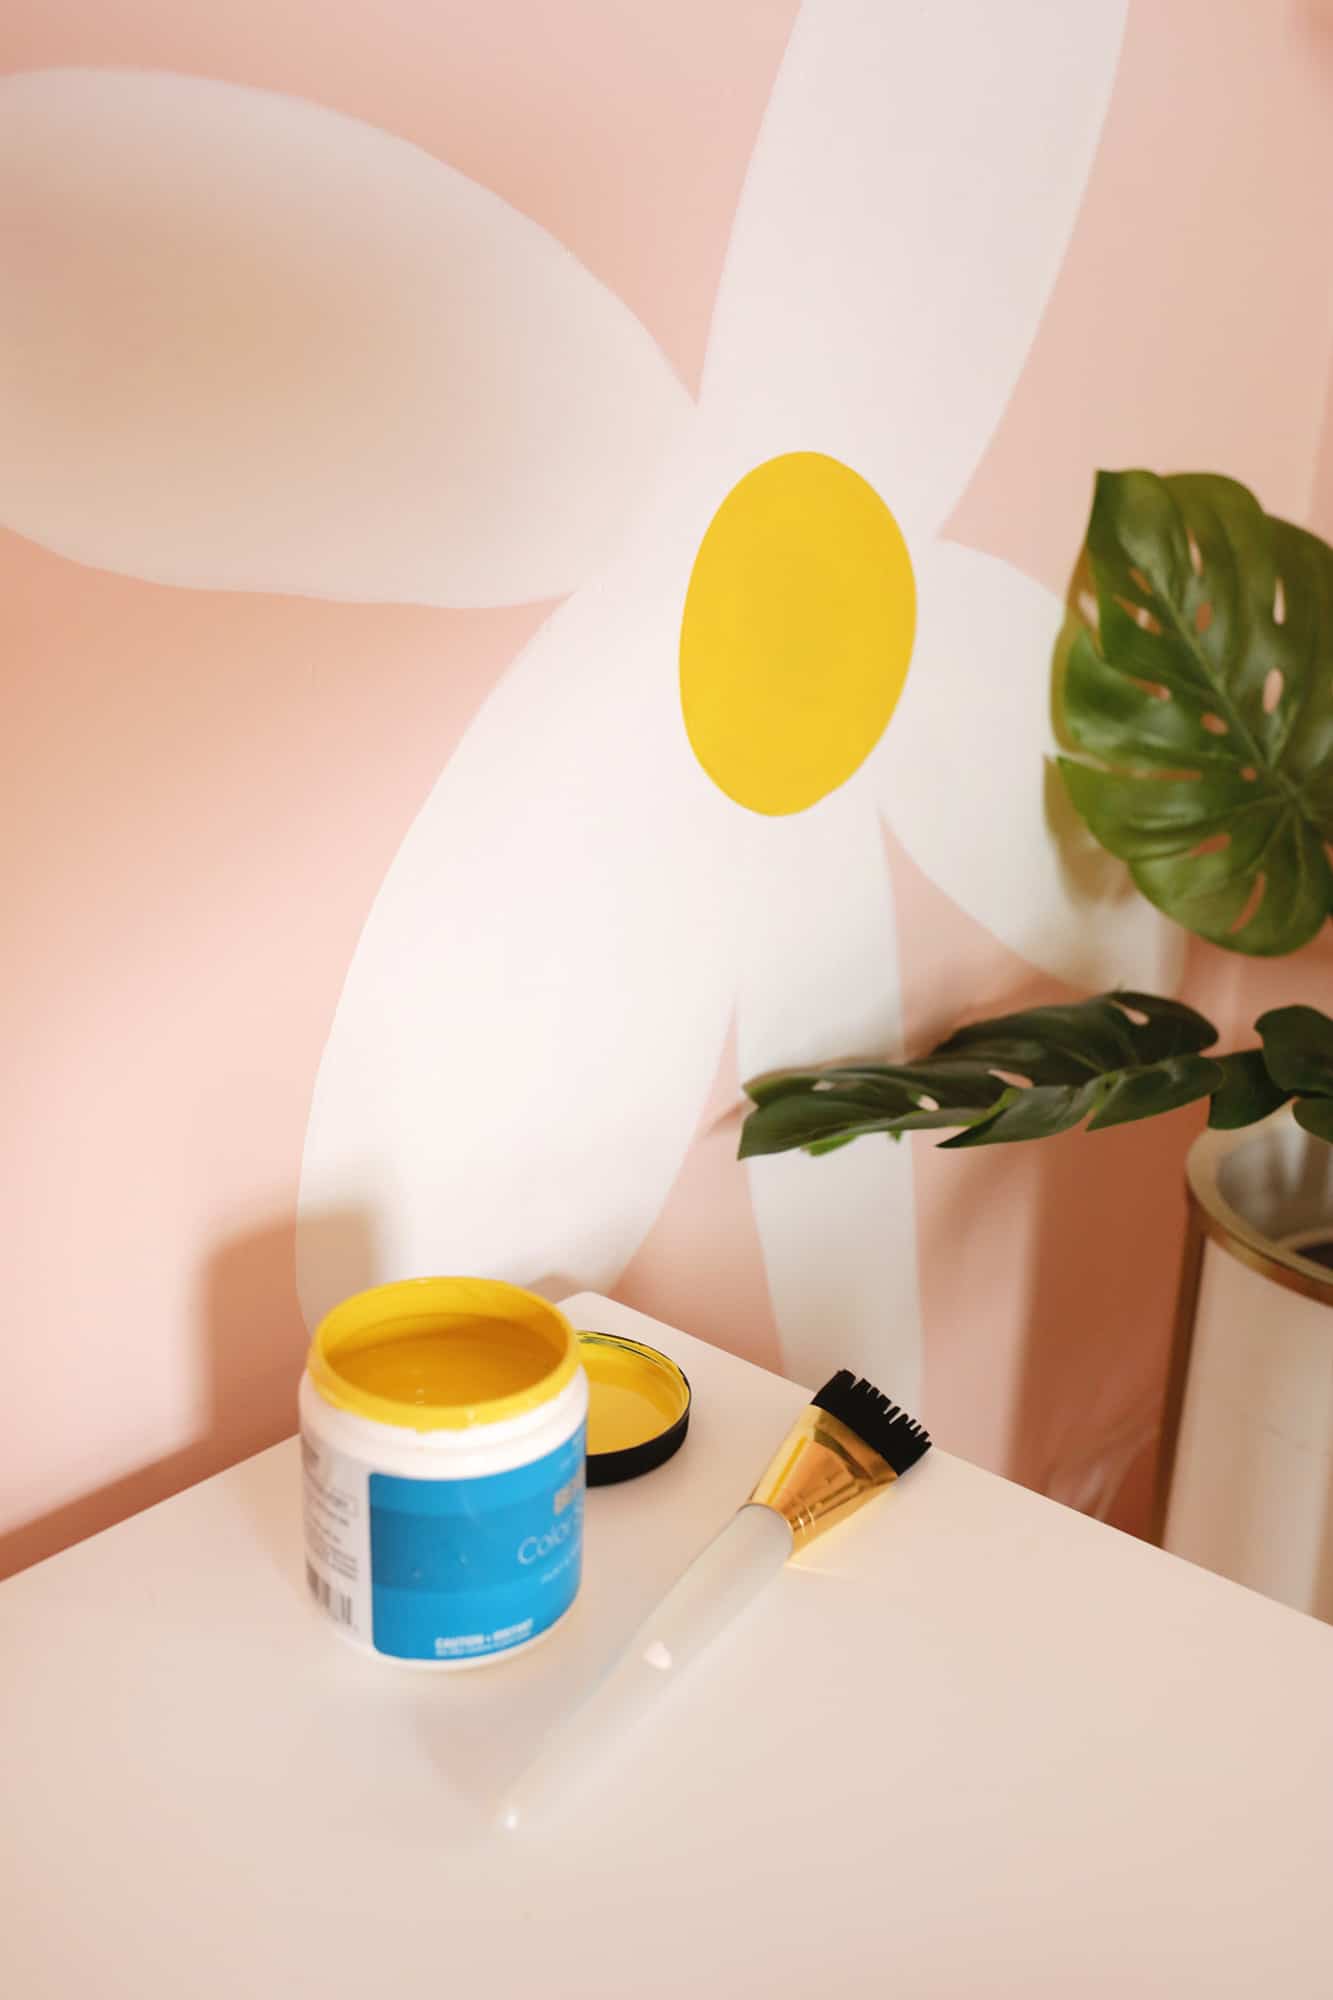 Once we had the white flowers filled in, I took my mustard yellow color (Mustard Glaze by Valspar) and made large imperfect circles for the centers of the daisies.
 Once the centers were on the flowers, the wallpaper was complete!!
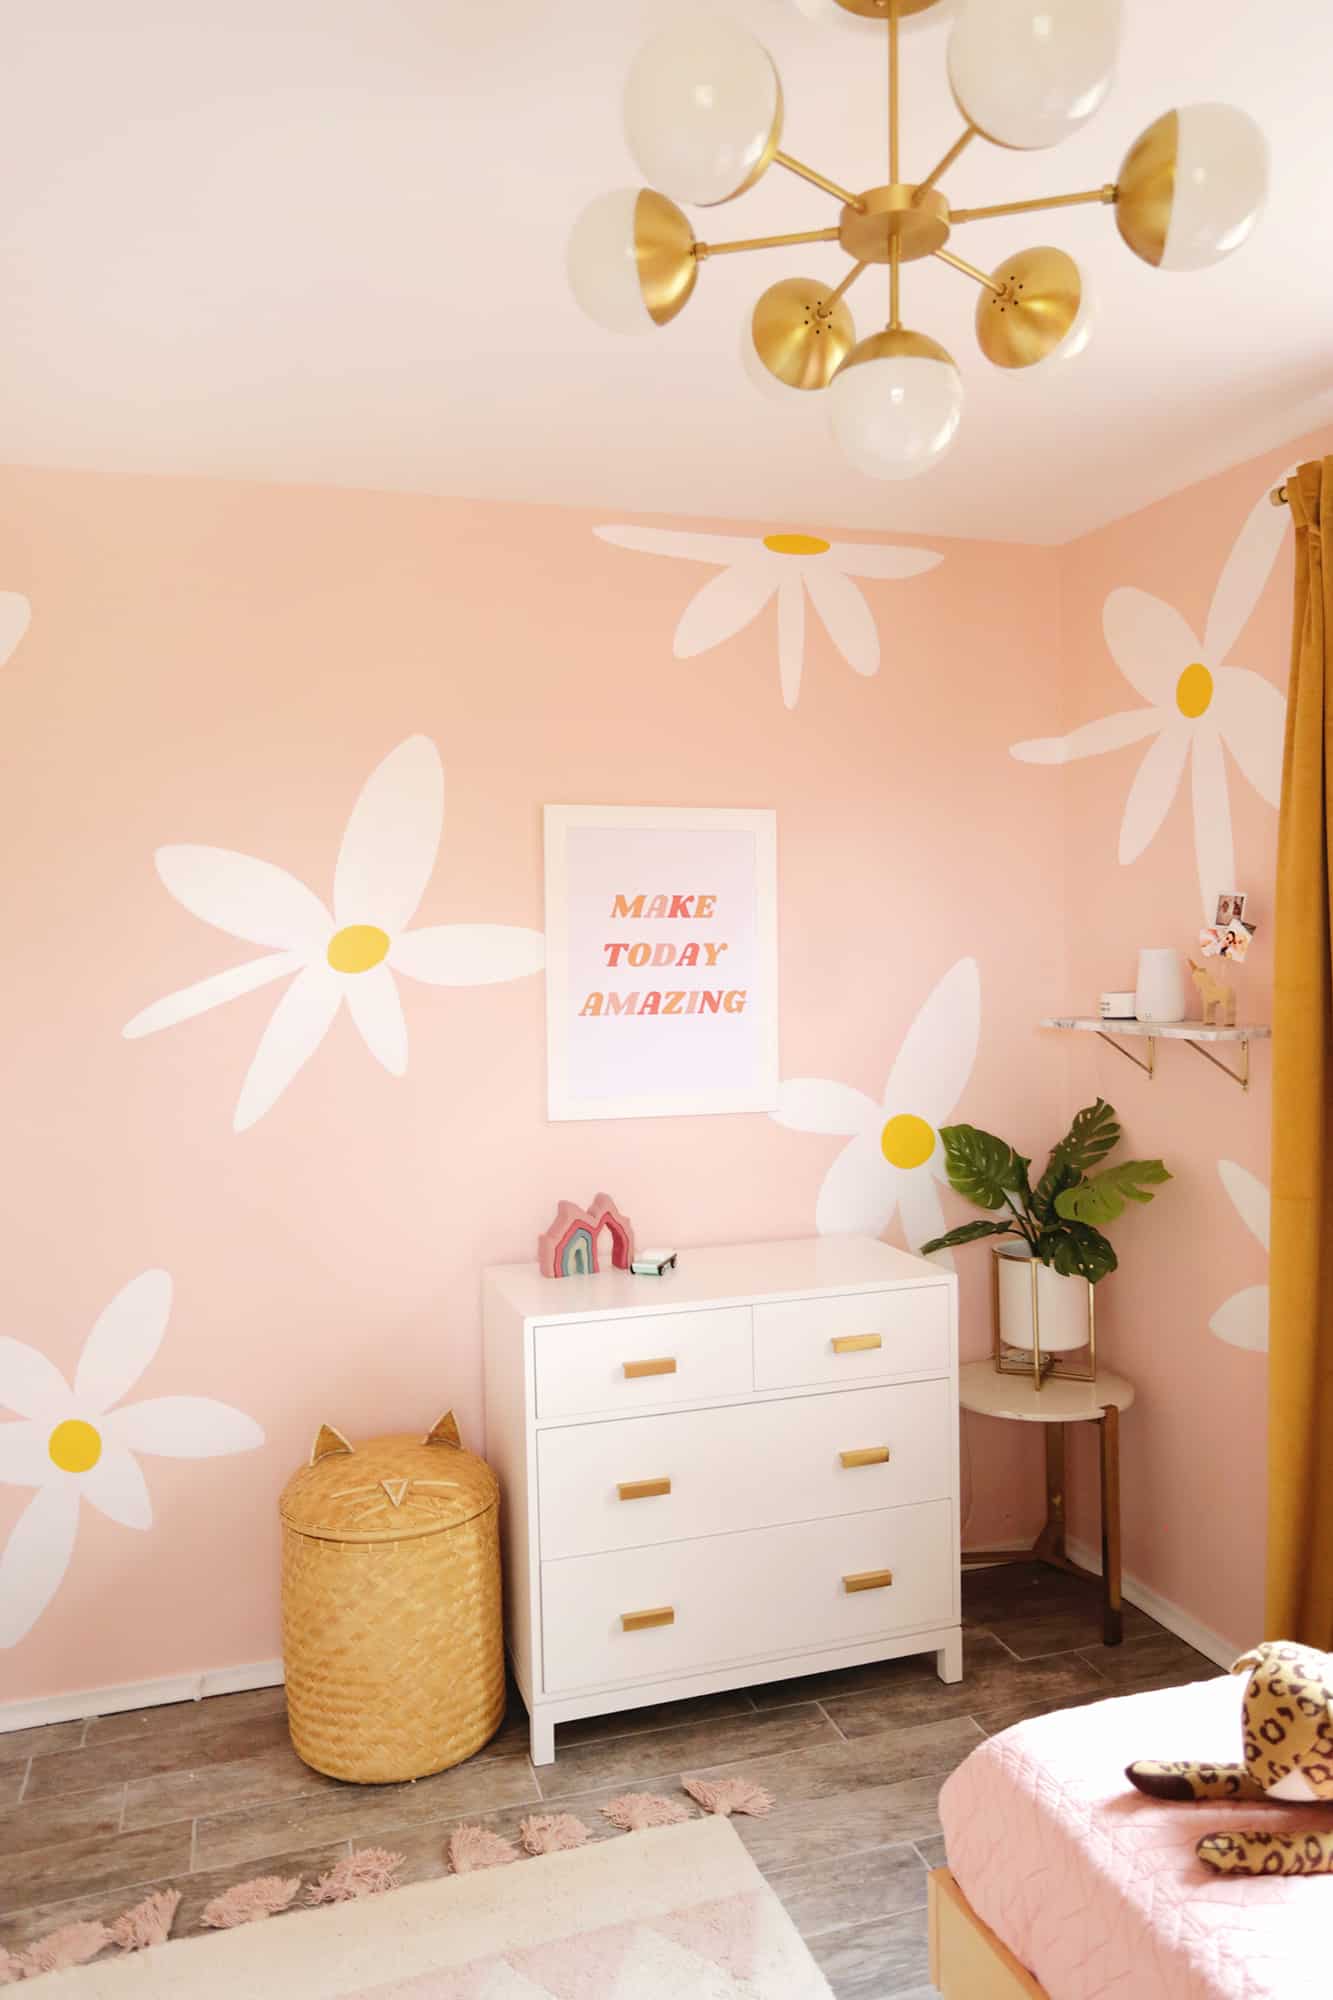

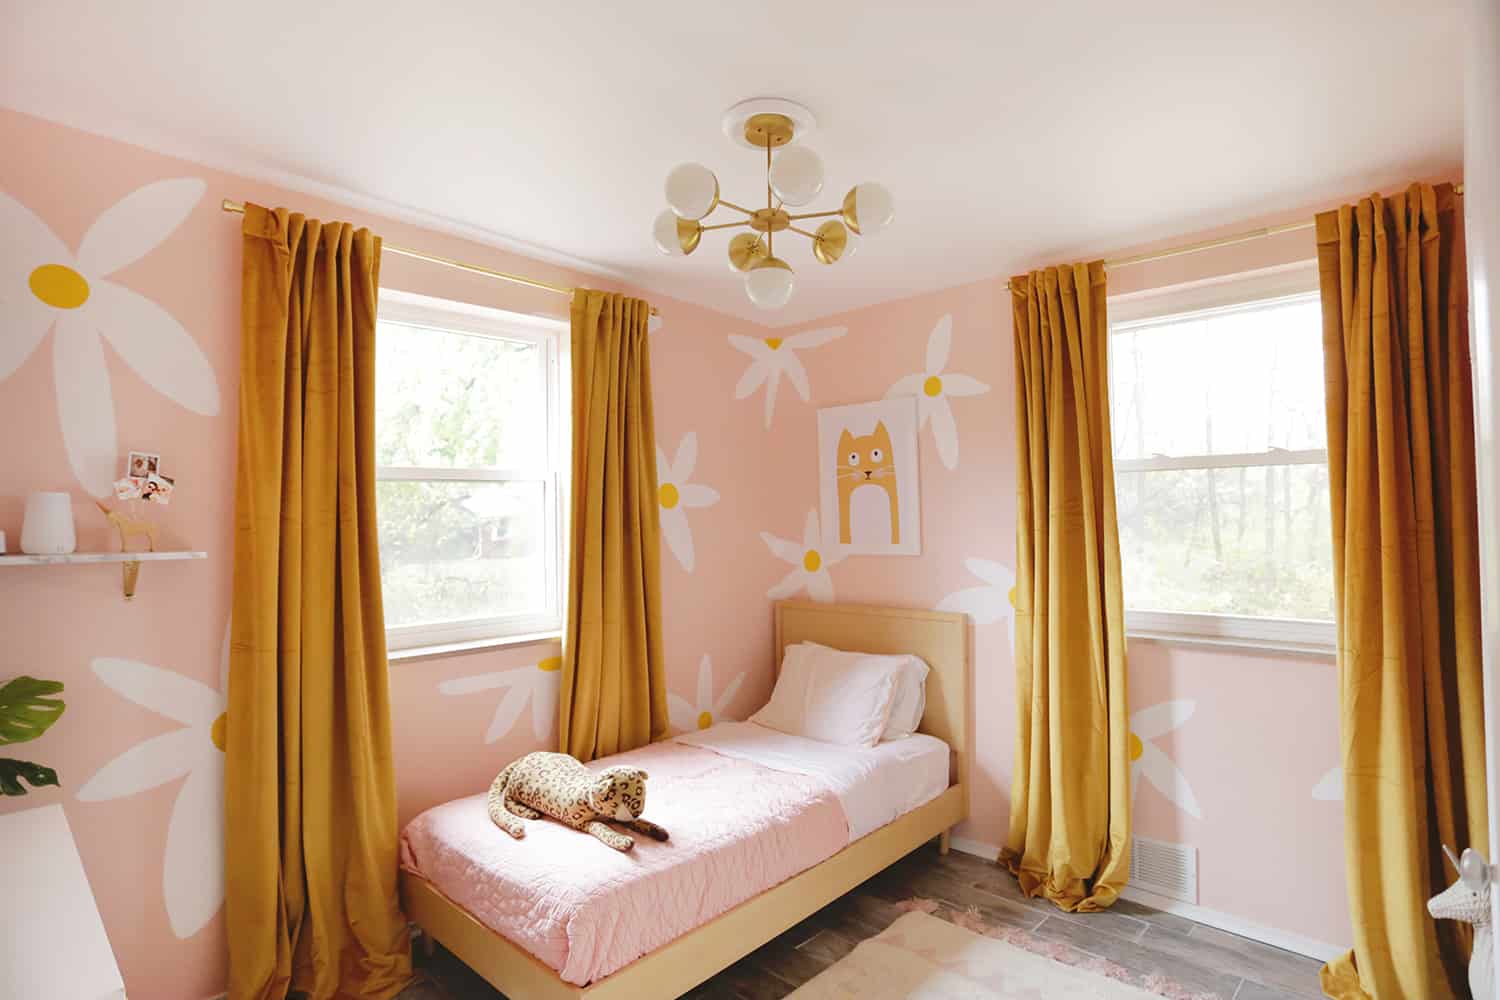 Seriously though, how sweet is that?! I love that the room has such a playful vibe and it feels like a kid’s room but not too babyish at the same time—perfect for a toddler about to become a “big girl” when she turns 4 next year.
I also love how the yellow flower centers look with her new wooden bed, her velvet mustard yellow curtains and pops of gold on her new dresser handles I switched out recently (similar here).
I also tried to pick some cute art prints that would compliment the flower pattern and this one and this one were perfect!
While it’s fun to do some projects that are super meticulous, it’s also nice to do these kind of more freeform shapes that don’t take up as much time. We still have a few more things to do in Lola’s room before it’s done, but it’s getting close and I can’t wait to see it finished! xo. Laura
Where is the cat print from??
I always love the room updates, you are so creative! Can you share where you got the kitty hamper? I scrolled the comments and I don’t think I saw a link.
I’ve seen similar at West Elm, and believe it or not, Aldi’s. They weren’t at Aldi’s very long.
You’re so creative! Loving all of this and the way you presented the details of how the room was designed. Definitely an inspo for my daughter’s room that we are still doing!
Where is the rug from? It would look perfect in my room!
OMG! That´s a well done proyect!! PS: fell in love with that basket!
Hi! Where is the sweet pink quilt on her bed from? Thanks!
So using this as inspo for my nieces new “big girl” room. She loved the leopard. Where did you find it?
Here’s a link!
https://merimeri.com/products/rani-leopard-large-toy
What a fabulous room — the layout is nearly identical to my 3-year old’s. Who made the cat print over the bed? My daughter would love it.
Absolutely LOVE it! My favorite DIY since your rope rug (that I copied)!
This looks amazing. Wish we did not have a popcorny kind of wallpaper all over, that makes it so uneven to paint on. But this looks great. A lucky kiddo living in there <3
Wow girl you are really talented. Seriously if I tried this is would just look like blobs. Love it ?
One tip I have for painting patterns on walls is to use a colored pencil in the color of the top paint (in this case white). The lines should be easy to follow but the marks disappear into the paint as you go along. No erasing needed.
That’s a great tip! I’ve done that at times too 🙂
Laura
So amazing! Where is the light fixture from?
Lucent Lightshop 🙂
YES!!! I know you created this lovely space for your young daughter, Laura, but as a grown woman I would gladly live there! 😀 It’s feel so joyful and breathable. Also, as a *certified* cat parent (I run Junipurr Studio, a digital hub for cat parents), I adore the cat love. May need to get that cat artwork and leopard toy for myself too 😀
Love this…very inspiring! Can’t wait to see the rest of the house!
I love this so much – especially the idea of a hand-painted “wallpaper.” I love wallpaper in general, but my house has textured walls, so they’d have to be torn out in order to do wallpaper, but the painted version would totally work. Also loving that marigold and pink combo.
xoKaelen | Darling Marcelle
I cannot believe you did this so fast! I love the colors. Lola is so lucky. One question if I may. Hanging curtain rods – do they have to be in the studs for kids rooms, do you think? I want to simply use dry wall anchors for best positioning but worry that my brute may pull them down.
Yeah, drywall anchors should be ok, but kids are crazy strong so see if there’s a stud nearby if you think you really need one!
Laura
Fantastic! Love it
Could you re-link the curtains? I keep getting a bad gateway error. Thanks!
Obsessed! So cute!!