 I am all about oversized art and prints. Hanging a large scale photo is one of the fastest ways to transform the feel of a space, but depending on how you do it, it can also be a pretty expensive way as well.
I love that more and more sites are selling reasonable large scale prints (and you can’t beat the price of printing out a photo as an engineer print).
But when you need a large scale frame, it can sometimes cost more than the print itself, which is always so frustrating to me (especially when I just want the most plain and simple frame possible). It’s just wood, you guys, not solid gold.
Anyway, the process is even more expensive when you need a custom size that isn’t readily available and have to have it made. So I thought I would show you a way to make large scale frames at a fraction of the price, and it can be whatever size you want! No saw required either!
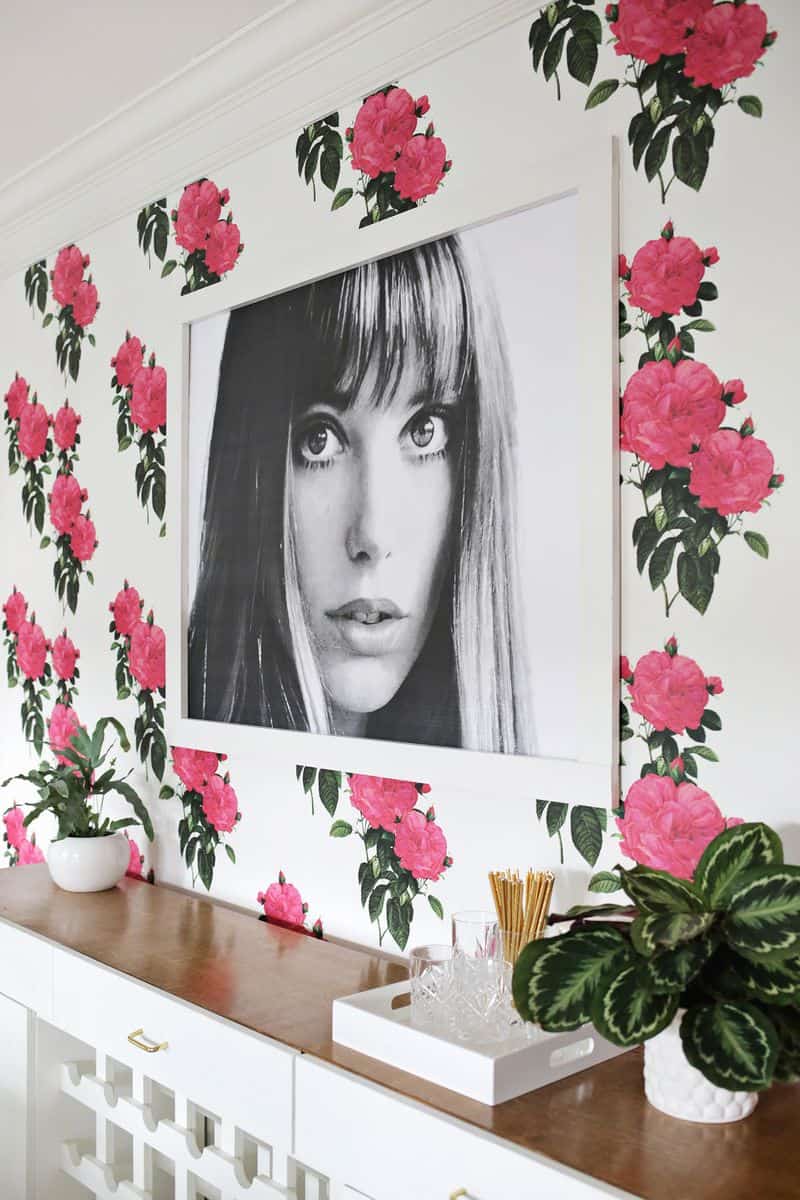
Elsie has an awesome giant photo of Jane Birkin that she wanted to hang in her dining room, so I volunteered to make her a custom frame to show you how it’s done.
 Supplies:
-wood boards your desired width (I used boards that were 1” thick and 3” wide)
–metal corner braces
–spray paint
–sawtooth frame hangers
–drill
-caulk or wood filler (optional)
 First, you’ll need to determine how big the inside edge of your frame should be. I usually like to measure the print or photo and then make the width and height measurements 1” smaller so I know there won’t be any gaps between the frame and print.
You can see in the photo above that I cut the vertical height boards to be the exact height that I wanted and then cut the horizontal width boards to be the exact width plus 6” to account for the two 3” boards that meet up with each end.
So, if I wanted the inside frame to be 30” tall and 40” wide, I would cut two 30” boards for the height and two 46” boards for the width.
My boards were 3” wide, so if you have a 4” wide board you would have to add 8”, etc. Since you should know exactly what length of boards you need, you can have them cut the wood for you at the home improvement store, thus escaping the need for a saw.
But you can also use a jig saw (like I keep telling you to get!) or chop saw if you have access to one of those.
 Drill the corner braces onto the back of each corner to hold the frame together.
 If you have any gaps between the boards that you aren’t happy about, you can quickly fill the gaps with caulk or wood filler to make your frame appear seamless.
 Once the filler is dry, use your spray paint to paint or stain your wood and attach as many sawtooth hangers as needed to hang your frame from.

 Use small nails or flat thumbtacks to attach your print to the wall, and then hang your frame over the mounted print.
You could also mount your print to foam core first, and then tack the board onto the back of the frame with small nails and hang it as one unit.
The only downside with that is you can sort of see the two layers when viewed directly from the side. Attaching the print to the wall makes it appear a little more seamless from the side.
 It looks great! You would never know that this was an inexpensive workaround to a more expensive frame. This frame was 35” x 44” and it cost under $25 to make.
Using it in conjunction with an engineer print made the whole project under $40! Not bad for a statement piece and it looks so pretty on the rose wallpaper.
I have several of these “cheat frames” in my house, and I plan on making many more as needed (although these frames are great for budget ready-made frames). Hope this helps solve an oversized or custom frame problem for you in the future!
And, if you’re looking for a custom framing option that doesn’t require power tools, check out this tutorial! xo. Laura
P.S. Check out our tips for framing art for more ideas.
Love this post? Sign up for our newsletter for more ideas!

Get creative ideas for recipes, crafts, decor, and more in your inbox!
 Get the How-To

Supplies
Equipment
- wood boards your desired width (I used boards that were 1” thick and 3” wide)
- metal corner braces
- spray paint
- sawtooth frame hangers
- drill
- caulk or wood filler (optional)
Instructions
- First, you’ll need to determine how big the inside edge of your frame should be. I usually like to measure the print or photo and then make the width and height measurements 1” smaller so I know there won’t be any gaps between the frame and print. You can see in the photo above that I cut the vertical height boards to be the exact height that I wanted and then cut the horizontal width boards to be the exact width plus 6” to account for the two 3” boards that meet up with each end. So, if I wanted the inside frame to be 30” tall and 40” wide, I would cut two 30” boards for the height and two 46” boards for the width.My boards were 3” wide, so if you have a 4” wide board you would have to add 8”, etc. Since you should know exactly what length of boards you need, you can have them cut the wood for you at the home improvement store, thus escaping the need for a saw. But you can also use a jig saw (like I keep telling you to get!) or chop saw if you have access to one of those.
- Drill the corner braces onto the back of each corner to hold the frame together.
- If you have any gaps between the boards that you aren’t happy about, you can quickly fill the gaps with caulk or wood filler to make your frame appear seamless.
- Once the filler is dry, use your spray paint to paint or stain your wood and attach as many sawtooth hangers as needed to hang your frame from.
- Use small nails or flat thumbtacks to attach your print to the wall, and then hang your frame over the mounted print. You could also mount your print to foam core first, and then tack the board onto the back of the frame with small nails and hang it as one unit. The only downside with that is you can sort of see the two layers when viewed directly from the side. Attaching the print to the wall makes it appear a little more seamless from the side.

Hi, thank you for the pictures – I like that the frame has metal edge anchors to keep it together and I’m going to source the materials this week to try and frame a large map we have laying around our room (it’s 50″x32″). Only thing is, I know for a fact that sticking tacks into the corners of the poster (our map) will NOT work. I had the map displayed this way (without a frame), for a couple of months, before the weight of the poster paper slowly caused rips to stem from the pin holes, damaging it’s corners. Even if I cover corner tacks up with a frame like this, gravity would still pull it and tear the corners. I think I’m going to try and staple (if not glue) the map to the frame, like one of your other readers did with a flag/fabric.
This worked perfect for hanging a large vintage flag I had. I stapled it to the back of the frame so it would be nicely stretched and it worked great.
Did I miss how to attach the print to the frame?
I tried this myself to make framed wallpaper panels and it turned out fantastic! But I actually did it a bit differently by using wood glue instead of the corner braces. You can see it here (I linked to you, too!): https://turquoisetoffee.wordpress.com/2017/10/29/diy-framed-wallpaper-panels/
why not just attach the photo to the frame?
I love this! http://www.hannamarielei.com
Thank you guys! I have this beautiful but terrifying piece of art that I bought from a senior at my school, and getting a frame for it would have cost about 1000 bucks, now I know and can make my own!
Thank you for sharing this tip ! It’s a great idea !
Alexandra
http://littlefrenchblog.blogspot.fr
Gorgeous!! Re: the walls, I would have never thought in a million years that oversize flowers would make an elegant albeit tasteful wallpaper (think Jessica Lange’s room in Tootsie). But this is glorious and – to the “I’m a bad ass for painting one wall in the living room merlot” person such as myself – ballsy. 🙂
-Toby
I love this. I have been meaning to get my wedding photos framed, but they are so expensive. This is perfect, thank you!
You make this look so easy! I will have to try this out myself. I’ve done pretty well with frames from the dollar store or on sale at Michael’s- but this is great because you can completely customize the size and look.
Yes, I want to know the same!
This looks so easy and cute! I could totally pull this off!
Paige
http://thehappyflammily.com
I’ve been meaning to do this for a while – anyone know how high of resolution the image needs to be to print that size? Is 300dpi good enough?
This is such a great solution and totally a “why didn’t I think of that??” Thanks!!!
How easy this is, wonderful idea!
https://www.makeandmess.com/
I’m in love with the table underneath the picture frame, where is it from??
Also I made one of these frames around christmas time but had the brackets in the front, stained it dark and had chicken wire in the back so I could hang christmas cards on it, super cute and if I can make it anyone can. Loved your tutorial.
xo, Michelle
rosetolife.com
Such a good idea!
Abbie E.
http://abulouslife.blogspot.com/
this is so much more simple than i thought! thanks for sharing =o)
http://dreamofadventures.blogspot.com/
This post is just what I needed! I have walls that are dying for large prints but I do not want to break the bank to do it. I will try this for sure!