") Pretty decorative boxes are one of my favorite things to have around the house (usually in little groupings with other candles or figurine type things). A lot of the time though, I love a box or container, but I’m not sure what to actually store in it!
Pretty decorative boxes are one of my favorite things to have around the house (usually in little groupings with other candles or figurine type things). A lot of the time though, I love a box or container, but I’m not sure what to actually store in it!
It occurred to me that most decorative boxes are actually the perfect size to be a jewelry box, and with a few quick tweaks, they can be really useful around the house as well as pretty!
Related: Marbled Clay Ring Dish and Acrylic Earring Holder DIY
") Supplies:
Supplies:
-decorative box with lid (this or this one are great options).
-1/4 yard velvet fabric
-straight pins and sewing machine
-hot glue gun or fabric glue
–cotton batting
–fabric scissors
–cutting mat, rotary cutter, and ruler
") First, you’ll want to double over your batting and cut a piece that’s as wide as your box and long enough to make a 1″ thick roll when all rolled up.
First, you’ll want to double over your batting and cut a piece that’s as wide as your box and long enough to make a 1″ thick roll when all rolled up.
If you make them about 1″ wide, then you can know how many you need to make to fill your box (a 5″ wide box would need 5 rolls, etc.).
Cut and roll all your pieces and pin in place for now.
") Use a cloth measuring tape to measure the circumference of your batting rolls and add 1/2″ to your measurement (this will give you a 1/4″ seam allowance when you sew it later).
Use a cloth measuring tape to measure the circumference of your batting rolls and add 1/2″ to your measurement (this will give you a 1/4″ seam allowance when you sew it later).
Cut your velvet fabric into a rectangle that’s 1″ longer than the length of your batting roll and as wide as the circumference width found in the first step above.
") Fold your fabric lengthwise (right sides facing each other) and pin in place. Sew down the open side with 1/4″ seam allowance and turn your velvet tube right side out.
Fold your fabric lengthwise (right sides facing each other) and pin in place. Sew down the open side with 1/4″ seam allowance and turn your velvet tube right side out.
") Stuff your cotton batting into the tube (don’t forget to take that pin out!), and repeat the sewing and stuffing process for each batting roll.
Stuff your cotton batting into the tube (don’t forget to take that pin out!), and repeat the sewing and stuffing process for each batting roll.
") To close the ends, put a dollop of hot glue (or quick dry fabric glue) directly onto the middle of the batting end inside the velvet tube and fold the bottom of the velvet up into the glue.
To close the ends, put a dollop of hot glue (or quick dry fabric glue) directly onto the middle of the batting end inside the velvet tube and fold the bottom of the velvet up into the glue.
Add more glue to fold in the sides one at a time, and then use a final drop of glue to fold the top flap down in place. Repeat process on the other side of the tube, and then with each additional tube.
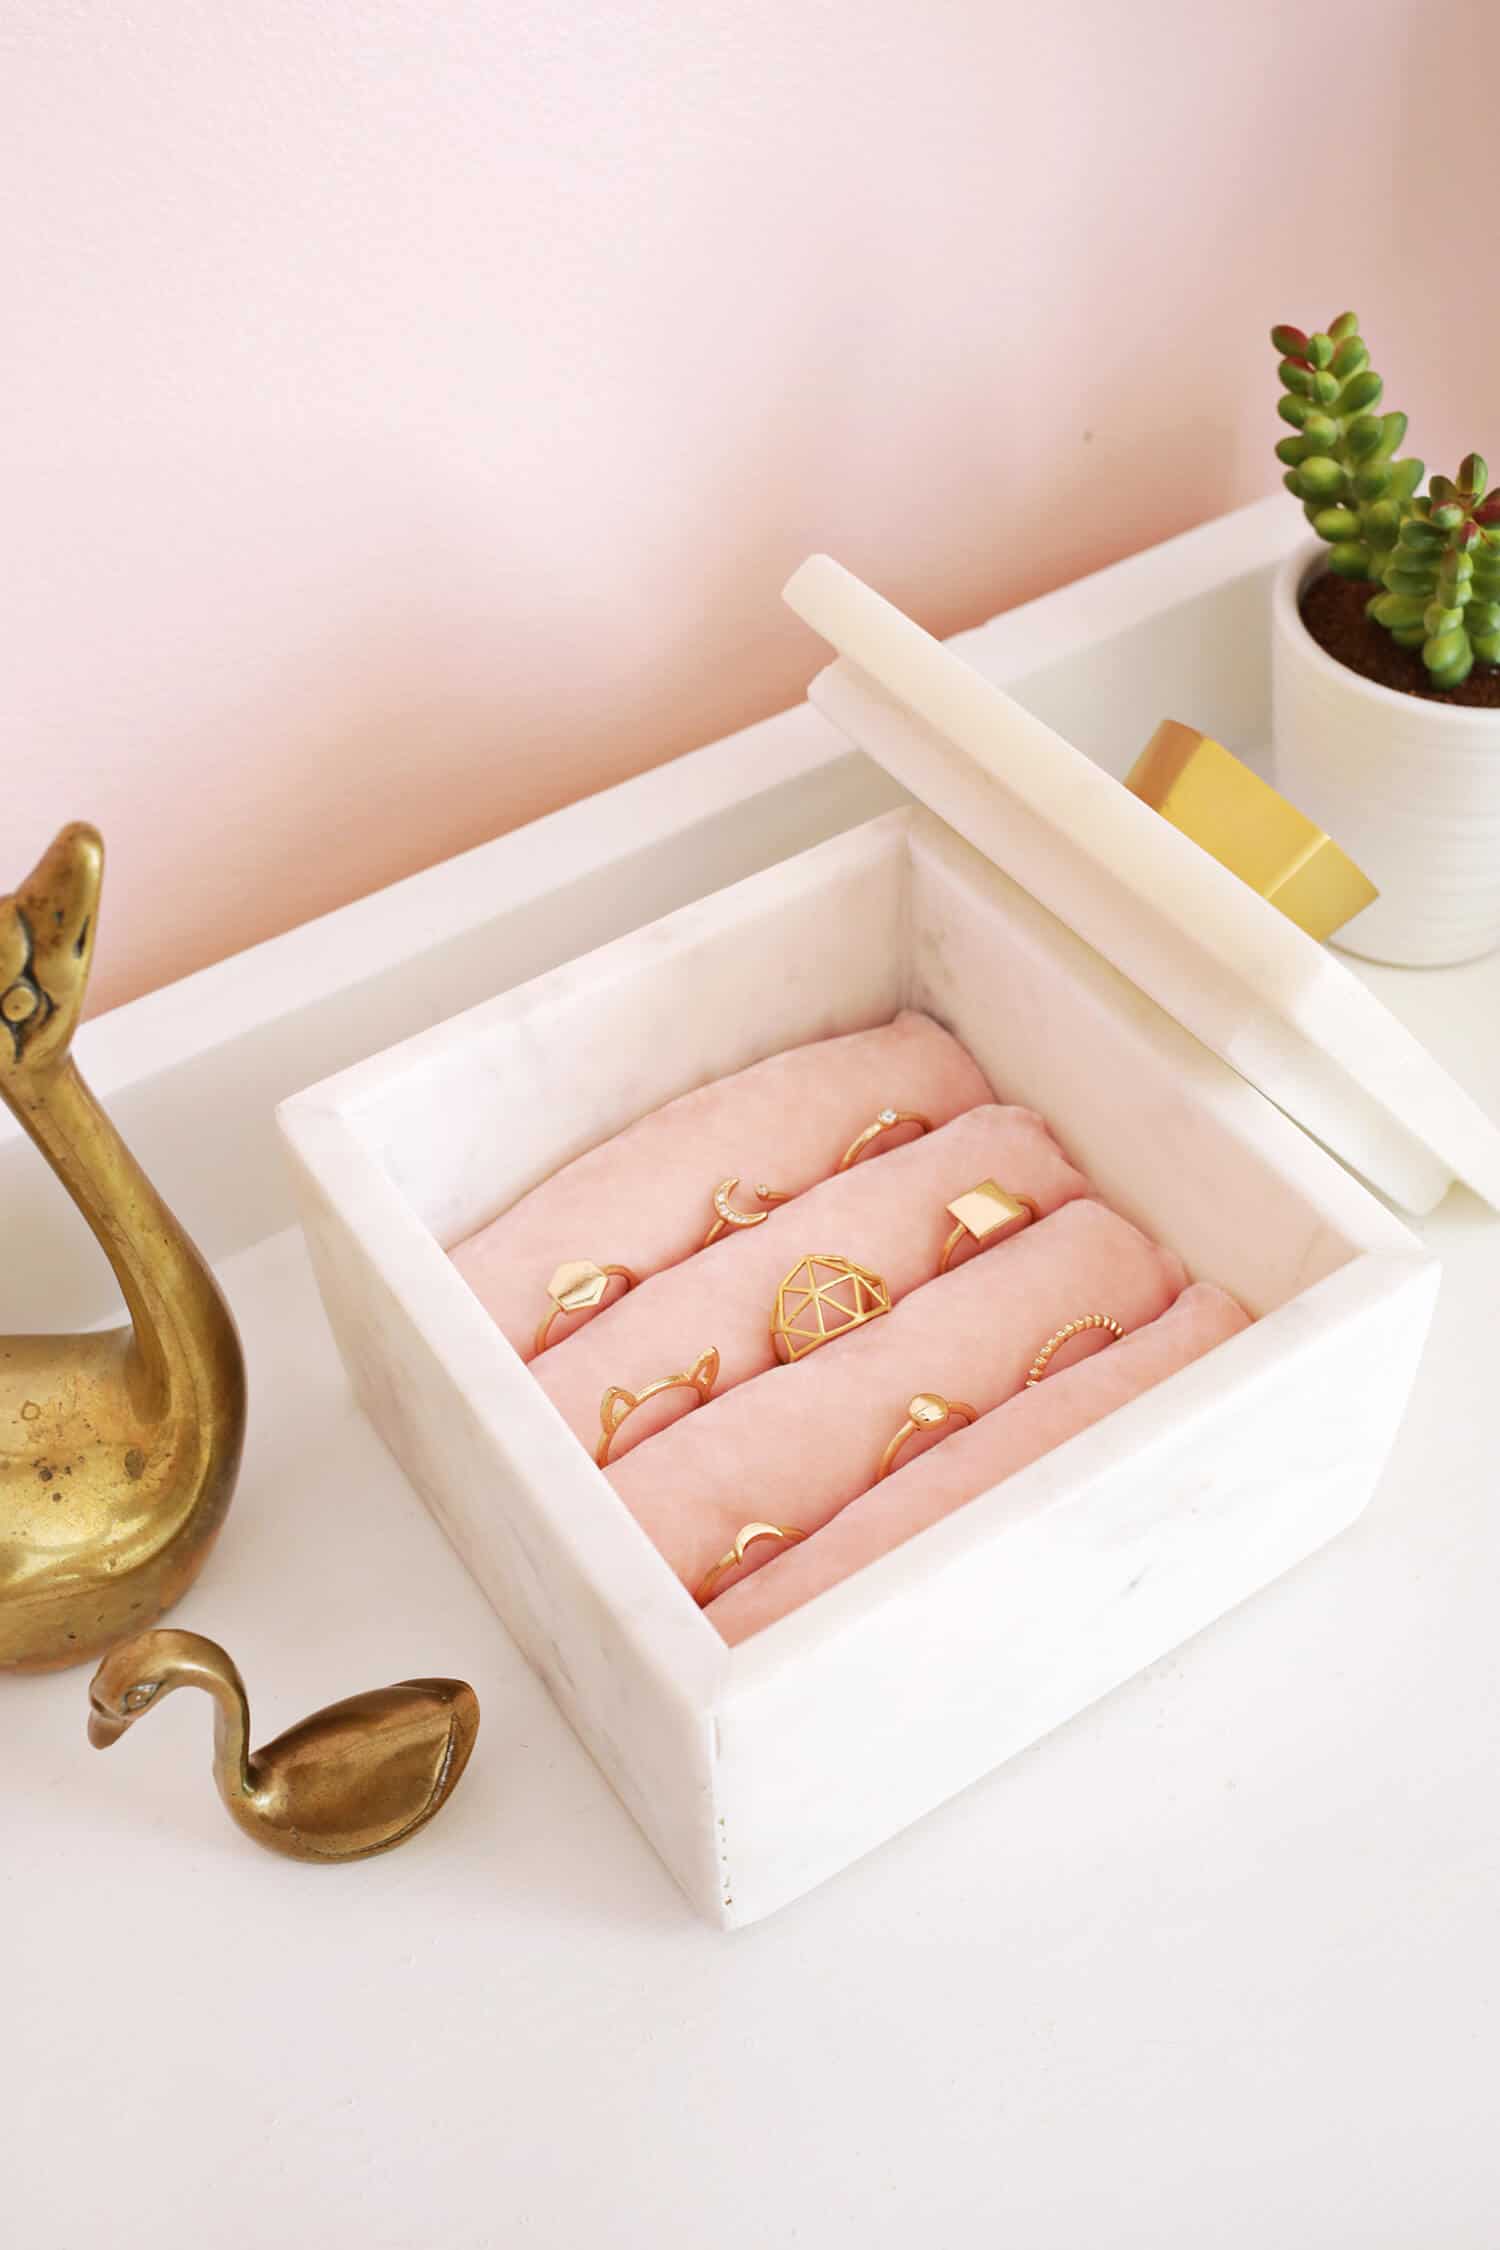
") Place your velvet tubes snugly into your box, and you just created a new jewelry box!
Place your velvet tubes snugly into your box, and you just created a new jewelry box!
")
") Not gonna lie, I love that marble, pink, and gold combo together, but of course you can do whatever box or color velvet you like! I have a lot of dainty gold stacking rings, so I have to keep ring dishes and boxes all over the house or they get lost really fast!
Not gonna lie, I love that marble, pink, and gold combo together, but of course you can do whatever box or color velvet you like! I have a lot of dainty gold stacking rings, so I have to keep ring dishes and boxes all over the house or they get lost really fast!
As you can see, it’s pretty easy to make your own jewelry holder with whatever box you happen to love, and if you vary the size of the batting rolls, then you can have more or less rows to add your jewelry into.
Hope this DIY is just what you need to keep your space useful and pretty! xo. Laura

So beautiful, like it very much.
Very pretty boxes
Such an ease, surely trying on this today and will post how it went!! Wish me luck!!
The box is so pretty. You no longer need to buy any separate box for keeping jewelry.
Love it!
Very good to see this idea about jewelry box making. Thank you for sharing with us.
Very Nice
That looks so gorgeous and it’s so easy to do! And I love the combination of marble, gold and pink as well.
Good idea! We make custom cardboard jewelry boxes in mass order 🙂
That looks so cute!!
This is such an innovative and great way of using a box. Even I really like hoarding boxes and always wonder what can I store in them as I cannot let them go. This great way of jewellery storage will definitely come in handy as I have a ever growing collection of jewellery. Will surely encourage my friends also to make this and use. Thank you so much for sharing this quick DIY jewellery storage idea.
Check out Pipa Bella’s website for trendy jewellery: https://www.pipabella.com
Wao, I love it. Thanks for sharing
Such a cute and low cost idea to make really good jewelry box.
This is a smart way of handmade packaging. The method of making jewelry box was attractive. This is really helpful for those who have a creative mind for doing something new.
I also like such kind of packaging Boxes for my cosmetics industry.
For jewelry boxes I usually choose American companies like customprintedboxes.us is one of my favorite company.
This tutorial of making box is awesome. Post is genuinely fastidious and I have learned lots of things from it about this. Thanks laura gummerman! Keep it up!
I have no idea it’s so easy! I trying As soon . Thanks
Hi, so my brother and I are making a set of jewelry boxes for my mum’s birth as a gift and while we have most of the materials (boxes, wood stain, sandpaper, etc.), the one thing we’re stuck on is the fabric to use inside it.
I’ve read that natural fabrics work best because they contain no chemicals that could potentially disturb the balance in the accessories. Velvet where I reside isn’t something very cost-friendly in the local fabric and craft shops and I understand why. But we’ve wondered: Can we use quilting cotton fabric for the interior? Would that do any harm? And the batting, is it better to use a thin batting and roll it up or use a stiffer, thicker one?
Either type of batting would be fine, as well as the cotton fabric 🙂
Very nice to see this tutorial about making jewelry boxes. Thanks for sharing with us!
I am going to have to try this; simple, customized, and cute!