 This project was inspired by the mid-century design of George Nelson’s slatted benches and the user-friendliness of so many of Ana White’s building plans. It’s a happy marriage of iconic design and some amateur elbow grease. I will always be drawn to mid-century furniture for its sleek, clean lines and how versatile and relevant so many pieces from that time still are today, so when I saw that Ana White had plans for a slatted bench (thanks, Pinterest!), I got a little giddy!
I studied a few variations of similar designs but most hinted at a more Craftsman or industrial style. I went with the basic premise of creating box joints to join the seat and legs together, but switched out the 2″x 4″‘s for 1″x 4″‘s to give it that mid-century bent. In the end, I had a beautiful bench that still cost less than anything I could’ve purchased in stores and could easily be put to use at my dining room table, the end of our bed, our front porch, or in my studio! Since I’m a chronic rearranger, the versatility of this piece is even more of a win. Another bonus, you don’t need to own a ton of power tools to make one of these. Just show up at your local big box lumber store during down time (NOT Saturday morning) and be sure you’ve got your supply list so you can get all of the correct cuts you need at the back of the lumber department. It’ll cost you about $6 in cut fees, but if you’re like me and don’t have a garage or table saw, it’s well worth it.

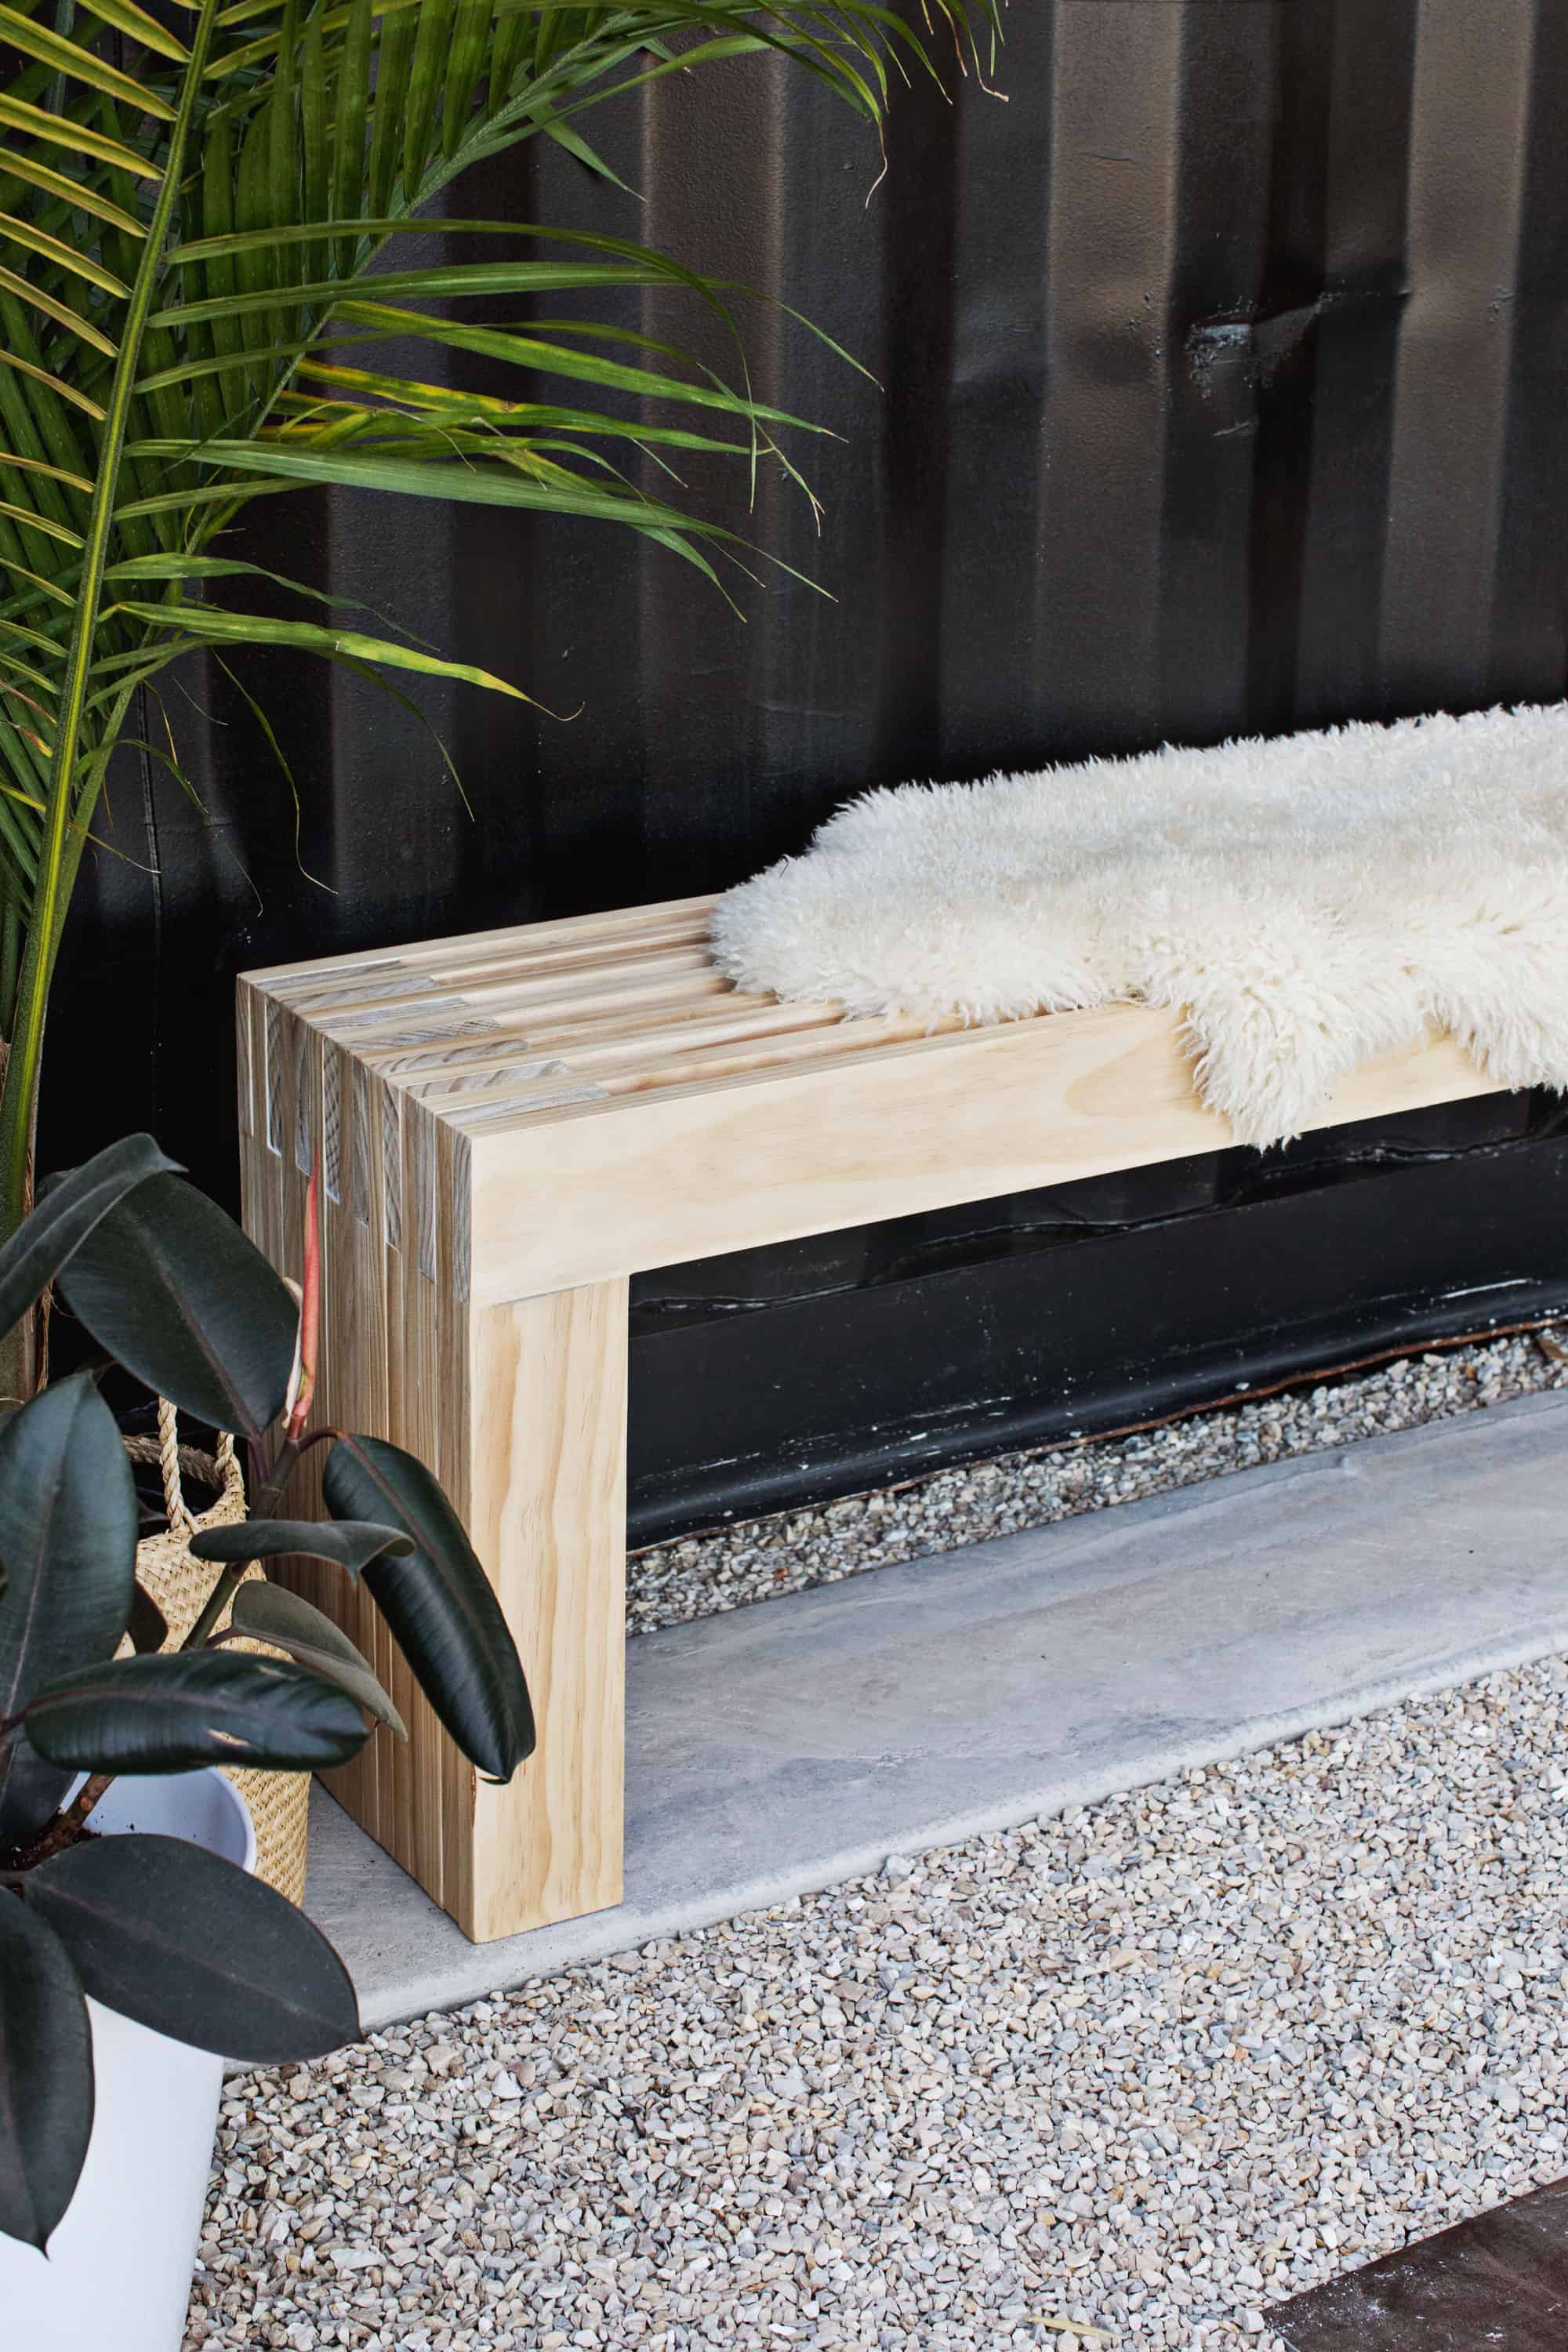
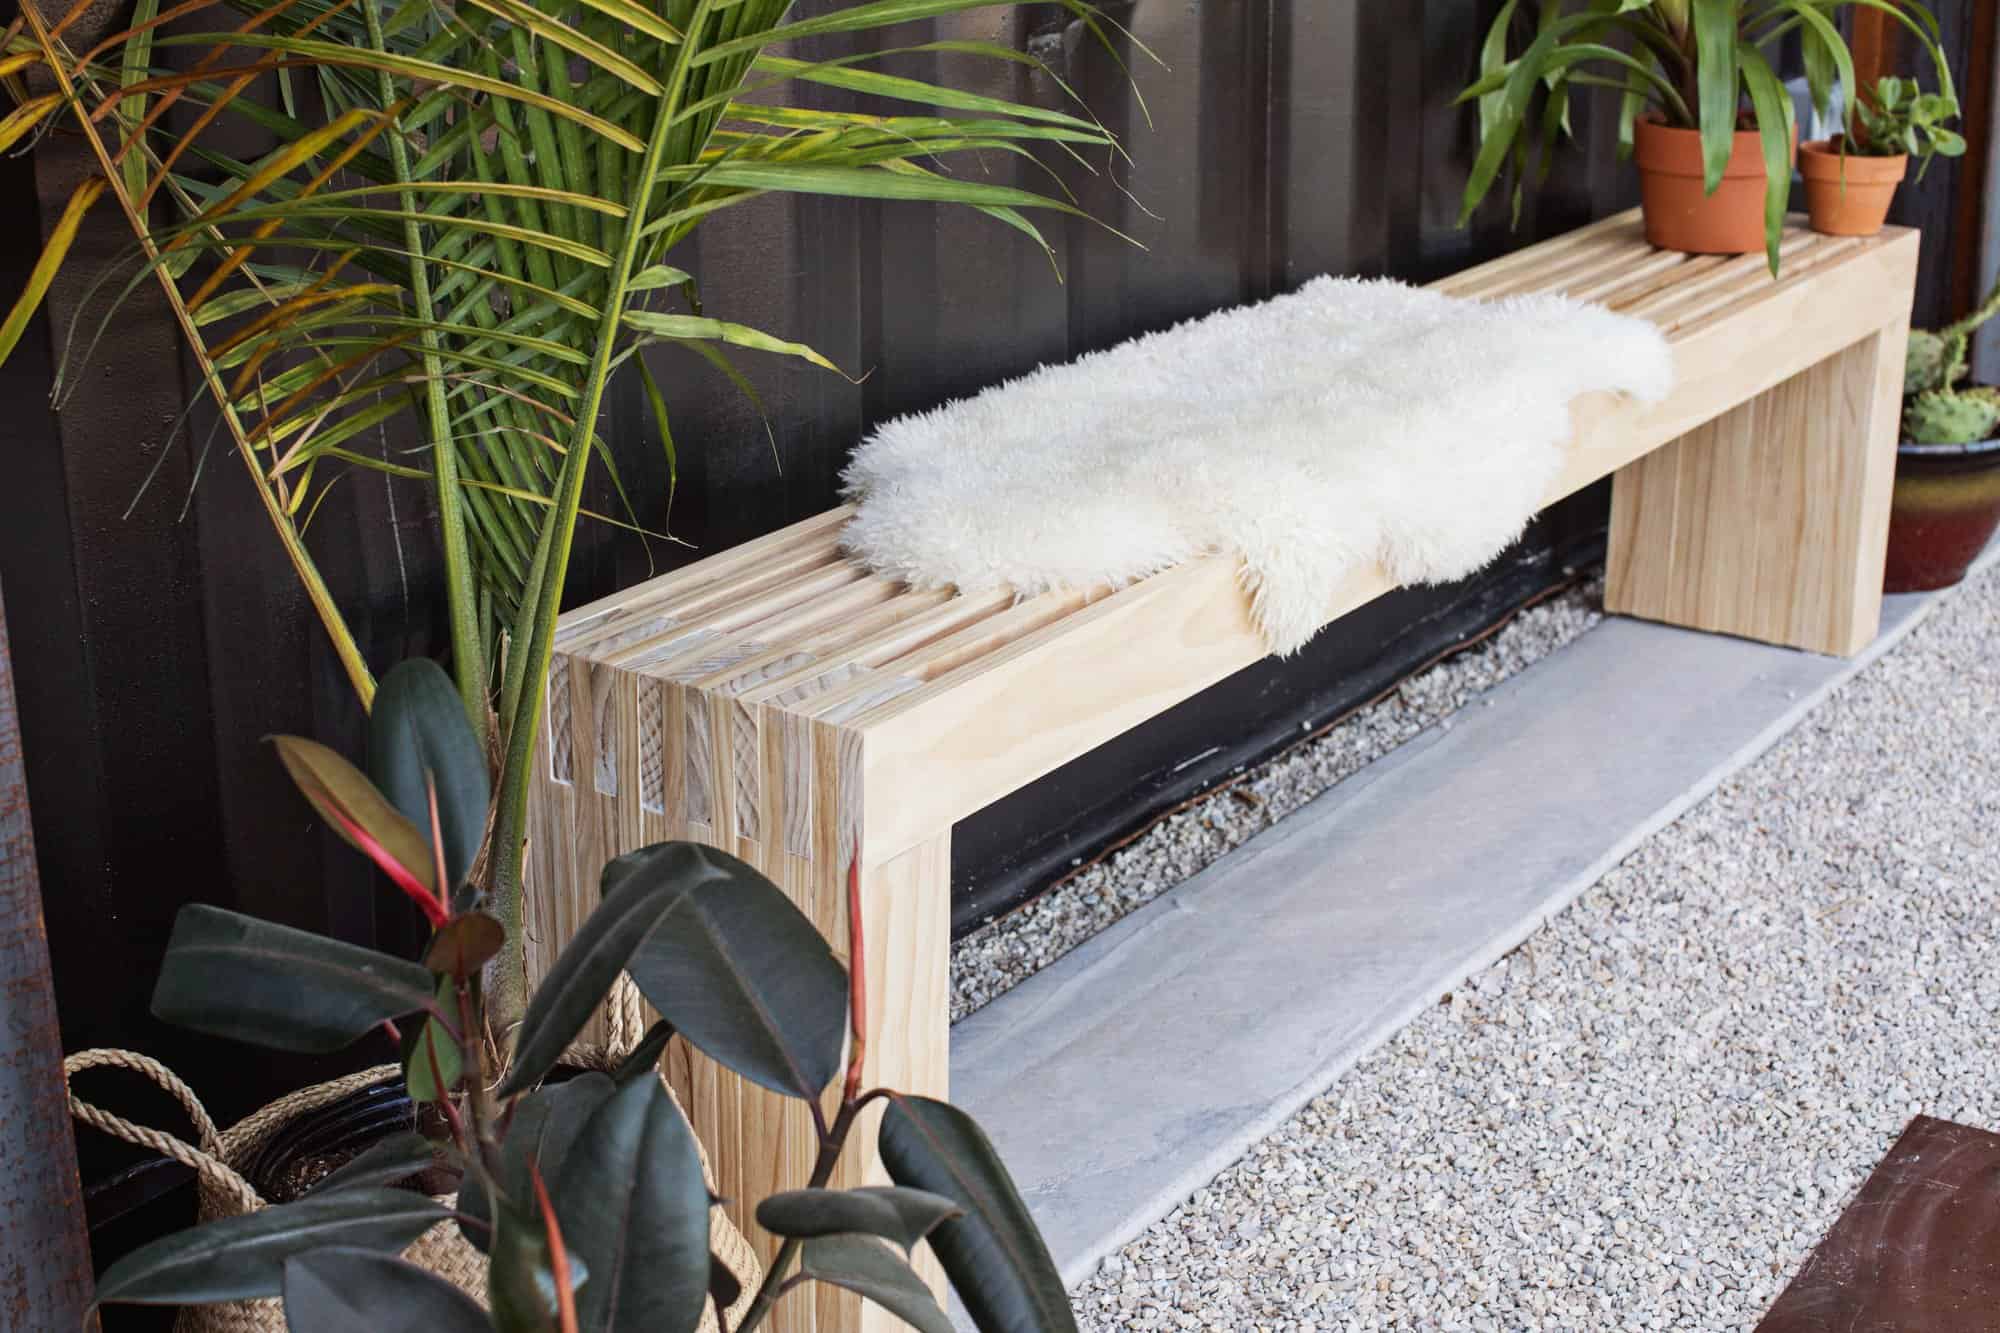
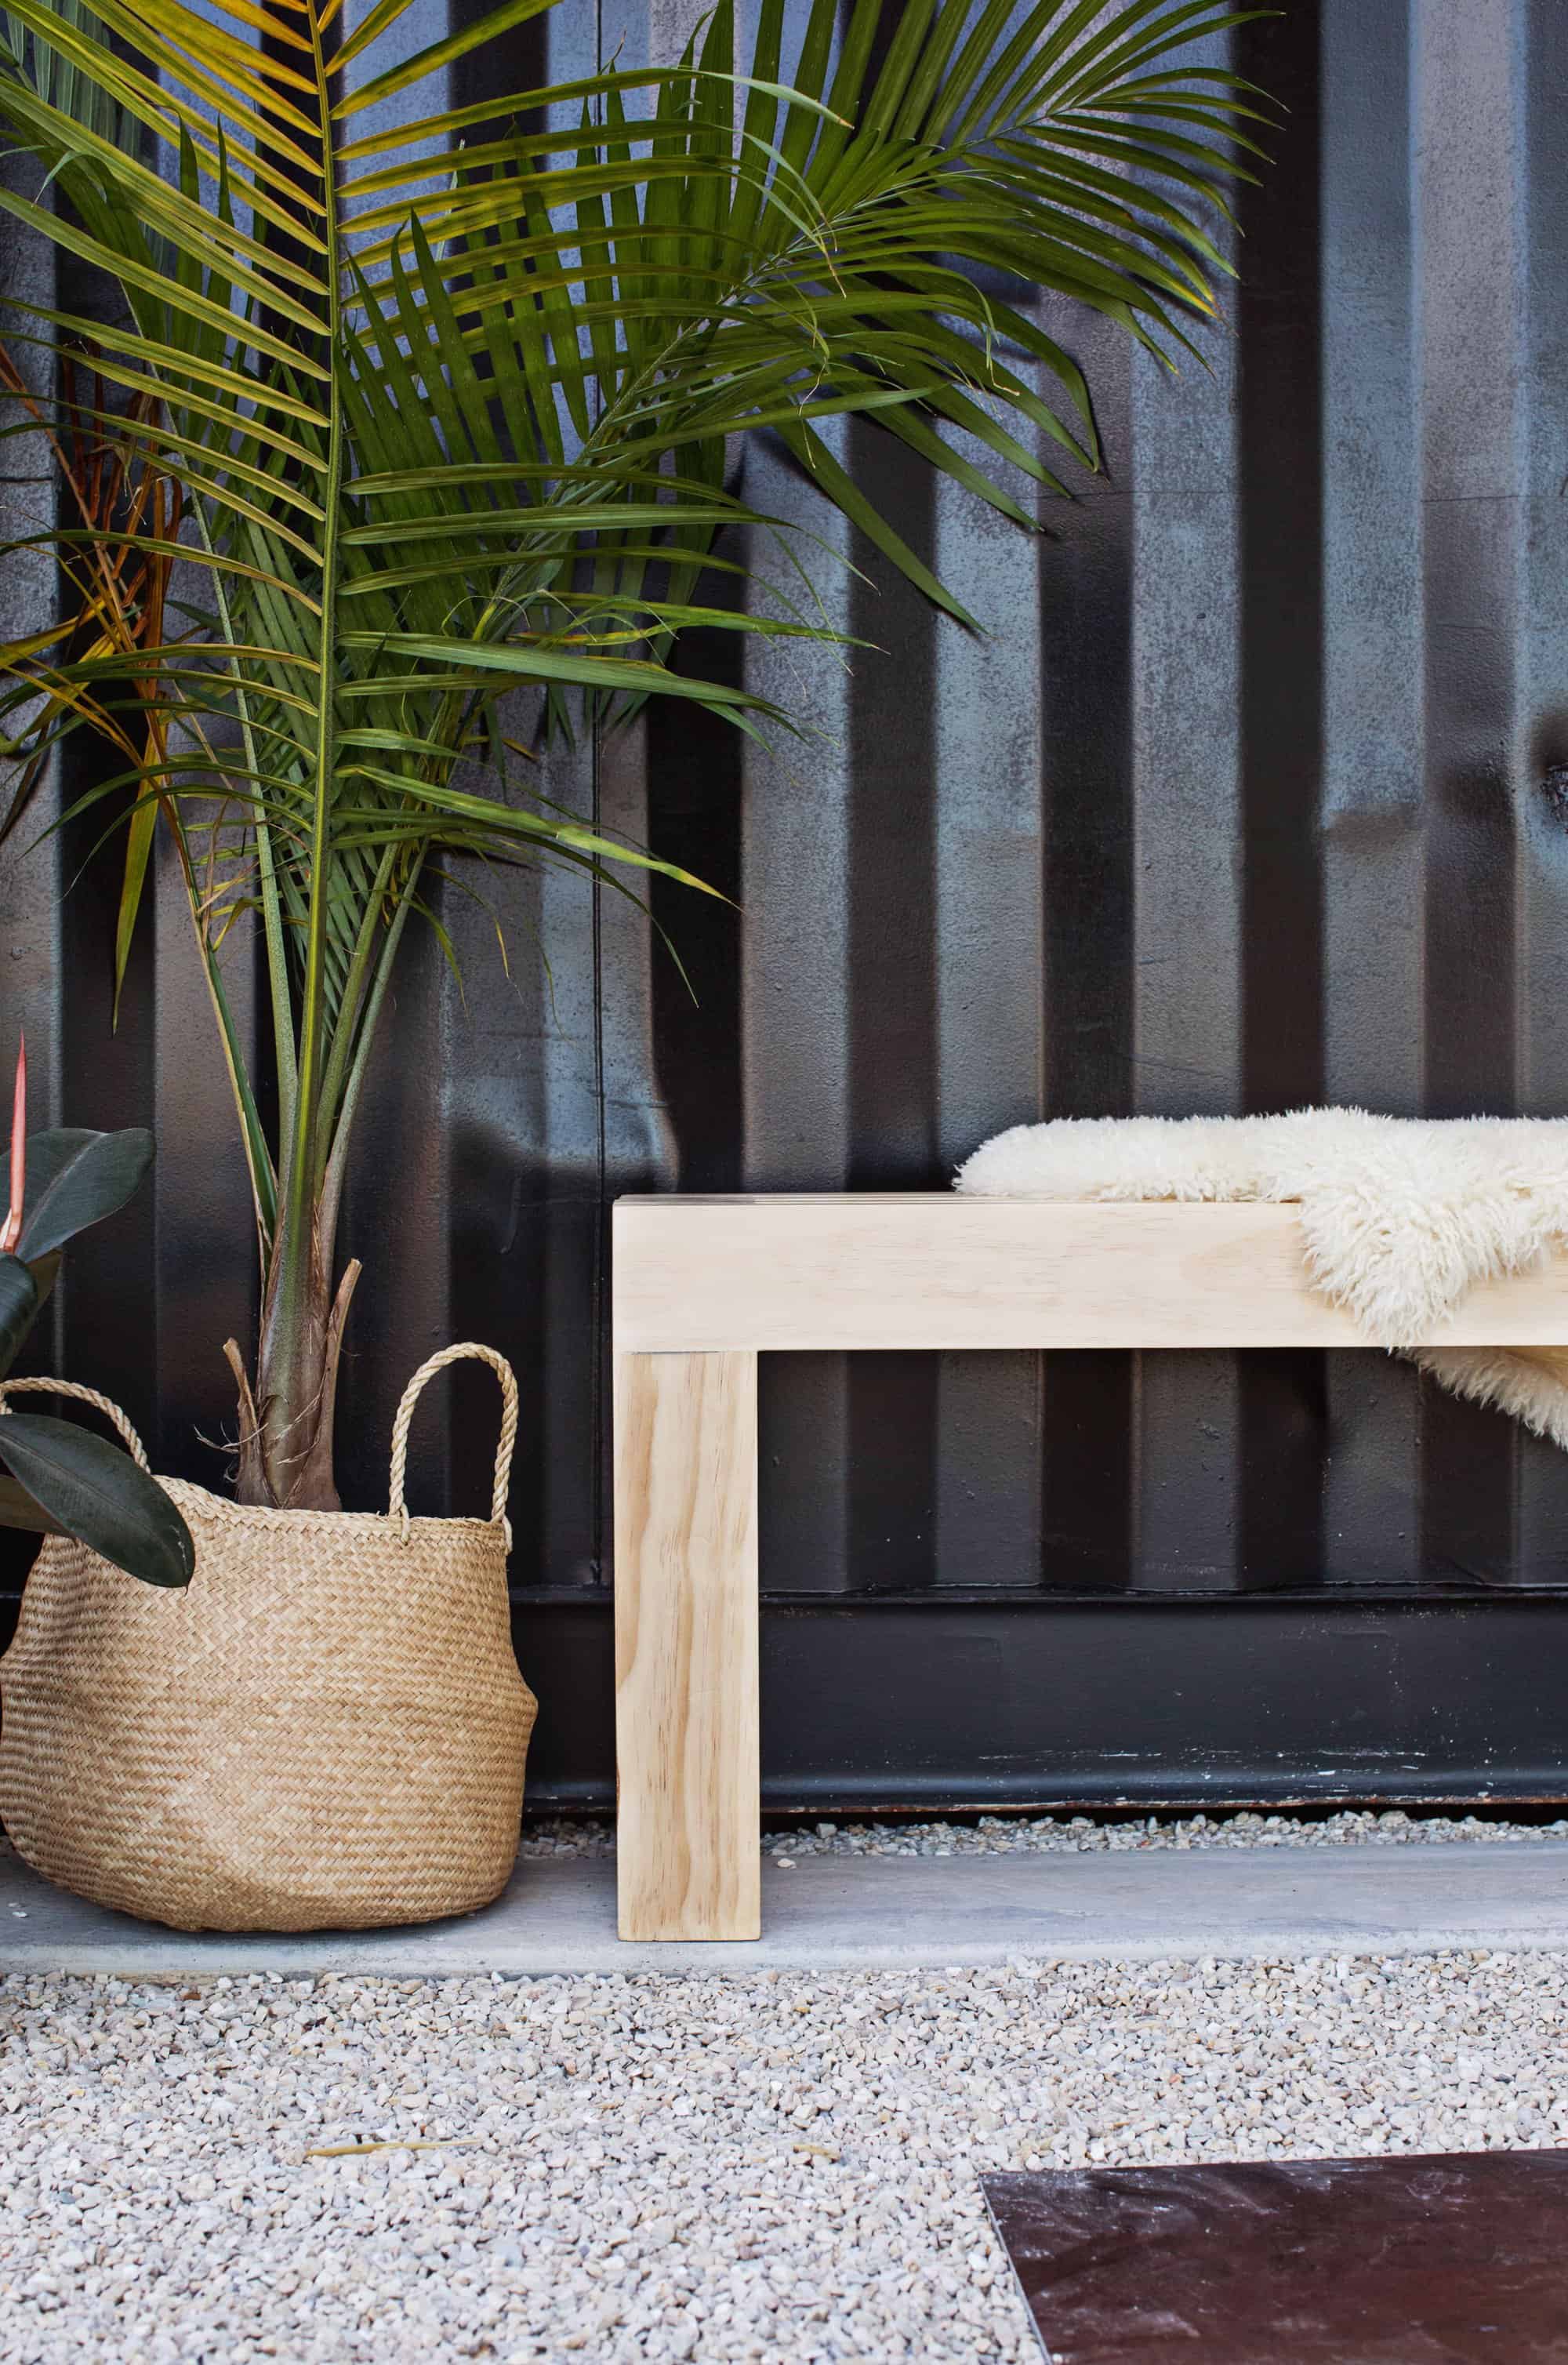
 Isn’t this bench gorgeous against that black wall?! We shot this project at The Co-Op Venue and thoroughly enjoyed getting to style it up with their top shelf plant life. I mean, their cacti game is strong over there!
 Supplies
-nine 1″ x 4″ x 6′ pine boards
-six 1″ x 4″ x 8′ pine boards
–two 24″ bar clamps (but four is easier)
–Liquid Nails
–standard caulk gun to use with Liquid Nails
-yardstick
–square tool
–100 #8 x 1.25″ counter-sinking wood screws
–power drill
–power sander
–80 and 120 grit sandpaper for sander
-paint, stain, or polyurethane depending on indoor or outdoor use
-brush or rags to apply paint or stain
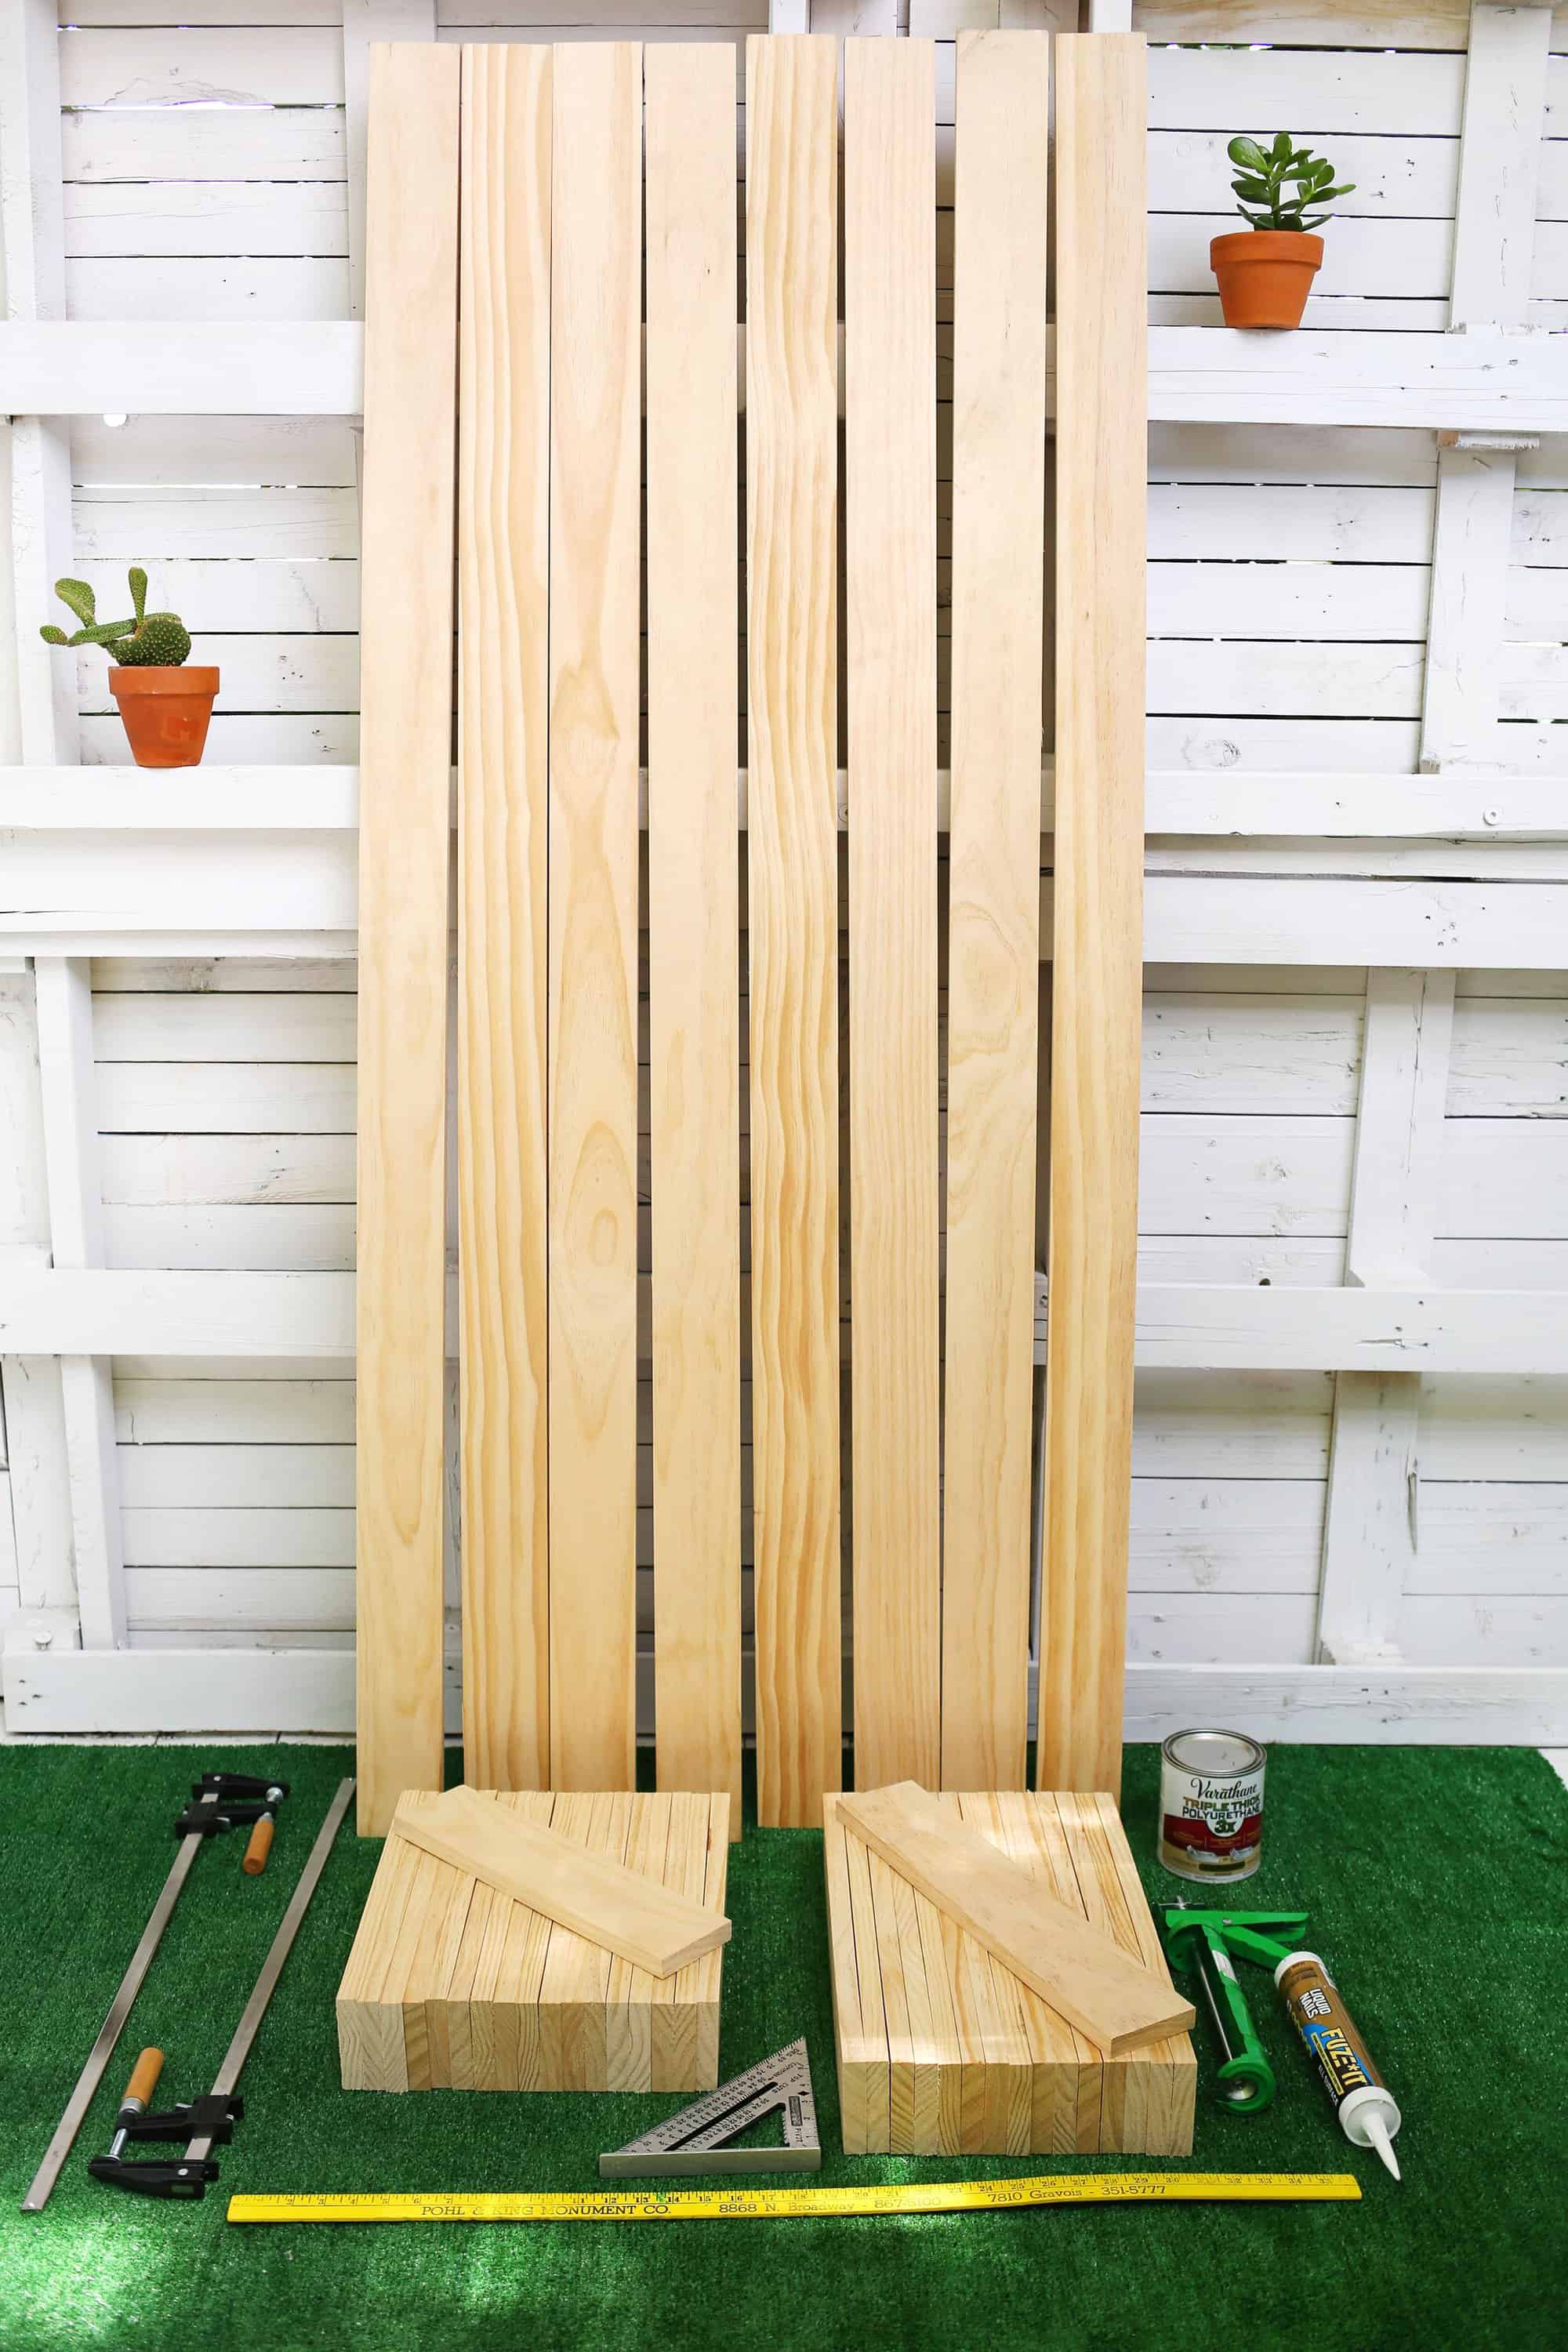
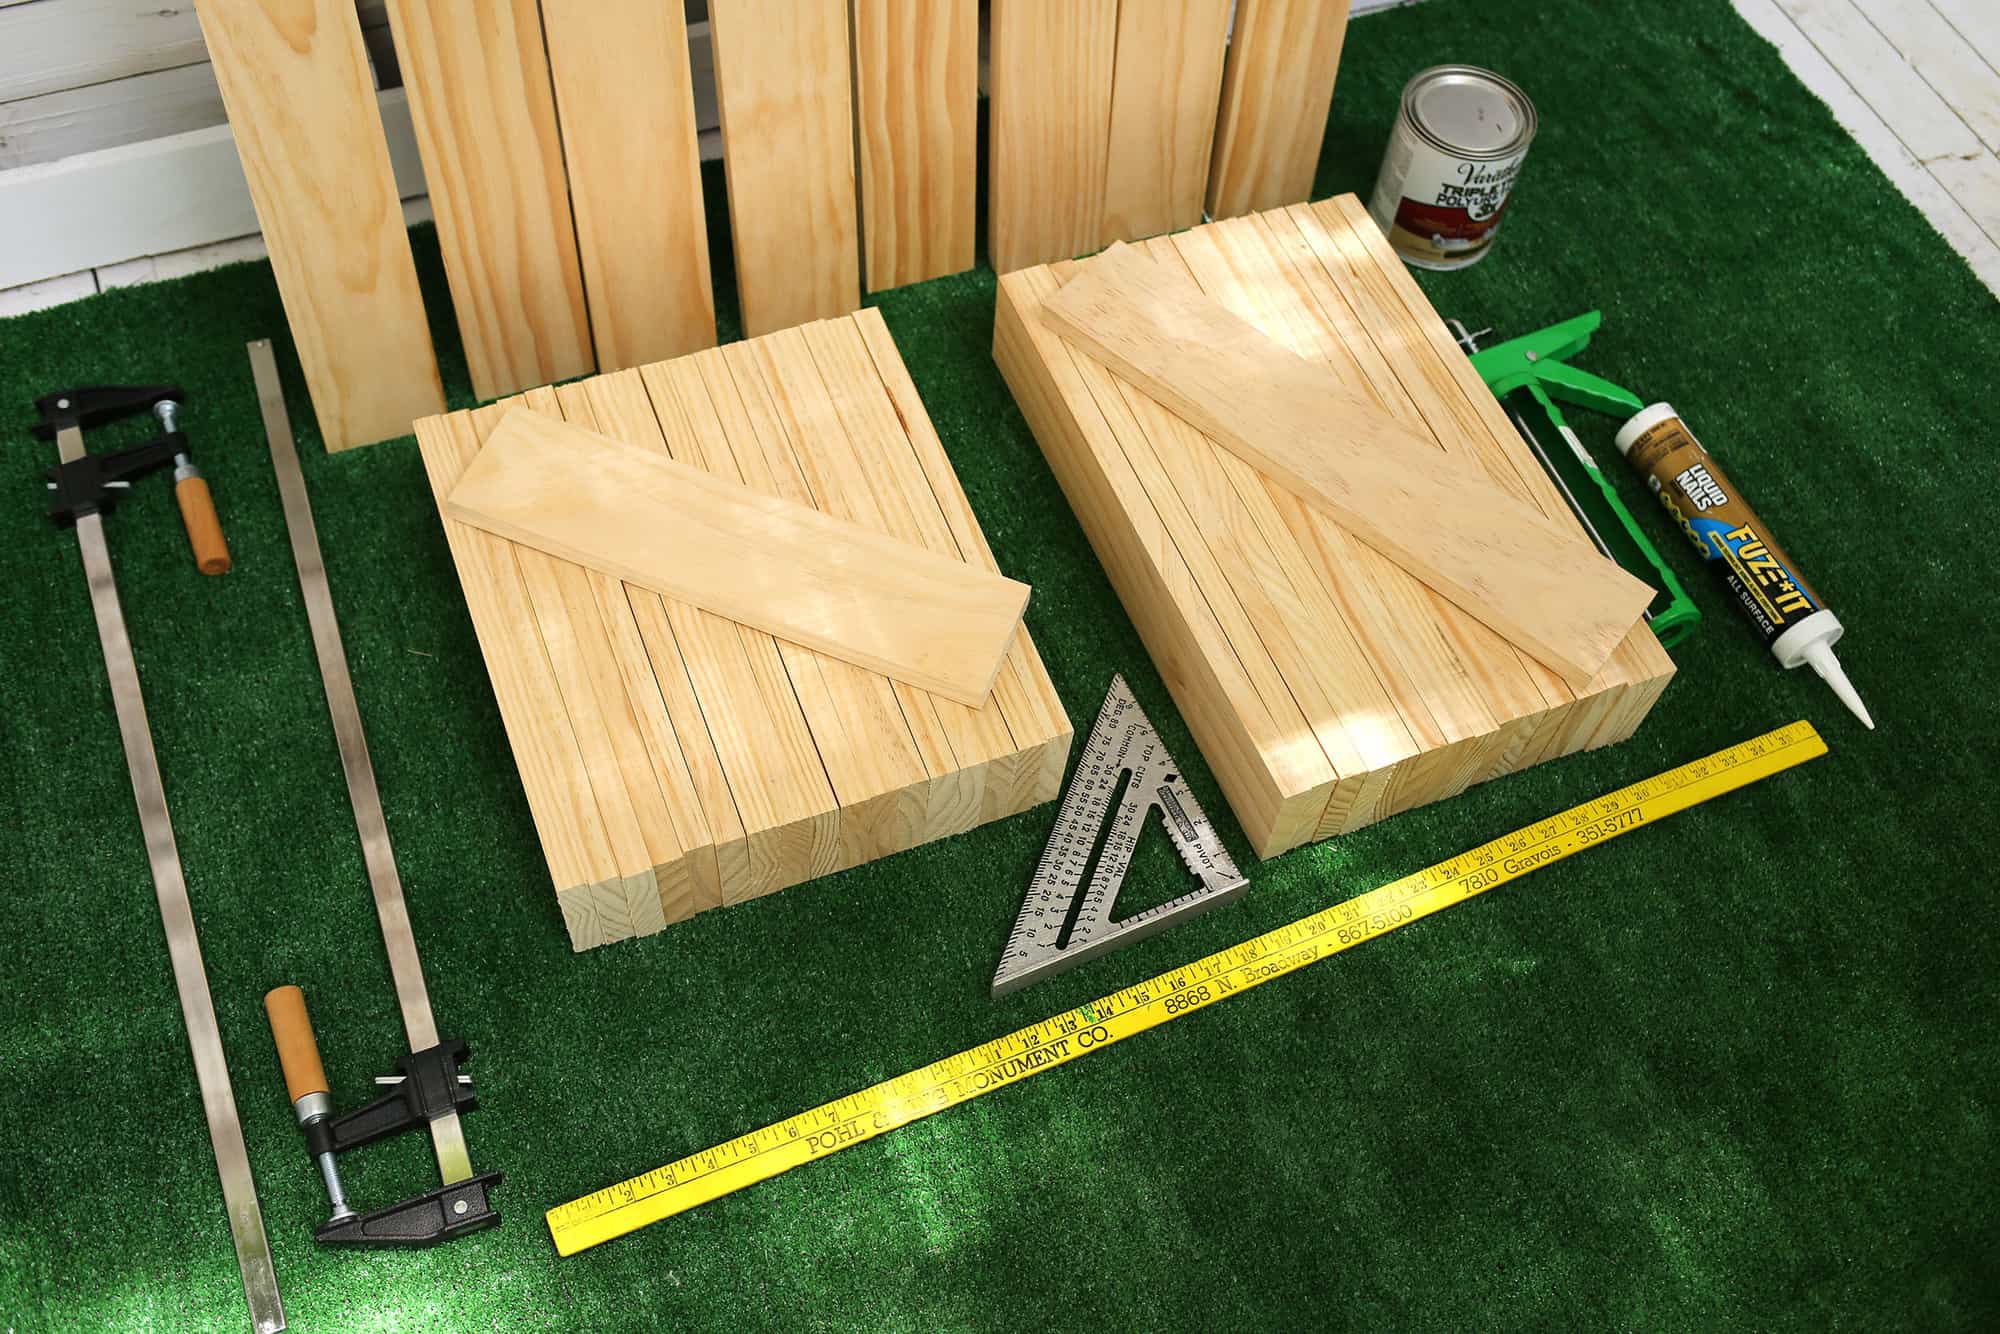 You will need nine of the 1″ x 4″ x 6′ pine boards but will only use eight of them on the bench seat. The ninth one will be cut down along with the rest of the boards. From the six 1″ x 4″ x 8′ boards, you’ll need 14 cuts that measure 18″ long and 16 cuts that measure 14.5″. Be DOUBLY SURE that you’re picking out the straightest boards possible and then be sure not to store them leaning against the wall for too long or they may want to warp. Warped boards are going to make you SO frustrated when you get home and realize you need to make a second trip to the other side of town. Also, unless you’re using spray paint, you’ll want to pre-paint or pre-stain your 6′ boards since you won’t easily be able to reach in between the slats once assembled. I love the look of natural pine, so I’ll be sealing mine with polyurethane. If you’re going to use yours outdoors, be sure to choose a stain or clear urethane so that it’s safe from the elements.
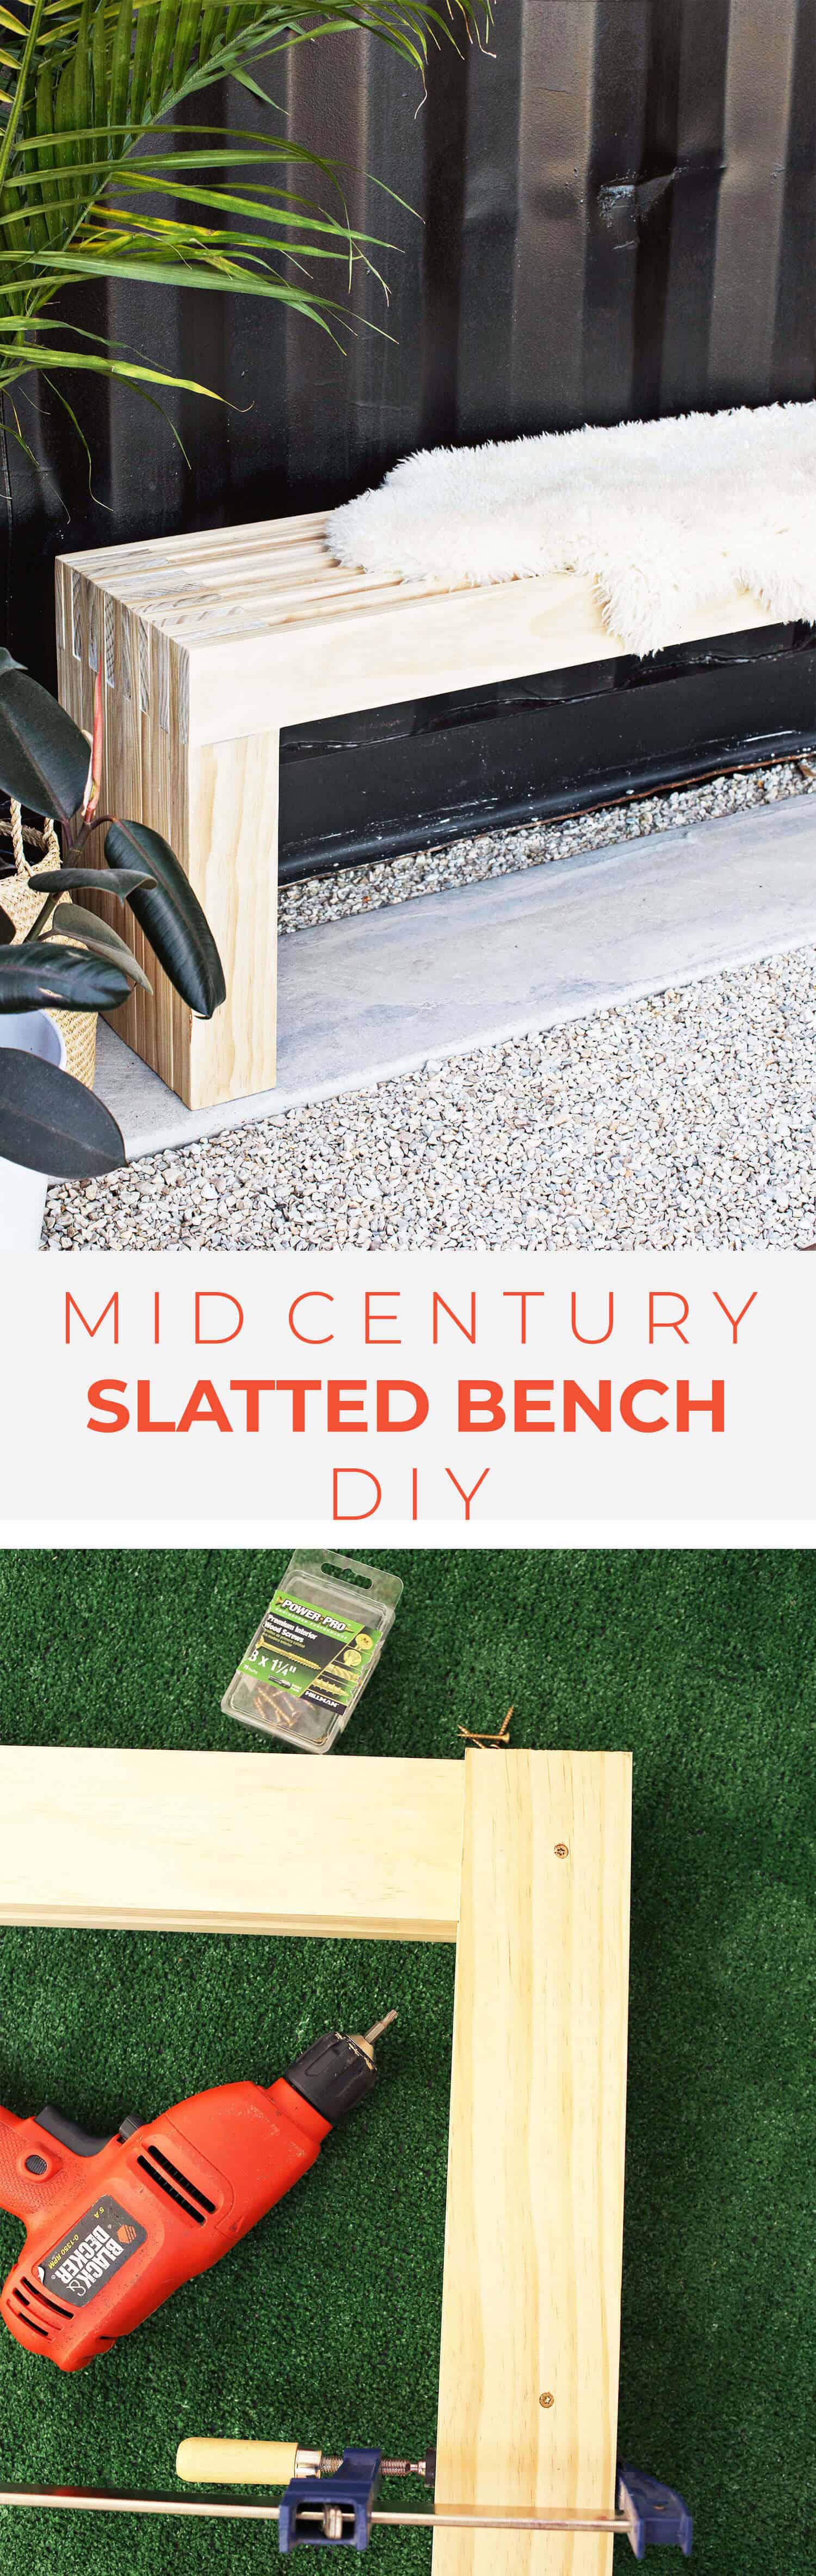
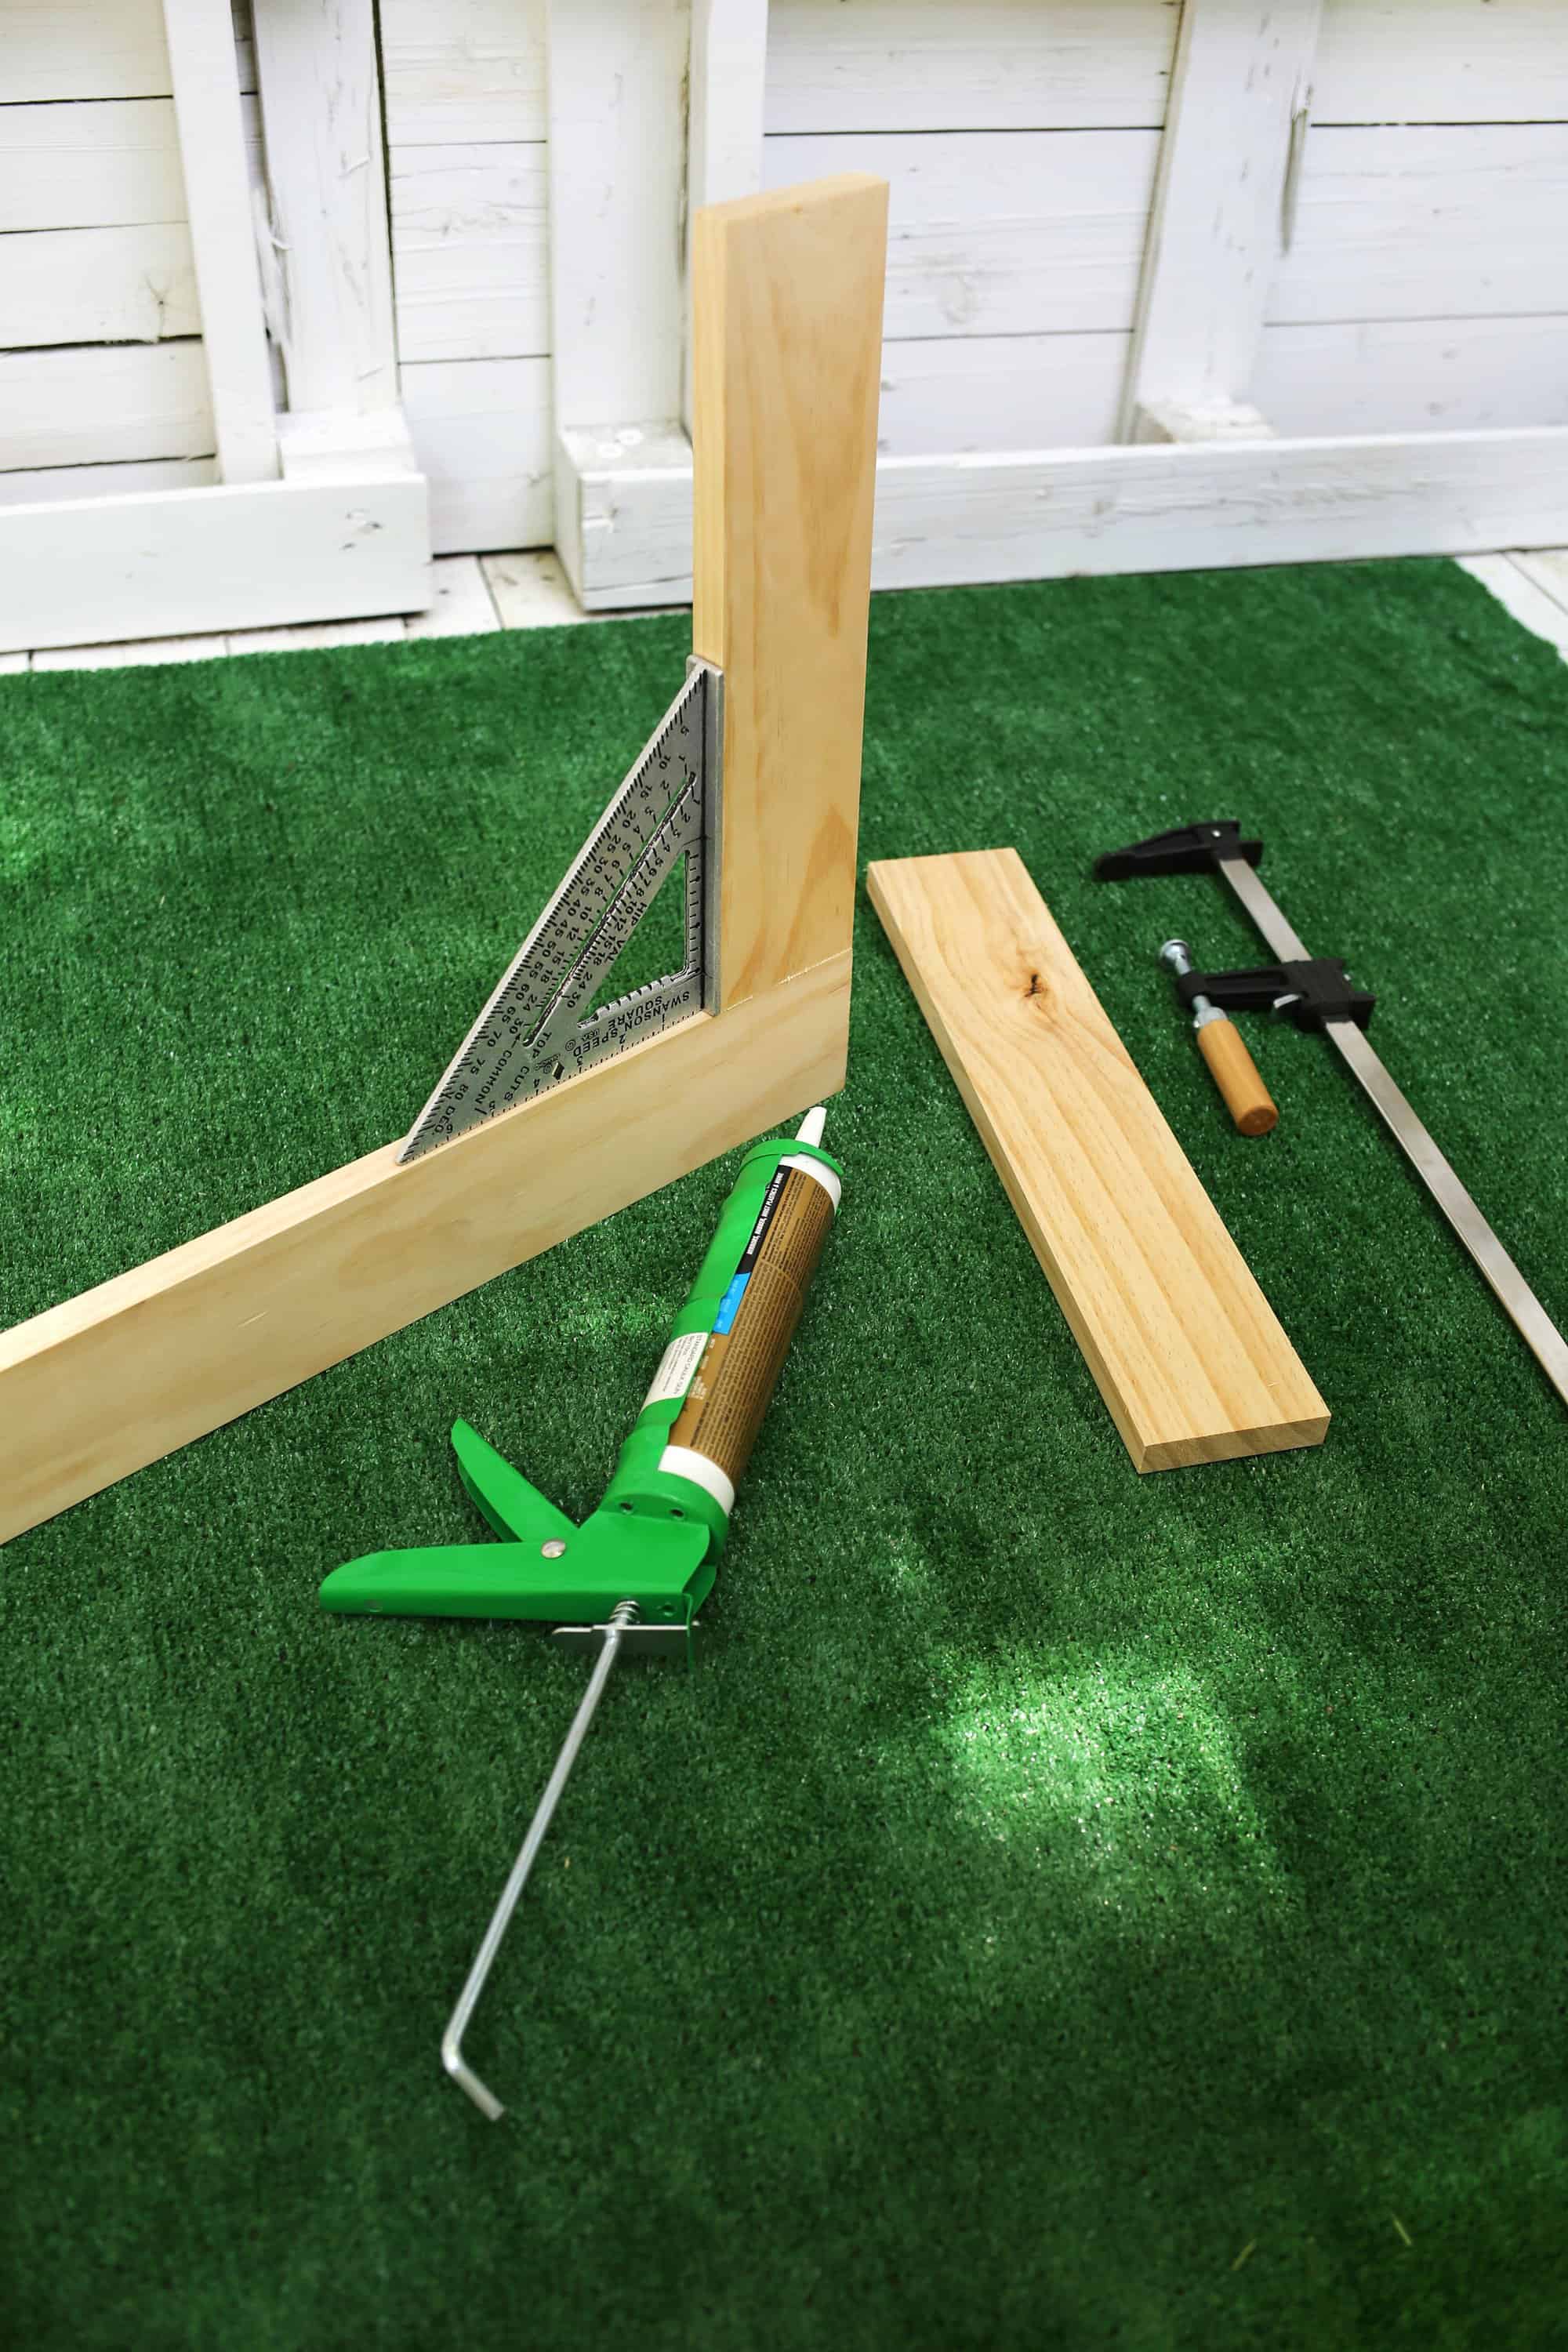 We’re going to start with a 6′ board and one of the 14.5″ boards. You want to make sure your wood is squared up because all of the rest of the boards will be following these lines. In the photo above, my bench is upside down to show you how it is square, but then I placed the bench flat. Since you’re using Liquid Nails, you’ll likely want to work on a surface that is protected. Also, keep a wet paper towel and scrap wood nearby to scrape off the excess that will squeeze out in some places.
Place a small bead of Liquid Nails on one of the boards where the 6′ piece and the 14.5″ piece will join and press them together with your clamp, making sure it’s still square. Liquid Nails will start setting in about 10 minutes, so don’t wait too long in between steps without clamping. Repeat on the other end of your bench.
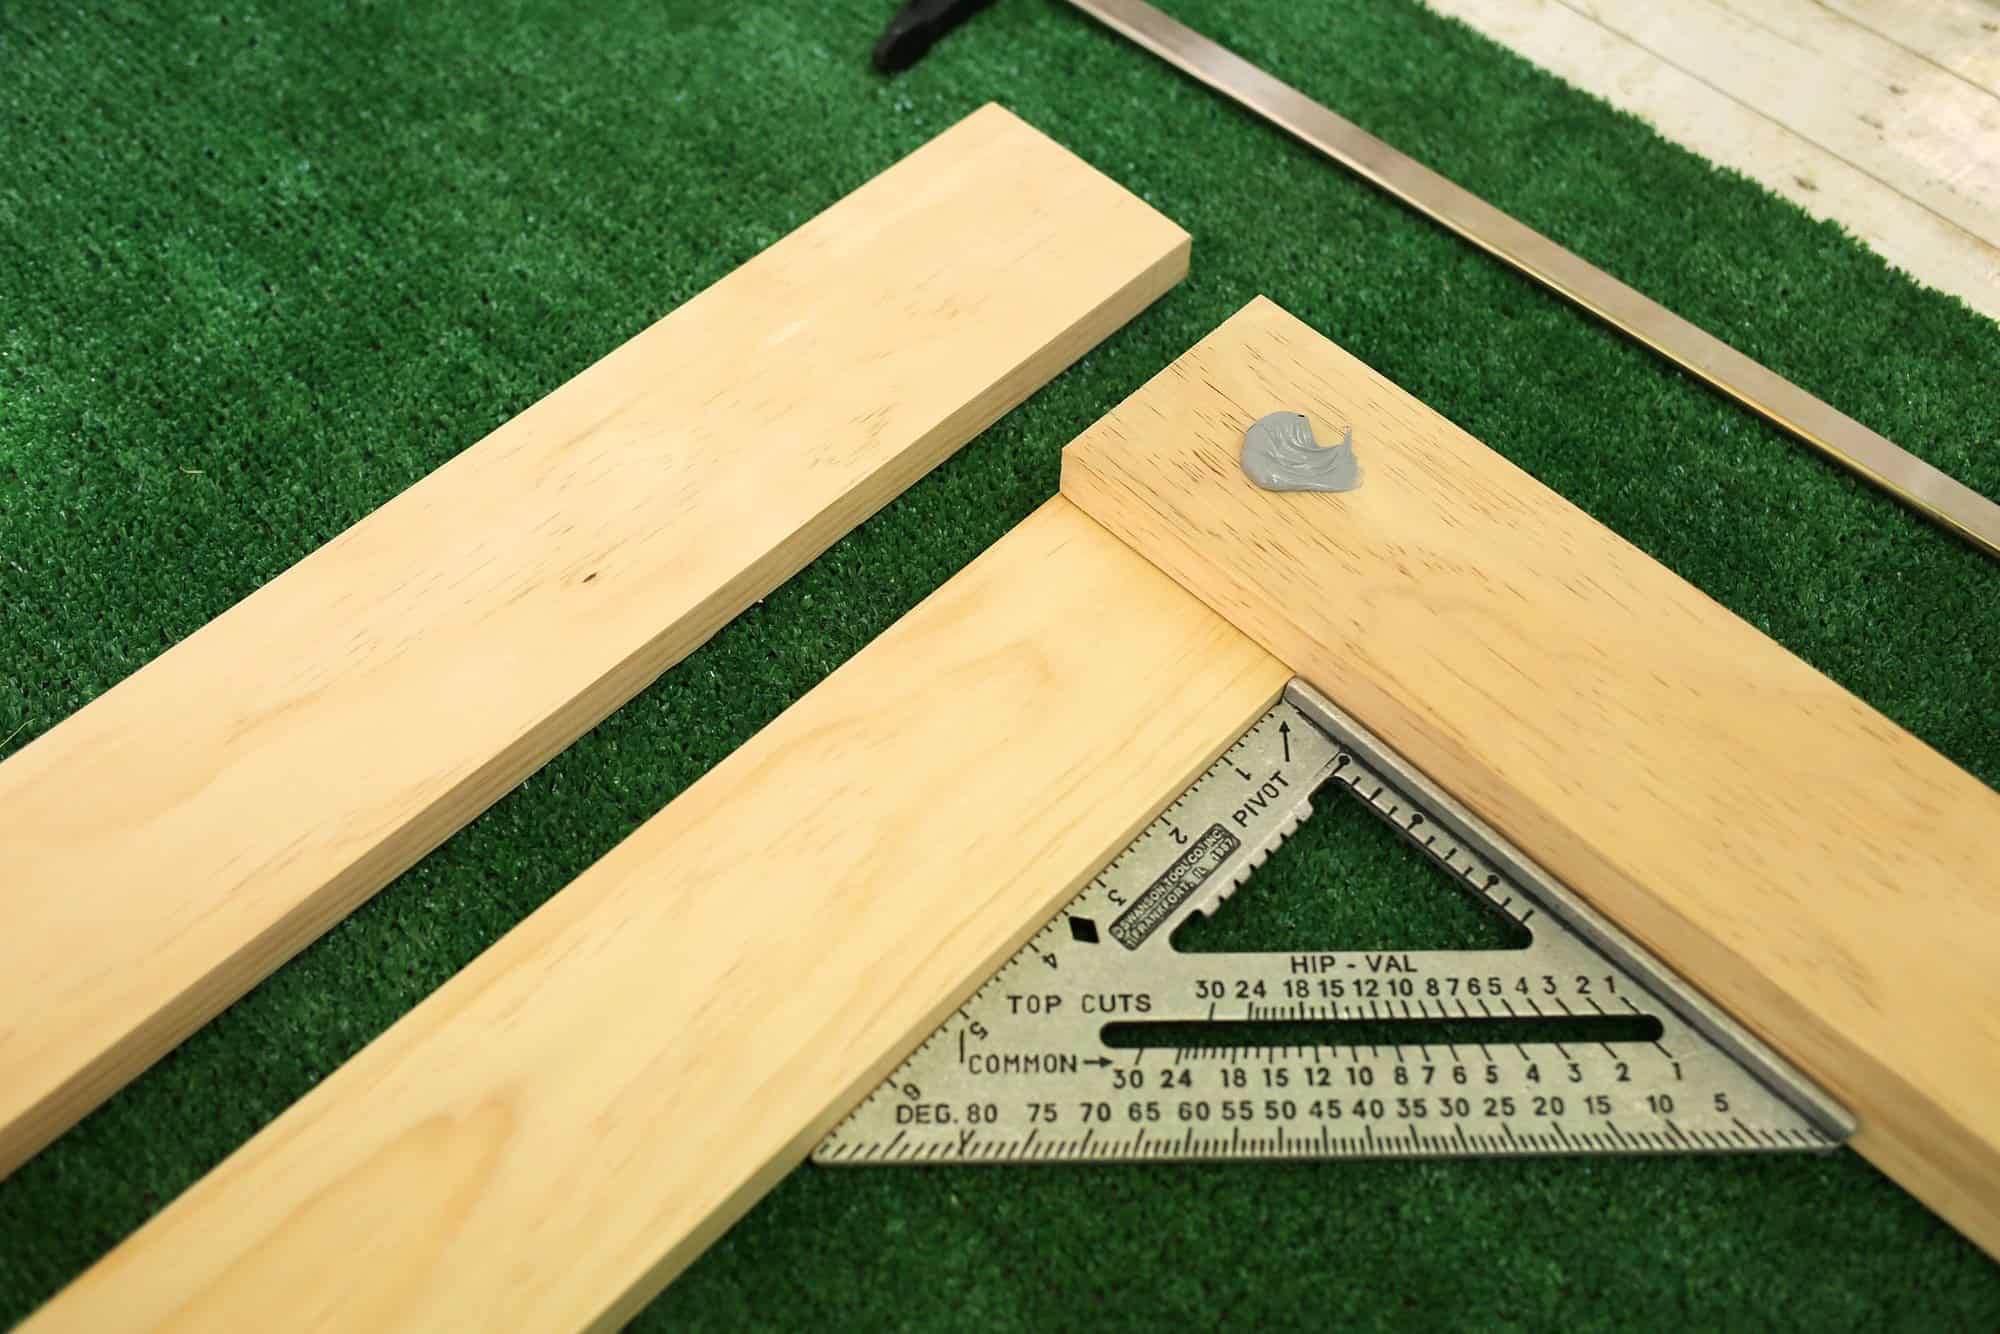 You next step will be to add a 1/4″ strip of Liquid Nails along the center of one of the 18″ boards and place it directly on top of the 14.5″ board so that it overlaps and is flush with the corners of the 6′ board. You can see where I’ve placed it in the photo above. Before adding the dot of Liquid Nails to add the next board (shown), I suggest drilling a screw in the spot where the glue is and then adding a second screw about 4″ up from the bottom of the other end of the 18″ board. Originally I was going to try and build this without hardware, but I got impatient waiting for my glue to dry. Repeat on the other side.
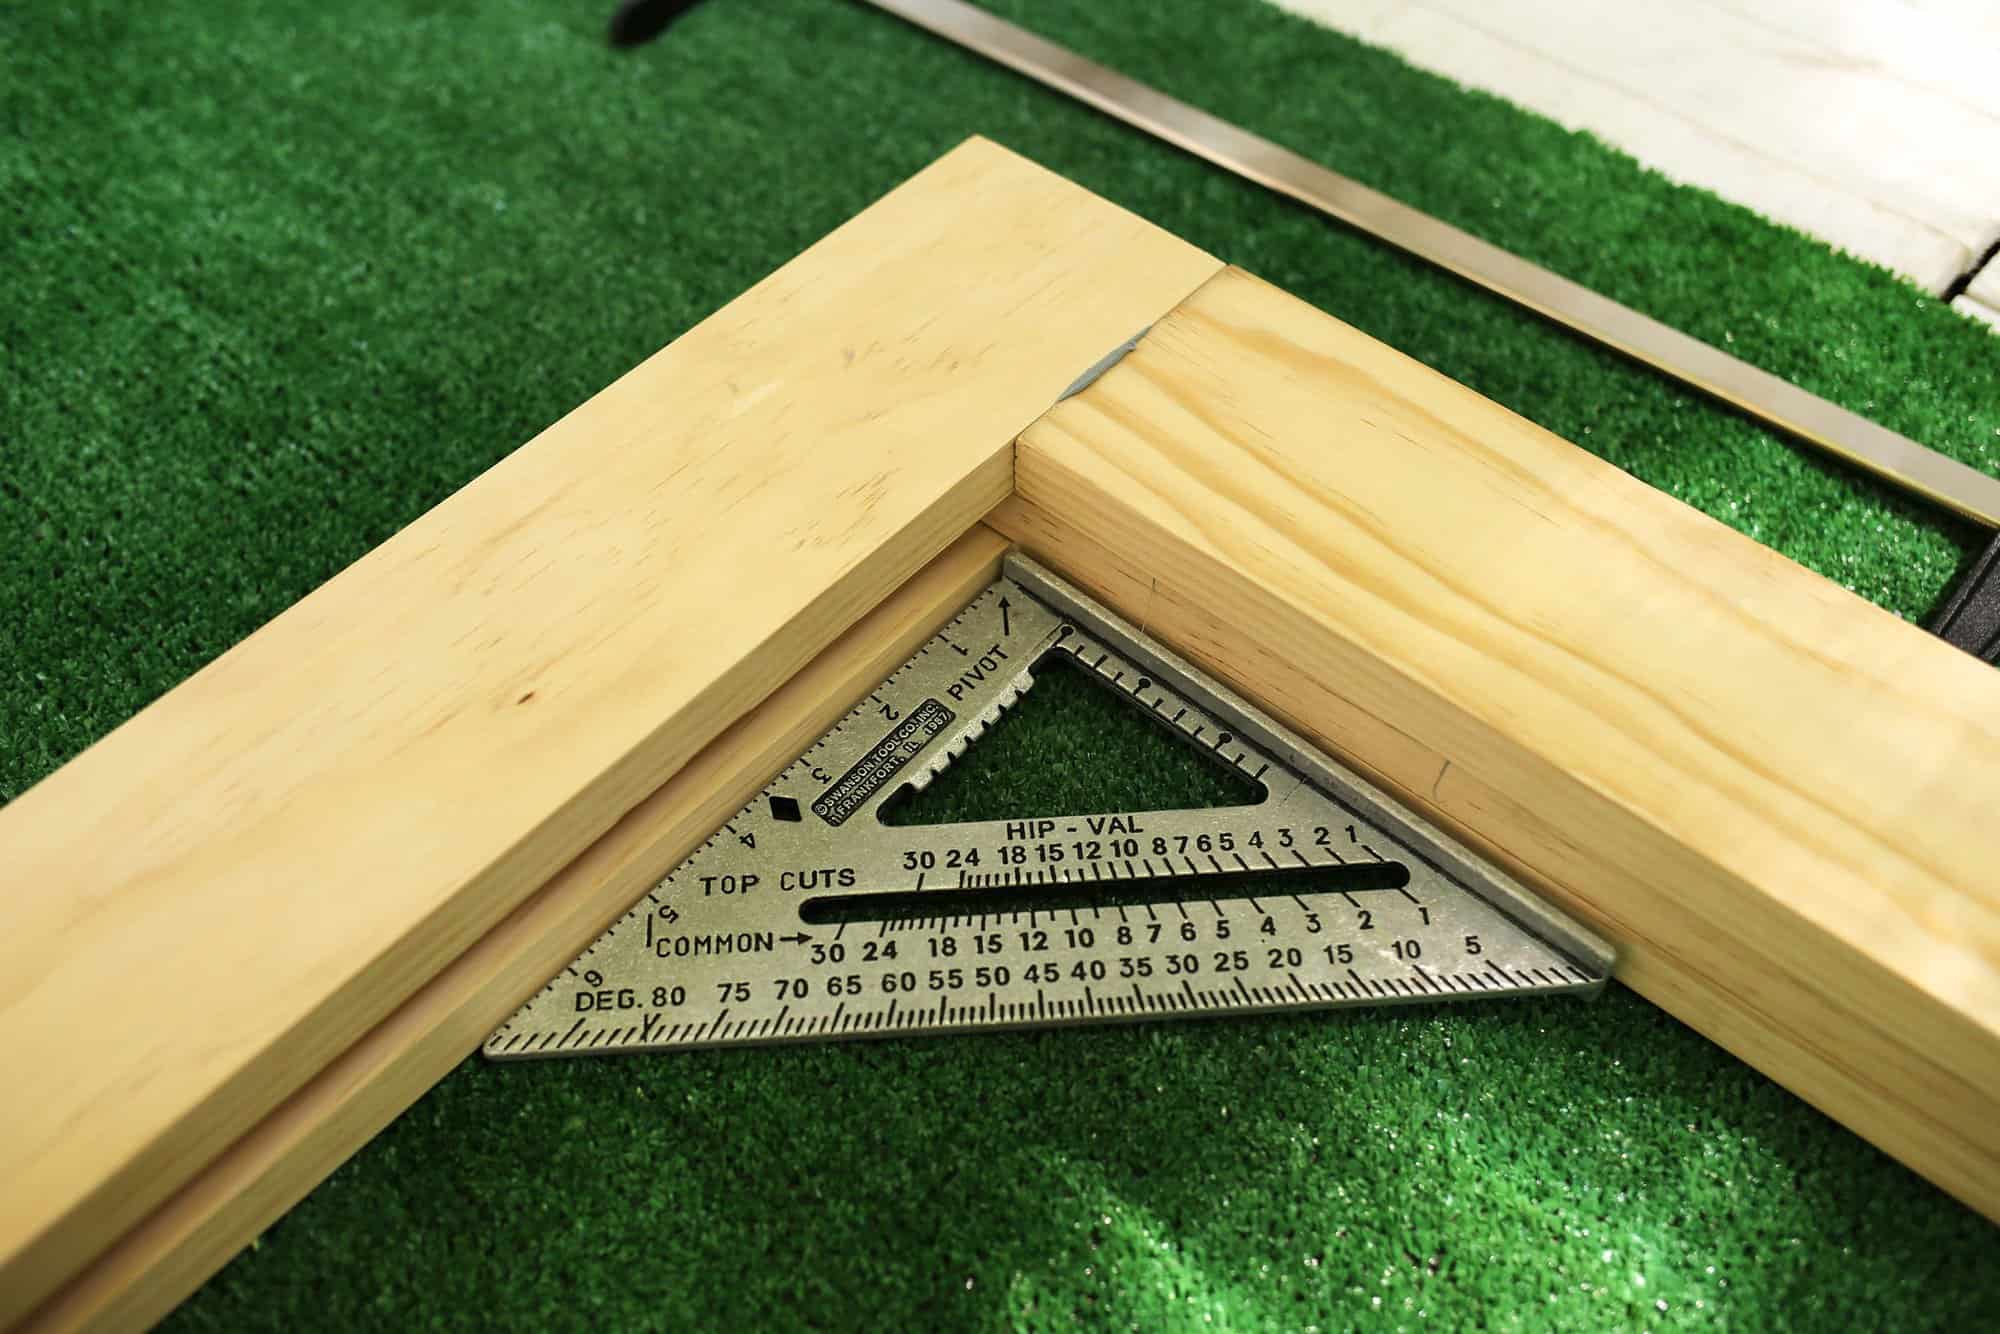
After you’ve added your screws, place your dollop of glue and then add your second 6′ board. Make sure it’s square and the edges are as flush as possible before clamping and drilling another screw down in that joint. Repeat on the other end.
 Then repeat the first step by adding a 14.5″ board so that it’s flush under the 6′ board and on top of the 18″ board. Place a glue dot at the top where it meets the 6′ board and a 1/4″ strip of glue down the center of the wide side where it will rest on the board under it. Clamp in place and drill about 2″ from each end of the 14.5″ board. Repeat on the other end.
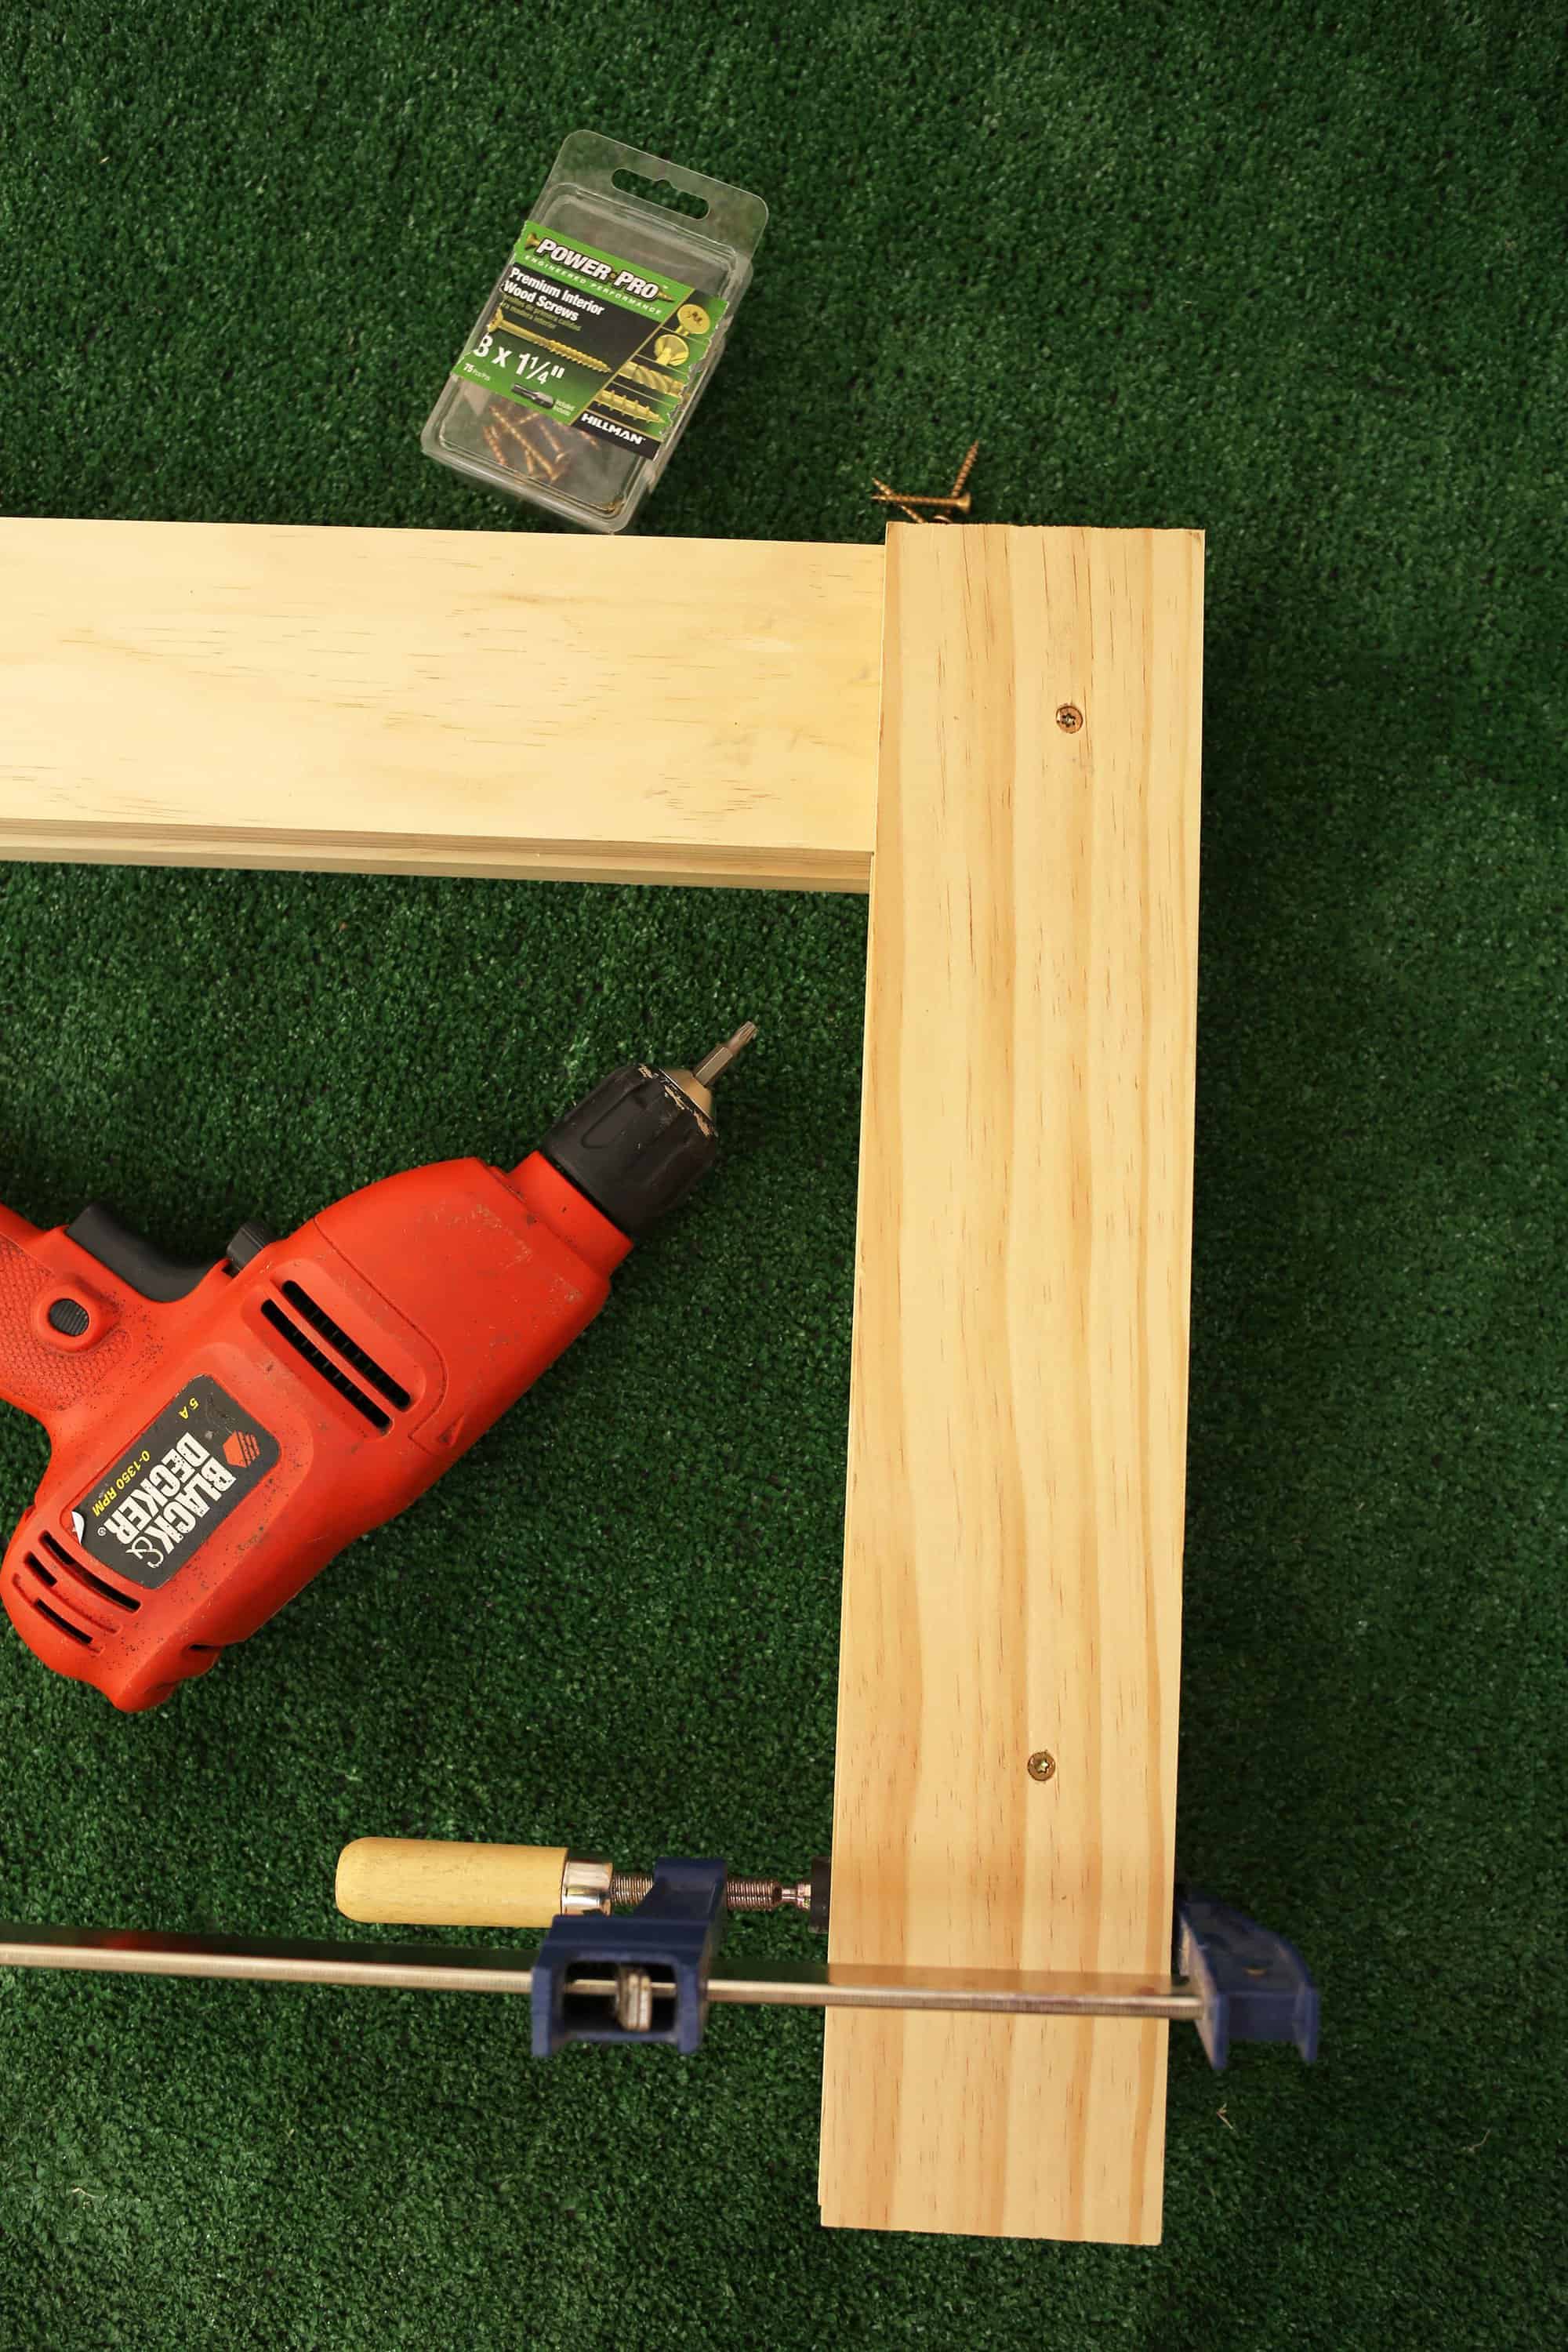 Then add your glue onto your 18″ board and place that on top, making sure it’s flush and square. Clamp and drill. Repeat on the other side.
Continue this process until you’ve used your last 6′ board and added your last 14.5″ boards underneath. We started with the front of the bench so the hardware wasn’t showing. If you’d like to avoid hardware showing on the back of the bench, just use your Liquid Nails and clamps on the last step and skip the screws. Just be sure it remains flush while it sets and doesn’t slide off to the side under the pressure of the clamps. If you’re painting your bench, you can just add wood filler over the counter-sunk screw heads and paint over it. Let your glue set for the instructed length of time before attempting the next step.
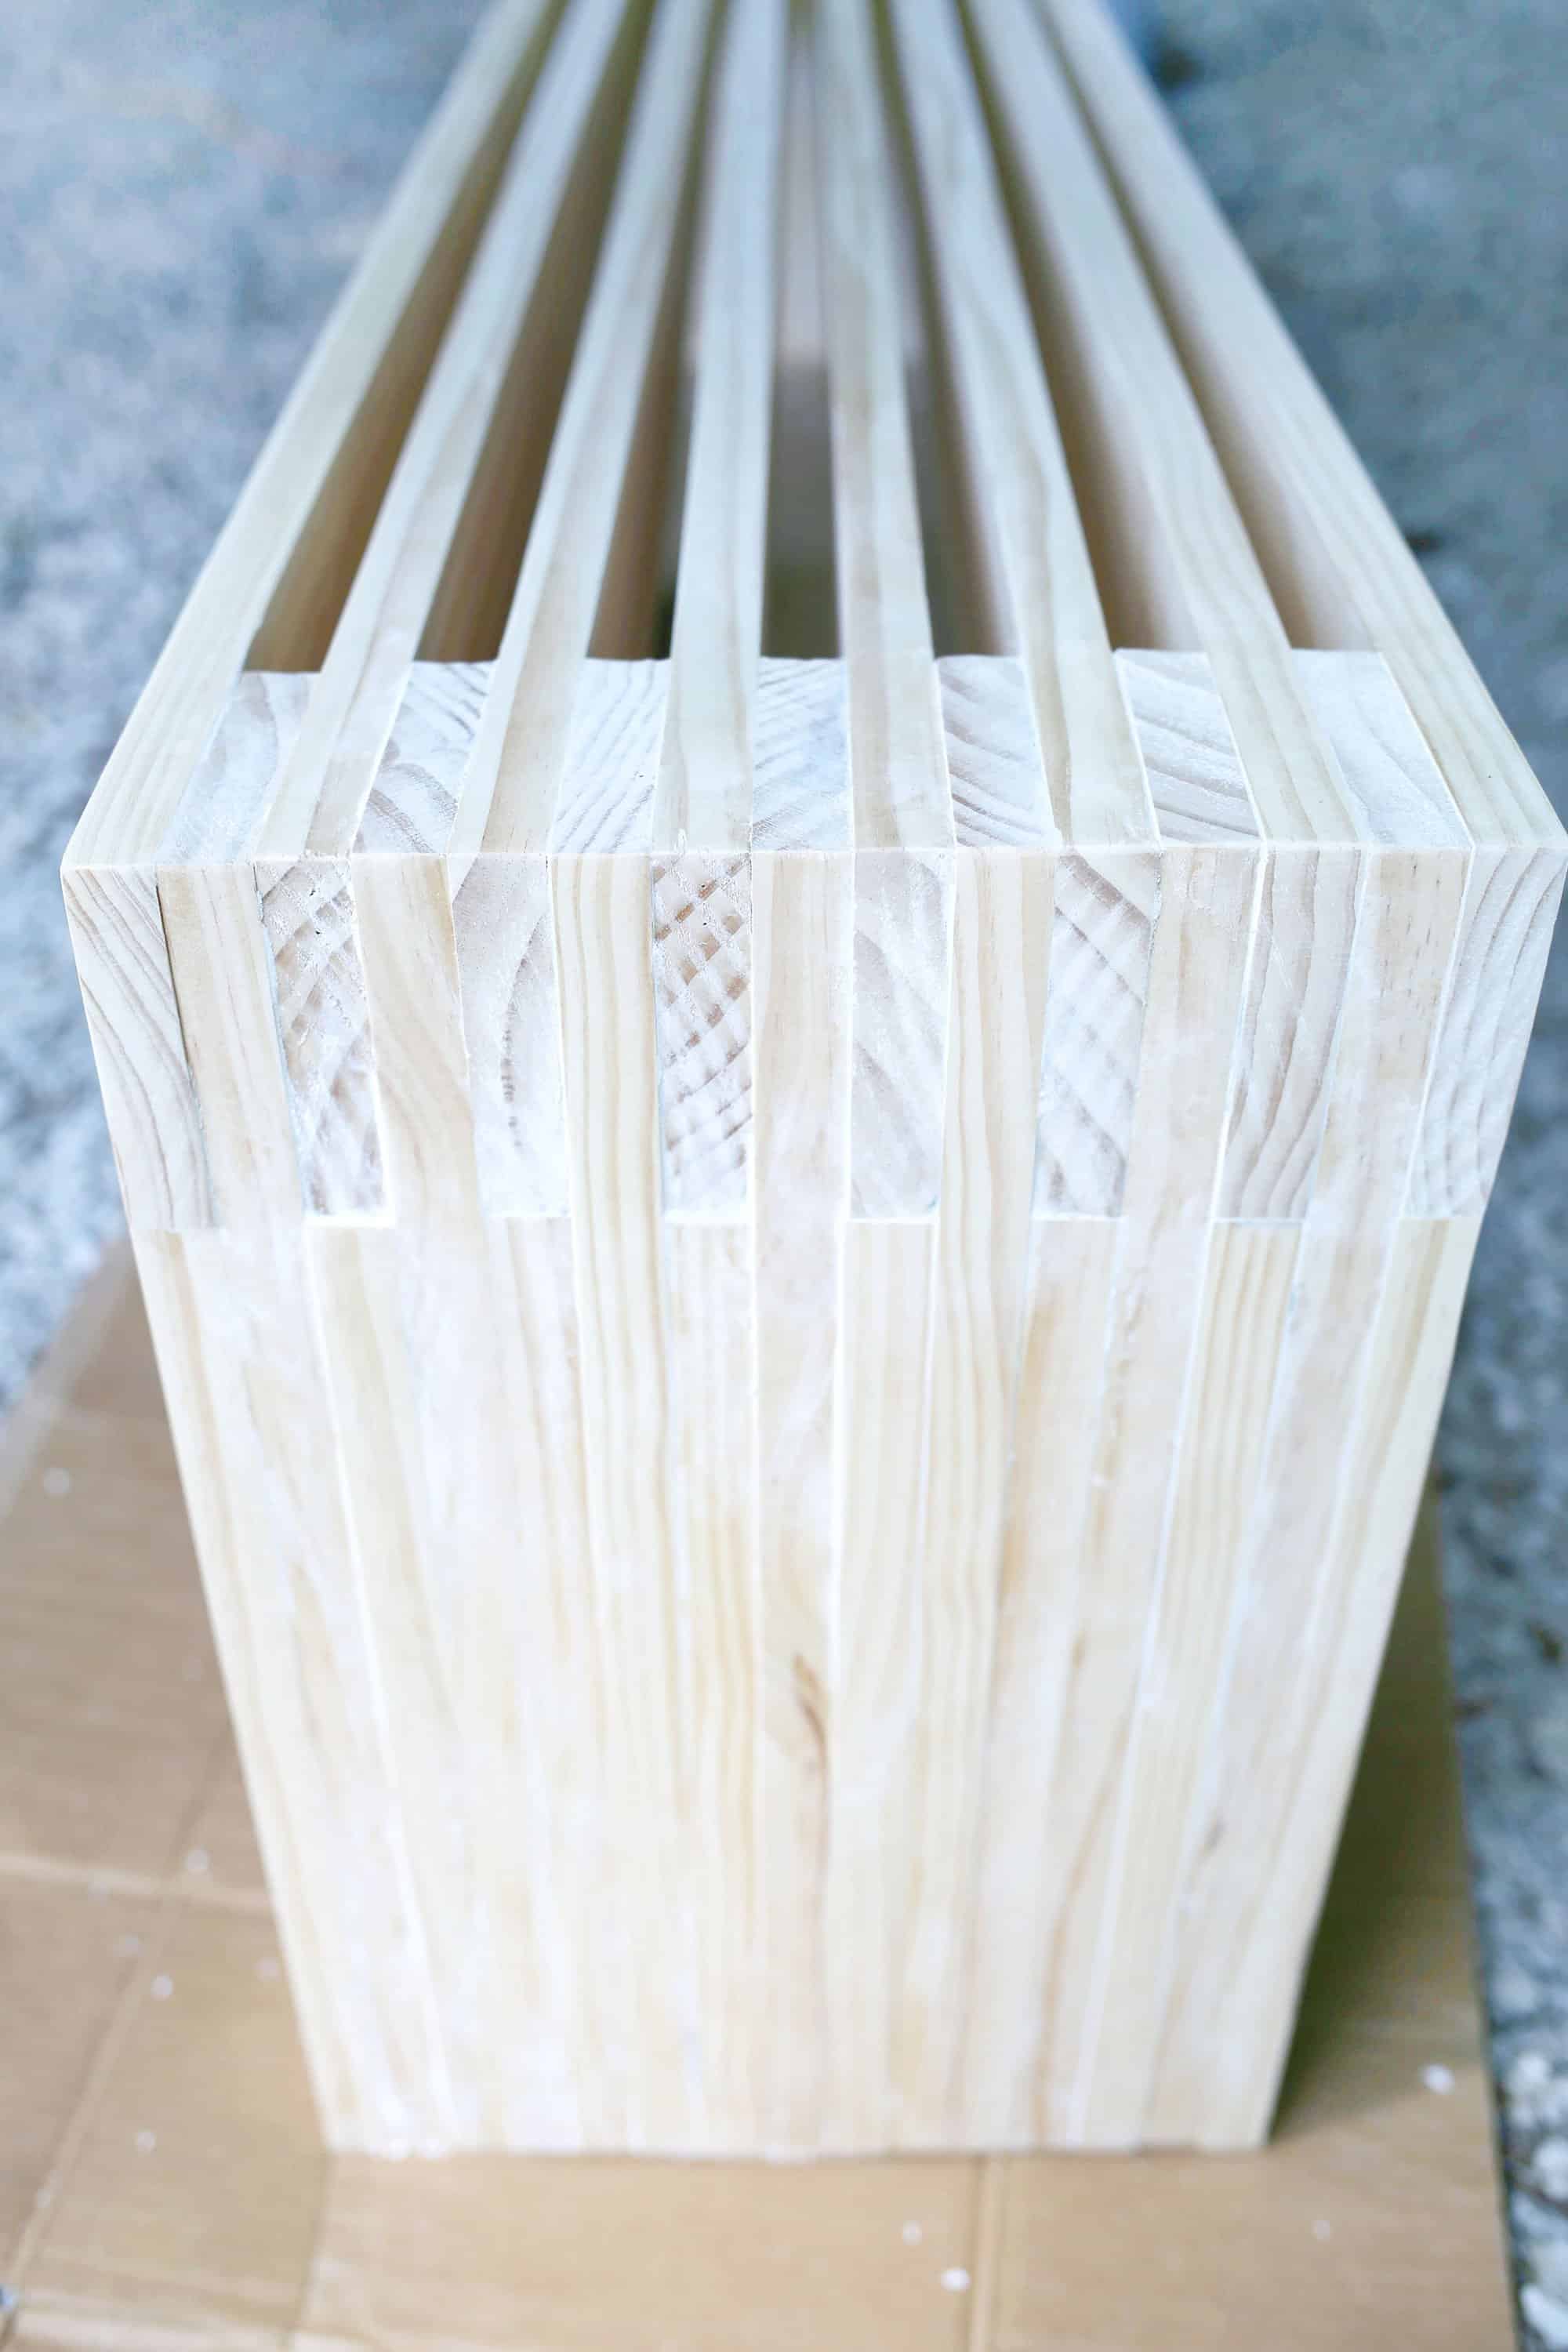 Sand down your uneven edges by using an 80 grit and then 120 grit sandpaper. This may take a bit of time depending on how uneven some of your edges may be. Step back every few minutes to make sure you’re not over sanding! It’s almost like cutting bangs. You get started and then 10 minutes later you’ve got quite the artistic cut! Wipe down your bench with a damp cloth and then add wood filler to any gaps in between your wood. Follow manufacturer’s instructions and then add your paint or stain if you haven’t already.
 I’ve seen people add furniture feet to the bottoms of their benches if they’re going to be outdoors and I’d also suggest adding a strip of thin wool felt to the bottom if you’re using it on hardwood floors.
Love a good bench DIY? Check out DIY Upholstered Waterfall Bench or Woven Leather Bench DIY!
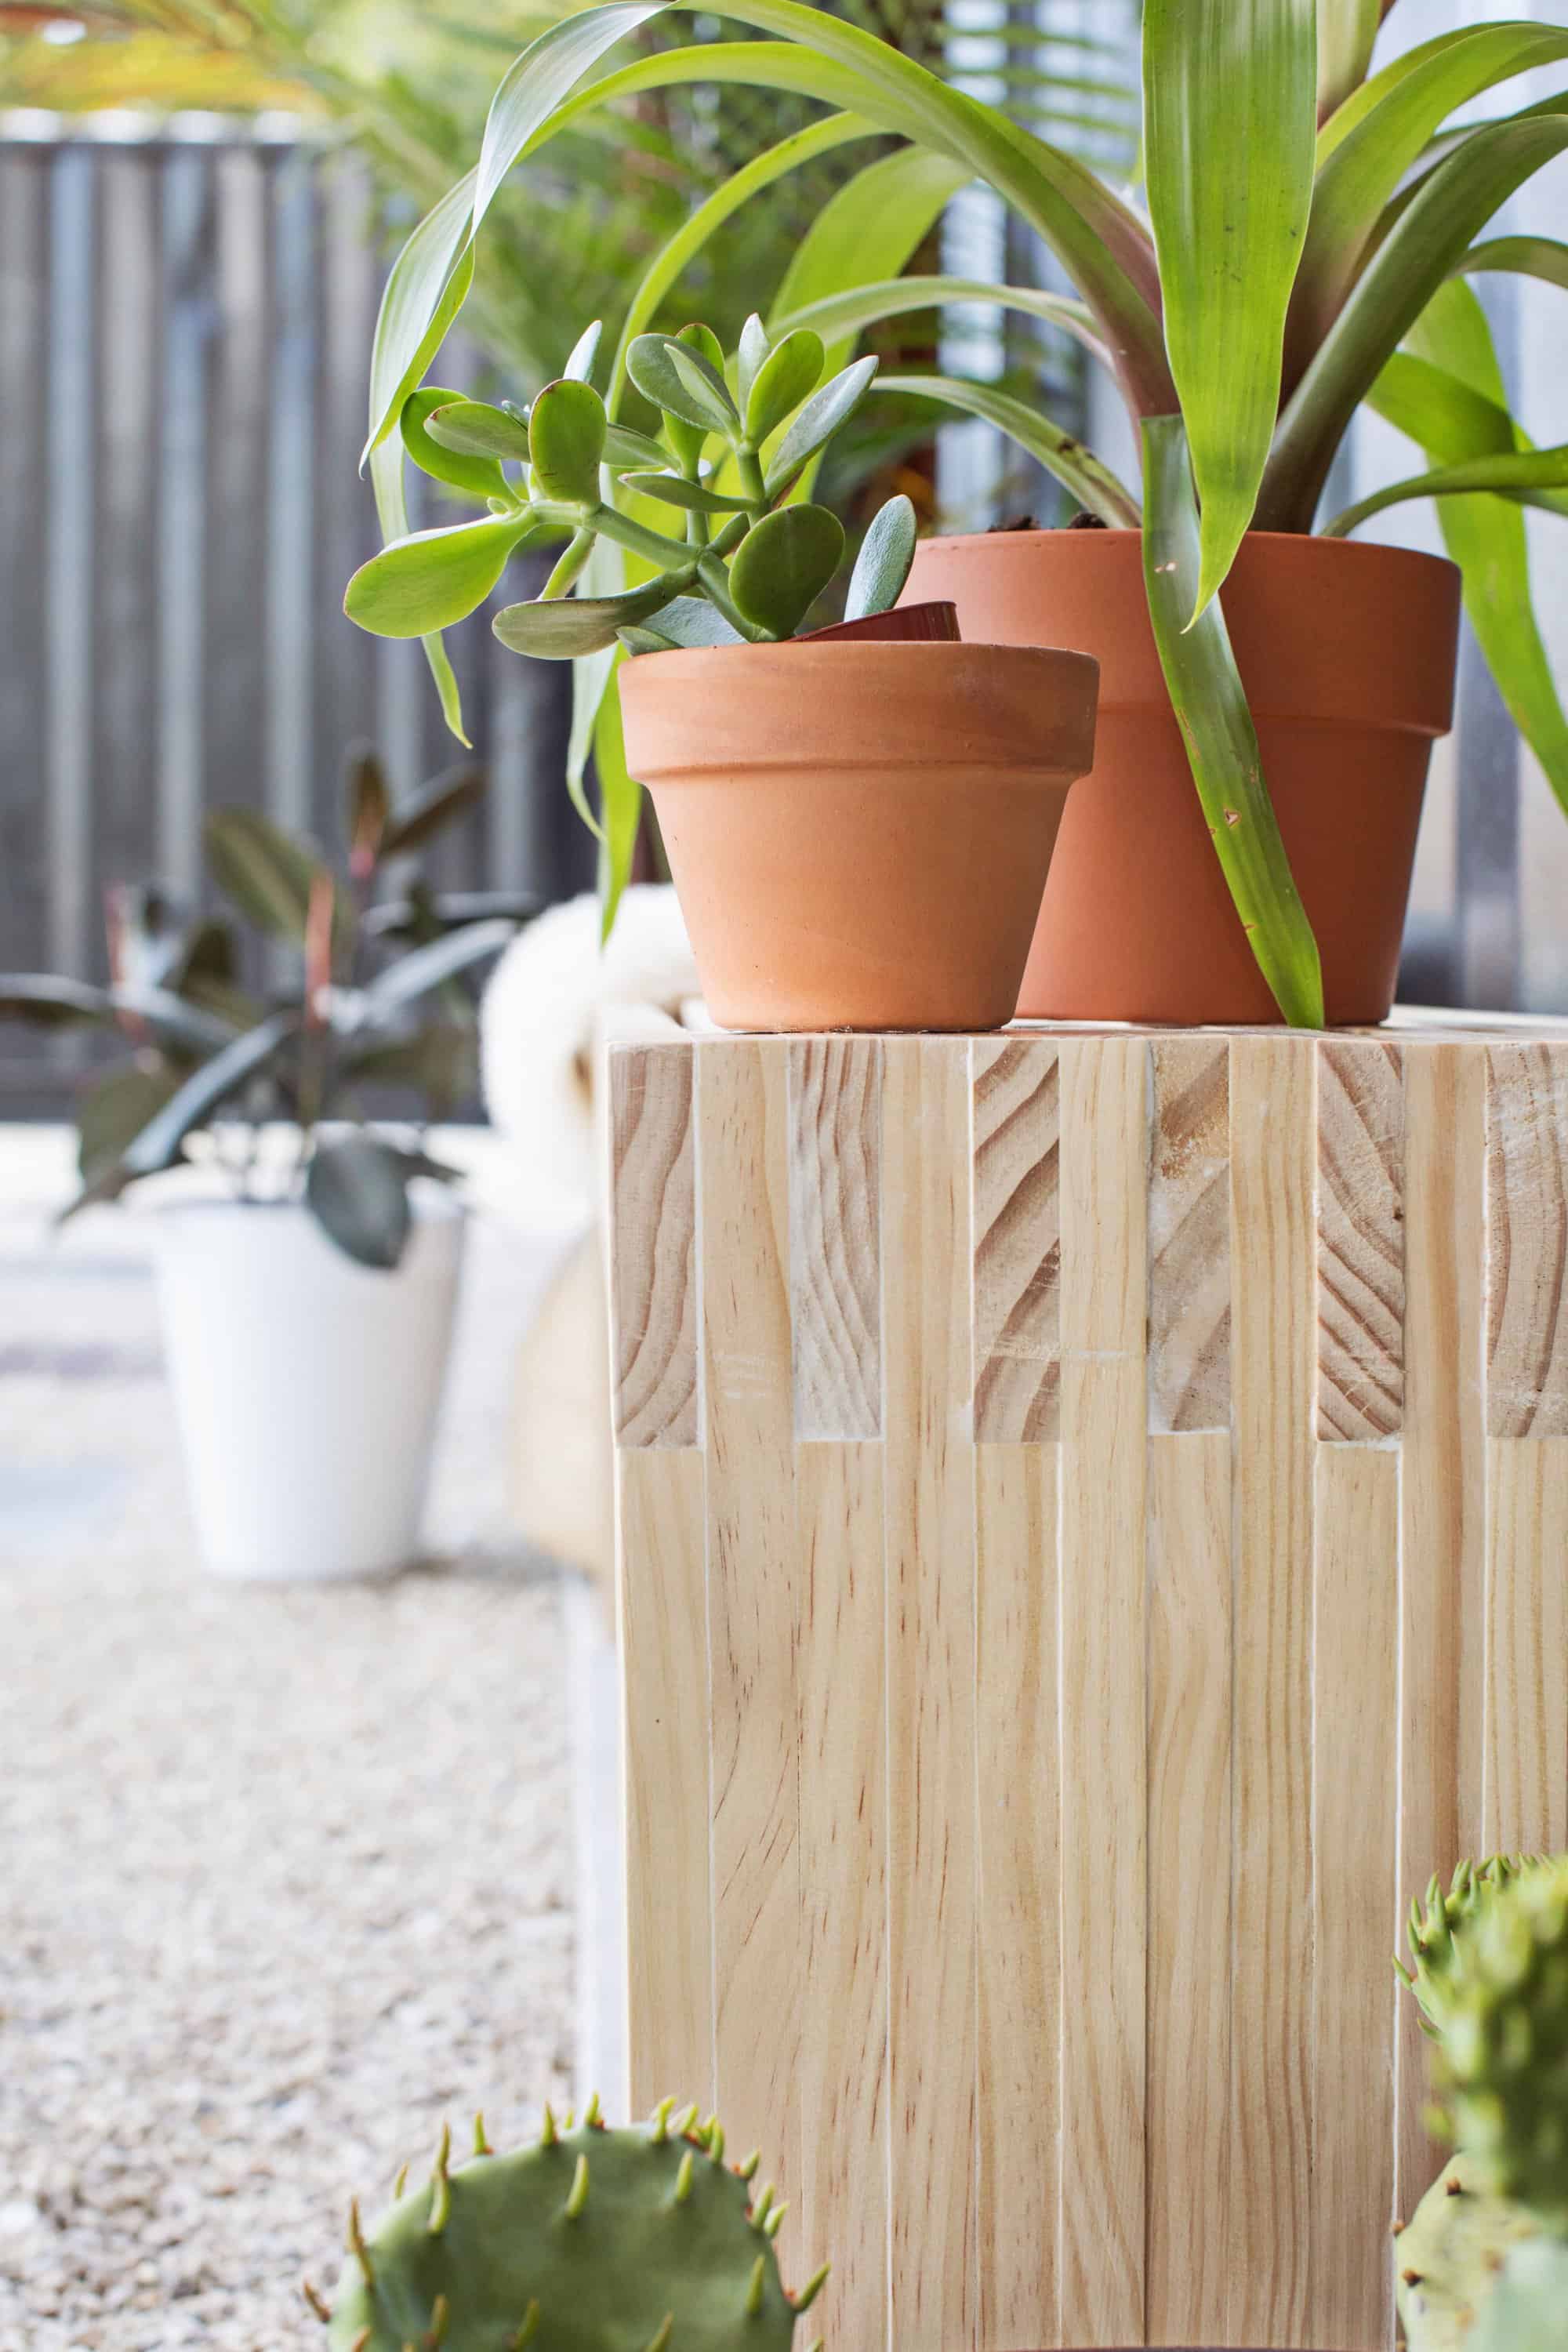
 It’ll add so much extra seating whenever extended family or friends come by, but in the meantime, it’s an excellent place to set a few new plants. Don’t you think? – Rachel
Attached an image of my changes to the design and the table
Wow, they both look amazing!
Not having done any woodwork for nearly 60 years at school this was my first project. I made it harder for myself by using scrap wood from old pallets. Also, I did not have many tools at that point!
I turned out fine although needed a lot of sanding. Then I worked on an alternative design whereby the slats also ran down the side supports. I have now built two of those and it is an improved design IMHO. Using the same criteria I built a matching garden table. Because of the size and weight I made it in two parts which then bolted together.
Is there a guide with easy steps to build this beautiful benche?
Wonderful project but there should be a way to download / print instructions with pictures.
Great DIY project for this weekend! Thanks for sharing this tutorial with us!
Looking so good, it well developed. might try to make it 🙂
Any DIY suggestions for a matching patio dining set? San Diego’s Greathouse has a few nice pieces that would go great with this bench.
Staining the wood to match the color to this set would also be a good option – https://www.greathouse.com/furniture/patio-furniture/drift-collection/
What do you think?
We just moved into our new/old home. DH and I were just talking about building a bench for our entry way and one for the foot of our bed to sit on when putting shoes on in the morning. I love this bench so much. It’s perfect. I know we can fallow your easy how to instructions and build it. Can’t wait to make it. You rock with creativity!
Jenny Lynn,
Such high praise! Thank you for saying so and I hope you tag us so we can see your finished benches when you get done!!!
I’m impressed with out beautiful this looks!
Hanna,
Thank you so much!!!
Definitely a beautiful project to do!
This bench is so cute! I want to make one!
Paige
http://thehappyflammily.com
What was the the finished size
I’m also wondering what the dimensions are!
6 feet long, 18 inches tall, and 11.25 inches deep.
I so want to do this. How much did the total project cost?
It’s so cool, I love the simple design!
https://www.makeandmess.com/
This is so beautiful bench and lovely design. I will try it later. Thanks.
Yup! Love it against that black wall.
– Greta
www.mintyfrosting.com
This is the perfect project for my small balcony! Thanks for the share, love checking out your blog.
This bench is beautiful and looks totally doable! I’m so tempted to hit the hardware store…
http://www.rogiandco.com (A Modern Dog Lifestyle Blog)
This is so freaking good! I saved it before I even read the post;)
www.pentupstyle.blogspot.com
I’m hyperventilating at how good this. I’m making one this weekend BUT I’m going to make it a console table and have the sides be open and the top be solid. I’ve been searching for the perfect console table in my entryway but I’m on a strict budget these days so this is PERFECT. Thanks Rachel!!
Rachel, your projects are always a win!