 If you’ve seen glitter acrylic coasters before online, then you may have had the same thought I did of, “yes, please!” I’m a big fan of the look of acrylic accents on things, so it’s fun to do some small projects with resin and molds to add a little sparkle to your day-to-day life with some glitter.
They are actually super easy to make too—I’ll show you how!
Related: Resin Art – Beginner’s Guide
 Supplies:
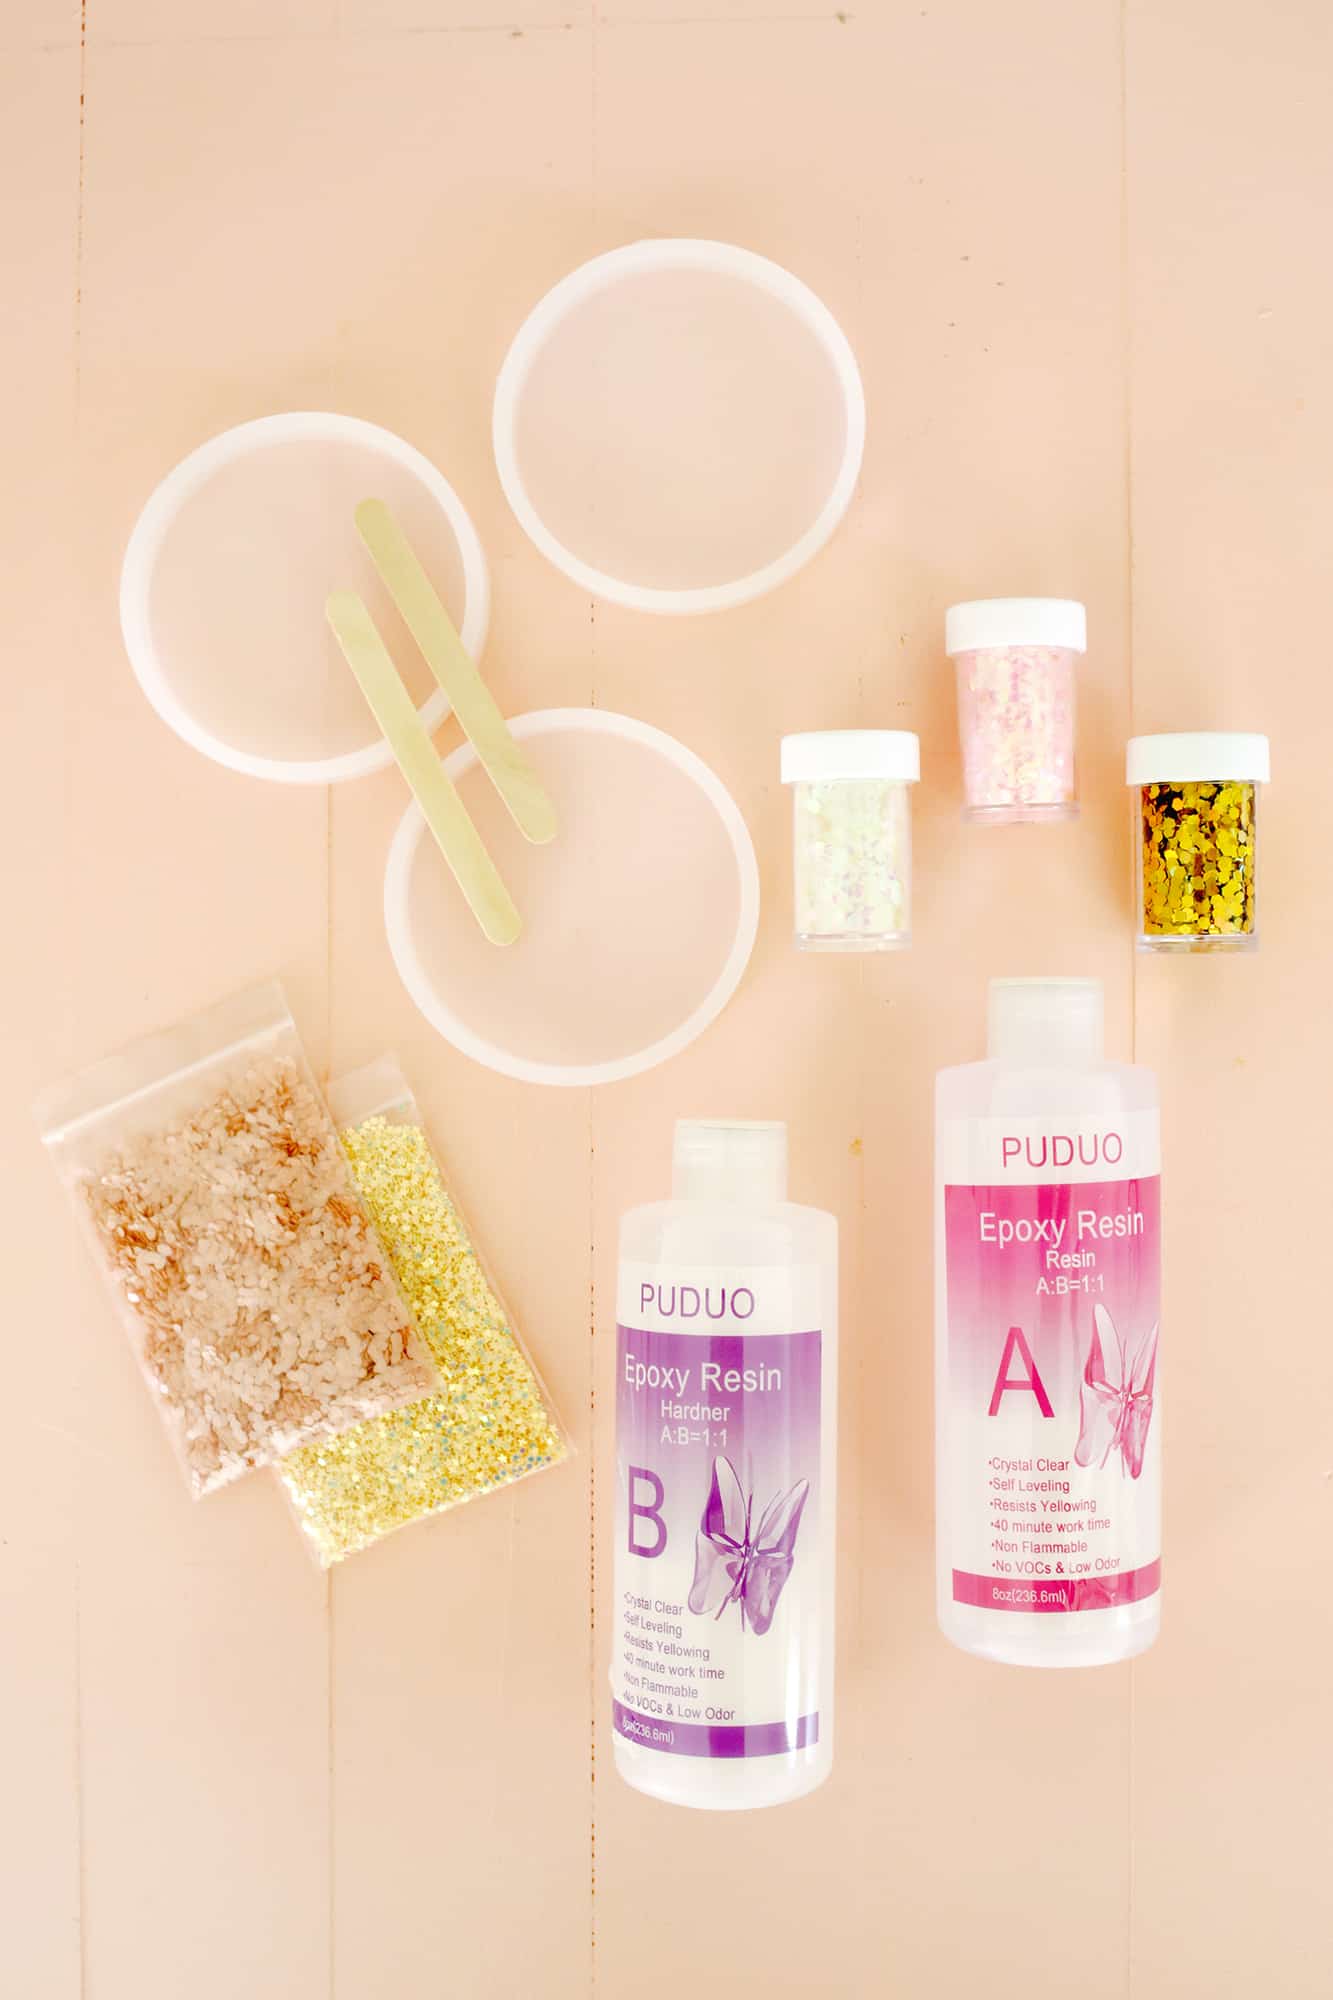
–coaster mold
–clear epoxy resin kit
–mixing cup
–glitter of your choice
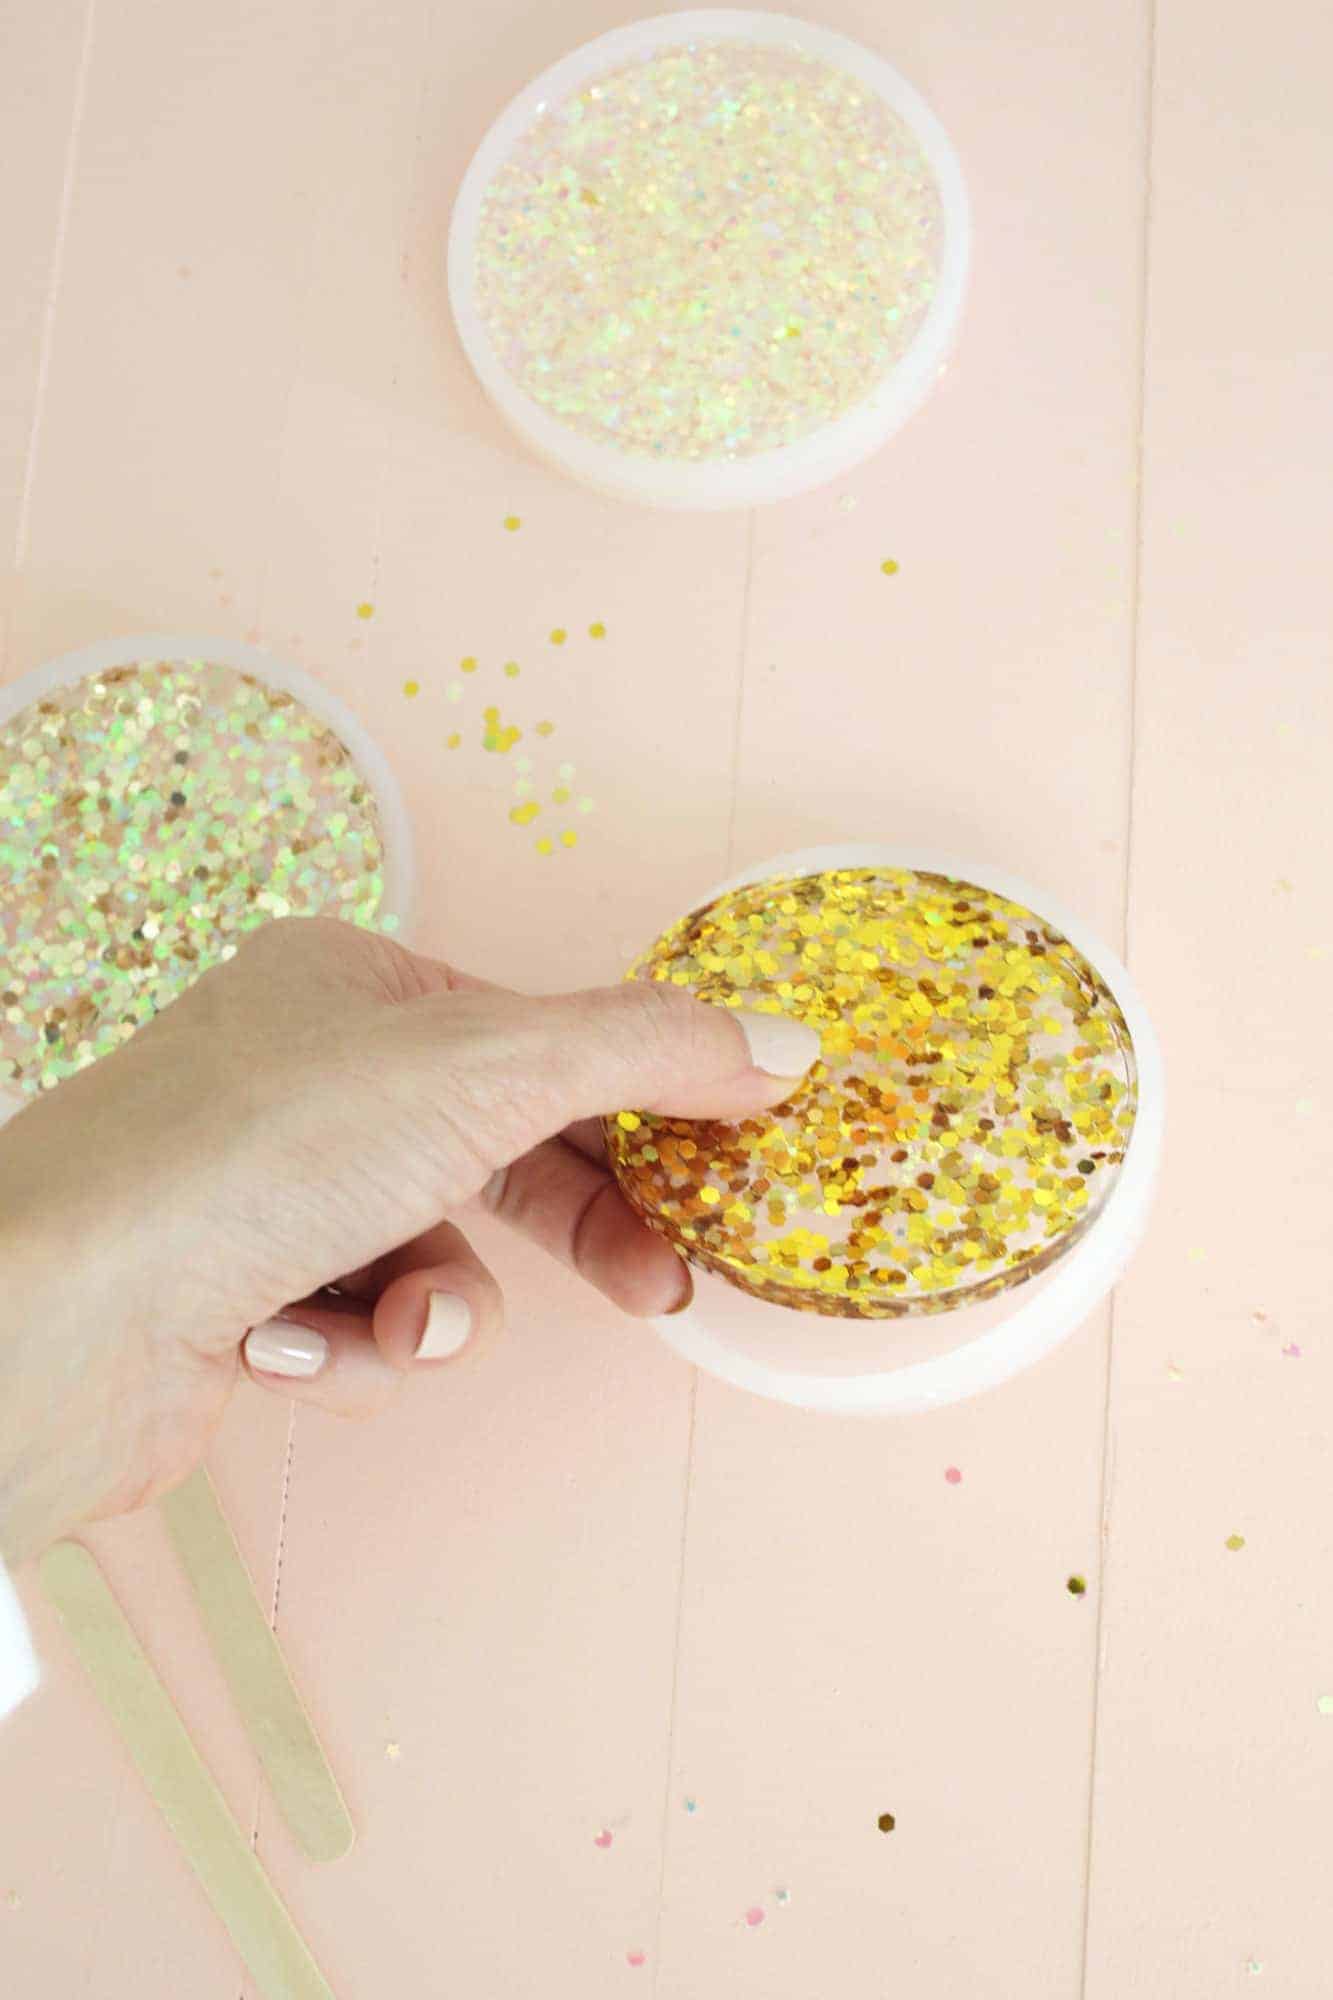
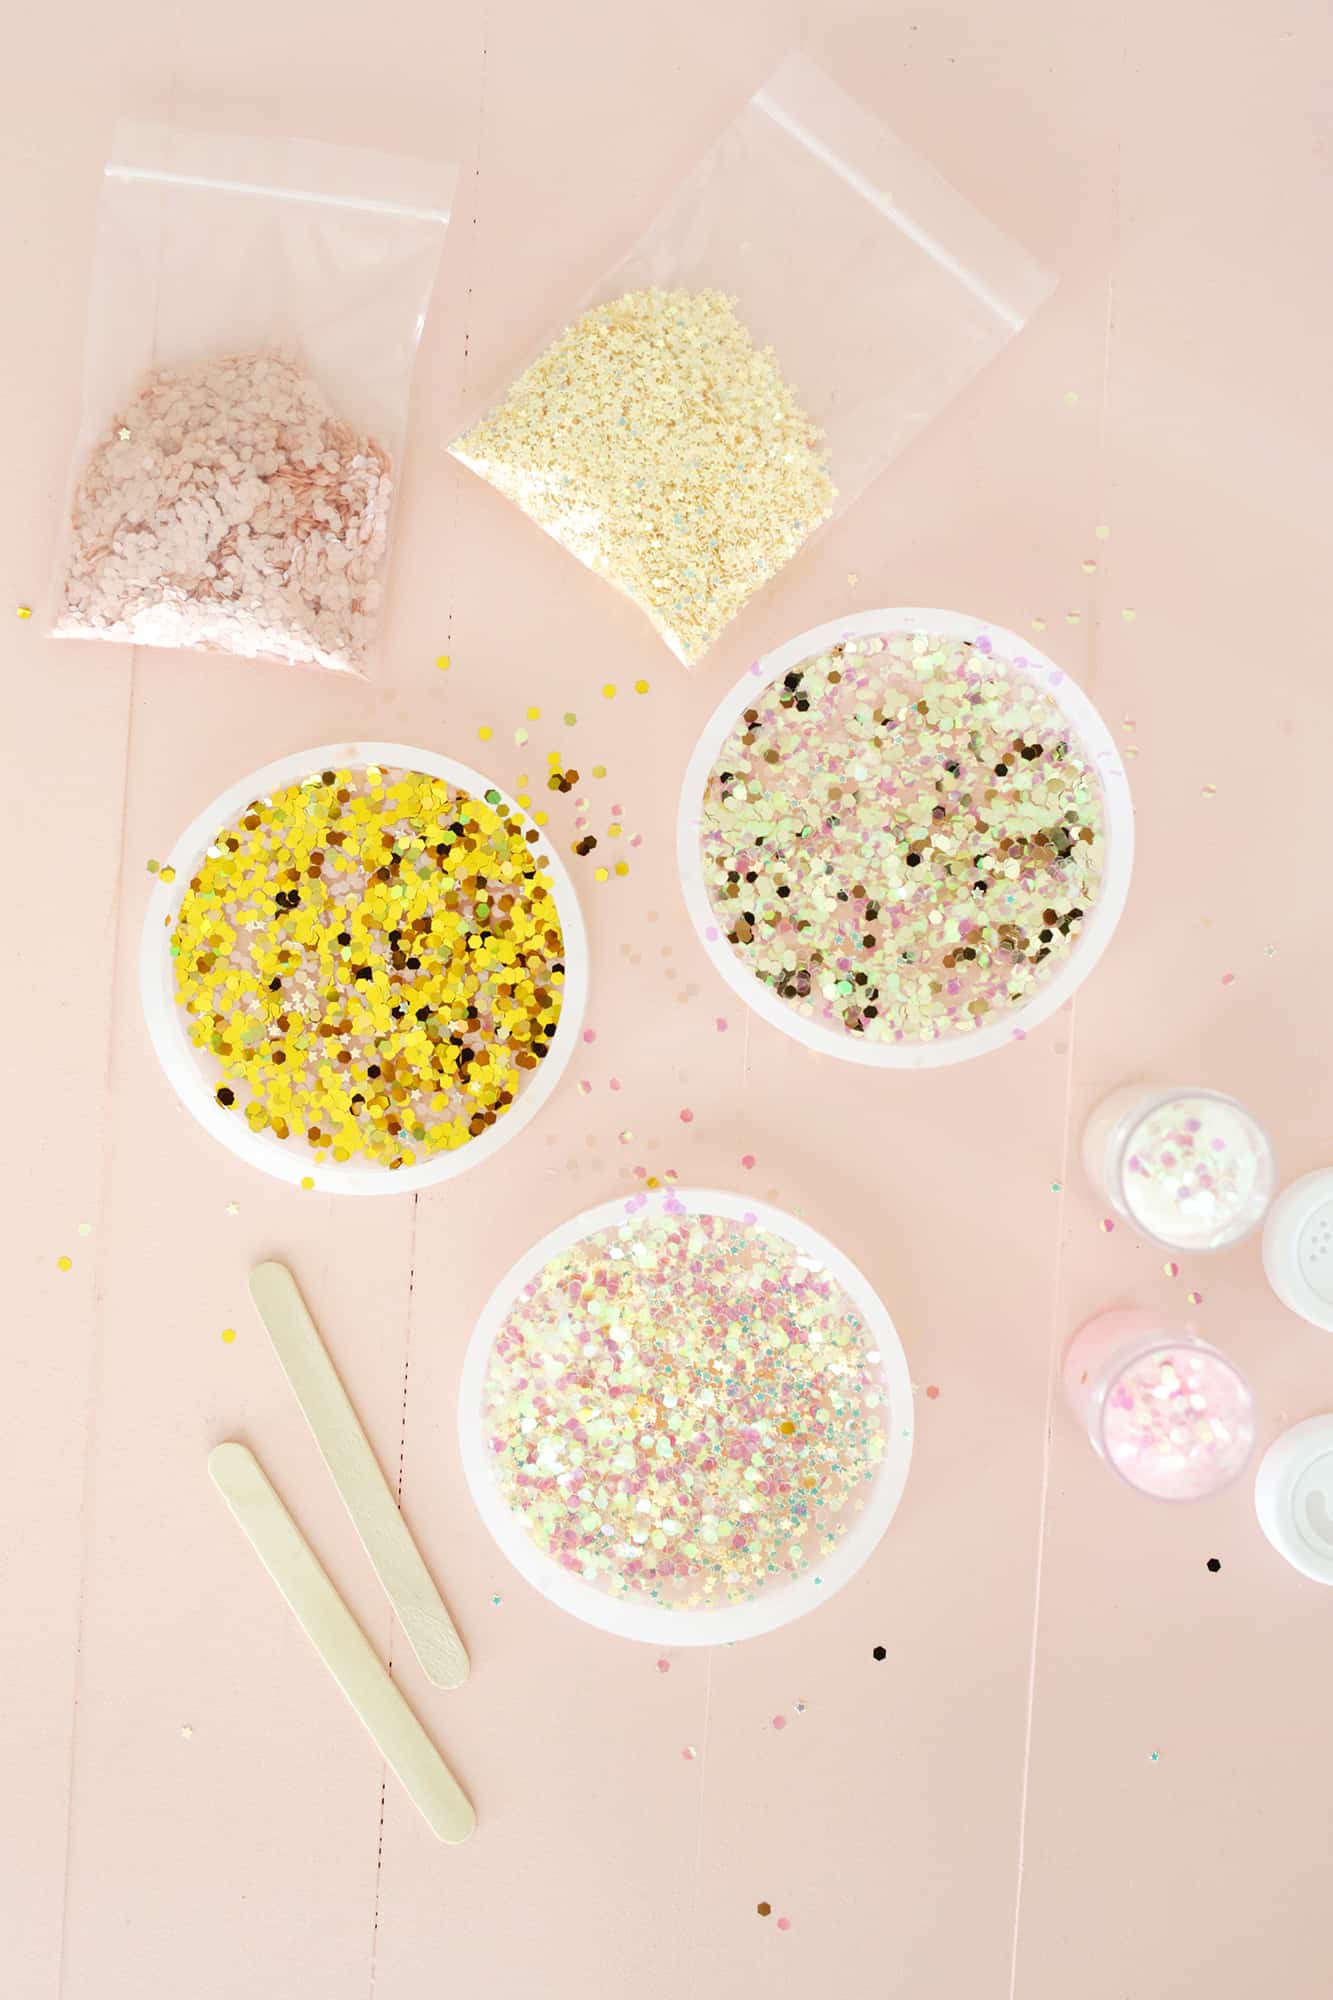 First, you’ll want to decide what colors of glitter you want for your coaster! You can do all one color or mix up the glitter colors/textures/shapes … whatever you like! Put your desired glitter into the bottom of your coaster molds.
If you want there to be some clear areas where you can see through to the surface where the coaster is sitting, then don’t fully cover the bottom. If you want it to be one solid mass of glitter, then use a heavy hand and make sure it’s completely covering the bottom.
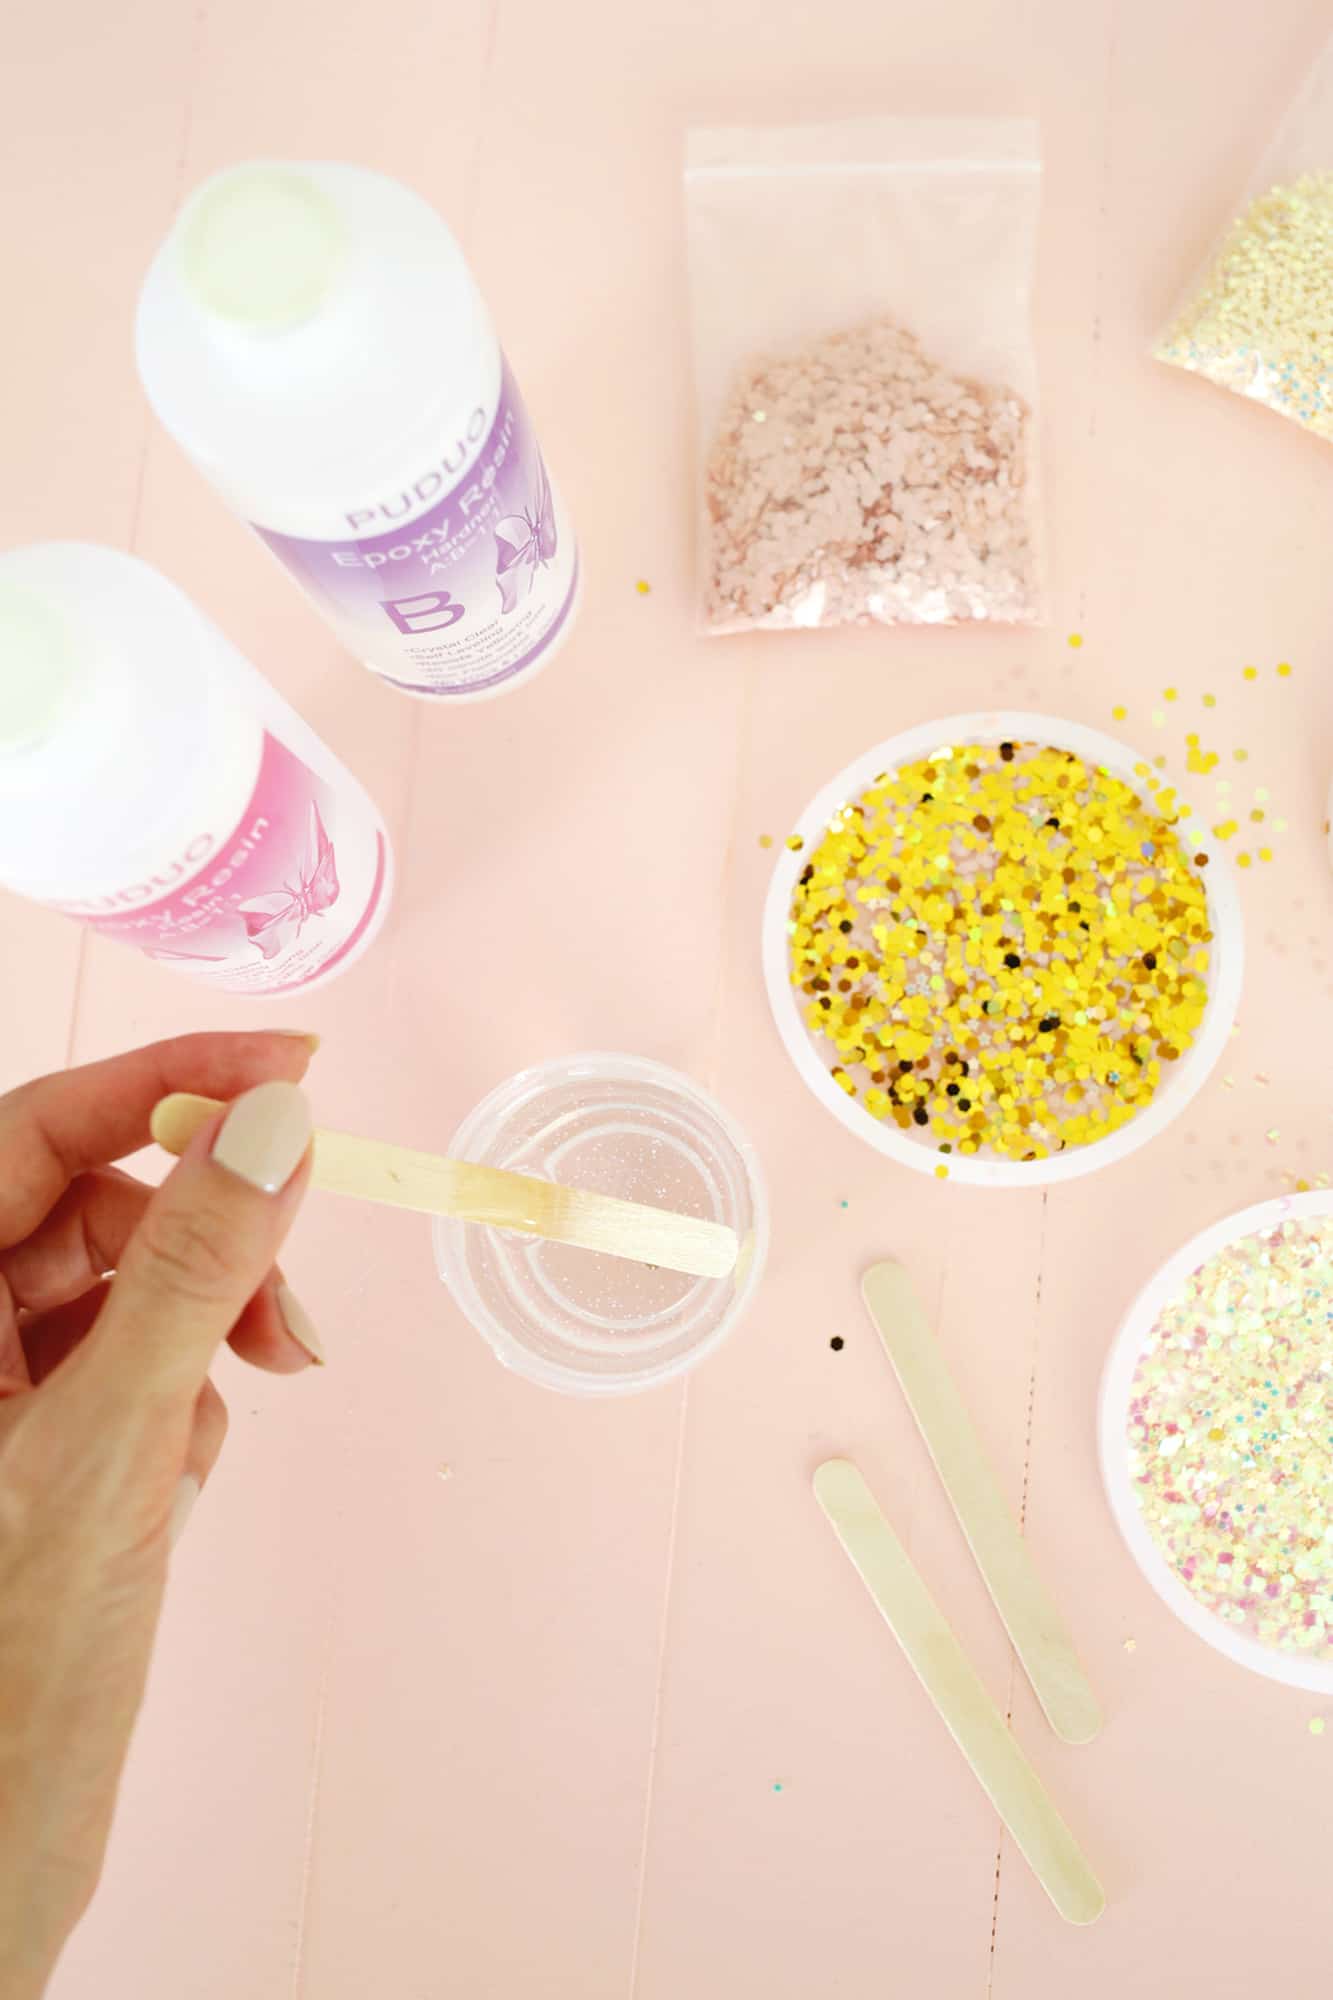 Follow the directions on the package to mix up your epoxy to get it ready to pour! All quality epoxy resin products will also outline safety measures you should take when working with the liquids as they can give off a strong smell and ruin furniture or other surfaces if spilled, so be sure to follow all the directions.
*The epoxy kit directions will tell you to do this in a well-ventilated space and wear gloves, both of which I did, but the gloves got sticky and I was worried about getting it all over my camera so I had to take them off to do the photos and put them back on between shots 🙂
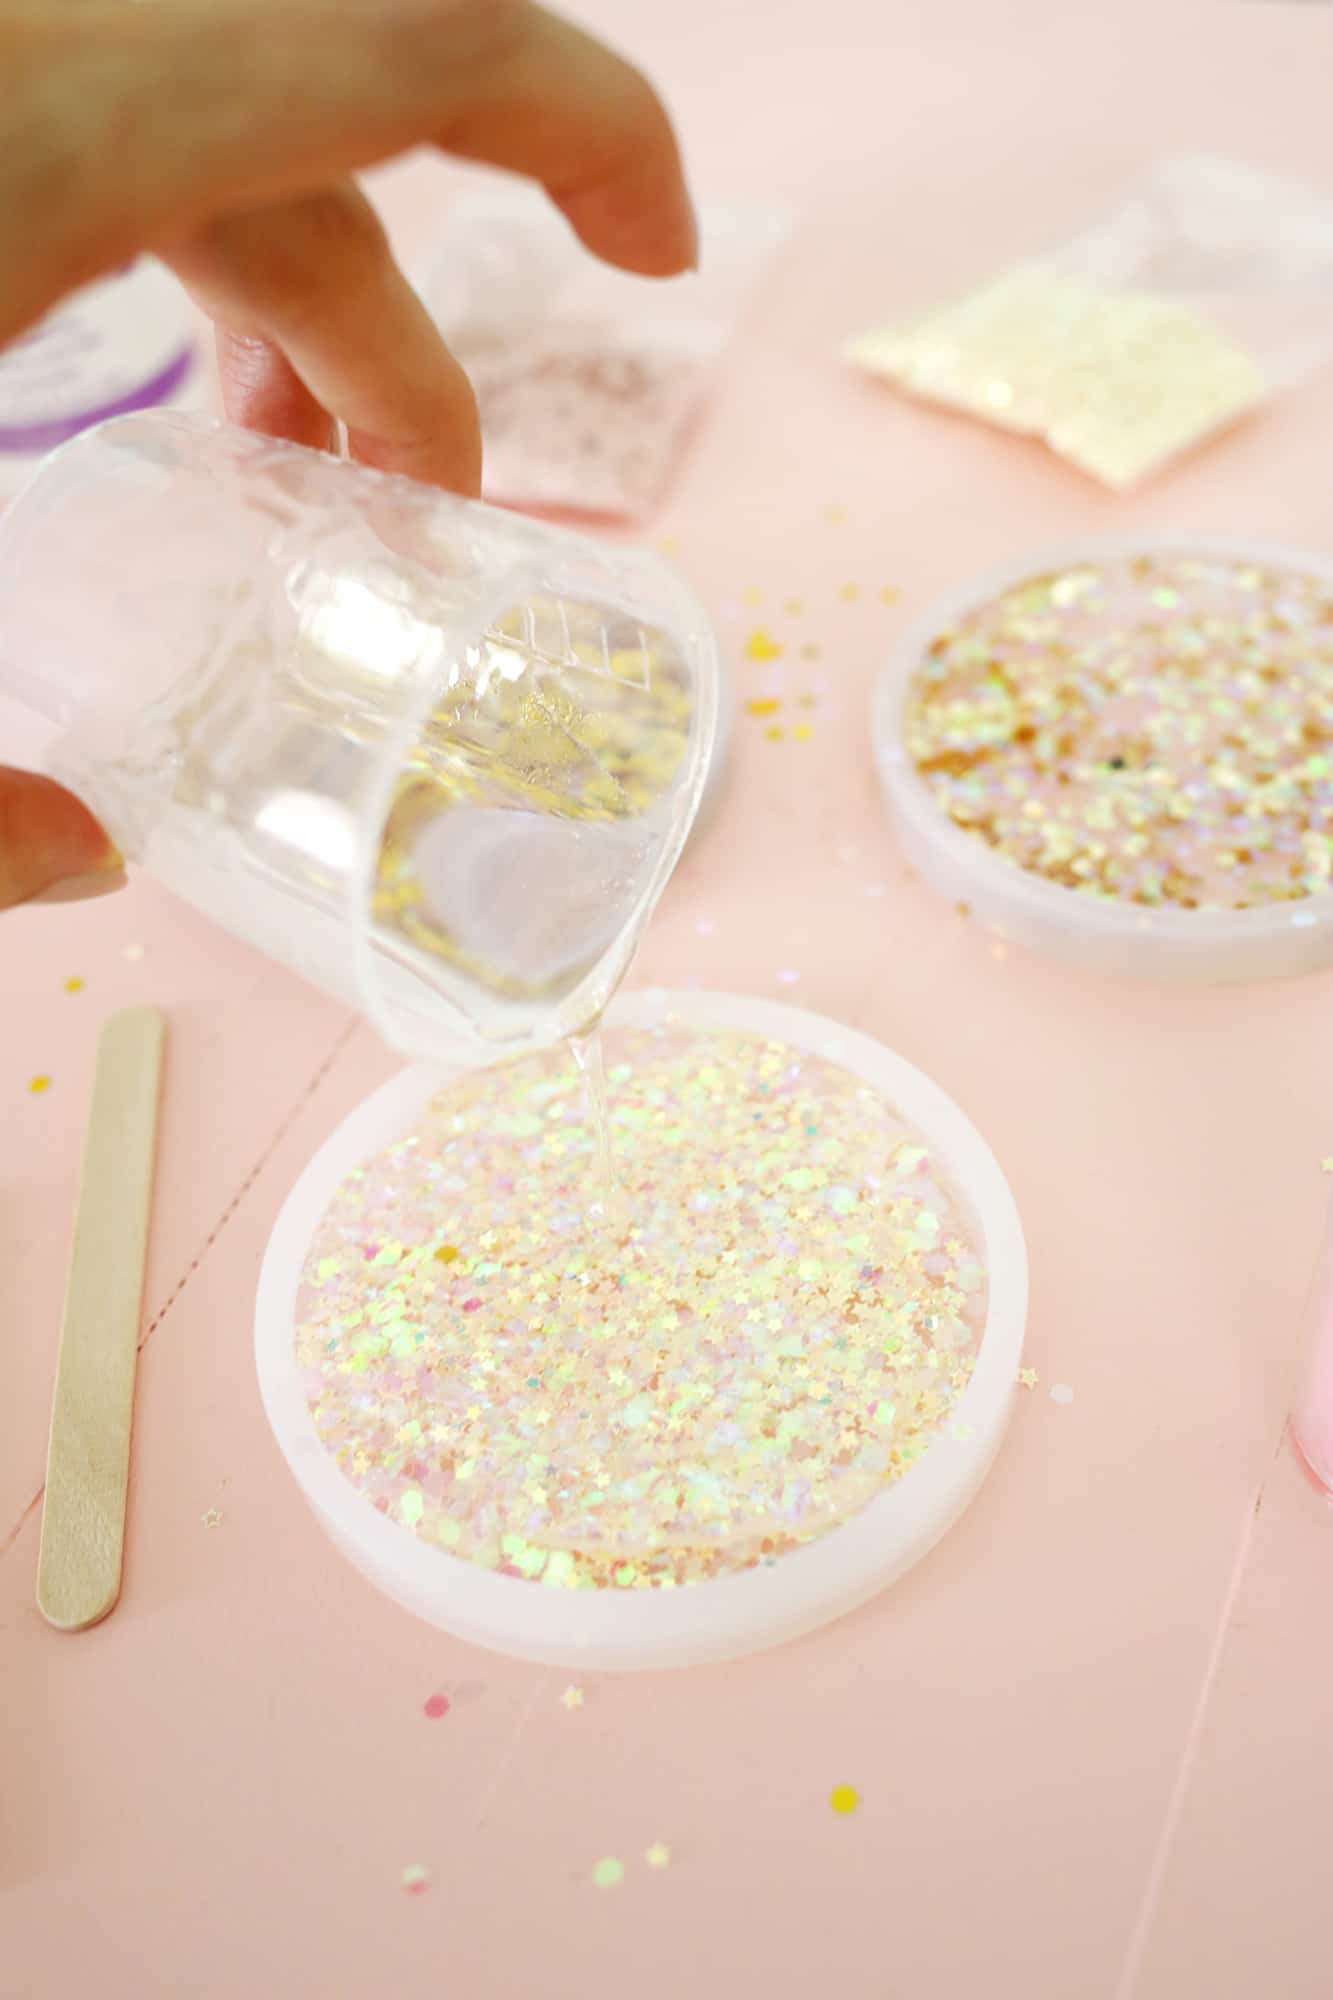 Pour your epoxy over top of the glitter and fill the mold to right below the top edge.
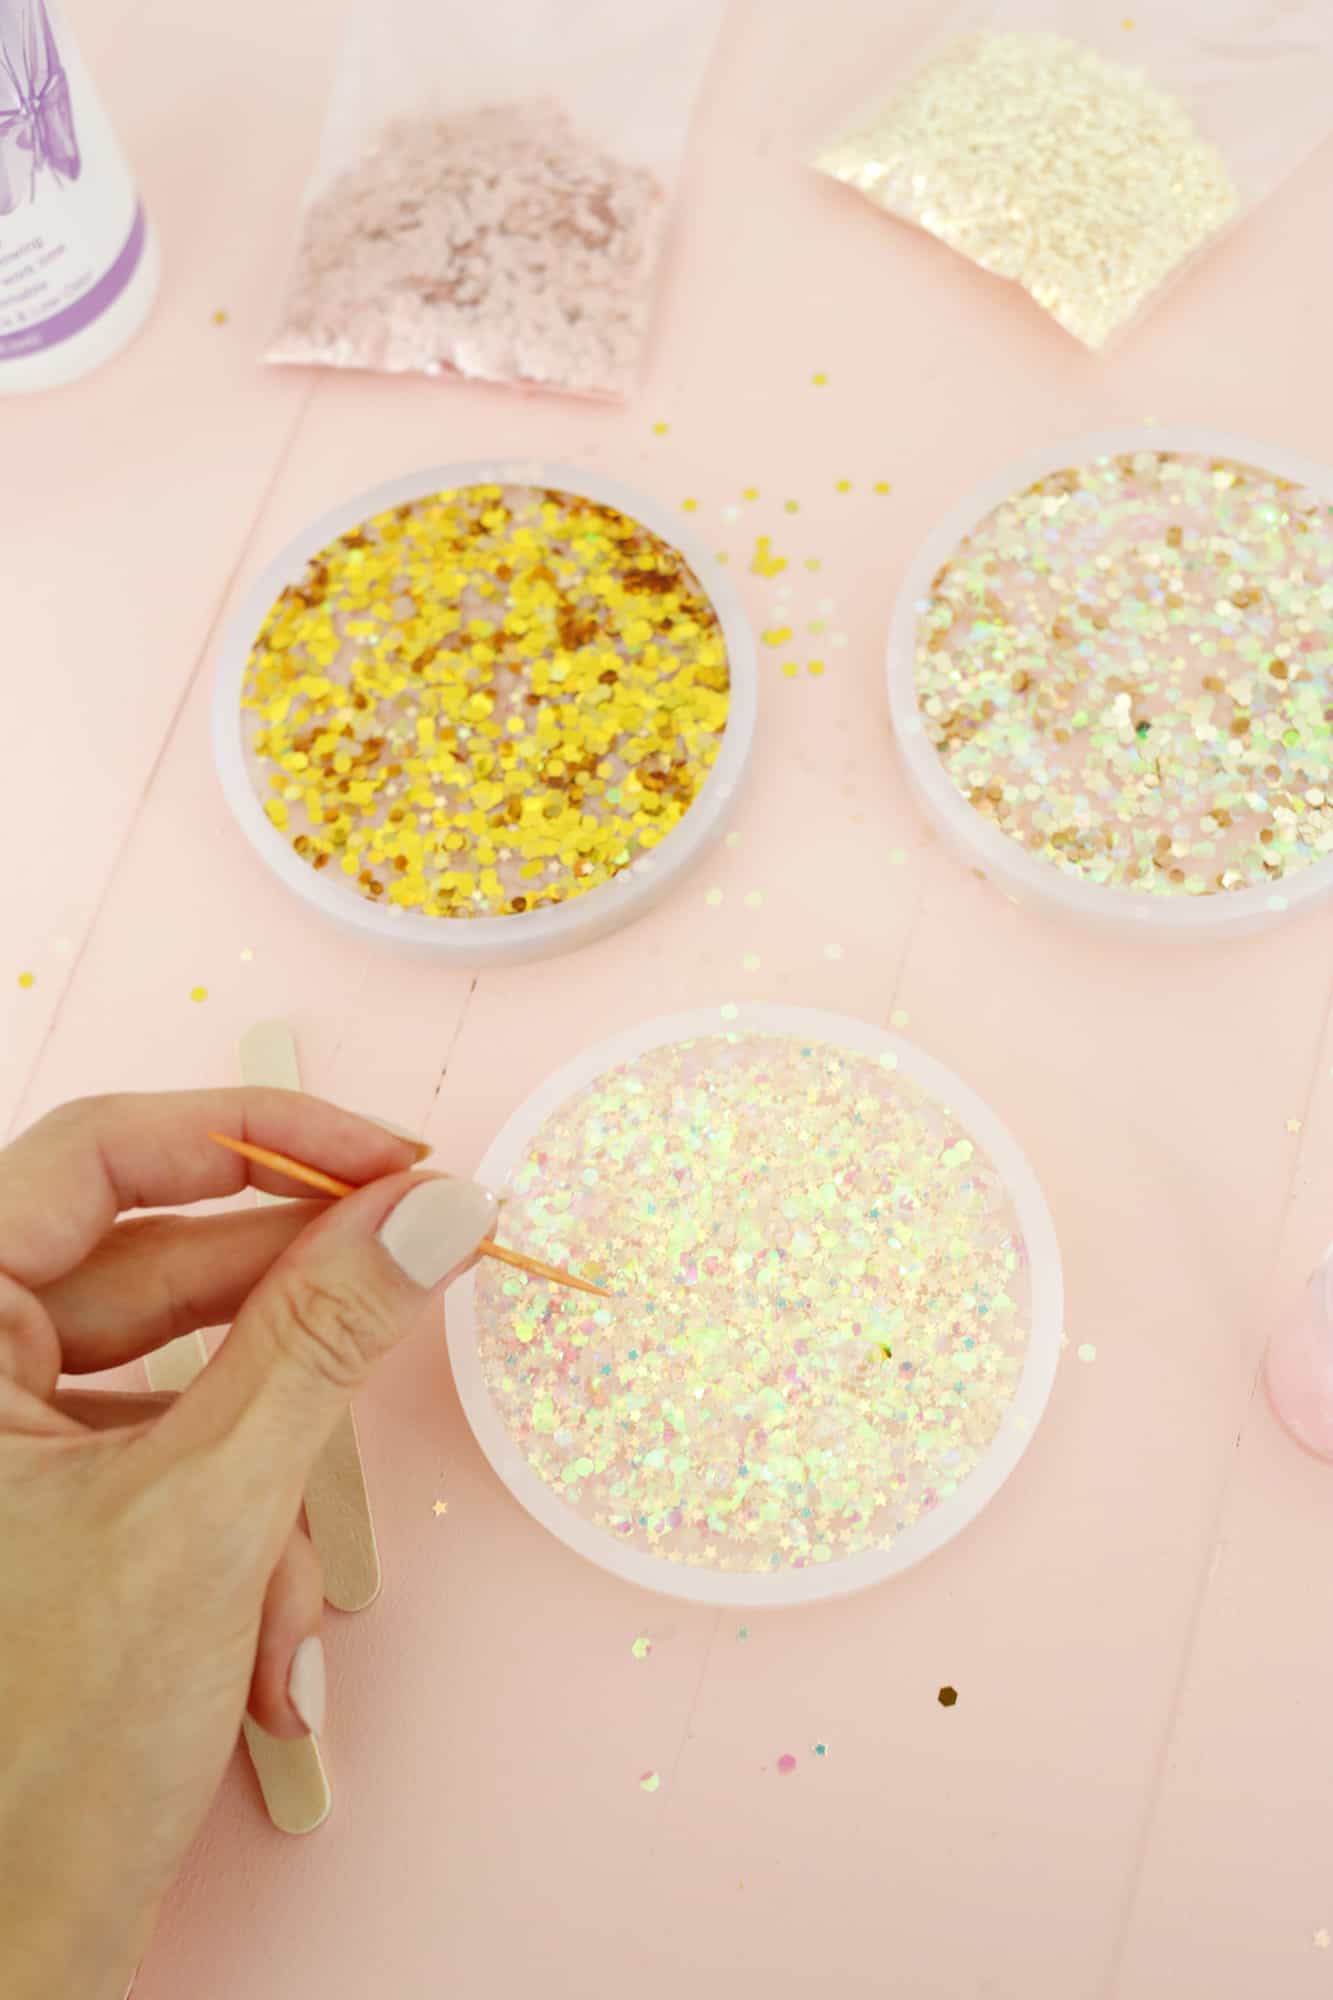 Use a toothpick to pop any bubbles that come up over the next 5-10 minutes and then let it dry for 10-24 hours (each kit may need a different dry time, so just check what your kit recommends).
Before you let it set you can also use your toothpick to move around any glitter pieces that you want to, so check and see if you have a bare spot or if one area is too dense.
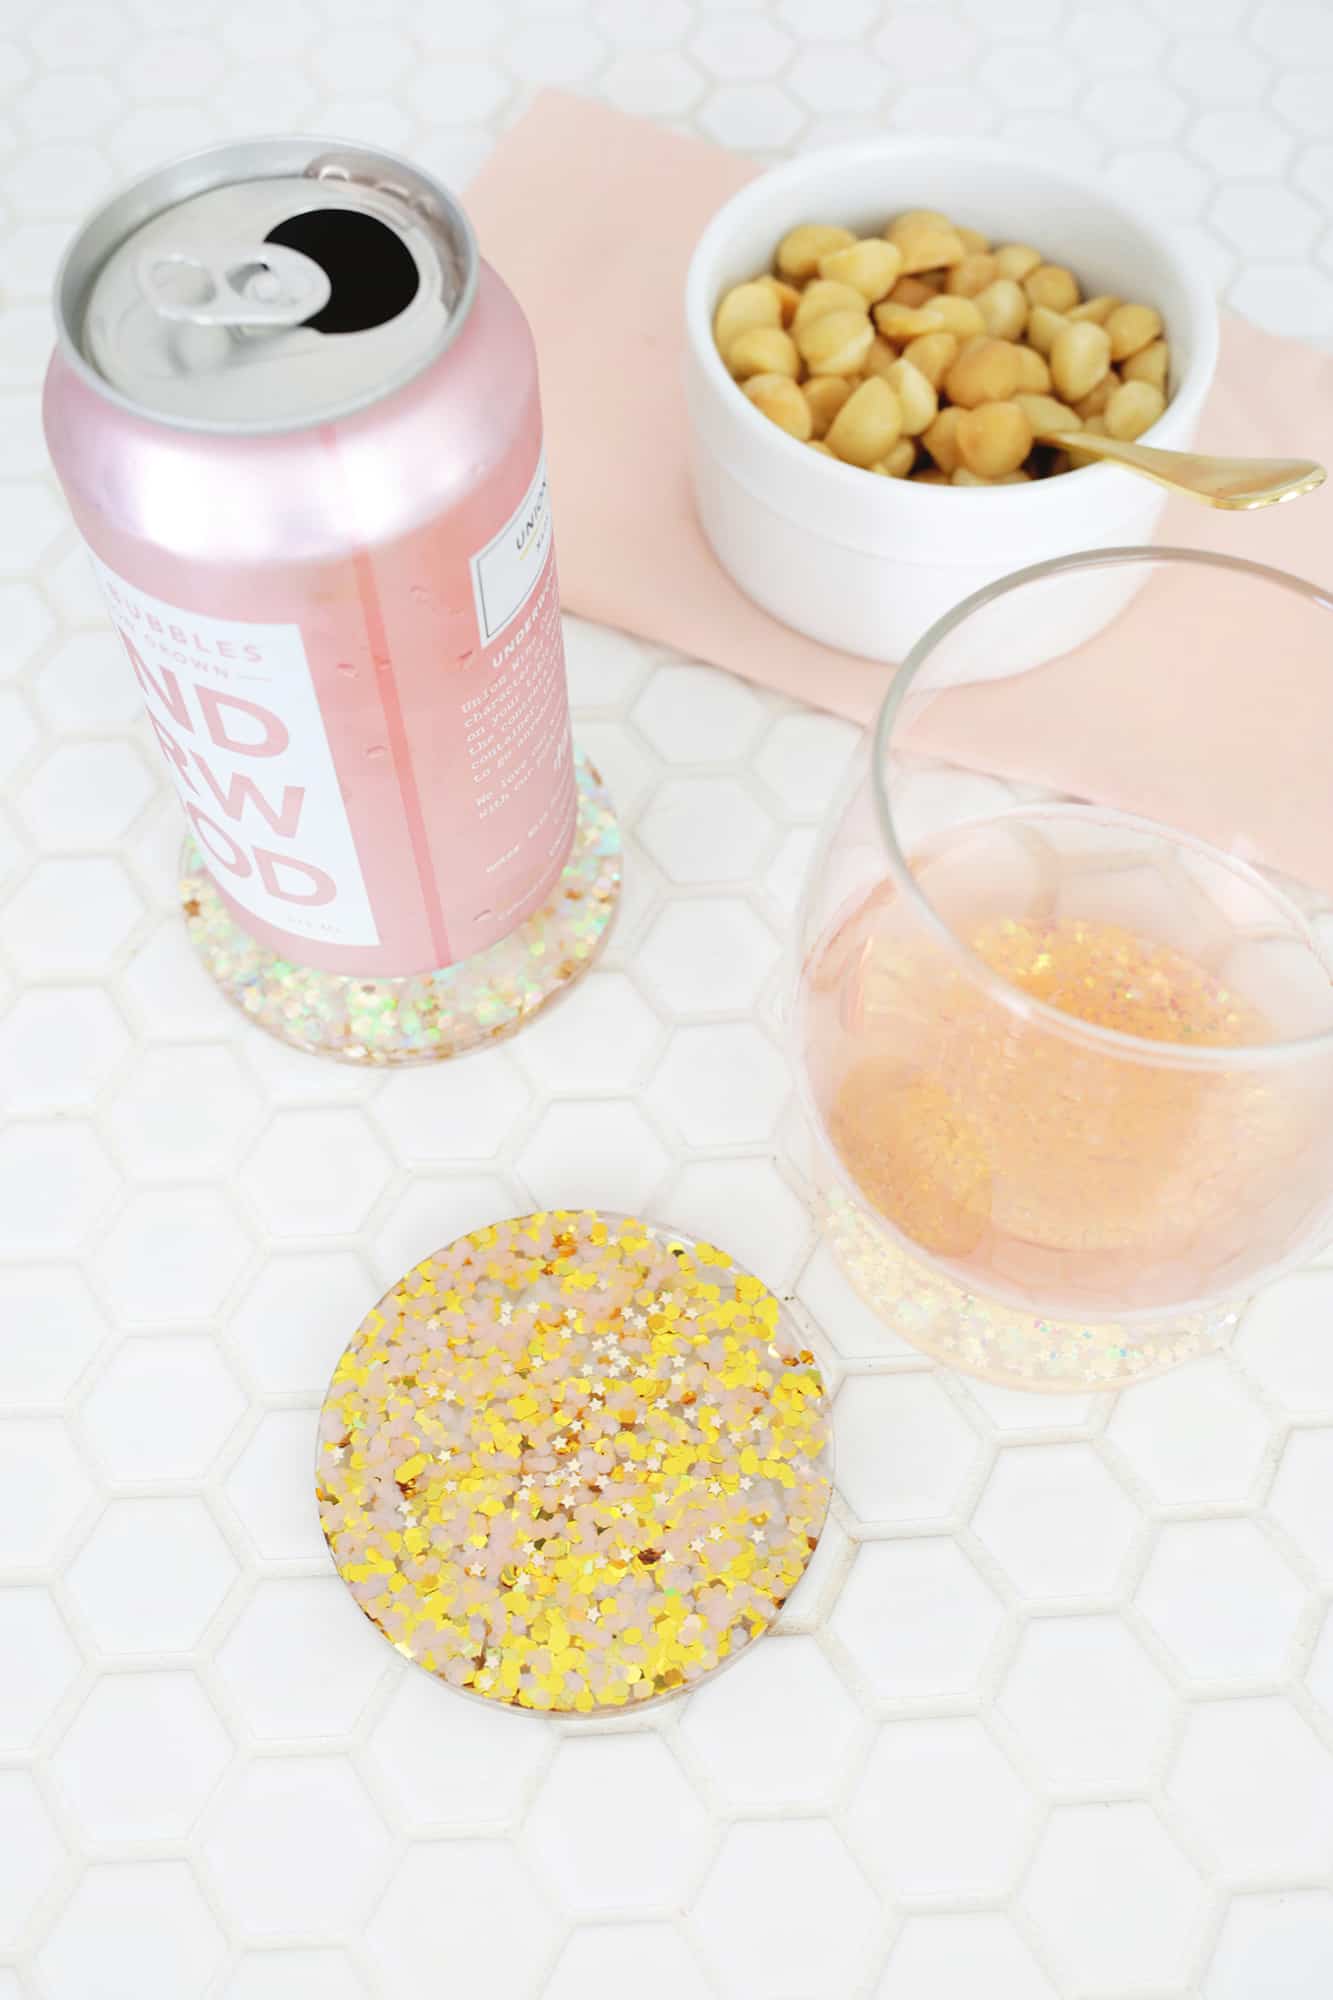
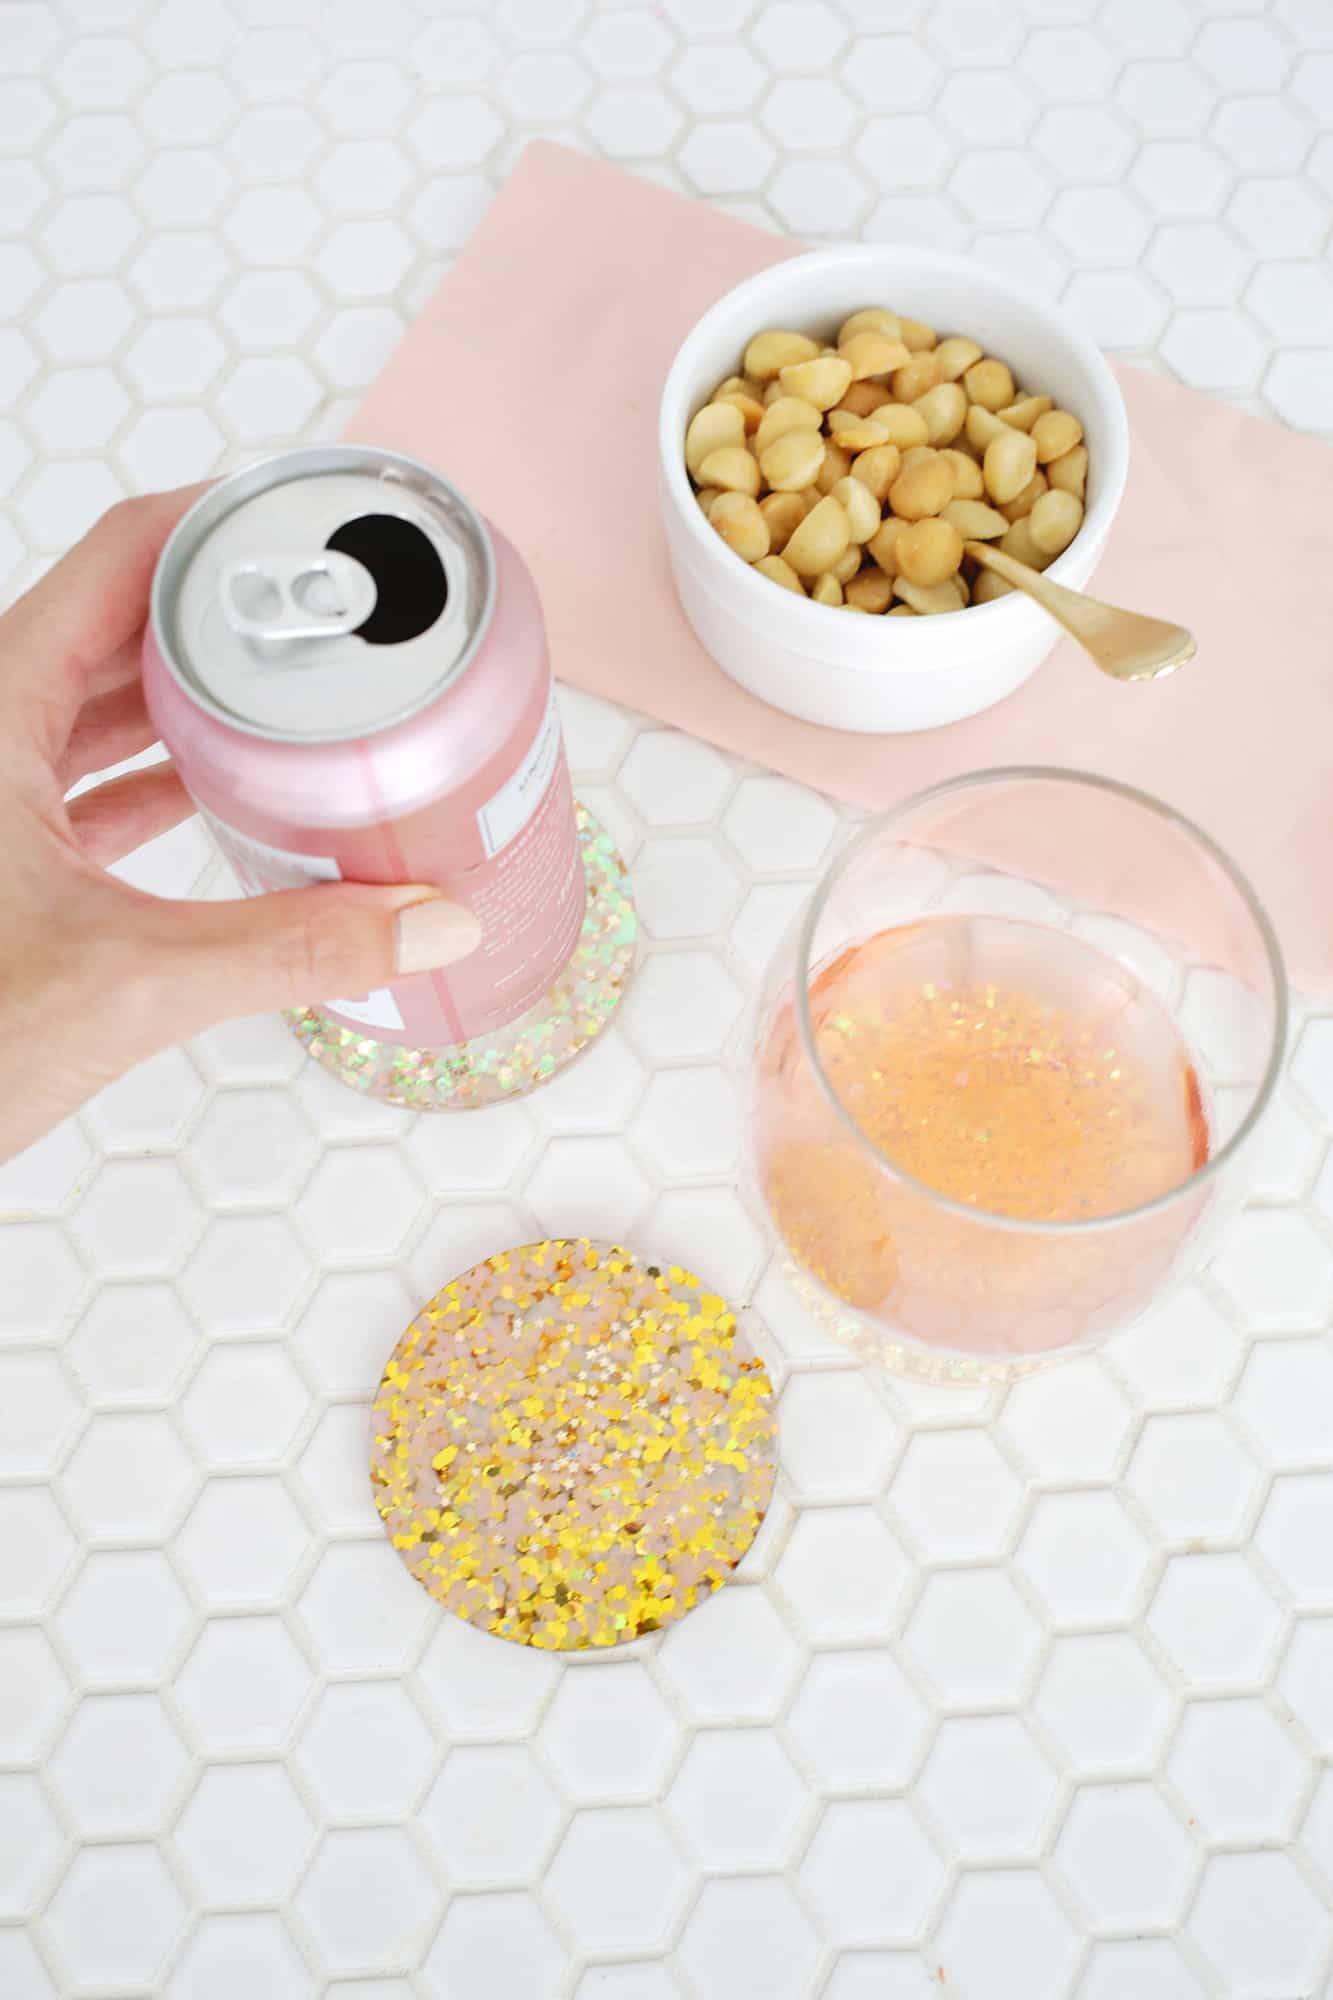
 When your molds are set, you can pop them out and they are ready to use!
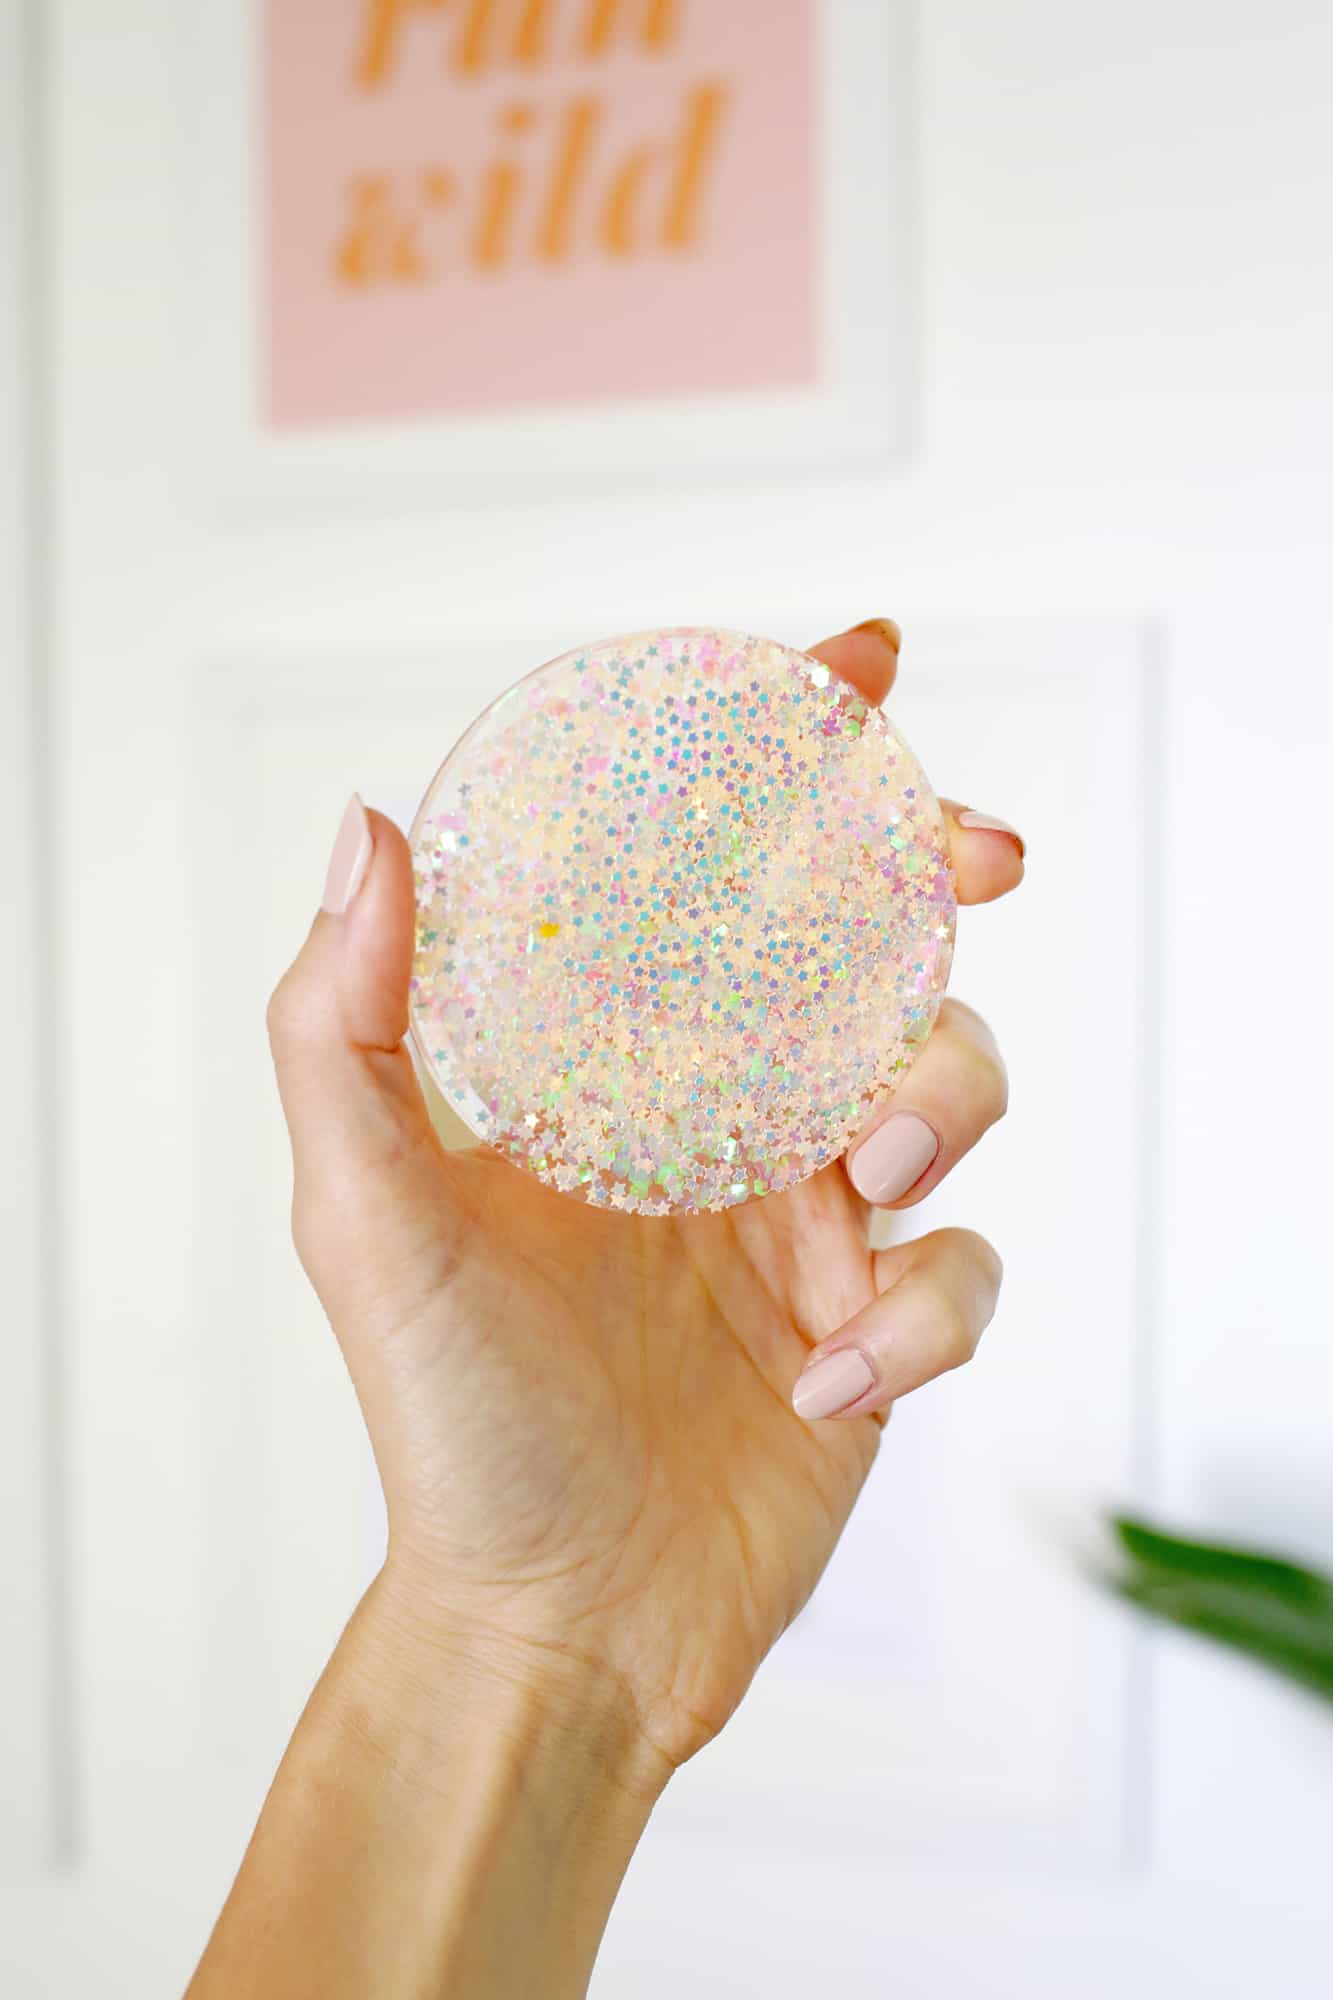
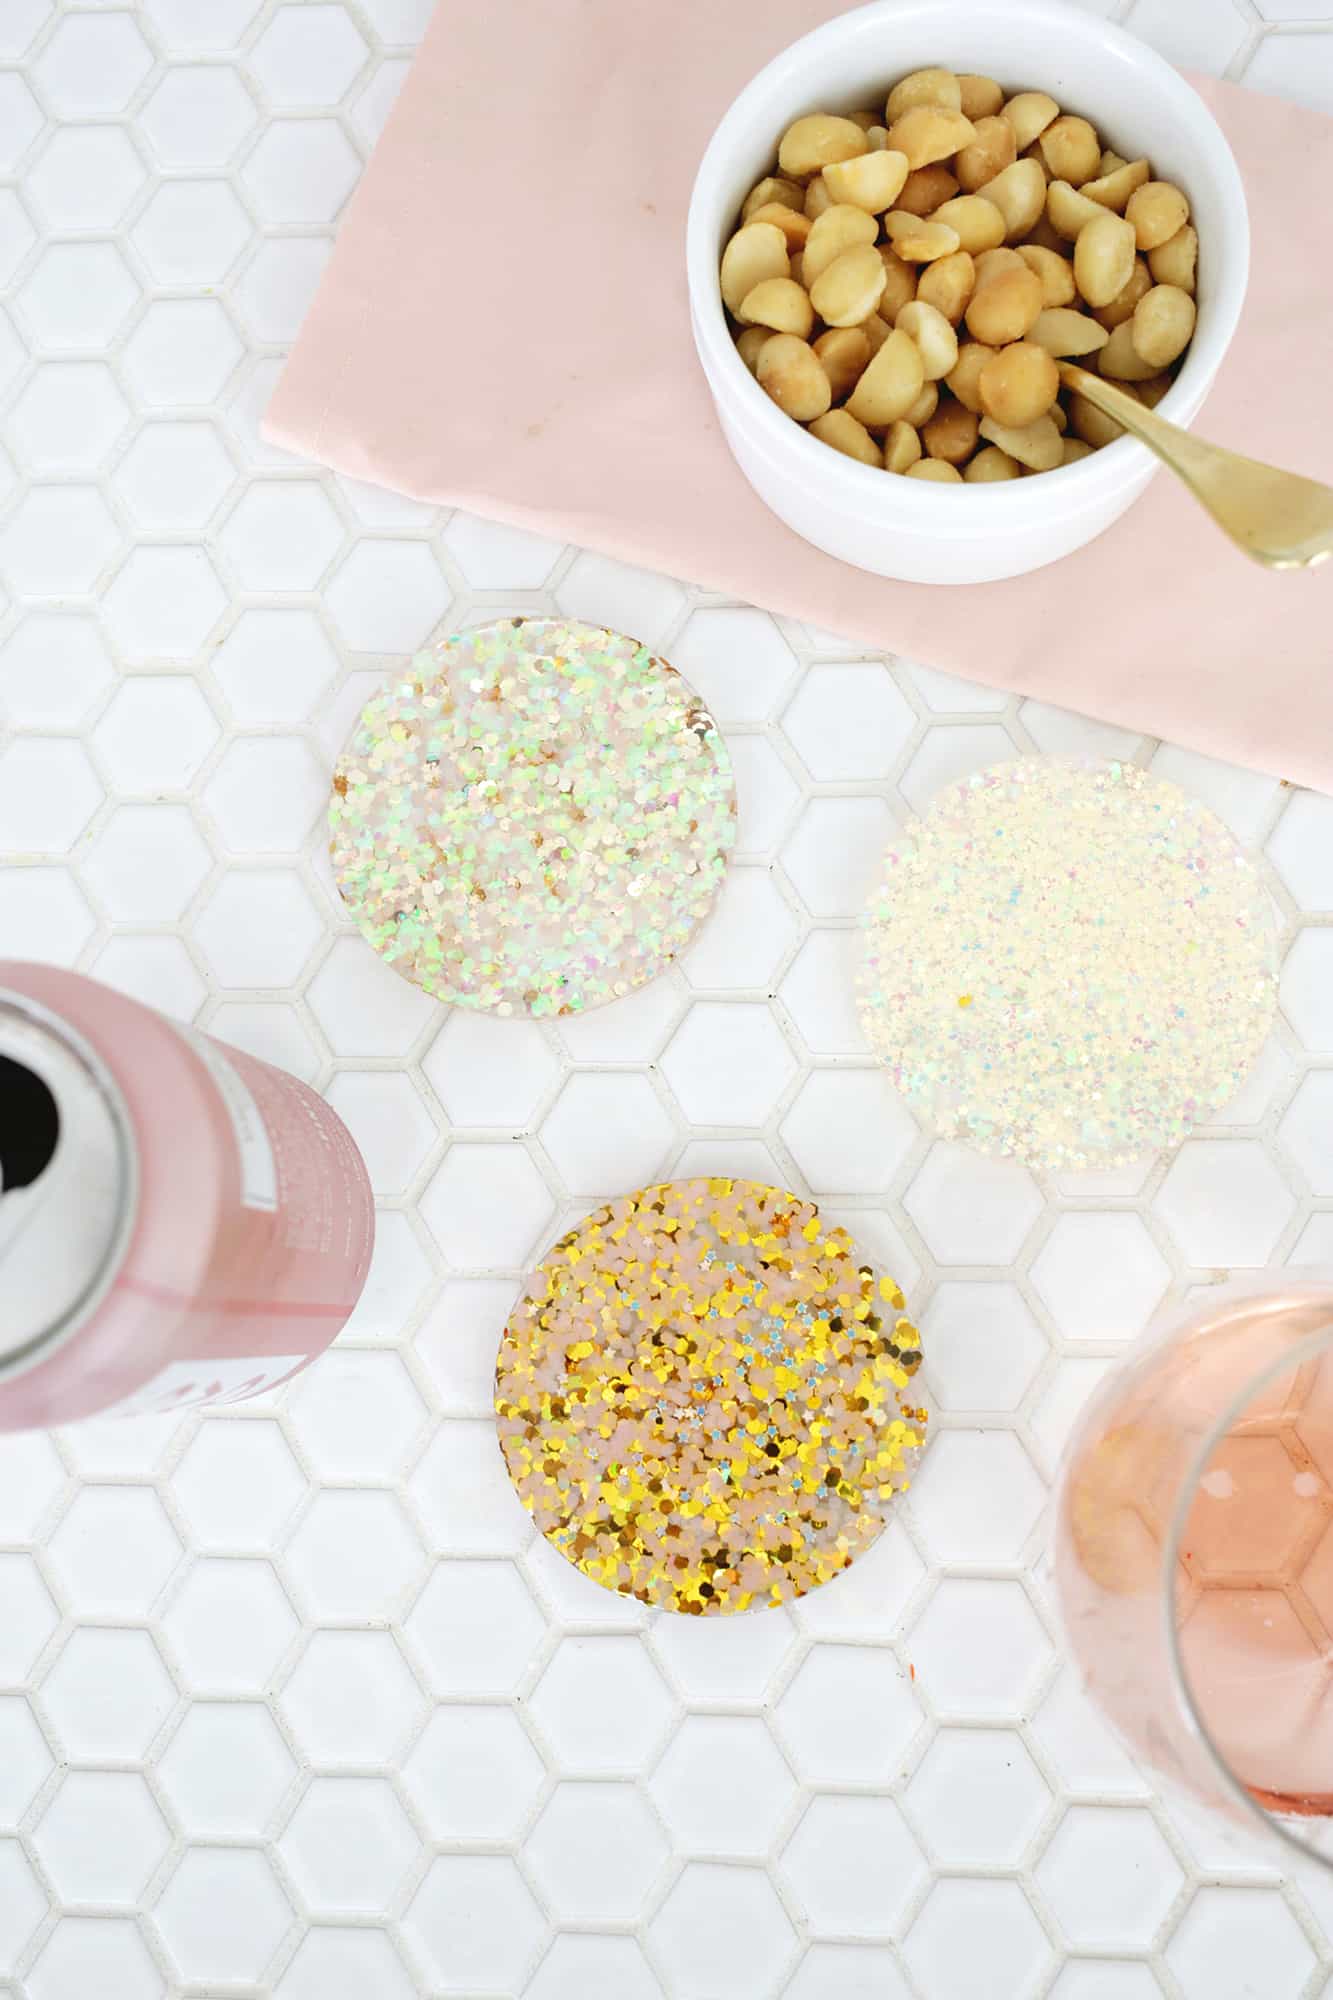
 How dreamy are those?? And so simple to make as well. These would be a great gift in a set of four, so keep these in mind when gifting season comes around too.
Sometimes you just need a little sparkle in your day to make you smile and a glass of chilled rosé on one of these bad boys definitely ups my happy factor … xo. Laura
Love this post? Sign up for our newsletter for more ideas!

Get creative ideas for recipes, crafts, decor, and more in your inbox!
 Get the How-To
Supplies
- coaster mold
- clear epoxy resin kit
- mixing cup
- glitter of your choice (I used gold chunky glitter and this and this color)
Instructions
- First, you’ll want to decide what colors of glitter you want for your coaster! You can do all one color or mix up the glitter colors/textures/shapes … whatever you like! Put your desired glitter into the bottom of your coaster molds. If you want there to be some clear areas where you can see through to the surface where the coaster is sitting, then don’t fully cover the bottom. If you want it to be one solid mass of glitter, then use a heavy hand and make sure it’s completely covering the bottom.
- Follow the directions on the package to mix up your epoxy to get it ready to pour!
- Pour your epoxy over top of the glitter and fill the mold to right below the top edge.
- Use a toothpick to pop any bubbles that come up over the next 5-10 minutes and then let it dry for 10-24 hours (each kit may need a different dry time, so just check what your kit recommends). Before you let it set, you can also use your toothpick to move around any glitter pieces that you want to, so check and see if you have a bare spot or if one area is too dense.
- When your molds are set, you can pop them out and they are ready to use!
These are so cute! But I wonder if they would absorb condensation from cold drinks or would it just run over them, not protecting the surface underneath?
It’s possible if you had a lot of condensation that could happen, but I think you would have to have a lot 🙂
Laura
So cute! I have yet to try resin… but this is making me want to dip my toes in (not literally, of course ?)
Cannot wait to make these! They are seriously so adorable!
-Kate
https://daysofkate.com/
These are so cute!
Do you have any suggestions for eco-friendly glitter? I would love to make these but I’ve been trying to do my part with not releasing glitter out into our world.
I would do these with dried flowers or something cute like that!
Laura
Please use gloves and follow resin safety protocol, like a ventilator mask and being in a well ventilated area! Resin can make you sick if used incorrectly! It can also make a mess if you spill so cover your work area!
These are fun, but I second Dana’s warning about including the right personal protective equipment in the post – it’s not just about ruining surfaces or dealing with a strong smell, the vapors themselves are very hazardous! The PPE is not what most people already have at home. Epoxy products warn on the labels that you need a respirator if there isn’t adequate ventilation already, & gloves. This also shouldn’t be mixed in any containers or with stirrers that could melt from the heat generated by mixing or react with the resin or hardener.
Also, you may want to correct the title – acrylic is a completely different type of plastic than epoxy. These are Epoxy Glitter Coasters, not at all acrylic ones
Hi! Like I said in the post you should follow the more detailed directions on the epoxy package which will definitely tell you to be in a well-ventilated area (which I was) so that is very important! I was wearing gloves when doing this but I was also holding a camera to take the photos so there were times I had to take them off to do certain things so I didn’t get epoxy on my camera, but the instructions on the package will also tell you to wear gloves as well 🙂
Laura
Oooh, I love this! I think this would be super cool with dried citrus slices instead of glitter-I might try it with grapefruit or blood orange slices. Thanks for the inspiration!
Amazing, Laura! I love fun DIY’s like this. I can totally see making a set for our home and giving them out as gifts.
Oooh these are awesome! Definitely going to be making these. Thank you, Laura!
How about I just copy and paste “super cute and fun” on everything you make??? Love these!