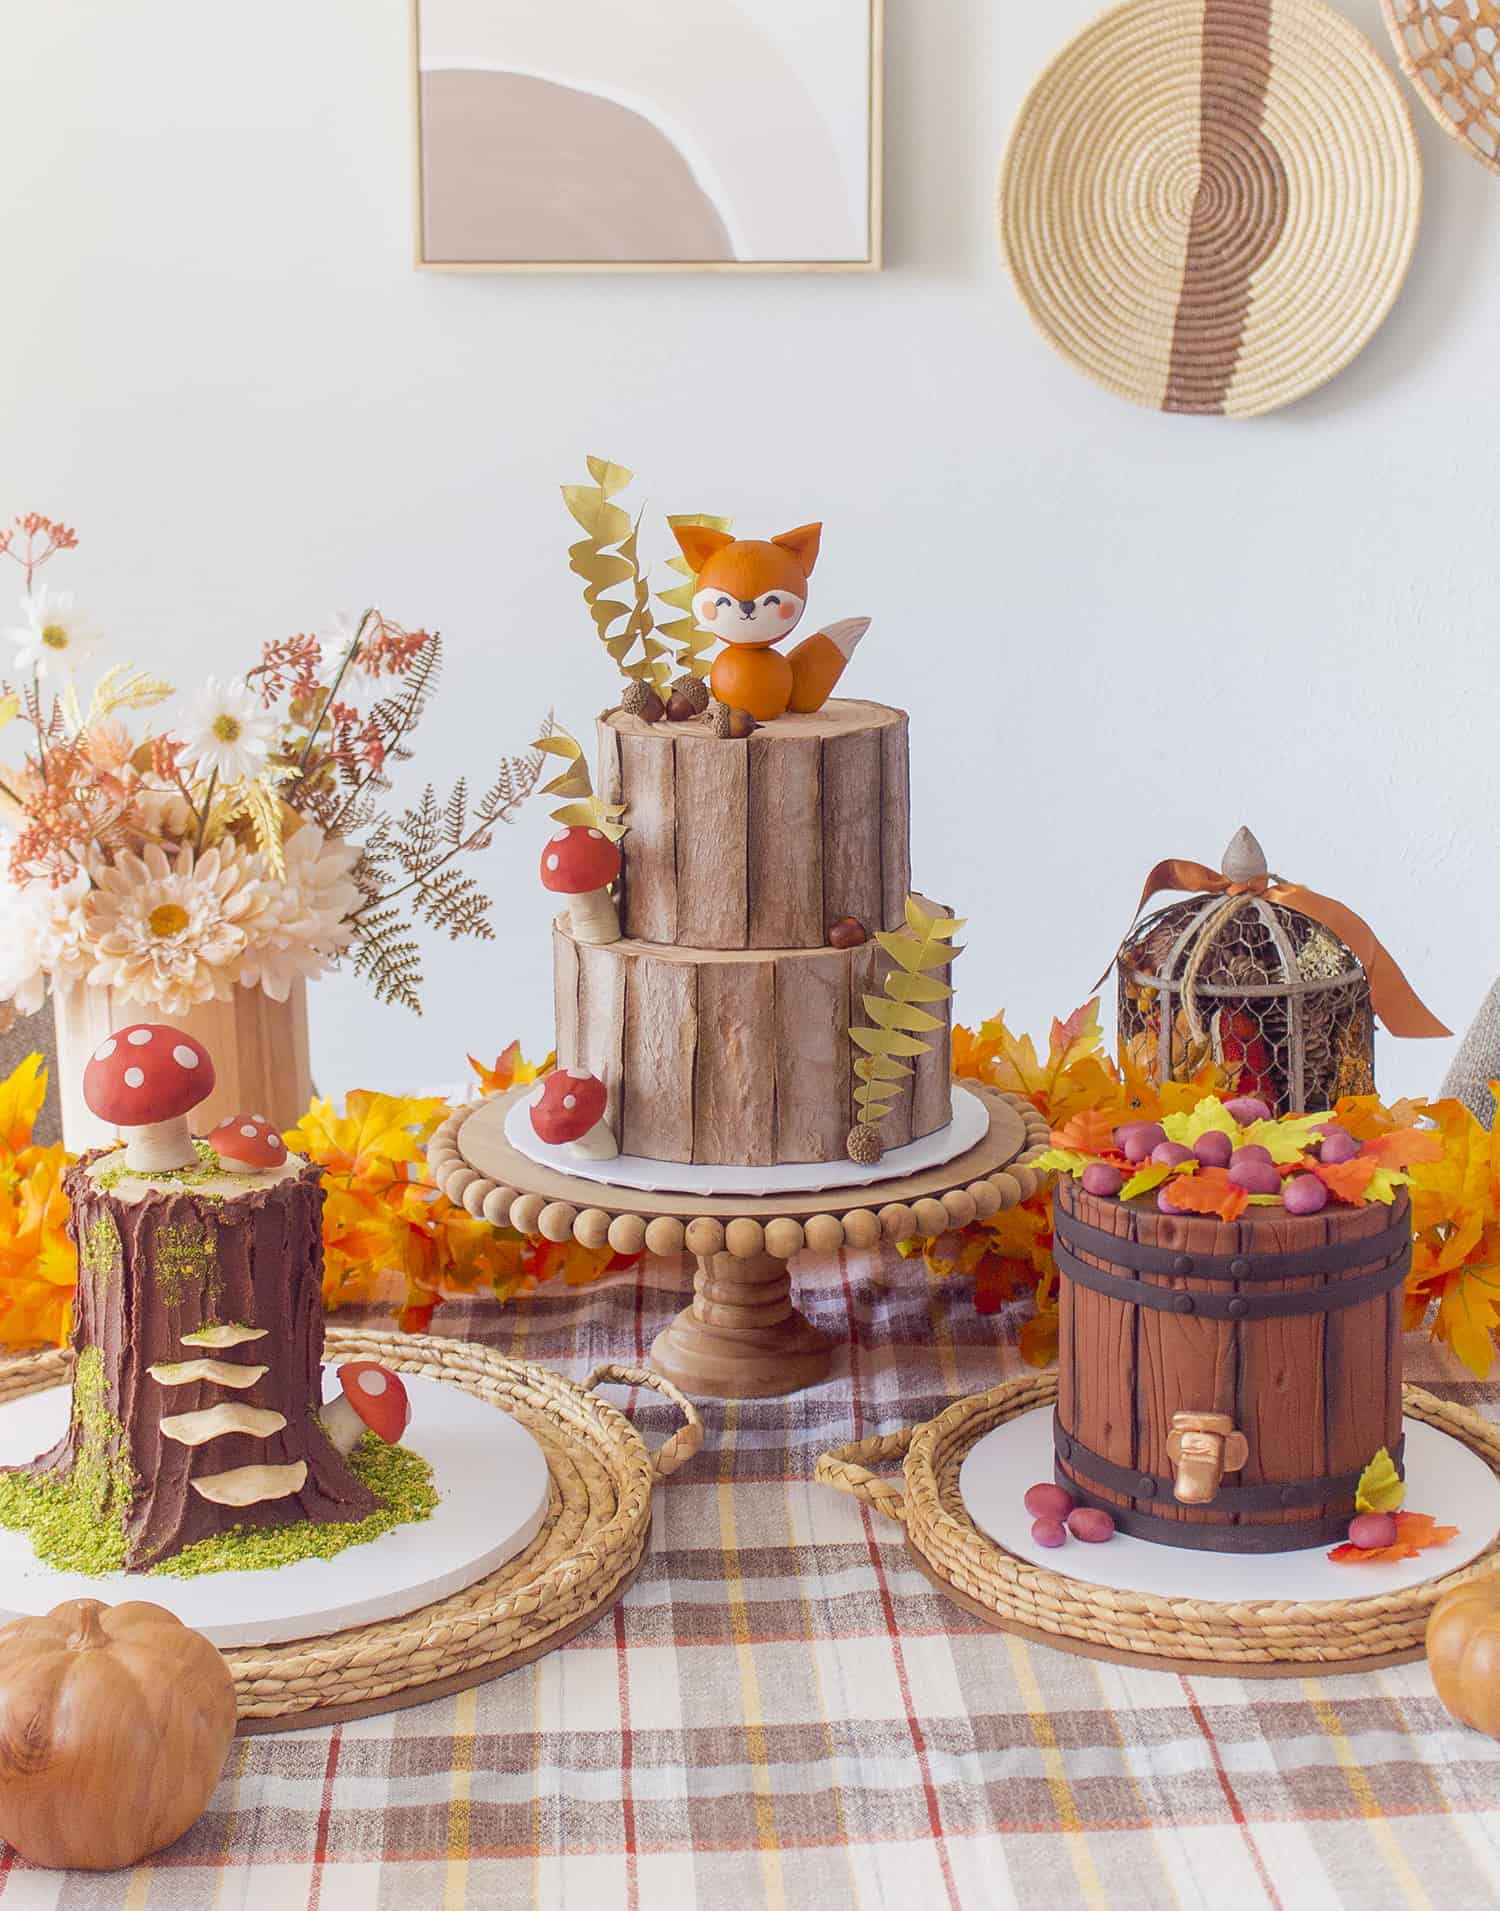
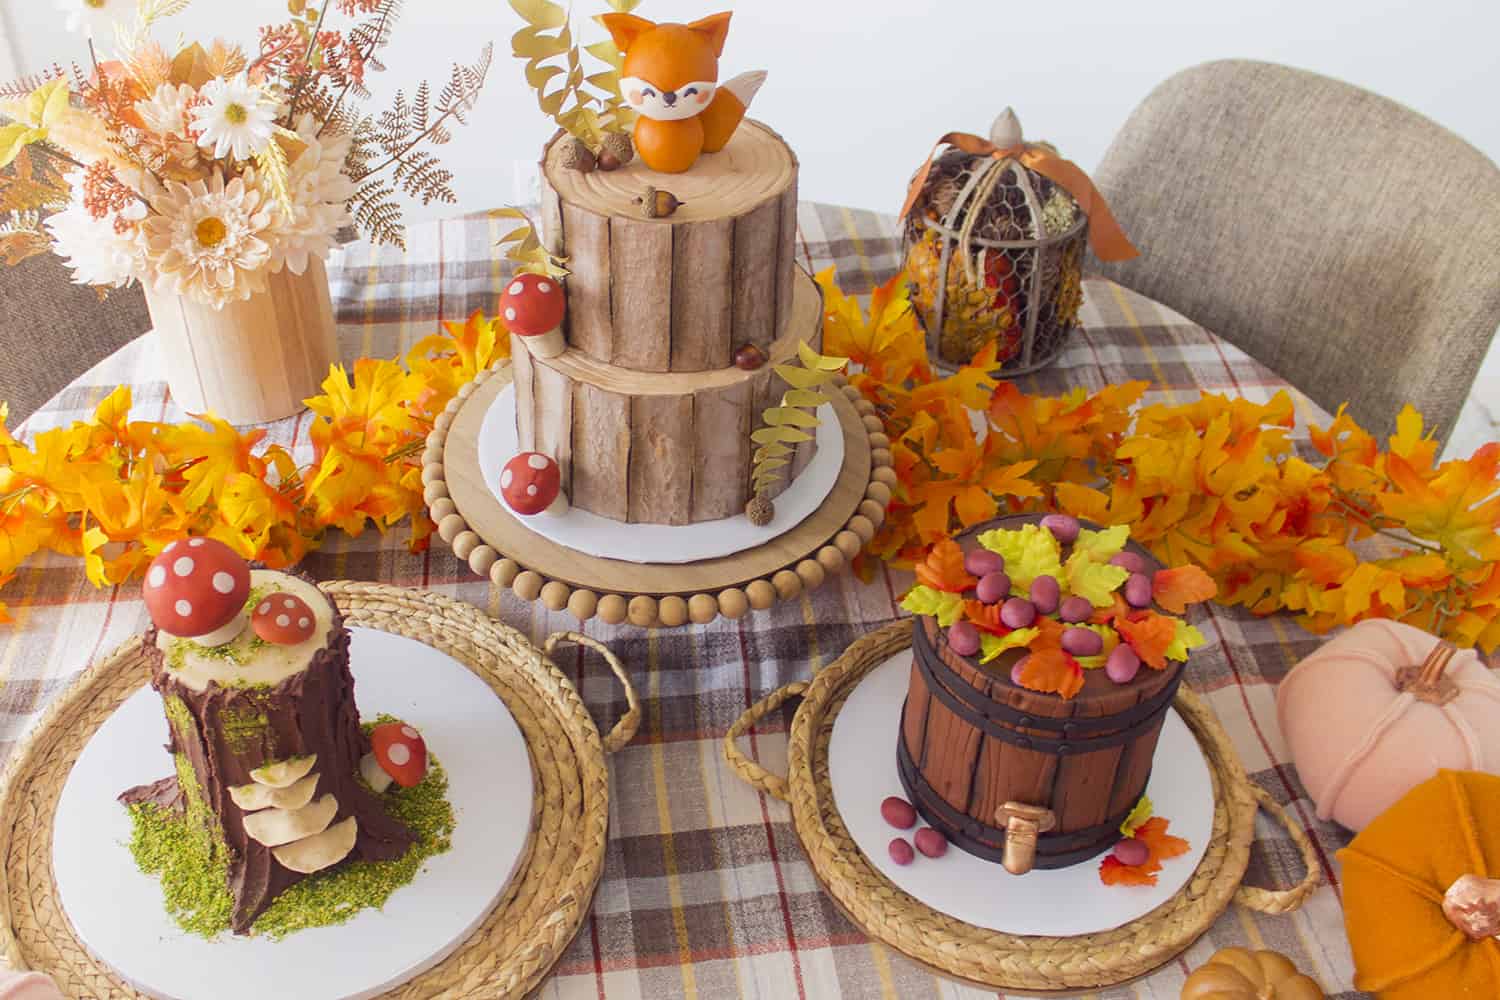
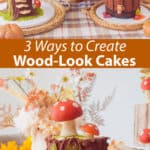
 I don’t know about you, but fall season means lots of wood decor for me. That includes cake! Imagine a wood-looking cake surrounded by apples, leaves, and pumpkins. So beautiful. Today, I will show you three different wood-looks for cake. Let’s get started!
Related: 15+ Best Cake Recipes

 Wood Look #1 – Weathered Bark
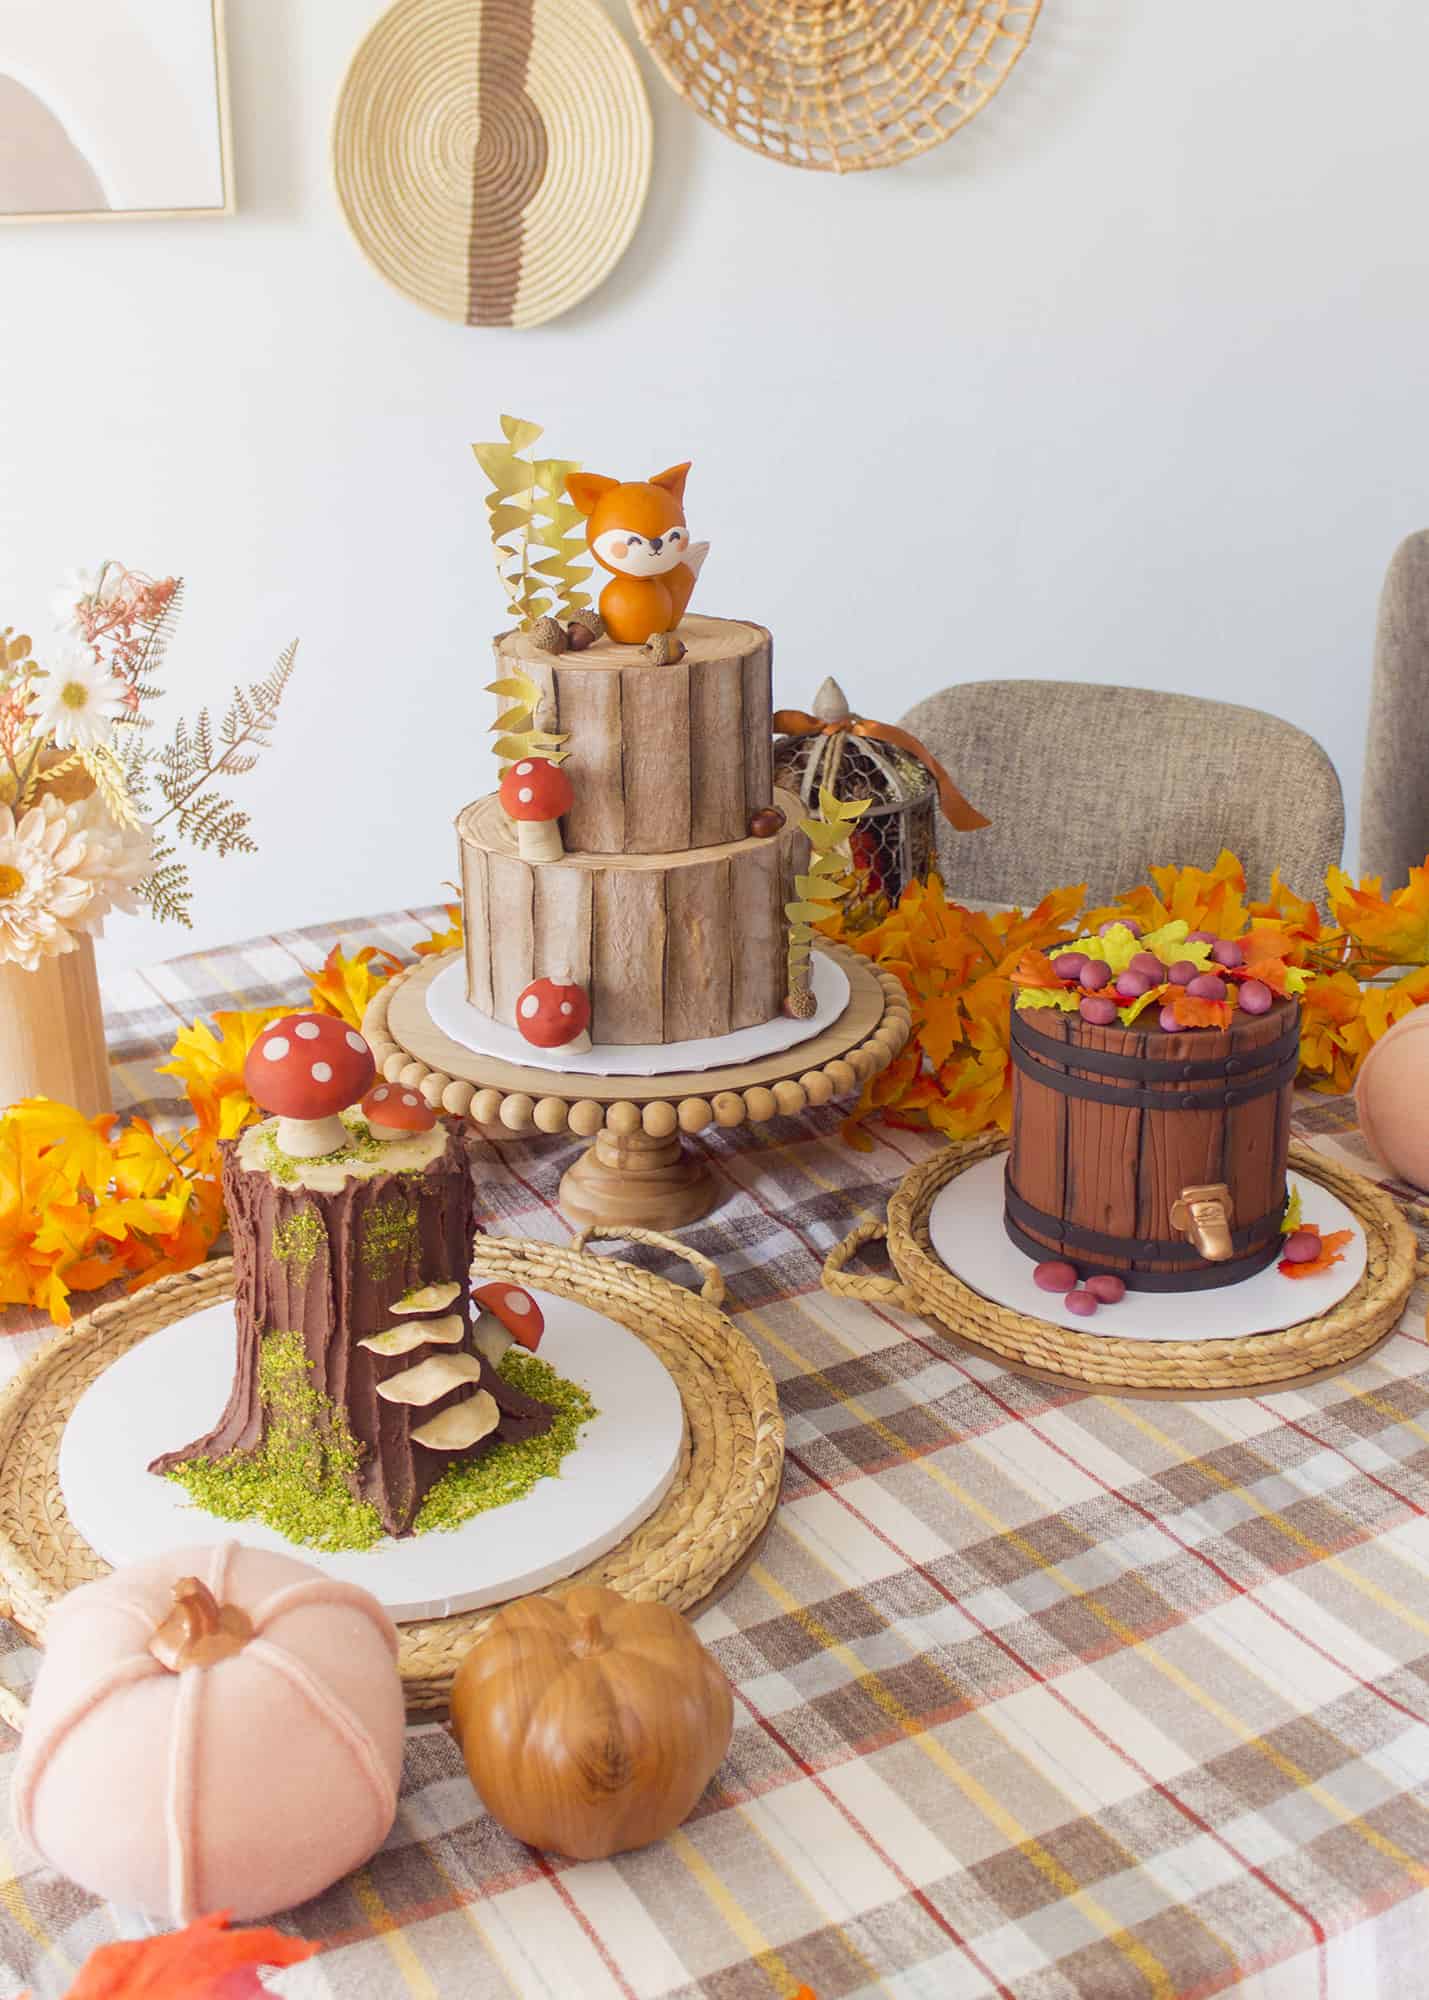
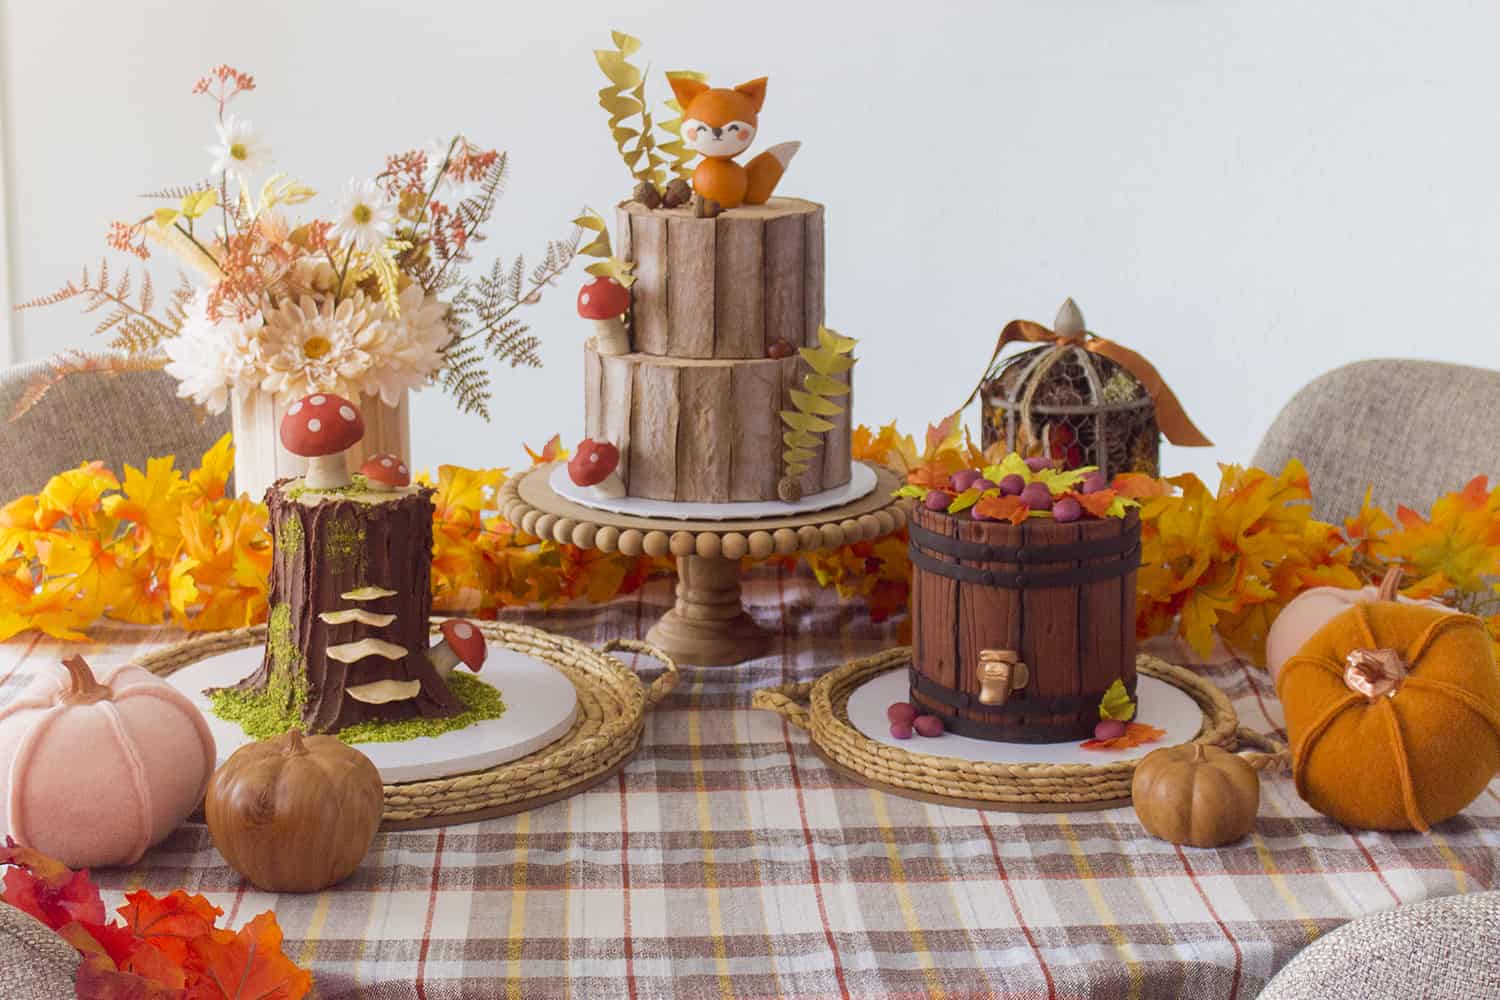 Wood Look #1 – Weathered Bark
This first technique was created by a good baker friend, Cakes and Crafts by Kass. It’s one of my favorite techniques and I try to use it often.
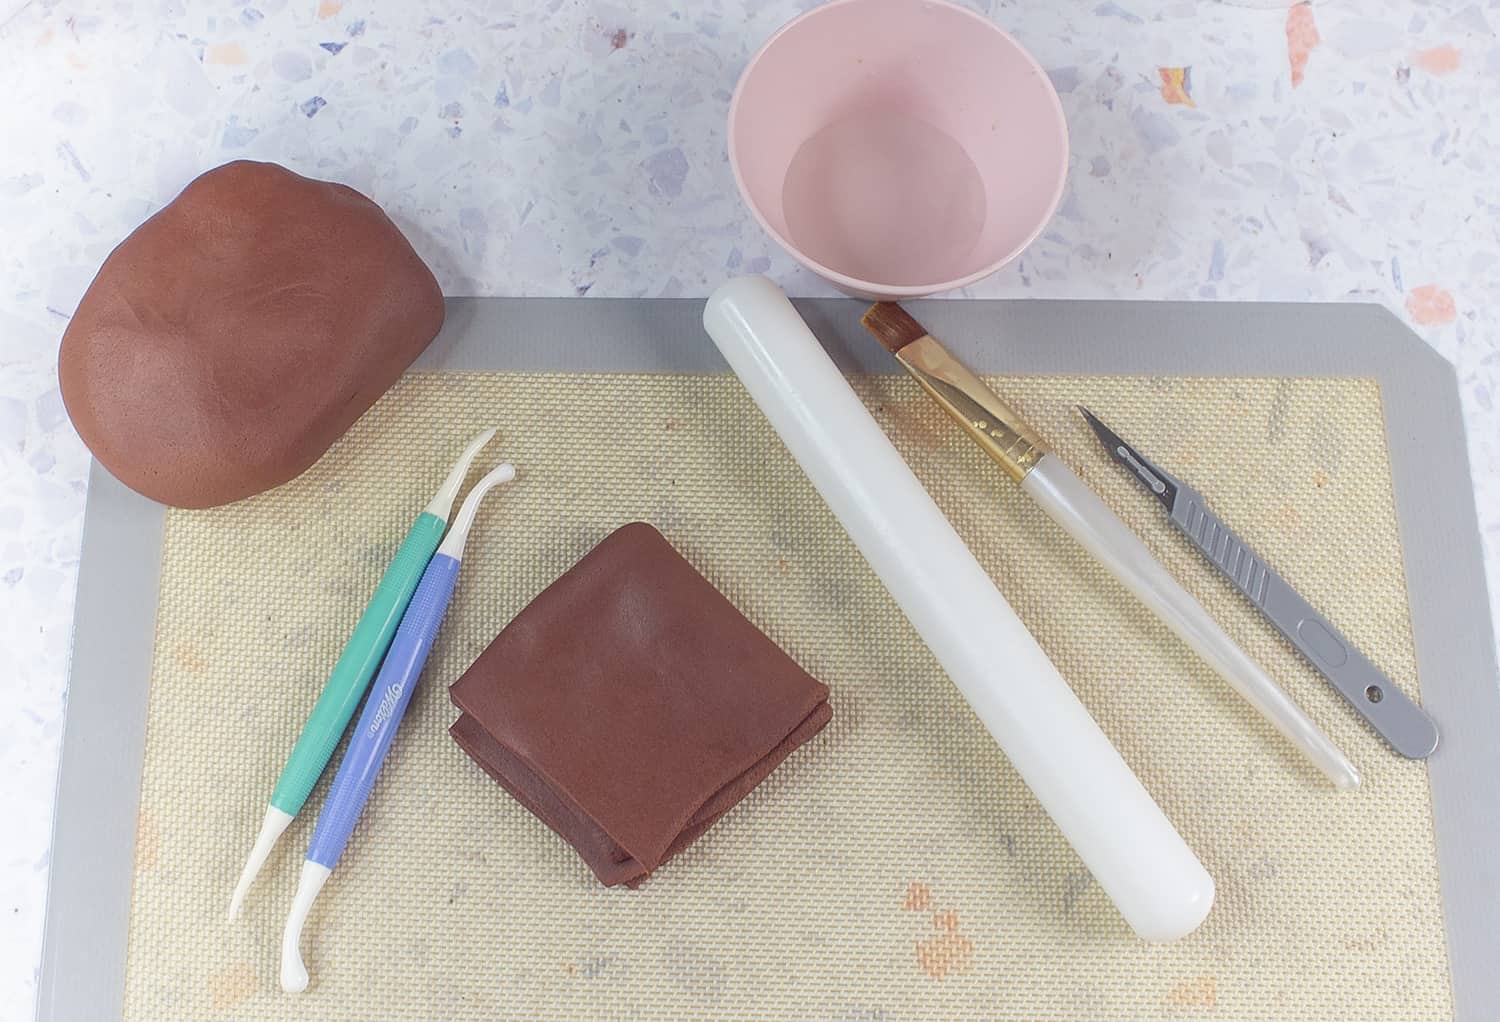
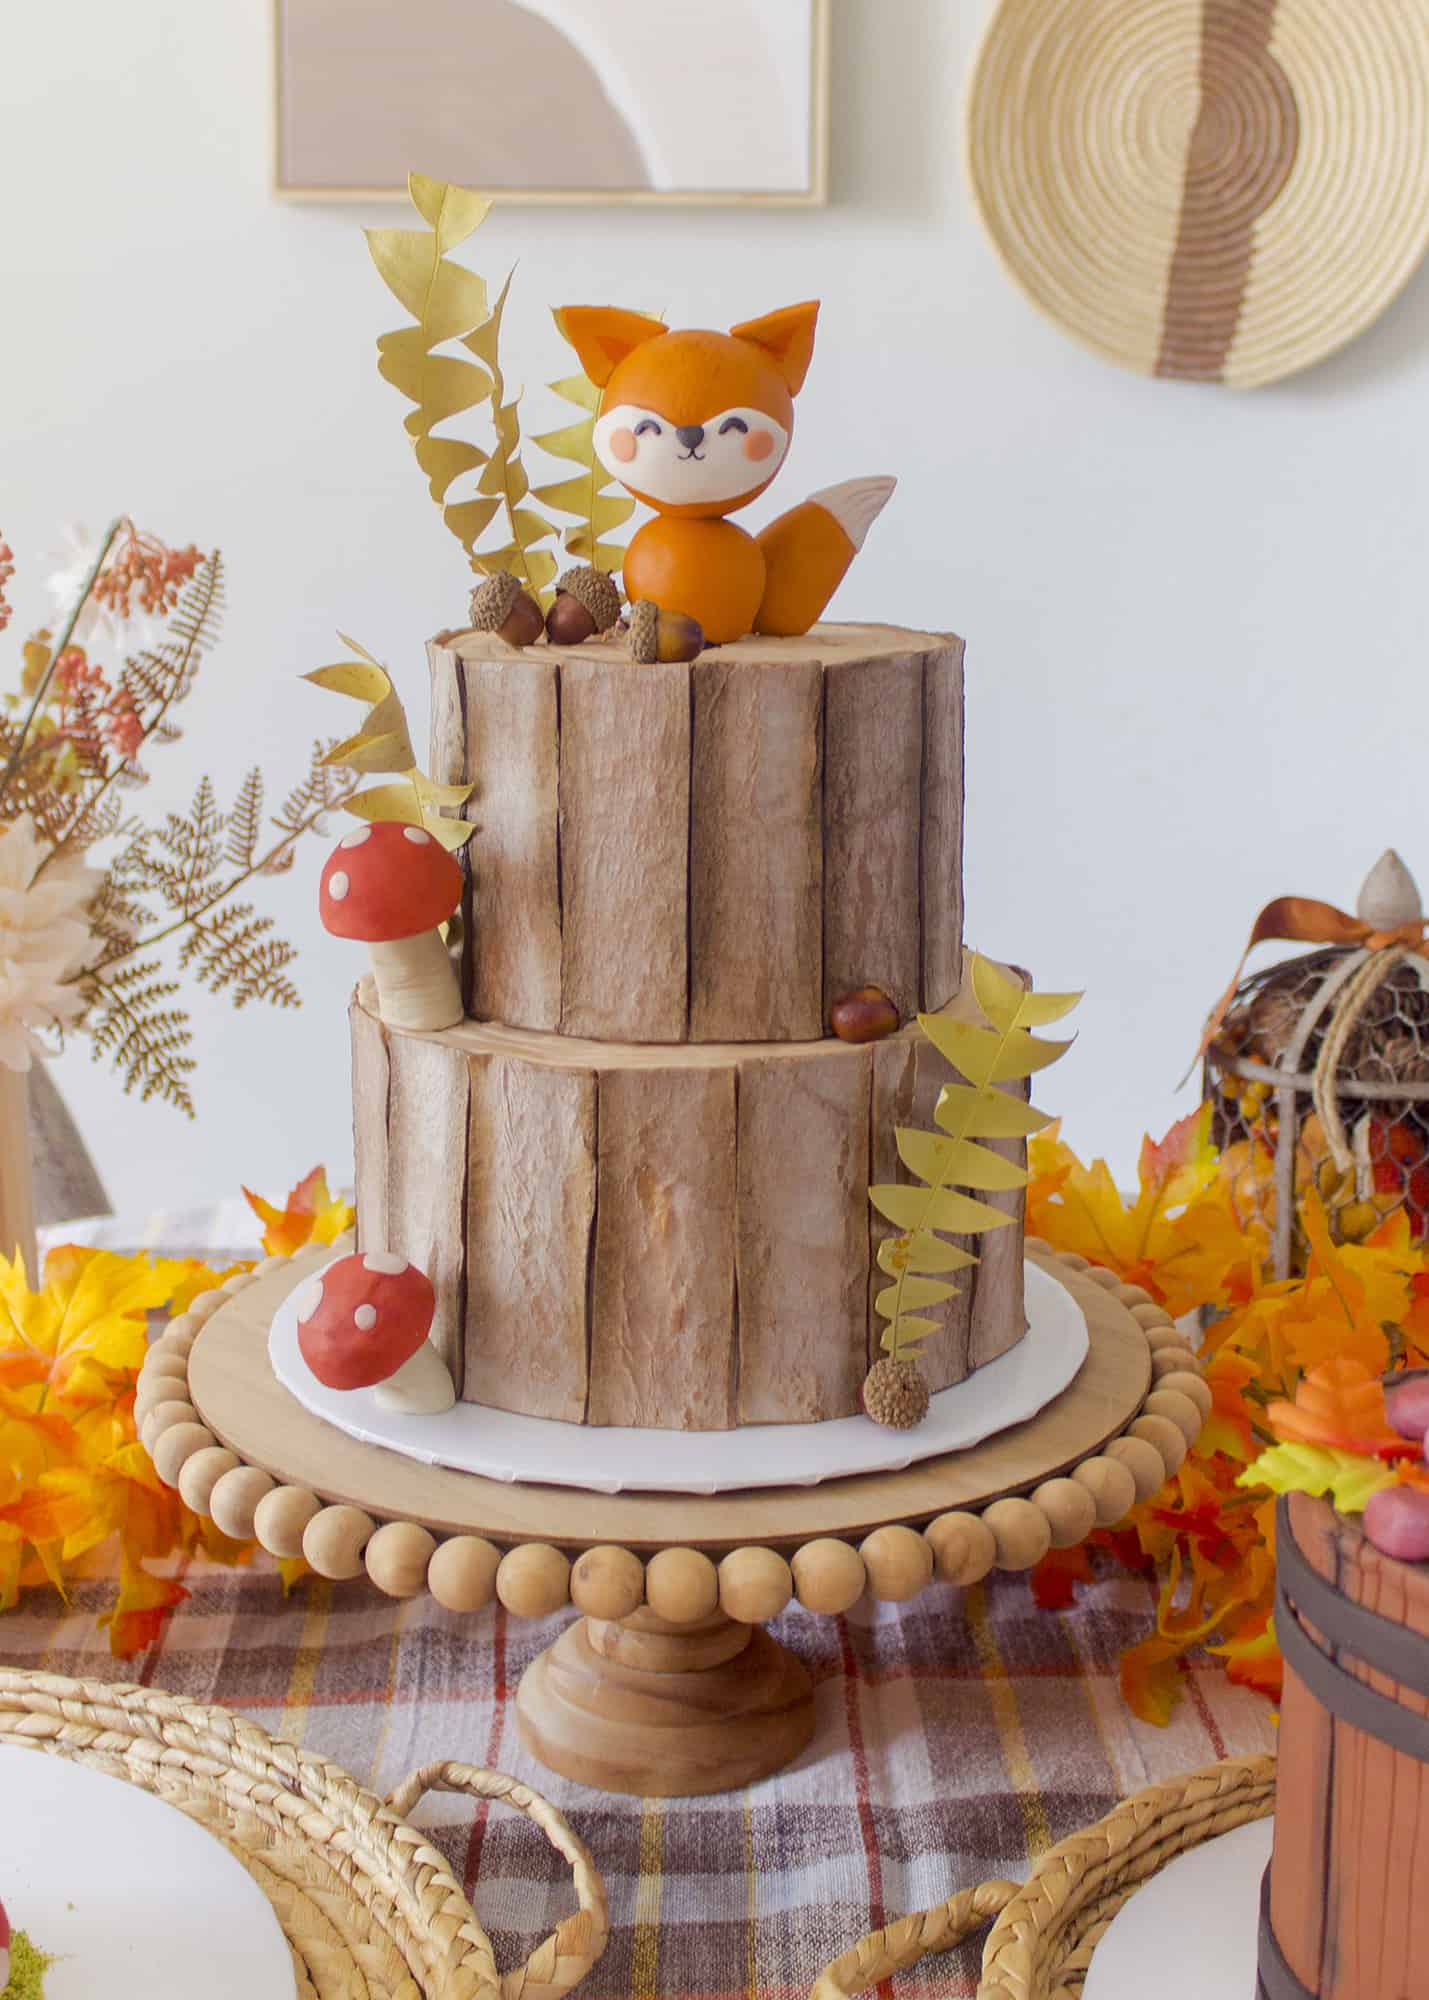 Supplies: brown and ivory fondant, wafer paper, a rolling pin, water, a brush, and a scalpel knife.
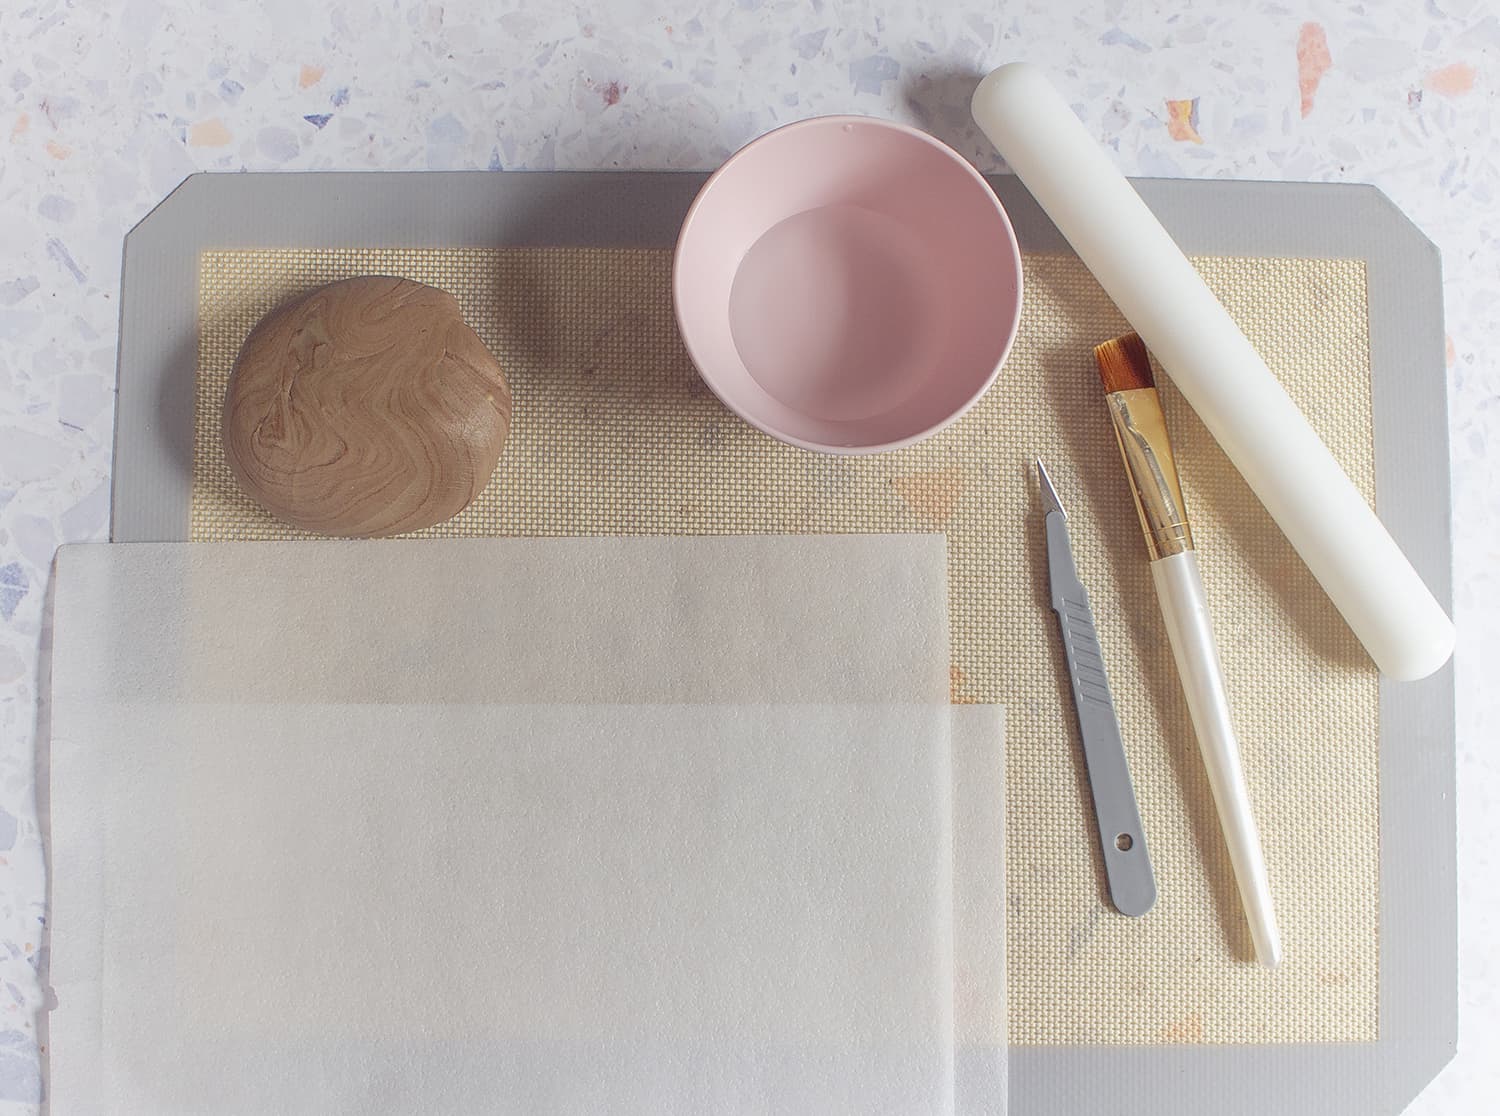 Step One: Roll out your fondant. I roll mine about 1/4” thick on a silicone surface.
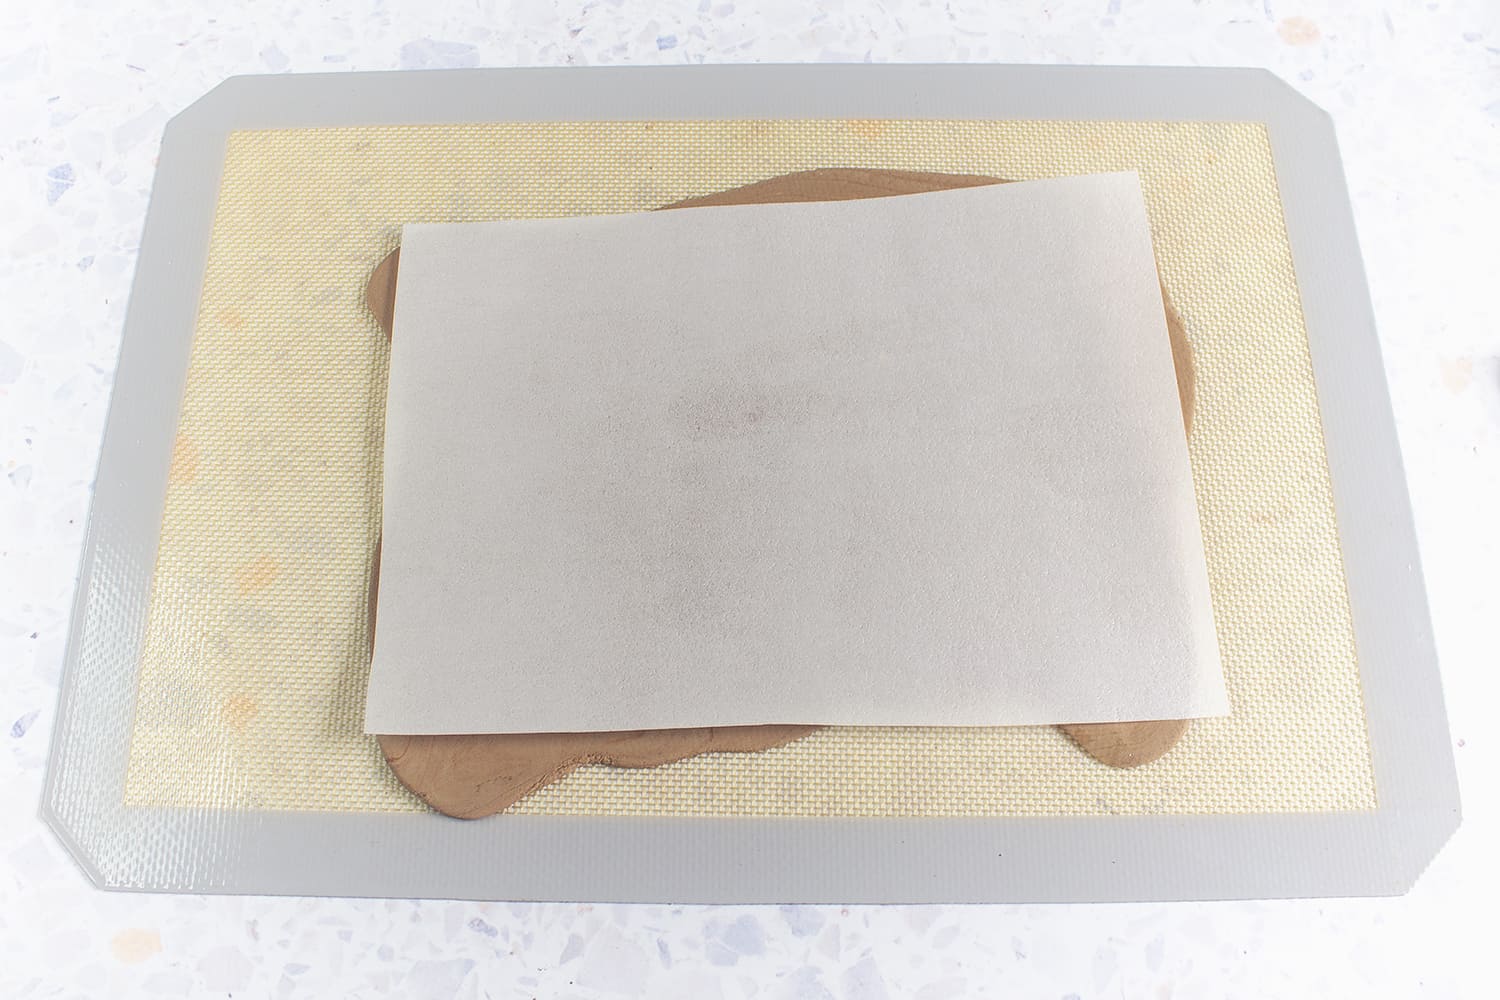 Step Two: Place wafter paper on top of fondant. I take a damp paper towel and go over the fondant first, so the wafer will stick to it just a little.
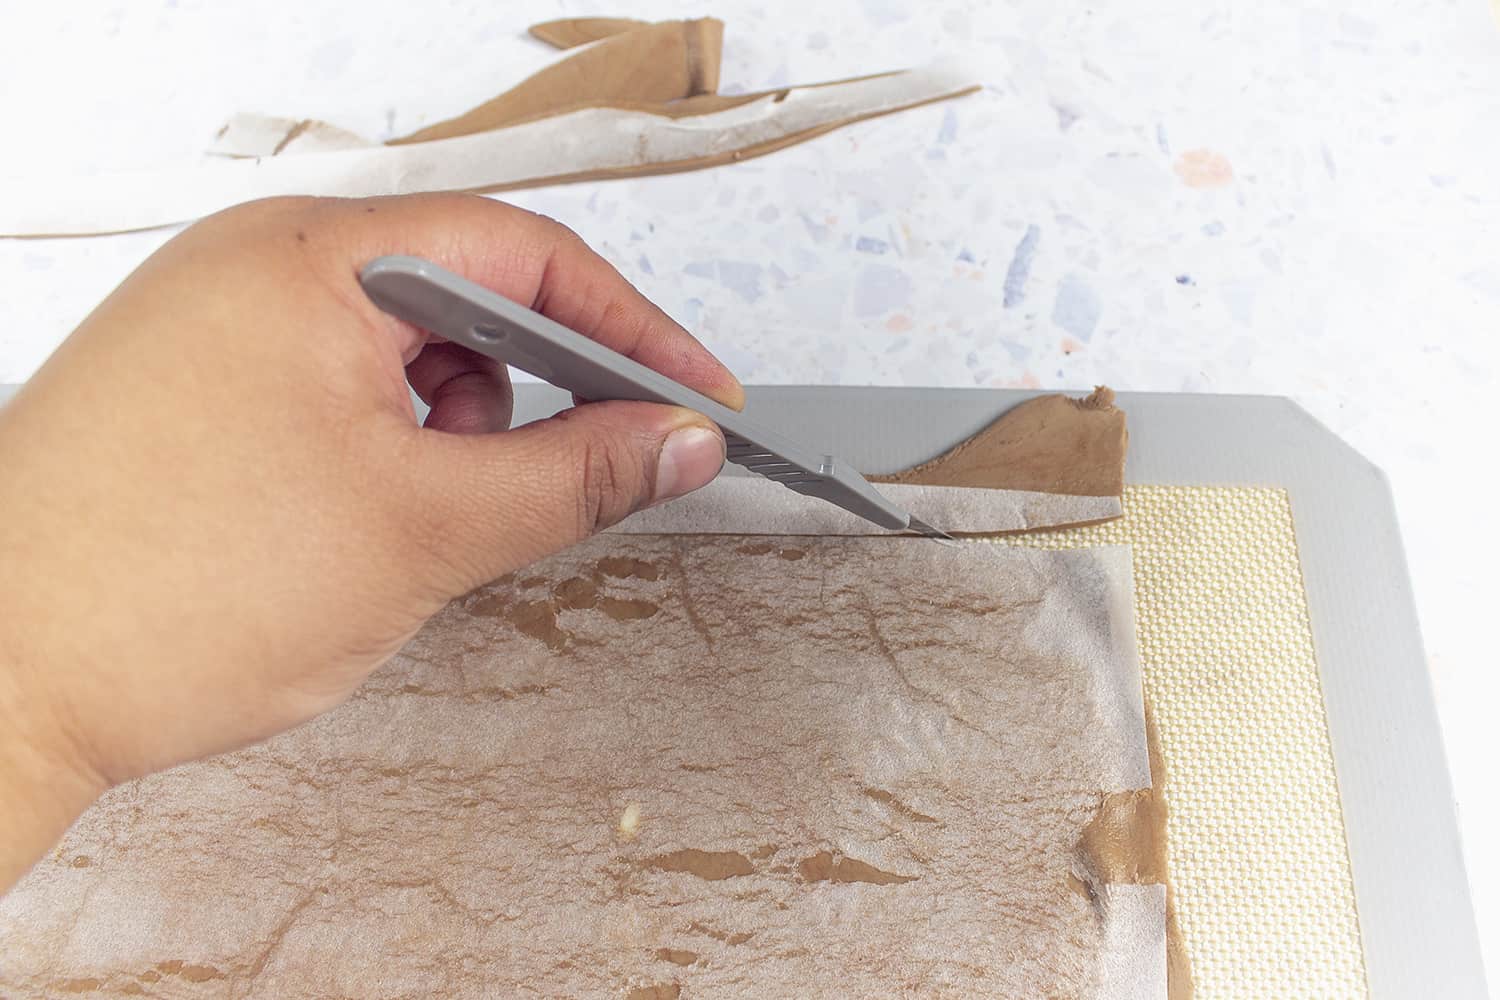
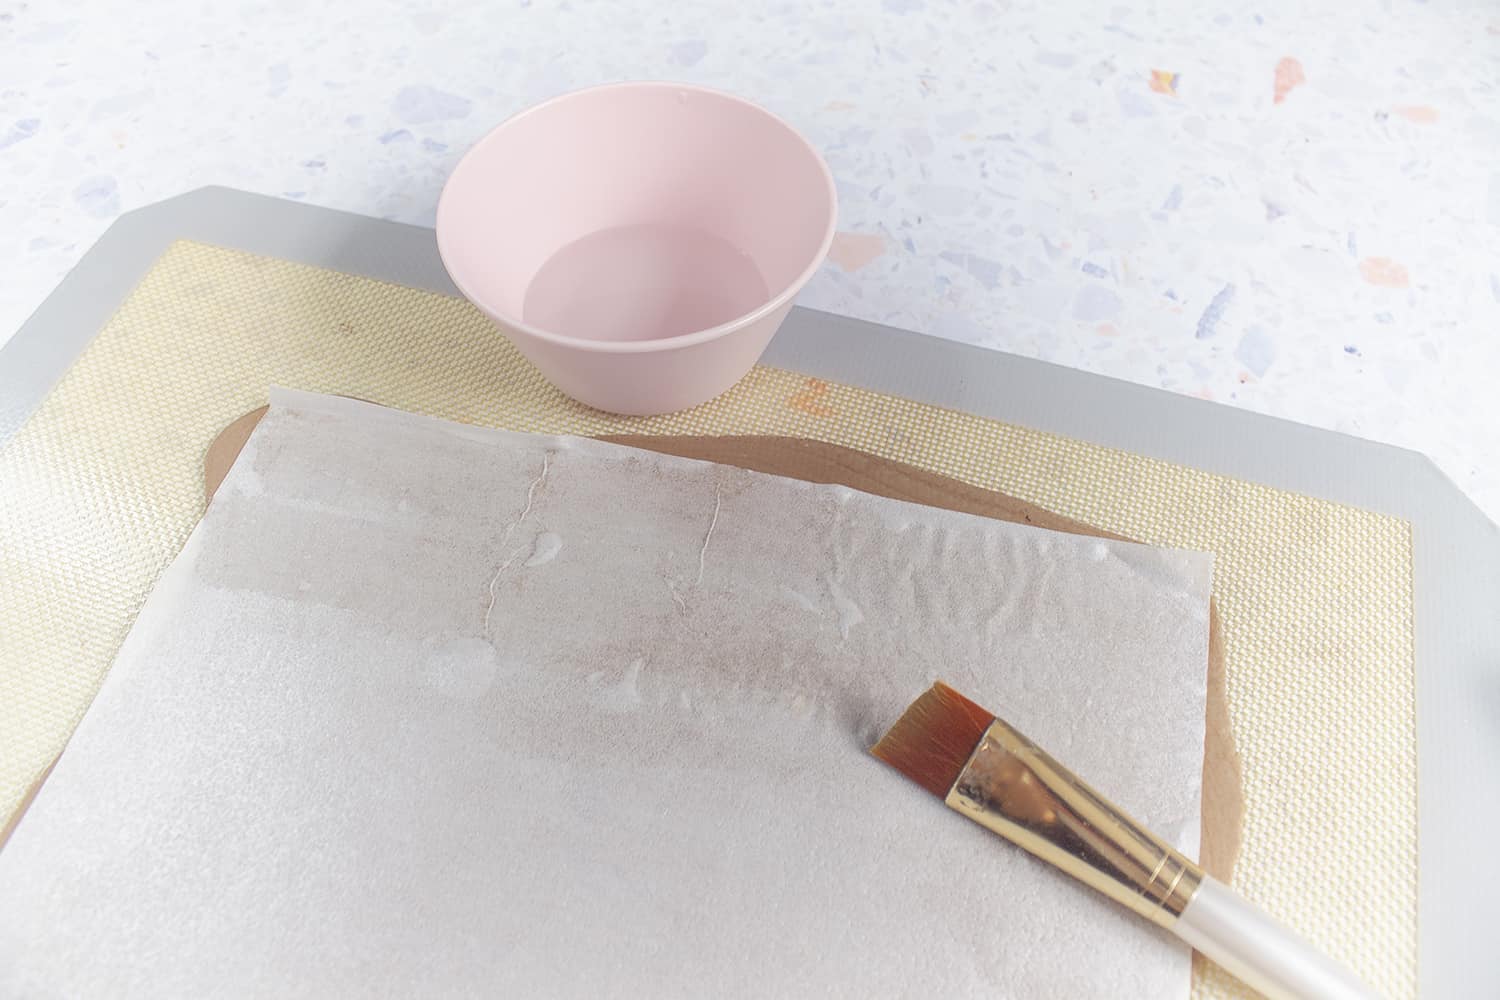 Step Three: With your brush, dip it in water and go over the wafer paper. Don’t oversaturate the wafer with water because it will become gummy and rip. You just want it to get tacky. If it’s too wet, peel it off and start again with a new wafer sheet.
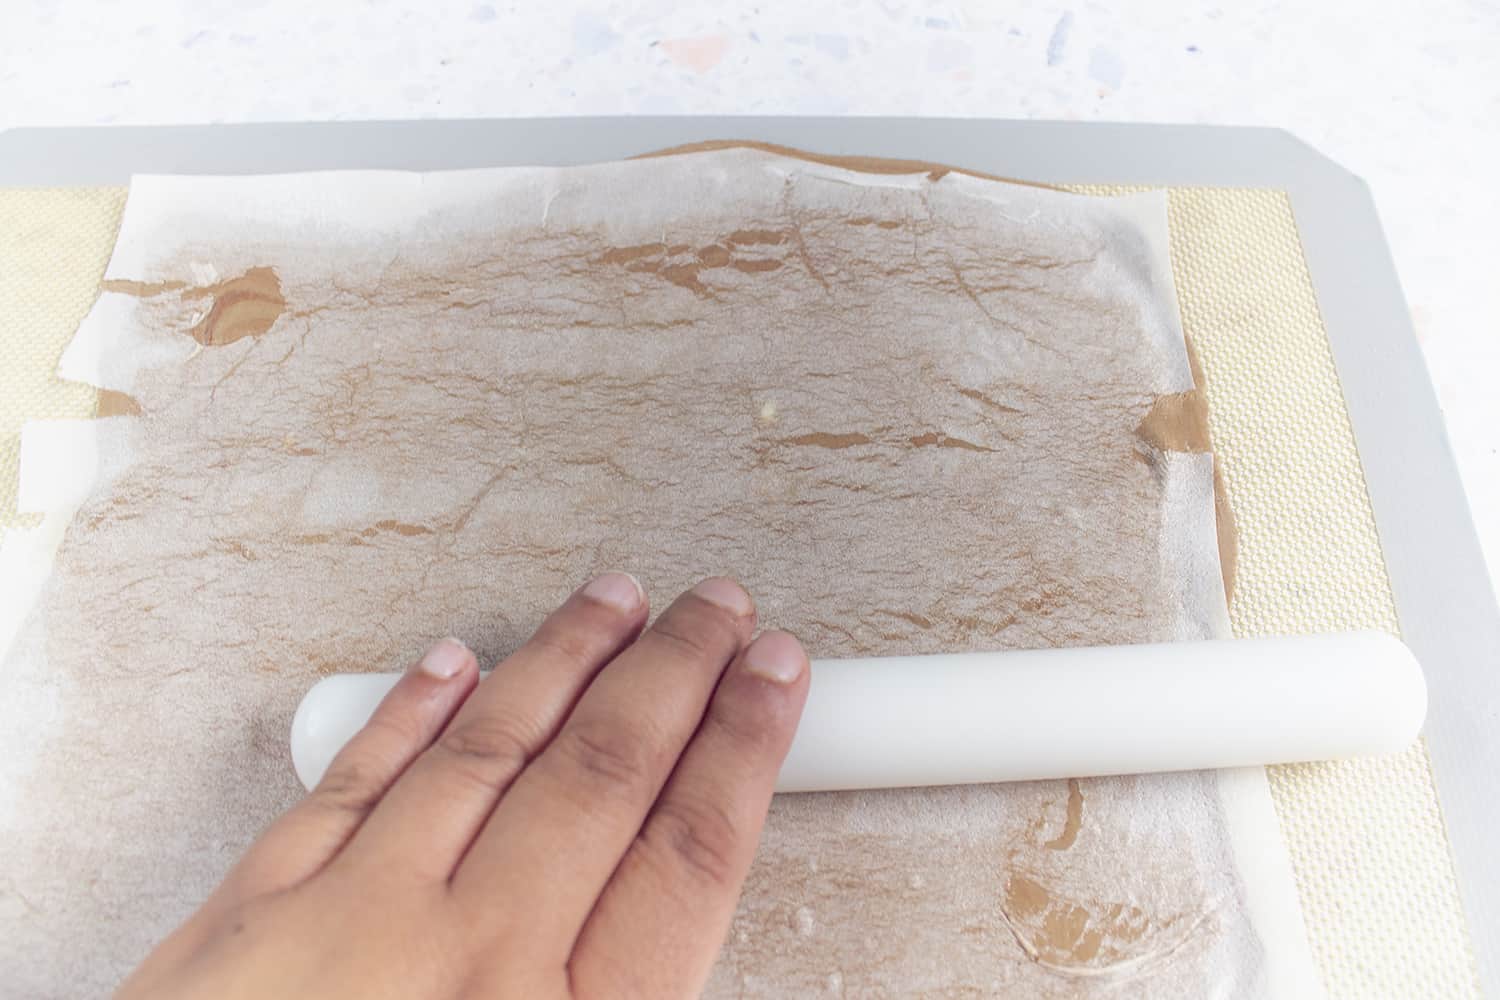
Step Four: With your rolling pin, roll over the wafer paper pushing into the fondant a bit. It will begin to stretch and rip creating that weathered wafer look.
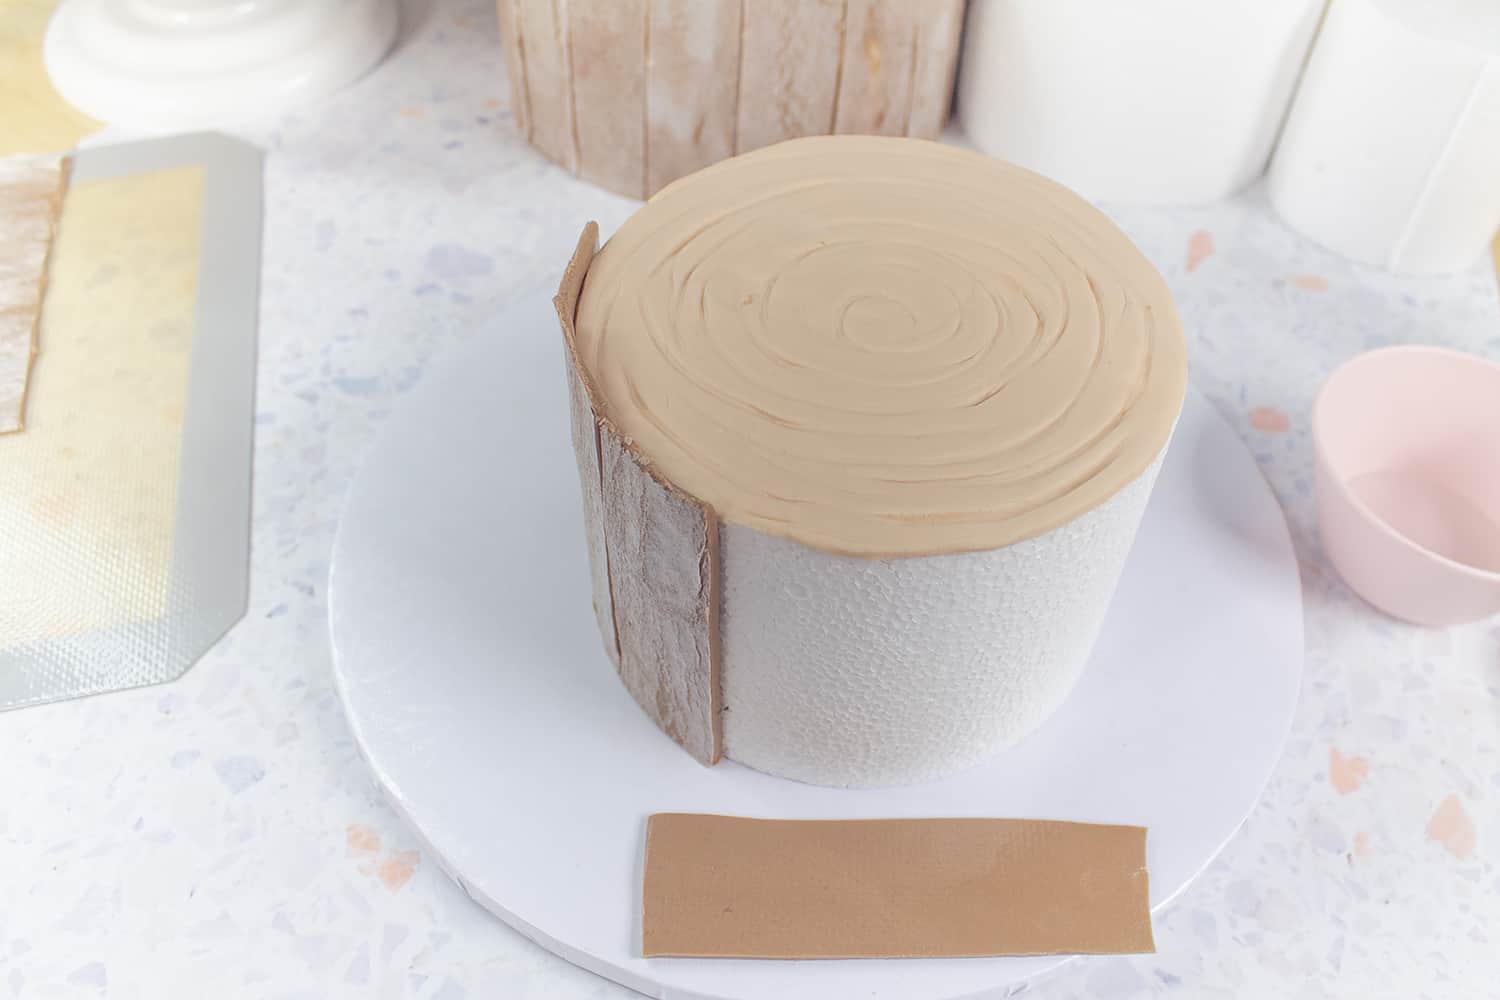
 Step Five: With some ivory colored fondant, cover the top of the cake. I take the other end of my scalpel and make round grooves.
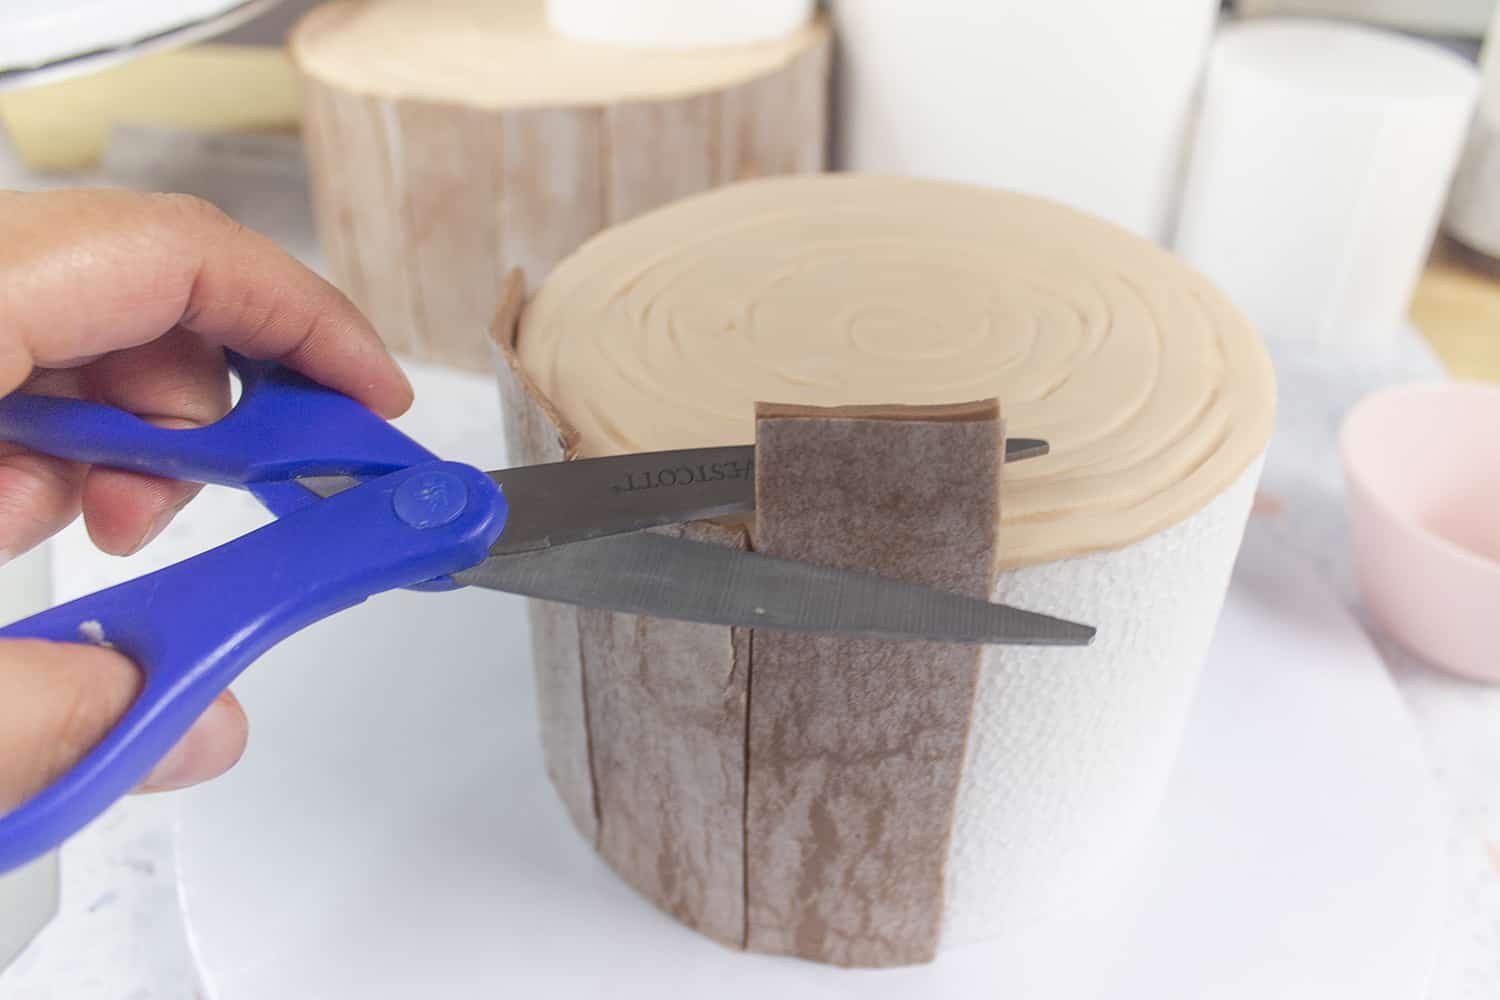
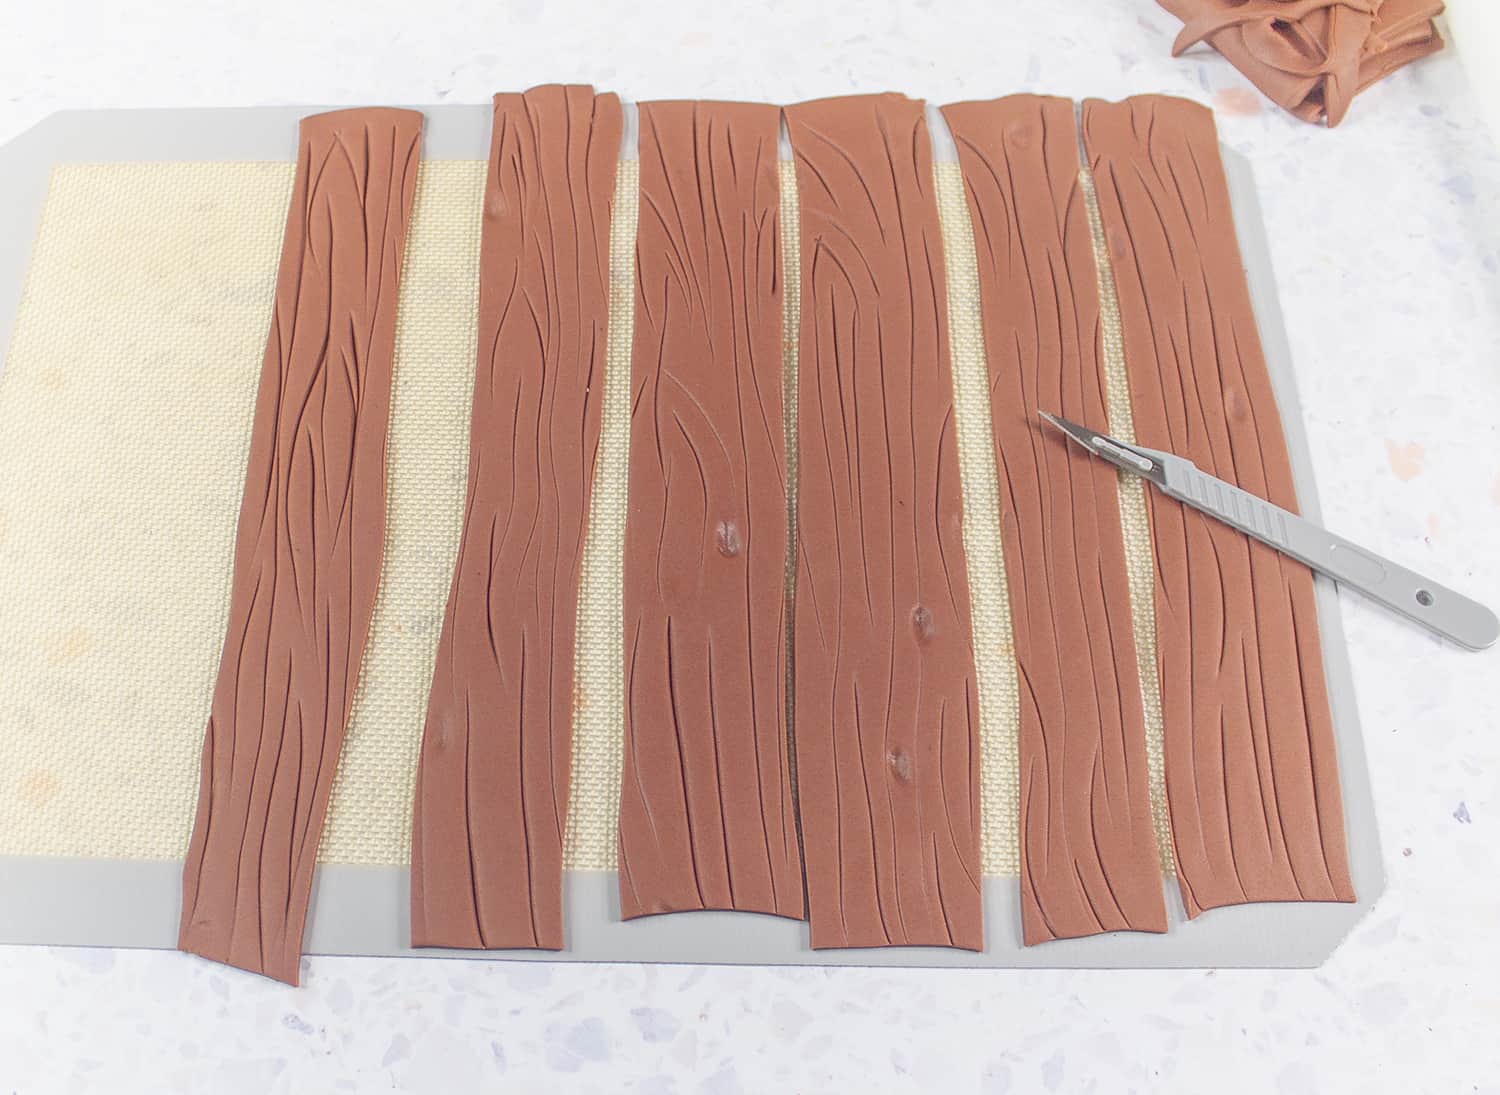
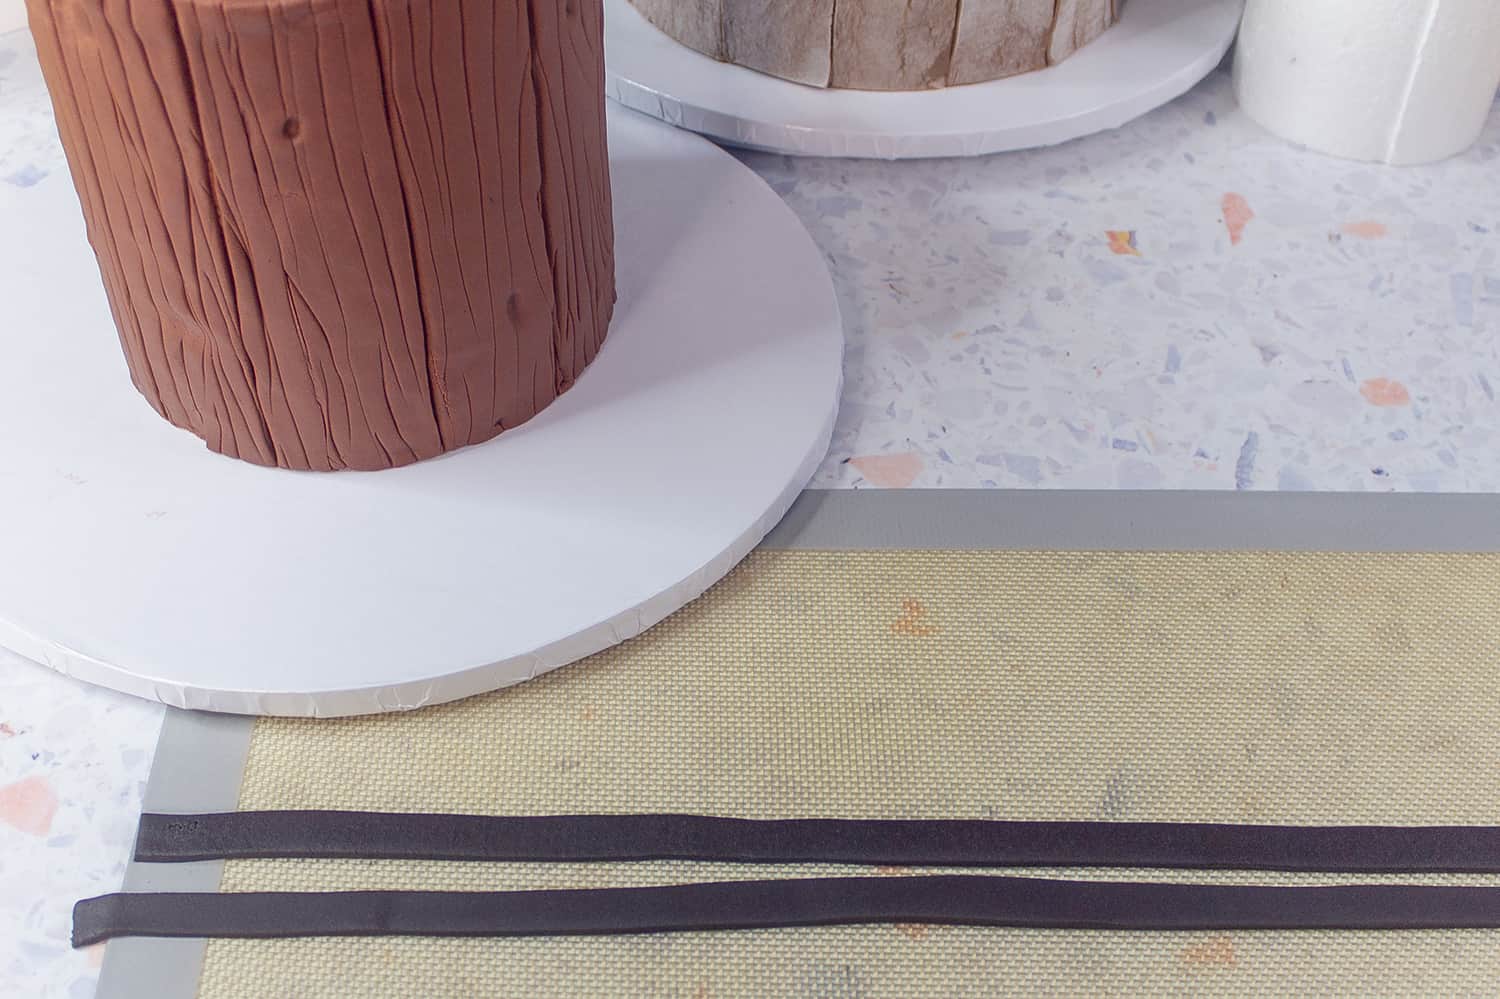
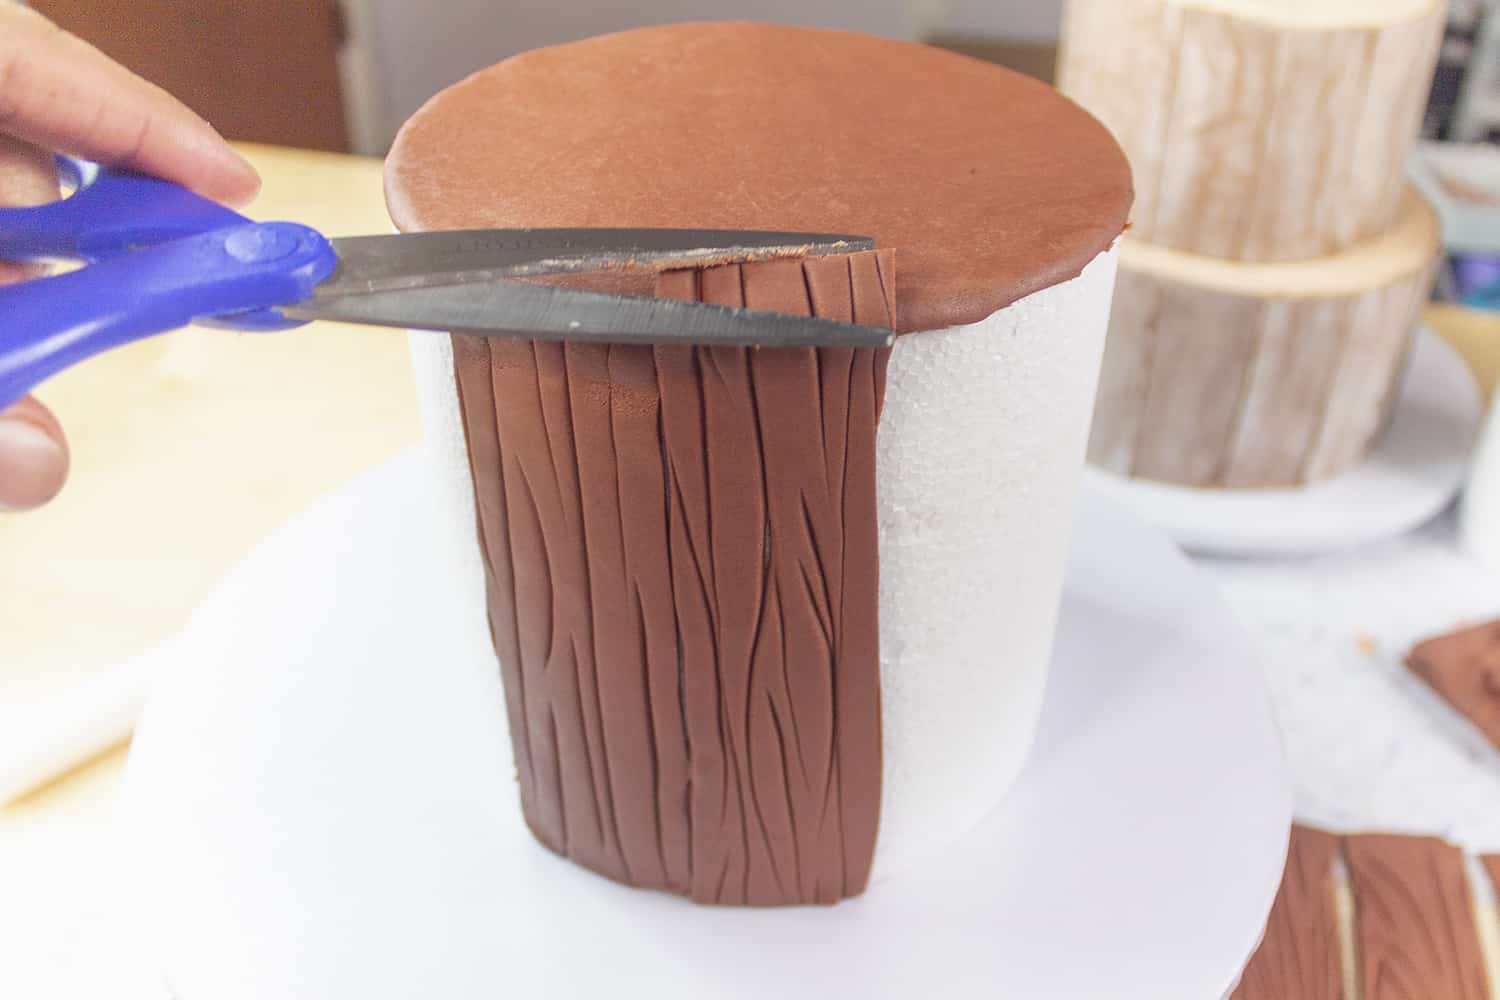
 Step Six: Cut the weathered wafer into strips and cover the cake strip by strip.
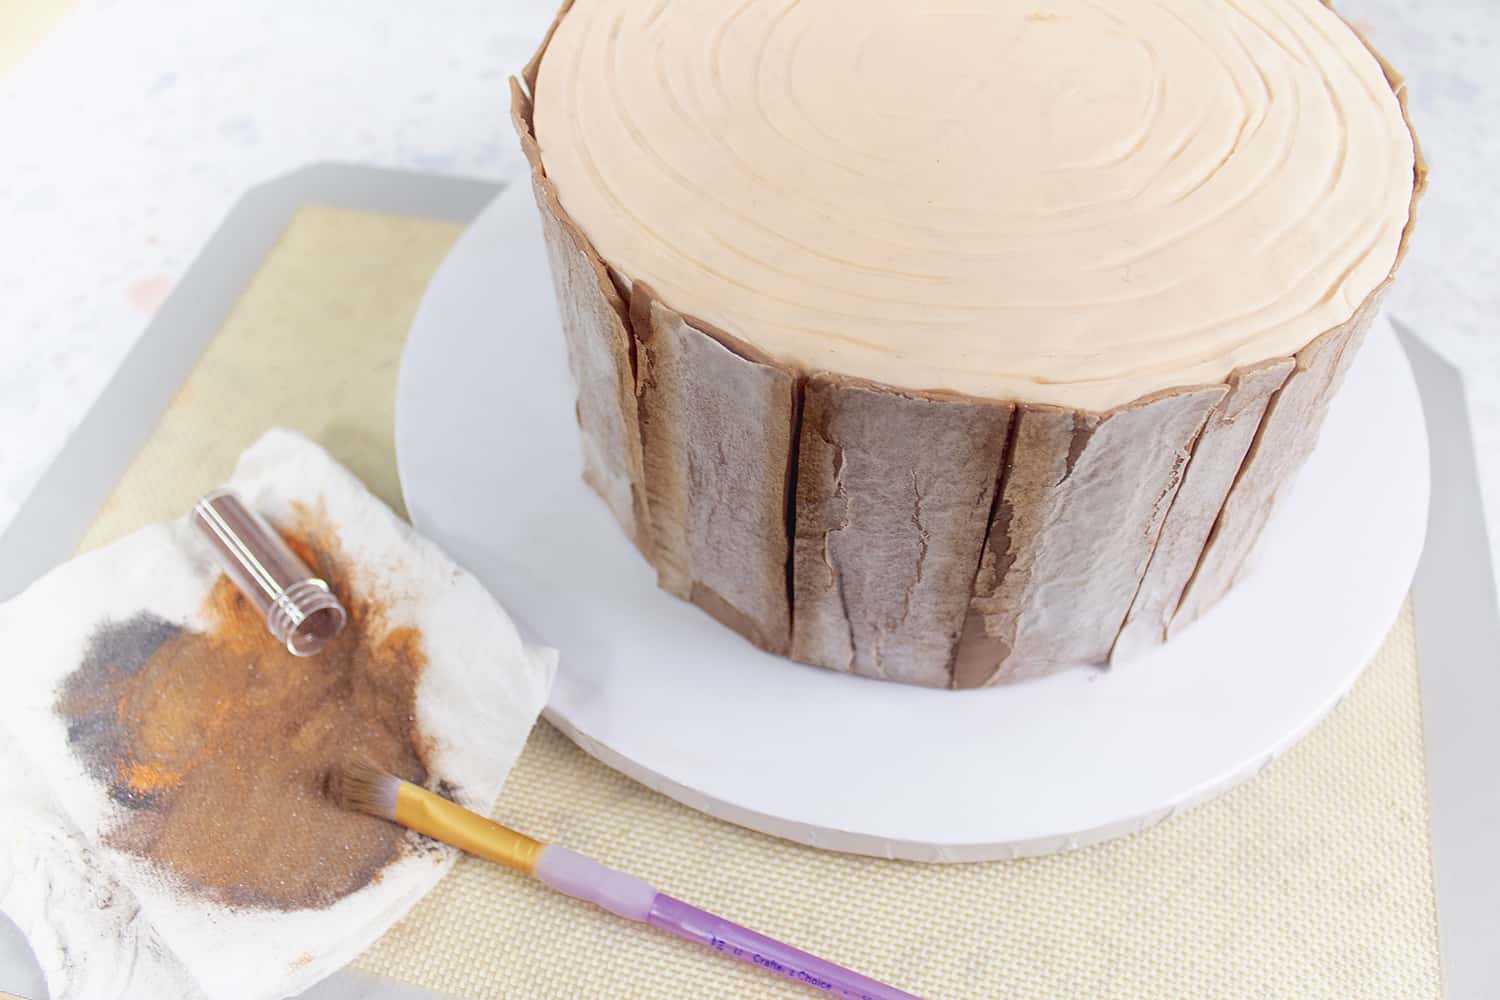
 Step Seven: (Optional) With a brush, add petal dust (I used brown and orange) to creases to add dimension.
Wood Look #2 – Wood Barrel
 Wood Look #2 – Wood Barrel
This technique is great for wine or apple barrel cakes.
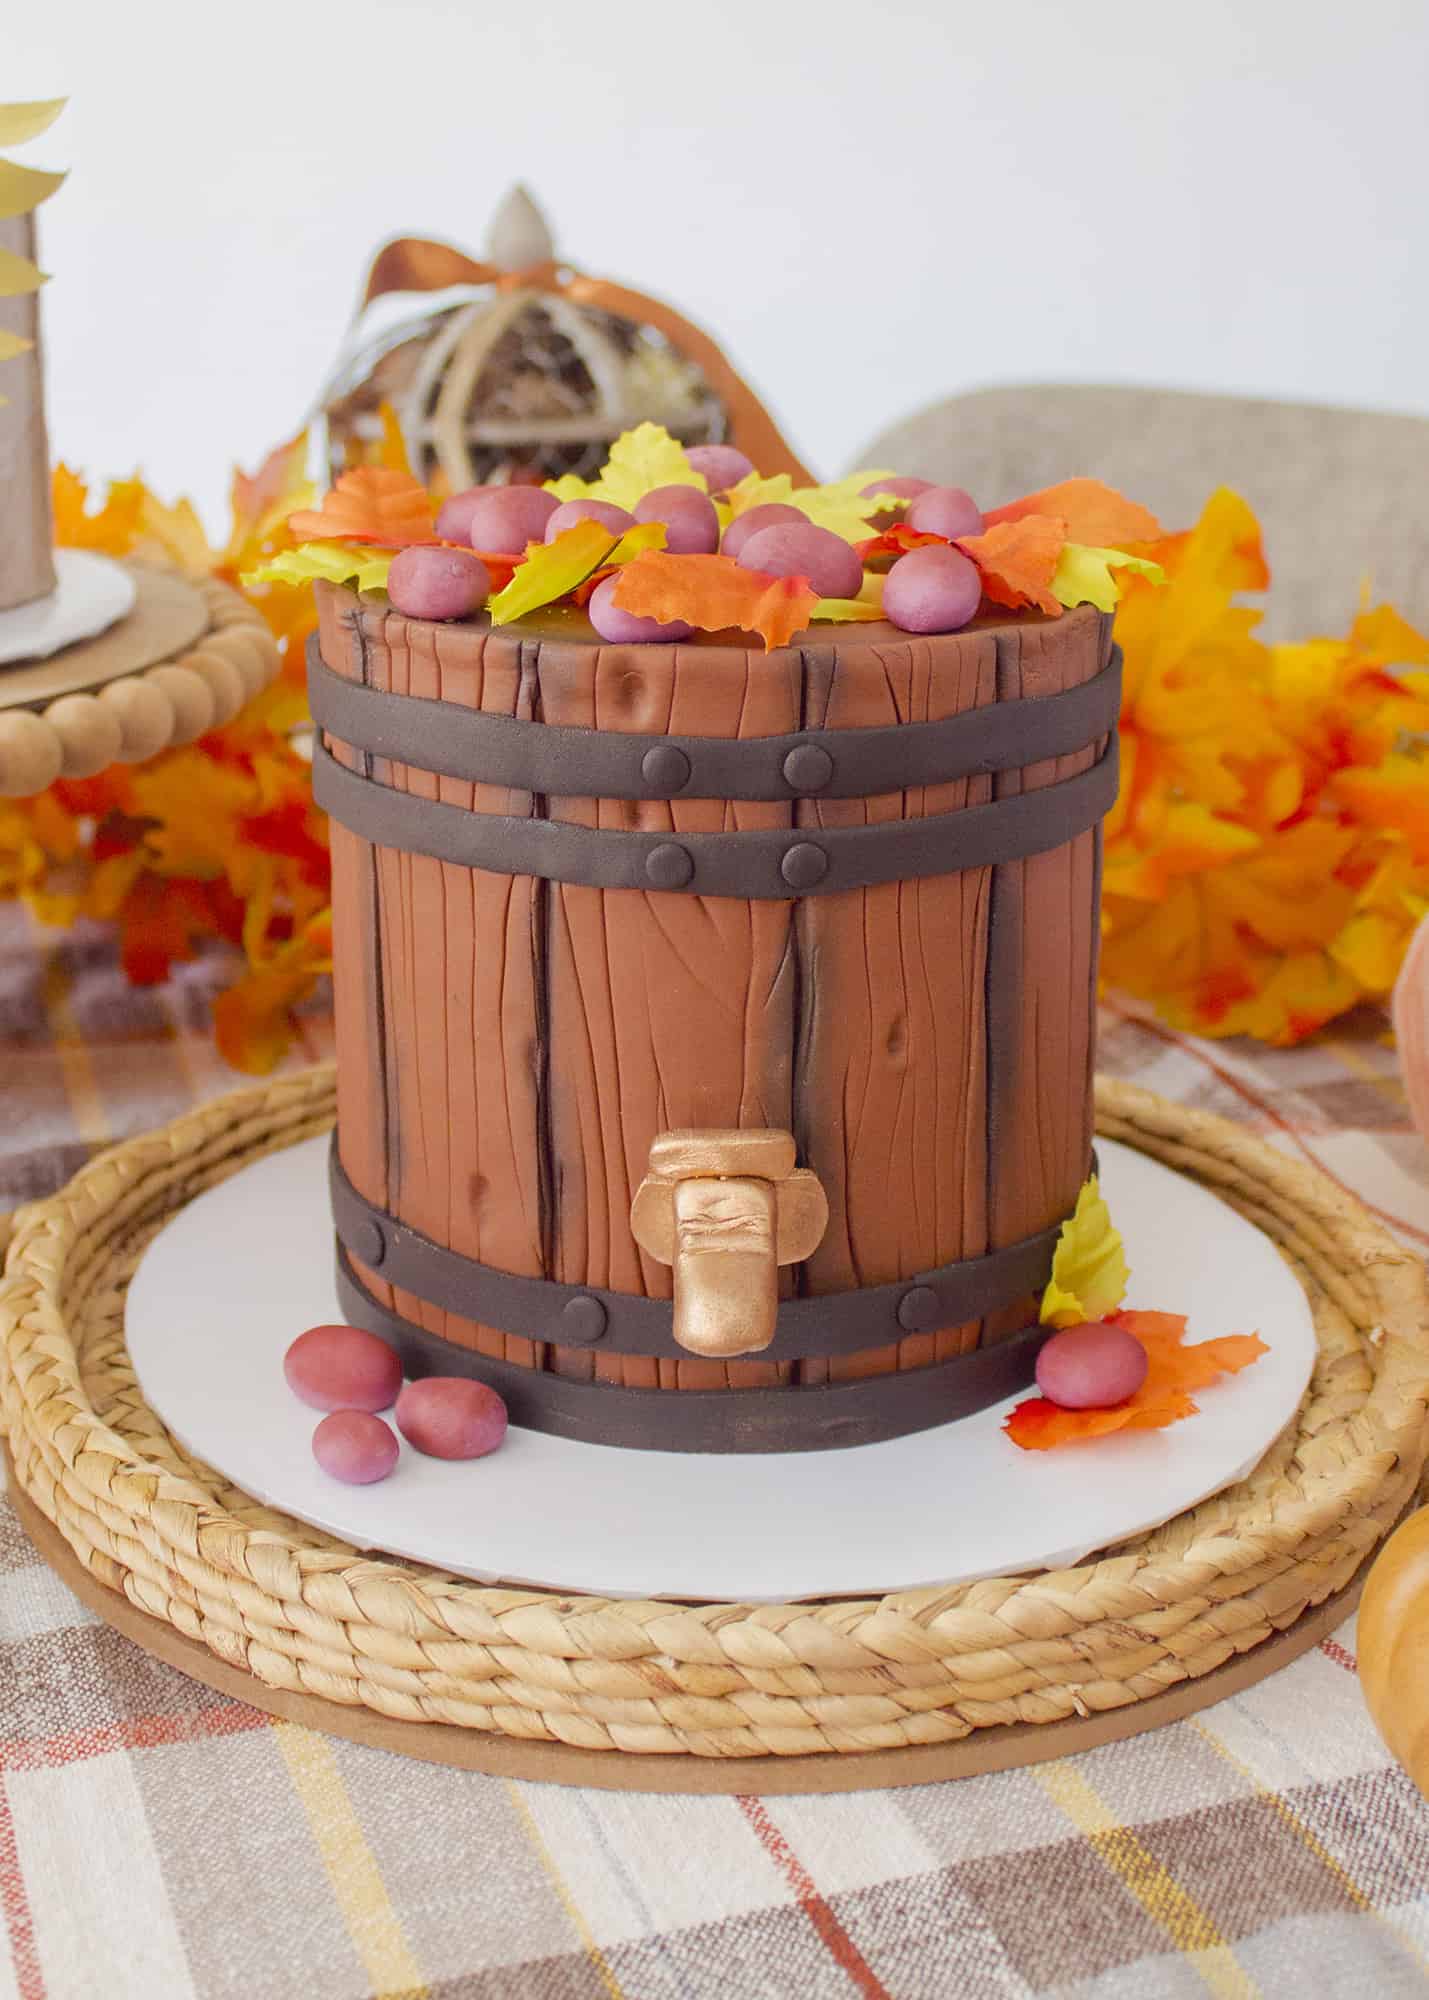 Supplies: brown and black fondant, fondant modeling tools (I used a dresden and ball tool), a rolling pin, and a scalpel knife.
 Step One: Roll out your brown fondant and cover the top of the cake.
Step Two: Roll out brown fondant and with the dresden tool, lightly make some grooves on the fondant.
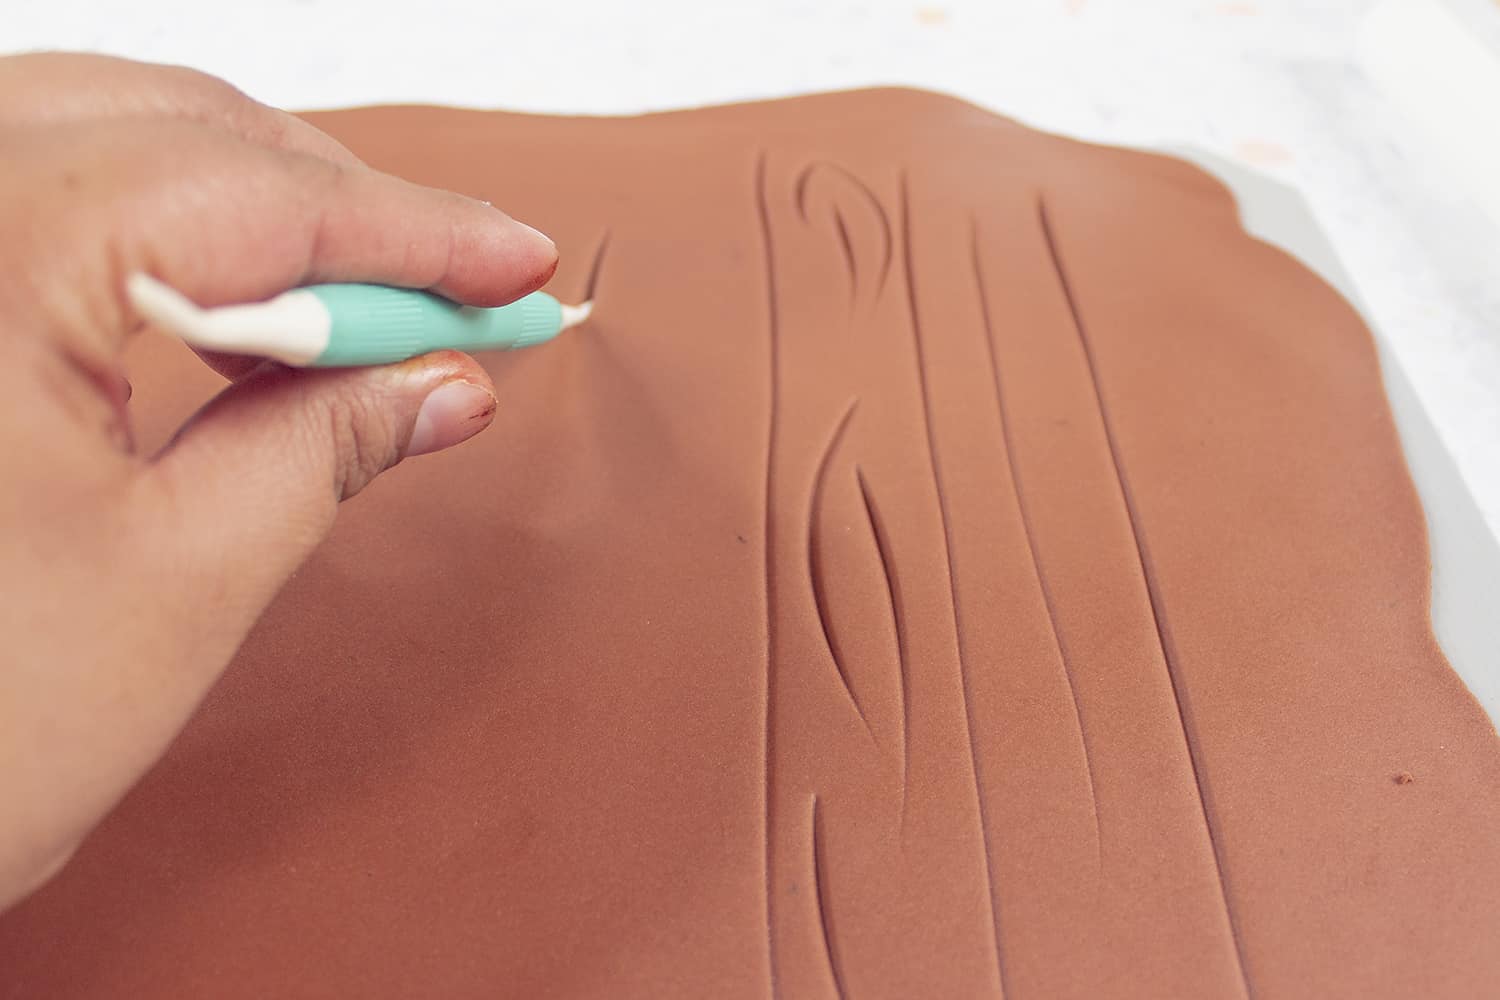
 Step Three: With the ball tool create some notches on the fondant.
Step Four: Make strips with the scalpel, cover cake strip by strip.
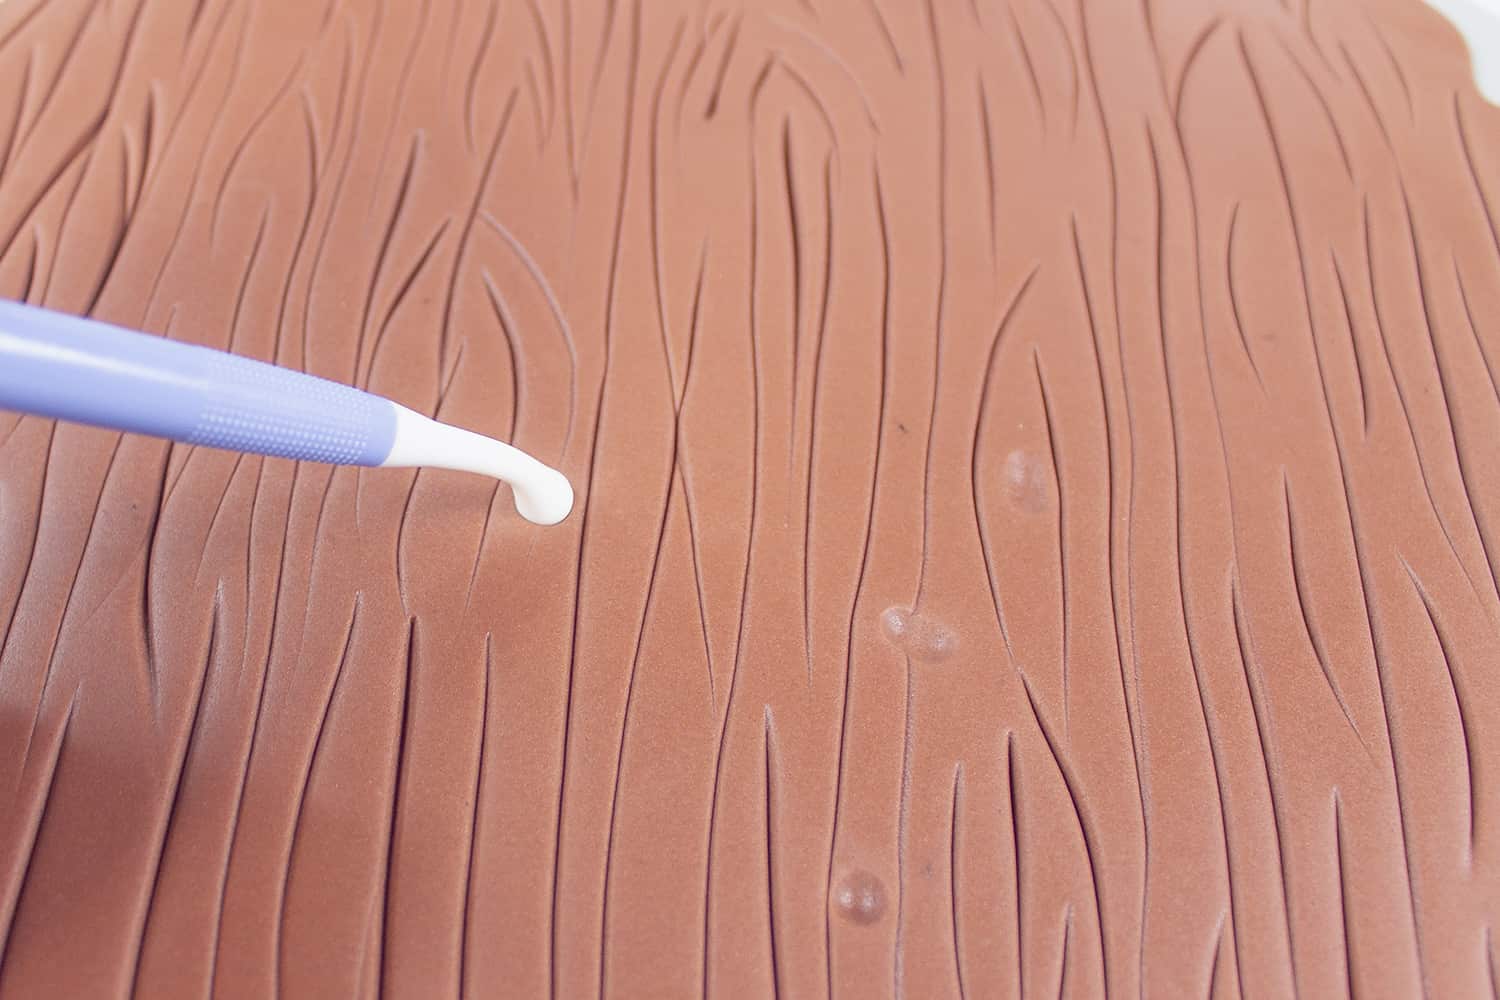
 Step Five: With the dresden tool, define the grooves.
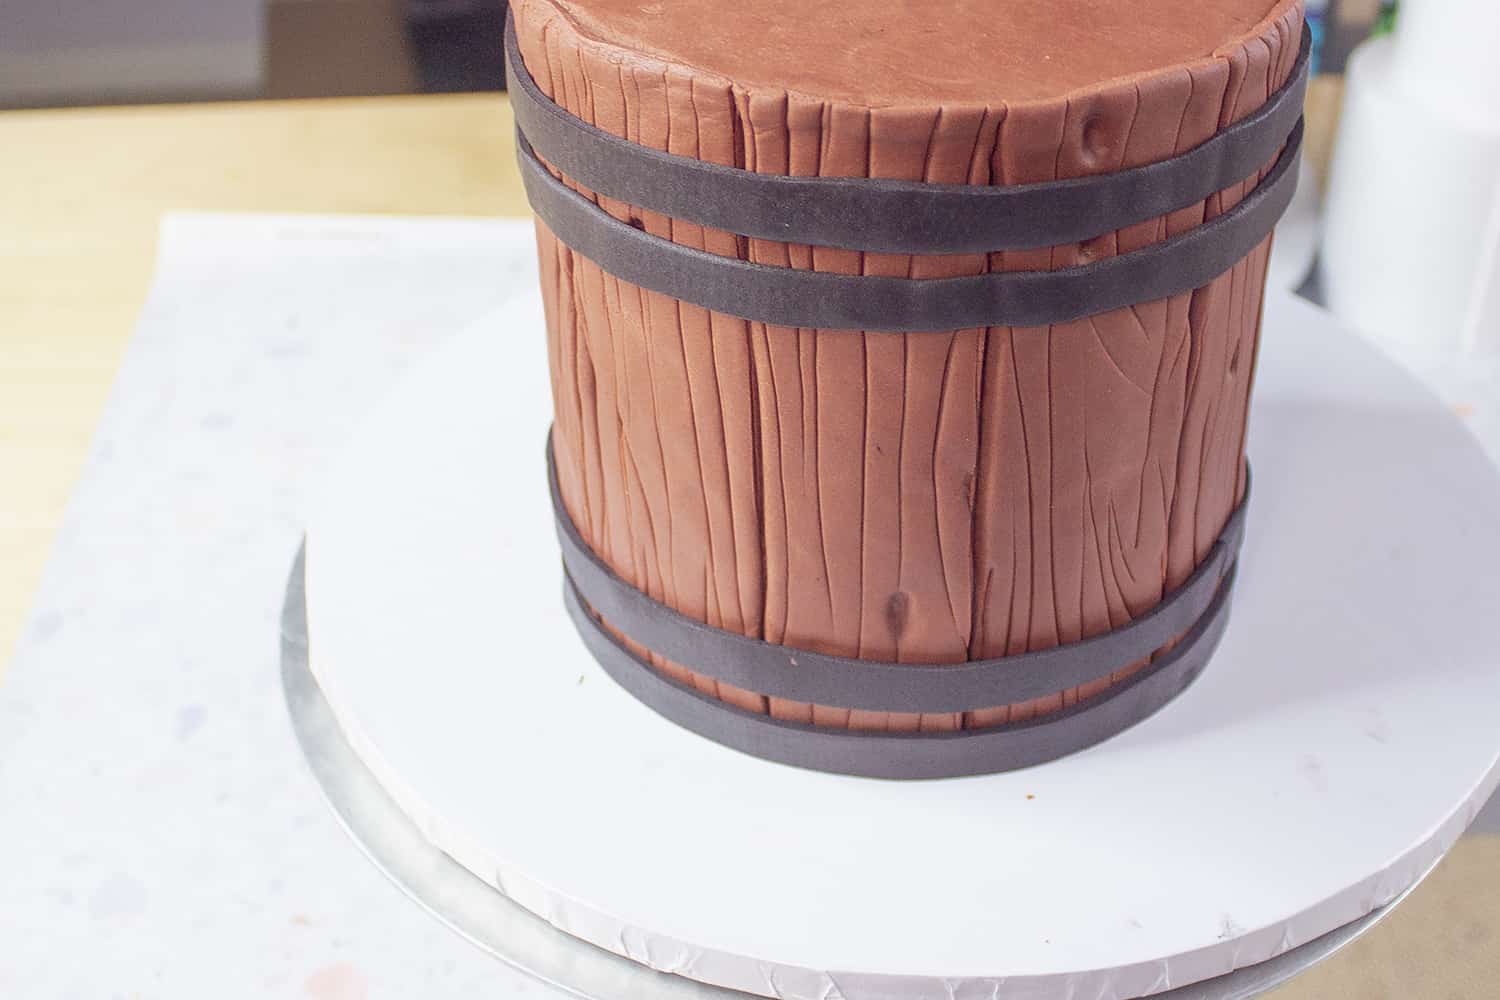
Step Six: Roll out some black fondant and make a few skinny strips, adhering the black strips with a little bit of water.
 Step Seven: (Optional) With a brush, add petal dust to creases to add dimension.
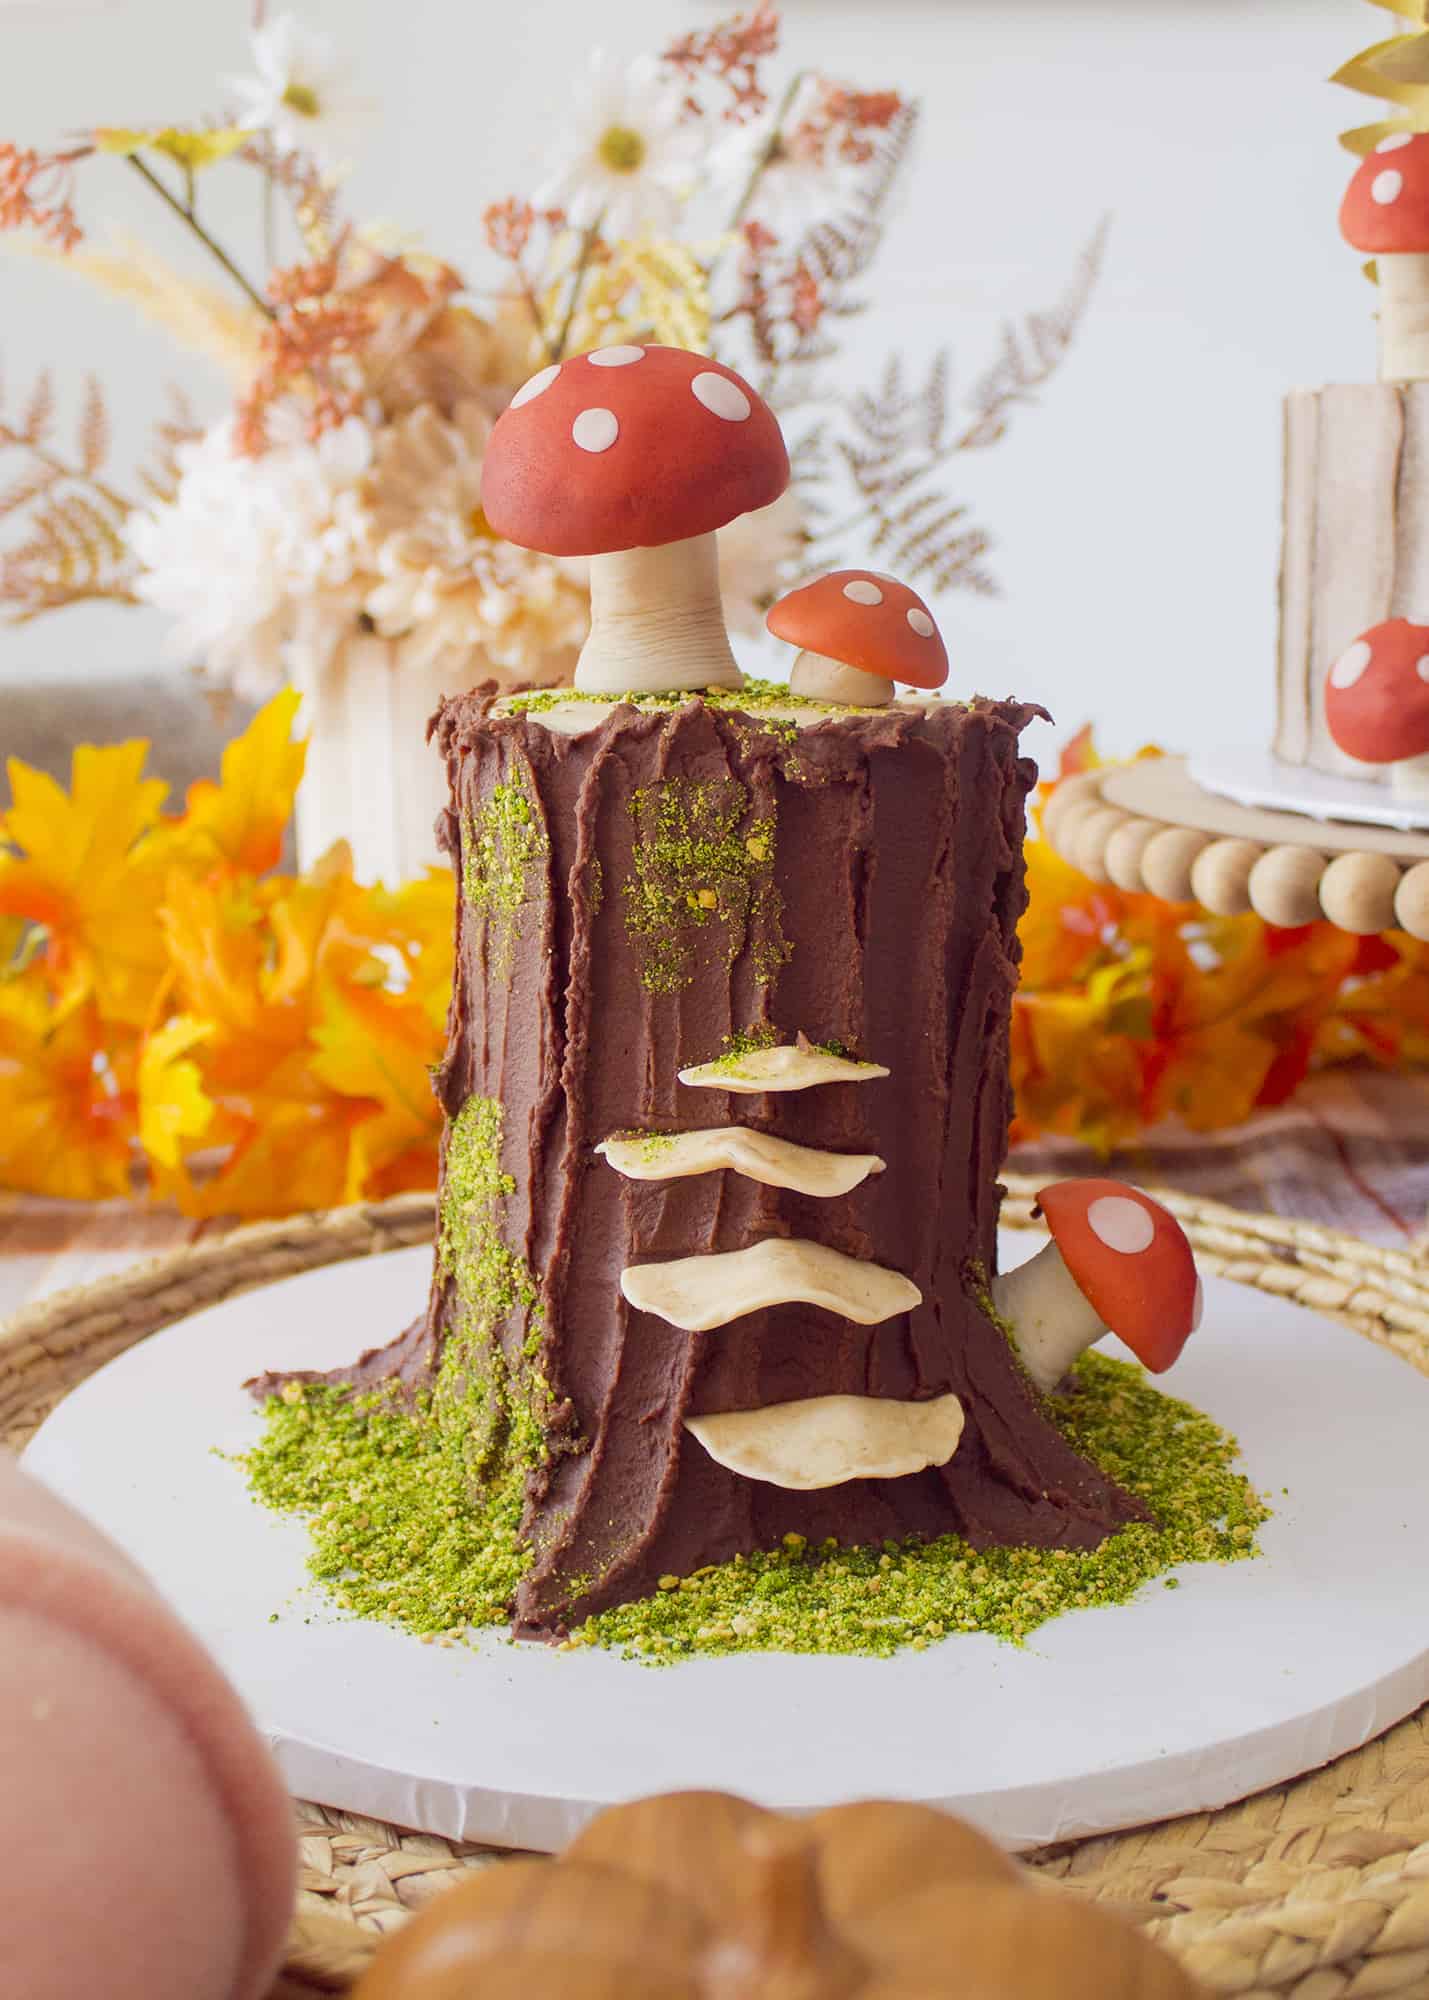
Wood Look #3 – Tree Stump

 Wood Look #3 – Tree Stump
This technique can be done with any buttercream or even chocolate ganache.
 Supplies: icing of choice (I used white and chocolate ganache) and a couple of spatulas.
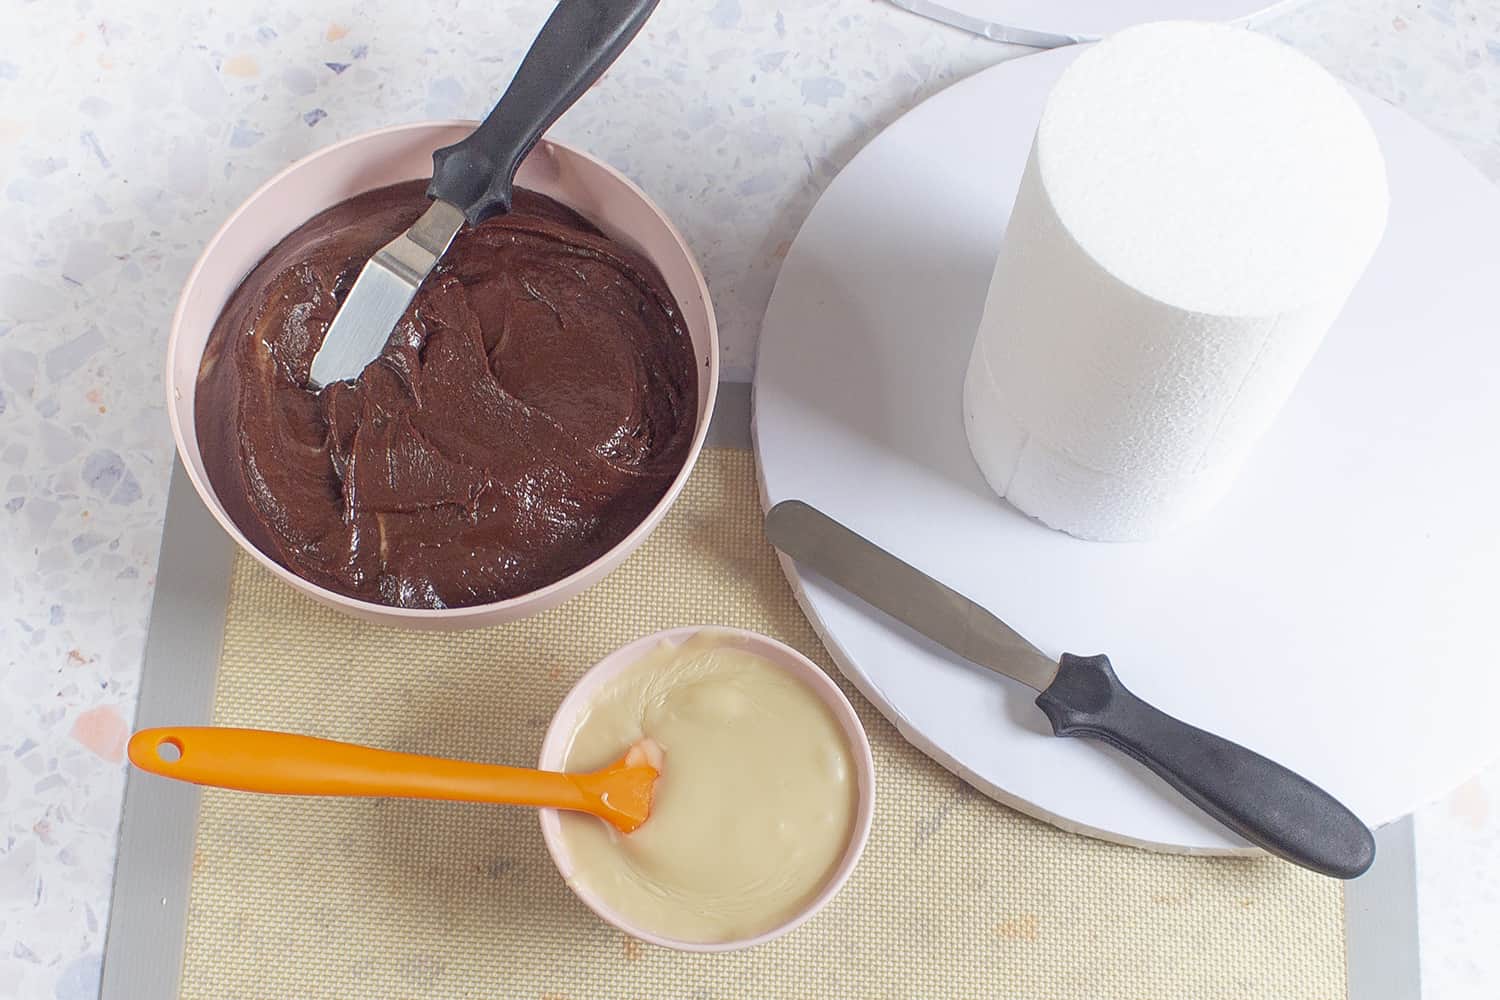 Step One: Spread light colored icing over the top of the cake.
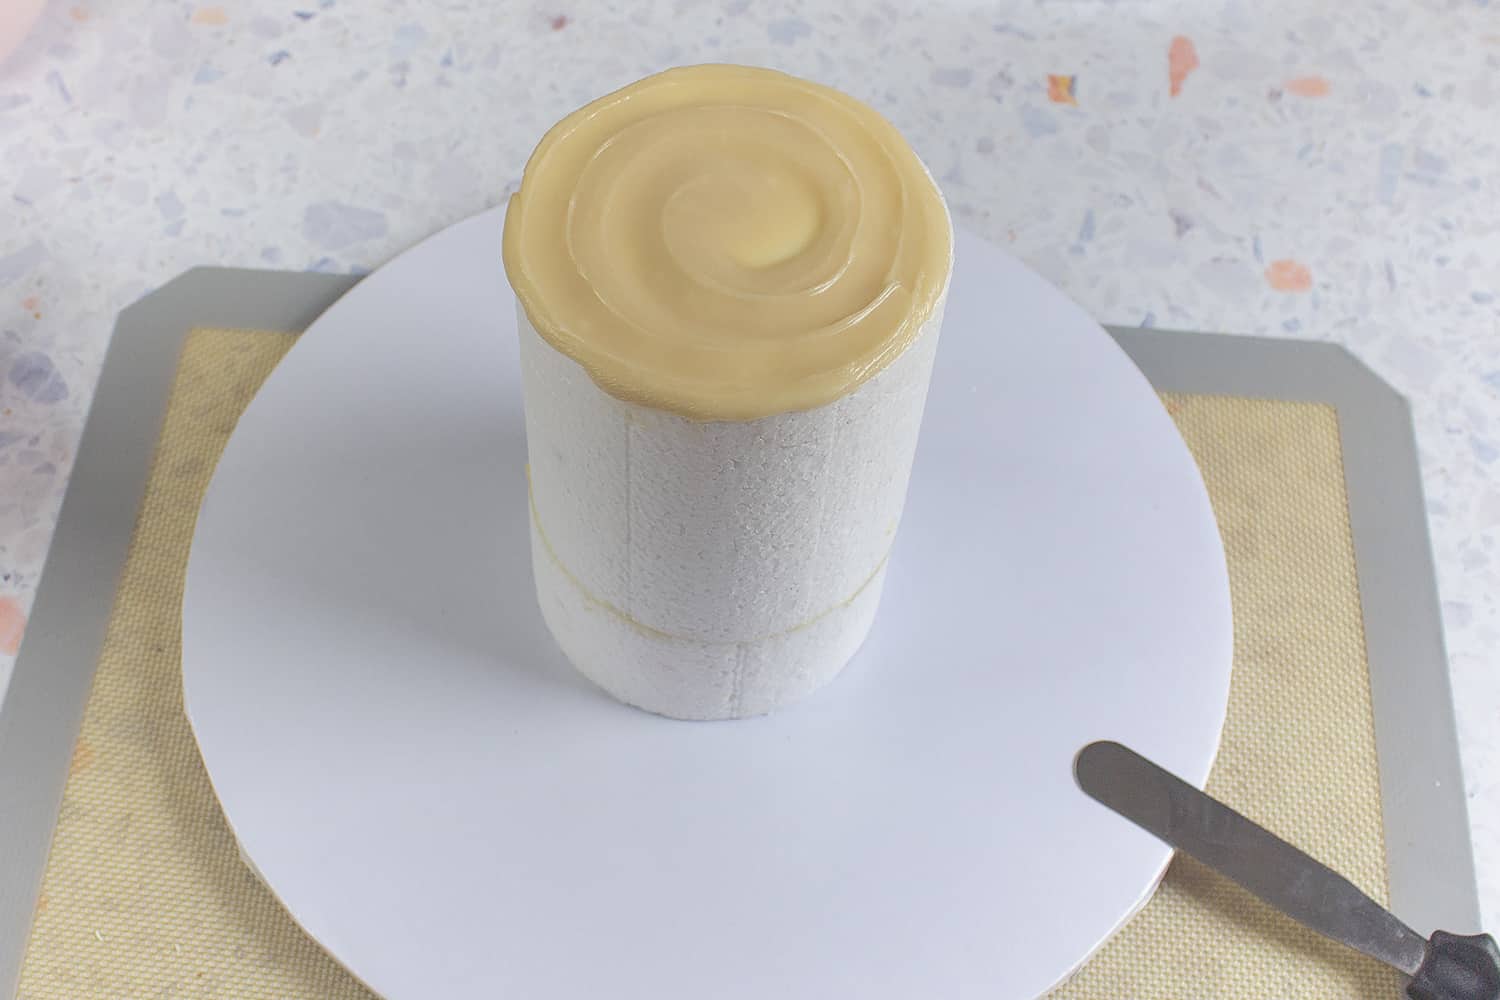 Step Two: With the spatula make a swirl design.
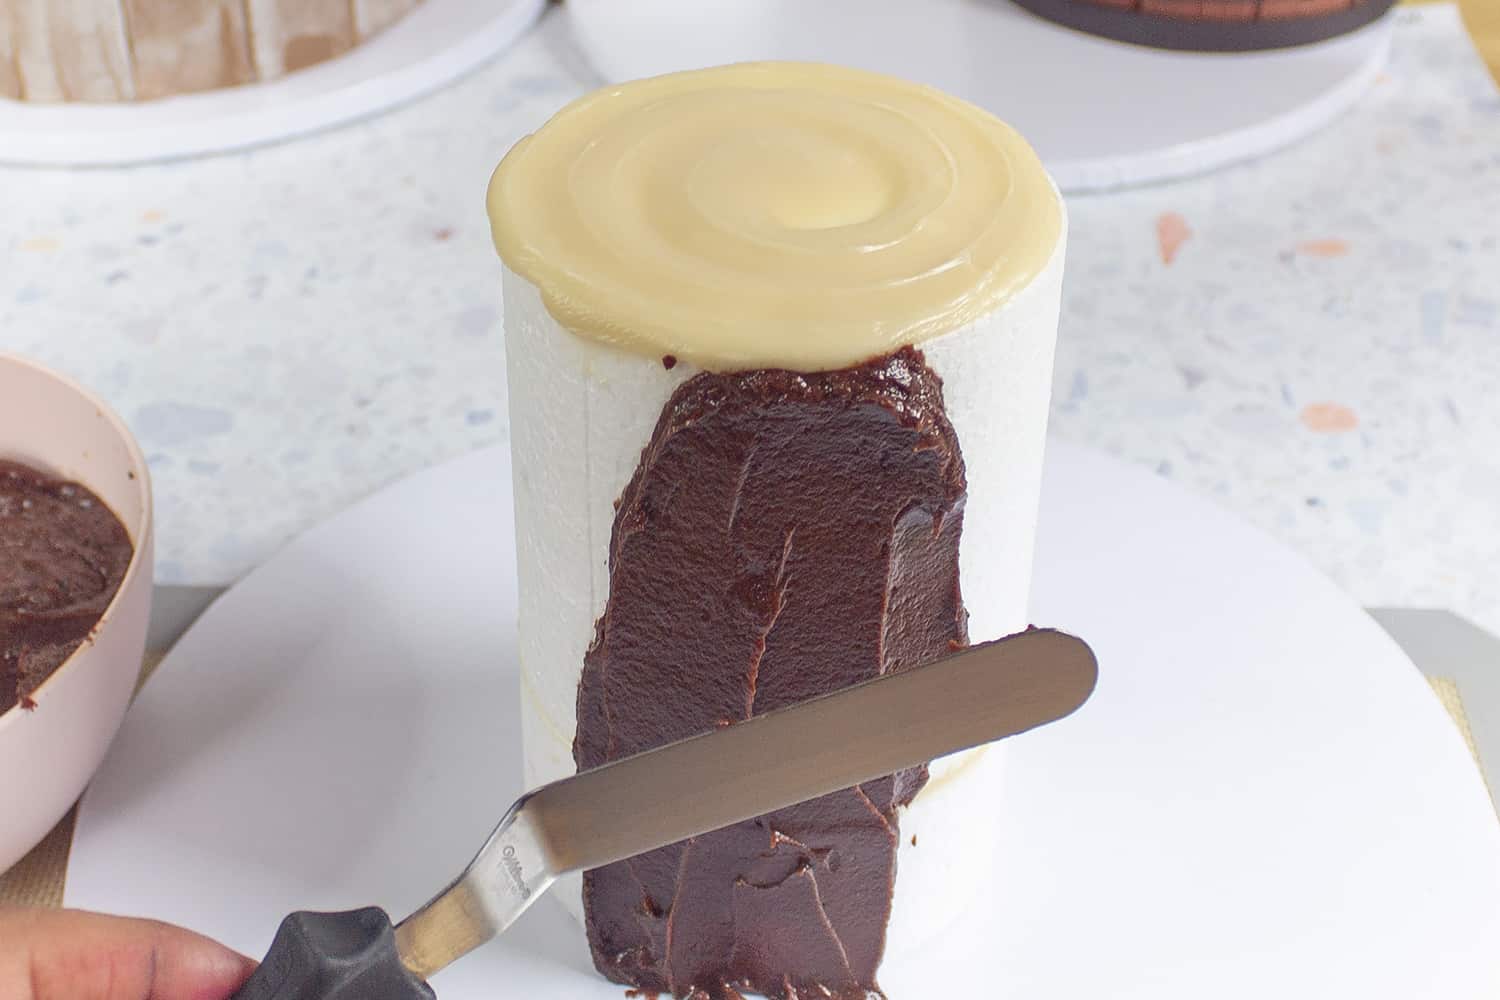
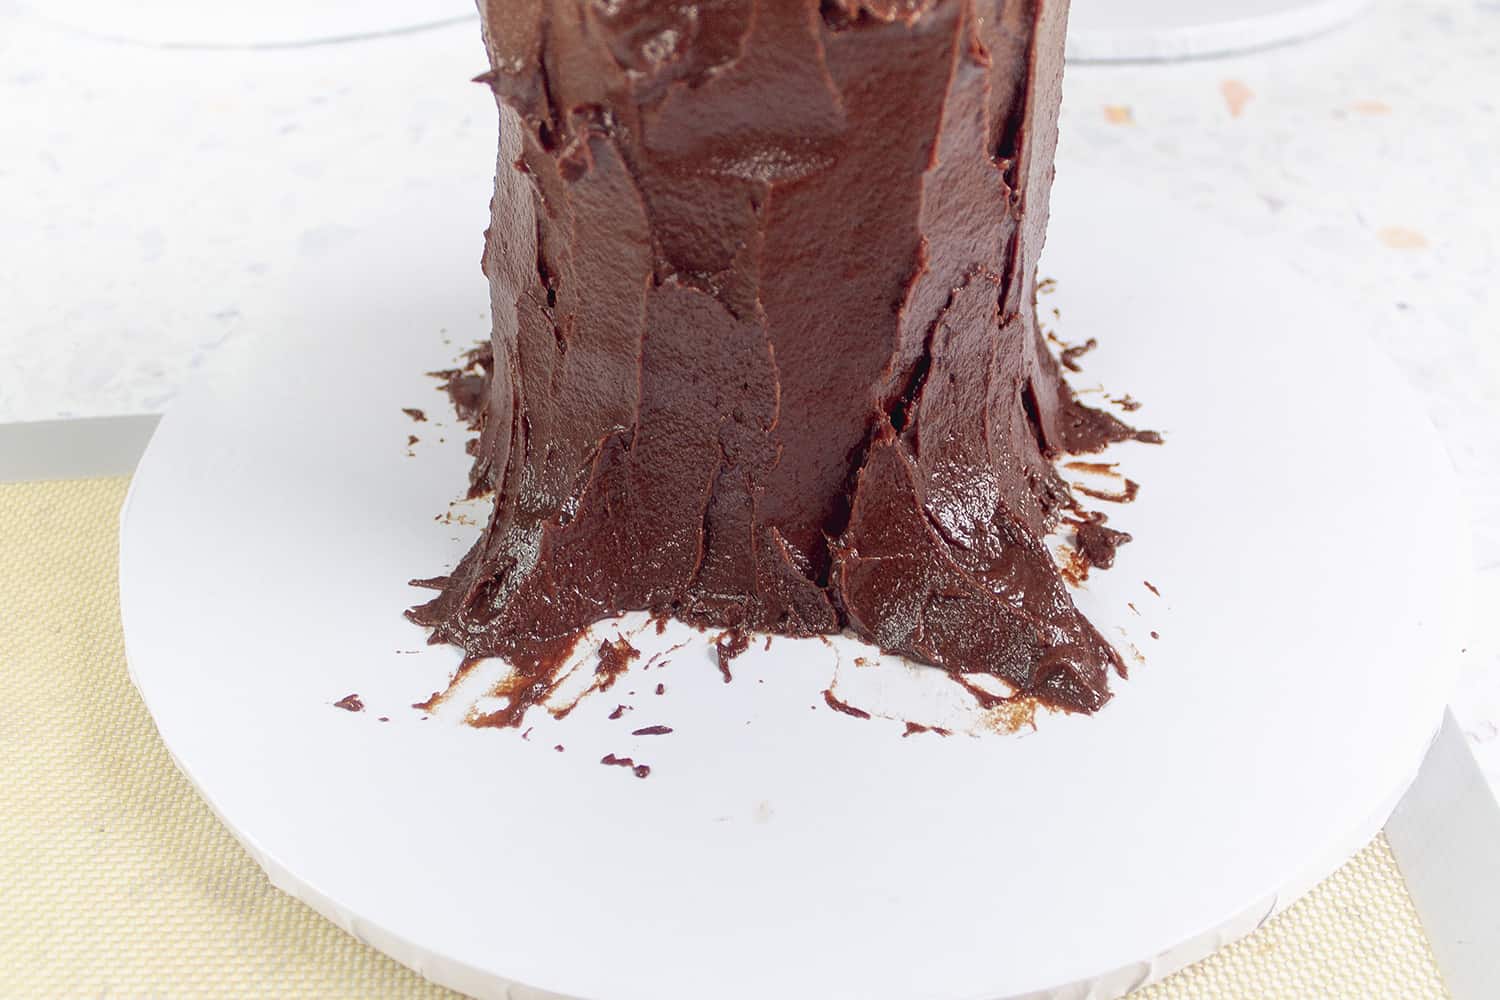
Step Three: Cover whole cake with chocolate icing.
 Step Four: Clump some icing at the base of the cake to create a root look.
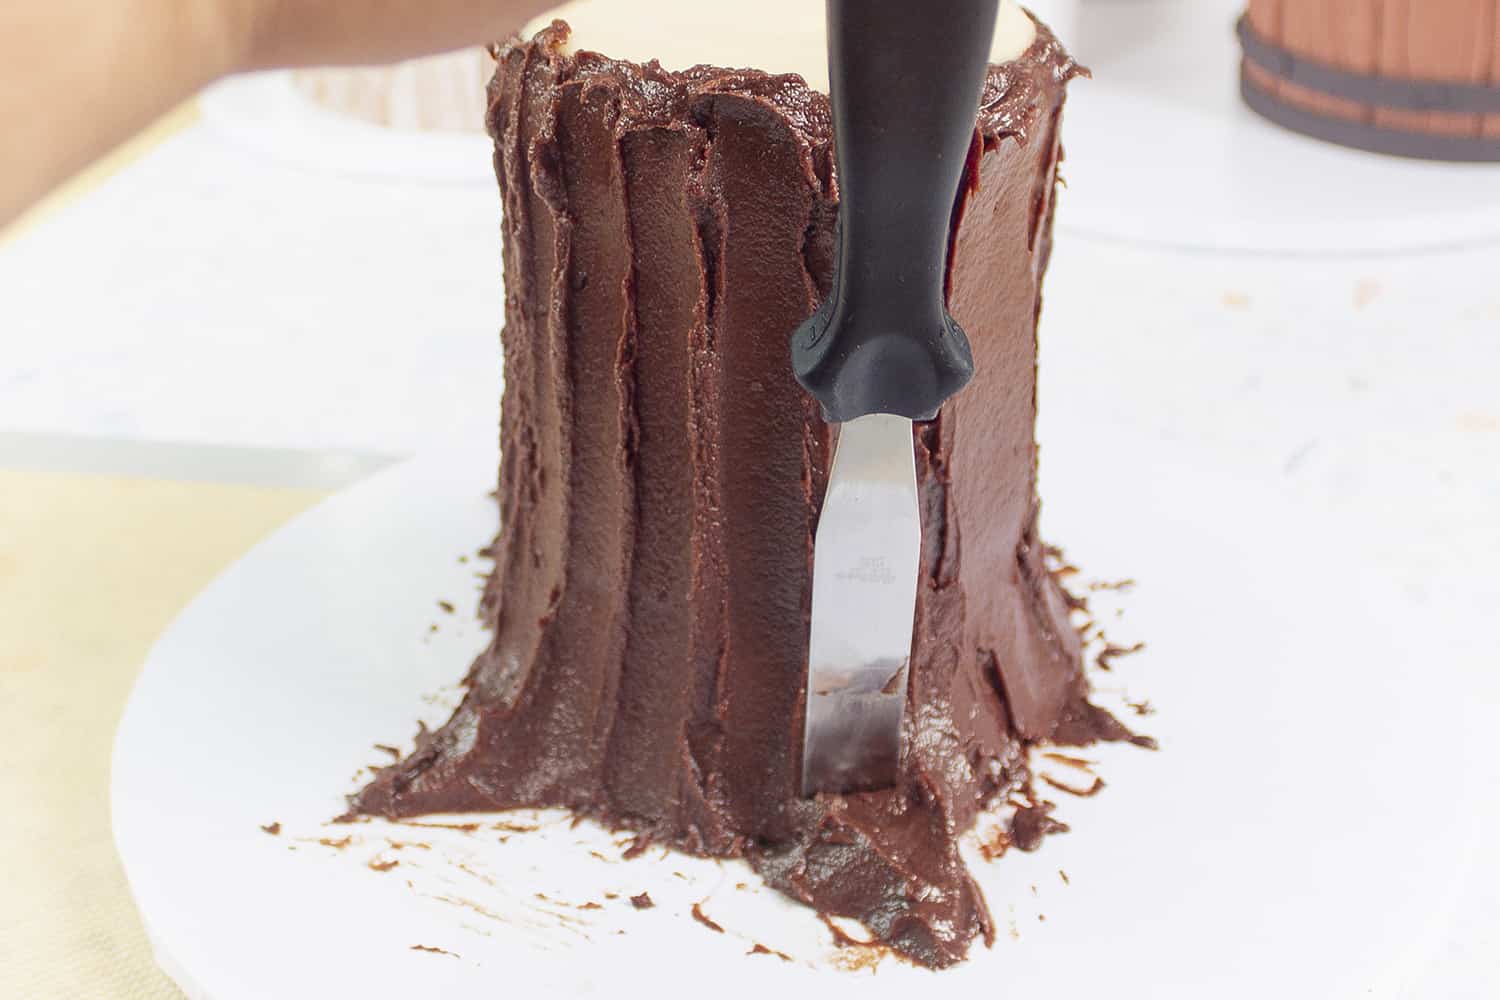
 Step Five: Once fully covered, take the spatula and create vertical lines going up the cake to create a trunk look.
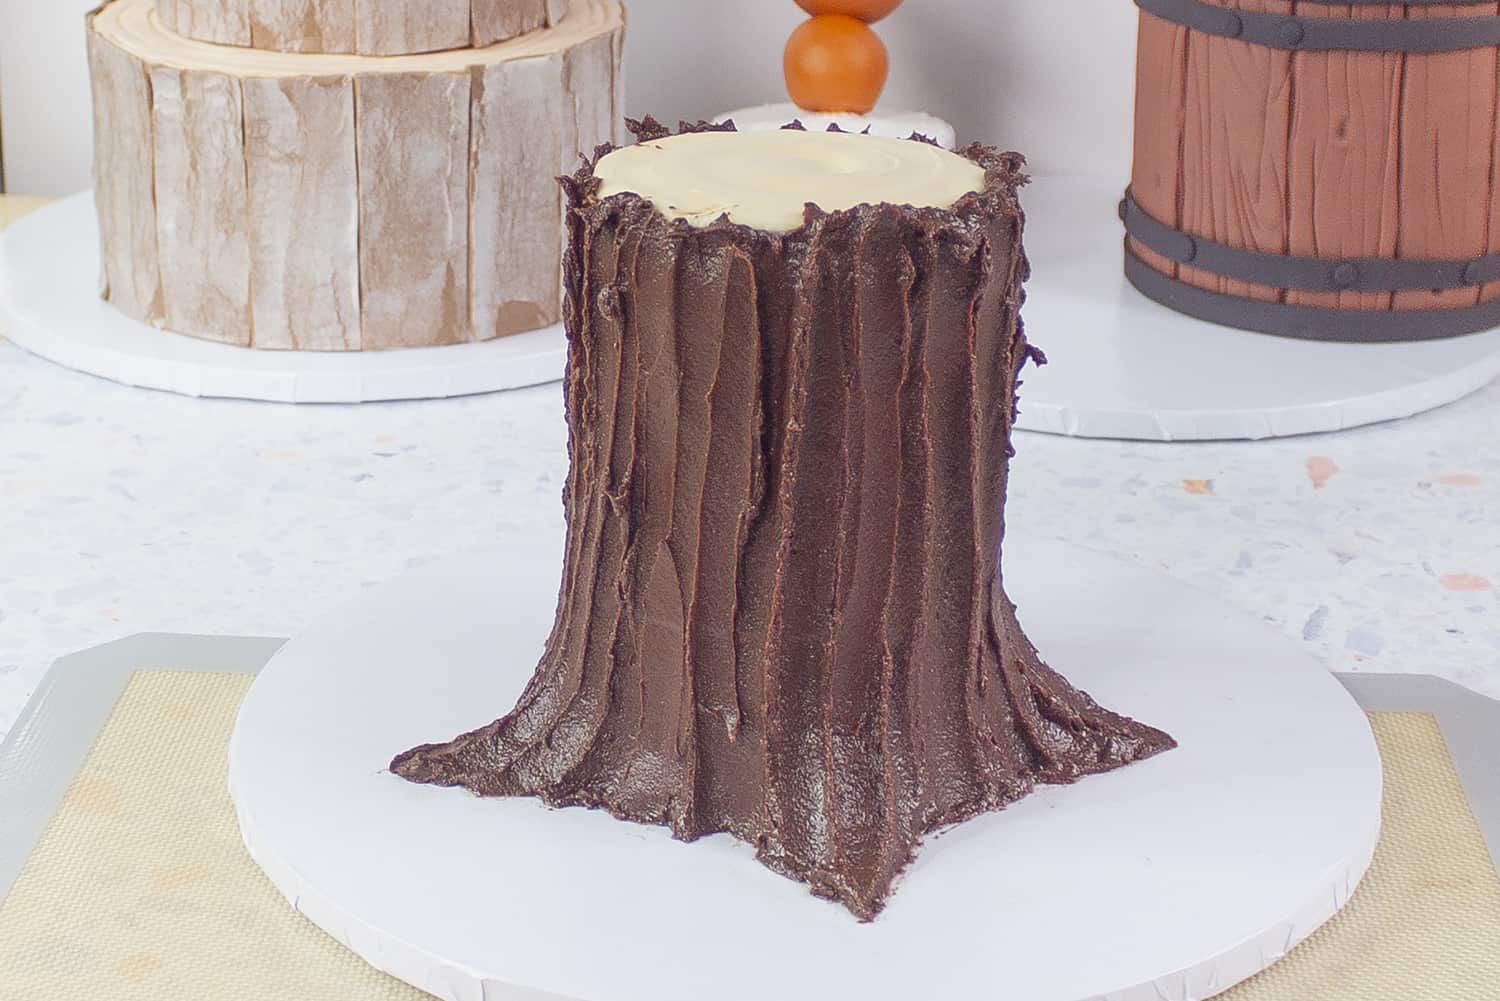 Then, you can decorate with crumbs at the base, or add meringue mushrooms or other embellishments.
 I hope you try these out this fall! They are so fun to make and decorate. -Ren
Love these!!! They been easy enough for a novice to make. Definitely gonna try out the tree stump cake! 🙂
They are magnificent !
For the taste, I prefer the solution of the ganache, more natural.
This tutorial is SO helpful and the wafer paper trick is genius!
lol who would’ve thought smooshing wafer and fondant would create a tree looking thing! totally genius!
Ren!!! You are blowing my mind!!!! WOWWWWWWW
thank you ??
Okay, these are all super adorable. Are the crumbs around the base of the third cake crushed pistachios?
thank you! the crumbs at the bottom are graham cracker crumbs dyed green with food gel color.