 Almost a year into pandemic life, and we are just starting to get our days into some sort of real schedule. This past summer, in the middle of all the chaos, we decided it was right to move back to my hometown of Pittsburgh, Pennsylvania, and thus began the whirlwind of selling/packing/moving cross country/renovating a new house … and all with a toddler during a pandemic! All that to say that I kept thinking we needed to get to a more structured day for our 3-year-old daughter, Lola, so she would know what to expect and my husband (who is currently watching her while I work during the day) would feel like he had a plan each day as well. Planning is … uh … not one of his talents (although all things fun and crazy are, so he’s literally the perfect dad a toddler could ask for!) So, I told him I would come up with a schedule and help him plan out their day. We basically made a list of all the necessary things that have to happen (breakfast, snacks, lunch, quiet/nap time) and then made a list of possibilities that we would like to see happen in between those more set times (art, reading, learning, outside time, etc.).
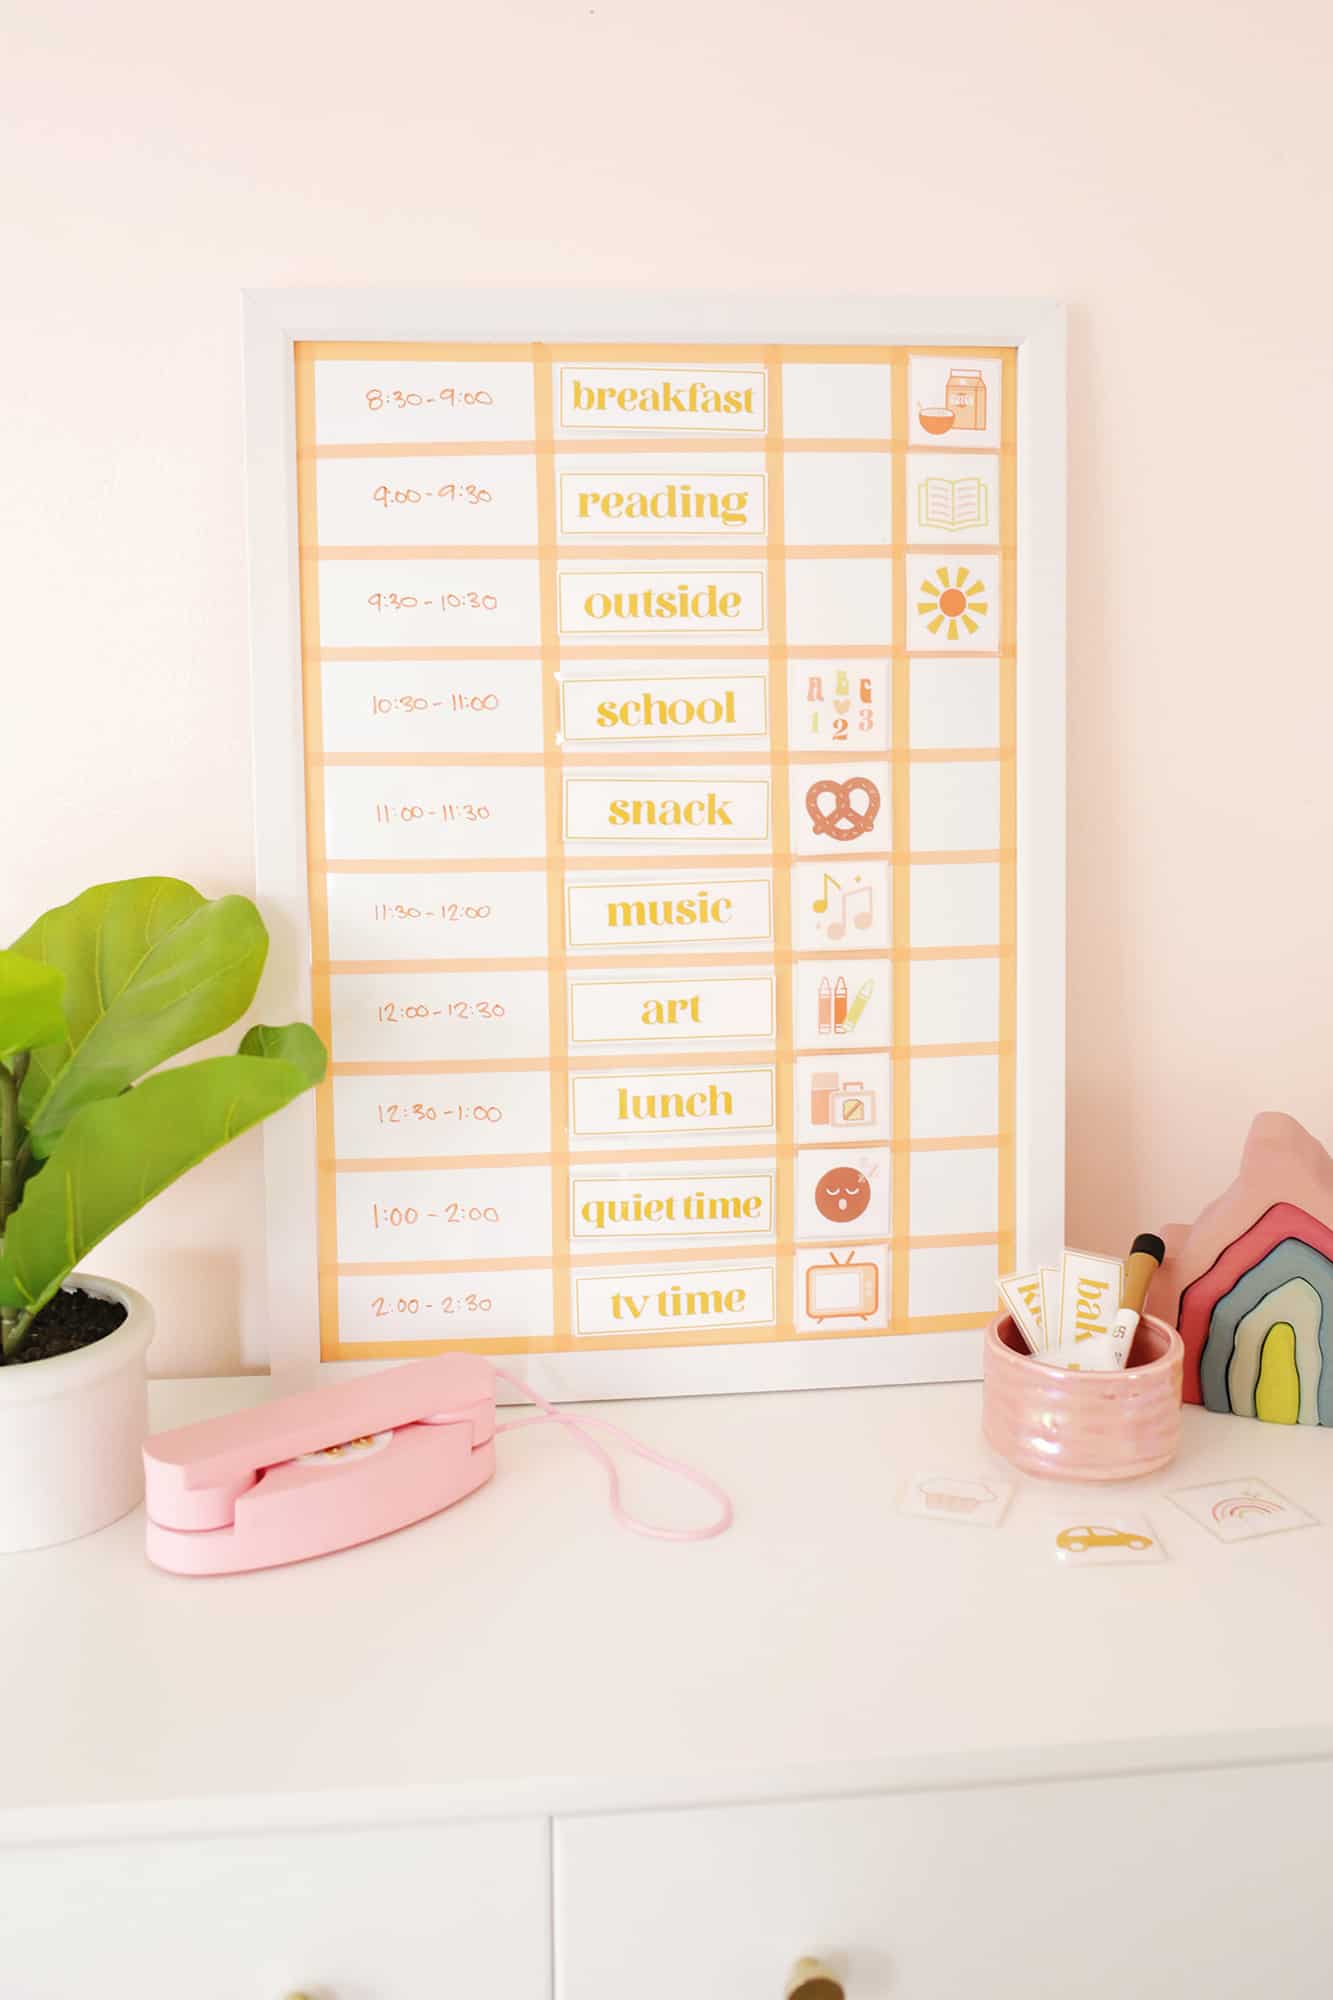
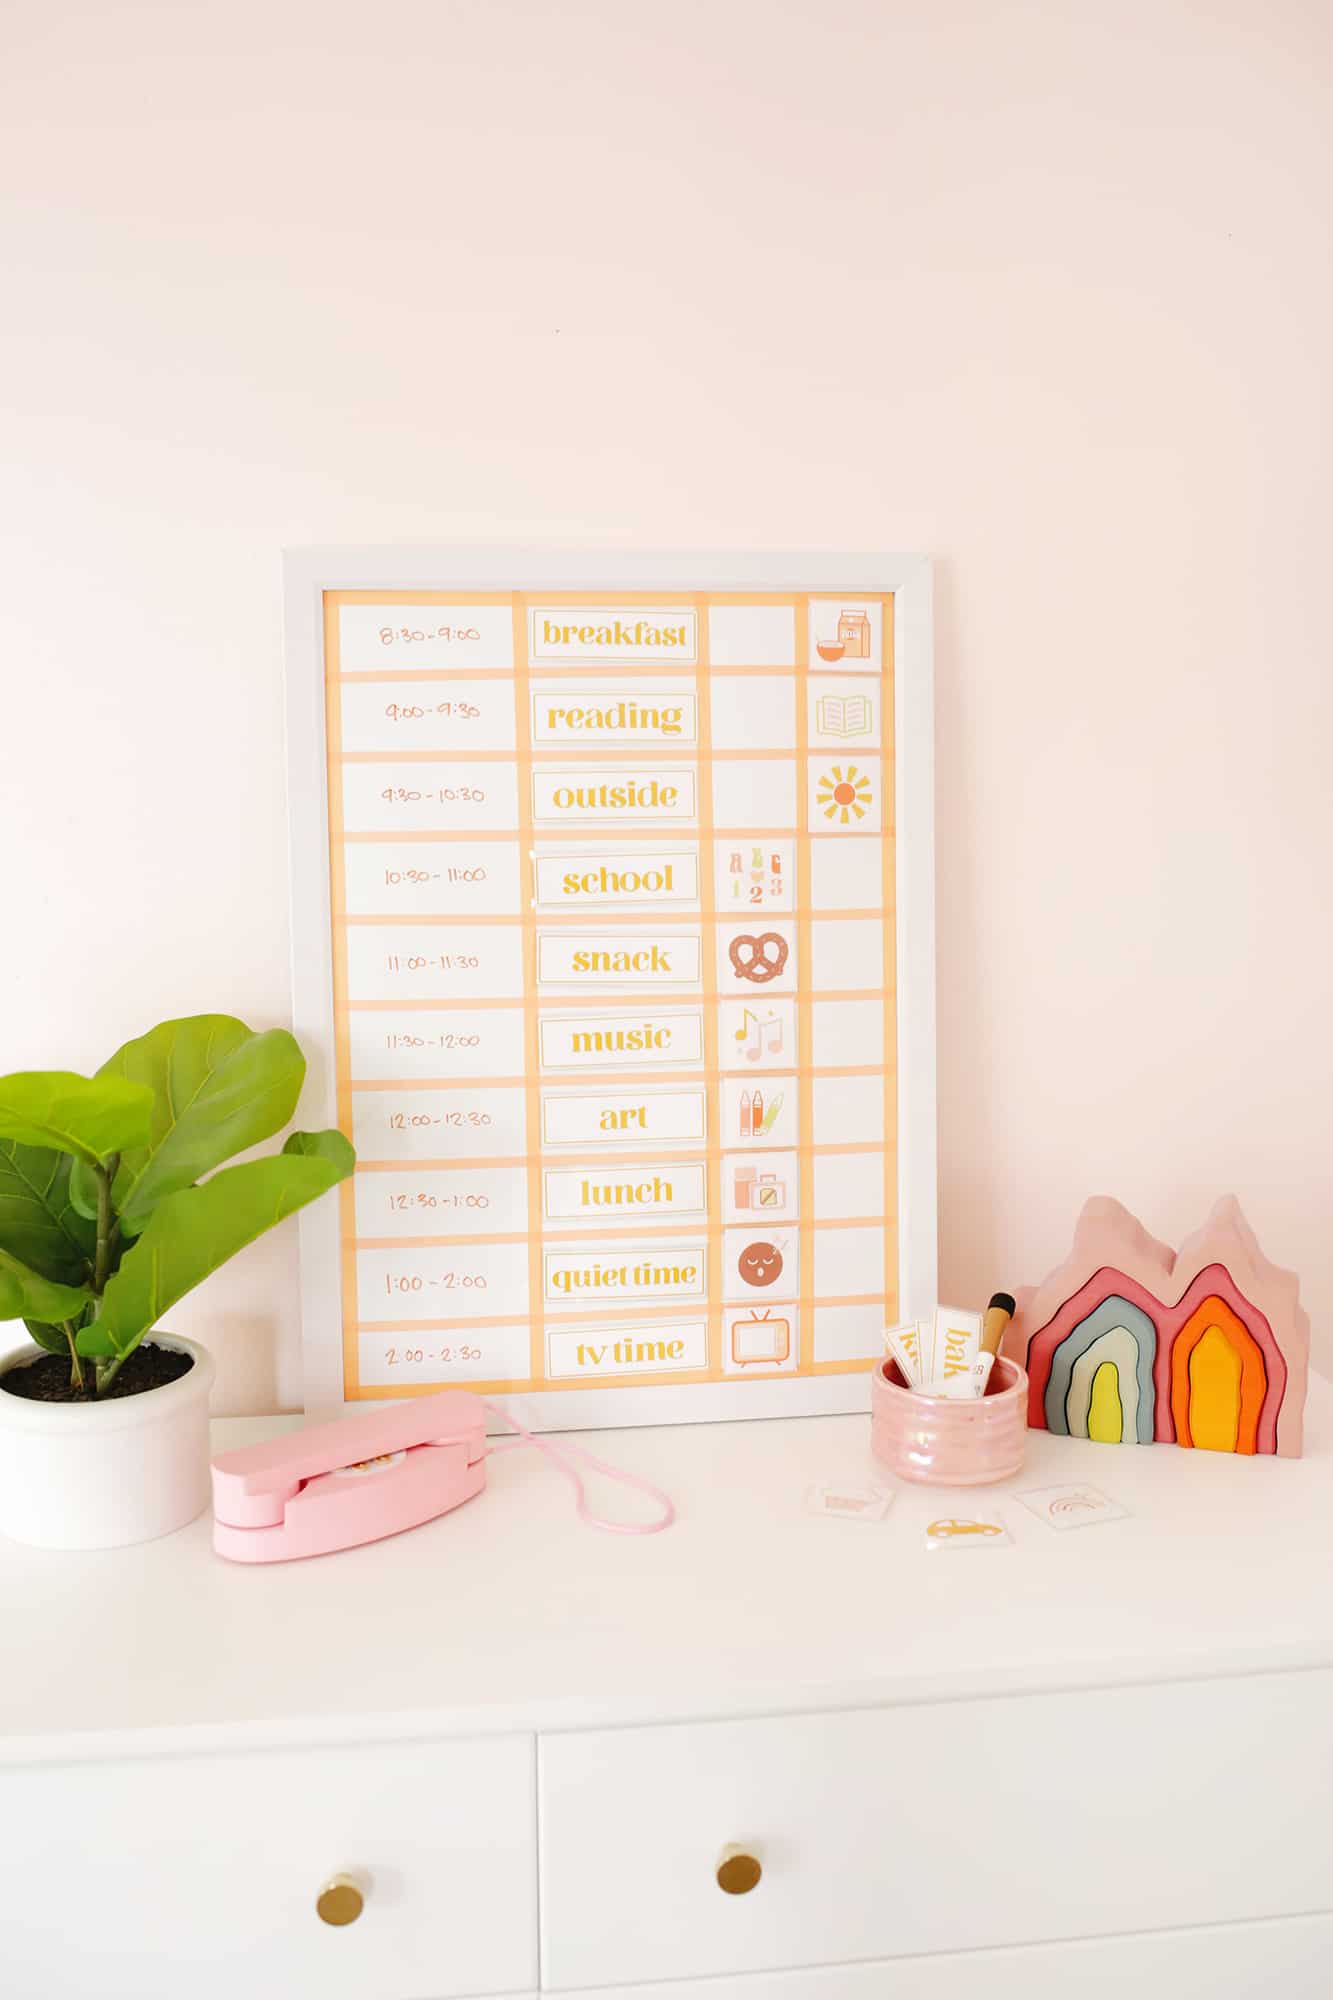
We broke the day up into increments of time devoted to one of those activities—we’ve been doing the new schedule for about a month now and it’s going great! The only thing I wanted to tweak was to make the schedule into a visual chart so that Lola could see which activity was happening that day. and which one was next so she could participate in the schedule. And, I wanted to make it on a changeable magnetized board so they could easily make sessions longer or shorter or switch the order of a day’s events as needed. I’ll share what we came up with—I think you’ll love it too!
 Supplies:
-magnetized whiteboard (I used this one)
–thin washi tape (or chart tape) in color of your choice
-dry erase markers
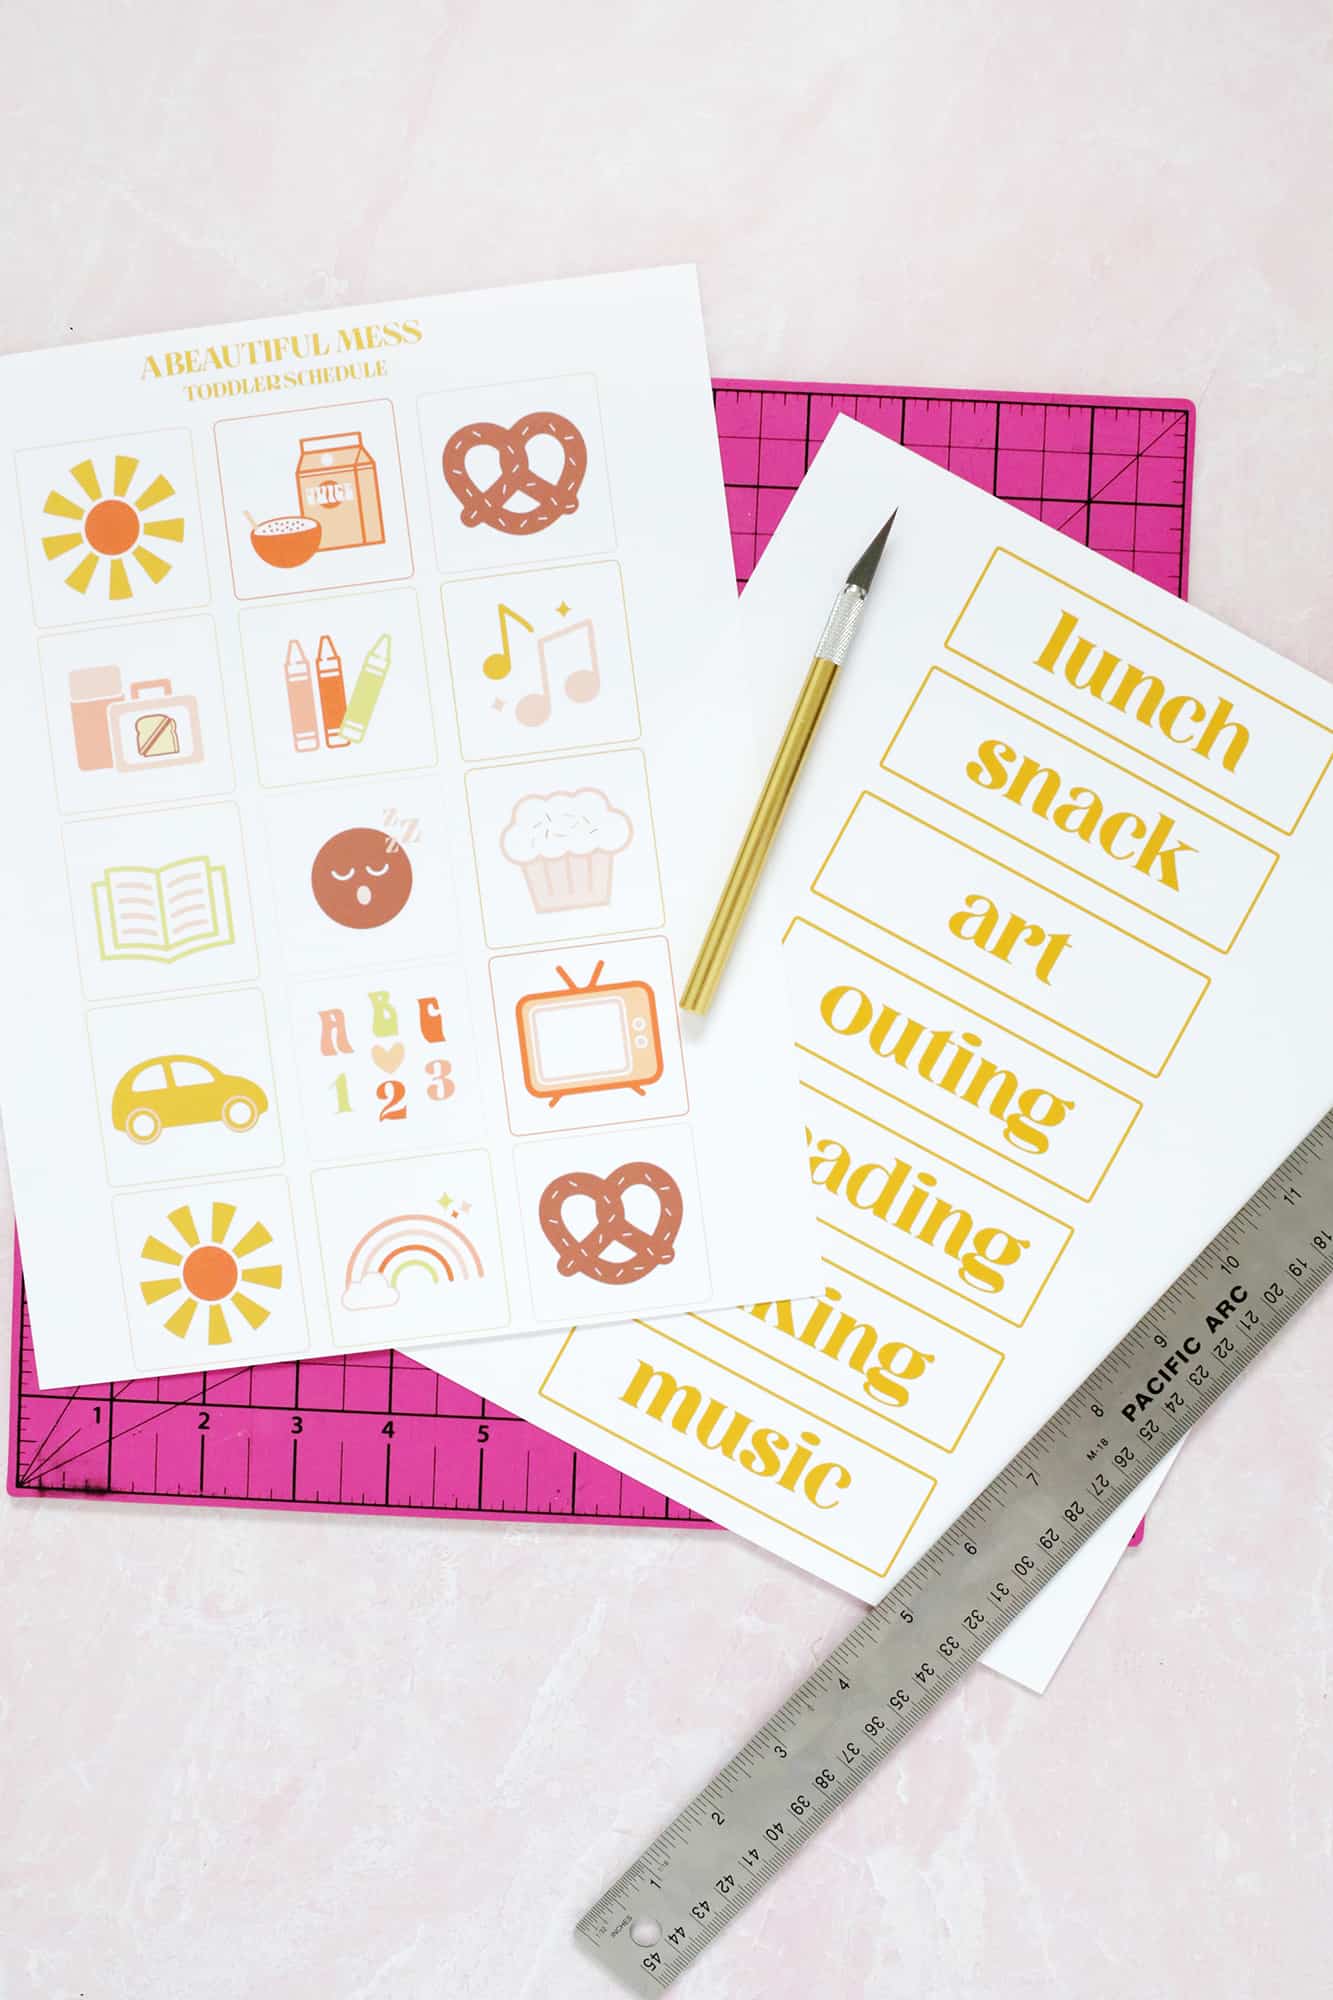
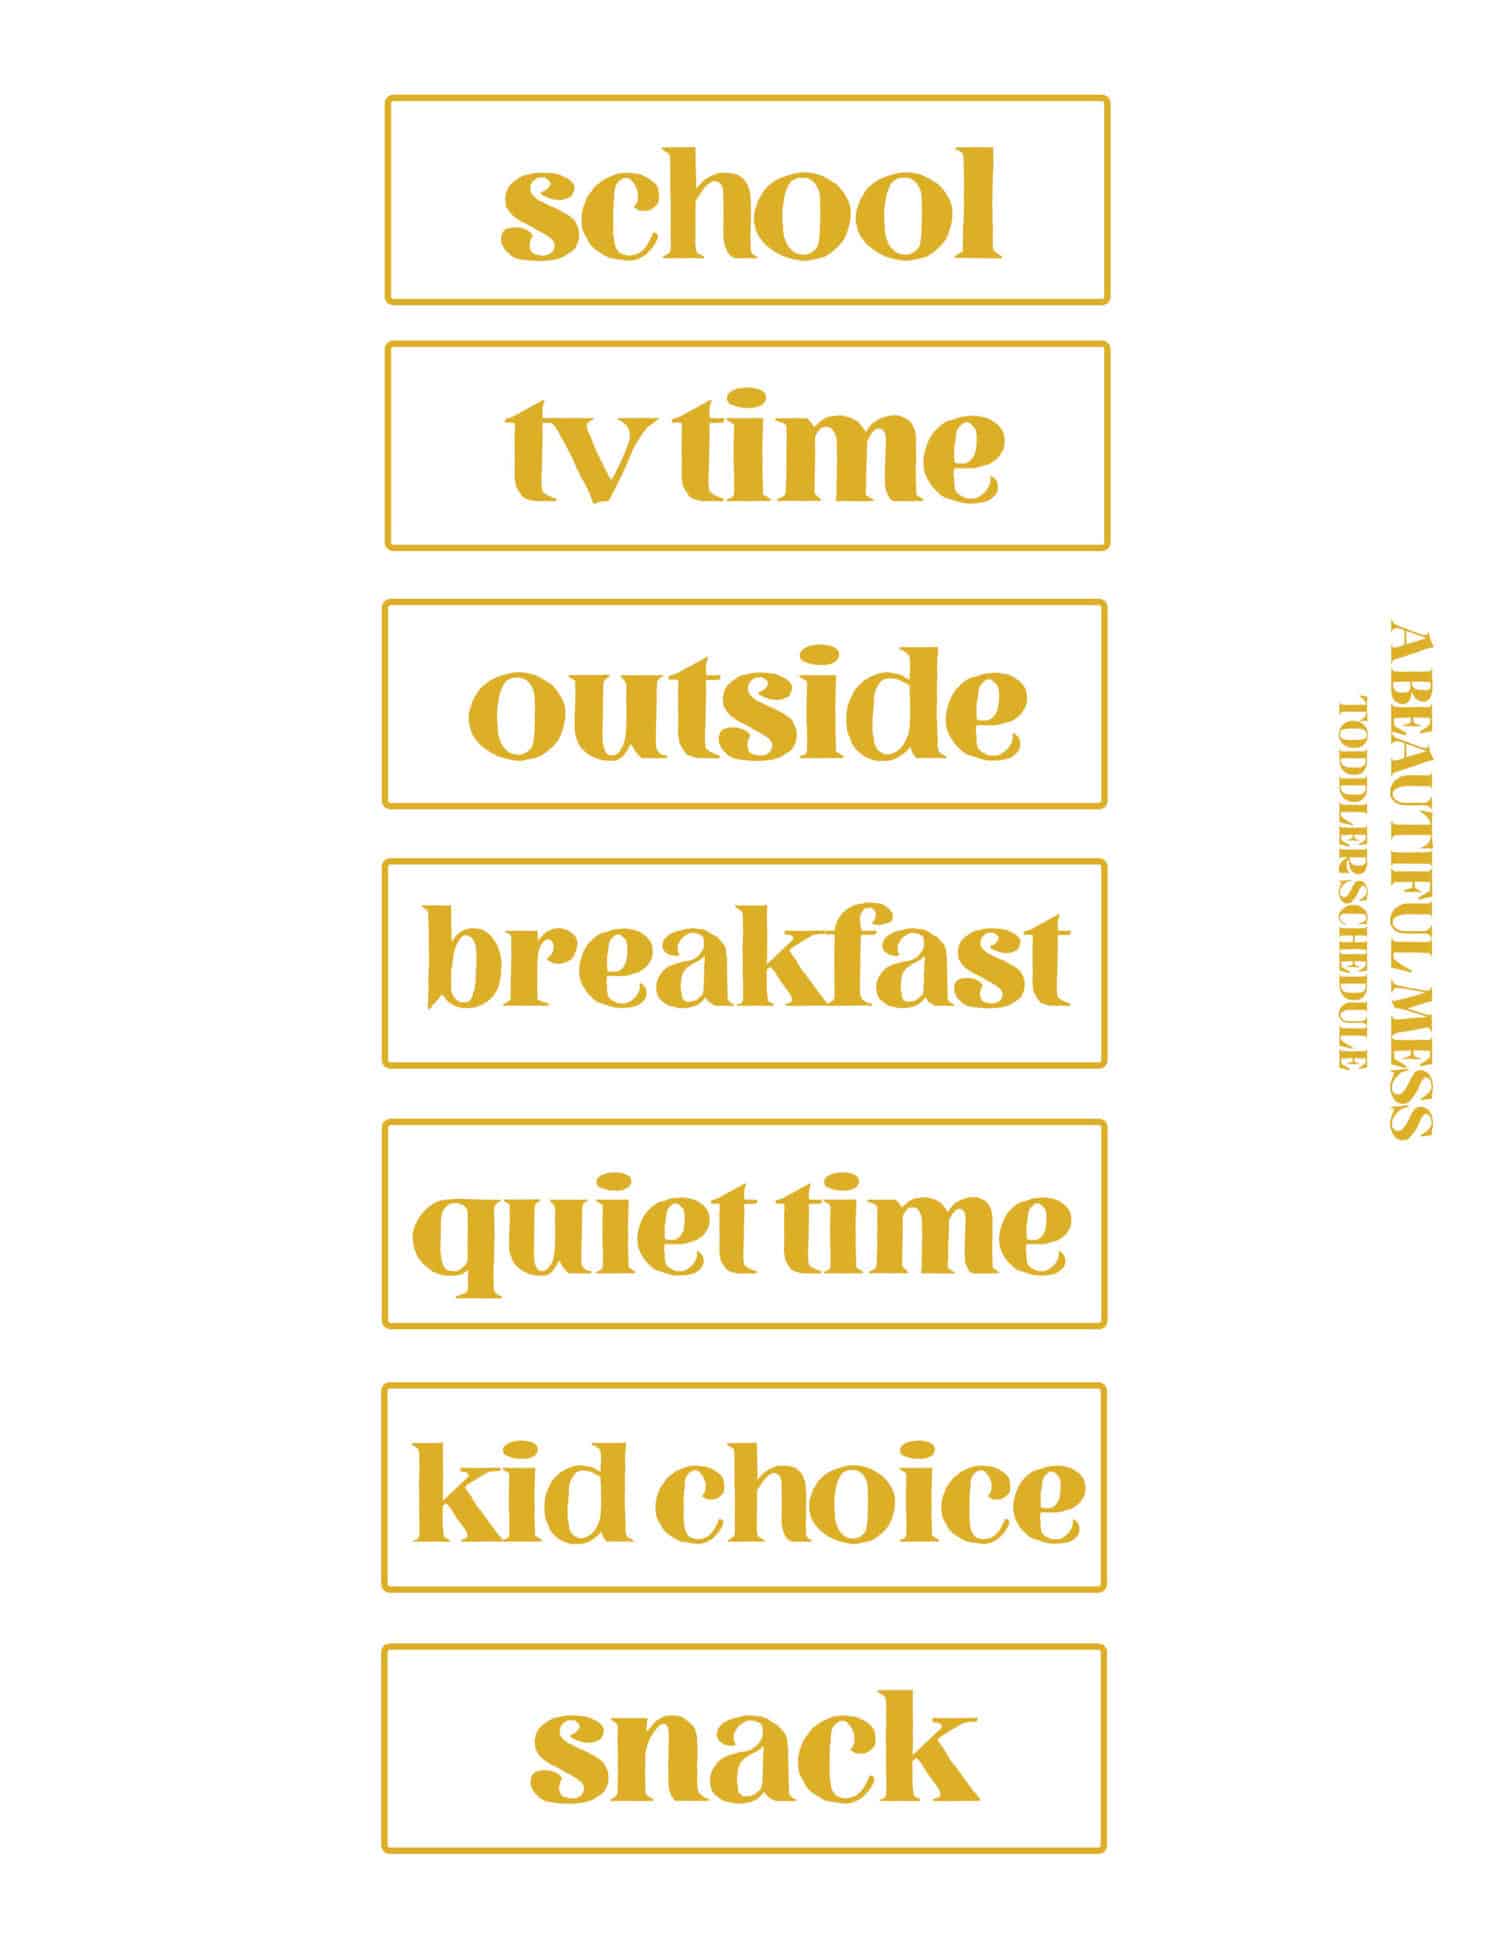
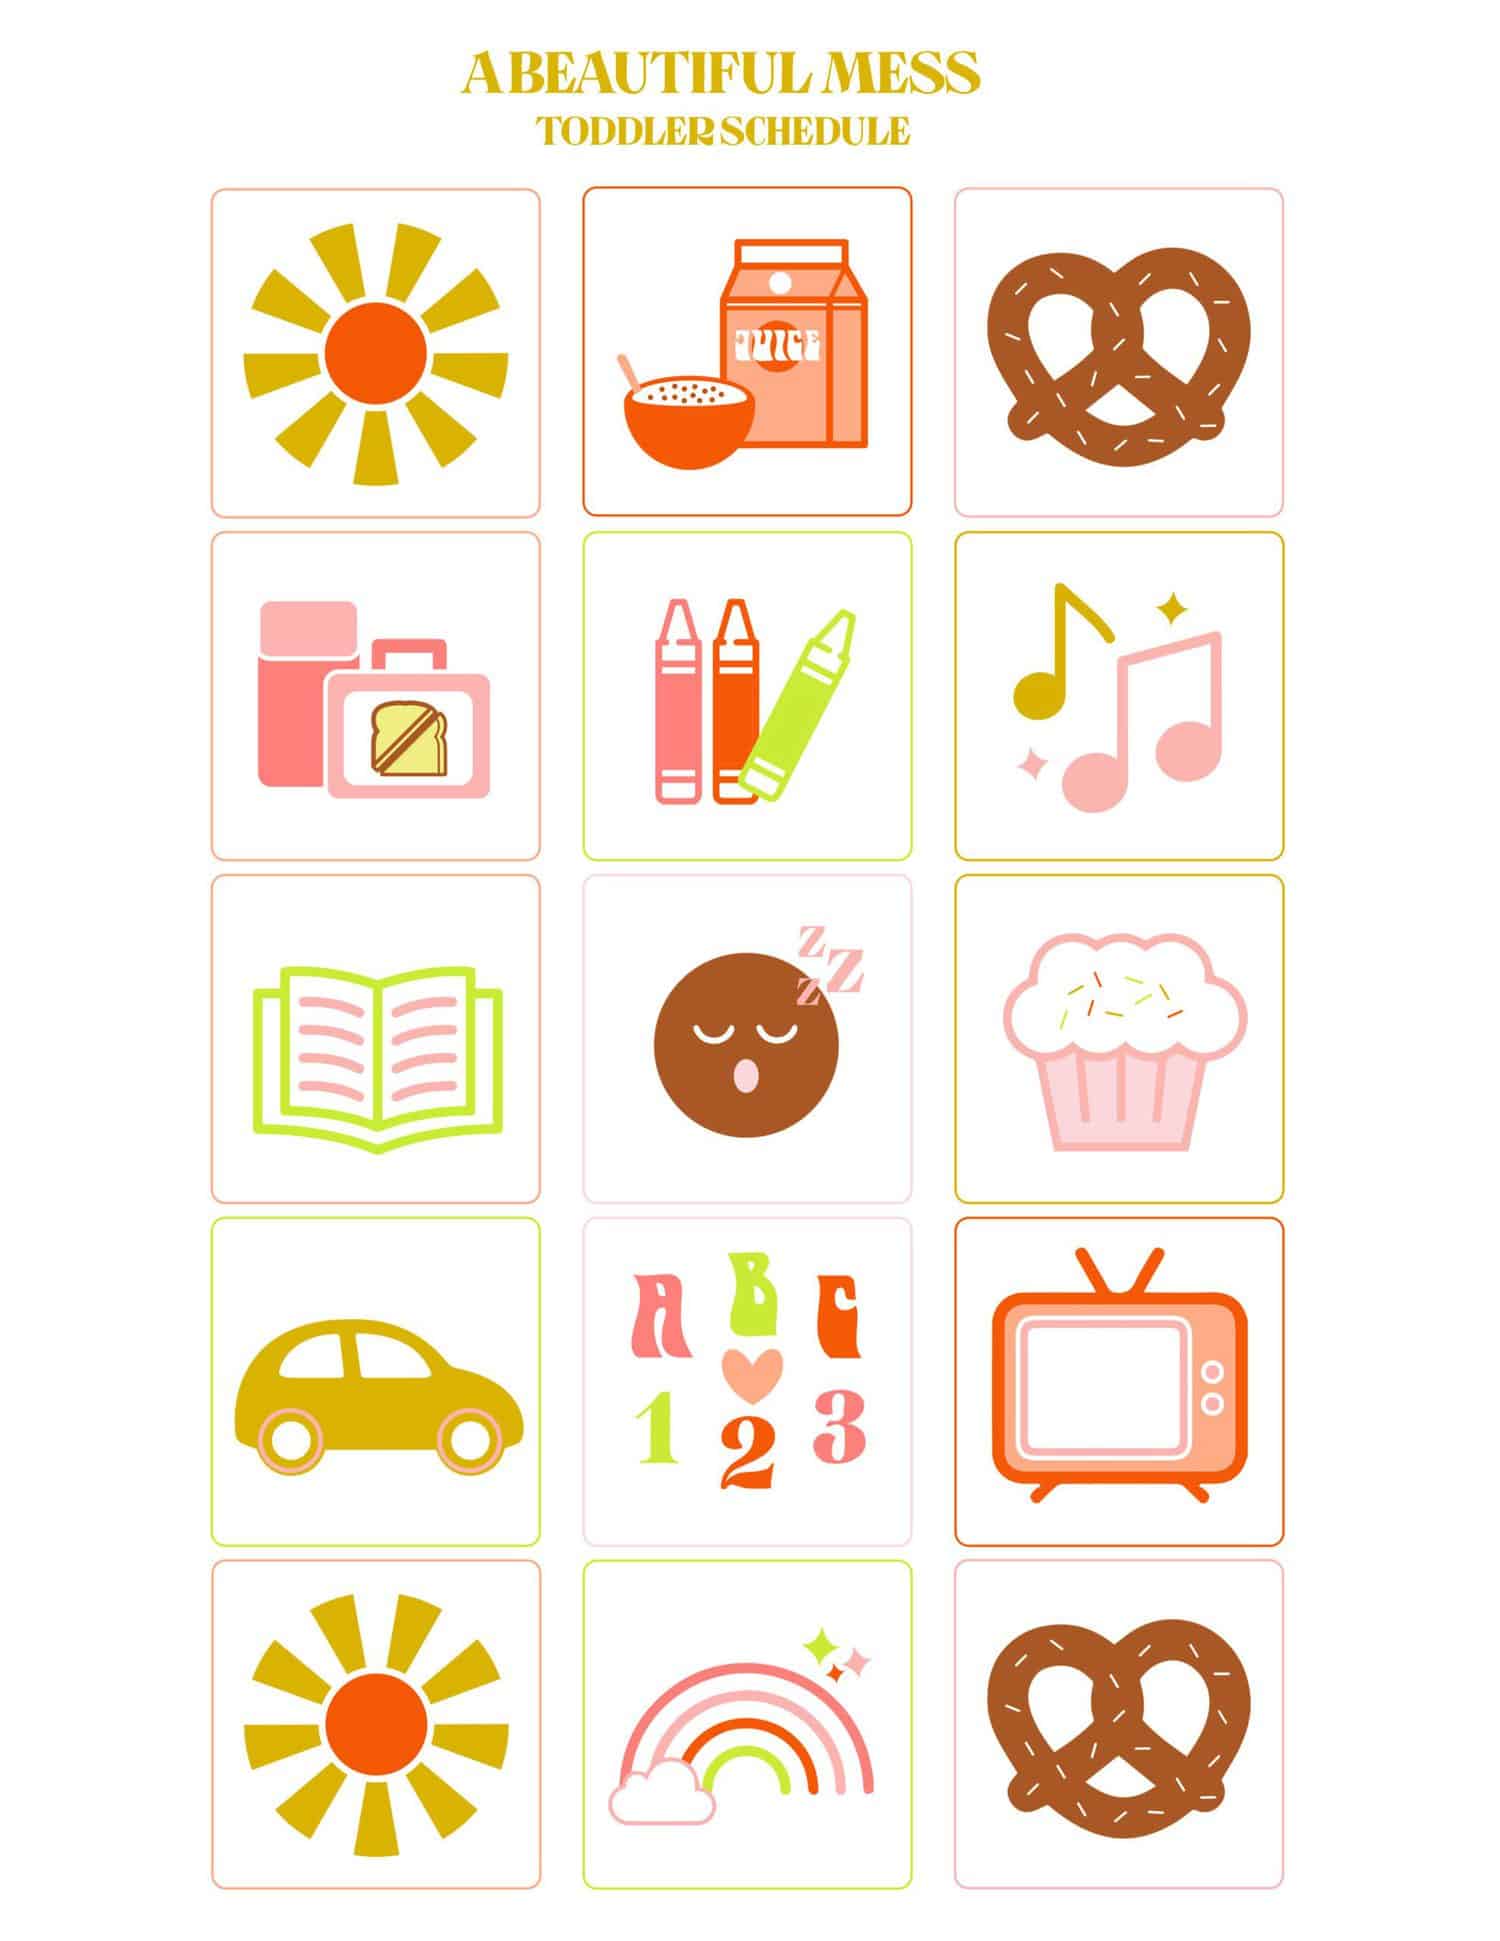
-chart printables (1, 2, 3)
-printer and paper
–peel and stick magnets
-scissors or X-Acto knife, ruler, and cutting mat
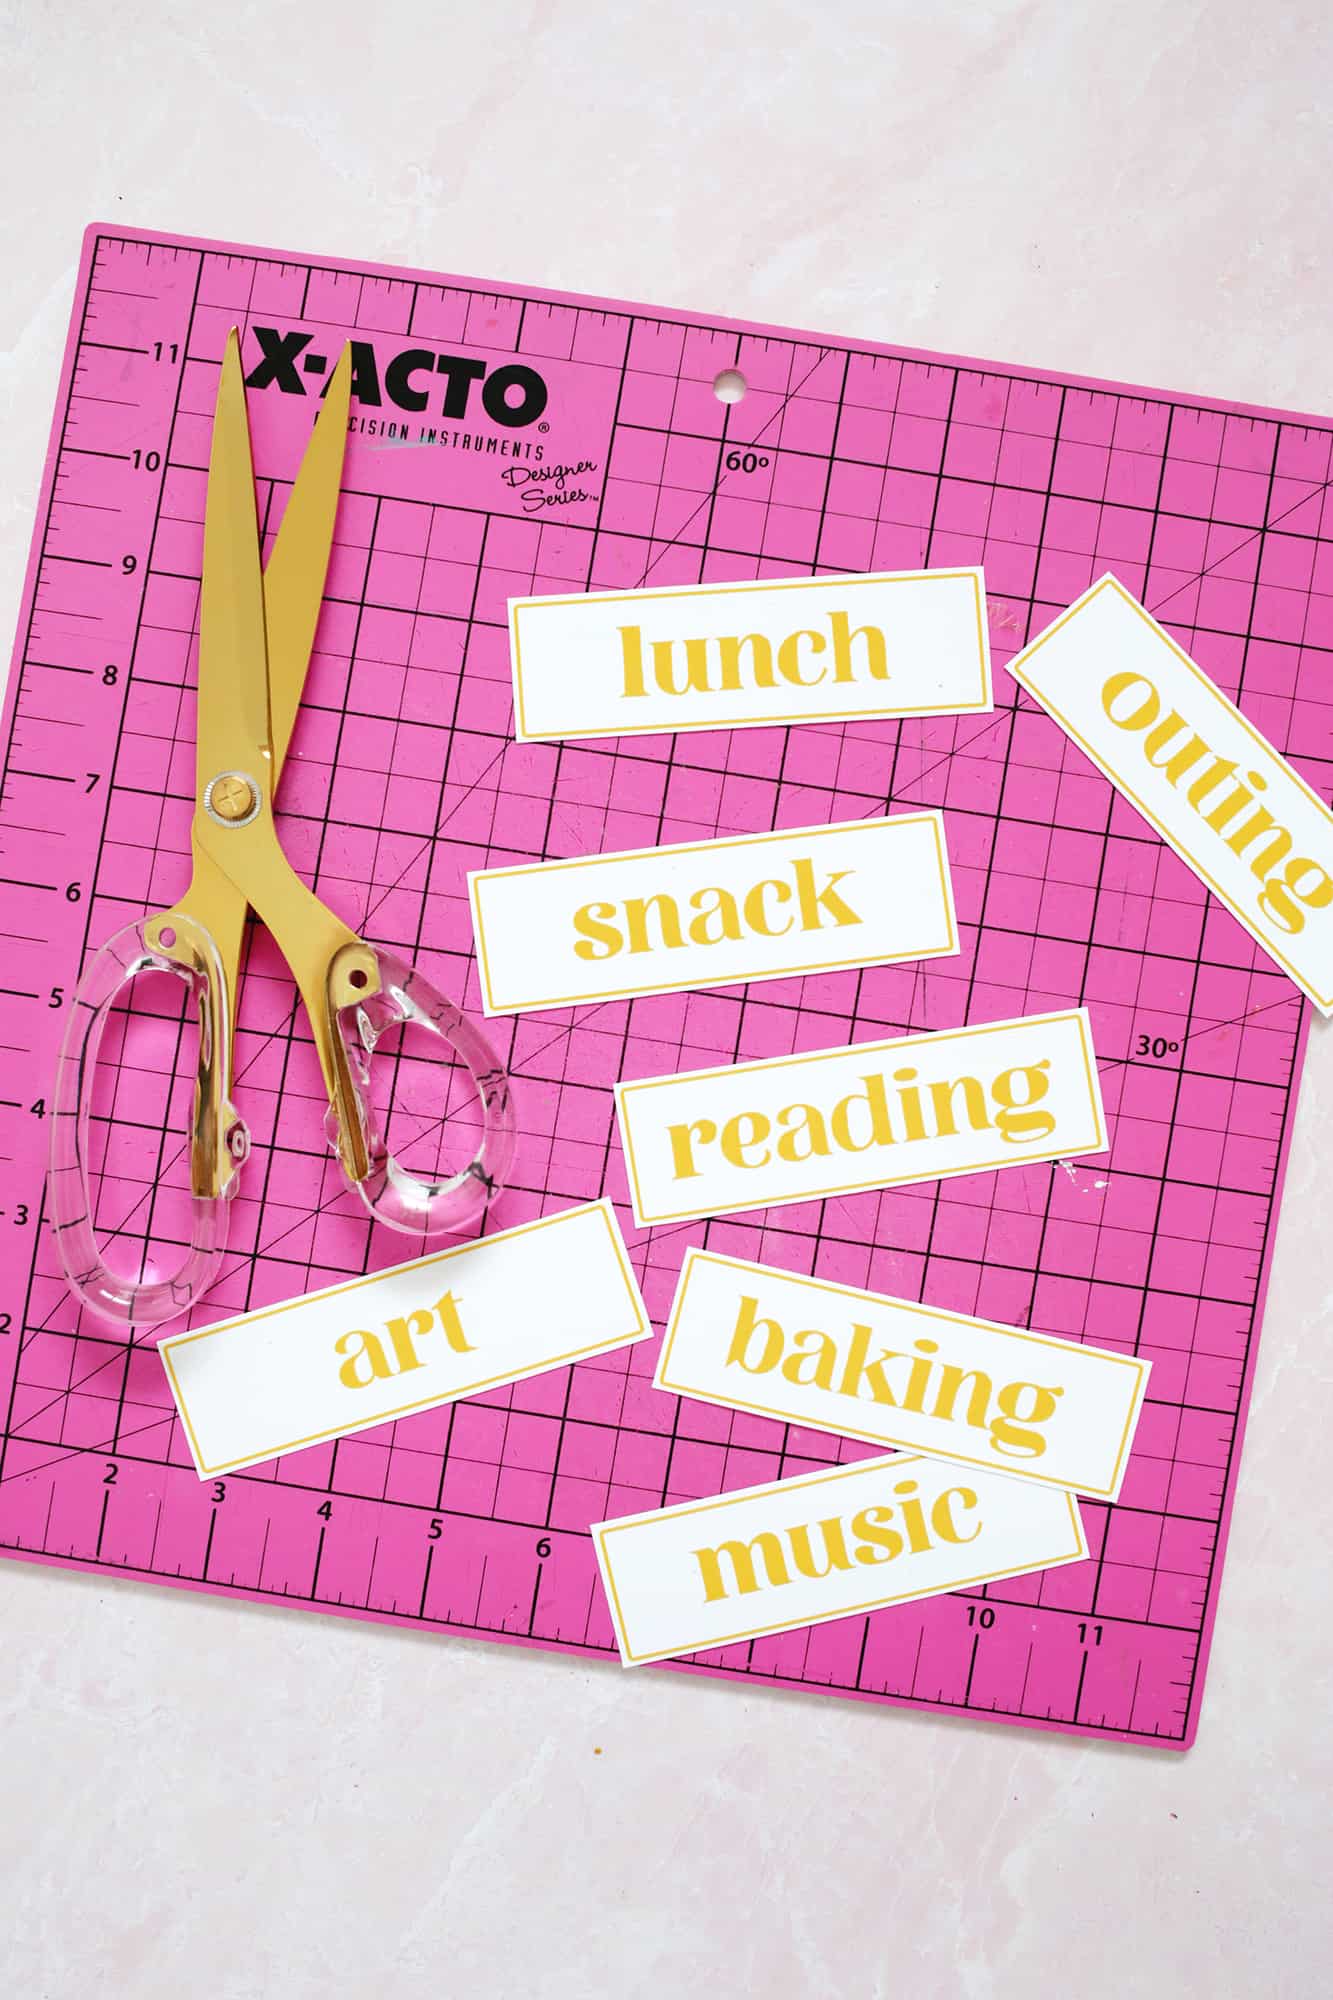 First, you’ll want to print out your labels and icons. Cut out your labels and icons with scissors or an X-Acto knife, leaving a small border of white around the boxes.
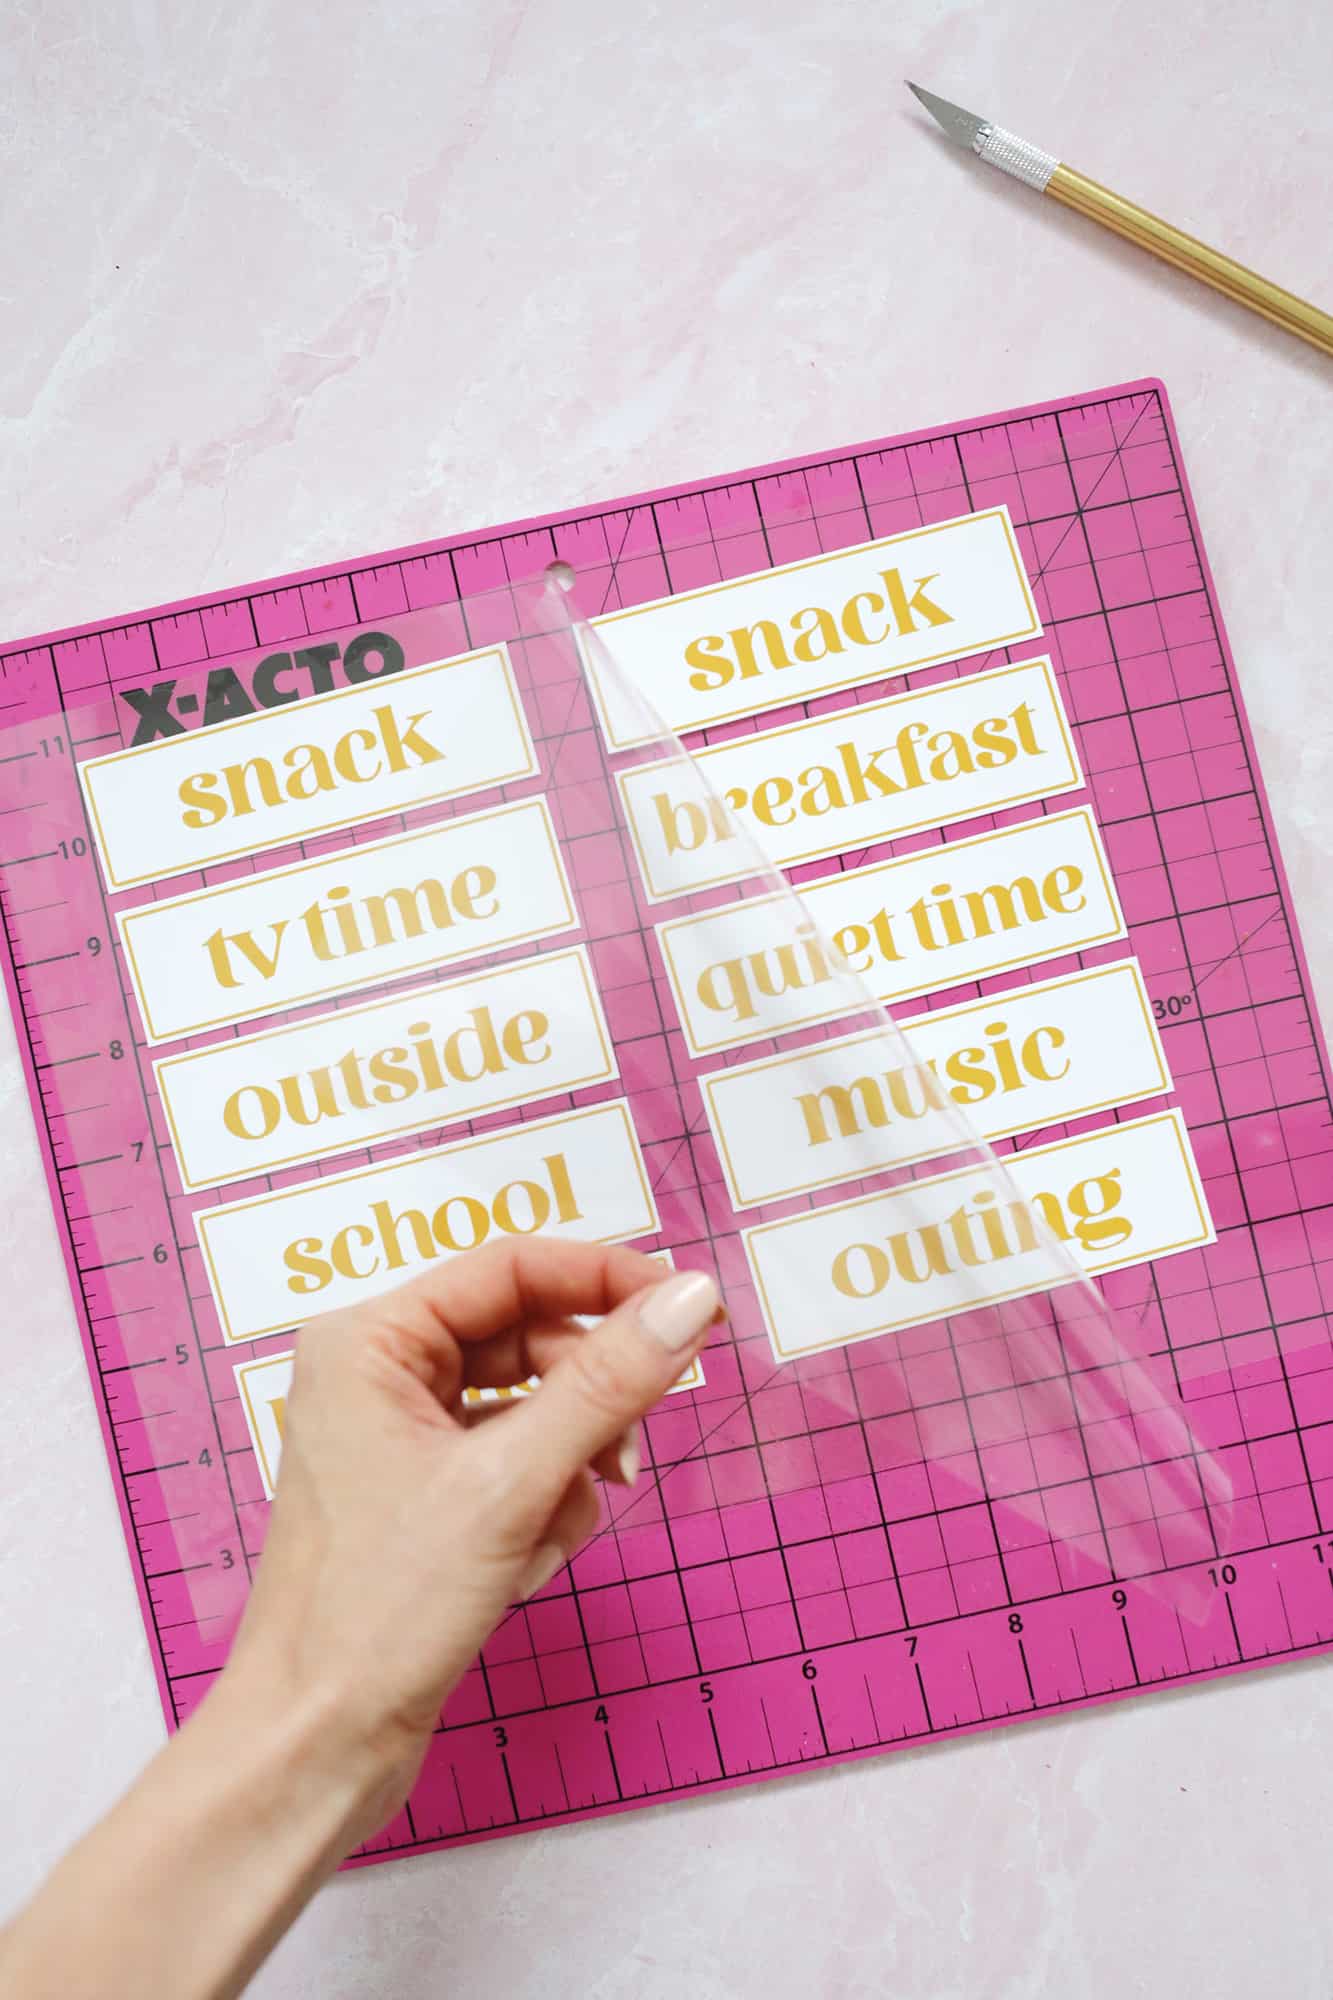 Peel off one self-adhesive sheet and arrange your squares in a row with space between them, and put as many as you can fit on one page. Peel off another sheet and place it on top of your page, pressing down to smooth out any bubbles. I arranged mine on a cutting mat so I could see the lines beneath it and line them all up in a row—that makes cutting them out with an X-Acto knife and ruler easier (my favorite way to cut things) and faster if they are all perfectly lined up straight.
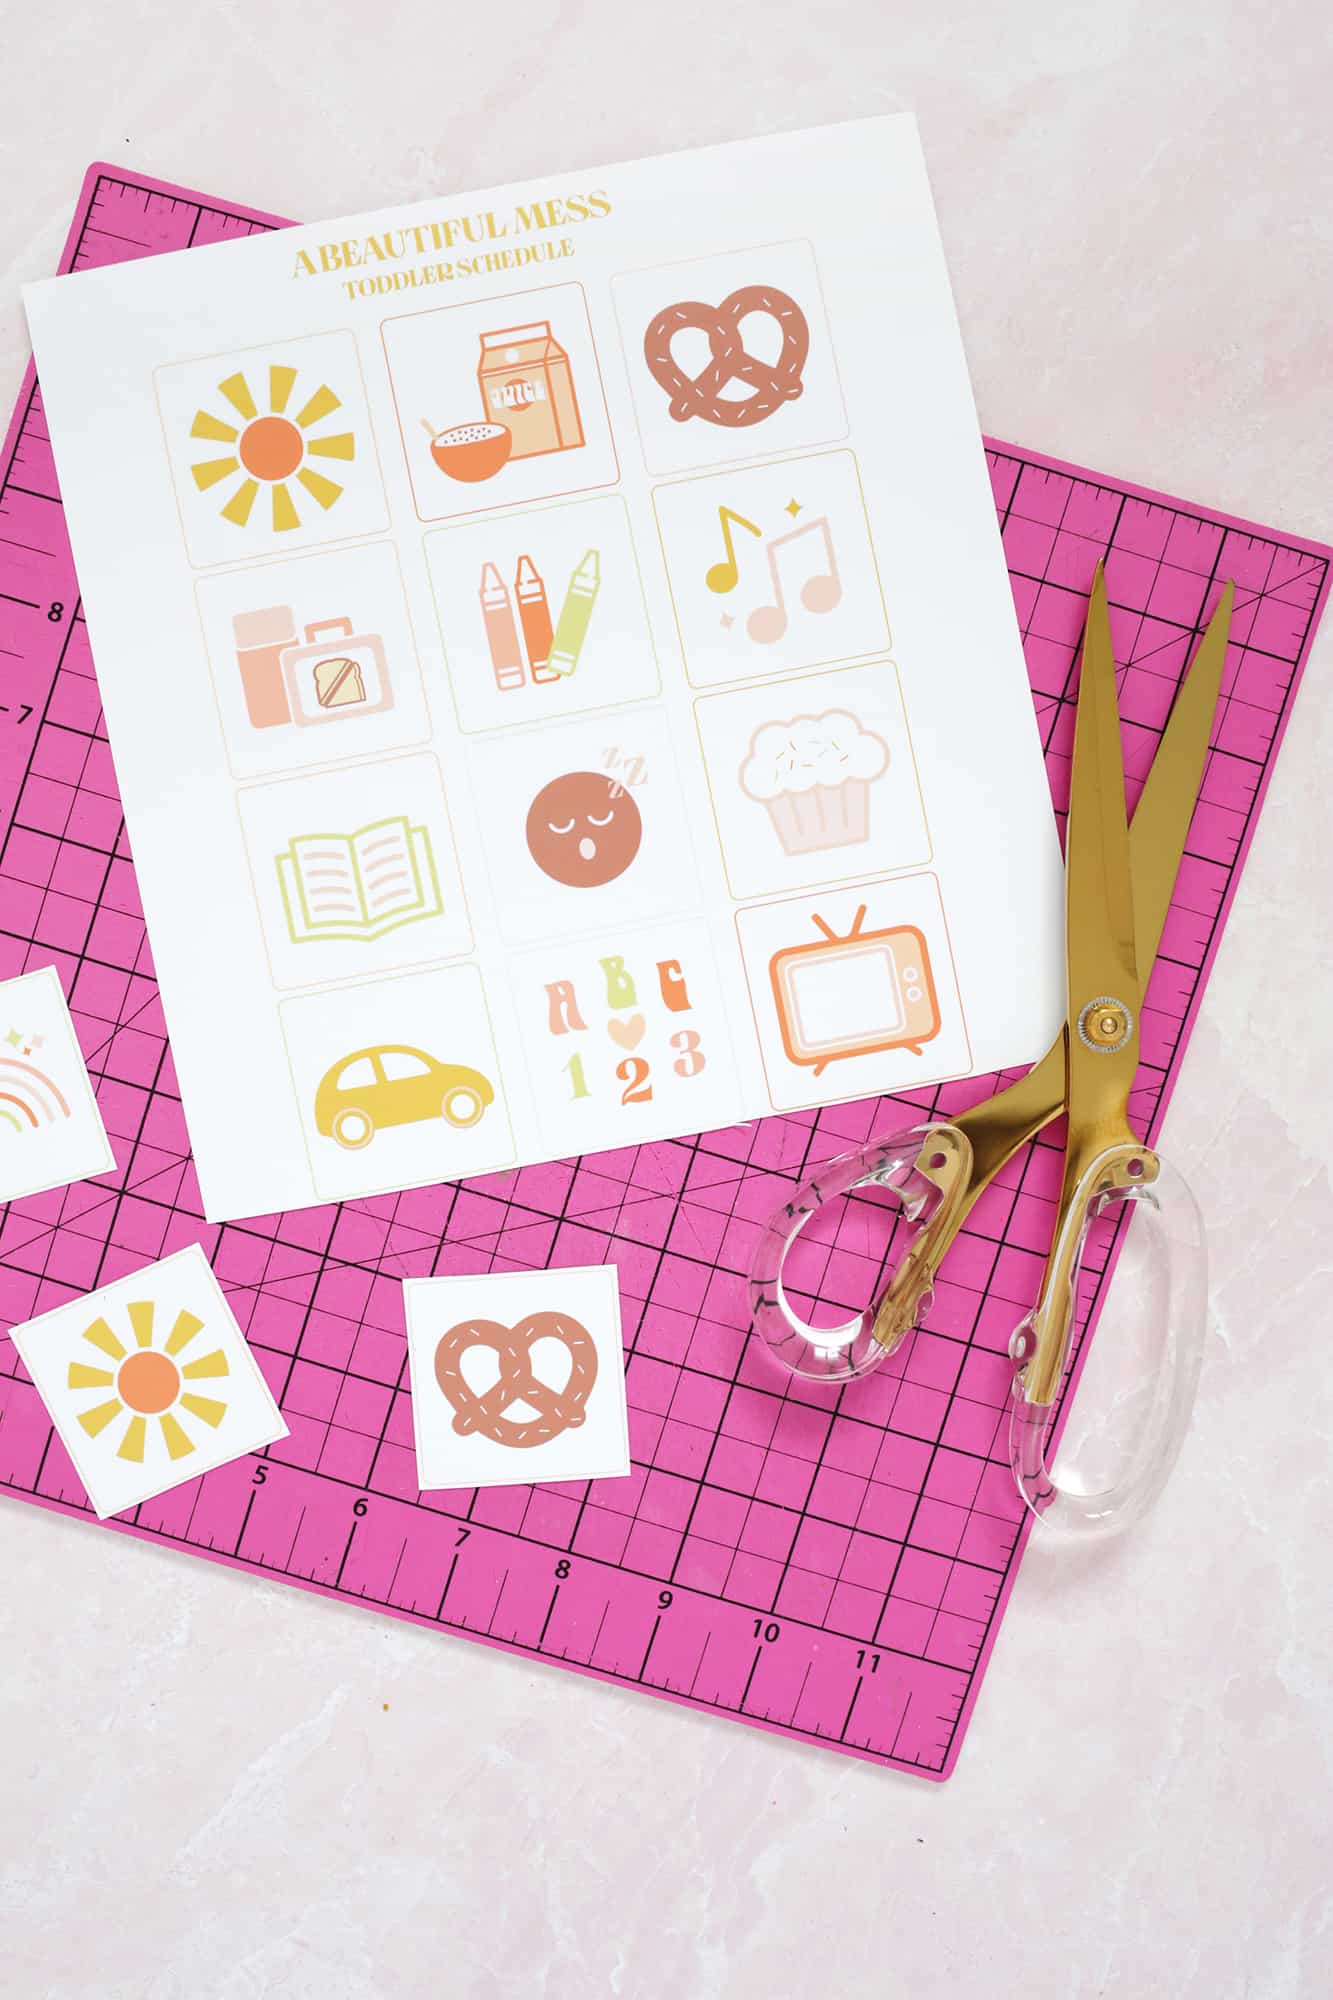
Cut out your icons and labels, leaving 1/4″ of film around the edges. If you want to do a faster method, you can also laminate the whole sheet without cutting them apart first and then cut them after lamination. But I like the look of cutting them out first and having the clear edge all the way around, so I did it that way.
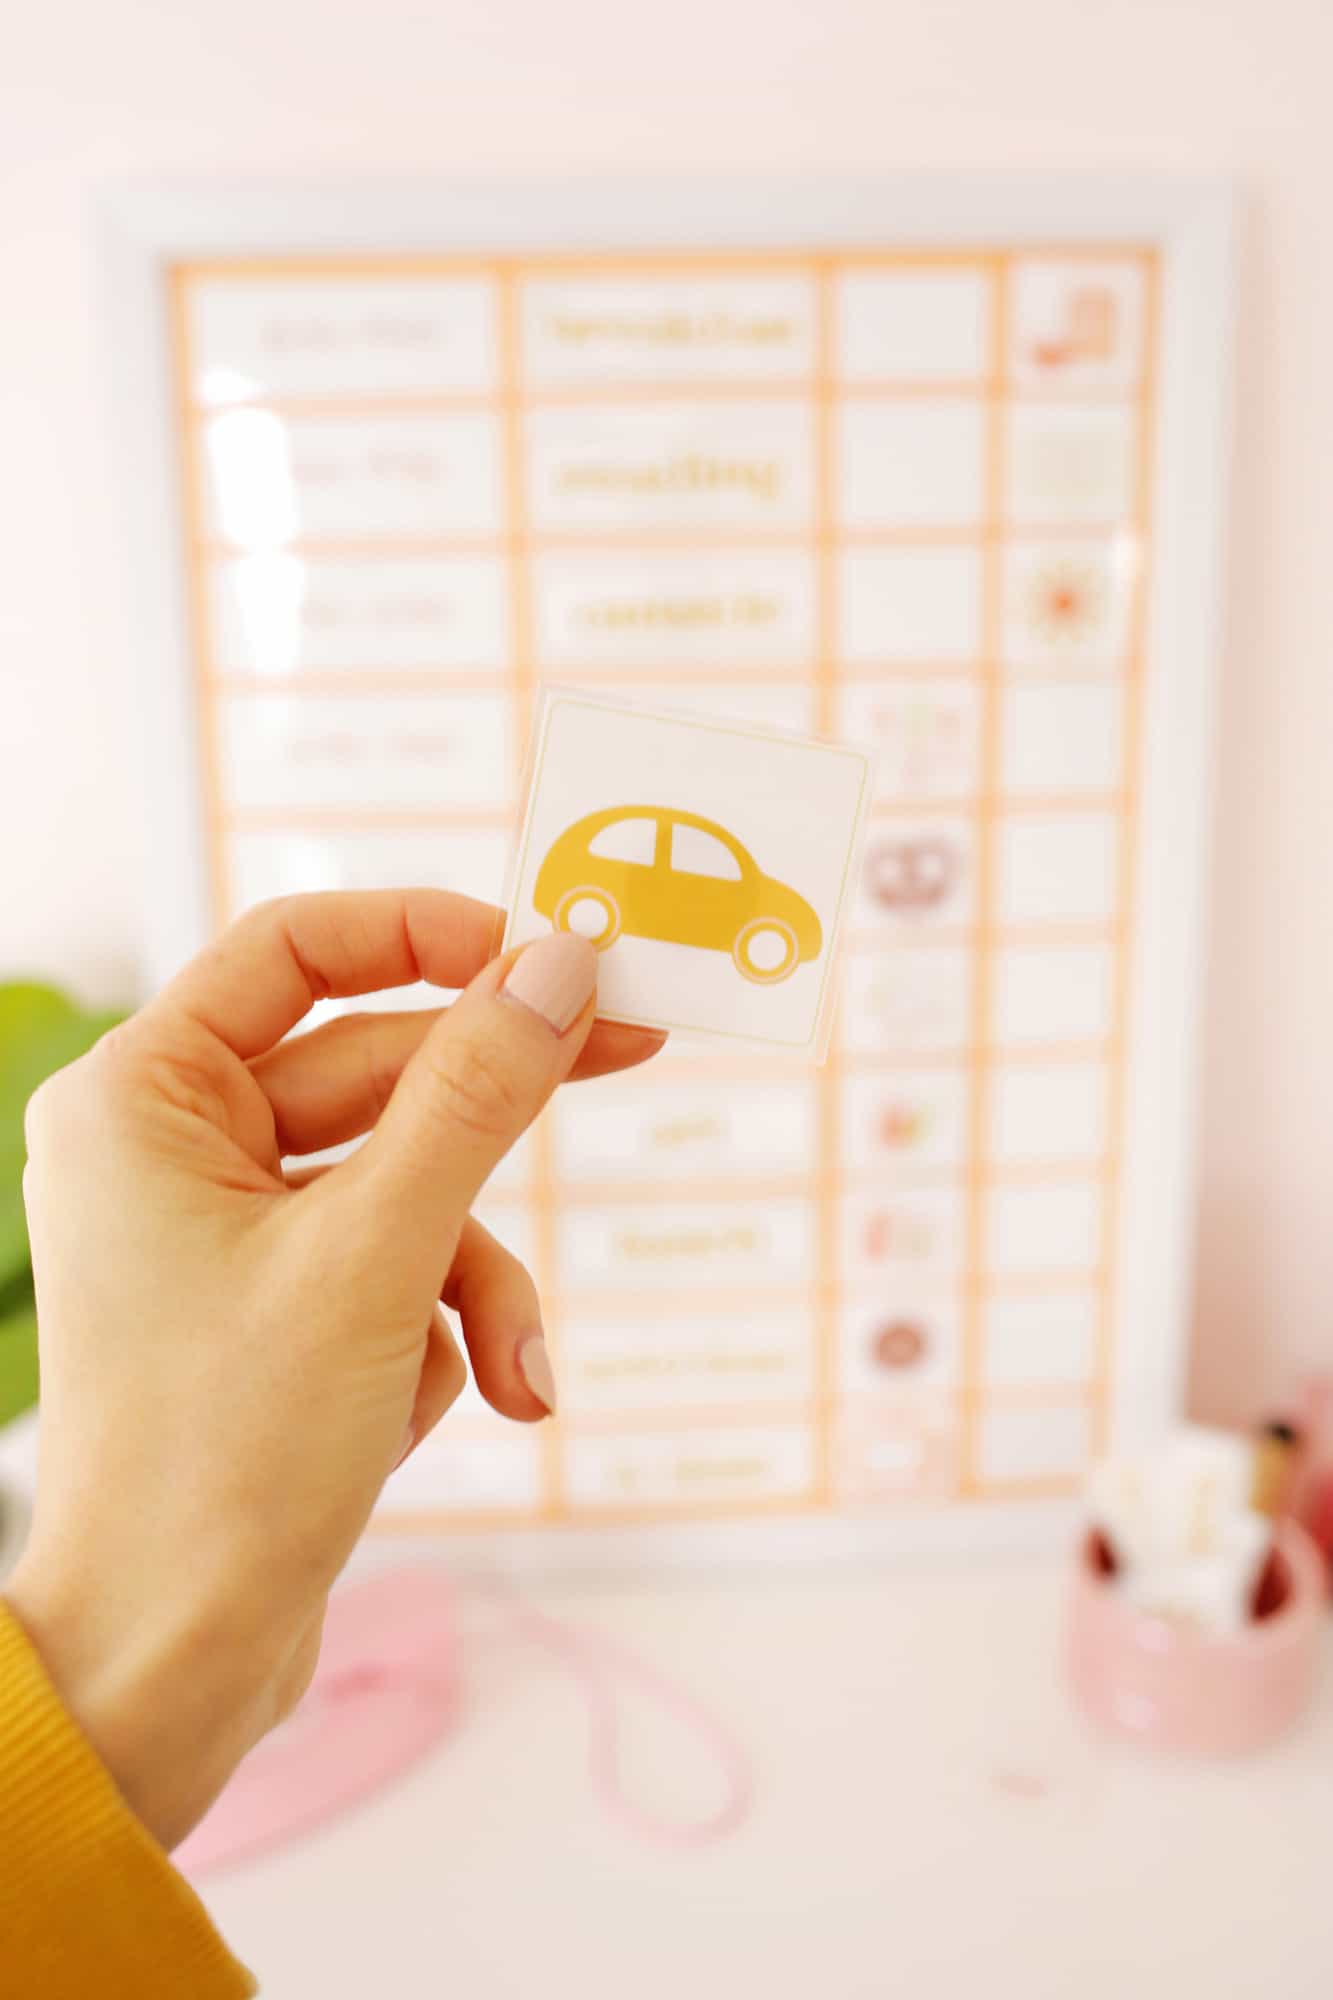
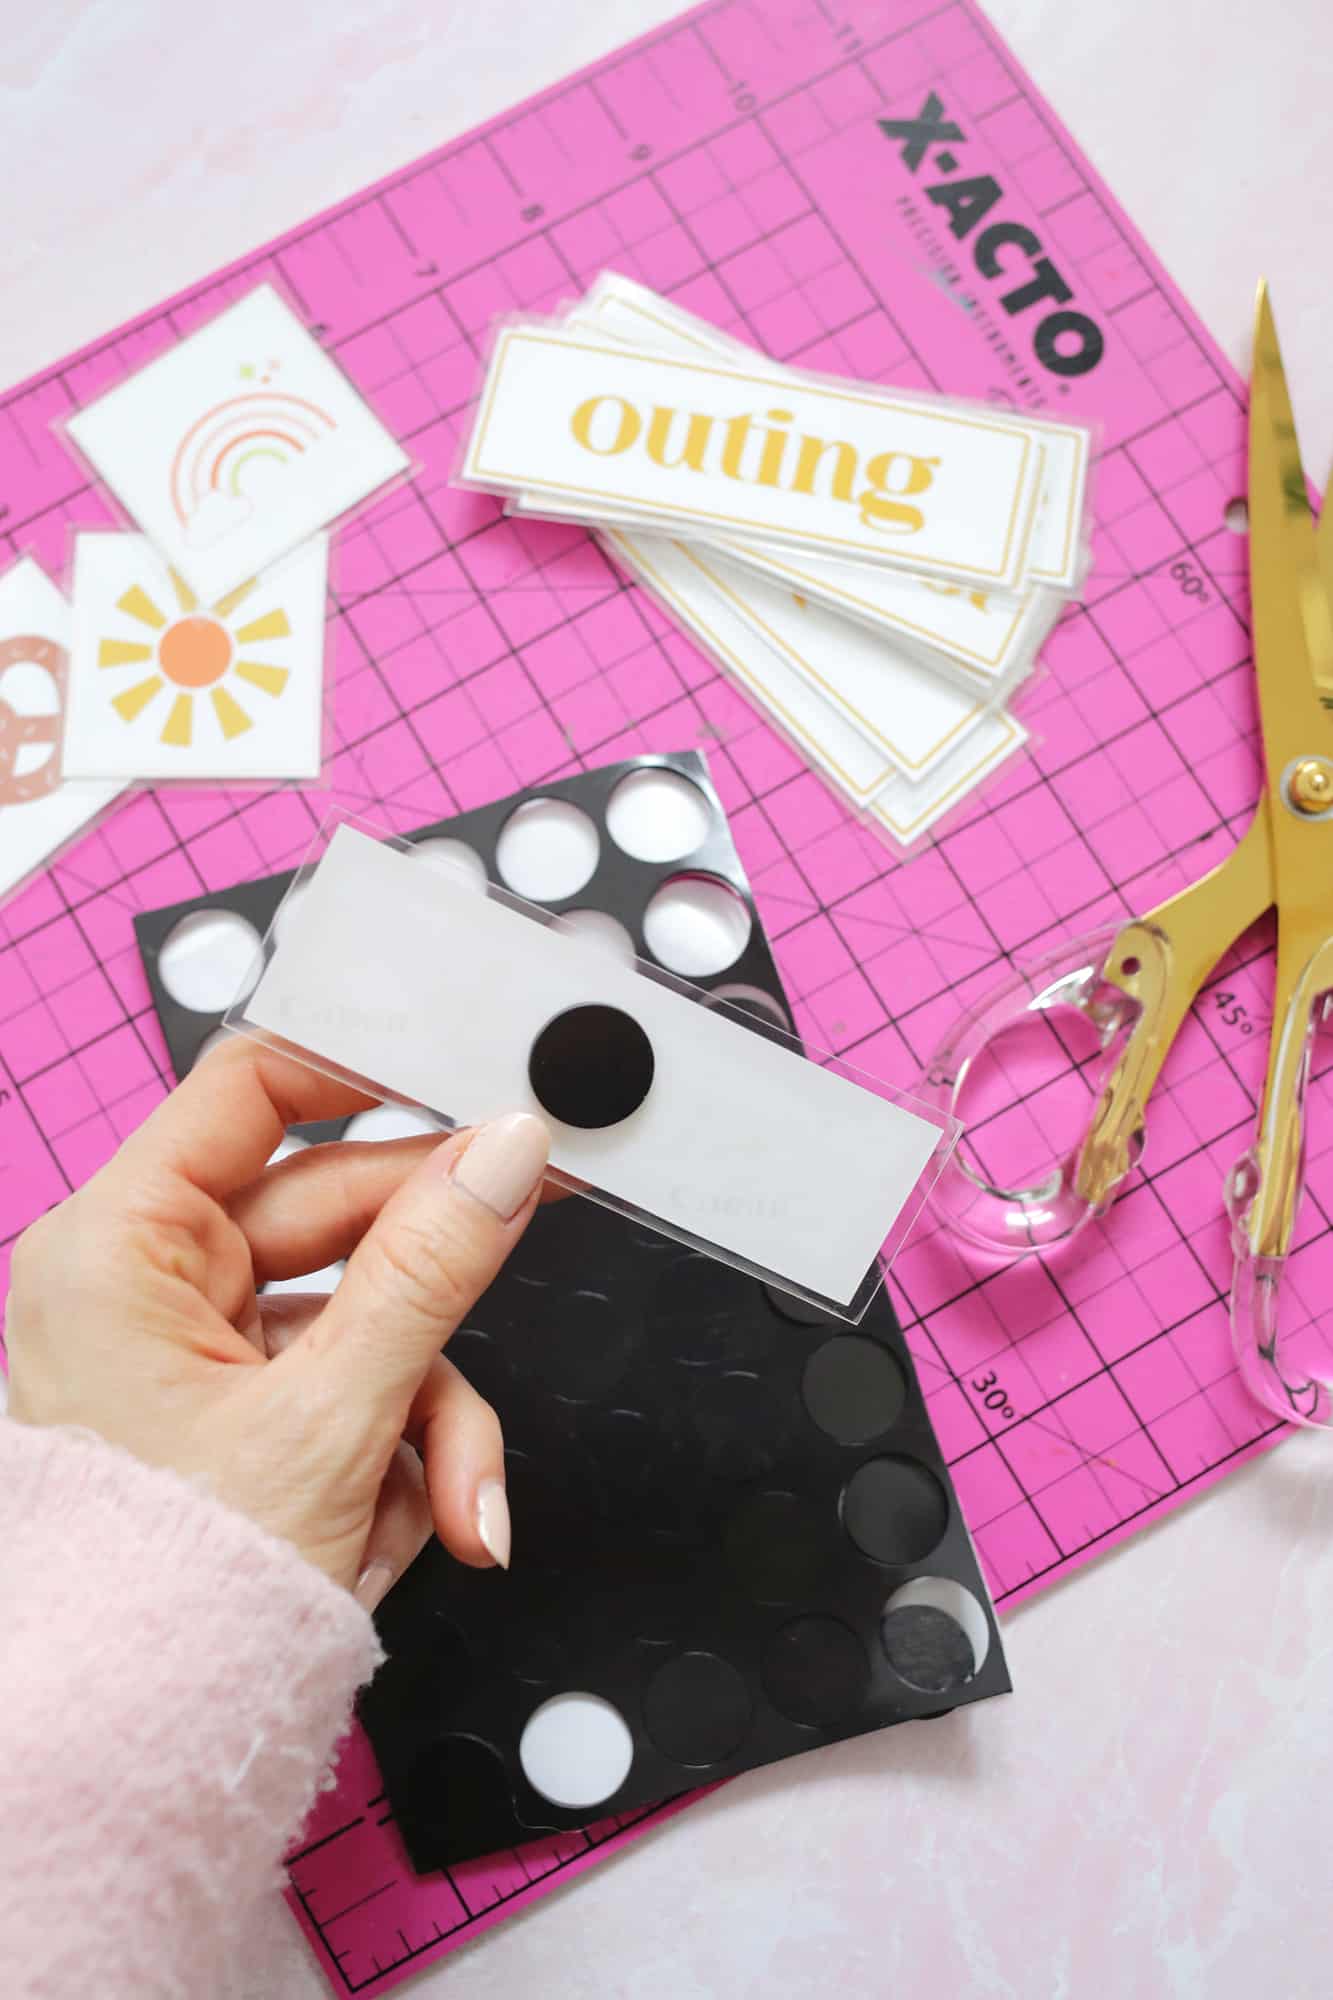 Once your printables are cut and laminated, stick a magnet on the back of each icon and you’re ready to work on your board!
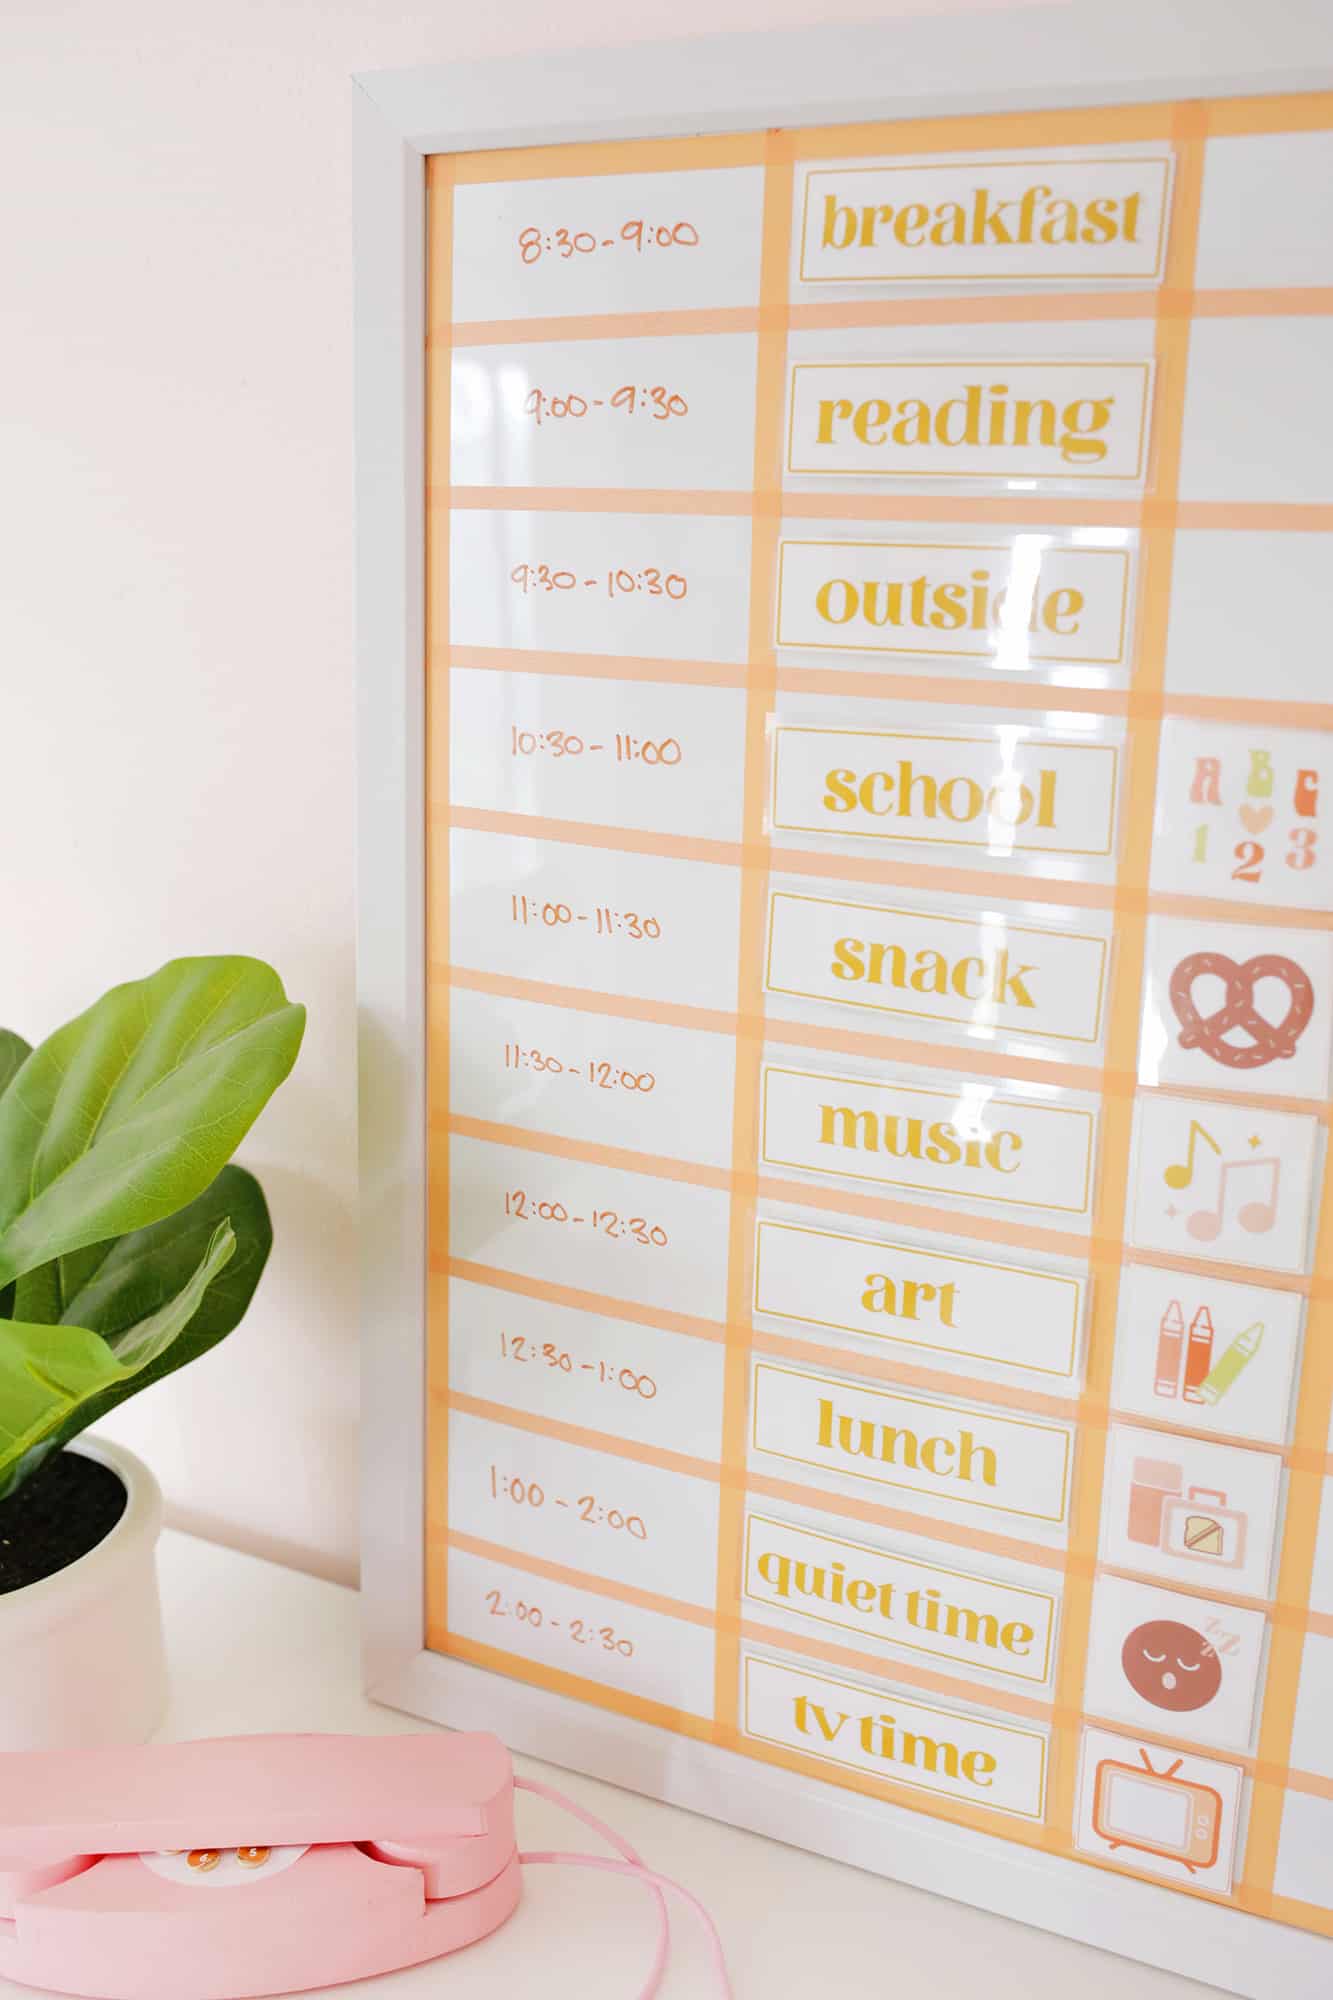
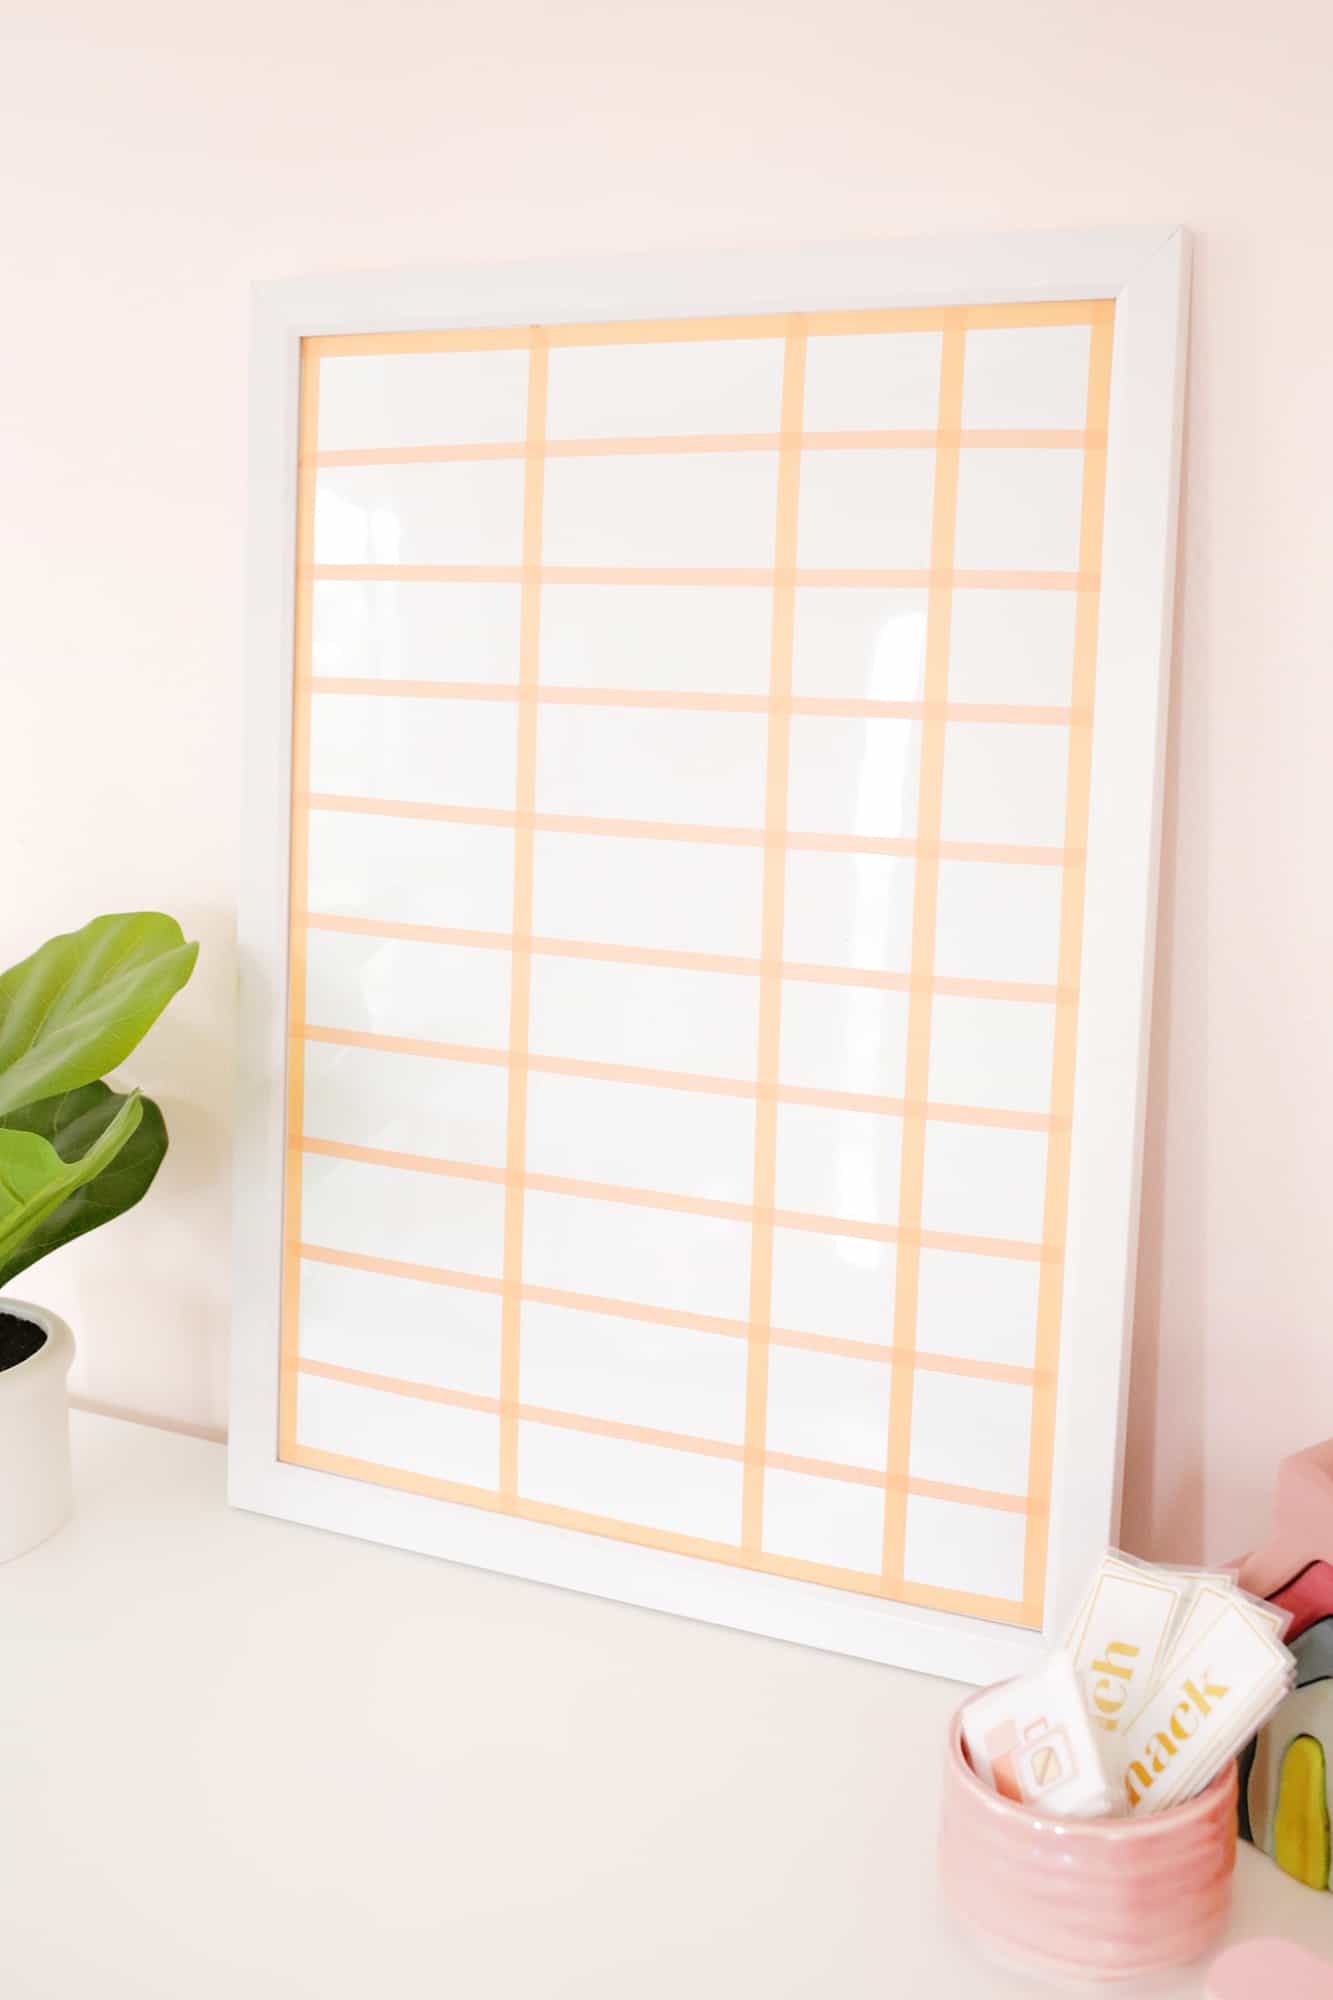 To make your board, get your calculator and divide your board into as many segments as you have categories in your day. I have 10 sections on my board, but if you were doing a lot more you could always buy a bigger white board to have more space. An easy way to add tape lines on a board is to make a dot with a light colored dry-erase marker (where each section should be on the left and right sides of the board) and then simply connect the two dots with a line of washi tape.
Once I had all my horizontal lines on, I did the same connect-the-dot thing to add three vertical lines to make two boxes on the right-hand side for the icons (she moves them to the right box when the segment is complete) and then divided the left area into two rectangles where I would write the time for each segment and put the segment label. Once I had my grid, I put tape all the way around the edges to finish out the look and cover over the tape ends from the other lines. Washi tape comes off white boards pretty easily so you can always change your schedule or use the board for something else later. My only suggestion is to be careful when you write/erase in dry-erase markers, as the paper tape will stain if you get fresh marker on it.
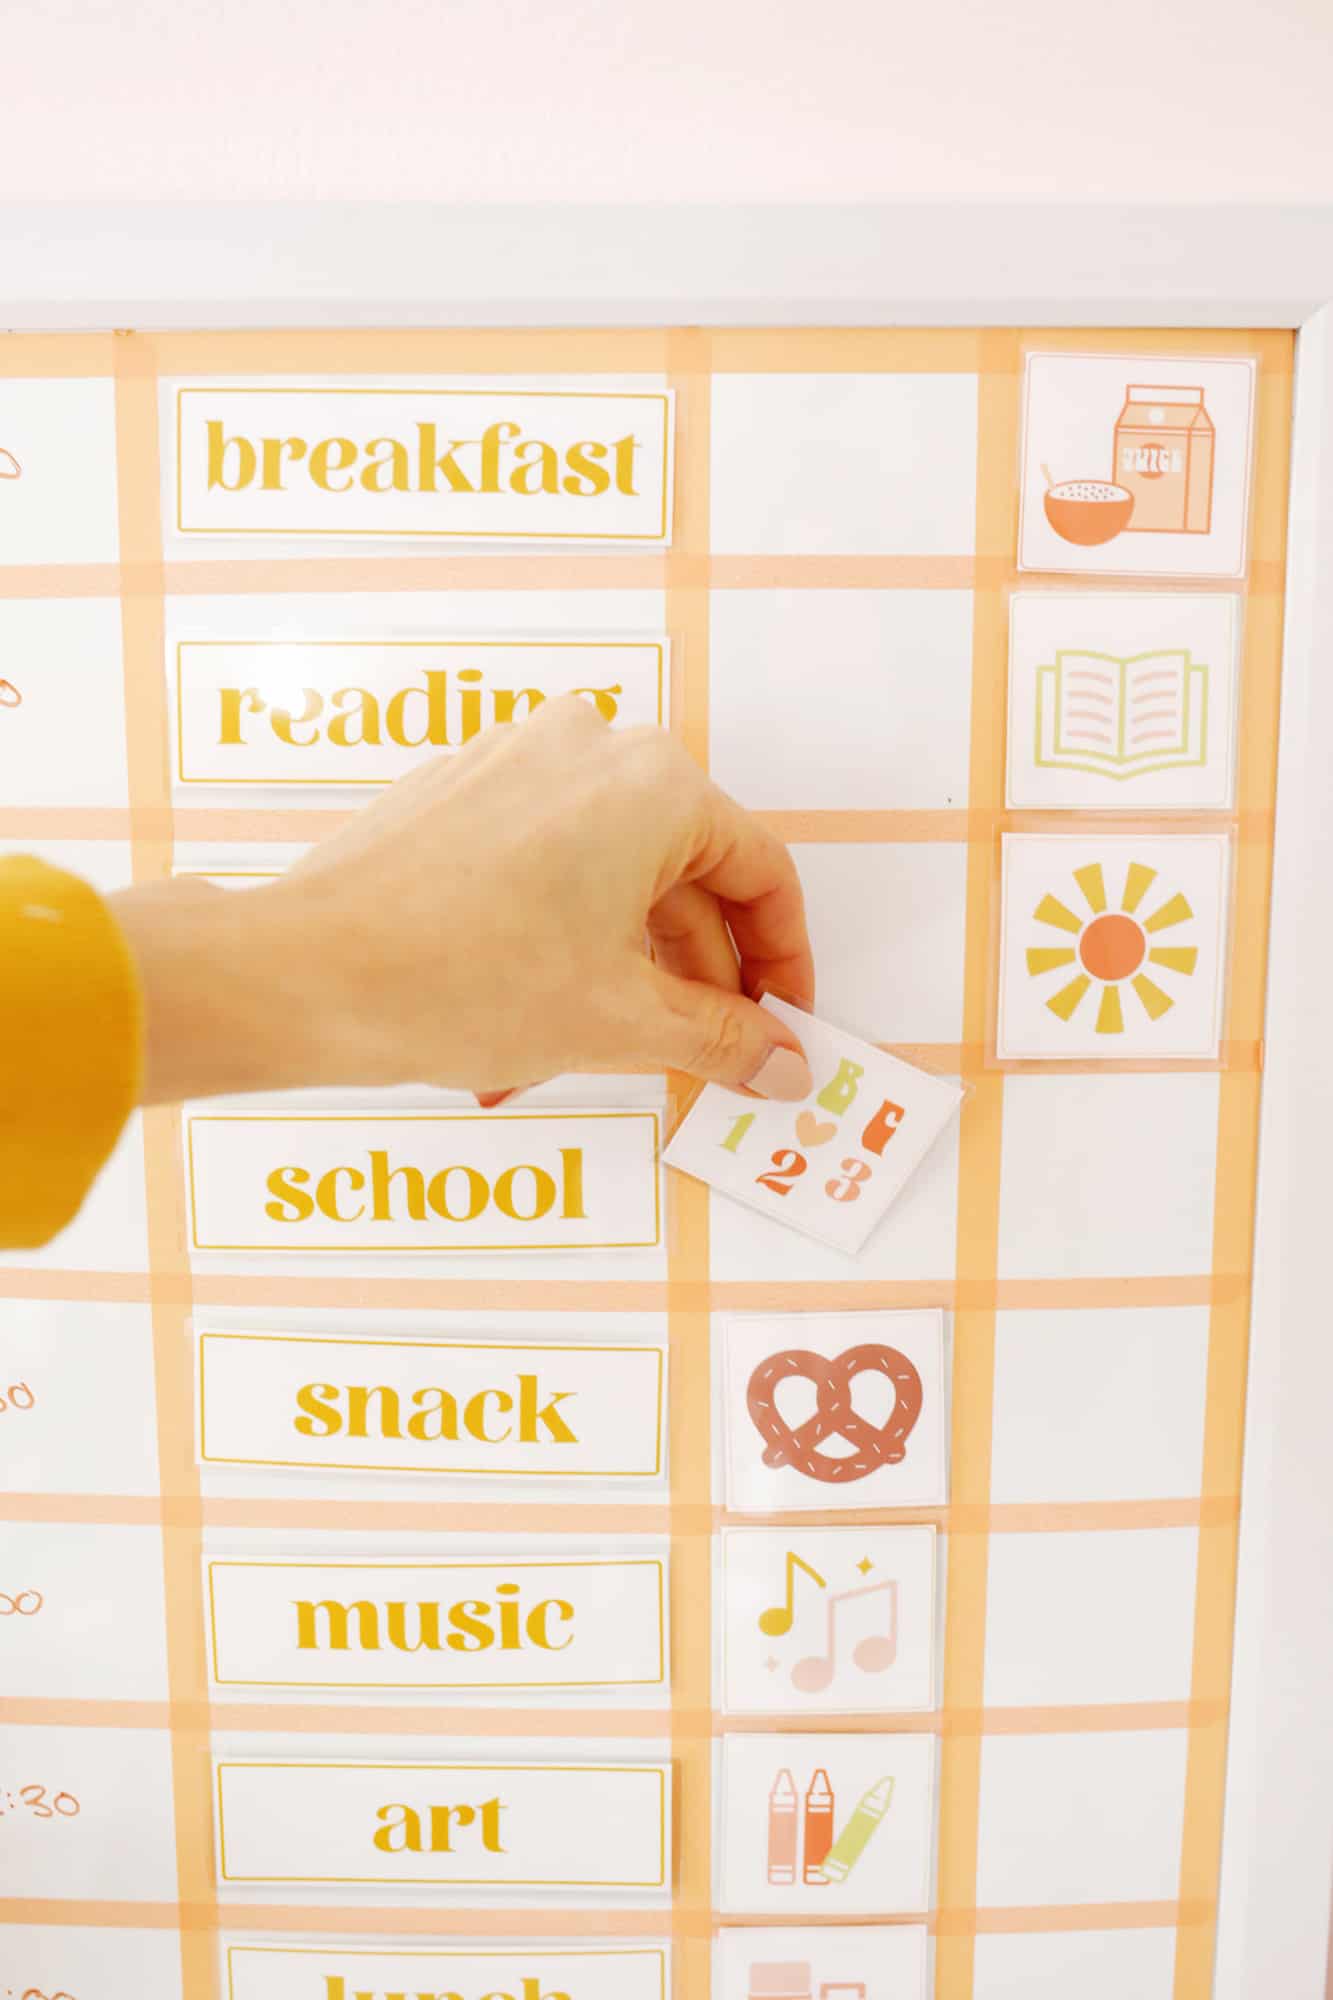 Once your grid is on, you’re ready to add your icons and labels and start your day! We let Lola move the icon from the left column to the box next to it on the right when she’s done with that activity as a way to involve her and let her see what’s next as the day progresses. The picture labels are pretty self explanatory (although we made a rainbow for the “kid choice” icon, so there’s one that’s kind of a miscellaneous category), but feel free to switch them around to mean something different if you would like that makes more sense for your lifestyle.


 So far, the new schedule is so helpful for us! I feel like Lola likes knowing what will happen in a day now and it takes the pressure off Todd to constantly be thinking, “What do we do next?” all the time. She’s also been doing way more art and music than tends to happen when we just wing a day, and she loves doing yoga now (we do yoga during outside time when it’s rainy or too cold outside) which is also a big plus (I caught her “growing her tree” in tree pose in the bathtub the other day). We also have this timer for Lola that we use for her quiet play time segment so she can see how much longer is left (genius!), but you could also use that for pretty much every segment if you wanted to. We’ve also used her color clock that tells her when it’s time to get up to let her know how long segments are since we can change the color to whatever we want easily from our phones.
It’s up to you to do whatever you like within each segment, but I love art boxes like this for art time, playing along with these to your artist of the week during music time (or try a music jar!), Cosmic Kids channel for yoga, and workbooks like these and these for lesson time, and making a book wall with a few of these bookshelves to be a little library that you can put different books on each week. We also have a blog post with 100 ideas for things to do with kiddos so that can help too! Hope this chart makes your day a little more organized as well! xo. Laura
P.S. Here’s a link to that wooden phone DIY and I love those wooden stackables too …
Love this post? Sign up for our newsletter for more ideas!

Get creative ideas for recipes, crafts, decor, and more in your inbox!
 Get the How-To

Supplies
- magnetized whiteboard (I used this one)
- thin washi tape (or chart tape) in color of your choice
- dry erase markers
- self-adhesive laminating sheets
- chart printables (right click to download)
- printer and paper
- peel and stick magnets
- scissors or X-Acto knife, ruler, and cutting mat
Instructions
- Peel off one self-adhesive sheet and arrange your squares in a row with space between them. Put as many as you can fit on one page. Peel off another sheet and place it on top of your page, pressing down to smooth out any bubbles.
- Cut out your icons and labels leaving 1/4″ of film around the edges.
- Once your printables are cut and laminated, stick a magnet of the back of each icon and you’re ready to work on your board!
- To make your board, get your calculator and divide your board into as many segments as you have categories in your day. I have 10 sections on my board, but if you were doing a lot more you could always buy a bigger white board to have more space. An easy way to add tape lines on a board is to make a dot with a light colored dry-erase marker where each section should be on the left and right sides of the board and then simply connect the two dots with a line of washi tape. Once I had all my horizontal lines on, I did the same connect-the-dot thing to add three vertical lines to make two boxes on the right-hand side for the icons (she moves them to the right box when the segment is complete) and then divided the left area into two rectangles where I would write the time for each segment and put the segment label. Once I had my grid I put tape all the way around the edges to finish out the look and cover over the tape ends from the other lines.
- Once your grid is on you’re ready to add your icons and labels and start your day!
OMG I LOVE THIS SO MUCH!!!!!! I was looking into making a diy schedule chart with my 2 year old and I have to say this is so cute and seriously very aesthetically pleasing for myself as well 🙂 It will be so helpful in helping my toddler learn, so thank you so much for sharing this idea & the free printable!
We used this during lockdown and will bring back a looser version for summer! Any chance you’d make it editable? I’d l or to make a matching chore chart 🙂
I would love to use this however the link is not working, is this problem occuring for anyone else? could you email me a link to it? thank you!
Hi Hannah, the links should be working now!
I love this!
Love this! I’m going to make it for my niece and nephew. My sister will be happy with it too I think 🙂 X