 Today, I’m sharing a fun, easy, and just the right amount of sentimental holiday craft project: DIY salt dough frames. You can turn these into ornaments for a tree or into magnets for a refrigerator or other metal surface. These are fun to make and keep for yourself, but they would also make cute homemade gifts if you’re looking for something to give to the grandmas or aunts in your life and kids love to make salt dough ornaments. 😉
For this project, I’m working with Canon USA, and I used their IVY CLIQ+2 Instant Camera Printer. That’s right—you can use this to print from your smartphone (using the Canon Mini Print app) or you can use it as an instant camera, just point and shoot. I also love the rose gold color option, which you can see in some of the photos below. There’s a sale going on right now too, if you buy the IVY CLIQ+2 Instant Camera Printer between now and 12/31/2020 you’ll get the new ZINK Pre-cut Circle stickers free!
 I loved using my IVY CLIQ+2 Instant Camera Printer for this, as the 2″x3″ photos with sticky backs were the perfect size for this type of project. But you could also use other at home printers to size and print photos for these ornament frames—lots of options!
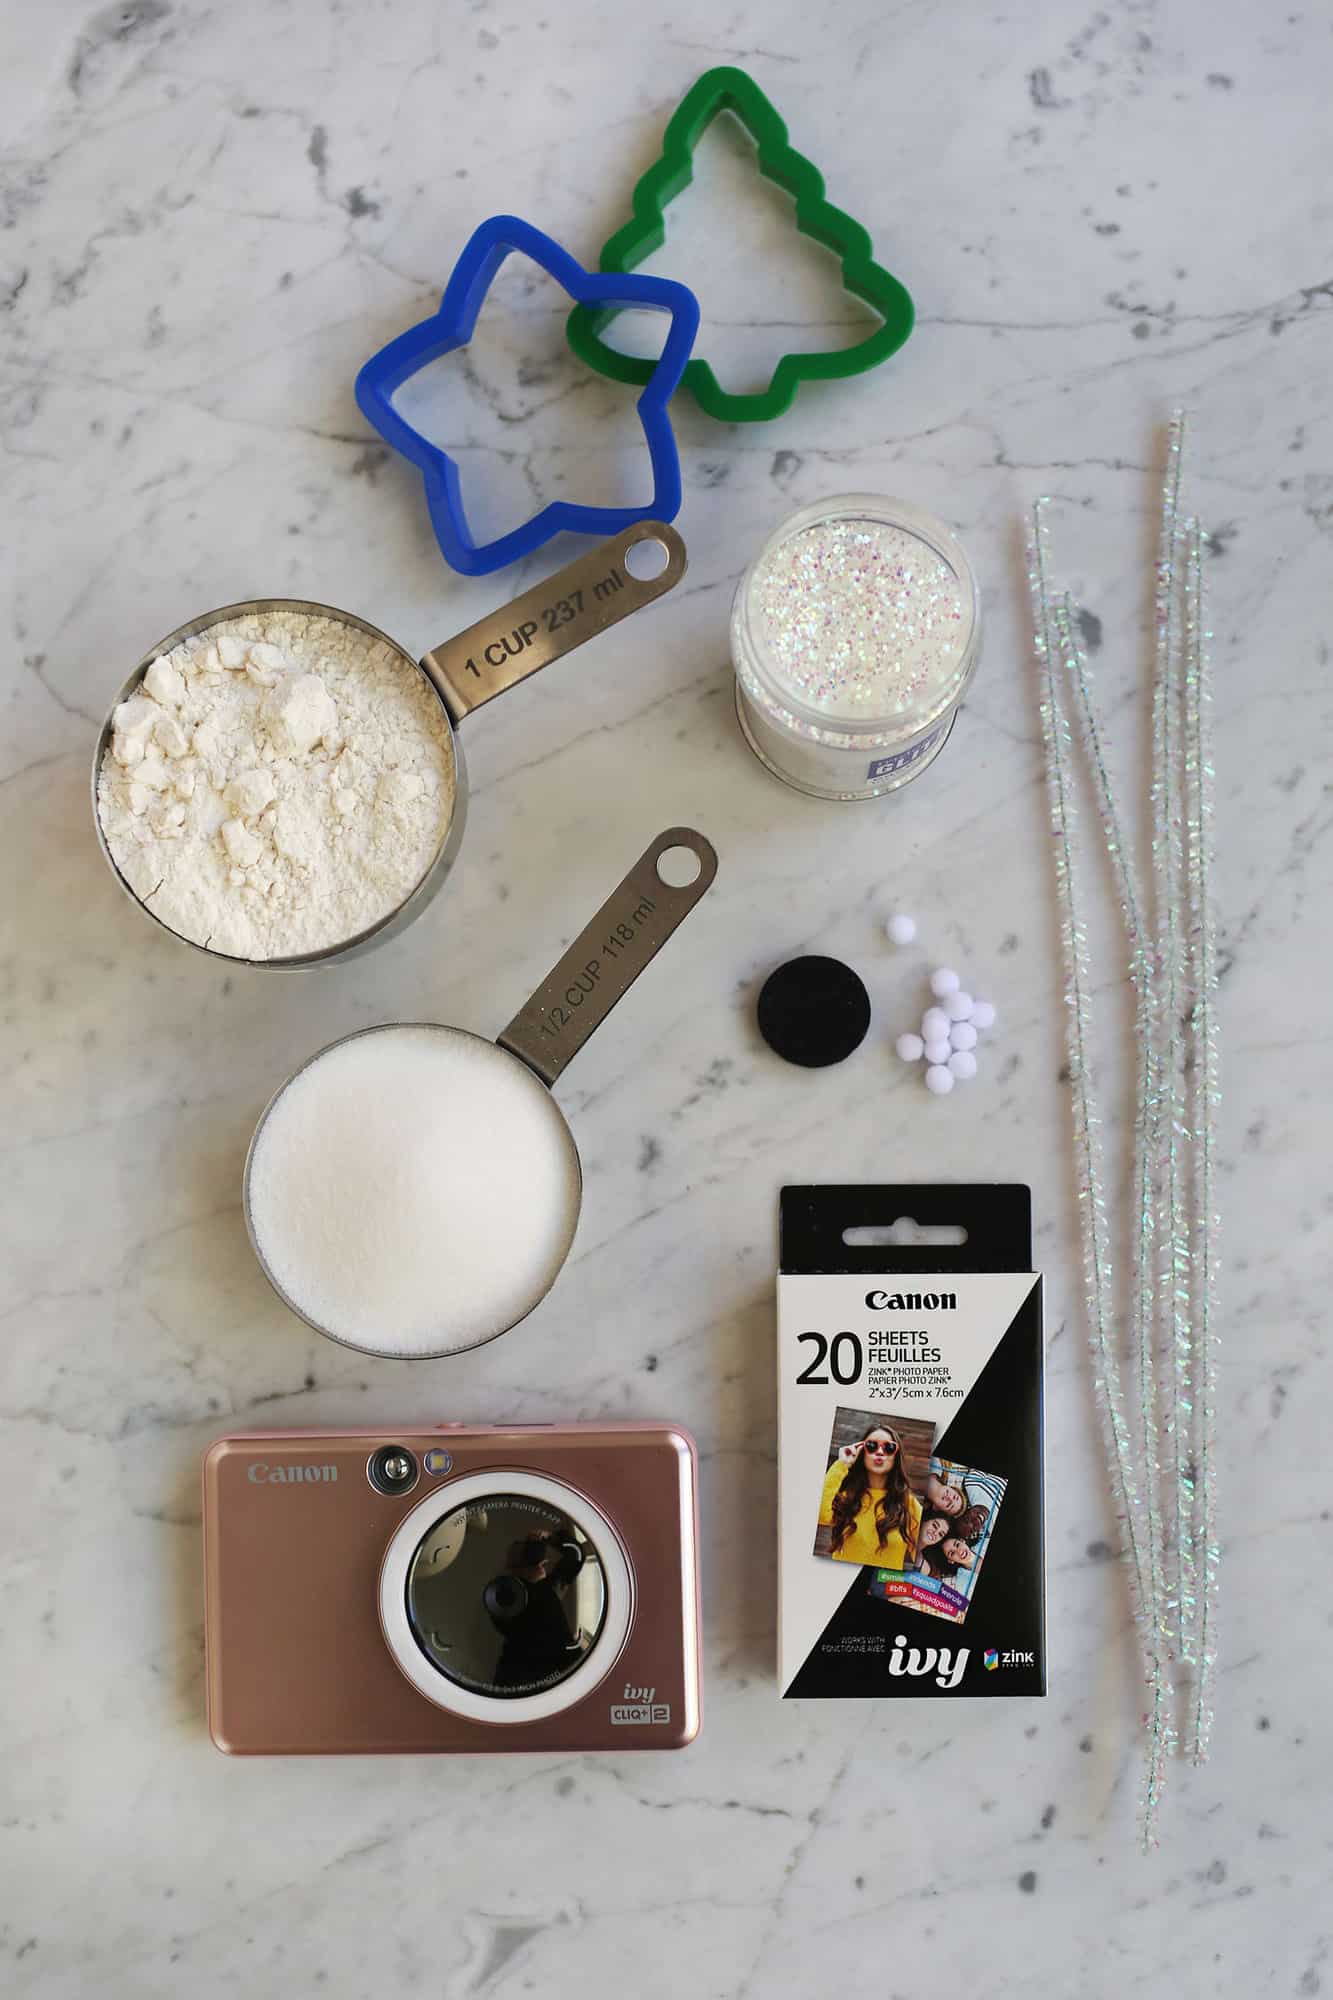 Supplies:
-2 cups flour
-1/2 cup salt
-3/4 cup water
-mixing bowl
-rolling pin
-cookie cutters
-parchment paper
–IVY CLIQ+2 Instant Camera Printer
-card stock or photo paper
-glitter and mini pom poms
-glue
-pipe cleaners, yarn, or magnet backs
For the salt dough, I choose to keep mine off-white, meaning I did not add acrylic paint to the dough (although you can, if you want). This meant all my utensils like a mixing bowl, rolling pin, and cookie cutters stayed food safe as the plain salt dough recipe is all edible ingredients (but don’t eat it, it’s VERY salty, ha). If you do add paint to the dough you may want to consider using utensils that you keep for crafting rather than being food safe. Just a tip.
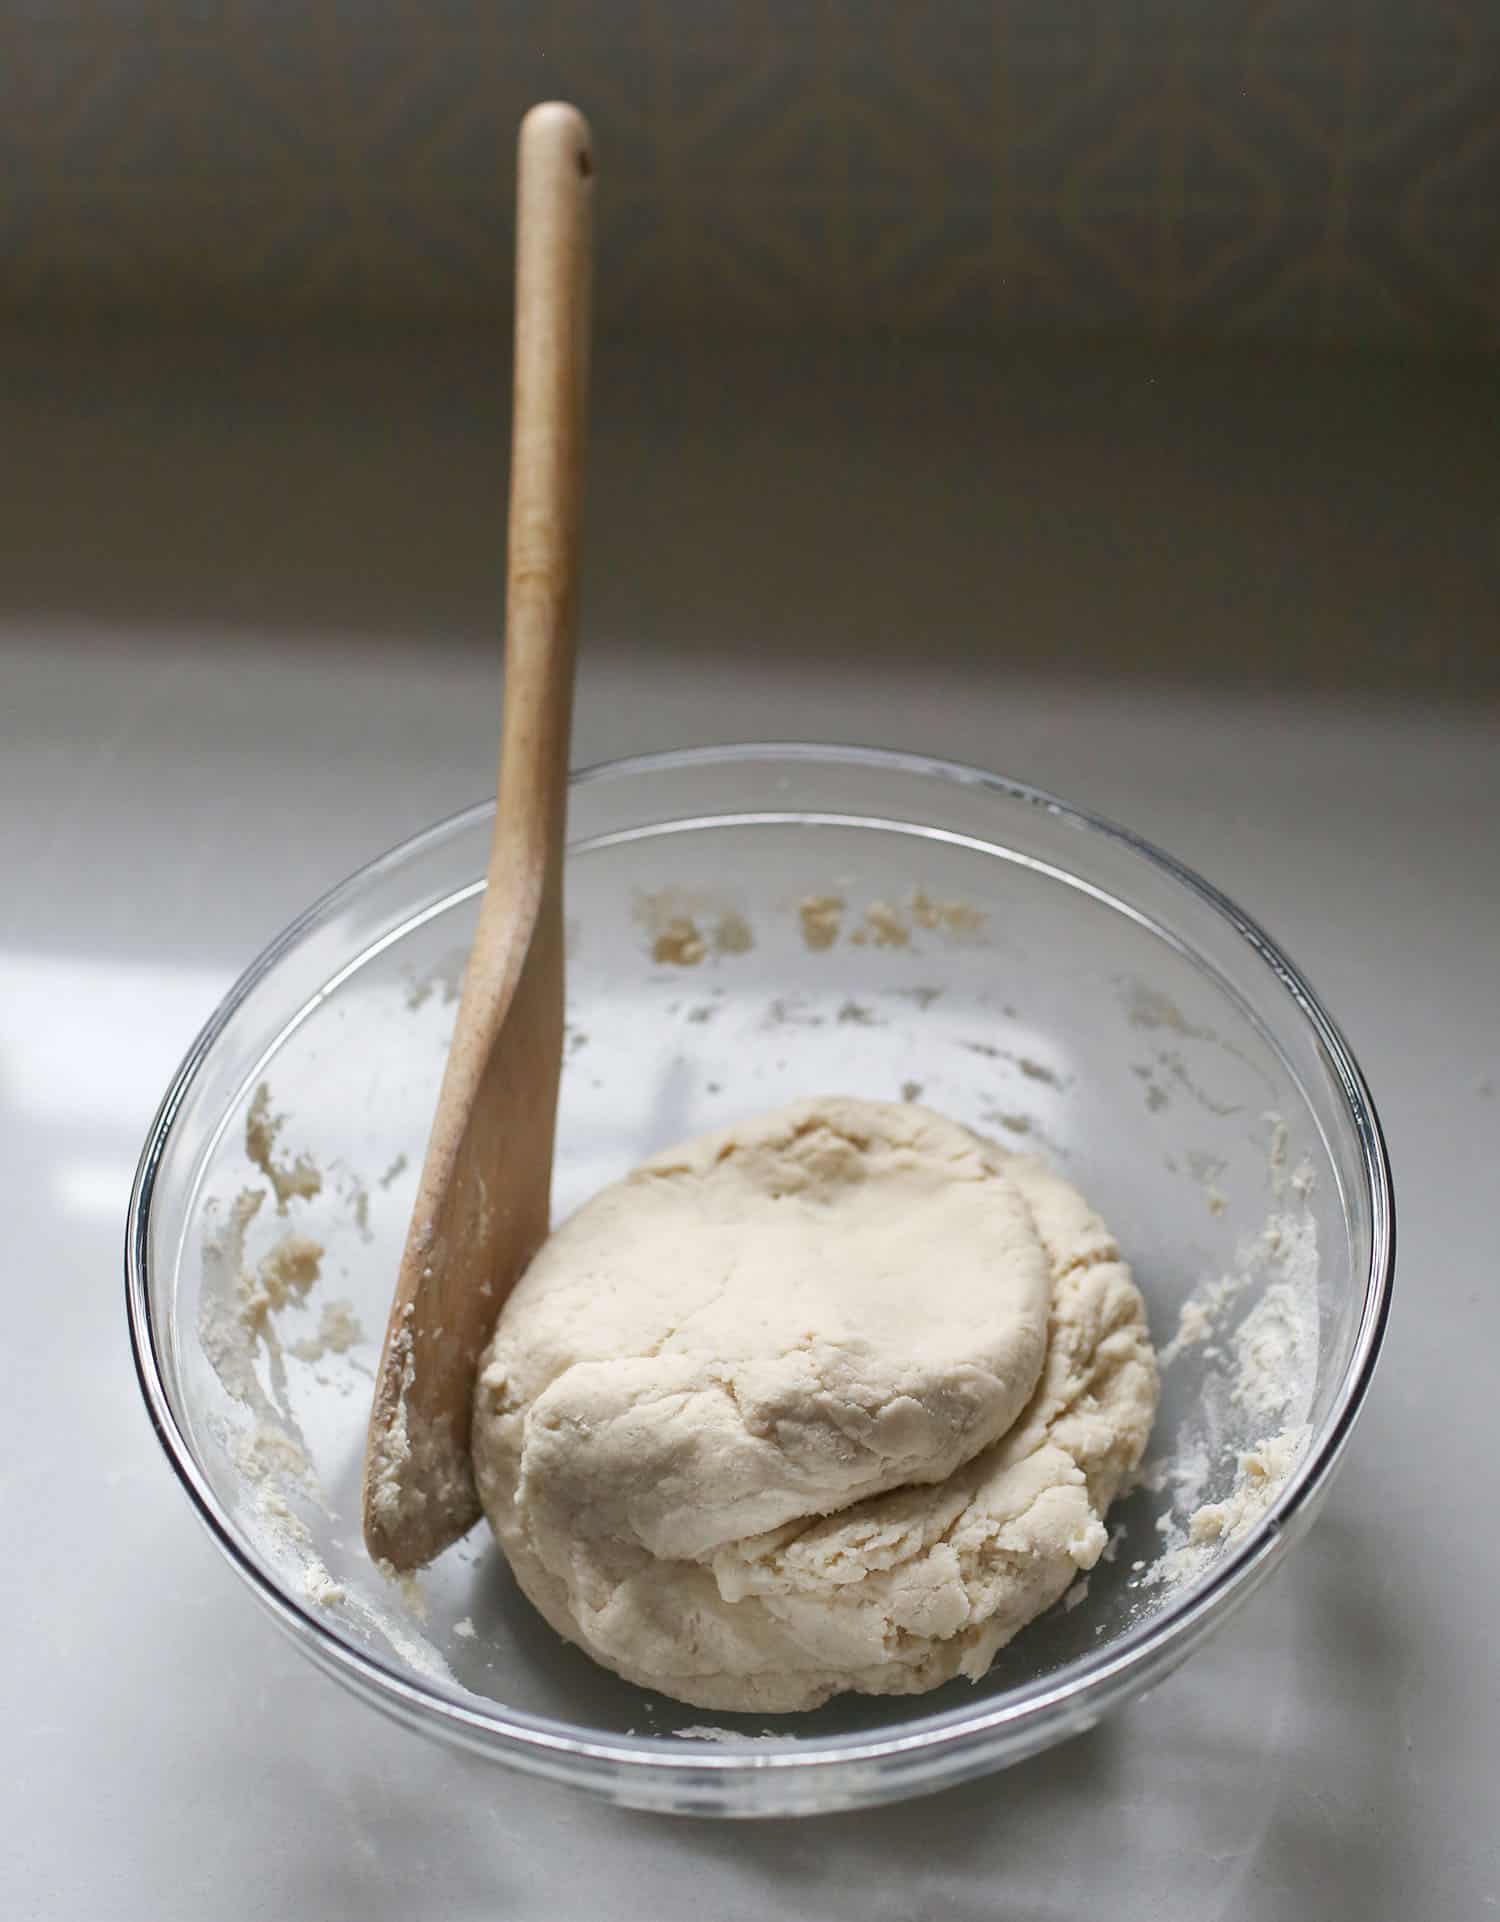 Step One: Mix together the salt dough. In a mixing bowl, add the flour, salt, and water. Mix with a spoon or your hands until a dense dough forms.
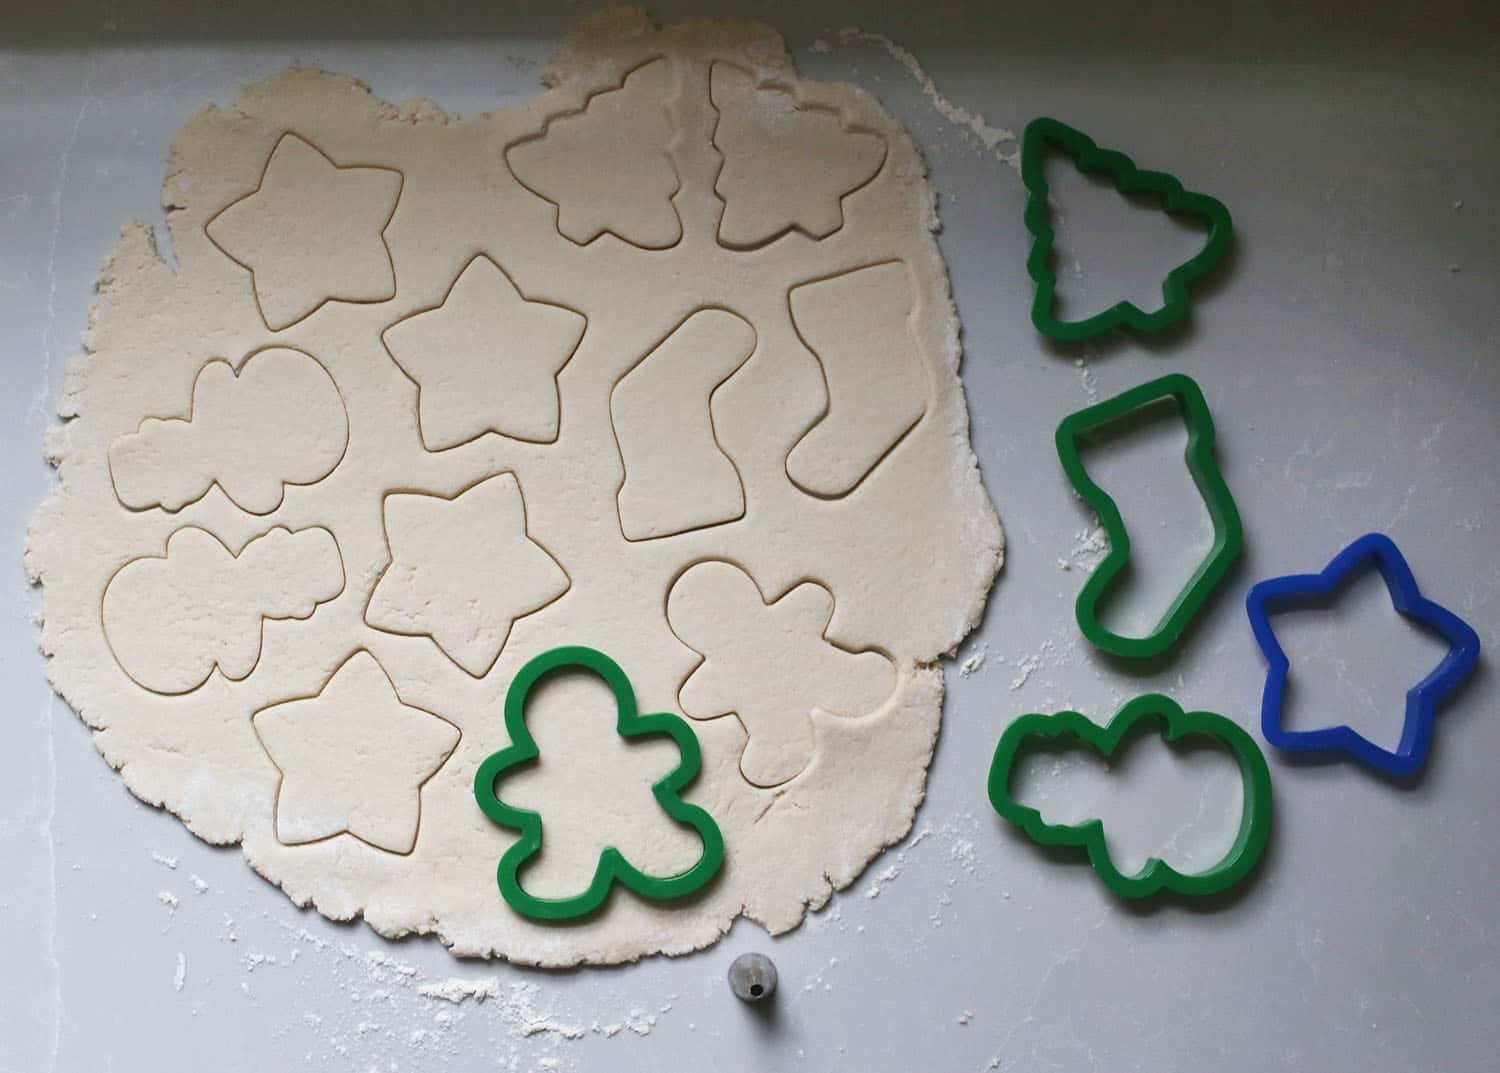 Step Two: Cut out the shapes and bake. I used holiday cookie cutters, but you could also freehand your designs and use a knife or X-Acto to cut out the shapes. For the frames, add a small square to the center of the shapes. And for any shapes that you want to be ornaments, use the top of a piping tip (or a knife/X-Acto) to cut a hole. Place the shapes on a baking sheet lined with parchment paper and bake at 200°F for 2-3 hours, until very dry. Allow to fully dry out on a cooling rack as well.
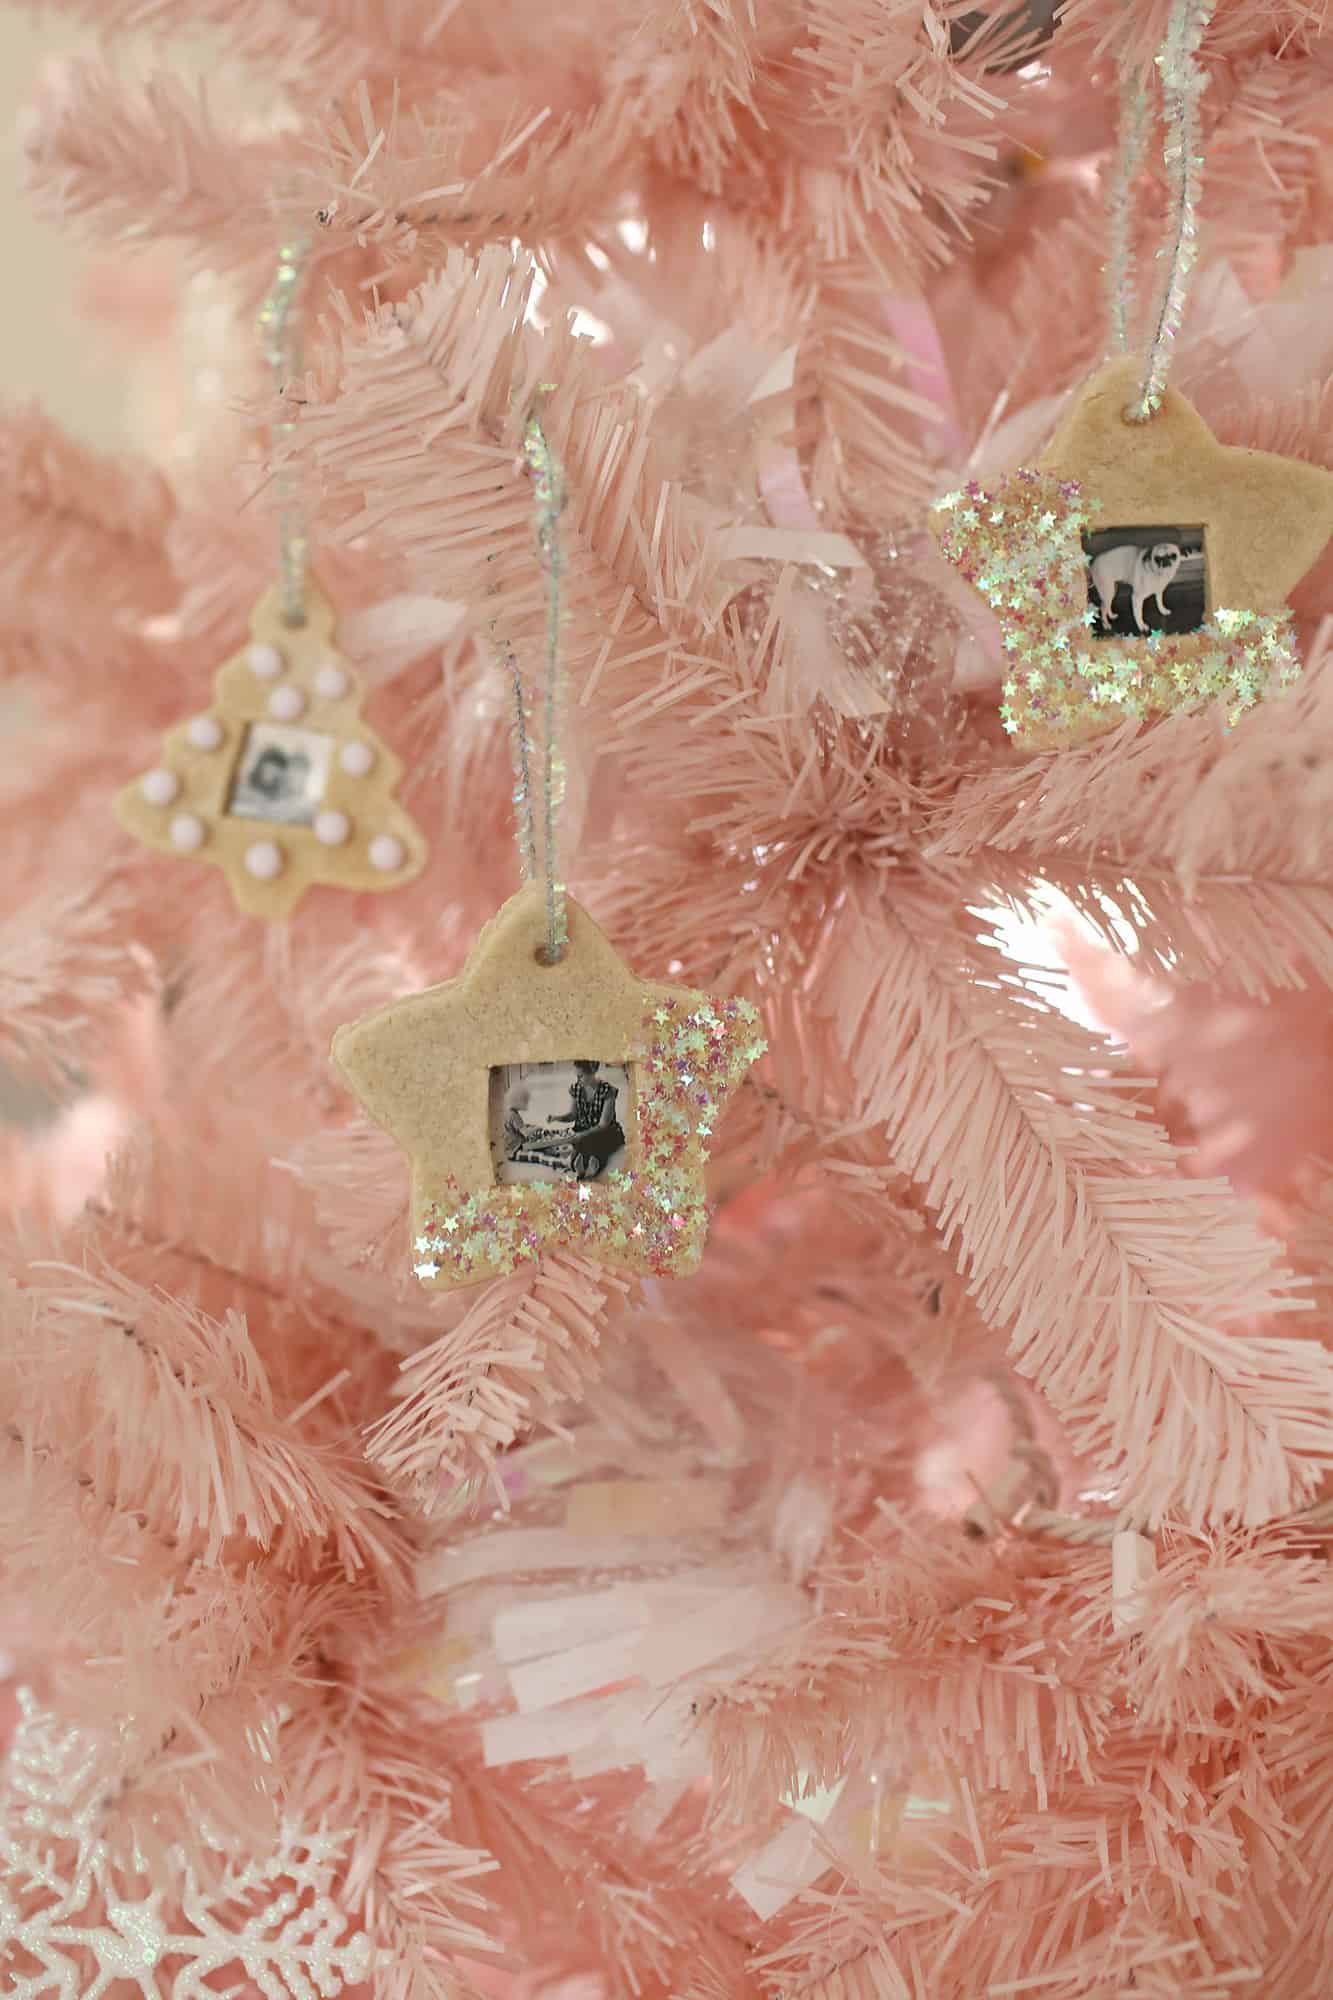
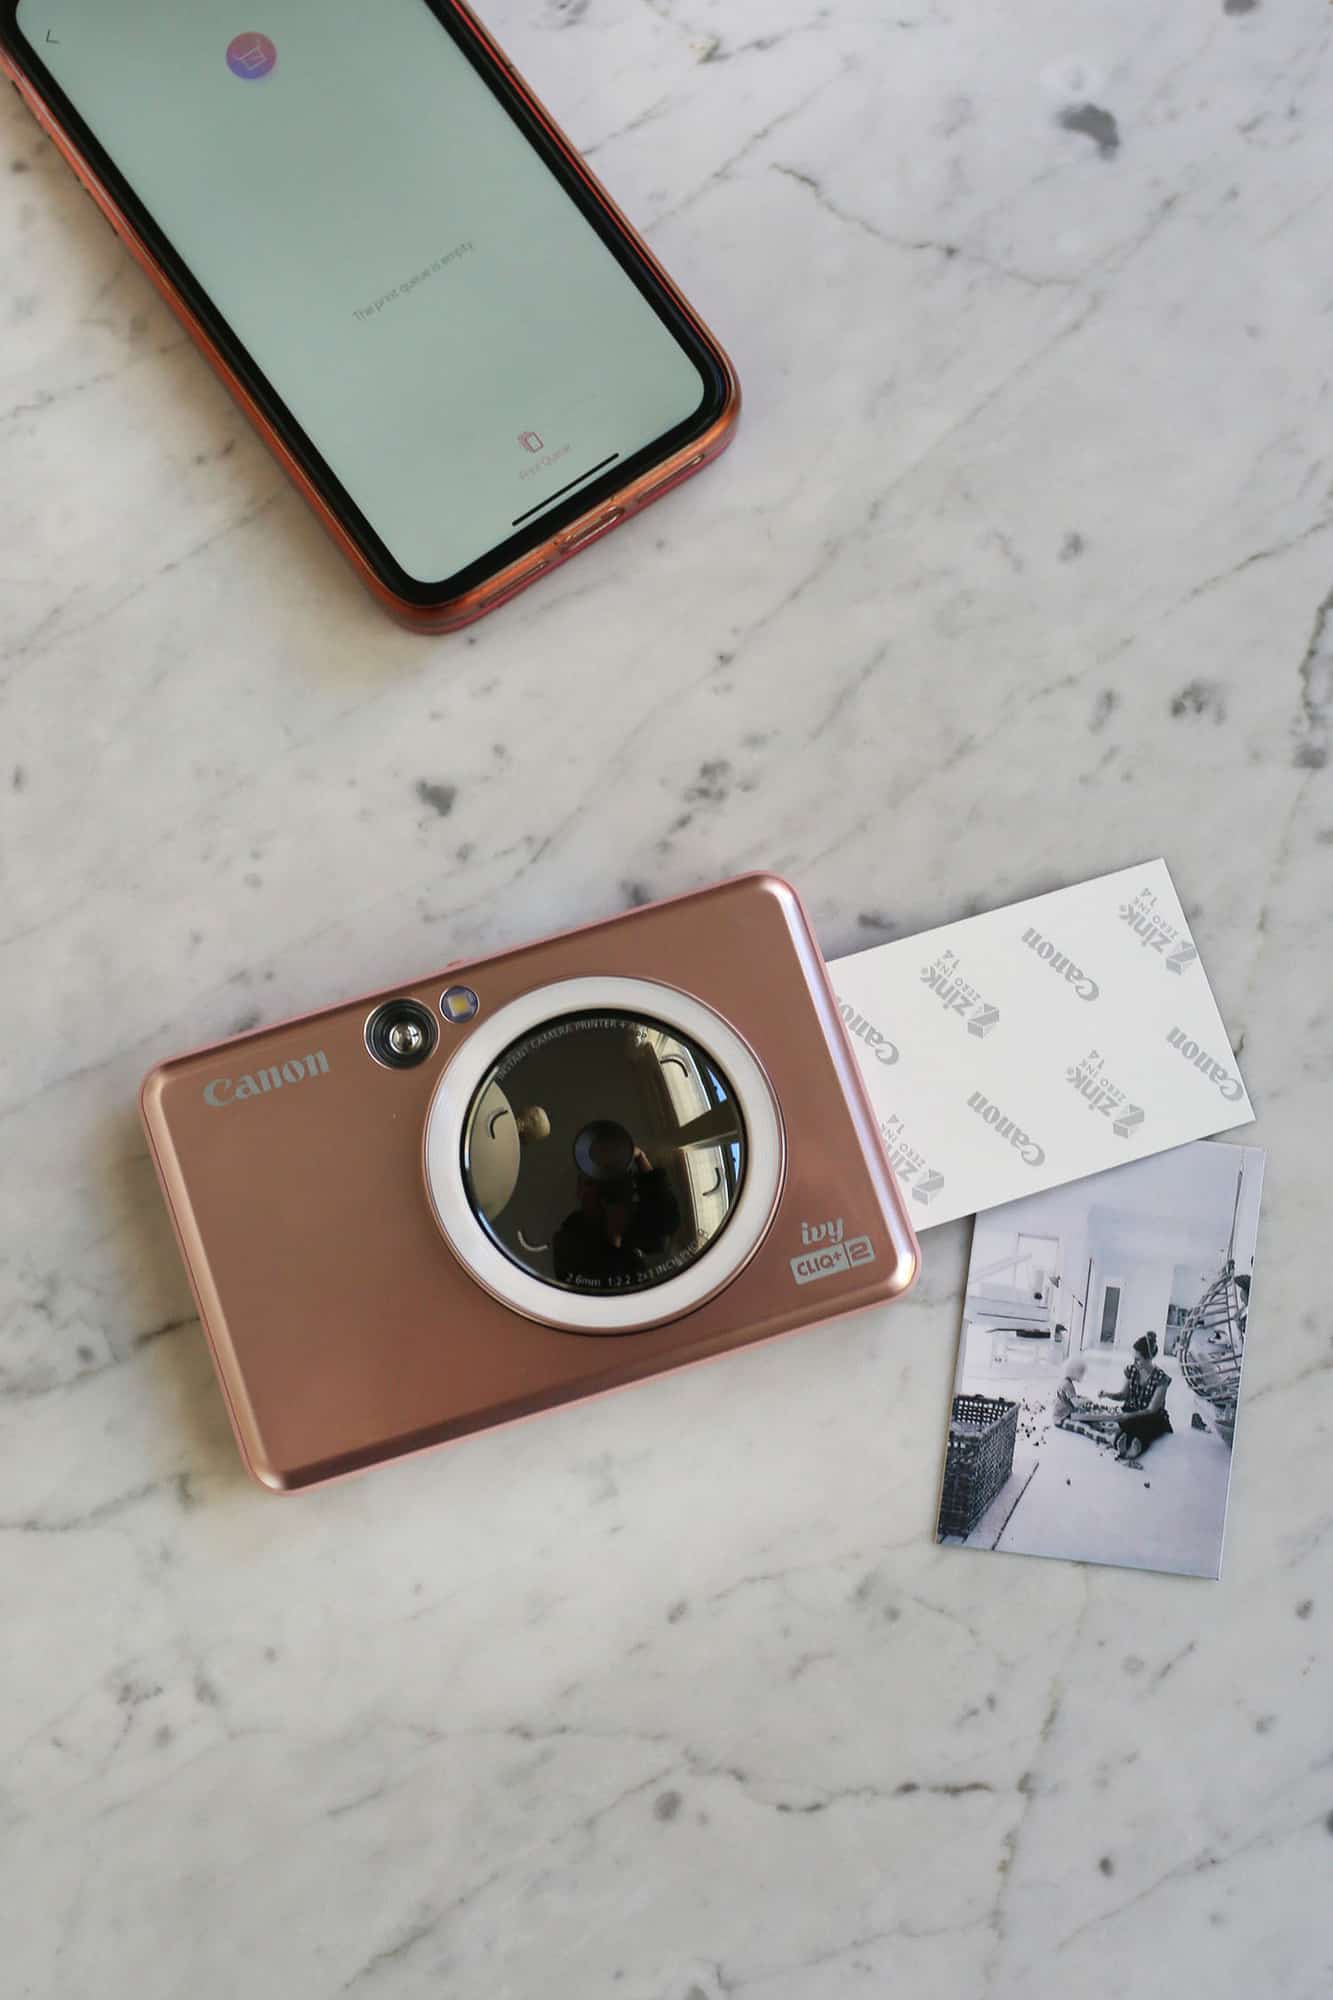 Step Three: Print your photos. I did a mix of photos of memories from this past year with my nieces, family, and my dog who passed away a couple months ago. I choose to do black and white photos, but you could do color as well. The app has some editing and design options you can use or you can edit your photos and simply print from the app. Either way!
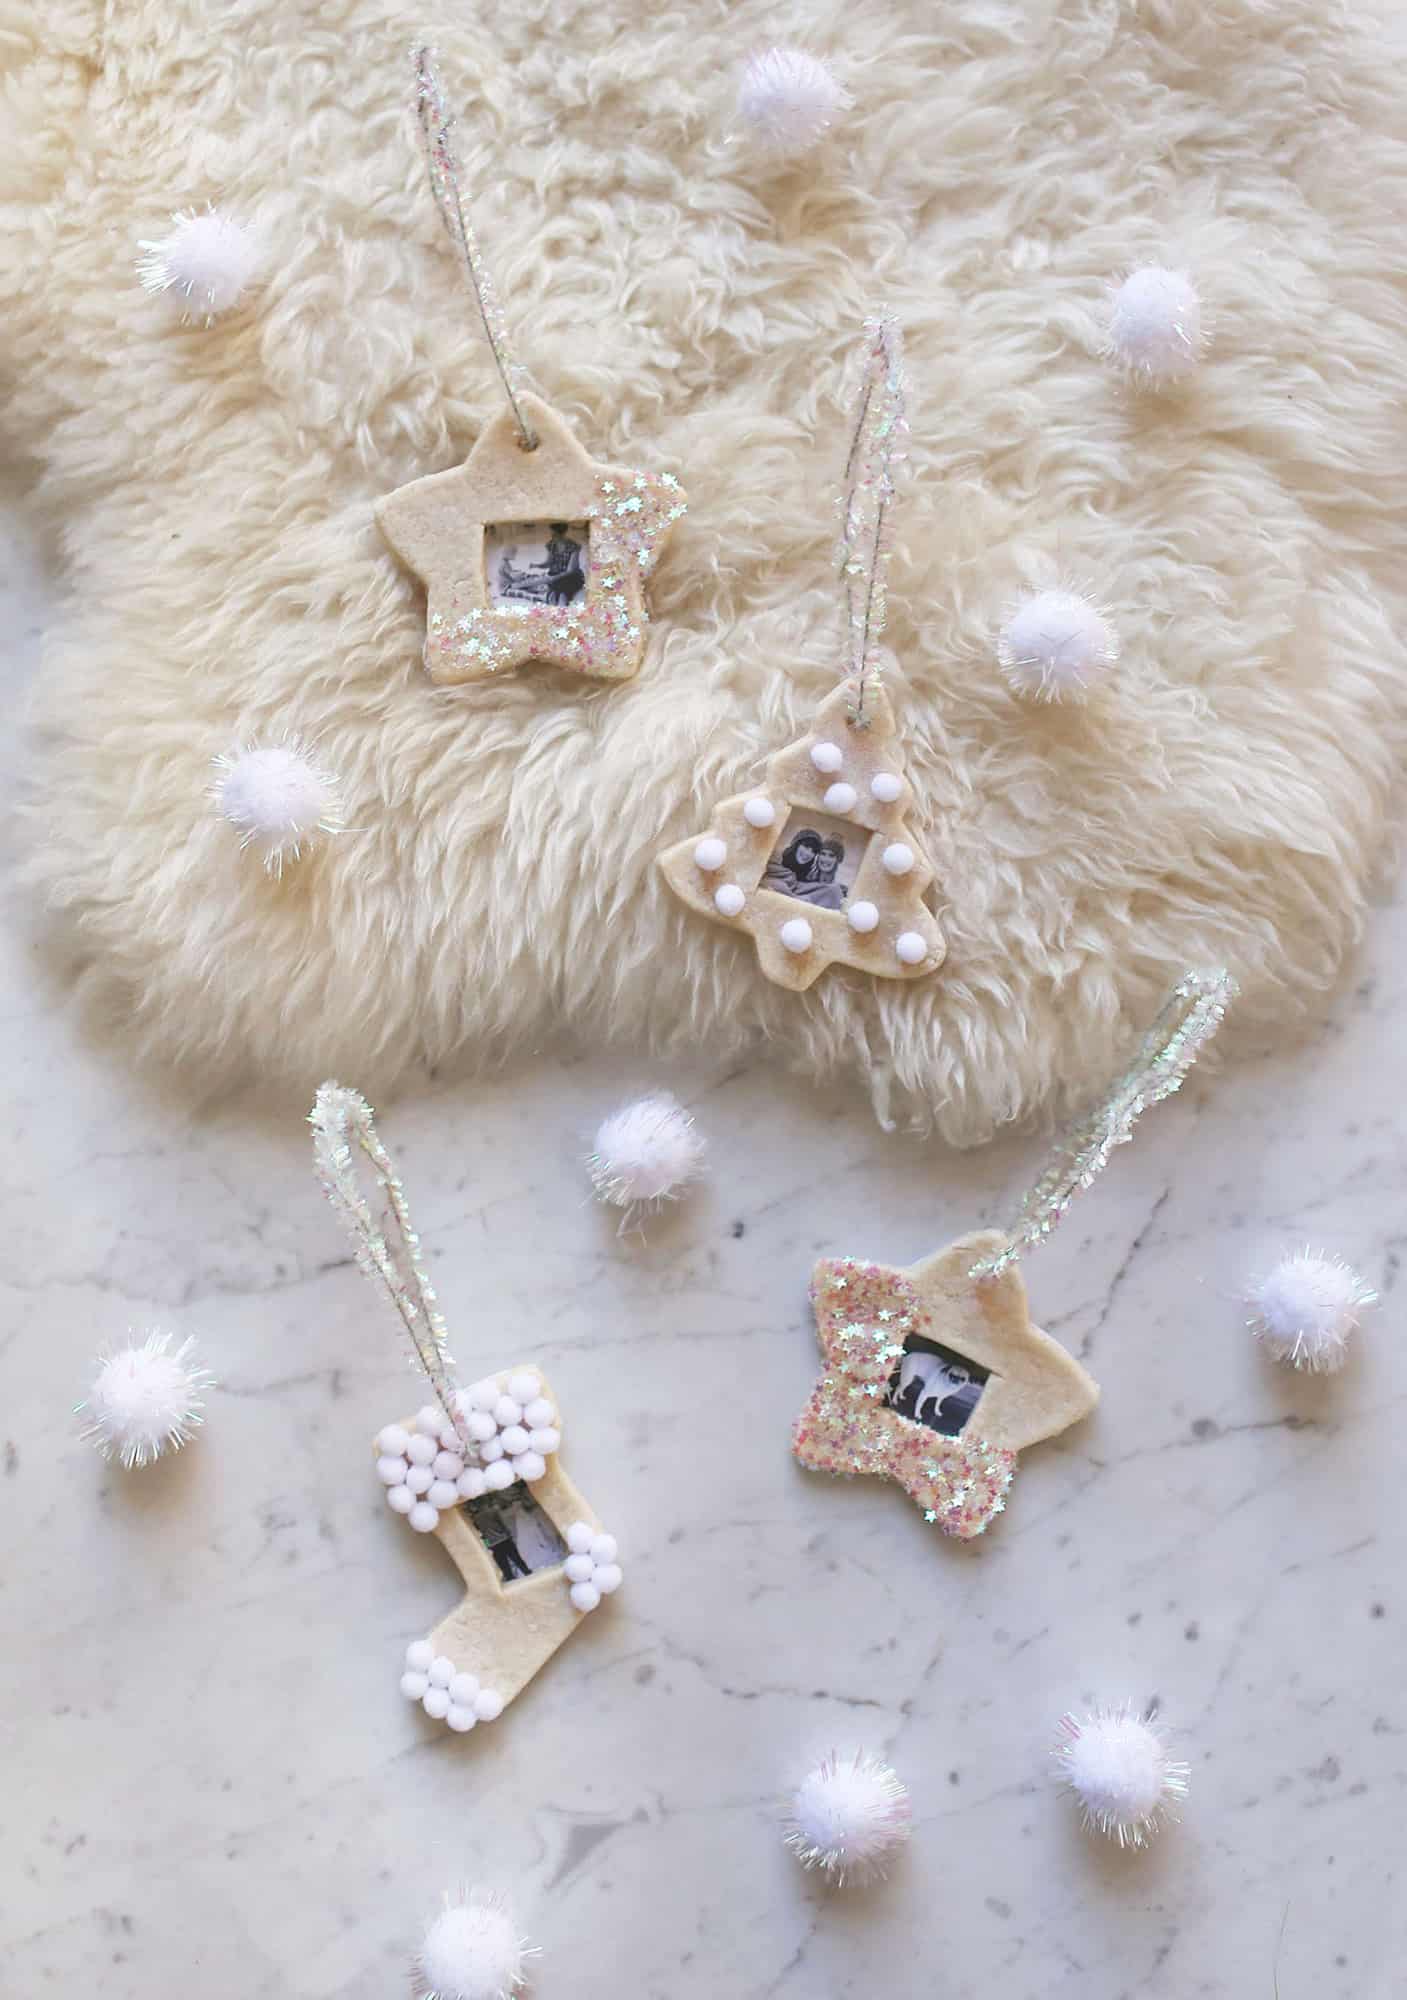
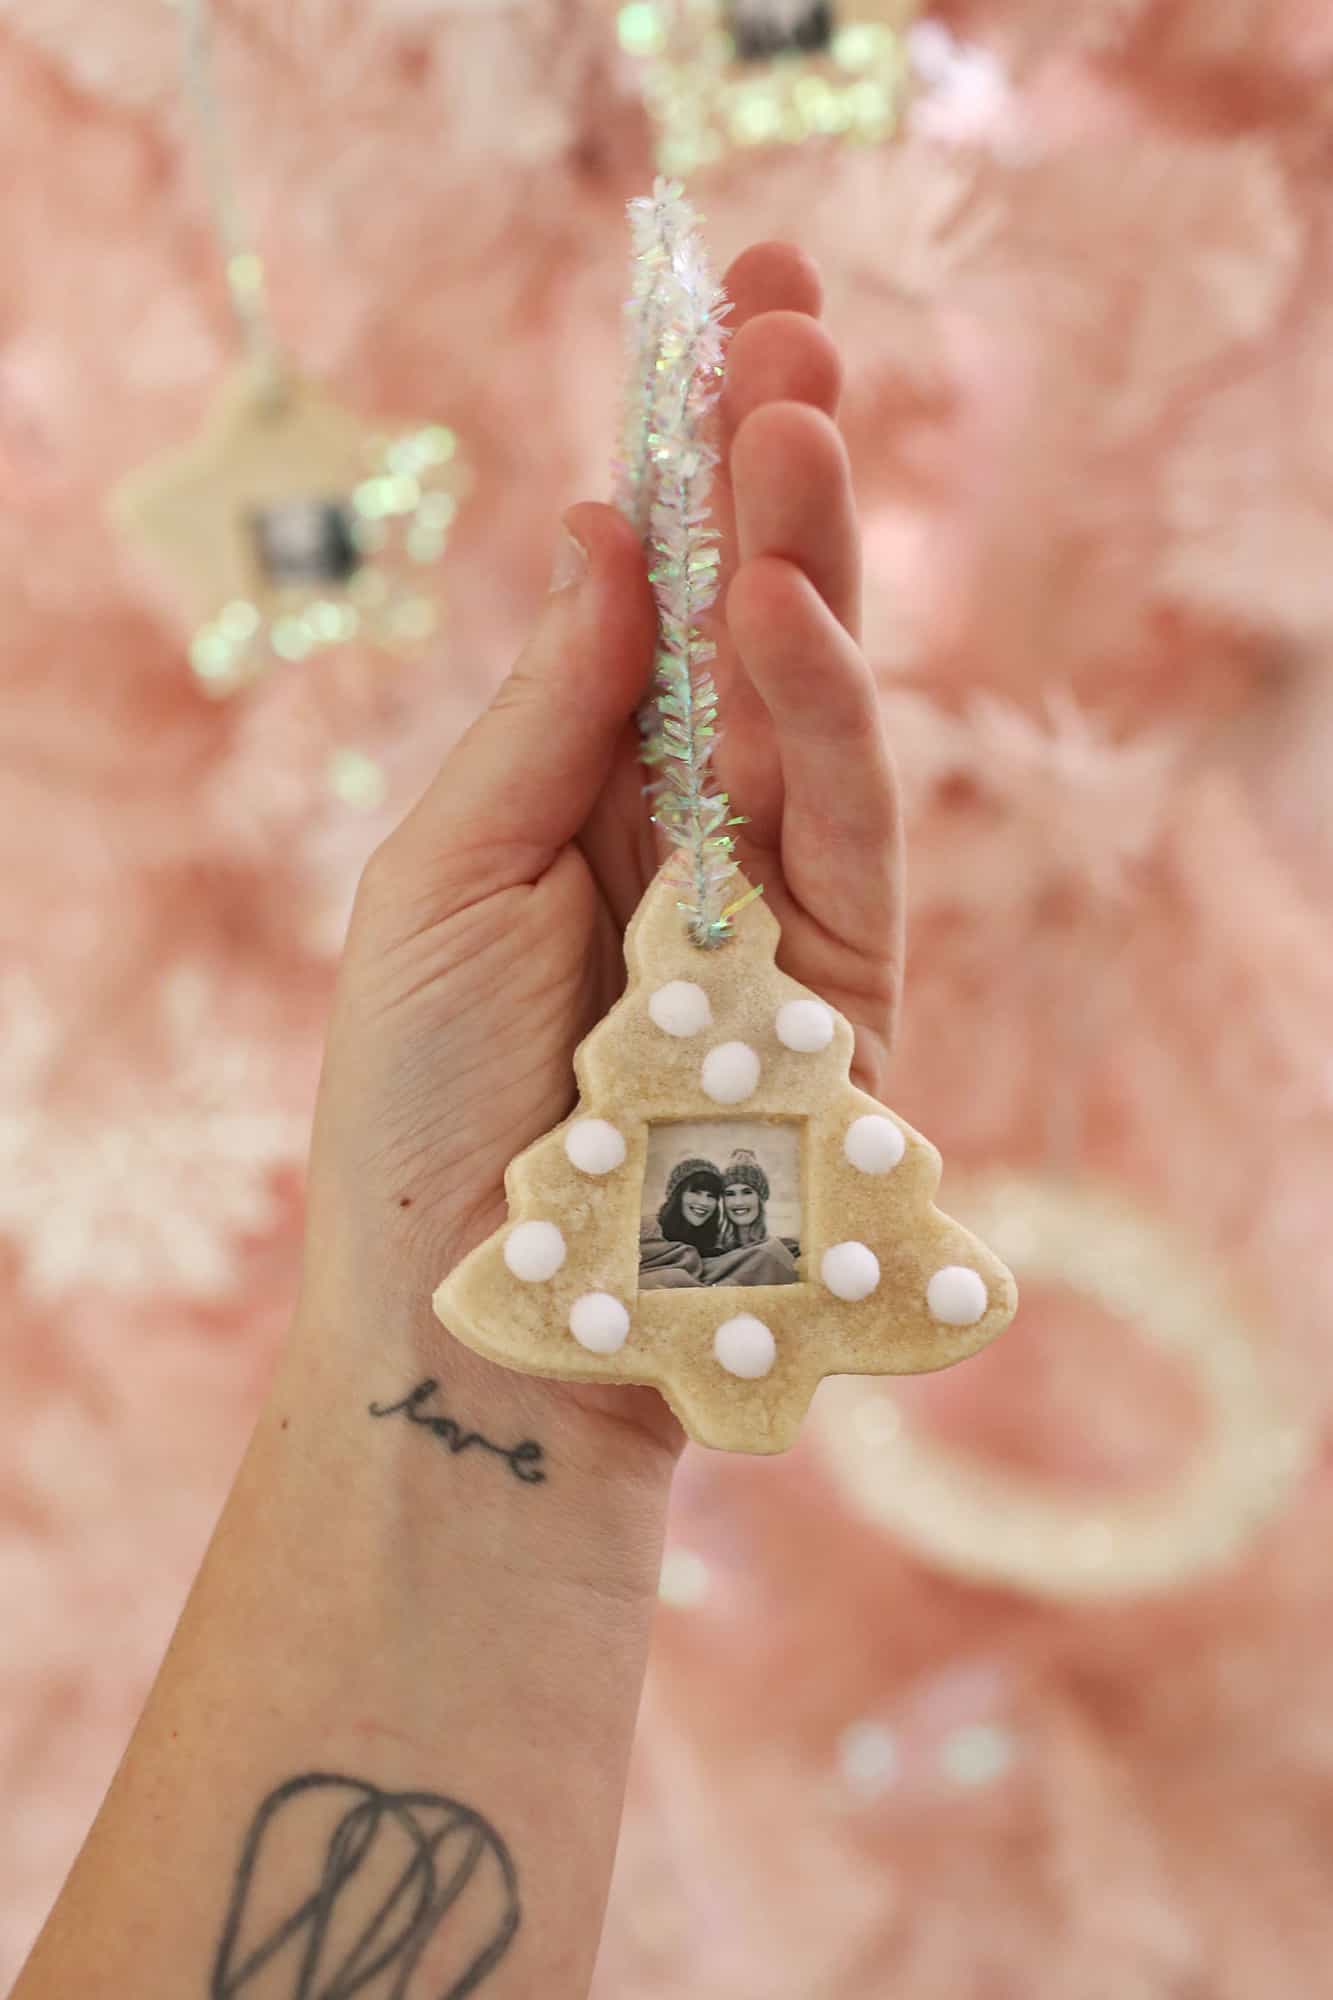
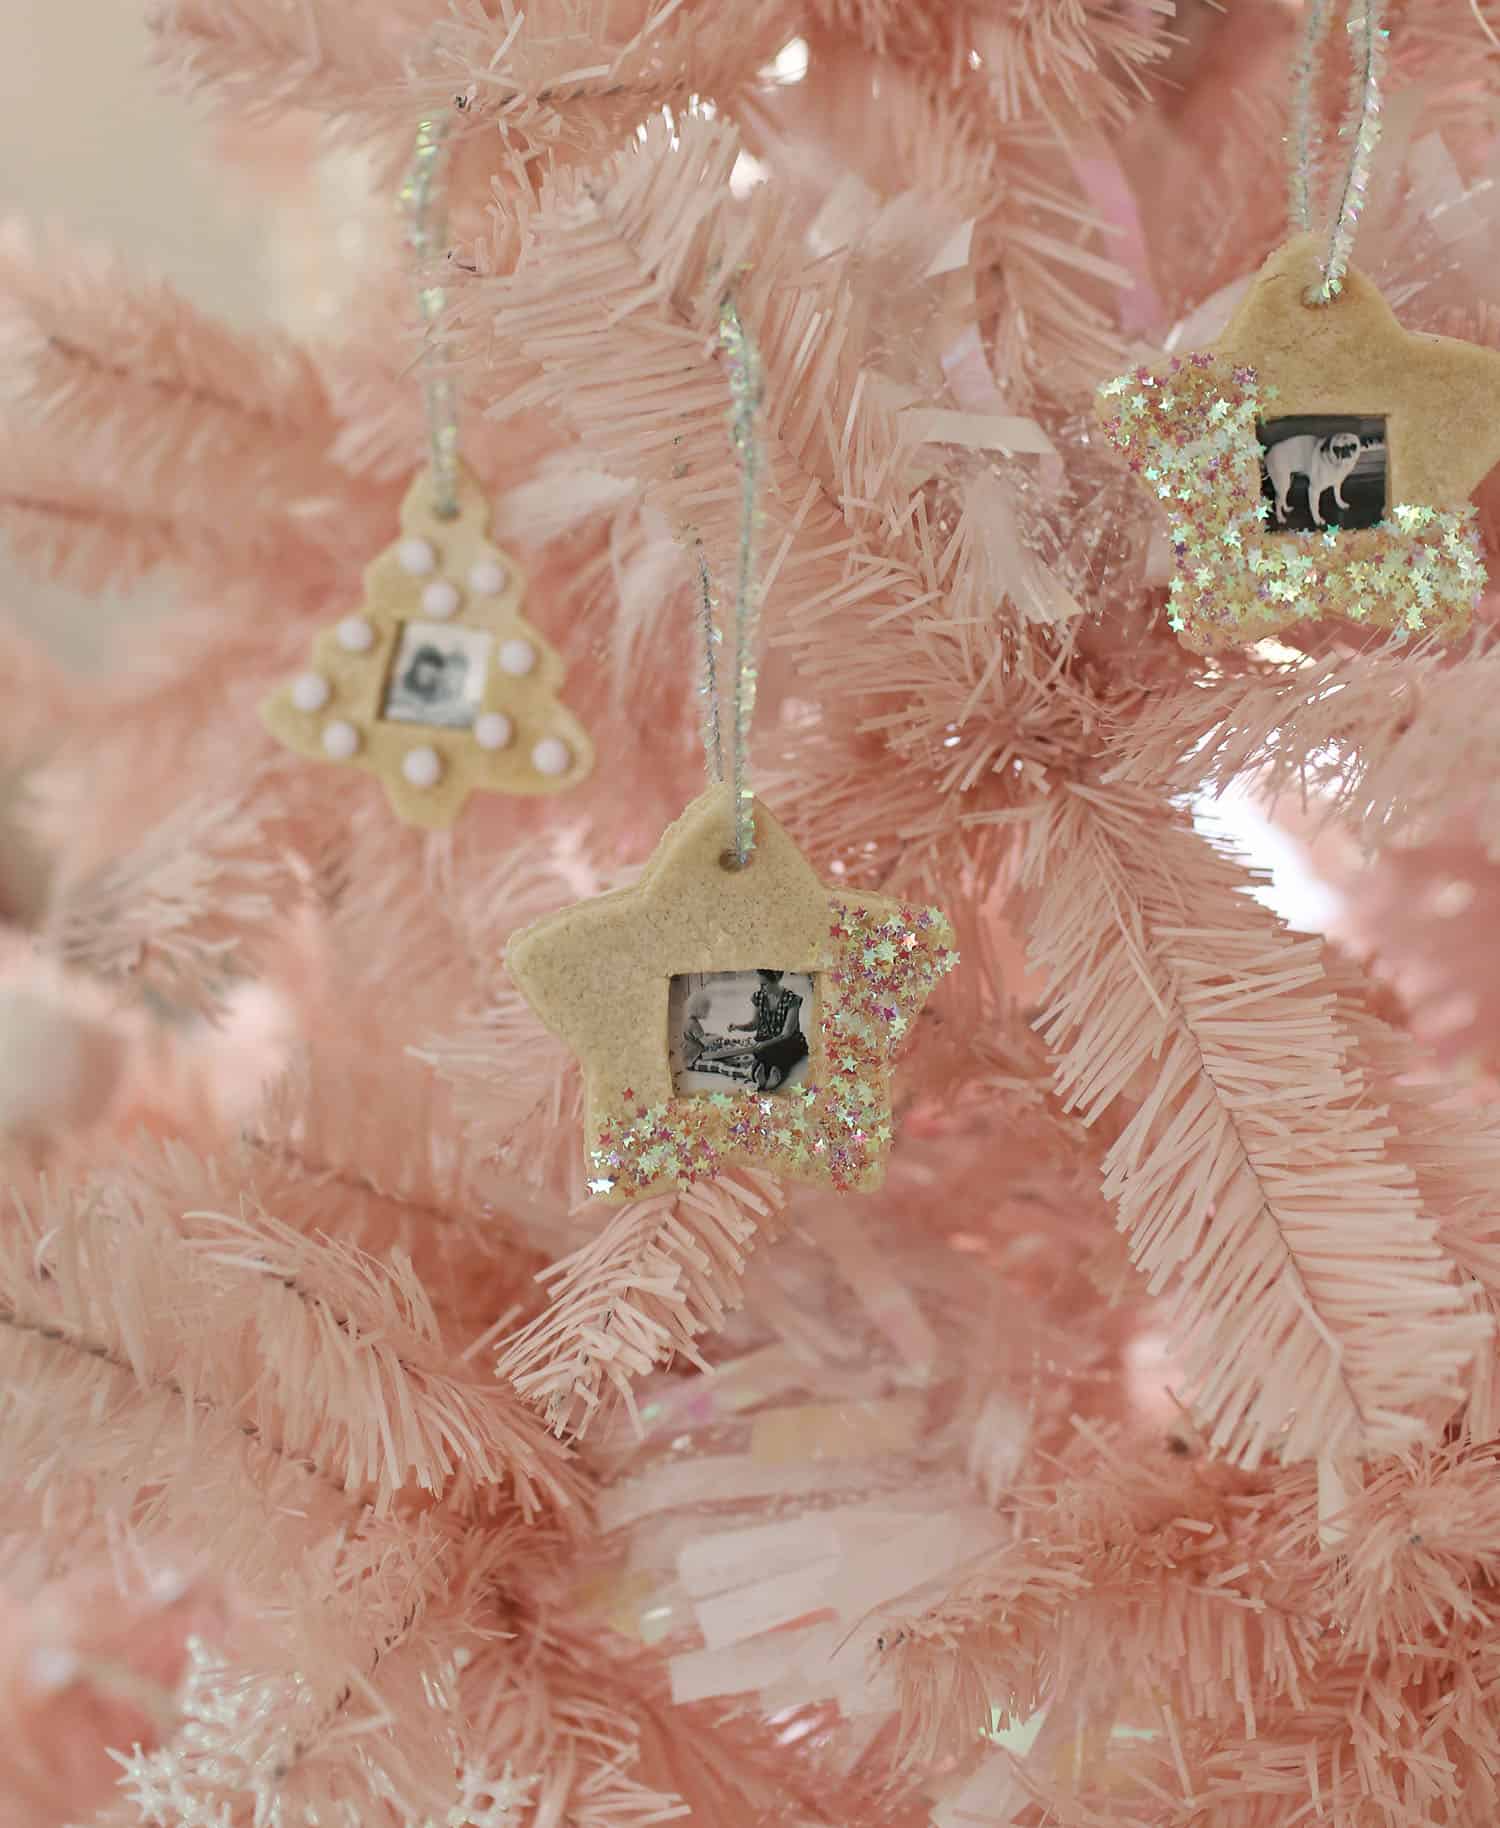
 Step Four: Decorate the frames and assemble. I added glitter and mini pom poms to the frames, but you could do all sorts of things—the sky’s the limit! You could paint your frames, glue other elements like yarn or collage papers. Once you have those done, trim and stick the photos to card stock or other thick paper and glue this to the back of the frame. If you are making ornaments, add the pipe cleaner or yarn for the hanging loop, and if you are making magnets, glue on your magnet back.
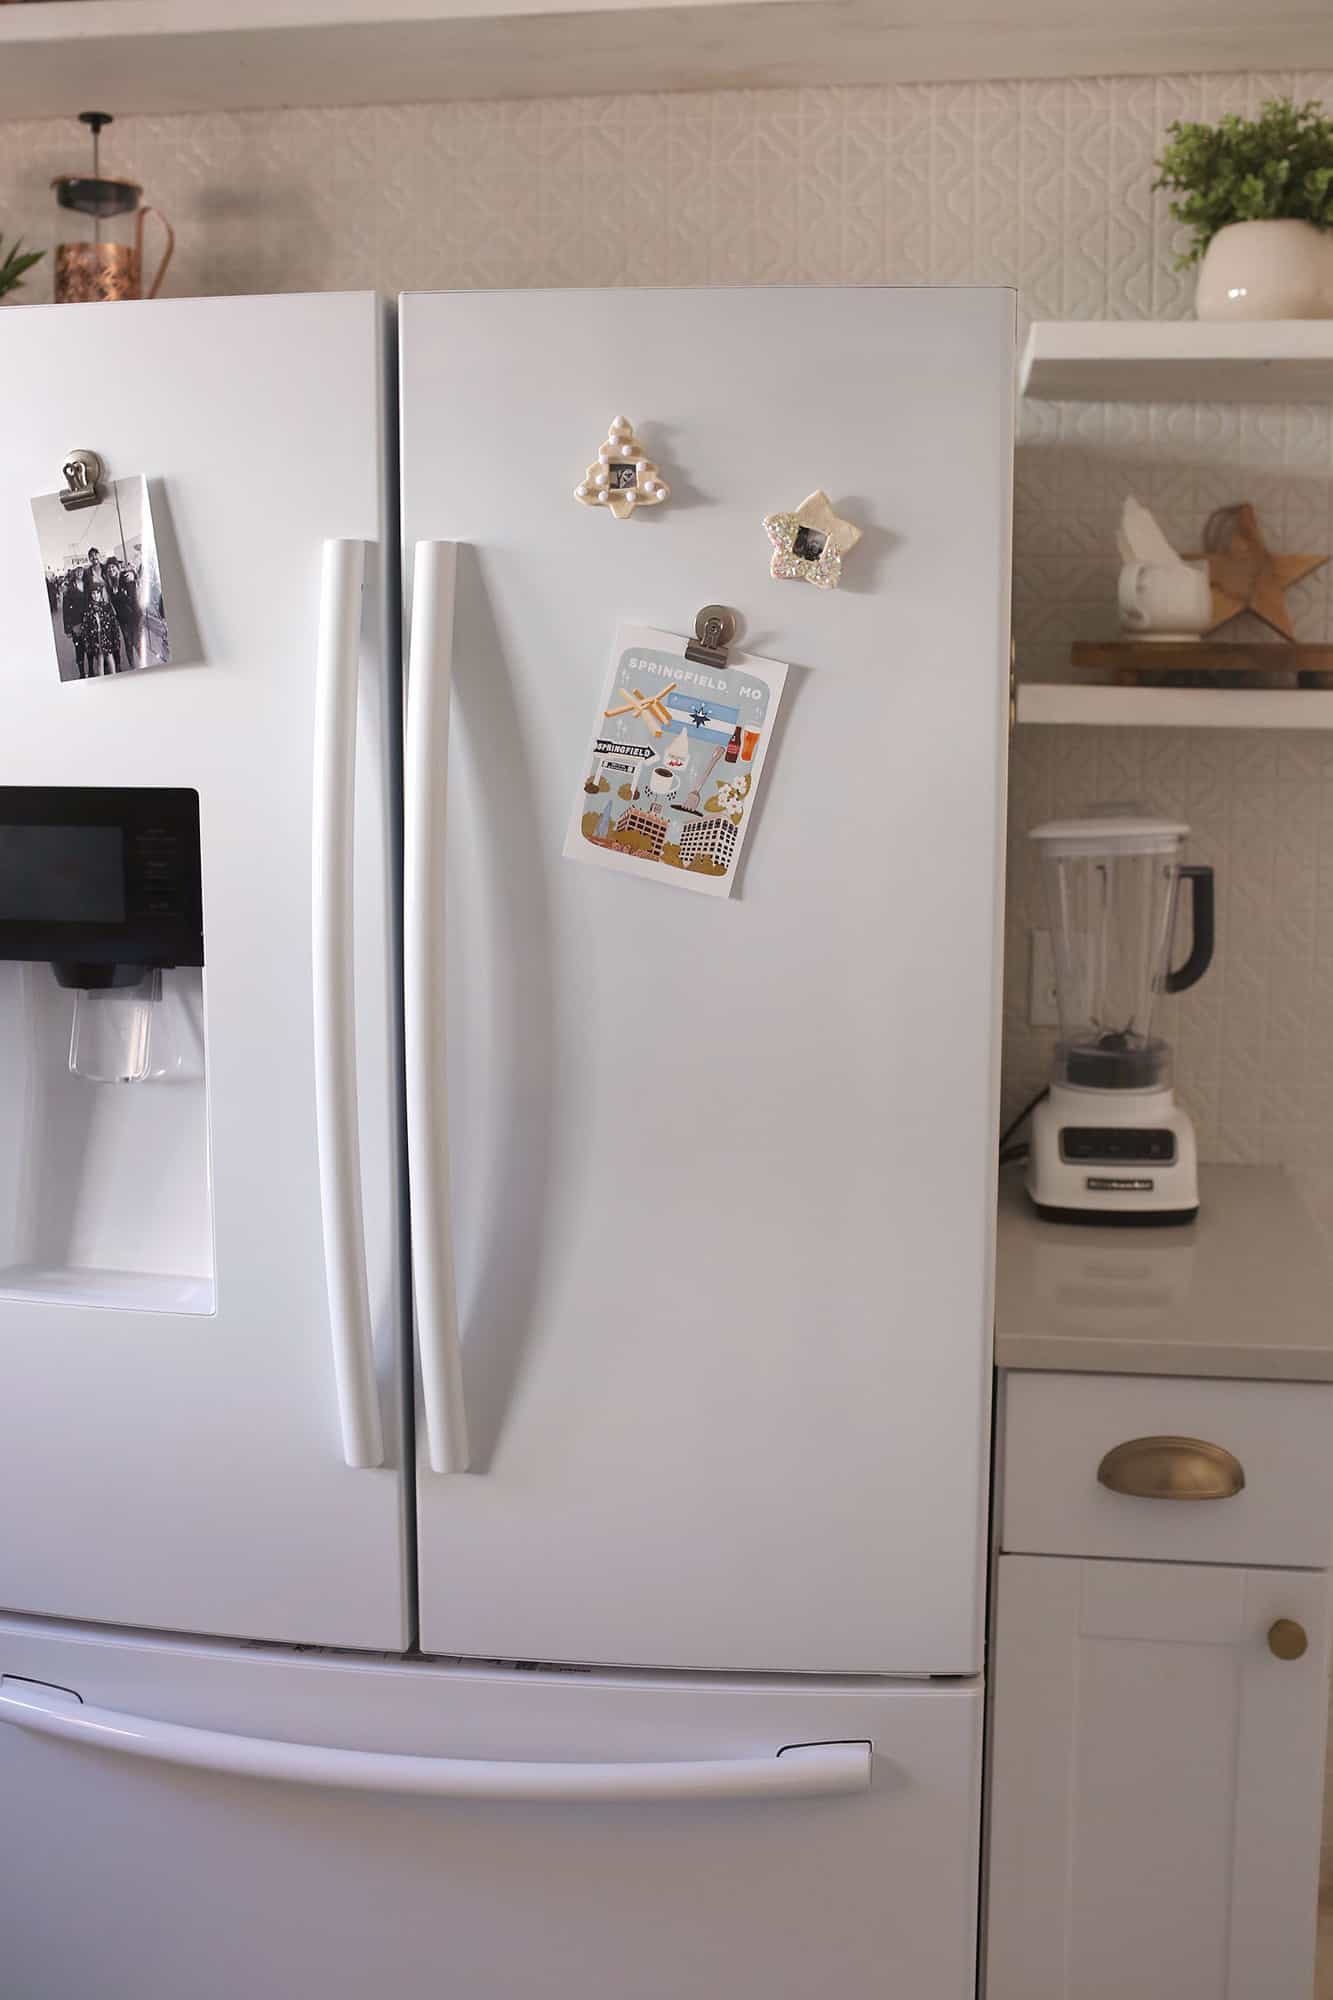
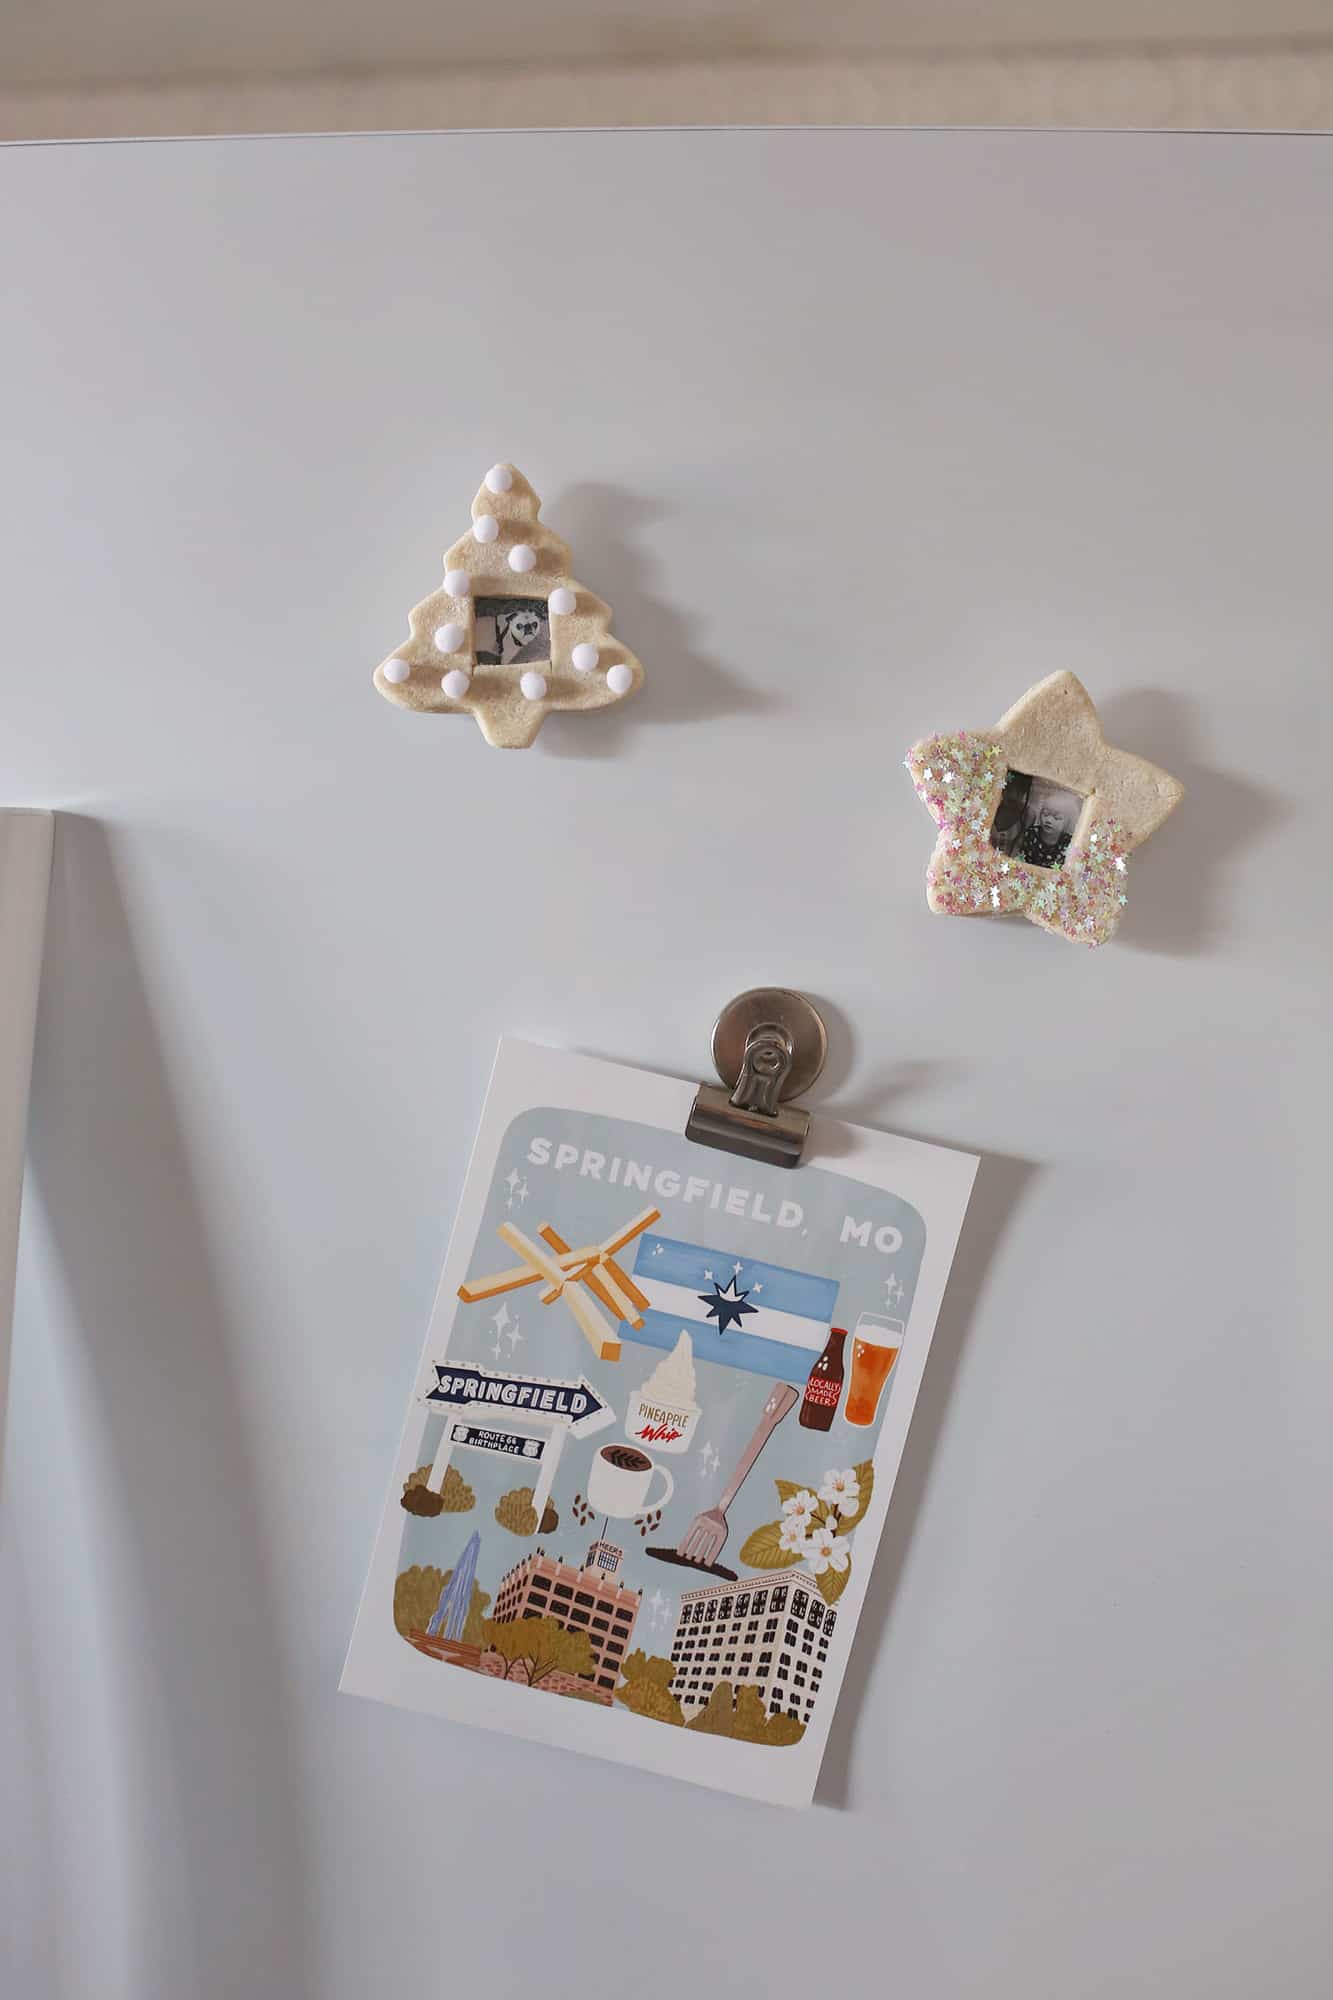 Here are a few magnets I made from my batch. 🙂

 This project was super fun to make on my own, but this would be a fun to one to do with friends or even kiddos. Happy holidays, friends! xo. Emma
Love this post? Sign up for our newsletter for more ideas!

Get creative ideas for recipes, crafts, decor, and more in your inbox!
 Get the How-To

Supplies
- 2 cups flour
- ½ cup salt
- ¾ cup water
- mixing bowl
- rolling pin
- cookie cutters
- parchment paper
- Canon IVY printer + paper
- card stock
- glitter, paint, or mini pom poms
- glue
- pipe cleaners, yarn, or magnet backs
Instructions
- Mix together the salt dough. In a mixing bowl, add the flour, salt, and water. Mix with a spoon or your hands until a dense dough forms.
- Cut out the shapes and bake. I used holiday cookie cutters, but you could also freehand your designs and use a knife or X-Acto to cut out the shapes. For the frames, add a small square to the center of the shapes. And for any shapes that you want to be ornaments use the top of a piping tip (or a knife/X-Acto) to cut a hole. Place the shapes on a baking sheet lined with parchment paper and bake at 200°F for 2-3 hours, until very dry. Allow to fully dry out on a cooling rack as well.
- Print your photos. I did a mix of photos of memories from this past year with my nieces, family, and my dog who passed away a couple months ago. I choose to do black and white photos, but the Ivy printer can do color as well.
- Decorate the frames and assemble. I added glitter and mini pom poms to the frames, but you could do all sorts of things—the sky’s the limit! You could paint your frames, glue other elements like yarn or collage papers. Once you have those done, trim and stick the photos to card stock or other thick paper and glue this to the back of the frame. If you are making ornaments, add the pipe cleaner or yarn for the hanging loop, and if you are making magnets, glue on your magnet back.
Notes
Credits // Author and Photography: Emma Chapman. Photos edited with A Color Story Desktop.


I made these with my grandkids and they loved it! They had so much fun mixing, shaping, and cutting, even the littlest one was super excited about them. Unfortunately, her involvement included dumping glitter and flour on the floor. Even though I need a rug cleaning now, the memories made were worth it and this is the easiest tutorial I’ve seen. So cute, thanks for the inspiration!
This is great-just be VERY careful to keep this away from dogs. I used to work at a pet poison center and salt dough ornaments are fatal.
Oh my gosh, fatal?! Thank you for the heads up. I actually would not have guessed that (although, I wouldn’t want anyone to consume these, as they are not meant to be food).
Was just curious what brand of glitter you are using? Love the stars!
A great Christmas DIY during quarantine !
Great idea! I’m definitely doing that with my kids this week end – thank you 🙂
Not related but just curious – this does not look like your kitchen – have you moved ? (I loved your kitchen, so if you did, I look forward to seeing the new one :-))
This might be a dumb question, but what kind of glue do recommend? We made salt dough all the time as a kid but never added anything but paint. I’m excited to make these as gifts!
Love this idea!!! Fun and easy but beautiful! A perfect project in my opinion.