Just in time for the holidays, you can make your own ornaments and gift tags using oven bake clay!
Oven bake clay is a quick and easy way to make ornaments in just about any shape you want (just use cookie cutters!) and you can decorate them with paint, paint pens, stamps, or puff paint for a festive holiday activity for all ages.
Is there a clay that’s best to use for clay ornaments?
As long as you are using a clay that eventually hardens, you should be fine. But choosing a firmer oven bake clay over the texture of a soft air dry clay will give you the ability to roll it out smoother and get cleaner edges with your cookie cutter.

Supplies:
–oven bake clay
–rolling pin
–bakers twine (I love colored bakers twine for this as well!)
–acrylic paint, puff paint, stamps and ink, or paint pens
–cookie cutters
-a straw
–paint brushes

Begin by rolling out your clay into a thin, even sheet (about 5/8″ thick). Using your cookie cutters, cut out shapes in different sizes.
You can do any cookie cutter shape you have in your cupboard!
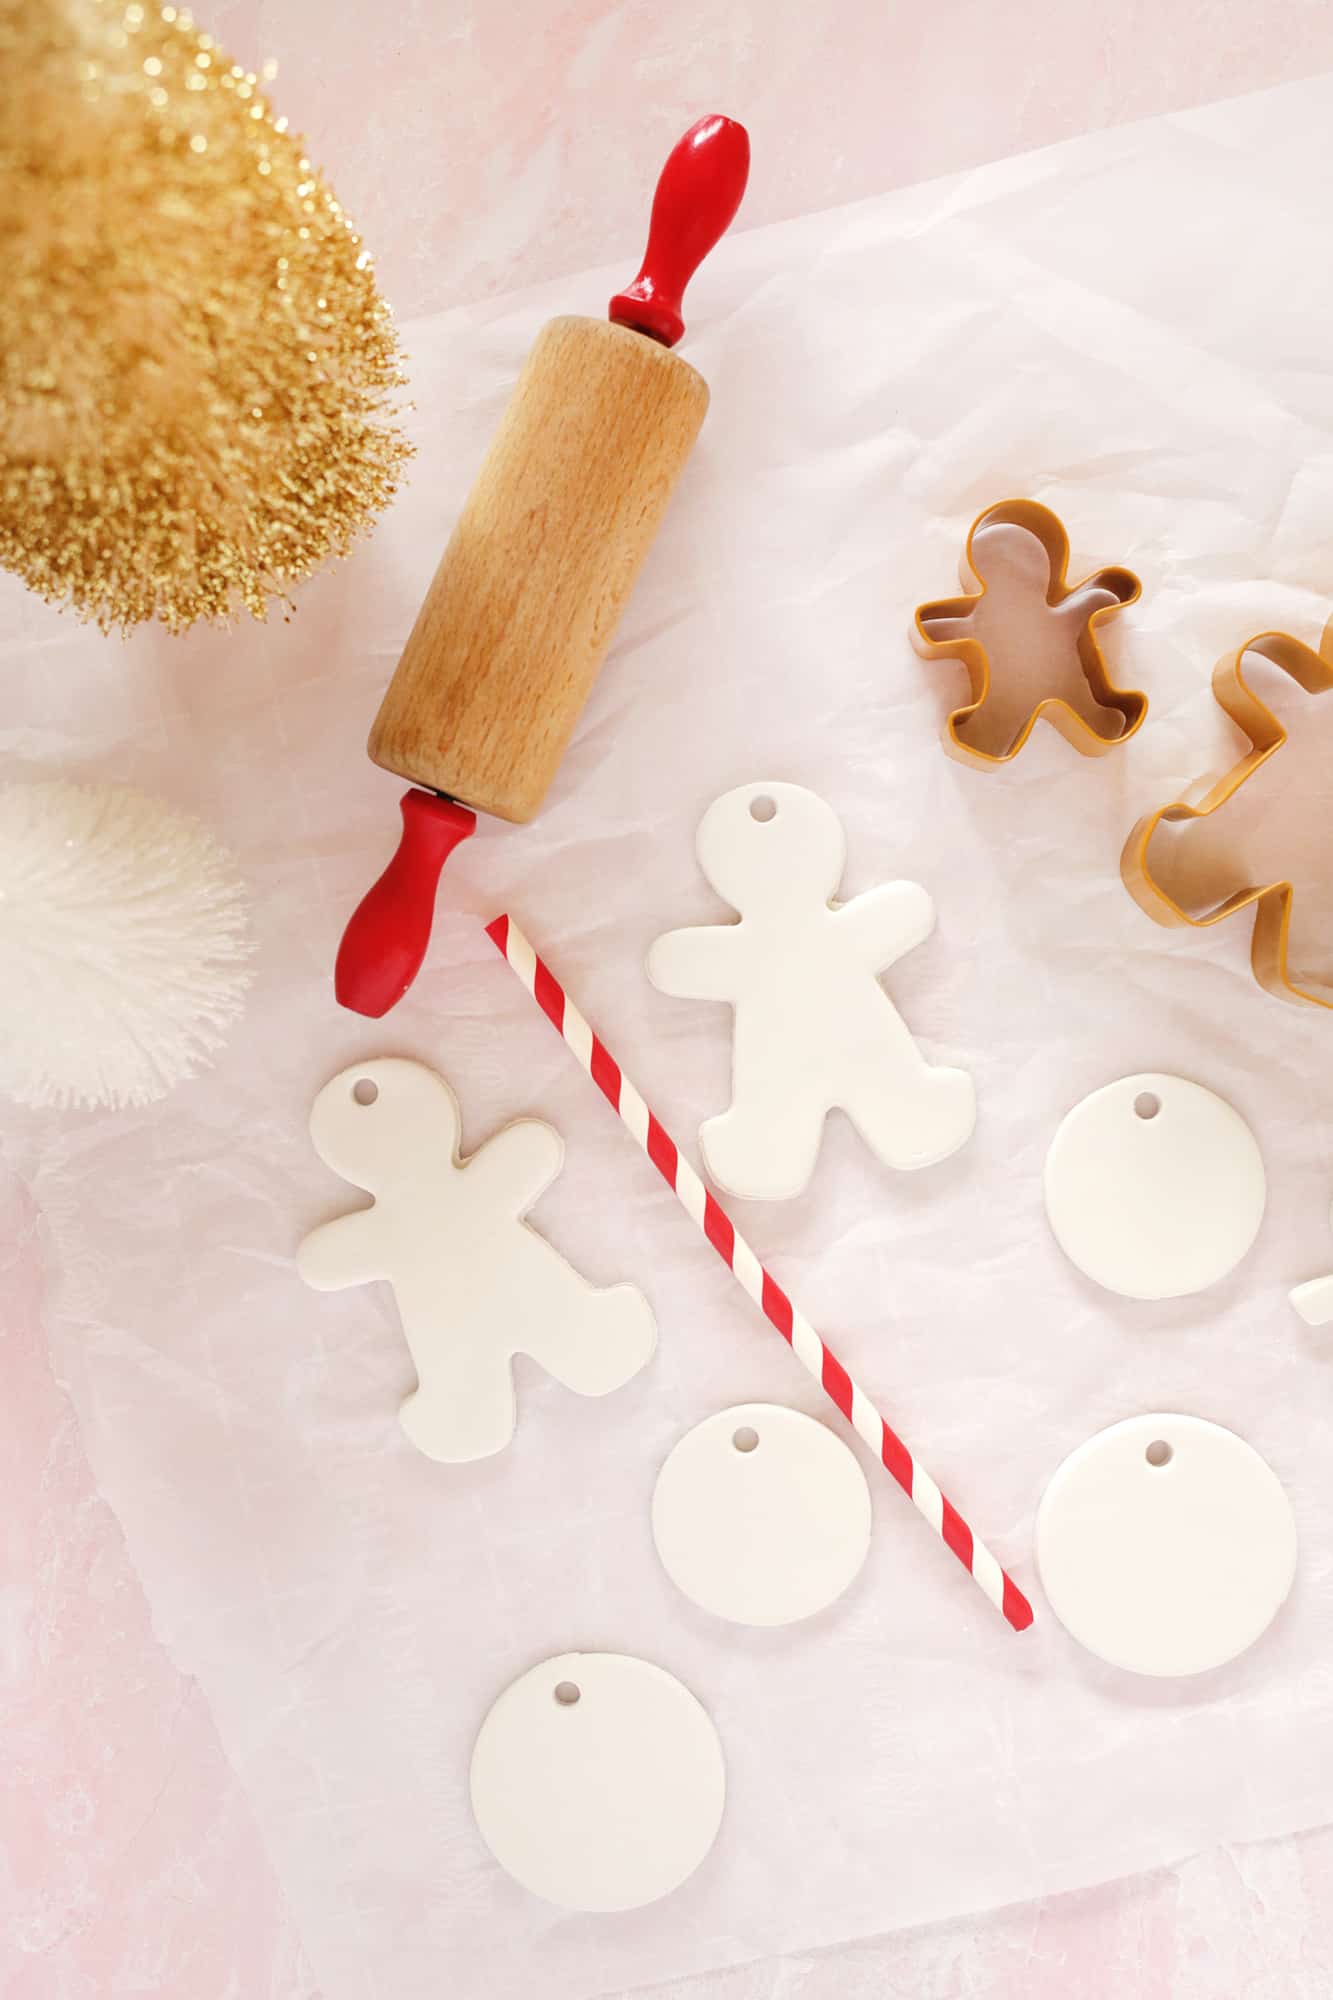
Next, poke holes in the tops of all your ornaments using a straw.
Love DIY projects that use clay? Check out these posts!
Or check out 20 Clay Craft Projects!

Bake according to the directions on the package. If you are using the original Sculpey oven bake clay, it should be on a glass sheet or dish, baking at 275°F for 15 minutes for every ¼ inch of clay thickness.
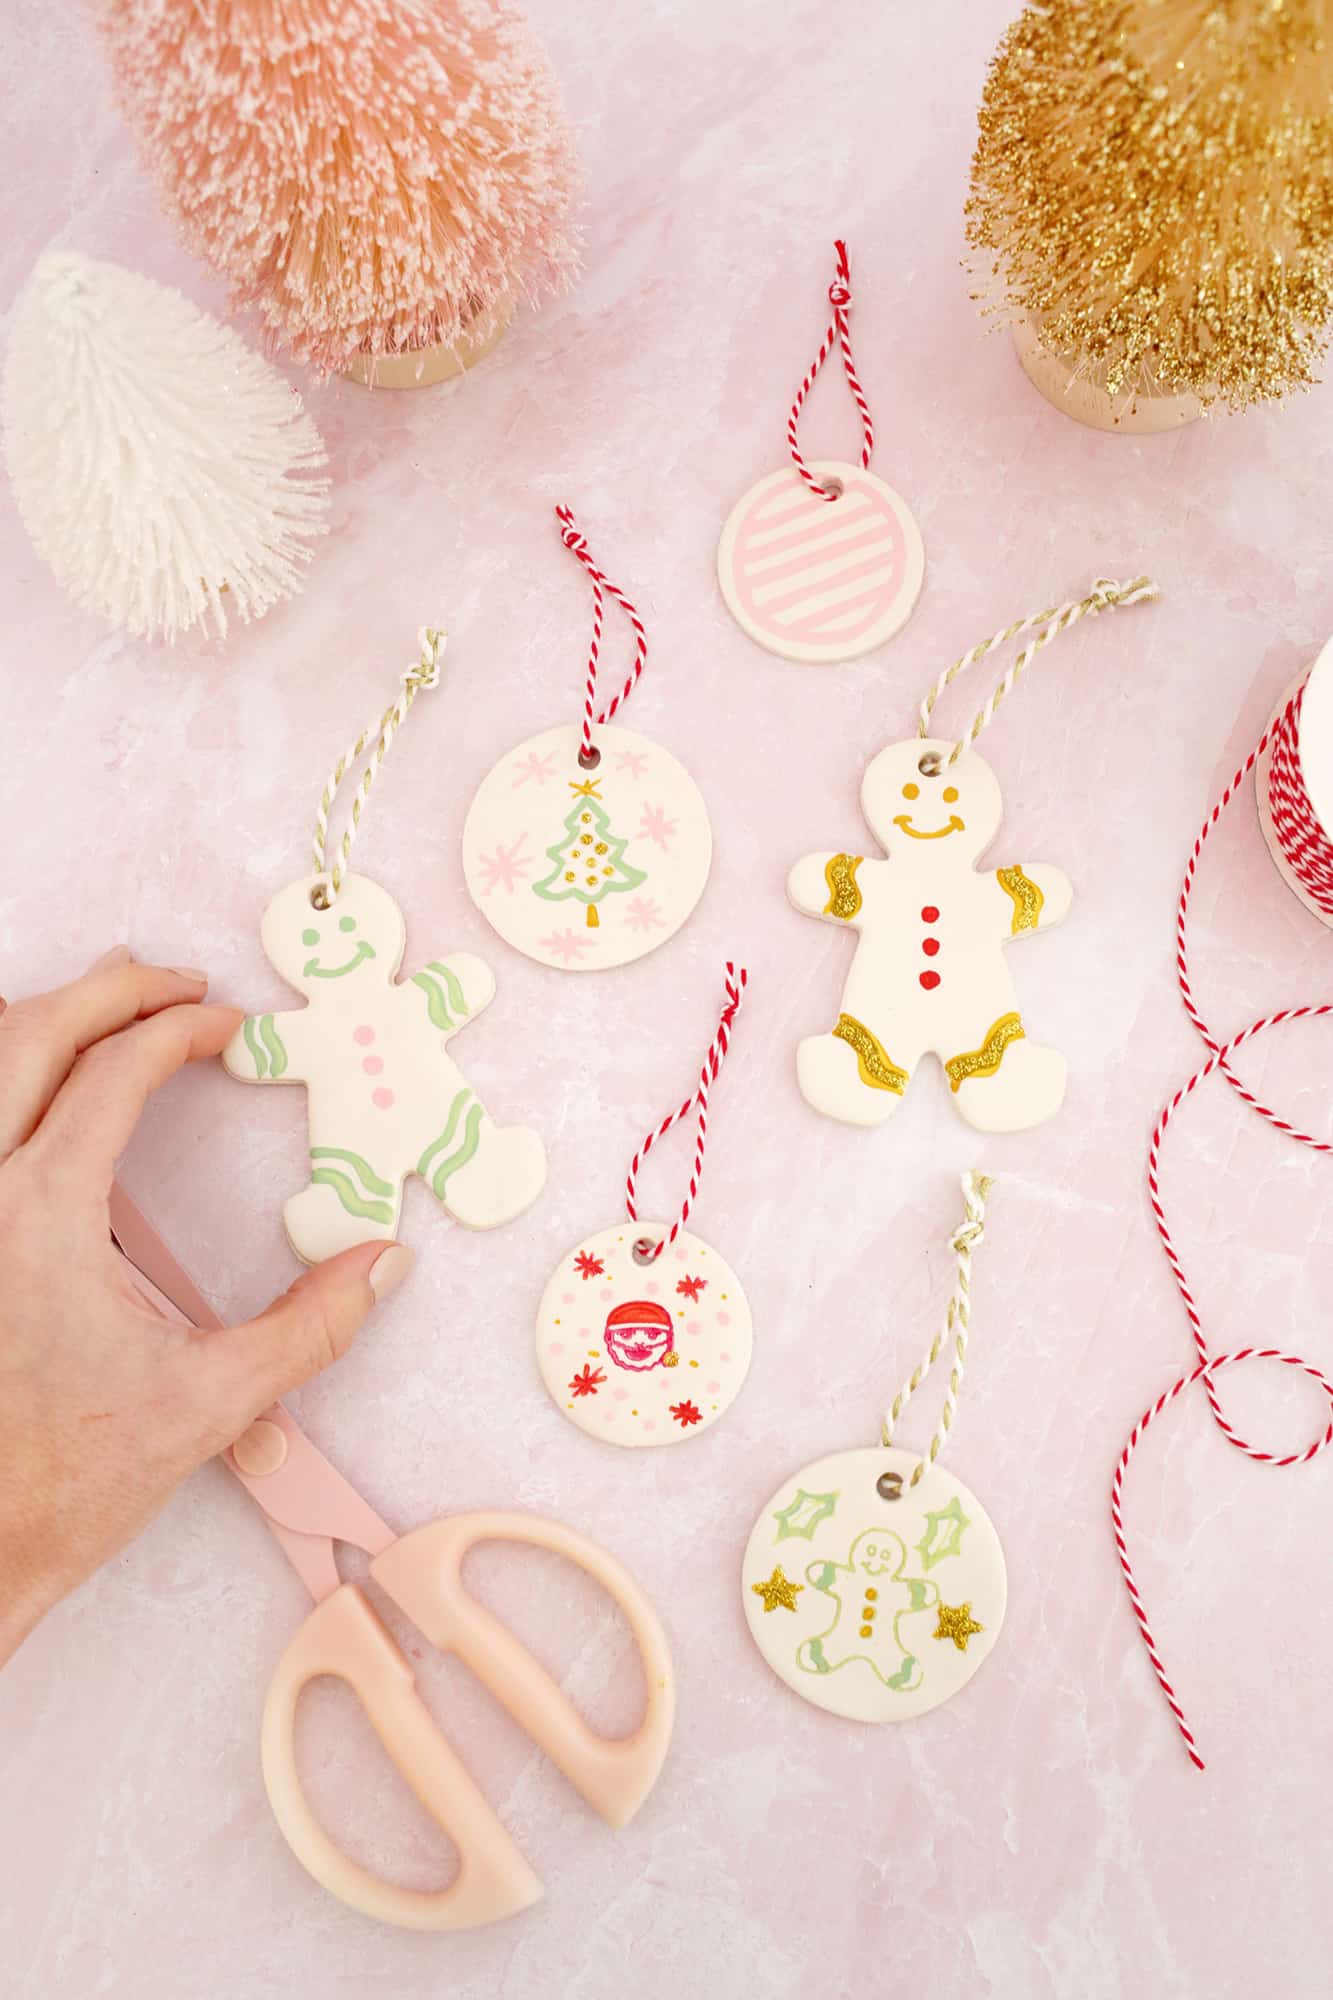
After you have baked the clay and let the ornaments cool, design to your heart’s content! Finish the ornaments with bakers twine or other thin ribbon or yarn.
I did mine with paint, stamps, and some glitter puff paint, but you can also use black and white paint and paint pens like our friend Kelli did.
Looking for a cute project with salt dough instead? Try these!


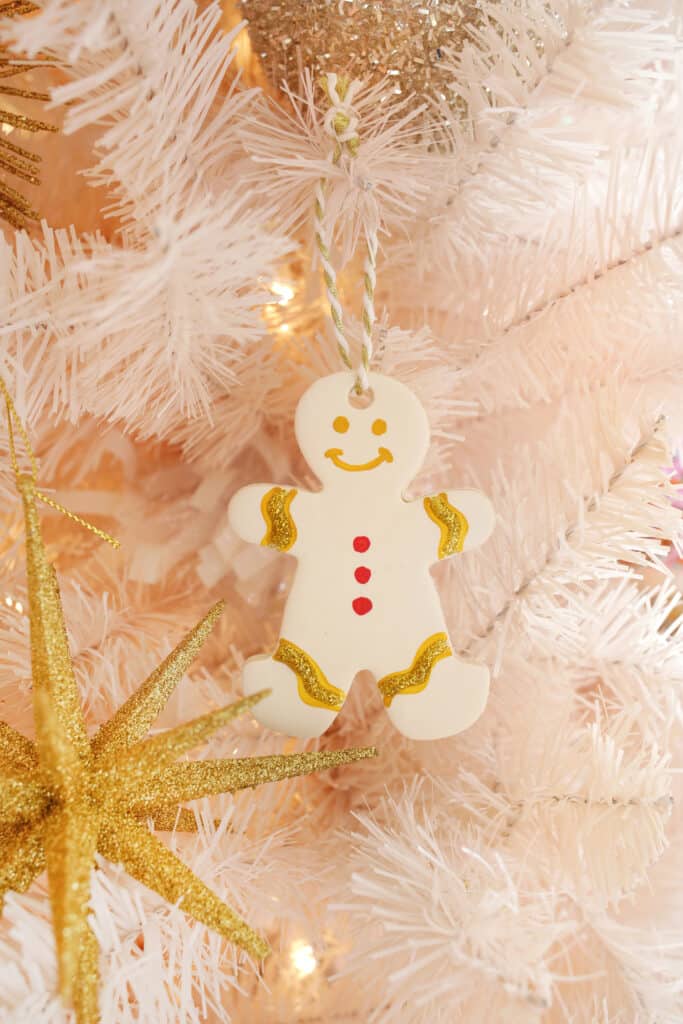
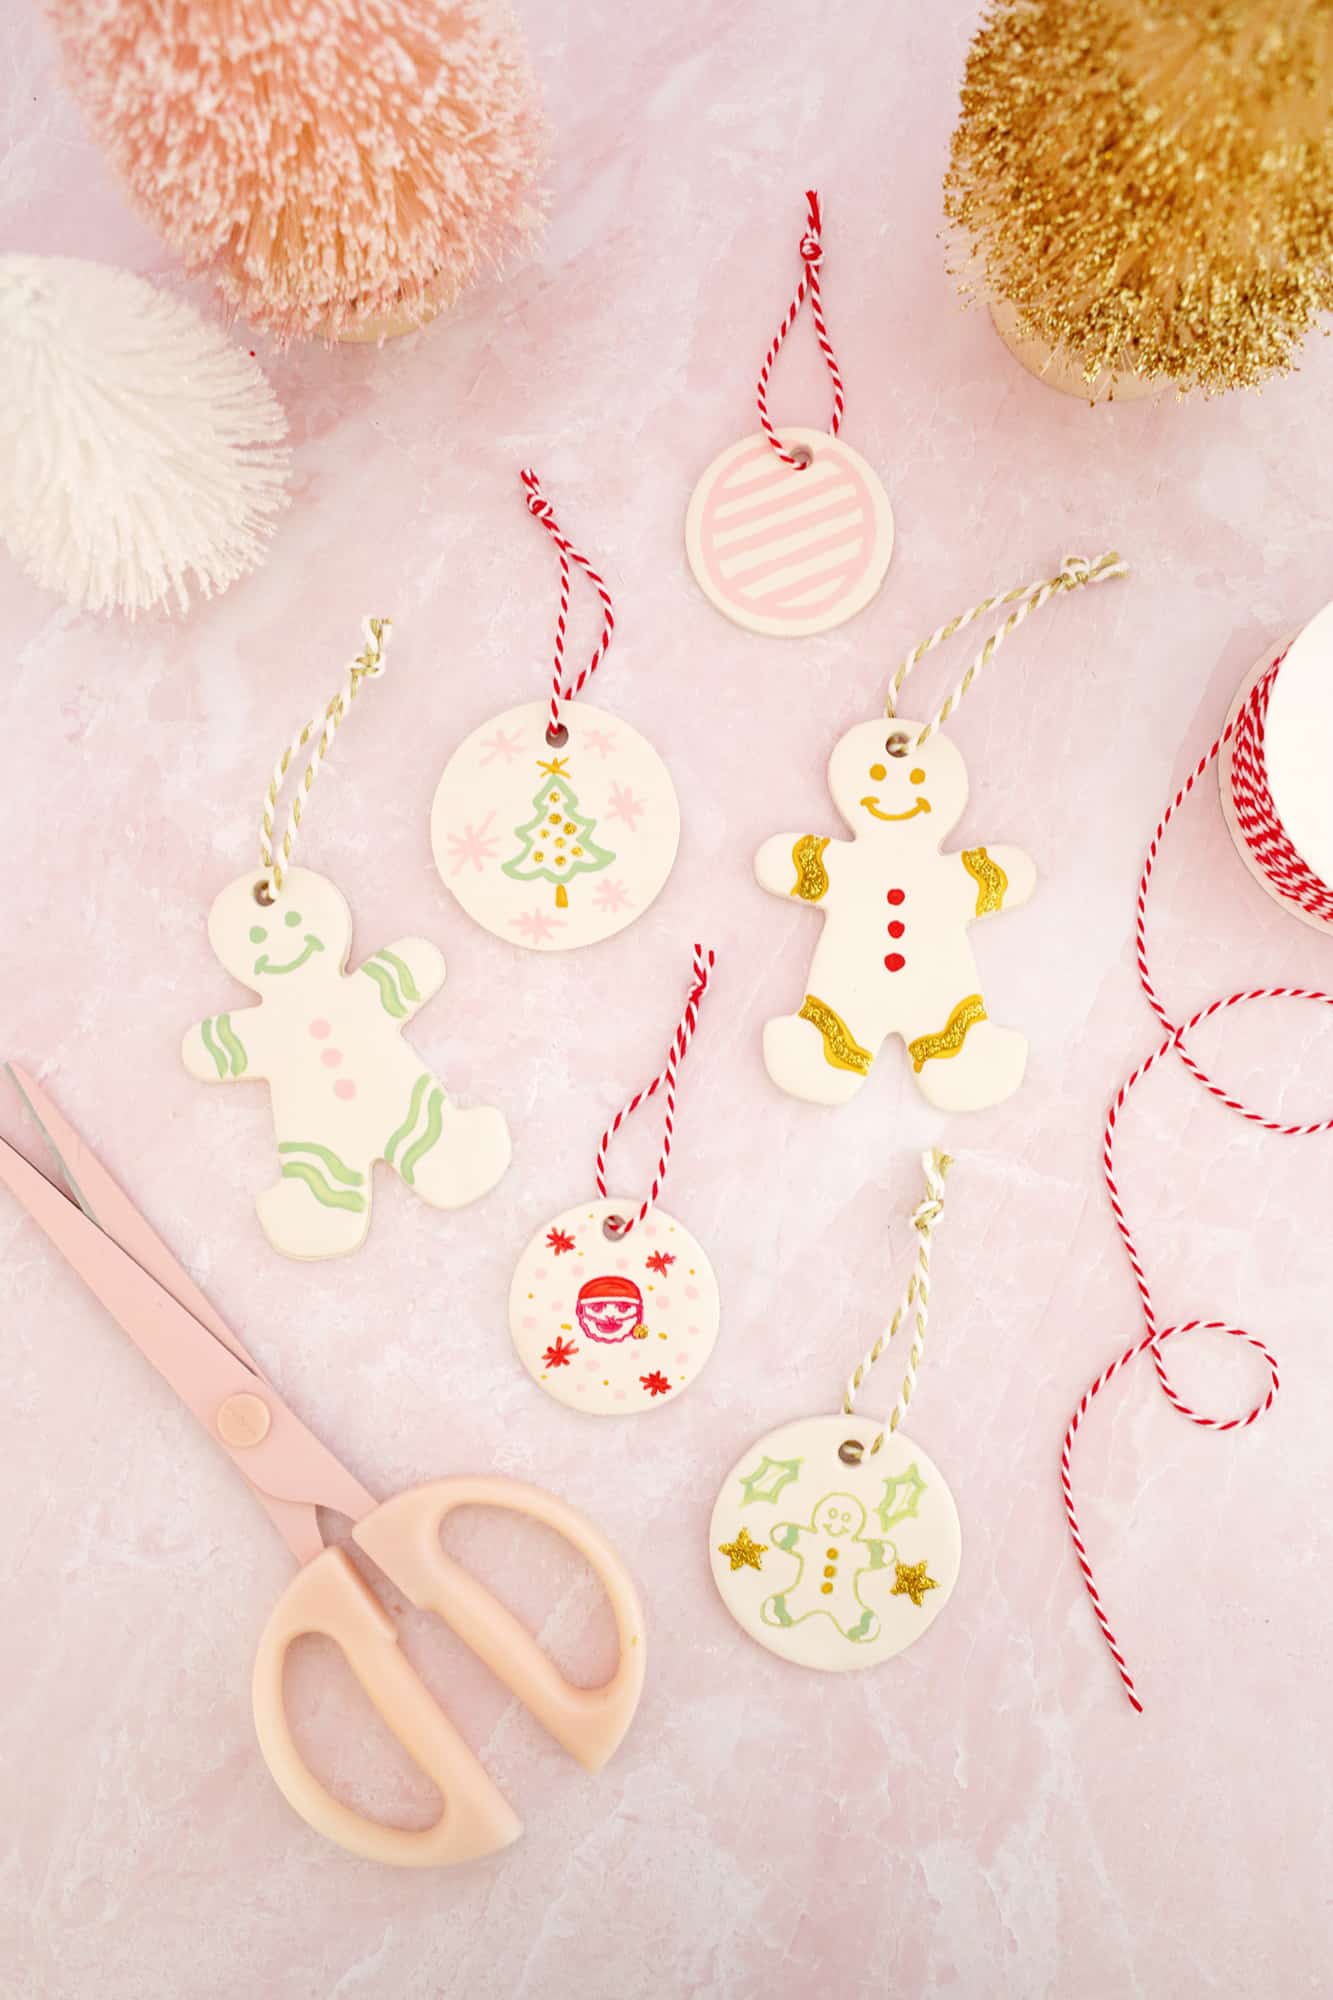

The smaller sized ornaments work great as personalized gift tags on a gift box, and the larger ones are perfect for decorating your Christmas tree!
If you want a handmade clay ornament but don’t have the time to make your own, you can buy one and support small business here instead!
Kelli also sells her art in her Etsy shop, so make sure to take a look at her adorable items and don’t forget that we have a treasure trove of fun holiday DIYs and recipes to gather inspiration from as well.
Have fun making your own creations! xo. Laura
Love homemade ornaments? Check out these posts!
P.S. Check out more holiday and home decor on our Amazon storefront!
Love this post? Sign up for our newsletter for more ideas!

Get creative ideas for recipes, crafts, decor, and more in your inbox!
 Get the How-To

Supplies
- acrylic paint (or paint pens, puff paint, or stamps)
- bakers twine
- straw
- oven bake clay
Equipment
- cookie cutter
- Rolling Pin
- paint brushes
Instructions
- Begin by rolling out your clay into a thin, even sheet (about 5/8″ thick). Using your cookie cutters, cut out shapes in different sizes.
- Next, poke holes in the tops of all your ornaments using a straw.
- Bake according to the directions on the package. If you are using the original Sculpey oven bake clay, it should be on a glass sheet or dish, baking at 275°F for 15 minutes for every ¼ inch of clay thickness.
- After you have baked the clay and let the ornaments cool, design to your heart’s content! Finish the ornaments with bakers twine or other thin ribbon or yarn.
I can’t wait to try this craft!!
I saw a Facebook Reel on how to make rolled Christmas ornaments but it wasn’t clear how to use the clay. This helped alot.
How do I use a snowflake cookie cutter?with oven baked clay. I’m having trouble with the points and openings in the center.
I love these. Especially the colors you decorated with. I painted some wooden ornaments this year and it was really fun. I will give this recipe a try next.
This looks like so much fun! I hope everyone is having a lovely holiday season.
Hi –
I love this idea of the clay ornaments. We are considering doing this as a school fundraiser with our high school art students but we are trying to do it as economically as possible. Approximately, how many of the larger size ornaments were you able to get from a package of clay and how much clay did you start with? Thanks for your help, time and suggestions.
Warmly,
Anne
I made these a couple of days ago, on Christmas Eve, and I loved them…well, most of them. I am not as talented as this person is at drawing on them, but I improved as I went along. Thanks for the great idea!
My mom found this and showed it to me,and i knew i was going to do this for my friends! They absolutely loved it! I did too, they make perfect gift tags and double as a small, cute personalized ornament. PERFECT. 🙂 thanks guys!
Do you think it needs to be 5/8″? When rolling out my clay I find that around 1/4″ looks about right but it sounds so much thinner than what’s called for. Worried they won’t bake nice now. Or look flimsy.
I finished this project last night. I have photos posted on my website. Thanks so much for sharing and the great inspiration.
These are so so amazing girls! love them! super jealous I didn’t come up with them! 🙂
I made these from your directions and they all break super eas 🙁 Any advice ?
I love this idea, they are so cute! Do you decorate the back side as well? I guess it’s up to the artist? Is the backside smooth enough to paint on?
I love these! <3
just made mine!! took them out of the oven and waiting for them to cool before painting. thanks for the great idea c: xo!
These are just enchanting…what beautiful designs and hand lettering. I wonder if I’m steady enough to do that. I had no idea the actual making and baking of the tags was so easy. Thank you very much for the great tutorial!
So cute! I usually make salt dough for the kids to make ornaments with this time of year. One of their favorite holiday activities <3
this is wonderful activity for the whole family and I see it as being transferred to other holidays like Valentine’s day- making valentines and exchanging them. Thank you.
they are just so beautiful, i think they are great.
Zoe
http://gypsiesister.blogspot.co.uk
Best. Idea. Ever!! I’ve been trying to hunt down an idea for Xmas gifts that doesn’t involve crochet or knitting which I can do but is certainly time consuming this time of year with all the other things going on. This is going onto my to do list pre-Xmas, thank you!!