")
I have become a bit of a jewelry hoarder over the past few years. I get a ring here, a new necklace there, and all of the sudden, I have quite the collection spread across my house.
The smaller rings and dainty necklaces have a tendency to wander off and disappear, so I’m trying to be better about putting each item in a “safe space” whenever I decide to take them off.
Since that’s the whole point of a jewelry box, I thought I’d have a few in bathrooms or on dressers to encourage the new habit, and I made a few tweaks to personalize the box a bit.
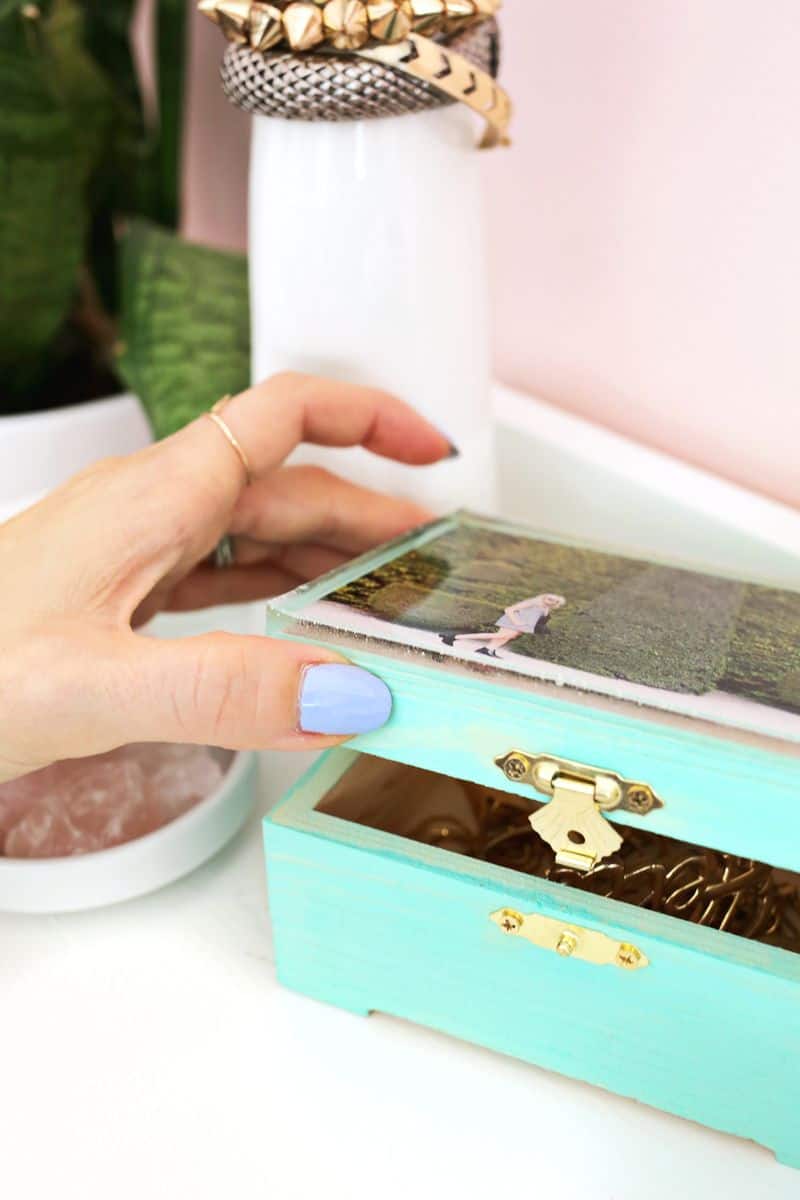
I love the look of Lucite and thick epoxy, so I thought an epoxy top with a photo from our trip to Paris last year (from the gardens of Versailles!) would be a special daily reminder of the trip.
Related: Resin Art – Beginner’s Guide
") We got to work with Canon USA for this project, specifically using the PIXMA MG7720 (pictured above), which is of course super simple to use.
We got to work with Canon USA for this project, specifically using the PIXMA MG7720 (pictured above), which is of course super simple to use.
But also, for a project like this, clear details in your photos are very important, and I’m very happy with the quality of the prints here!
Epoxy Jewelry Box DIY
Supplies:
-small wooden jewelry box
-paint or wood stain
-painter’s tape
–epoxy kit (I used this low-odor one, so much better than the smelly kind!)
-photo paper
-Mod Podge
–Canon PIXMA MG7720 Printer
")
")
") I’ll stress that you really do want to make sure the painter’s tape is pulled tightly around the sides and really pressed well onto the wood so no leaks can occur (use your nails to seal the tape).
I’ll stress that you really do want to make sure the painter’s tape is pulled tightly around the sides and really pressed well onto the wood so no leaks can occur (use your nails to seal the tape).
My wooden box came with gold hardware on the front that I easily took off with a small screwdriver and replaced once the epoxy was dry, but you could just fill the holes and leave it without it as well.
Check out how you can make any box into a jewelry box!
I really like how a thick epoxy top gives the box a much more specialized look than if I had simply glued a photo onto the top, and it hardly took much more effort to do so!
This would be a great gift to make for your mom or a friend with a personalized photo on top (and maybe with a piece of jewelry inside as well!). I think you’ll agree that this jewelry box is “clearly” a winner! xo. Laura
Did you use any type of sealer on the picture before adding the resin?
Beautiful ideas! Great job wooden jewelry box diy… We also provide wooden jewelry box diy as per user demand. Visit us at aarsunwoods.com
When I tried this, the painters tape didnt keep the epoxy in and it leaked really bad. Do you have any other recommendations for strong tape that wont leave the sticky adhesive on the box?
This is so fun! And I love it when you make videos 🙂
That’s so easy! I would have worried about the painters tape not actually sealing to the edge, since I always have issues getting my painters tape to stay stuck to the walls. But the video has convinced me. I have to try this!!!
love it 🙂
http://de.dawanda.com/shop/kleineswoelfchen
Wonderful jewelry box diy. Such a beautiful idea. Thanks for the post.
Super cute. I think you chose the perfect picture for this project.
Really nice! x
http://jessicawoods.fr
Nice! Pretty cool!
Nope, not sharp but you can also take a really fine sand paper and smooth the edges down as well 🙂
Laura
Good idea!
Laura 🙂
What is the mod podge for?
Hi! It’s to adhere the photo the top of the box.
It’s really shiny and smooth!
Laura 🙂
This looks so cool! It would even be a great present given the personal touch!
http://annescribblesanddoodles.blogspot.com
Cute idea, I may try this one day. Got loads of quite expensive jewelry just sitting around and I keep losing them. Need to start keeping them in one place.
This looks so pretty! http://www.hannamarielei.com
Lovely
http://soldenochedecocrochet.blogspot.com.ar/
Great tutorial video. Love to make a box like this one
I can see things getting quite messy if you don’t pull that tape really tight. Good thing you mentioned it! I wouldn’t have thought about it. This would be really fun to use on a side table!
Julie http://www.xfallenmoon.com/
I really, really, really want to make this!