 Hey, friends! As promised, I’m here to start sharing our progress reports. First up, the master bathroom. This room has come a LONG WAY in the past month. It’s about 60-70% done now. It’s functional, but not decorated yet. So it felt like a good moment to pause and share our progress!
Before I begin, here’s a little refresher on how the bathroom looked before…

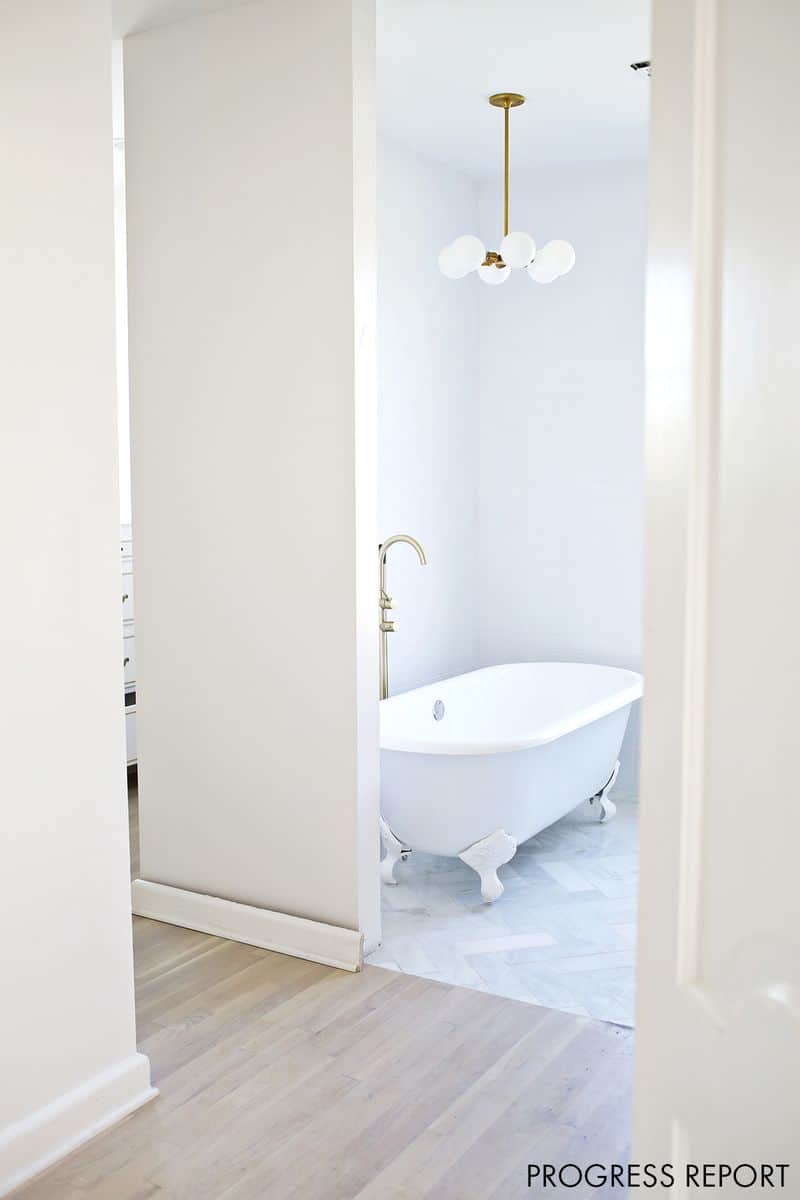
 And here’s how it’s looking today…

 We LOVE the way the herringbone floors turned out. I shared a little more about that process here. It turned out beautiful and feels very fresh and clean.
 We decided to try something fun for the shower floor and did a stripe pattern with penny tile. I LOVE it. It’s a very small area, but it makes a big statement.
 Inside the shower I am SO excited we added this little built in shelf. We used a piece of the marble backsplash that came with our vanity to make those little shelves.
 When you look closely, you can see I still have some painting to do. I chose not to use the tile corner transition pieces. I think it looks more modern and clean this way, especially with the pattern I chose. So I just have to go through and paint all these unfinished edges with bright white oil-based paint.
 For the walls in the bath/shower/toilet part of the room and also behind the vanity, we chose to do a crosshatch pattern with white subway tile.
You can also see our pretty brass faucet here. I had it metal plated and it was about half the price of what it costs retail. I’ll share more about that whole process in another post soon!
Ugh—you can also see that I missed that silver piece. I missed a couple other drain covers you can’t see too. Just adding that to my never-ending to-do list. No biggie.

 For above the tub, I picked this Schoolhouse Electric chandelier. I love how it fits the space and creates balance.
 For the vanity, I looked all over at a lot of different options and in the end went with this vanity from Amazon
![]() (I love that it’s simple, white and real marble) and decided to replace the hardware with these beauties from Rejuvenation. The mirrors are from CB2. I have to say, they look about a million times nicer in person than they do on their website. I love them and they were a really good deal. The sconces are from Cedar & Moss. Love them. You can’t really see here, but there are three of them.
(I love that it’s simple, white and real marble) and decided to replace the hardware with these beauties from Rejuvenation. The mirrors are from CB2. I have to say, they look about a million times nicer in person than they do on their website. I love them and they were a really good deal. The sconces are from Cedar & Moss. Love them. You can’t really see here, but there are three of them.
Still need to replace the silver knobs that came with the vanity and add some kind of baskets or containers to that bottom shelf. Oh yes, and I’m hunting for a rug to go in front of this vanity and another one for in front of the bathtub.


 A few details!

 My current mood is DELIRIOUSLY HAPPY. Like, SO happy.
I know I still have a lot of decorating to do, BUT we have a working toilet, shower, tub and sinks, and we can FINALLY move our clothes into a real closet. So I’m just gonna celebrate these milestones for a bit. :)) Thanks for reading! xx- Elsie
Credits // Author and Photography: Elsie Larson. Photos edited with A Beautiful Mess actions.
For sure i would have gone with a thin gold strip to finish the edges on the insets to continue the theme. Not a full corner edge, just the strip to give it just another whisper of gold accent. I think satin gold looks great as an accent color. Plus it’s soft enough to feel luxurious without blasting out “I’m gold!!!”
My question is how you managed to space out standard subway tile in a double crosshatch pattern and keep the grout lines straight. How large is your grout line? 1/16”? I have been trying to layout this same pattern and the only way I’m able to get the pattern to work is with no grout line at all. Any spacing changes the perfectly 6×6 pattern to 6×6 1/16” or what ever spacer is inserted. I’d be awfully thankful to know your secret.
Hi,
Love the master bath floor. What size tiles are the floors and what marble?
Thanks
Megan
Where can I find the reveal of the final master bath? Lovely so far.
Well, I am so impressed with your master bathroom- it is just so bright and shining. The mirrors are also great! Me and my wife are about to renovate our bathroom in a few months and we would like to achieve similar effect. We are going to start with some painting jobs. The problem is we don’t have much access of sunlight but hopefully it will still go well.
Cheers
It looks absolutely gorgeous! And so clean! I lvoe that!
xx,
E.
www.theslowpace.com
Hi! Loving this space (and all things ABM!), but just wanted to share some diy warning about white oil paint. We painted both our kitchen and bathroom with bright white oil paint and they both turned ugly creamy yellow. Apparently white oil paint always turns yellow, but no one warned us! It’s our biggest diy tragedy!
Wow, I LOVE those herringbone marble floors!! So dreamy!
The bathroom is coming together beautifully! For your next project, I highly recommend checking out Schluter System’s metal profile trim pieces. They are great for transitions like in the shower niche instead of a dated bullnose piece. Oh, and where $1,400 may be out of many people’s budget (mine included)….that cost of a solid wood vanity with marble counters and porcelain sinks is actually quite reasonable so I’d say inexpensive is a fair word to use. 😉 You could easily spend over a grand on just the countertop fabrication of marble.
It looks amazing – very light and bright! Can’t wait to see it completely finished.
Erin | http://www.beingerin.com/
The floor is beautiful and I love the hardware you chose for the vanity! So fun seeing you girls revamp your homes!!
It is looking so beautiful. Especially love those mirrors.
www.kelseymarie.co
Hi Elsie
The updates look great – the brushed brass looks super chic with the marble! When my husband and I restored our 1890s rowhome, we also ended up getting a marble vanity (ours is from Pottery Barn) and had to switch out the hardware. I had really good luck at Van Dyke’s Restorers (http://www.vandykes.com). They’ve got a good selection at reasonable prices (which I found is super rare in brass). Thought I’d share, in case you’re still hunting. 🙂
Wow!! Dreamy!!
www.tusksandtails.com
I just love the bathtub and the clean look of the bathroom. Beautiful transformation!
I love that you’re doing progress reports!! I love to see how all the new houses are coming along, and I’m looking forward to more posts- like what you did with the brass plating? Feeling curious and dreaming about the day I reno my own house 🙂
Yay! It’s so pretty! Question about the vanity: I’m kind of splashy when I’m at the sink, is that just me? 🙂 Does water drip down the back since it’s not caulked to the wall?
Hey Les,
It was definitely more of a visual decision than a functional one. We could have tiled half the wall around the tub instead, but I really LOVE the look of floor to ceiling tile and since it’s such small space I wanted to keep it as seamless and simple as possible.
Same thing in my kitchen! The backsplash tile behind the stove is likely the only tile that will ever get splashed on, but I love the look of going all the way to the ceiling. It’s so pretty!
xx- Elsie
I LOVE it!! 🙂
https://carolinespassion.wordpress.com
Wow! This looks amazing! Love it 🙂